I was a little nervous about finding replacement ribbon for my 70 year old typewriter. Honestly, I wasn’t sure where to start.
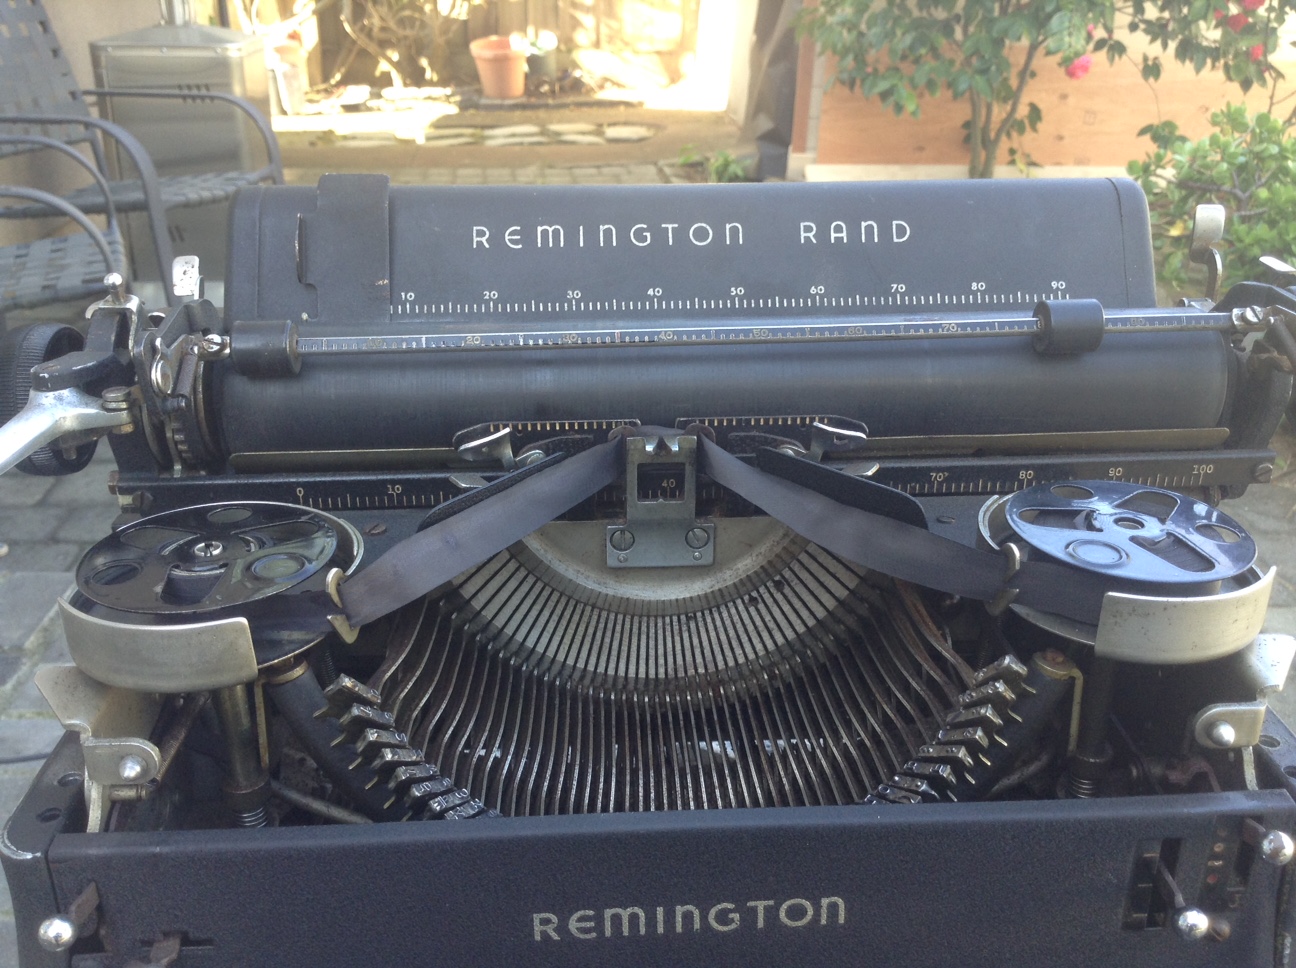
First off, the spool on which the ribbon was wound didn’t seem to be removable. It wasn’t like I could pop a new couple cartridges on and be done.
I found my solution from an inspiring Amazon.com review entitled:
“1/2″ ribbon is 1/2″ ribbon, will work on anything”:
In the review, the author states:
“Almost every metal spool on a typewriter holds onto the ink ribbon with a sharp little metal spearhead that simply pierces the silk and holds onto it that way. When you buy a new ribbon like this one, simply roll it all onto one spool, disconnect the ribbon (detach or cut with scissors), and replace the old ribbon with this one by skewering it on the spear instead, going the same way.
“Then wind to the original spool, and attach it to the spear on the other original spool. In other words, just replace the actual fabric ribbon, but NOT the spool that holds it (original spools holds more value for your typewriter anyway), and this will work on literally hundreds of different brands, no matter what.”
Brilliant! I thought I would have buy ribbon from a specialty vintage typewriter store. As it was, I went to an office supply store and for about $7.99 bought 1/2 inch printer ribbon:
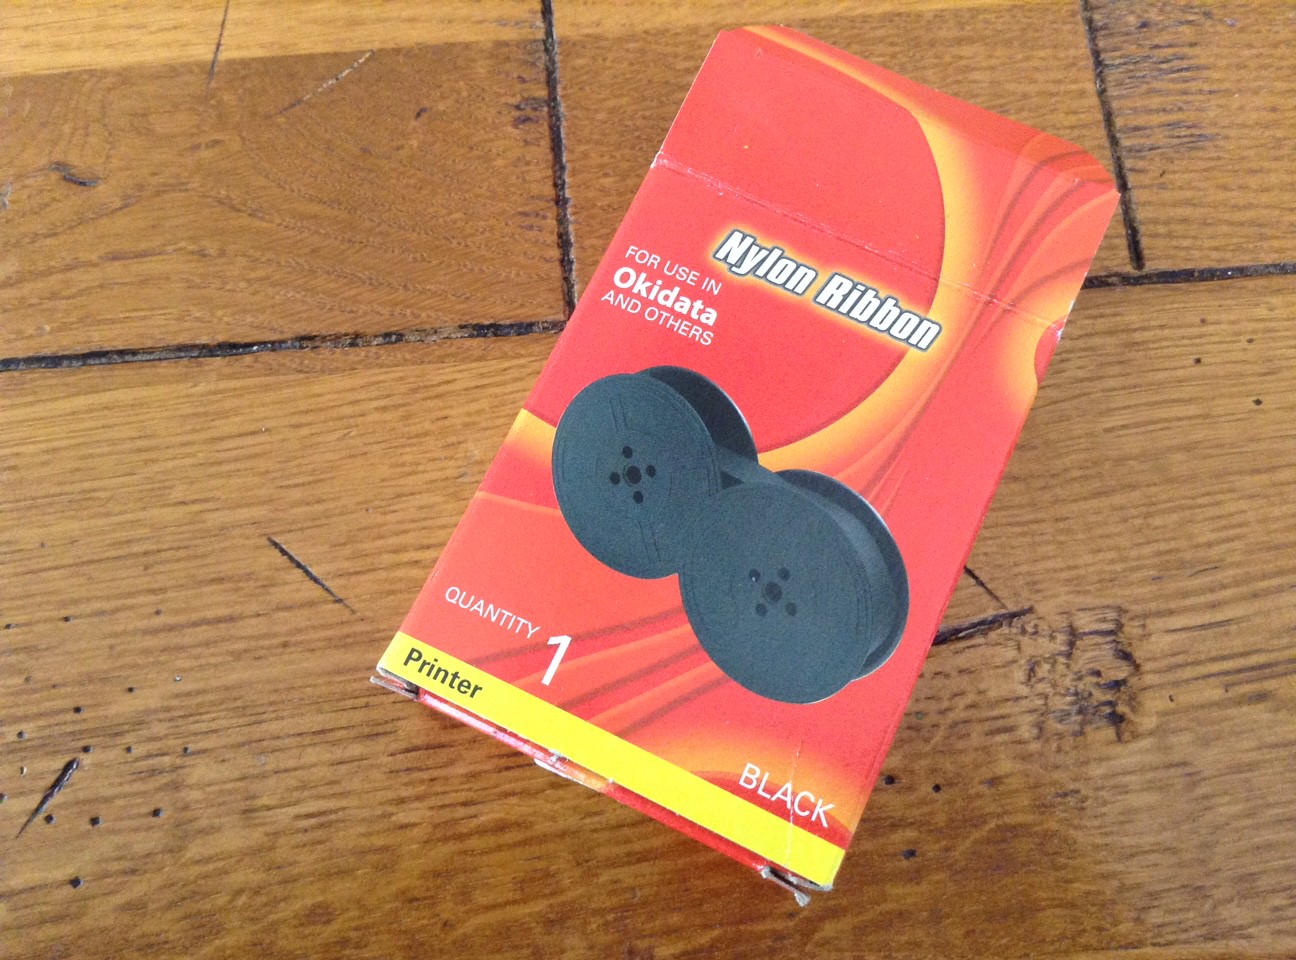
This 1/2″ black nylon ribbon is for use in Okidata…and others
Here are the steps I took (I think I am remembering correctly):
- I carefully photographed my existing ribbon and spool set-up; this came in handy when I wanted to double-check how things went together.
- I put on some disposable gloves – this was pretty messy with all the ink.
- I put the ribbon control into the middle so that I could freely wind the ribbon spools

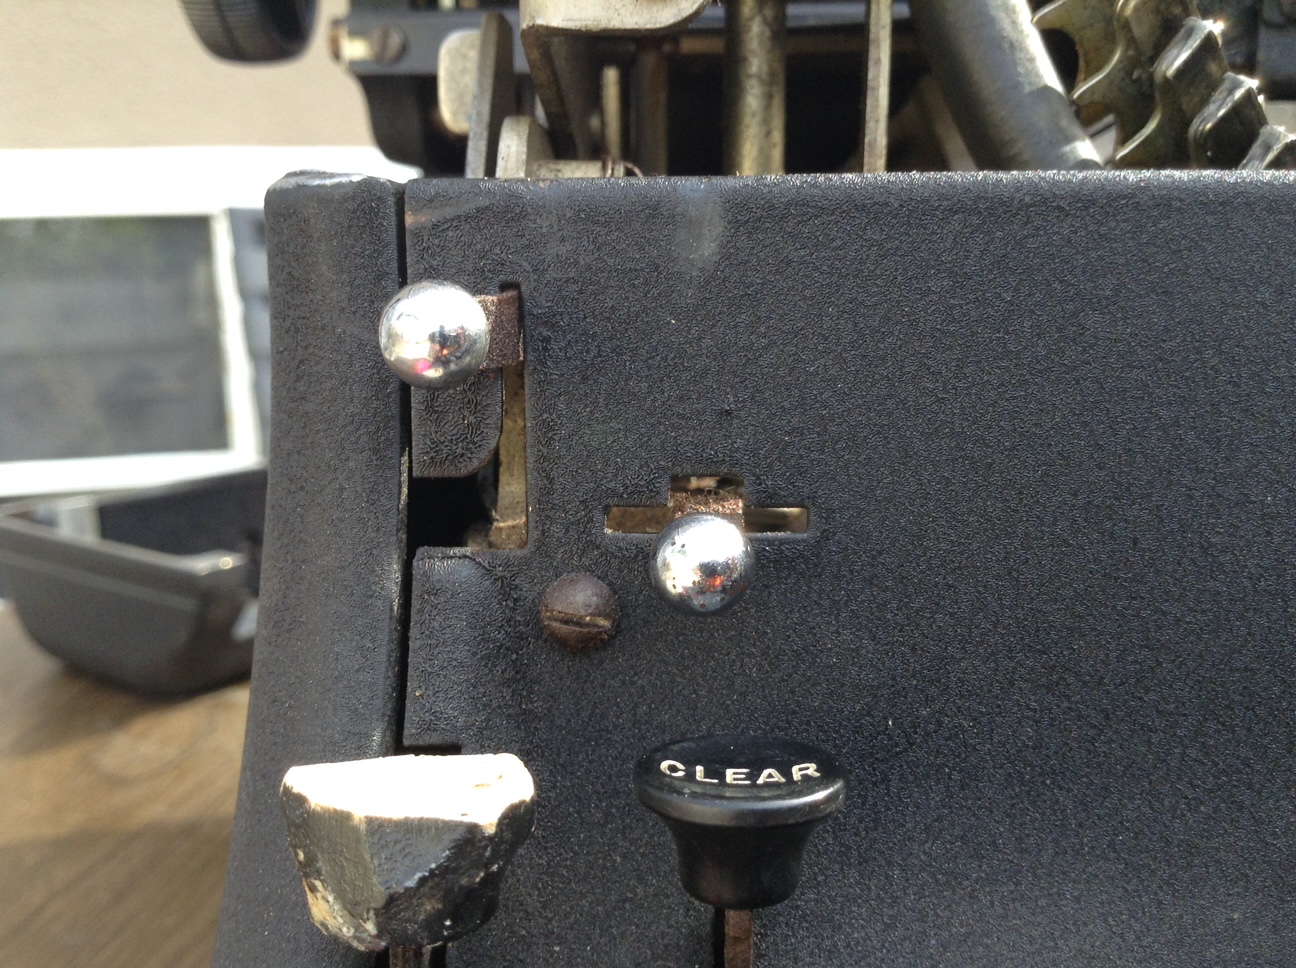
The ribbon control is the little knob above the clear key
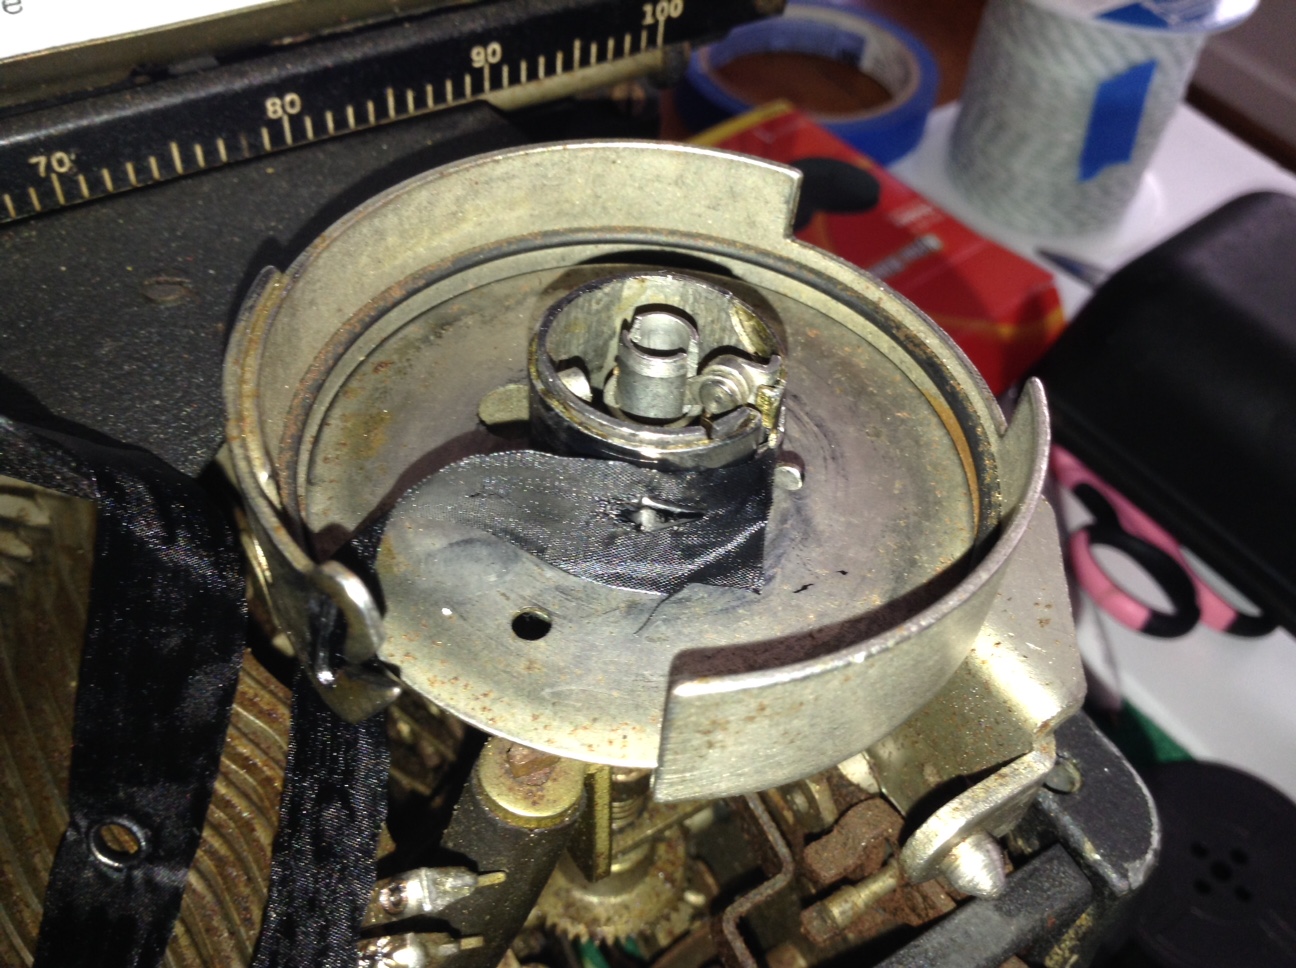
- I removed the spool covers.

With the spool cover

The spool cover just popped off
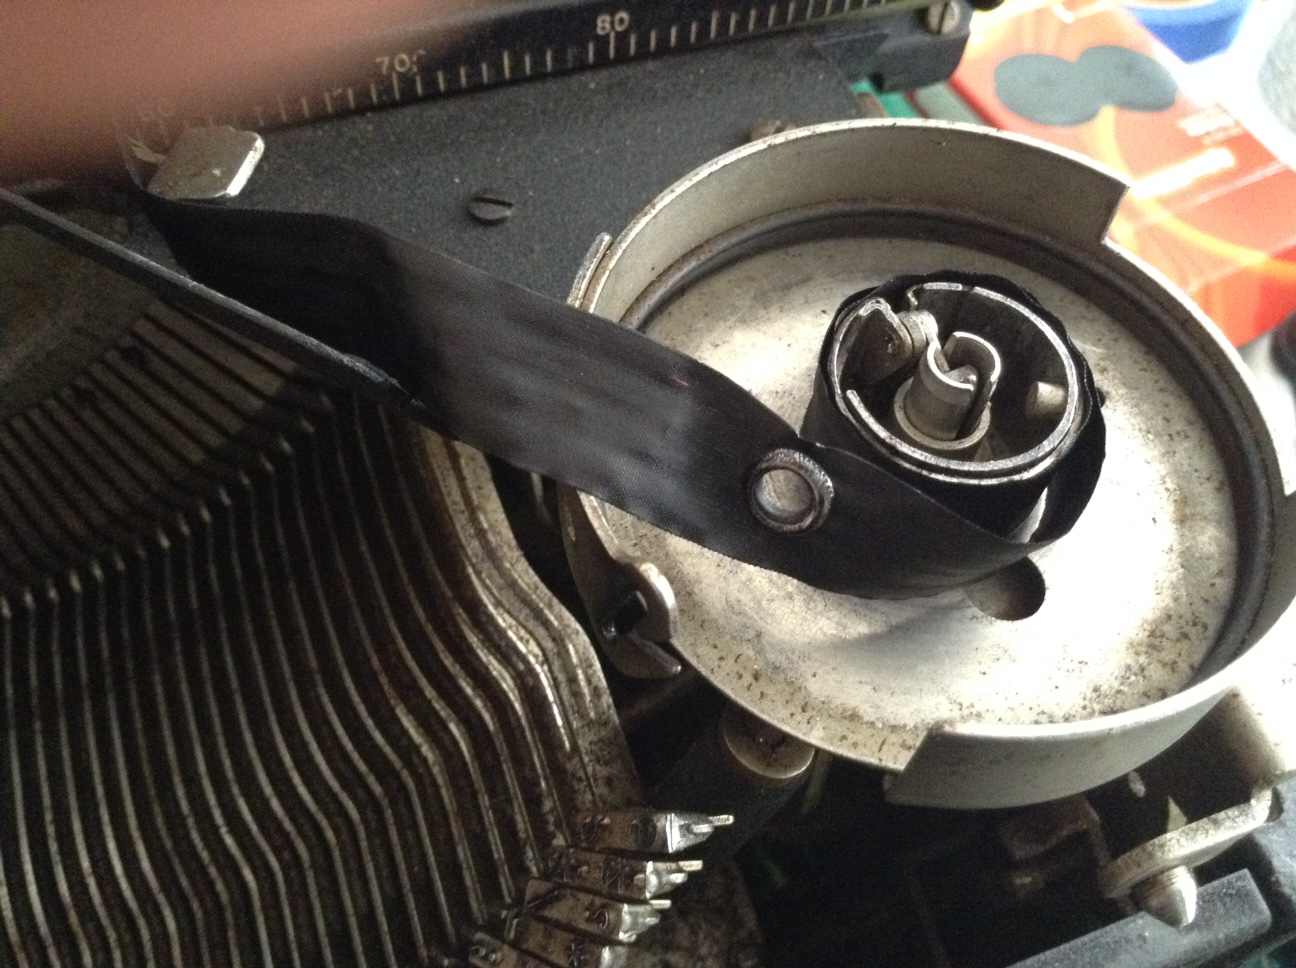
- I wound all the old ribbon onto the spool on the right.
- I cut the end of the old ribbon on the empty left spool.
- I took the the new ribbon out of its package
- I cut the new ribbon at the end of one spool and punched a tiny hole in the end of the new ribbon
- I popped the new ribbon hole over the metal spearhead on the left spool, making sure that I was winding the same way the old ribbon was wound
- I wound all the new ribbon onto the left spool – I found using the wooden skewers as a crank useful
- I removed the old ribbon from the right spool and threw it away.
- I fed the new ribbon through the ribbon guides and got it over the right spool where I slipped it over the metal spear on the right spool – I had to make a little hole at that end too.

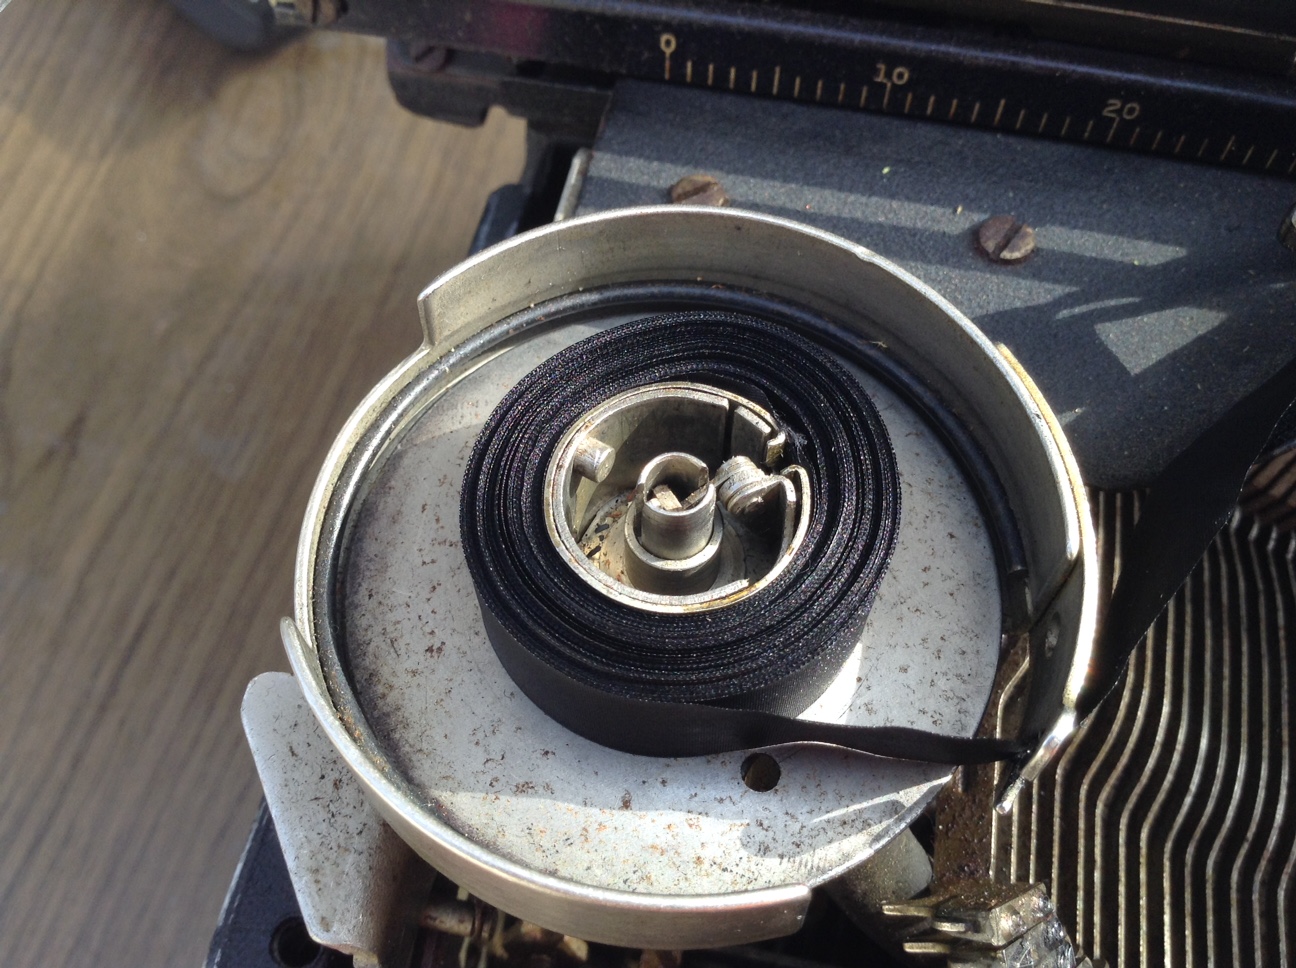
there’s the little spear on the spool

Not sure what this little metal grommet at the end of the ribbon is for except that it stops the ribbon from advancing when it gets to the end of the ribbon and you have to switch ribbon feed direction
- I wound a little ribbon over to the right side
- I set my ribbon control to the right. The ribbon was now feeding from the left to right. Success!


Hi, It’s very nice you’re repairing this old typewriter.
The metal ring at the end of the ribbon engages the automatic reverse mechanism on most typewriters, but for some reason Remington used a different spool of its own design, and a different reverse mechanism. I guess you can switch direction manually but there is a mechanism at the center of the spool that should do it automatically when the ribbon is completely unwound. For this mechanism to work you may need to remove the metal ring on the ribbon (to prevent it from sticking somewhere before the ribbon is completely unwound) but i’m not sure about that. I’ll check my Remington super riter.
LikeLike
Hey. I just want to say thanks a million I had to dig around to figure out how to replace my ribbon. All I need to do to my 48′ remington Rand is clean it out and oil it up. Again thank you for the help.
LikeLike
I’m glad the post helped. My 1948 KMC is still one of my favorites to type on.
LikeLike