A local typewriter enthusiast named Jean asked me to look at her 1980s Coronamatic 2500’s nonfunctional “N/n” key. Jean is a persistent typist, and she loves this typewriter so much that she was making do using double “l” with a handwritten diagonal in place of “N/n” when she typed on it.
Jean hadn’t expected to get so attached to the Coronamatic. It had belonged to her husband’s cousin Farhad, and when it was first offered to her, she wasn’t sure she should bring it into her home. However, the tan devil has wormed his way into her heart, and she has been using it a lot.
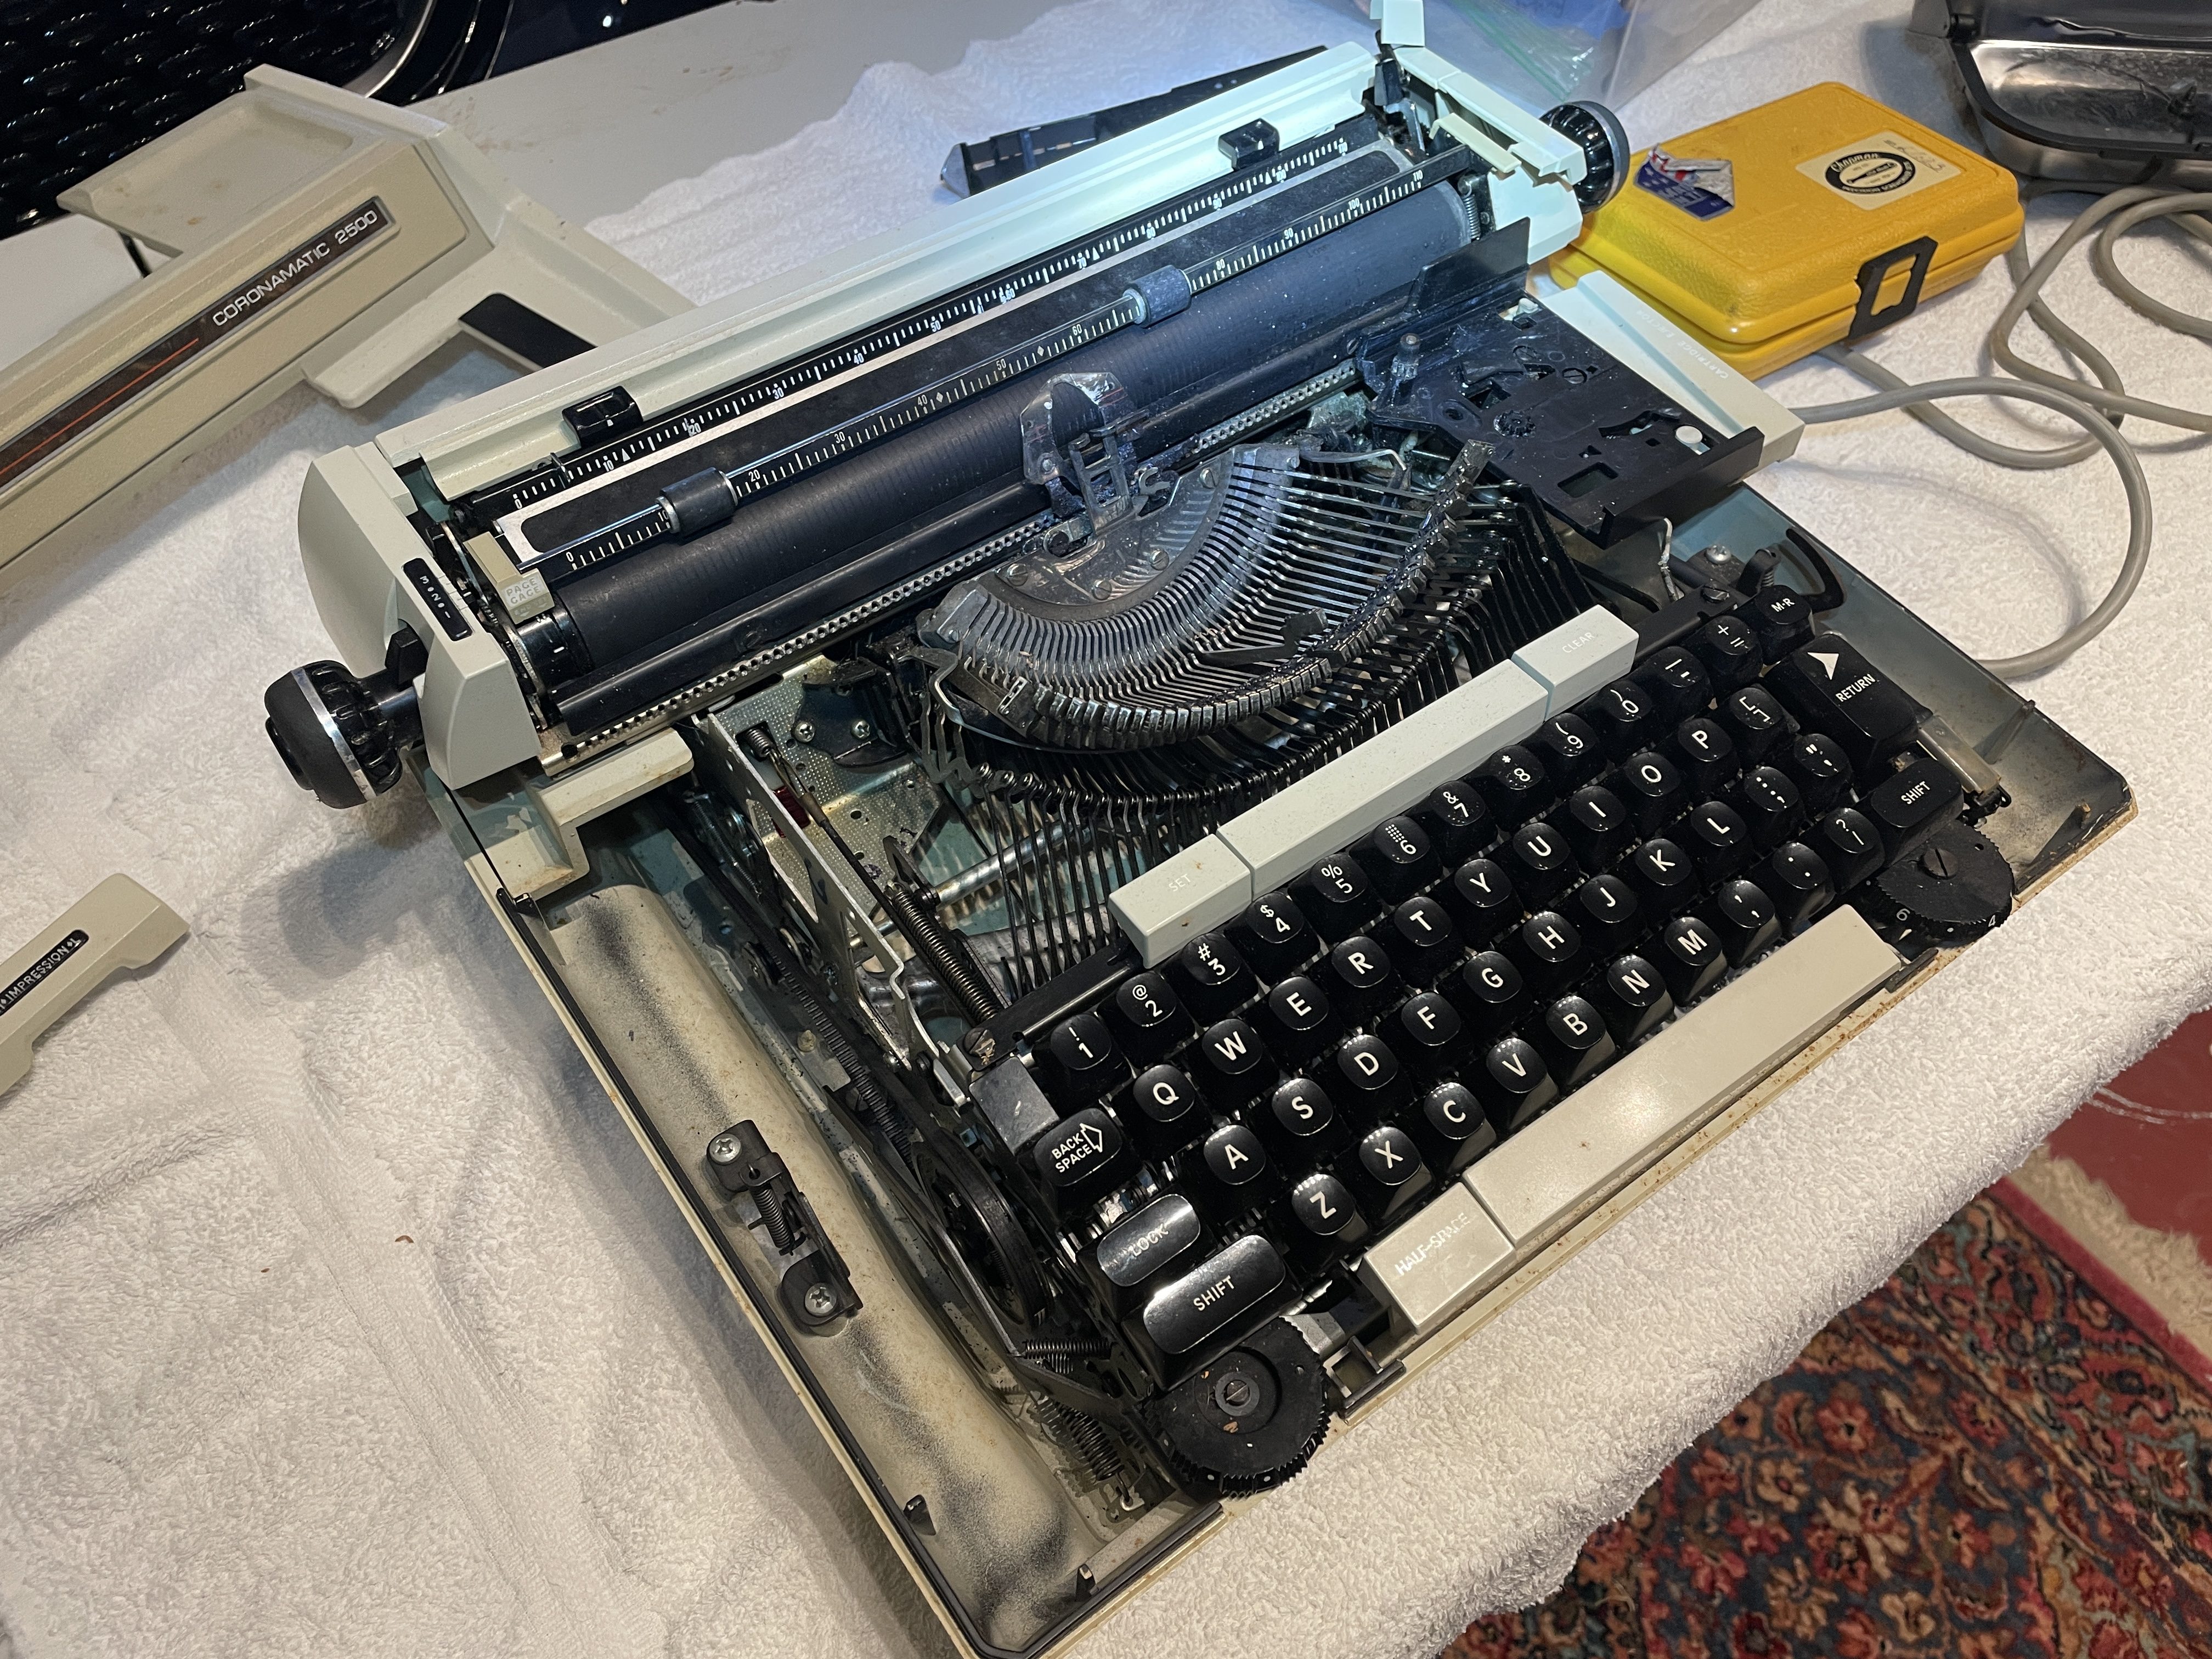
This is one of those power key return and cartridge-style electric Smith-Coronas on which I haven’t had the pleasure of working. I prefer manual return/spool electrics, but this one is a lot of fun and very fast.
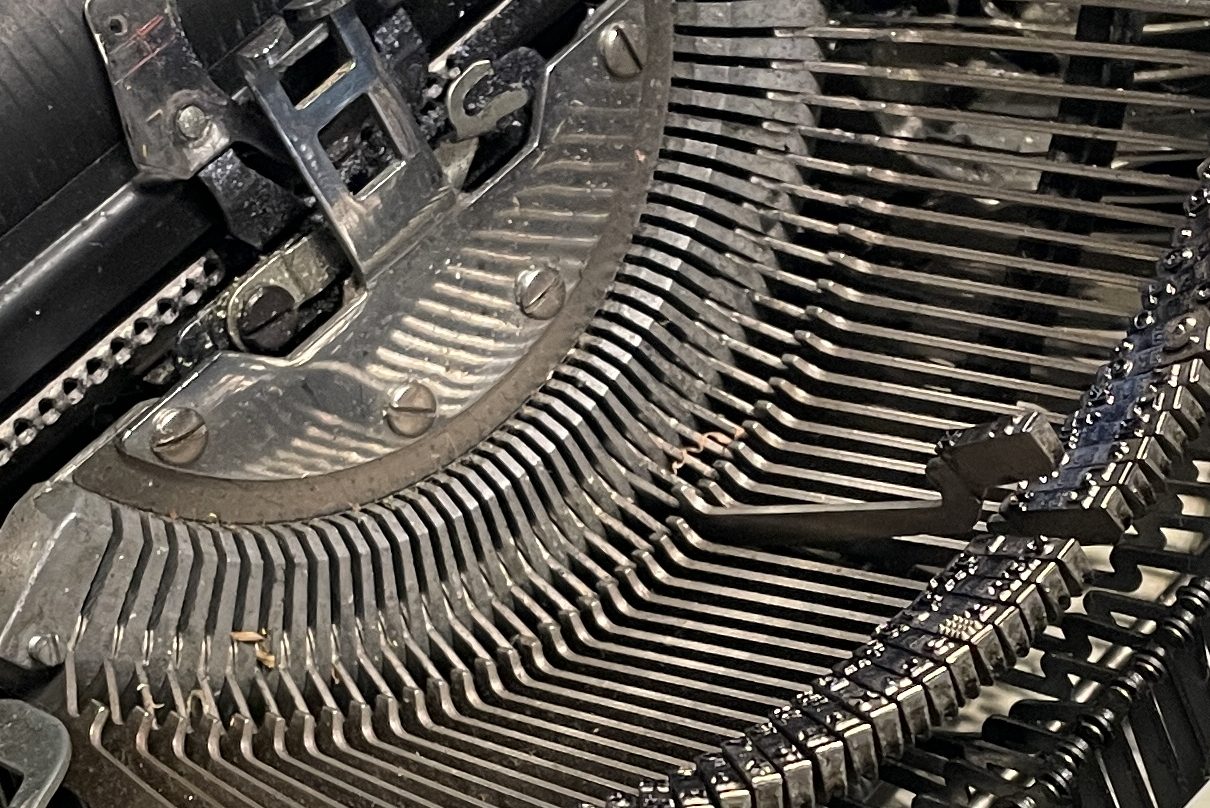
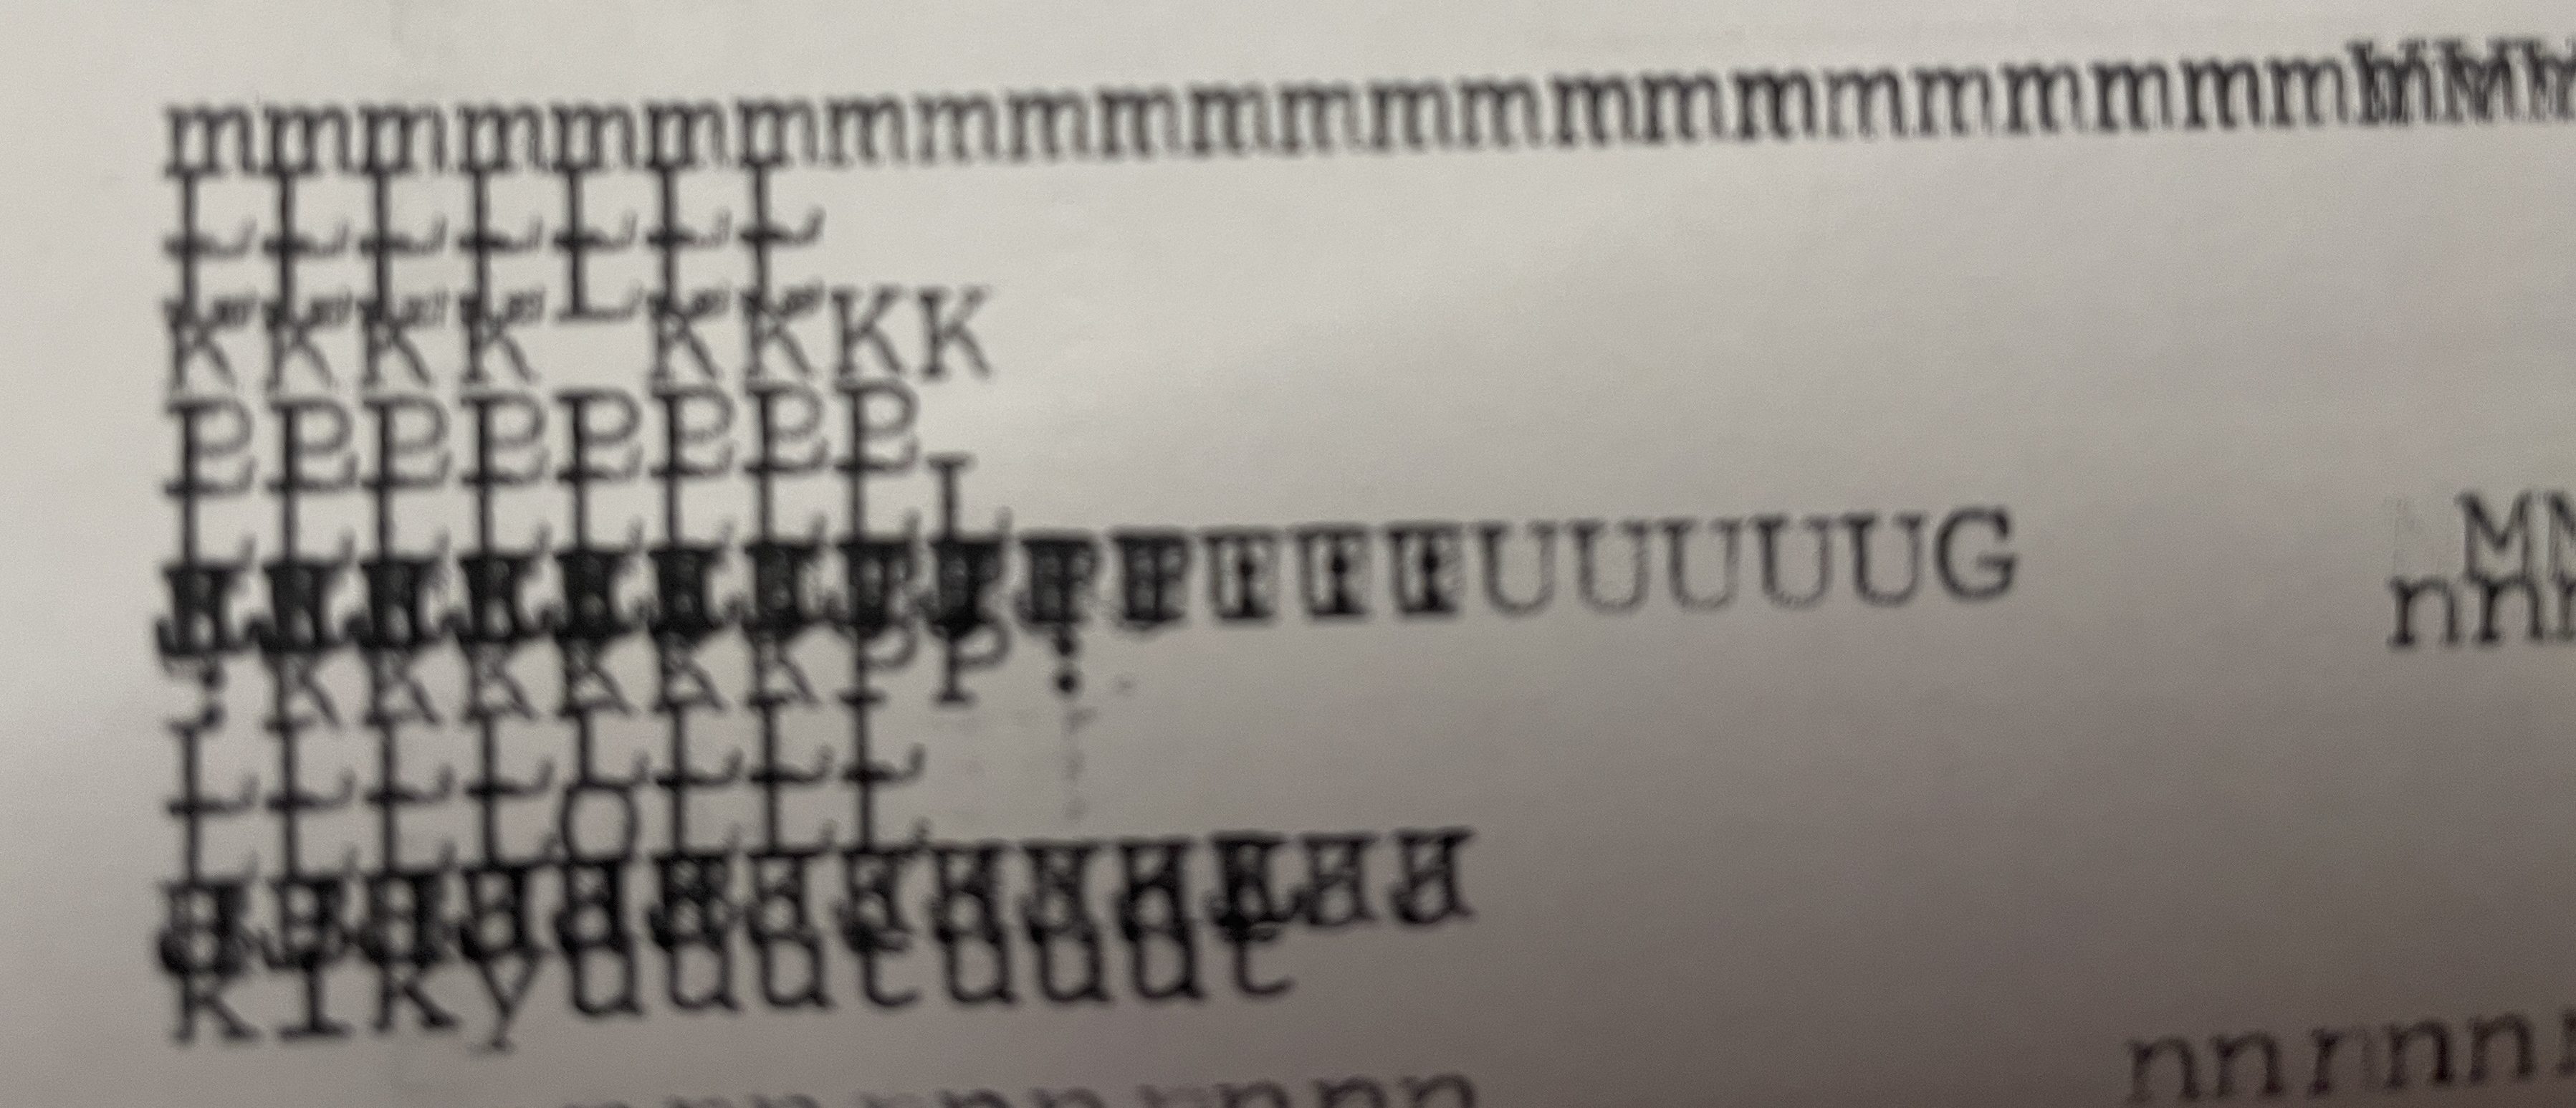
The issue with the “n” key looked like a bend or obstruction problem. The key was stuck in this position and wouldn’t move:
Before I started work, I did a little research on the Coronamatic 2500. I visited Duane Jensen’s Phoenix Typewriter YouTube channel and found a video. I got pretty choked up. Duane recently passed away and left a gaping hole in the typewriter repair community. There are so, so many typewriters I would never have been able to repair without Duane’s YouTube channel. Fortunately, his YouTube channel is archived and his videos remain up. Duane, rest in peace and rock on.
Don’t let that bland 1980s styling fool you—this is a fun, fully-featured creature. I particularly like the “Check Protector Key”:
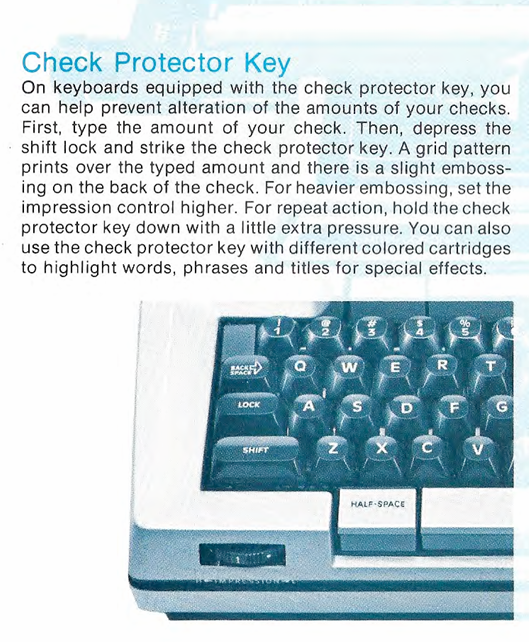
You can use it to make highlighted text:
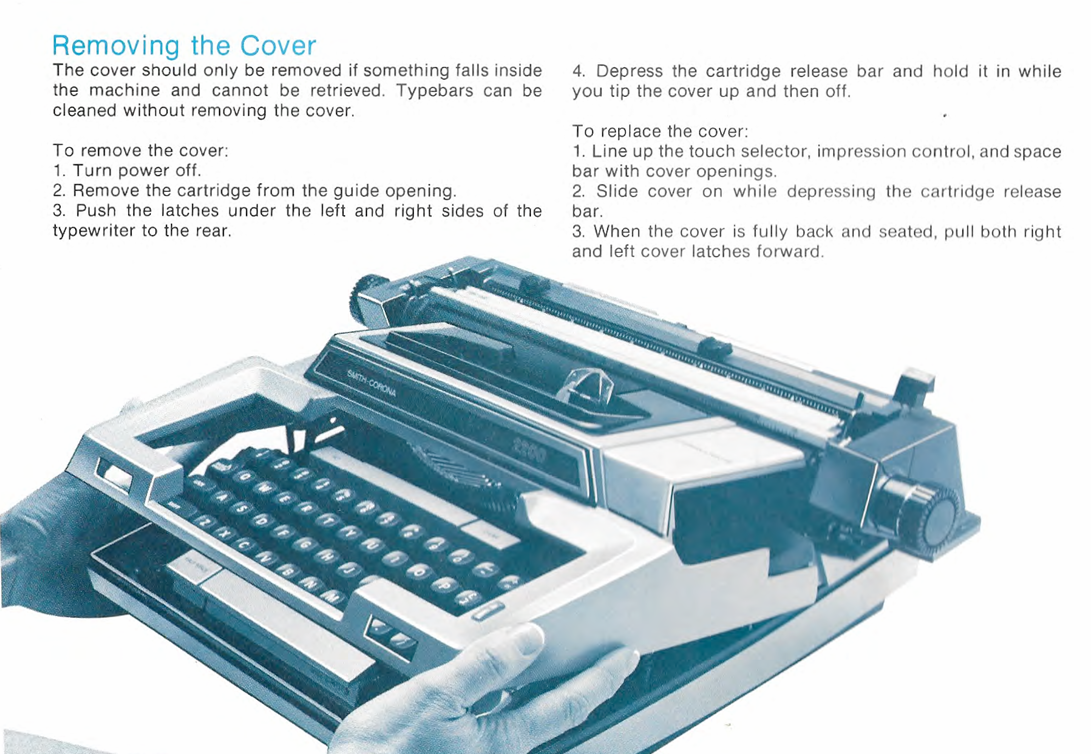
In Richard Polt’s typewriter manual archive, I found a Coronamatic 2200 manual which was very helpful since I wasn’t quite sure how to remove the top cover:
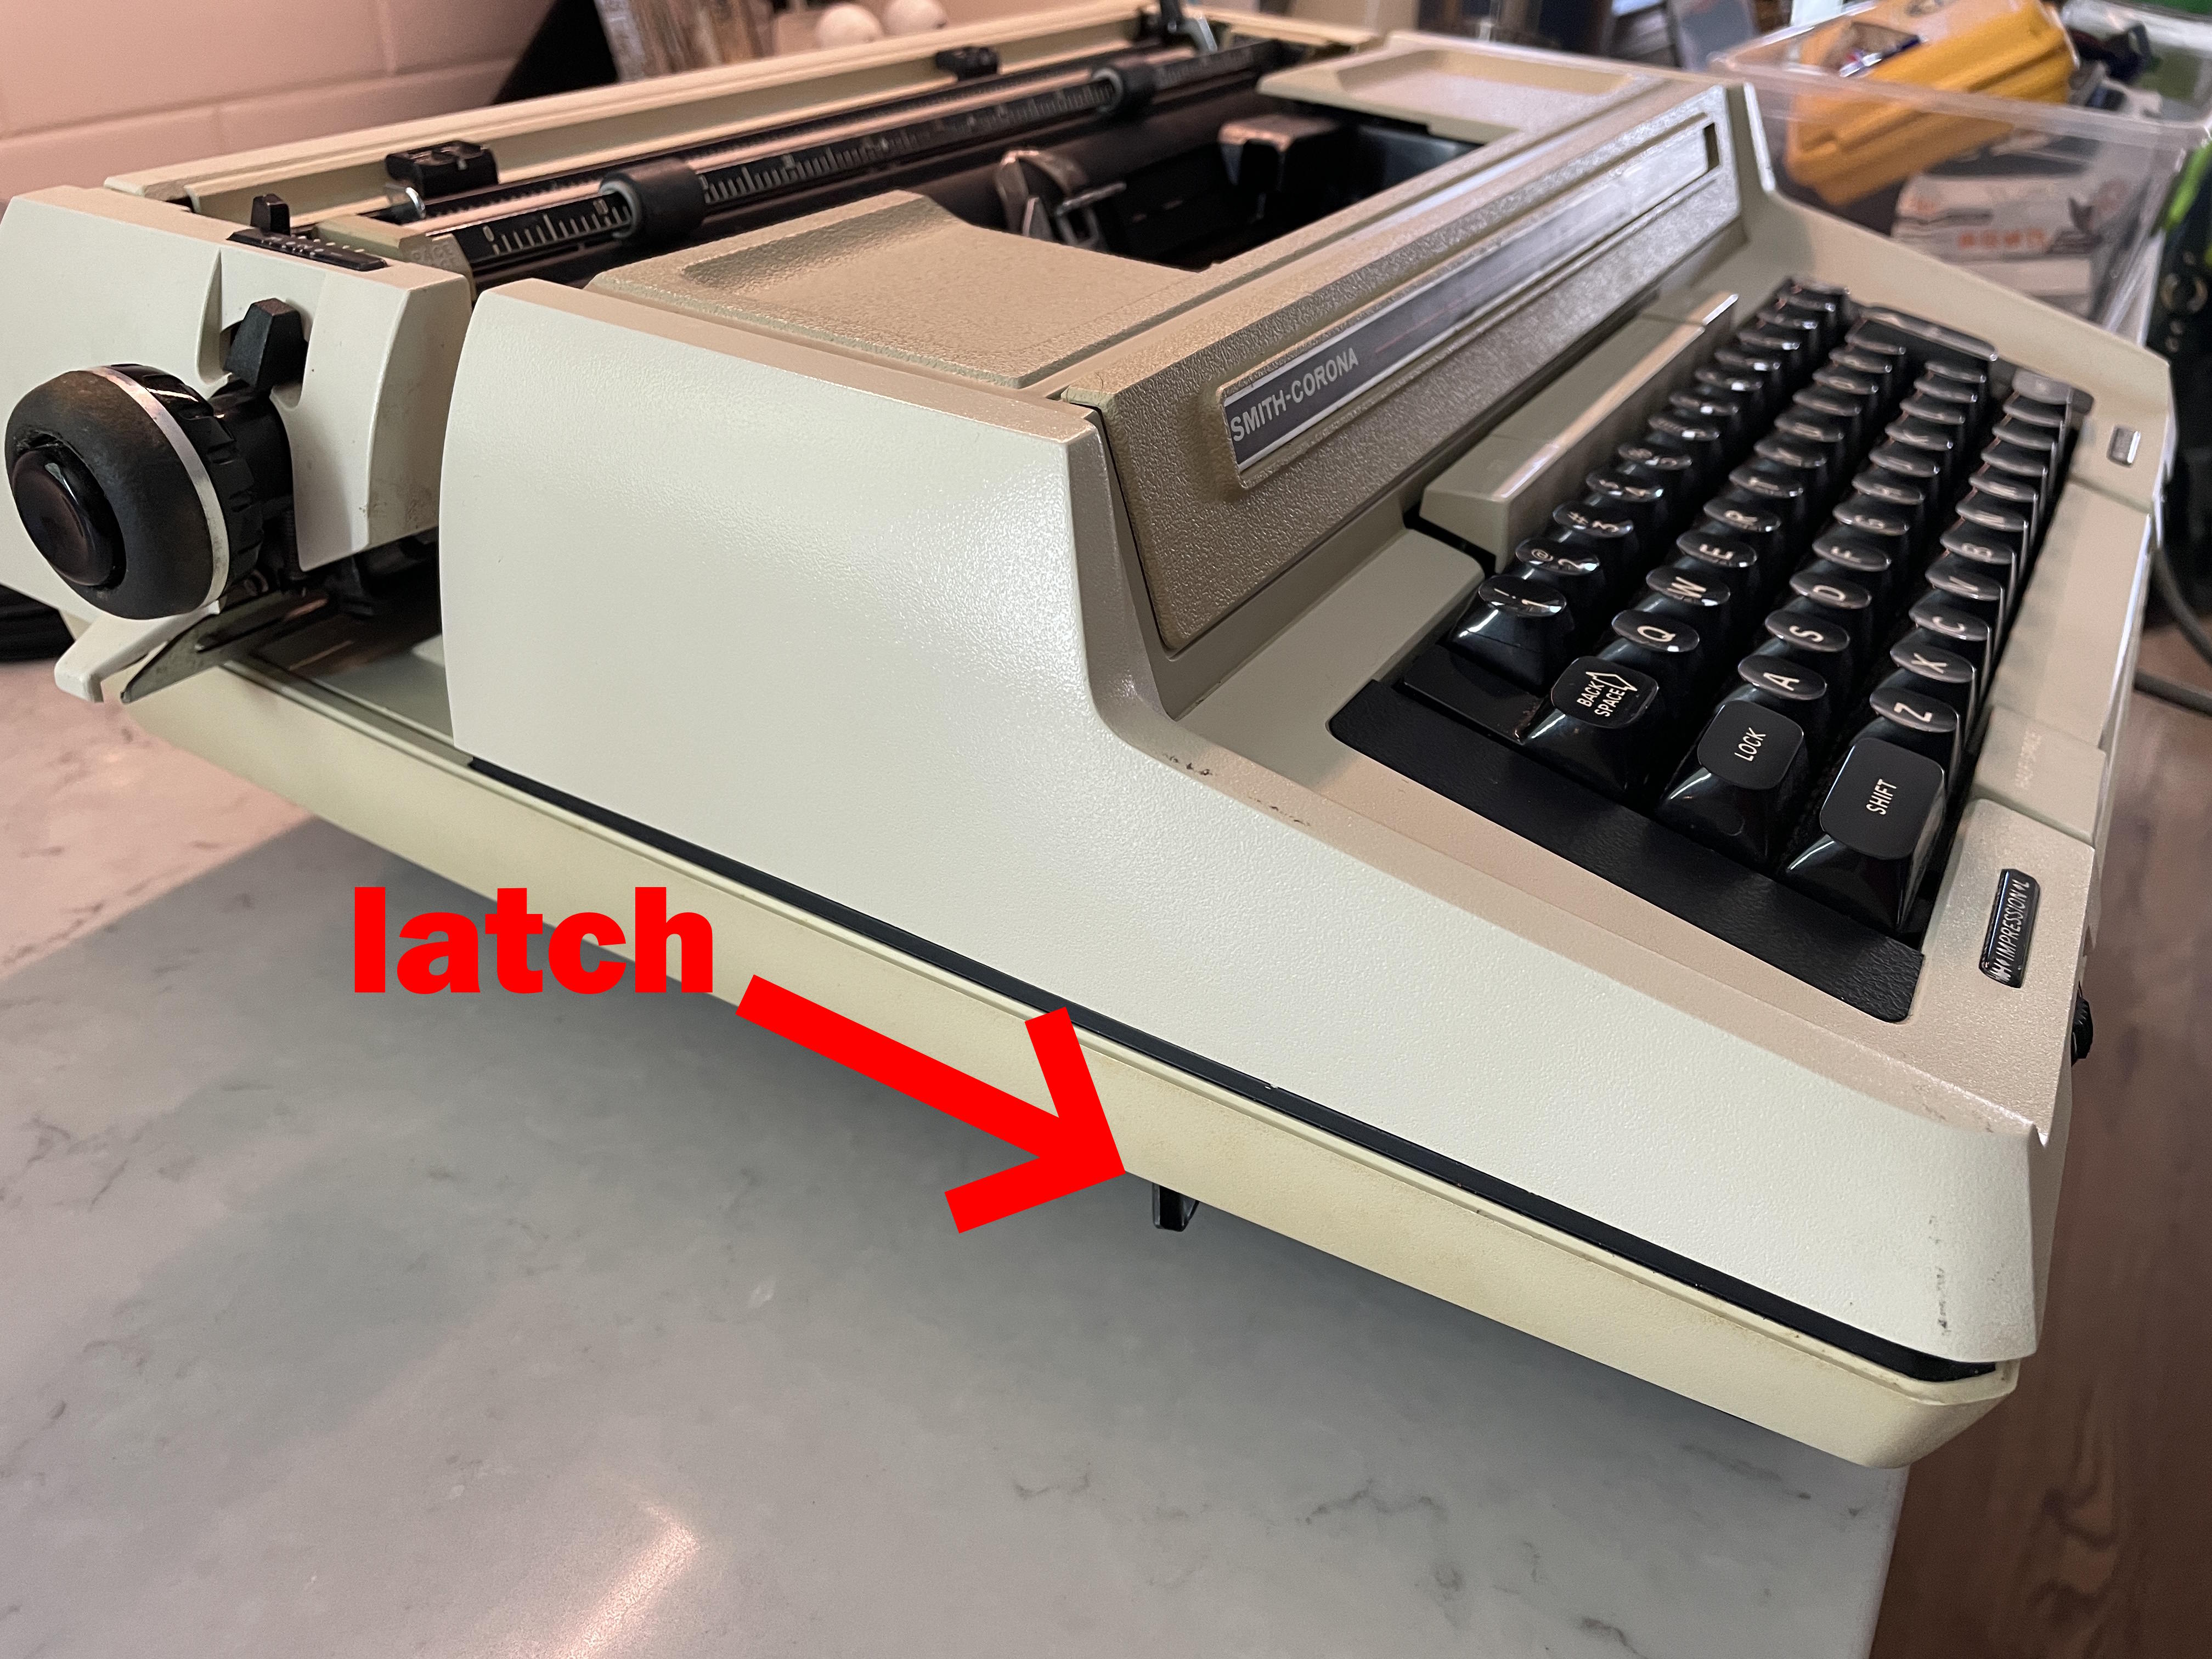
To remove the top cover, I pushed the latches underneath on each side to the rear and lifted the top cover.
Taking off the bottom cover is a little trickier. There are four screws that hold the bottom cover plate in place. In addition, there’s a round plug cover that holds the electrical cord in place. Removing this plug cover (rotating counter-clockwise) makes taking the bottom shell off easier. The words “REMOVE FOR SERVICE ONLY” are printed on it, but the first time around, I had problems removing it. There may be some kind of three-prong specialty tool for this plate removal. I ended up having to feed the electrical cord through a small hole.
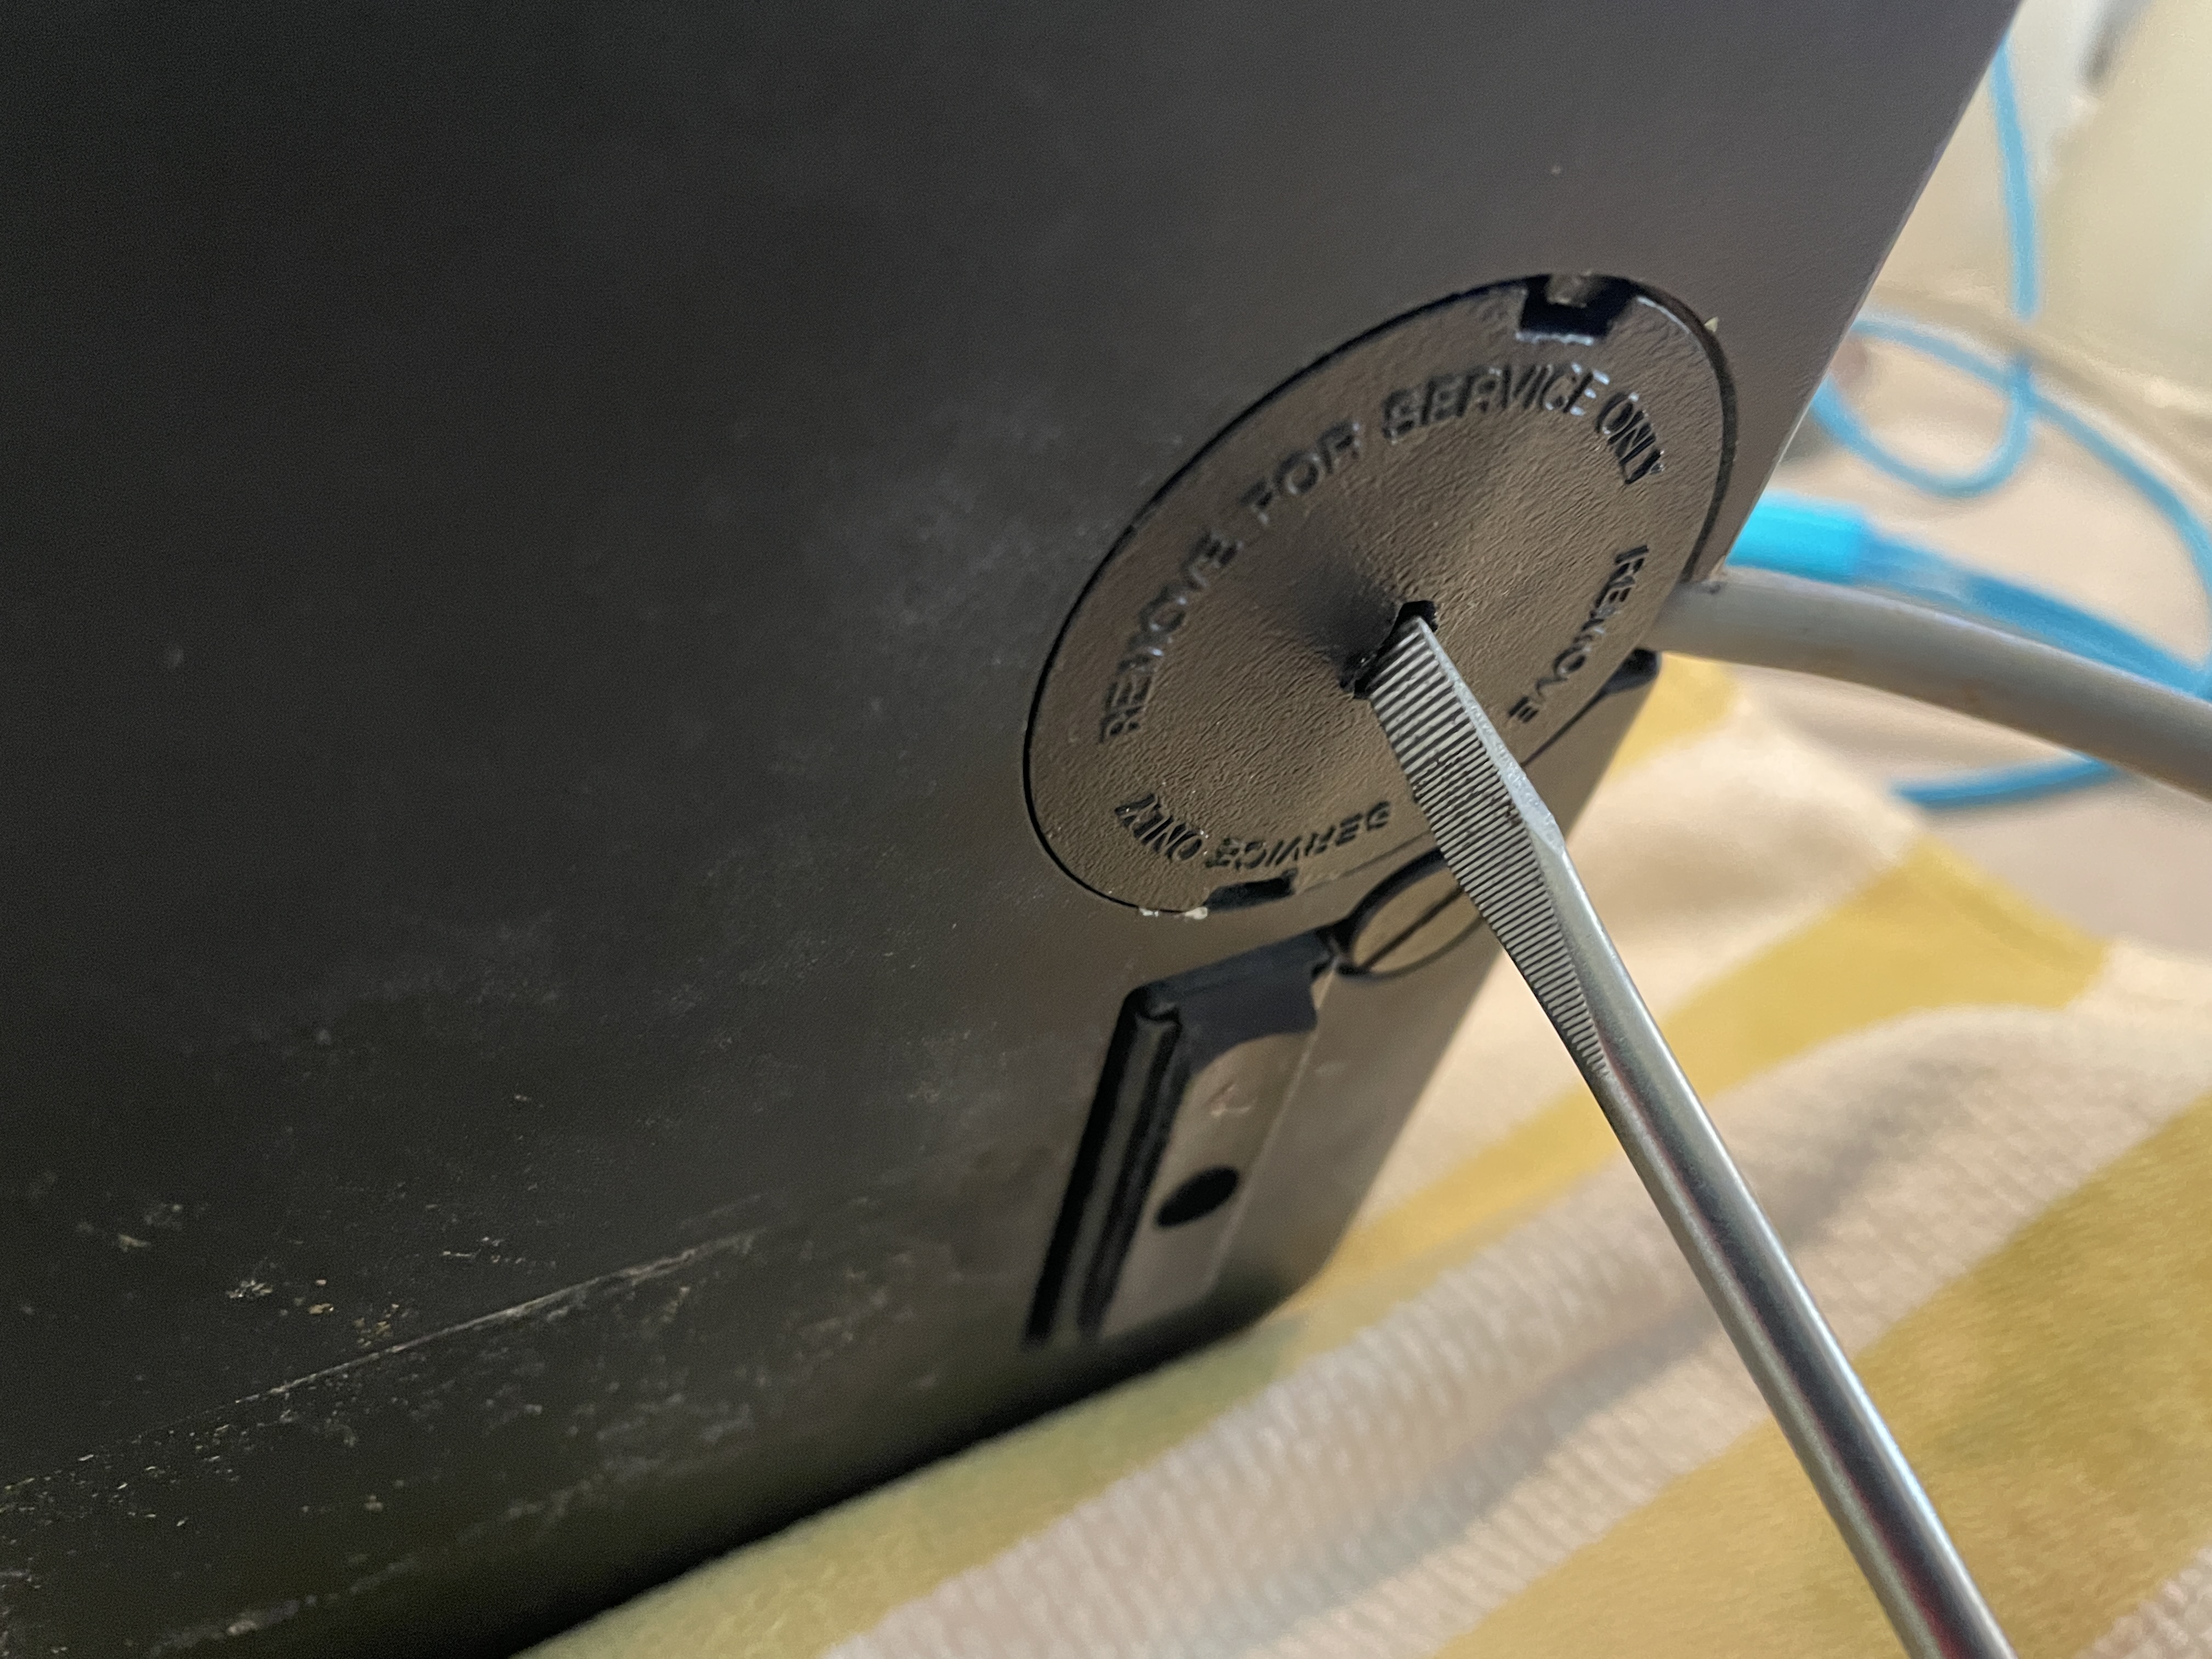
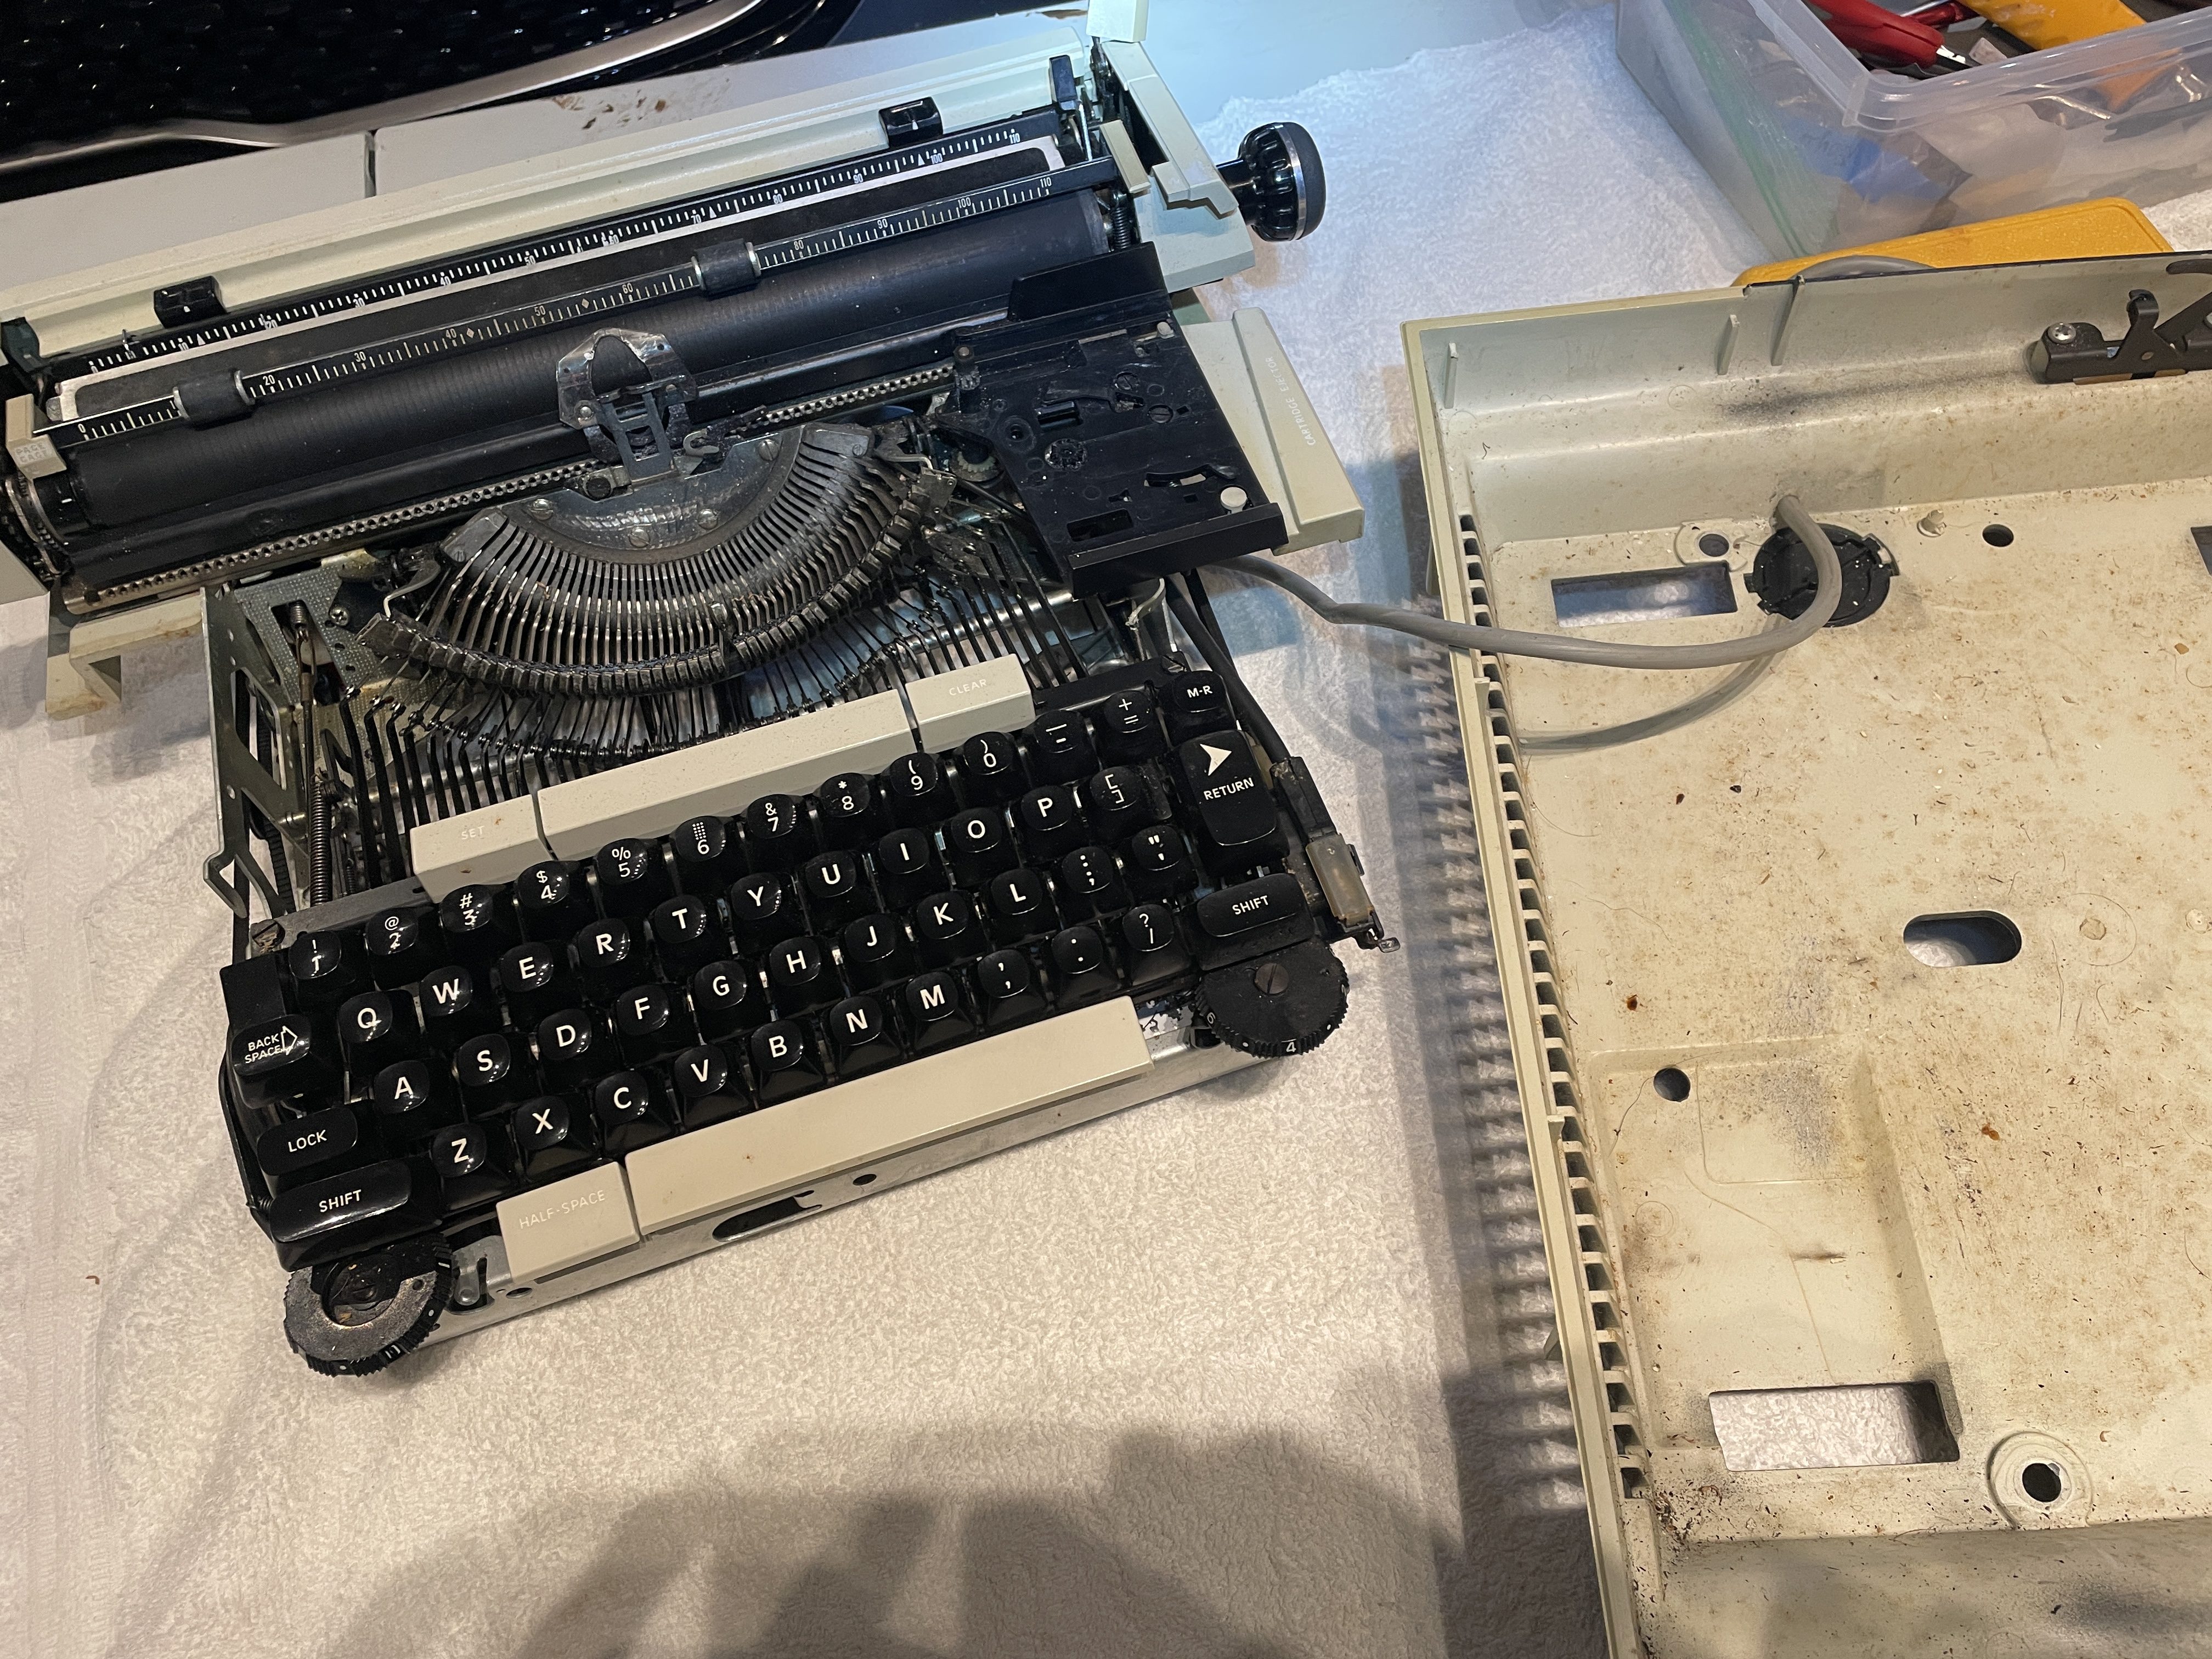
Once I got the machine out of the bottom cover, I was able to fiddle with the brittle 40-year-old plastic plug cover and pop it off.
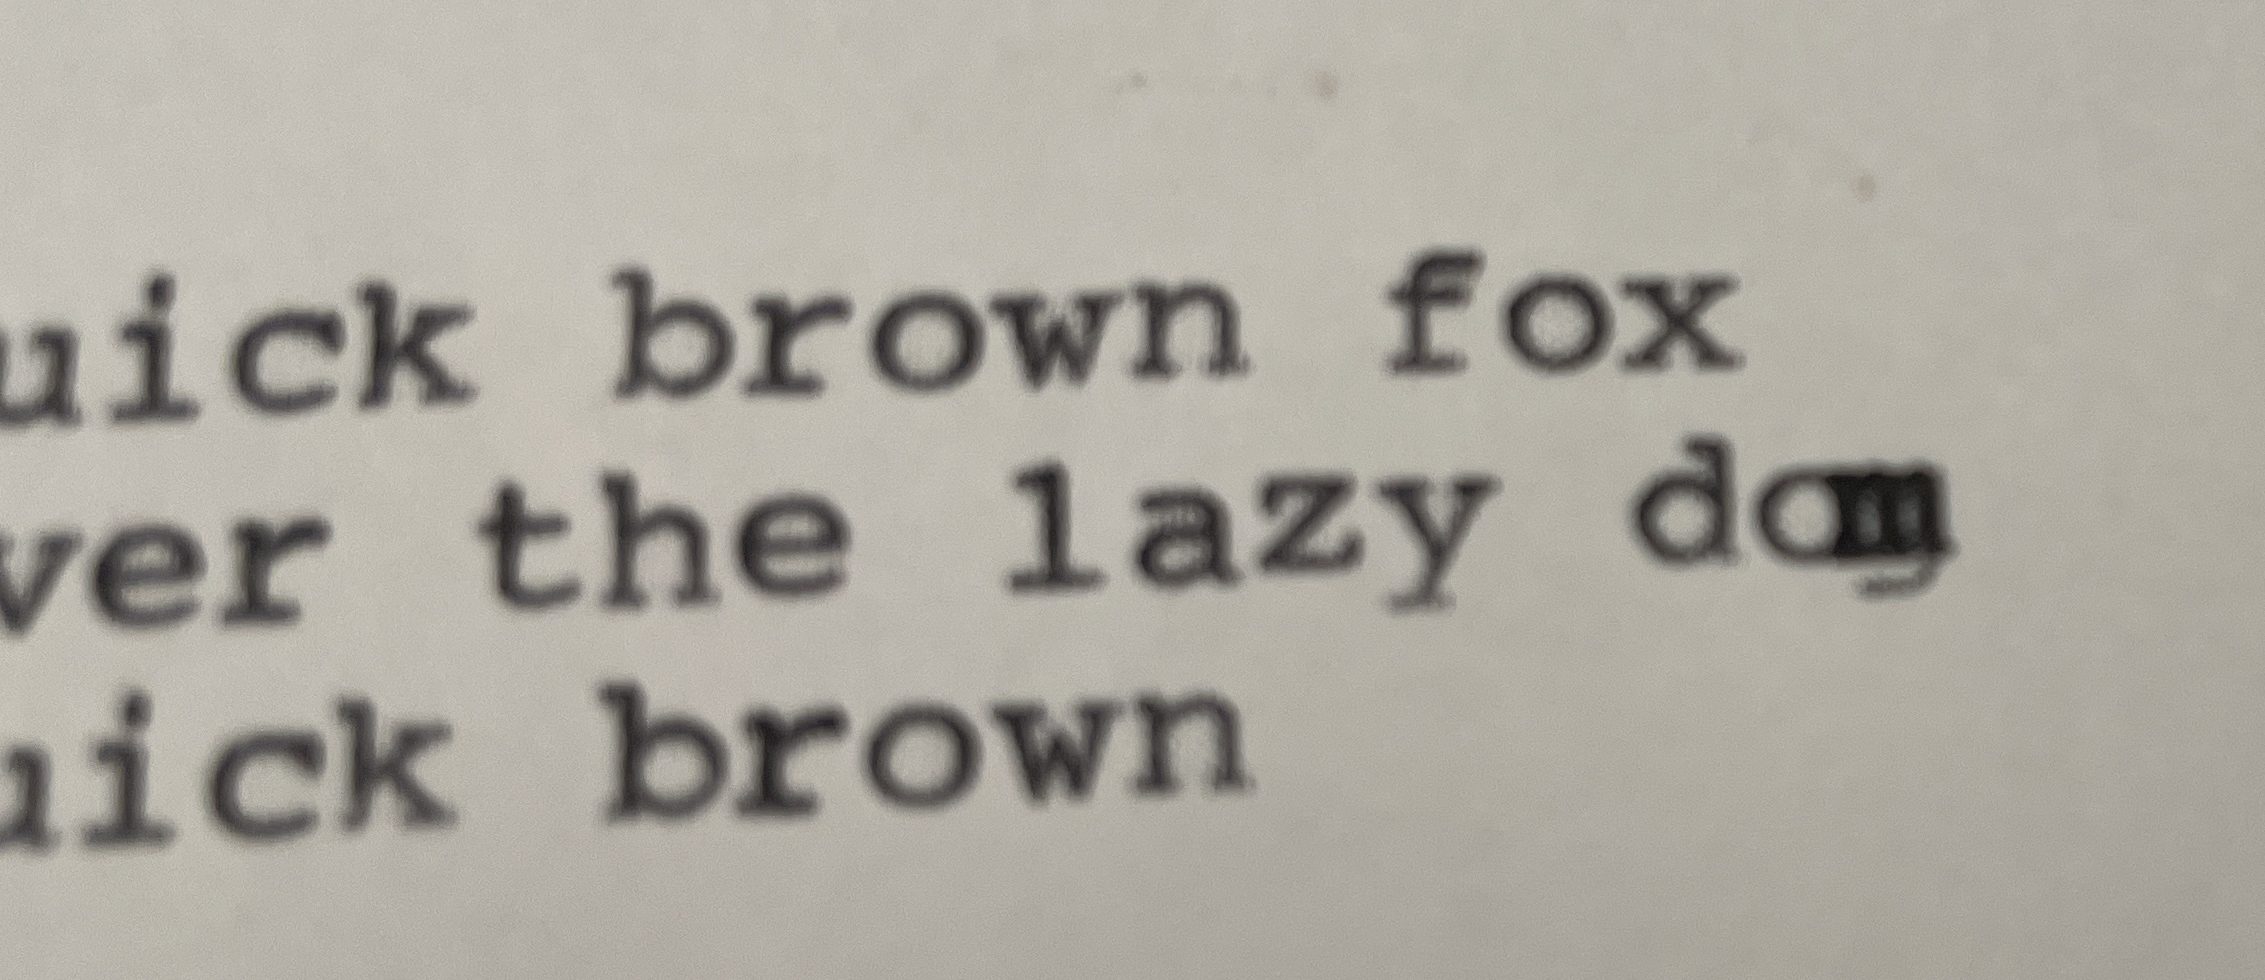
Nonfunctional Key
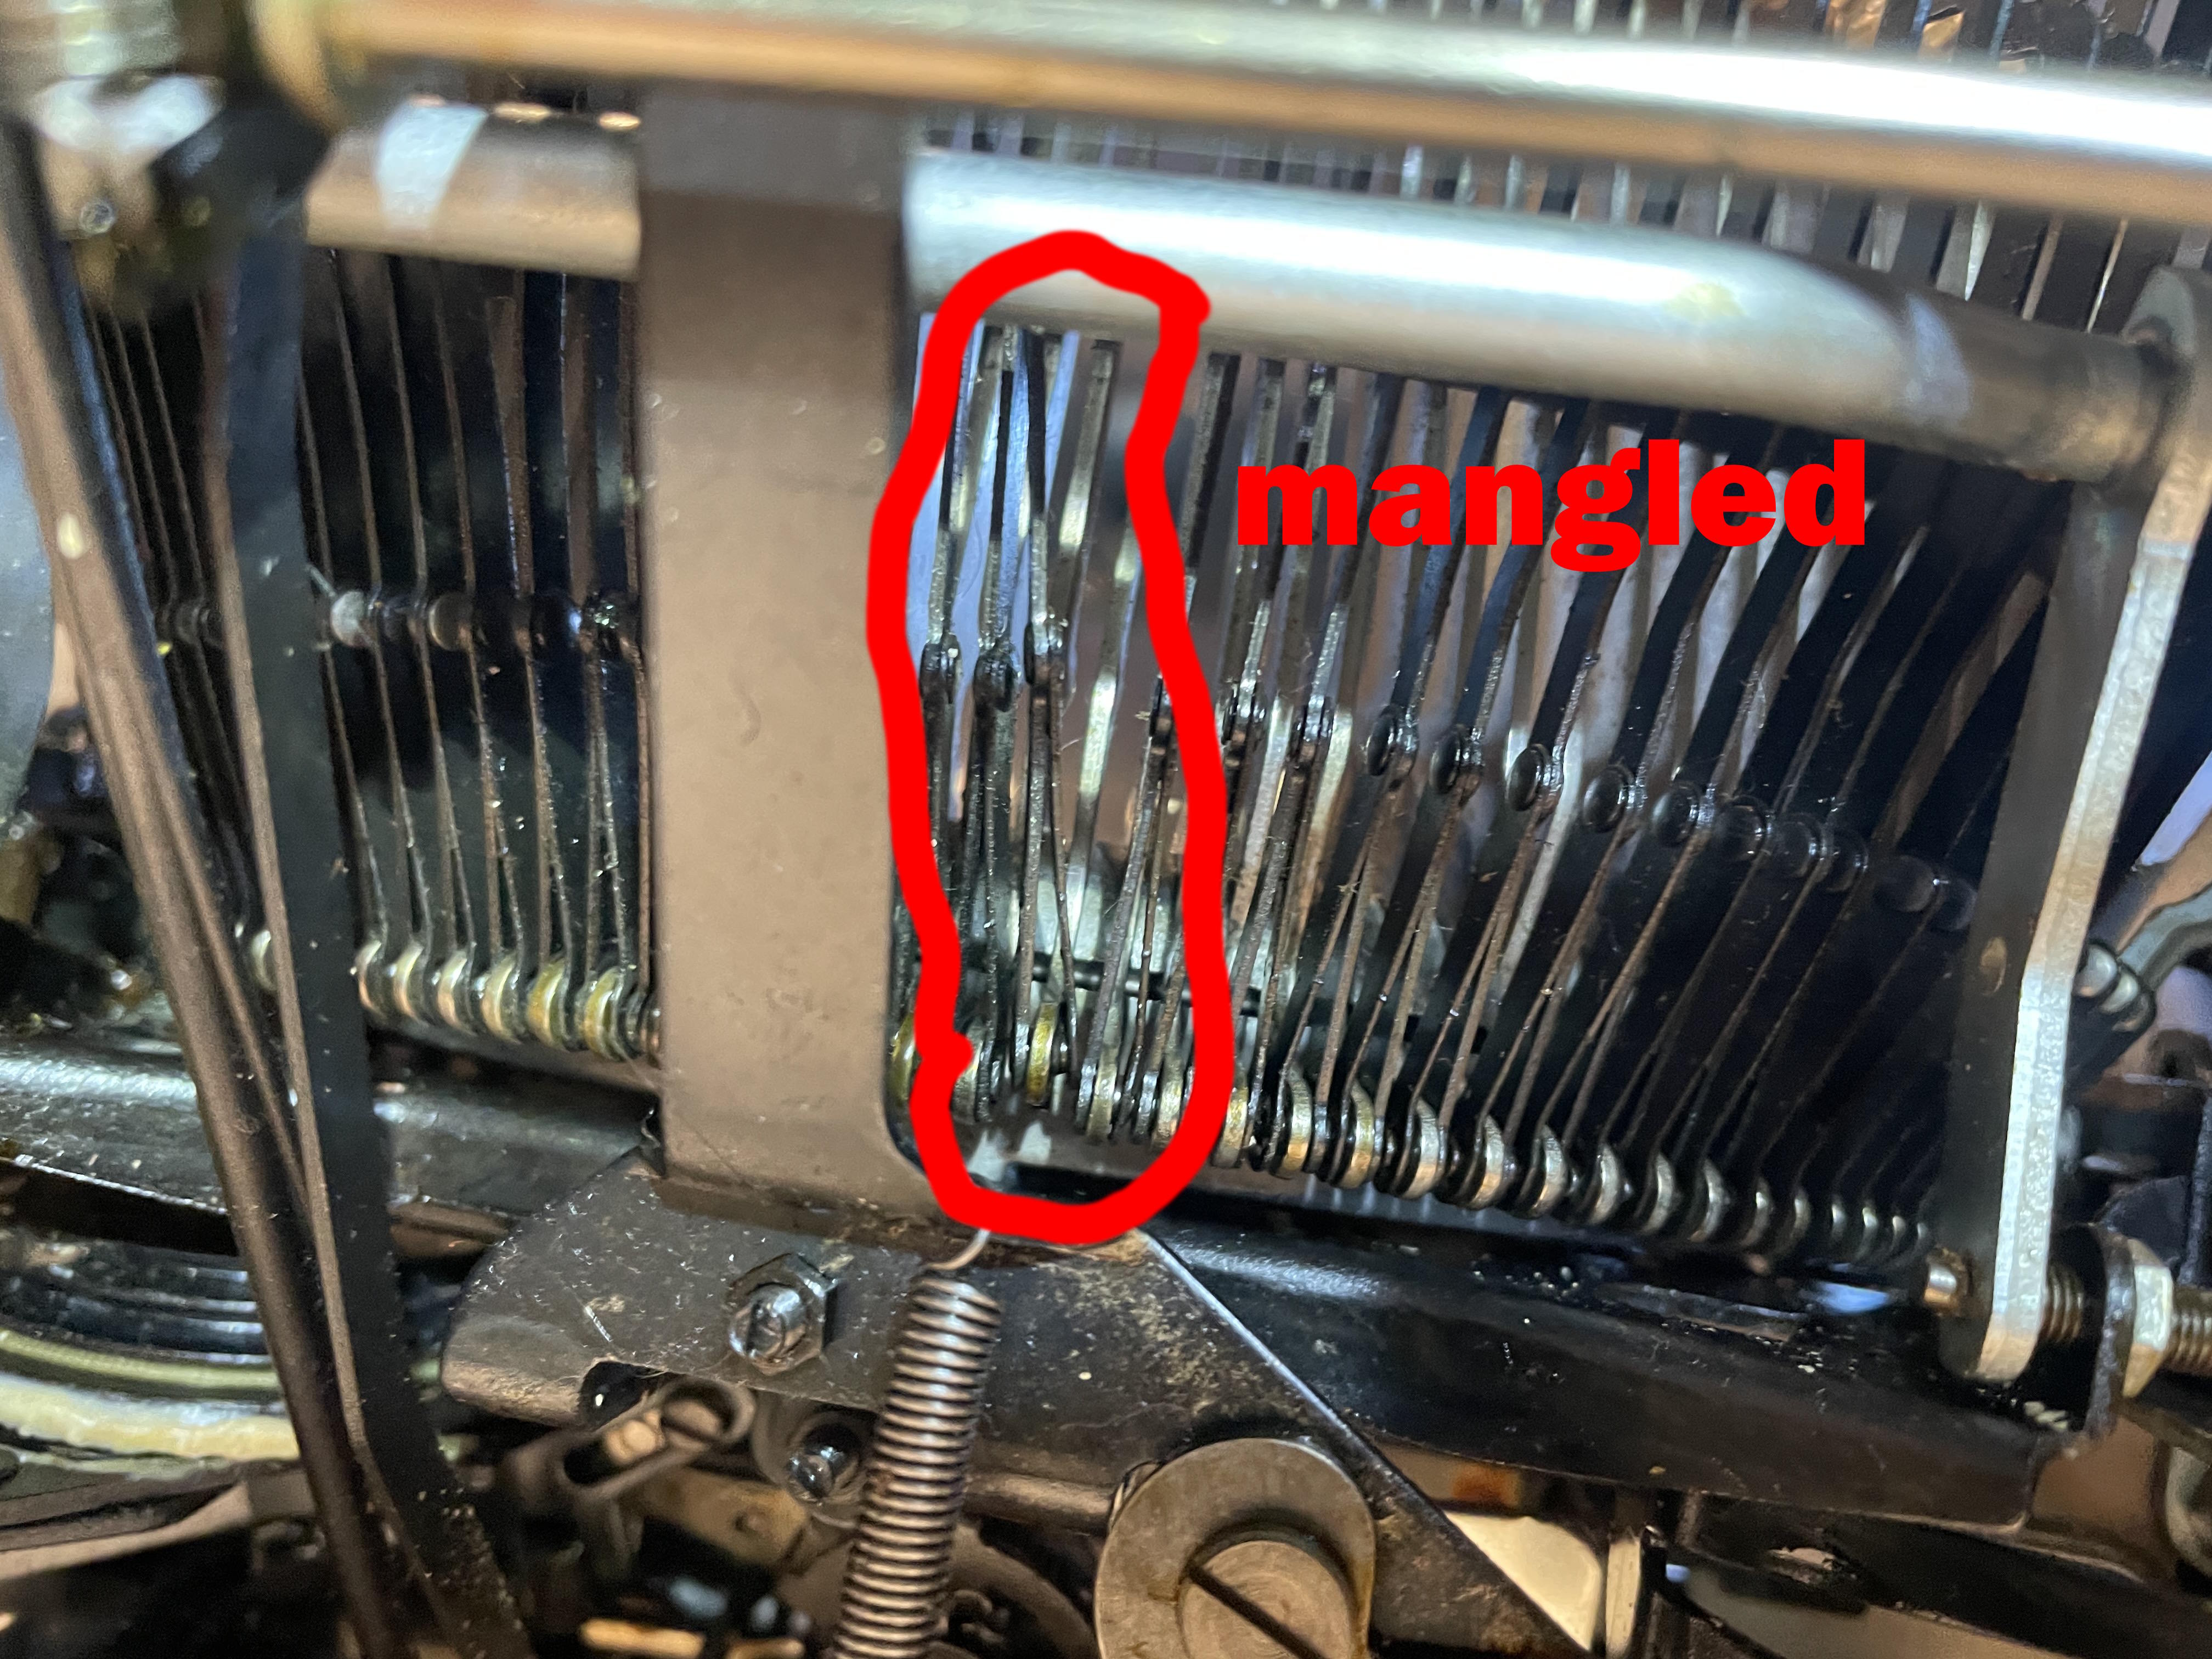
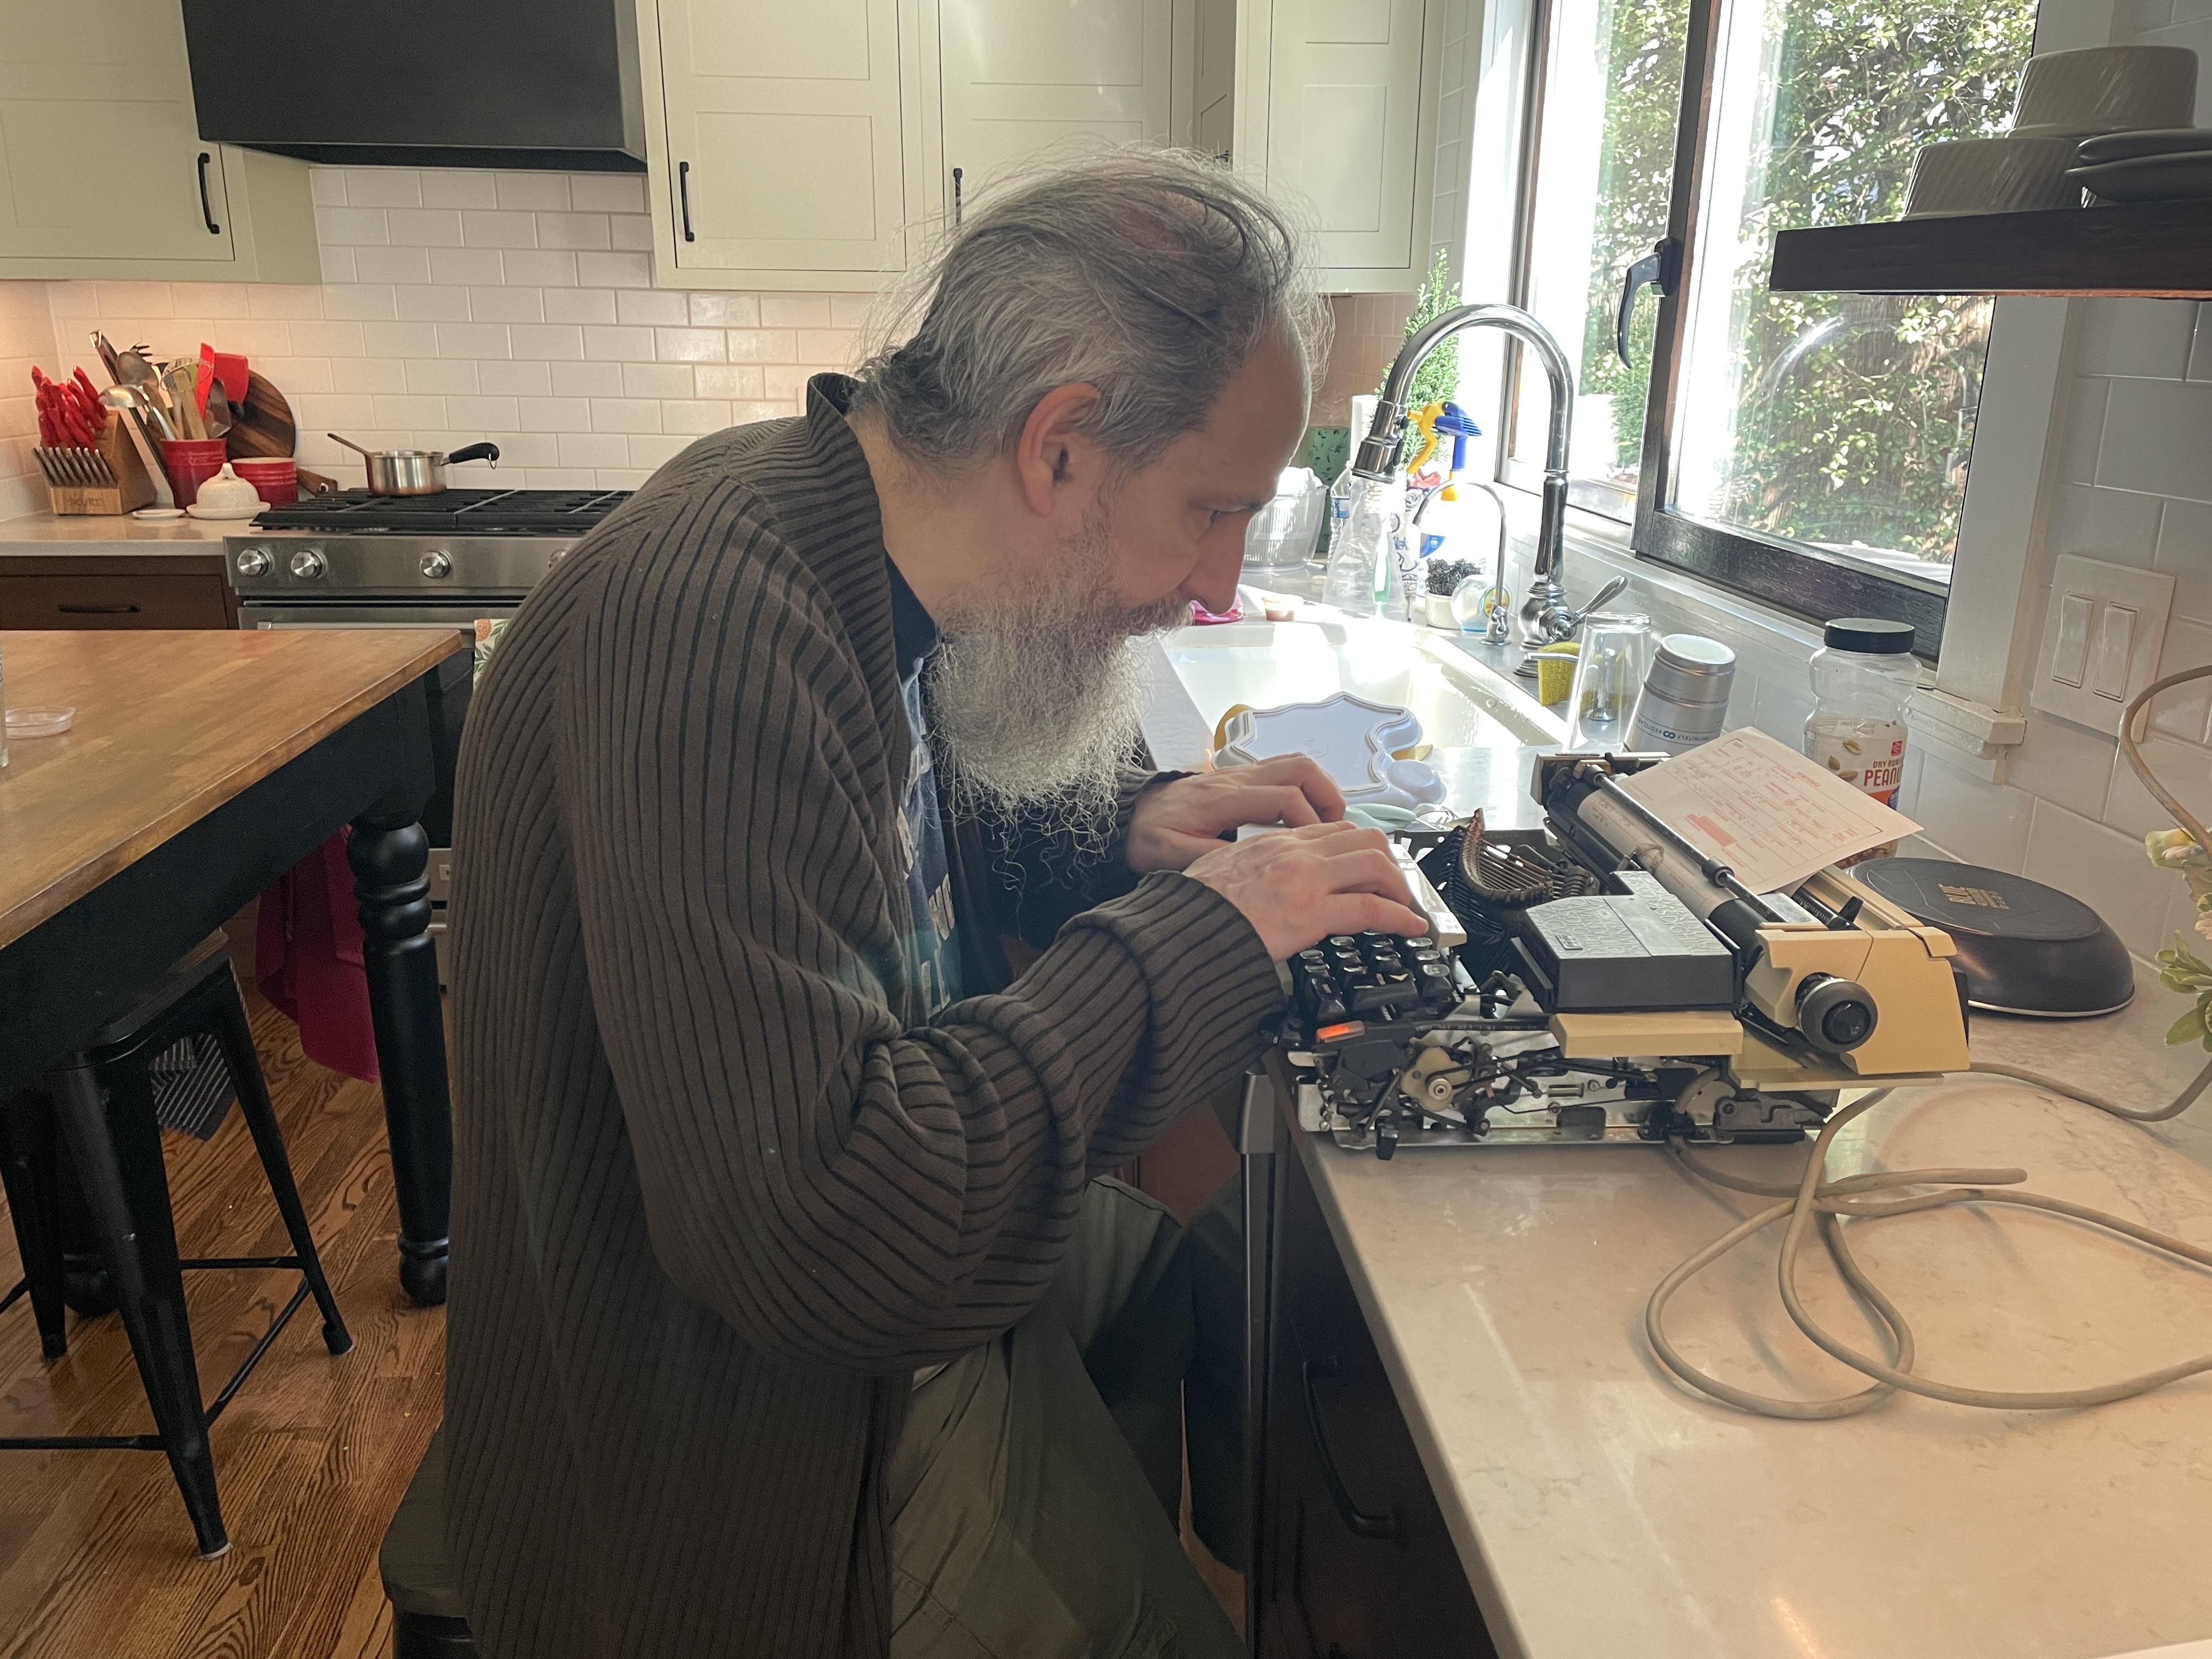
When I got the typewriter out of its shell, I saw that the “N/n” typebar and sublevers were all bent up and colliding with neighbors.
The typebars on electric typewriters lock in a down position without power, so in order to work on a typebar, you have to strike the key while turning the belt pulley on the left with your hand. When the typebar moves up a bit, you can grasp it and raise it fully to work on it. It will reset into a locked position when it falls back into place in the basket.

Manually turning the belt pulley until typebar rises
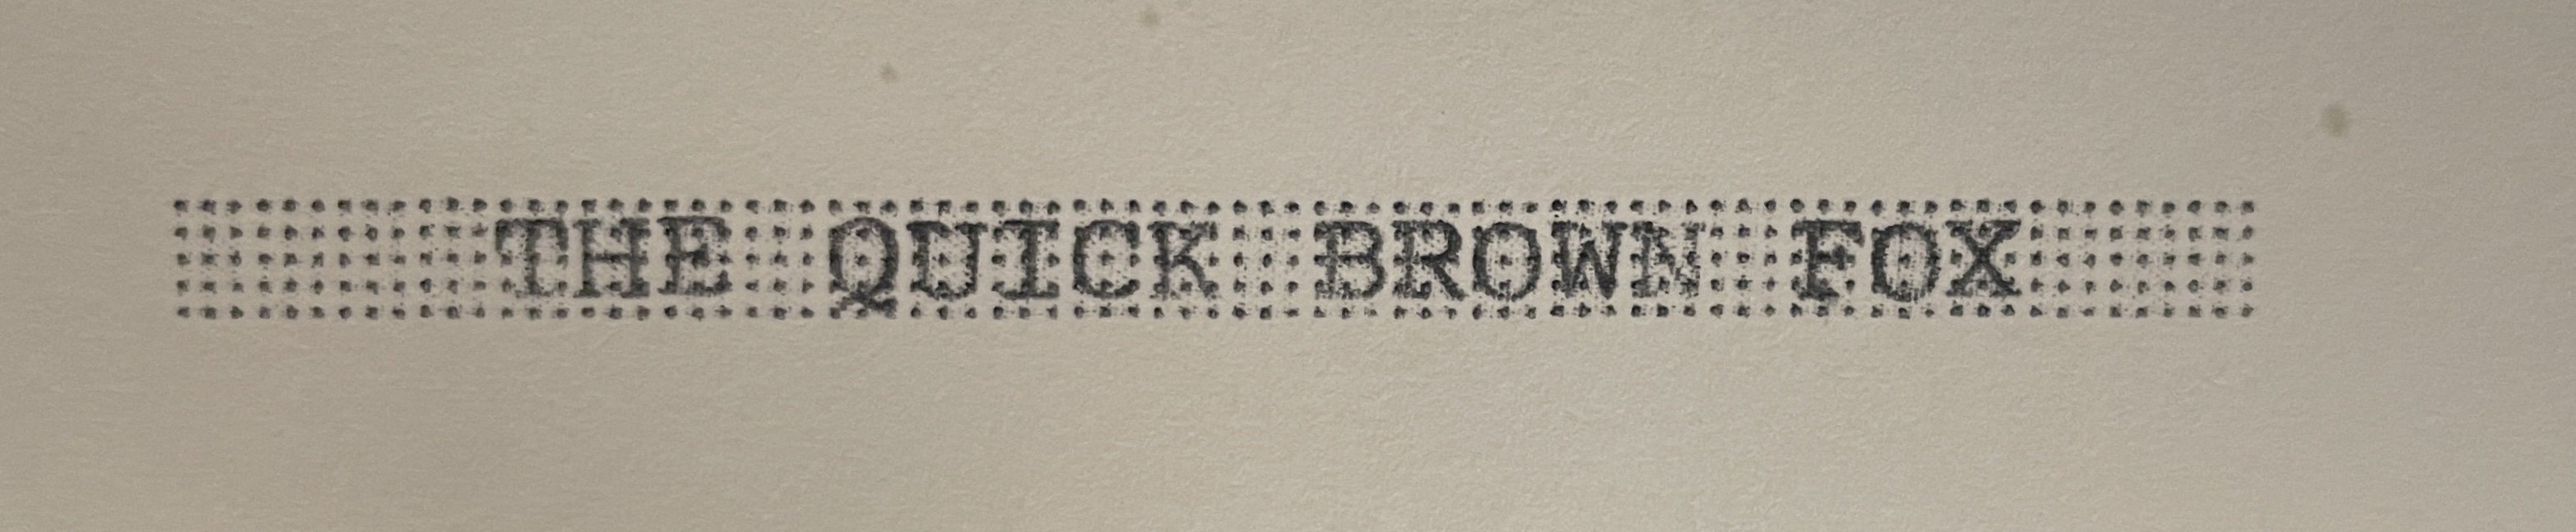
The typebar and sublever were very crooked, and it took a while to straighten them out. I’m finally getting full movement and a pretty good imprint on the “n”. Uppercase “N” is still kind of sketchy, but I’m satisfied.

Gummy Line Indexing
I noticed that the line Indexing on carriage return was not working. Typing wouldn’t go to the next line on return.
I cleaned and lubricated the indexing mechanism on the left side of the platen and hit the return button over and over and over again and over and over and over and over and over.
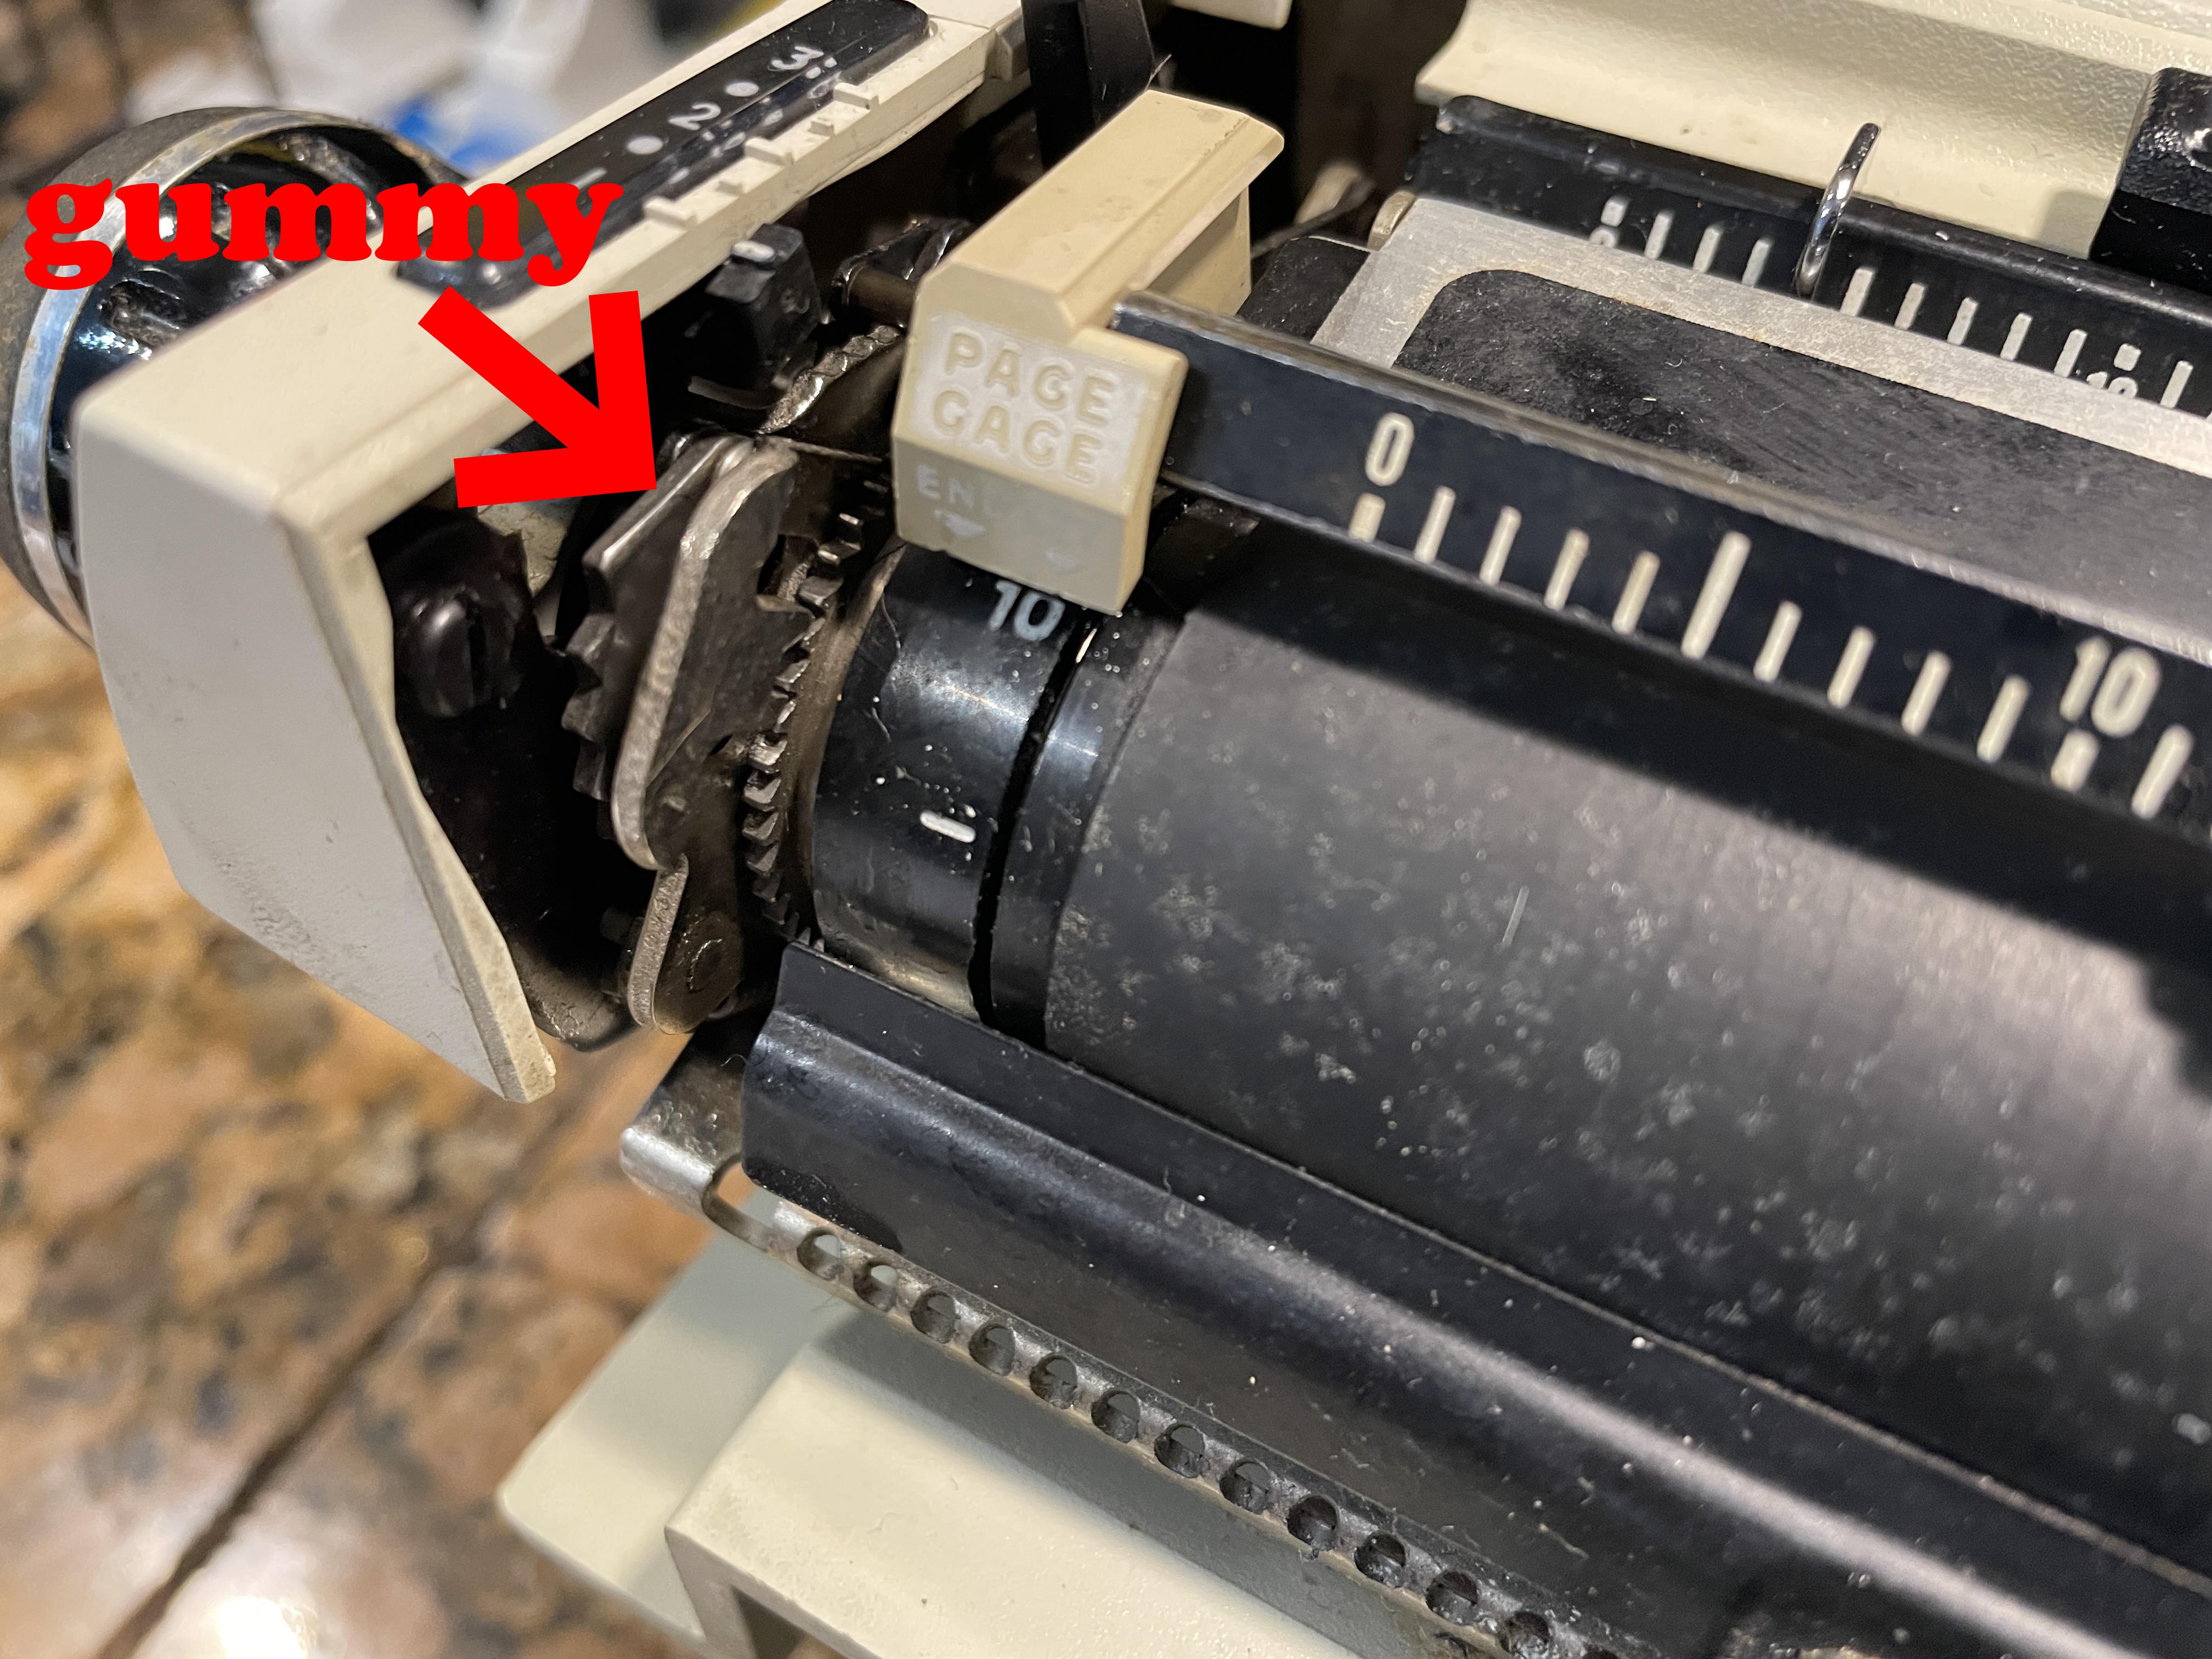
The typewriter finally began indexing properly.
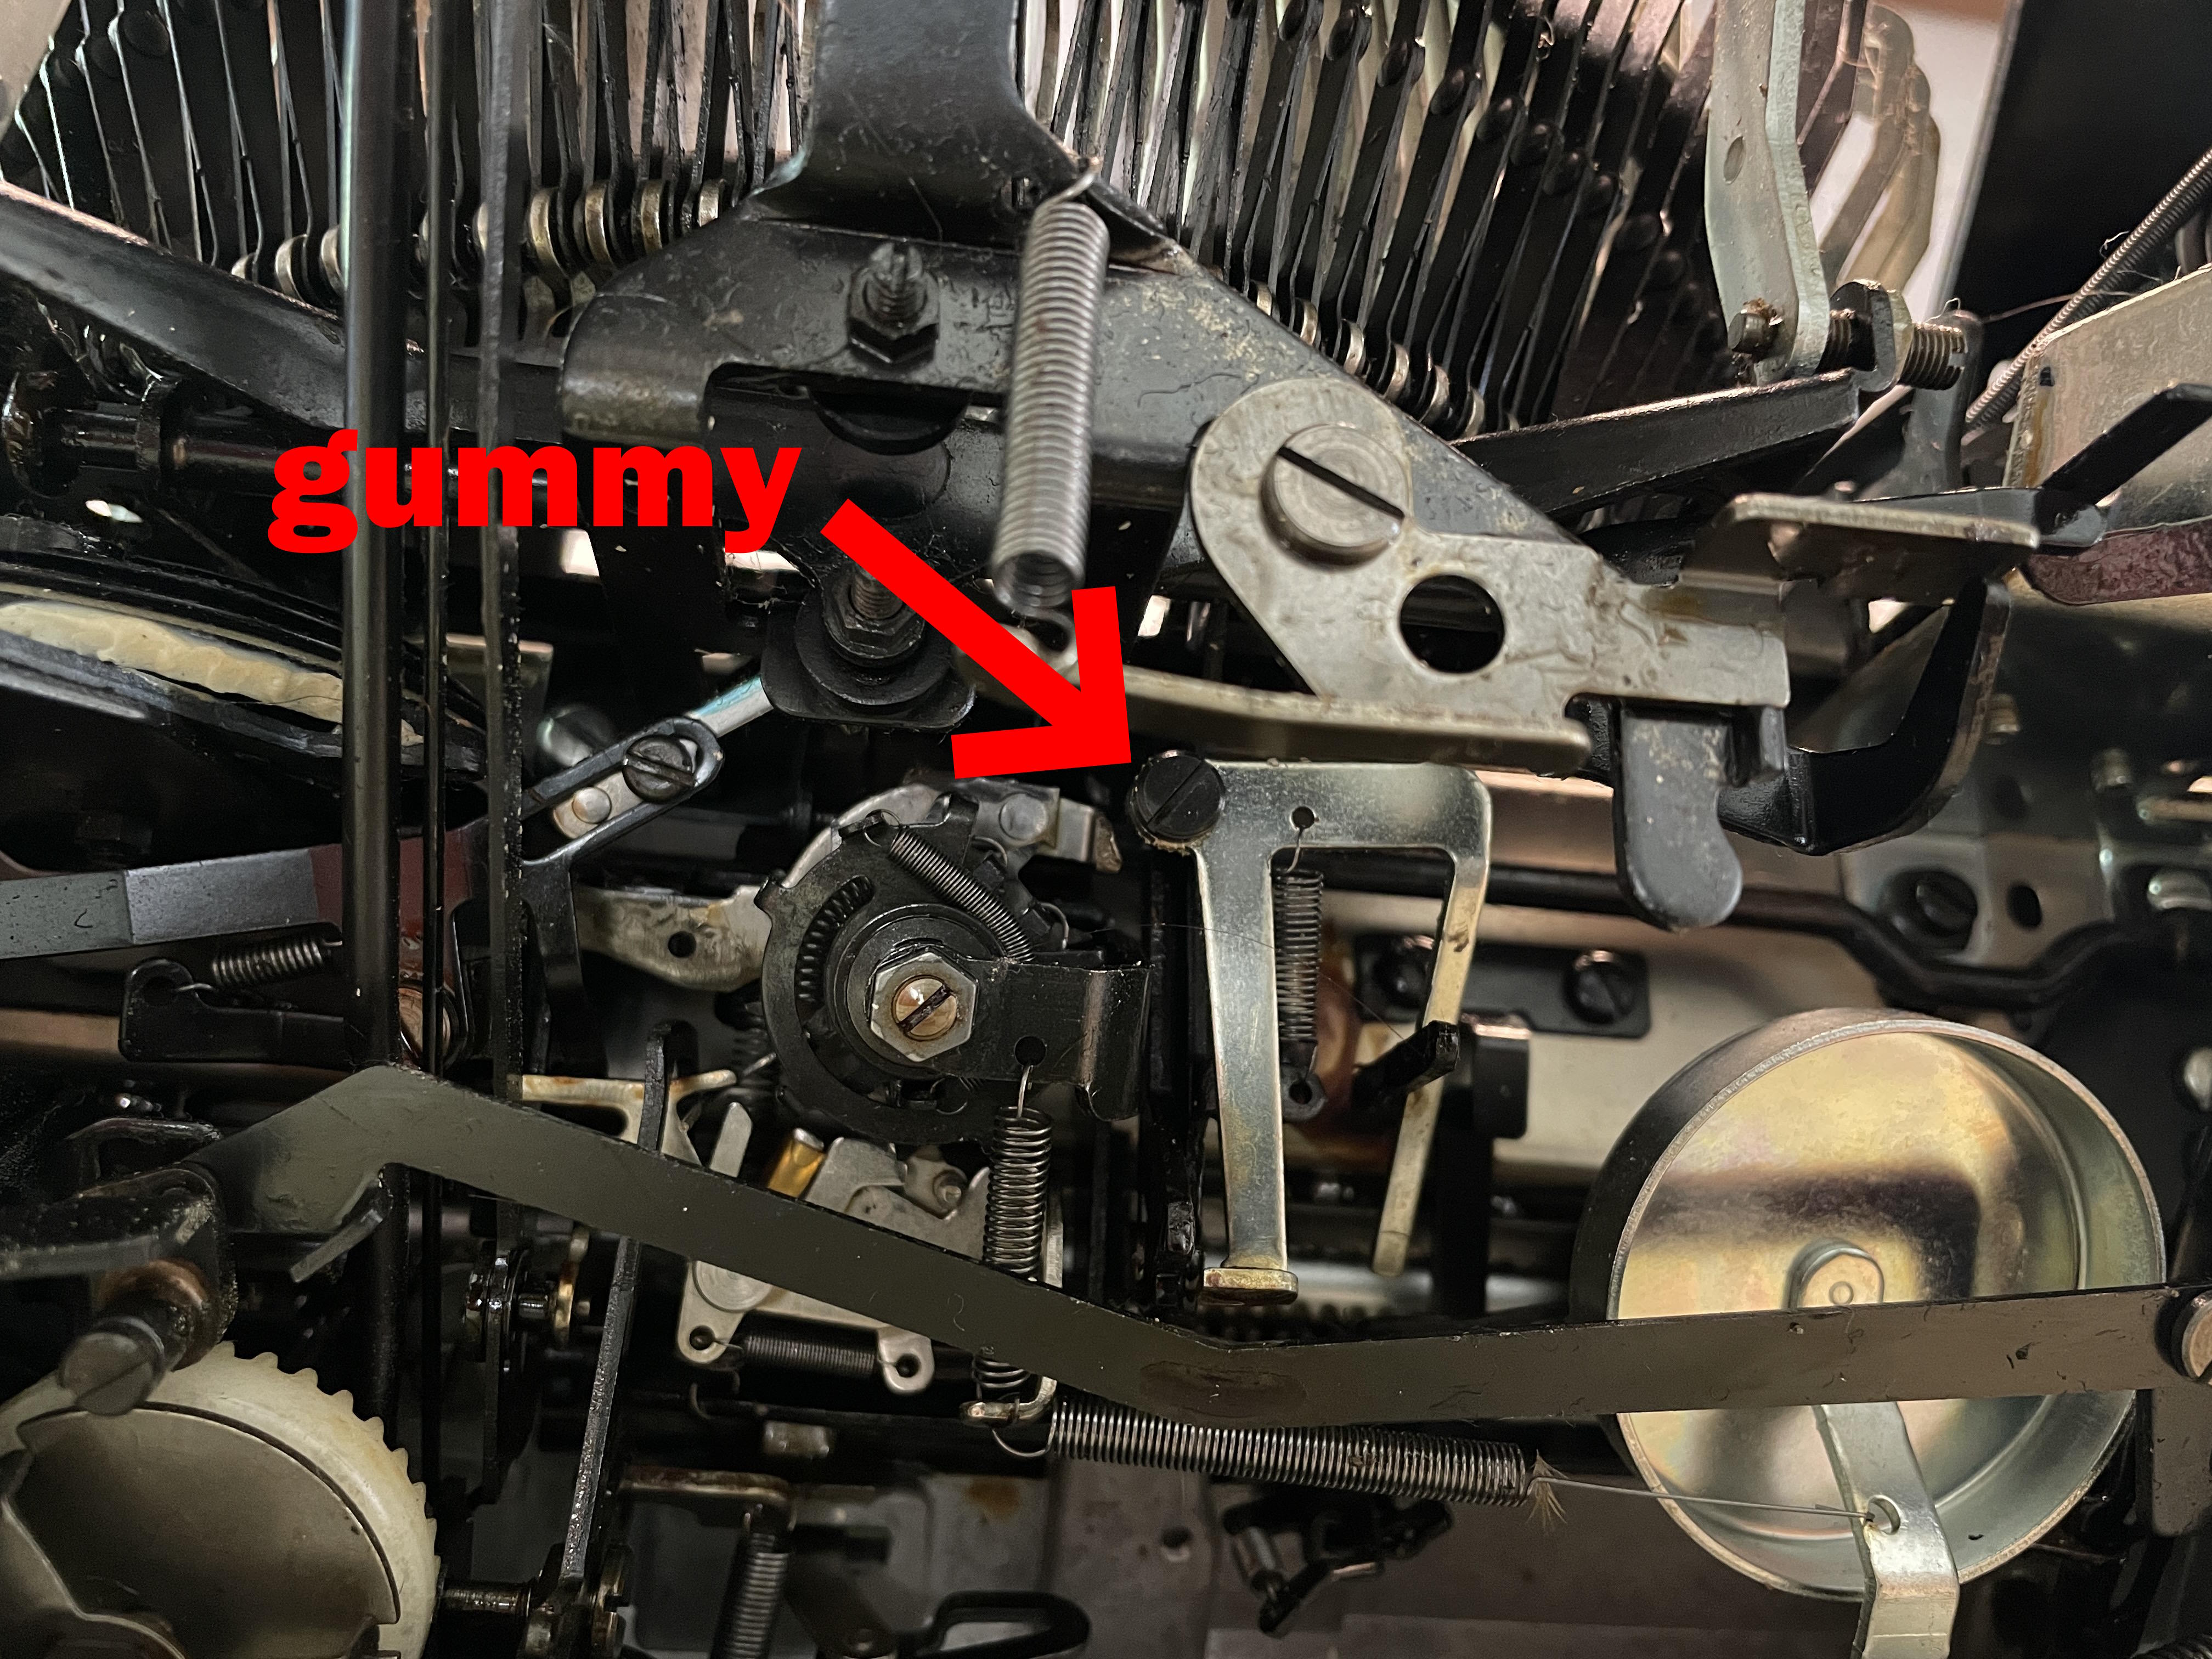
Gummy Line Lock
I put it back into its shell and AAAARGH. The line lock wasn’t working. I had made the mistake of not testing too well before I had put it back together.
Joe Van Cleave has a nice video on what to do with a Smith Corona line lock that doesn’t engage.
I took the machine out of its shell again and found a very, very gummy shoulder screw that I dabbed with mineral spirits until the mechanism went boing-boing-boing. The line lock began to engage properly.
All good now. I did testing before I got it back into its shell.
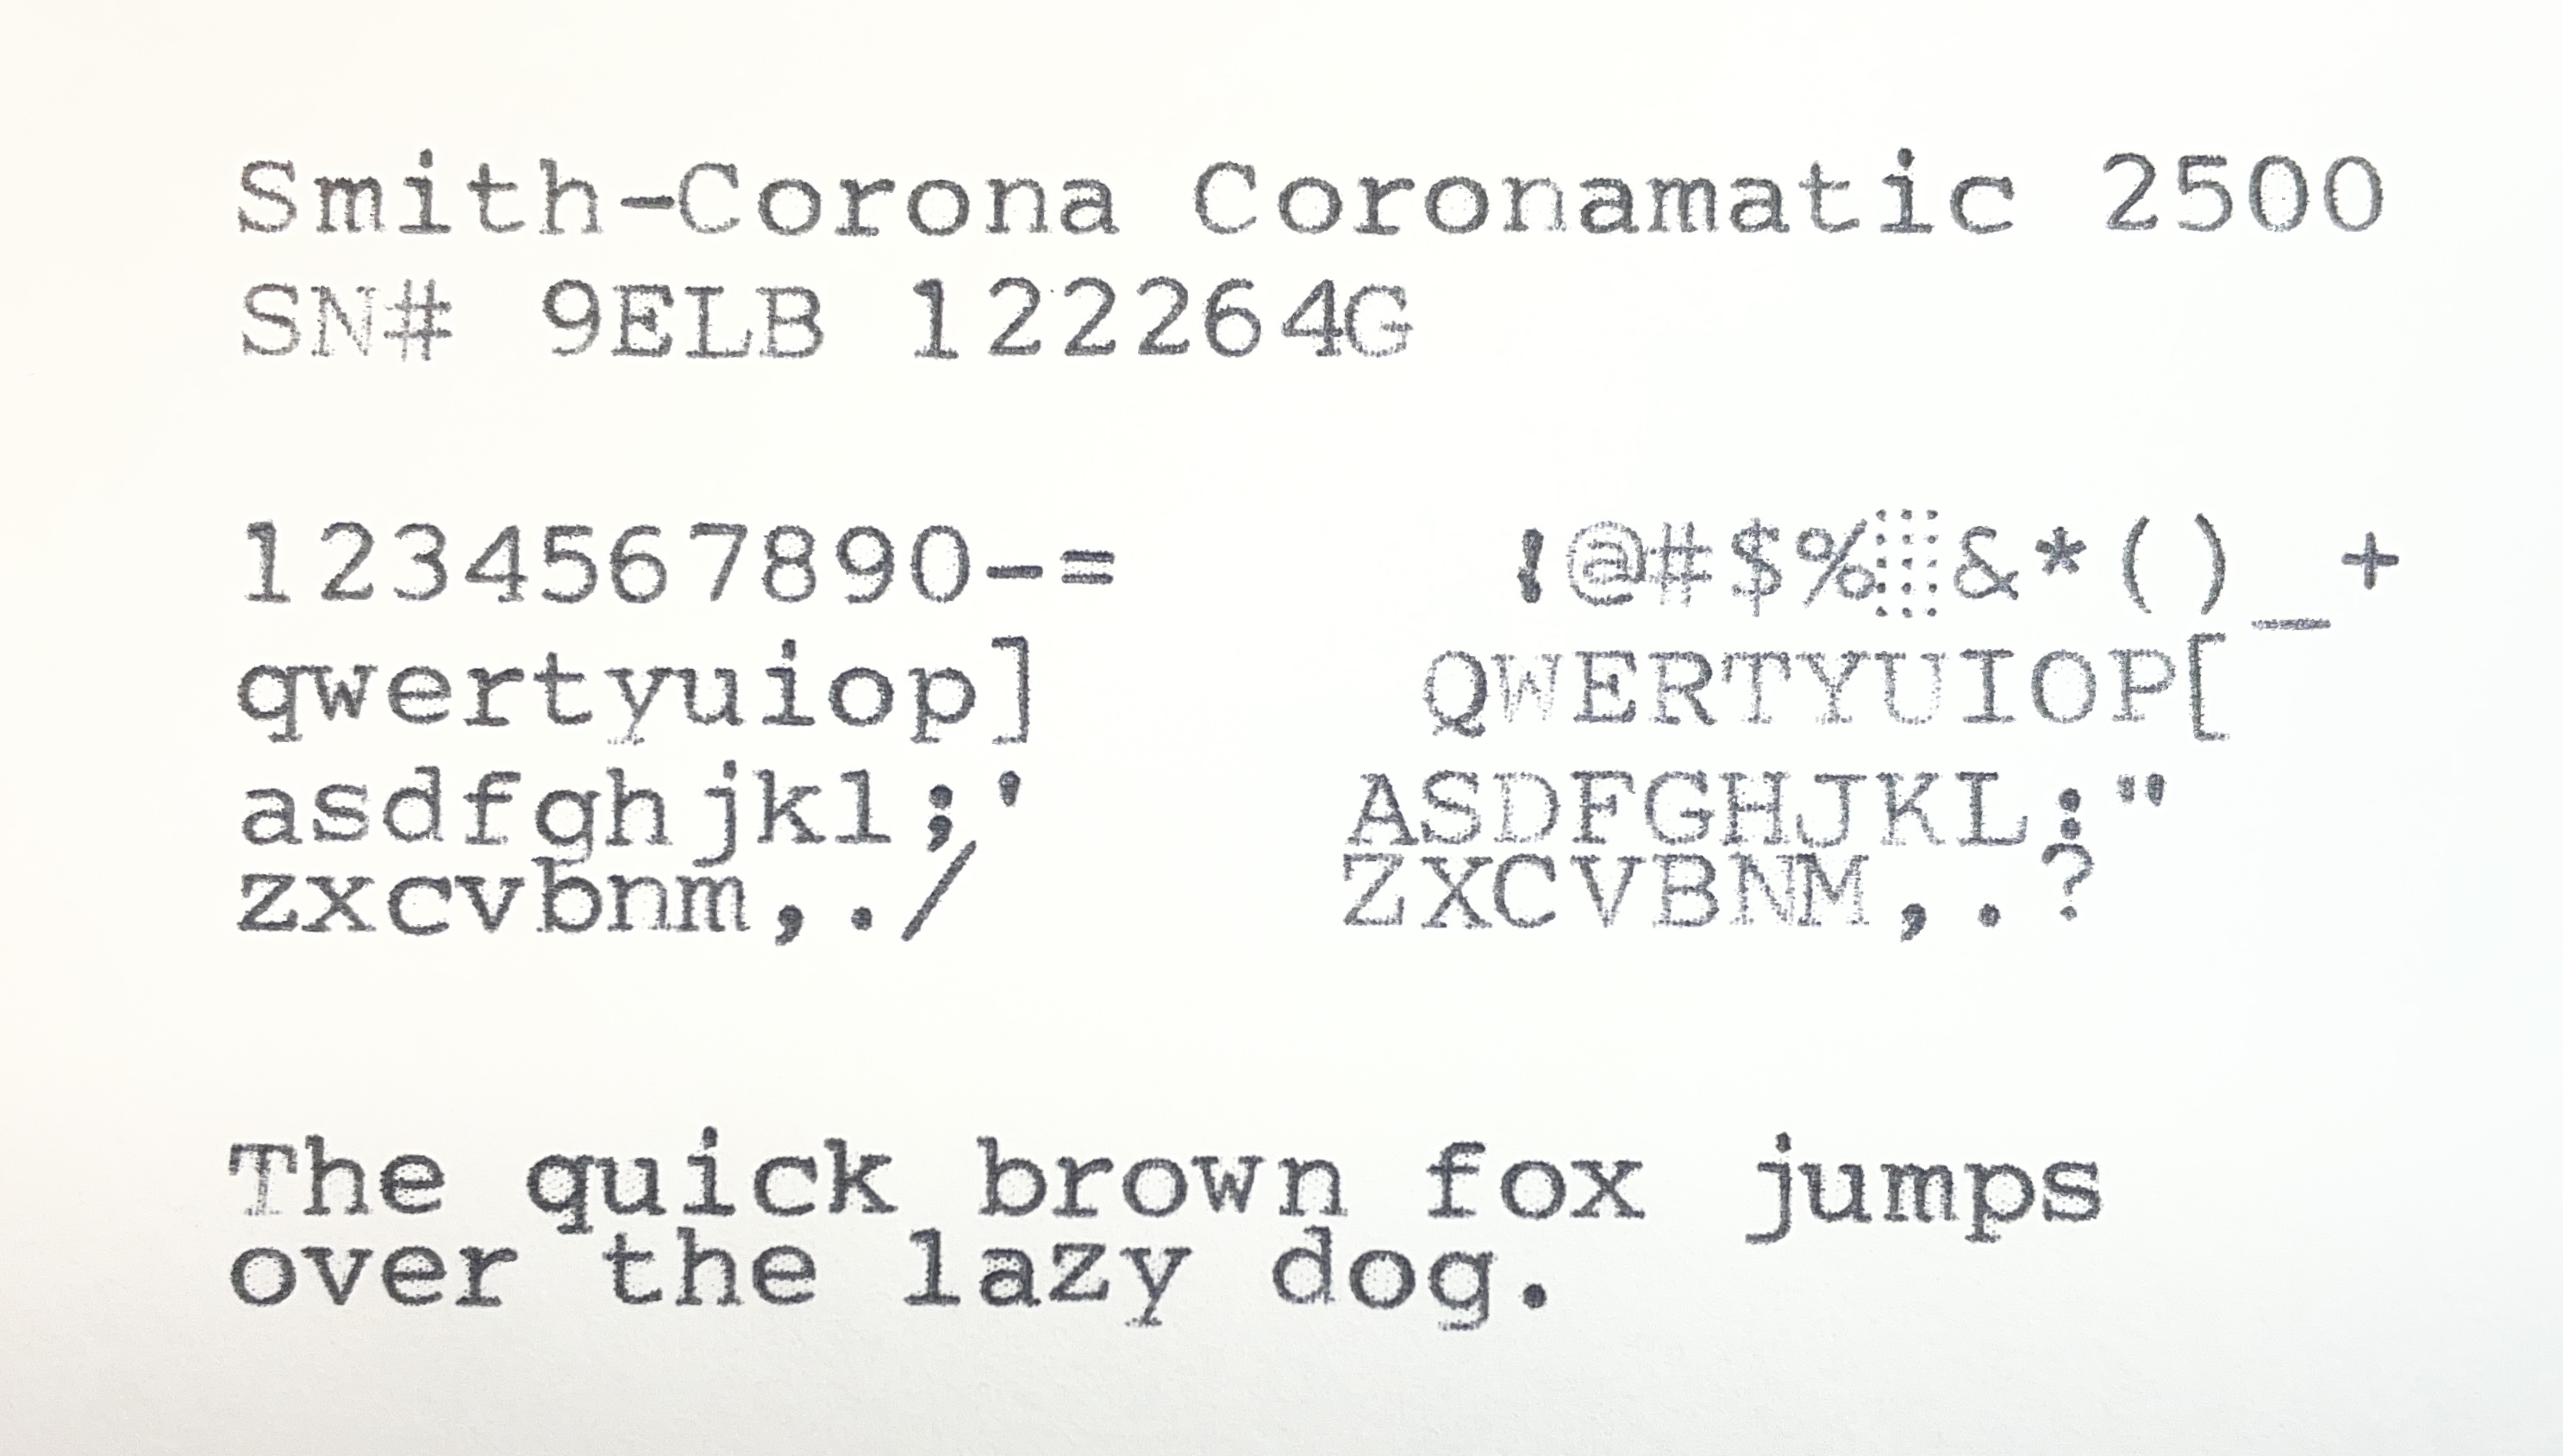
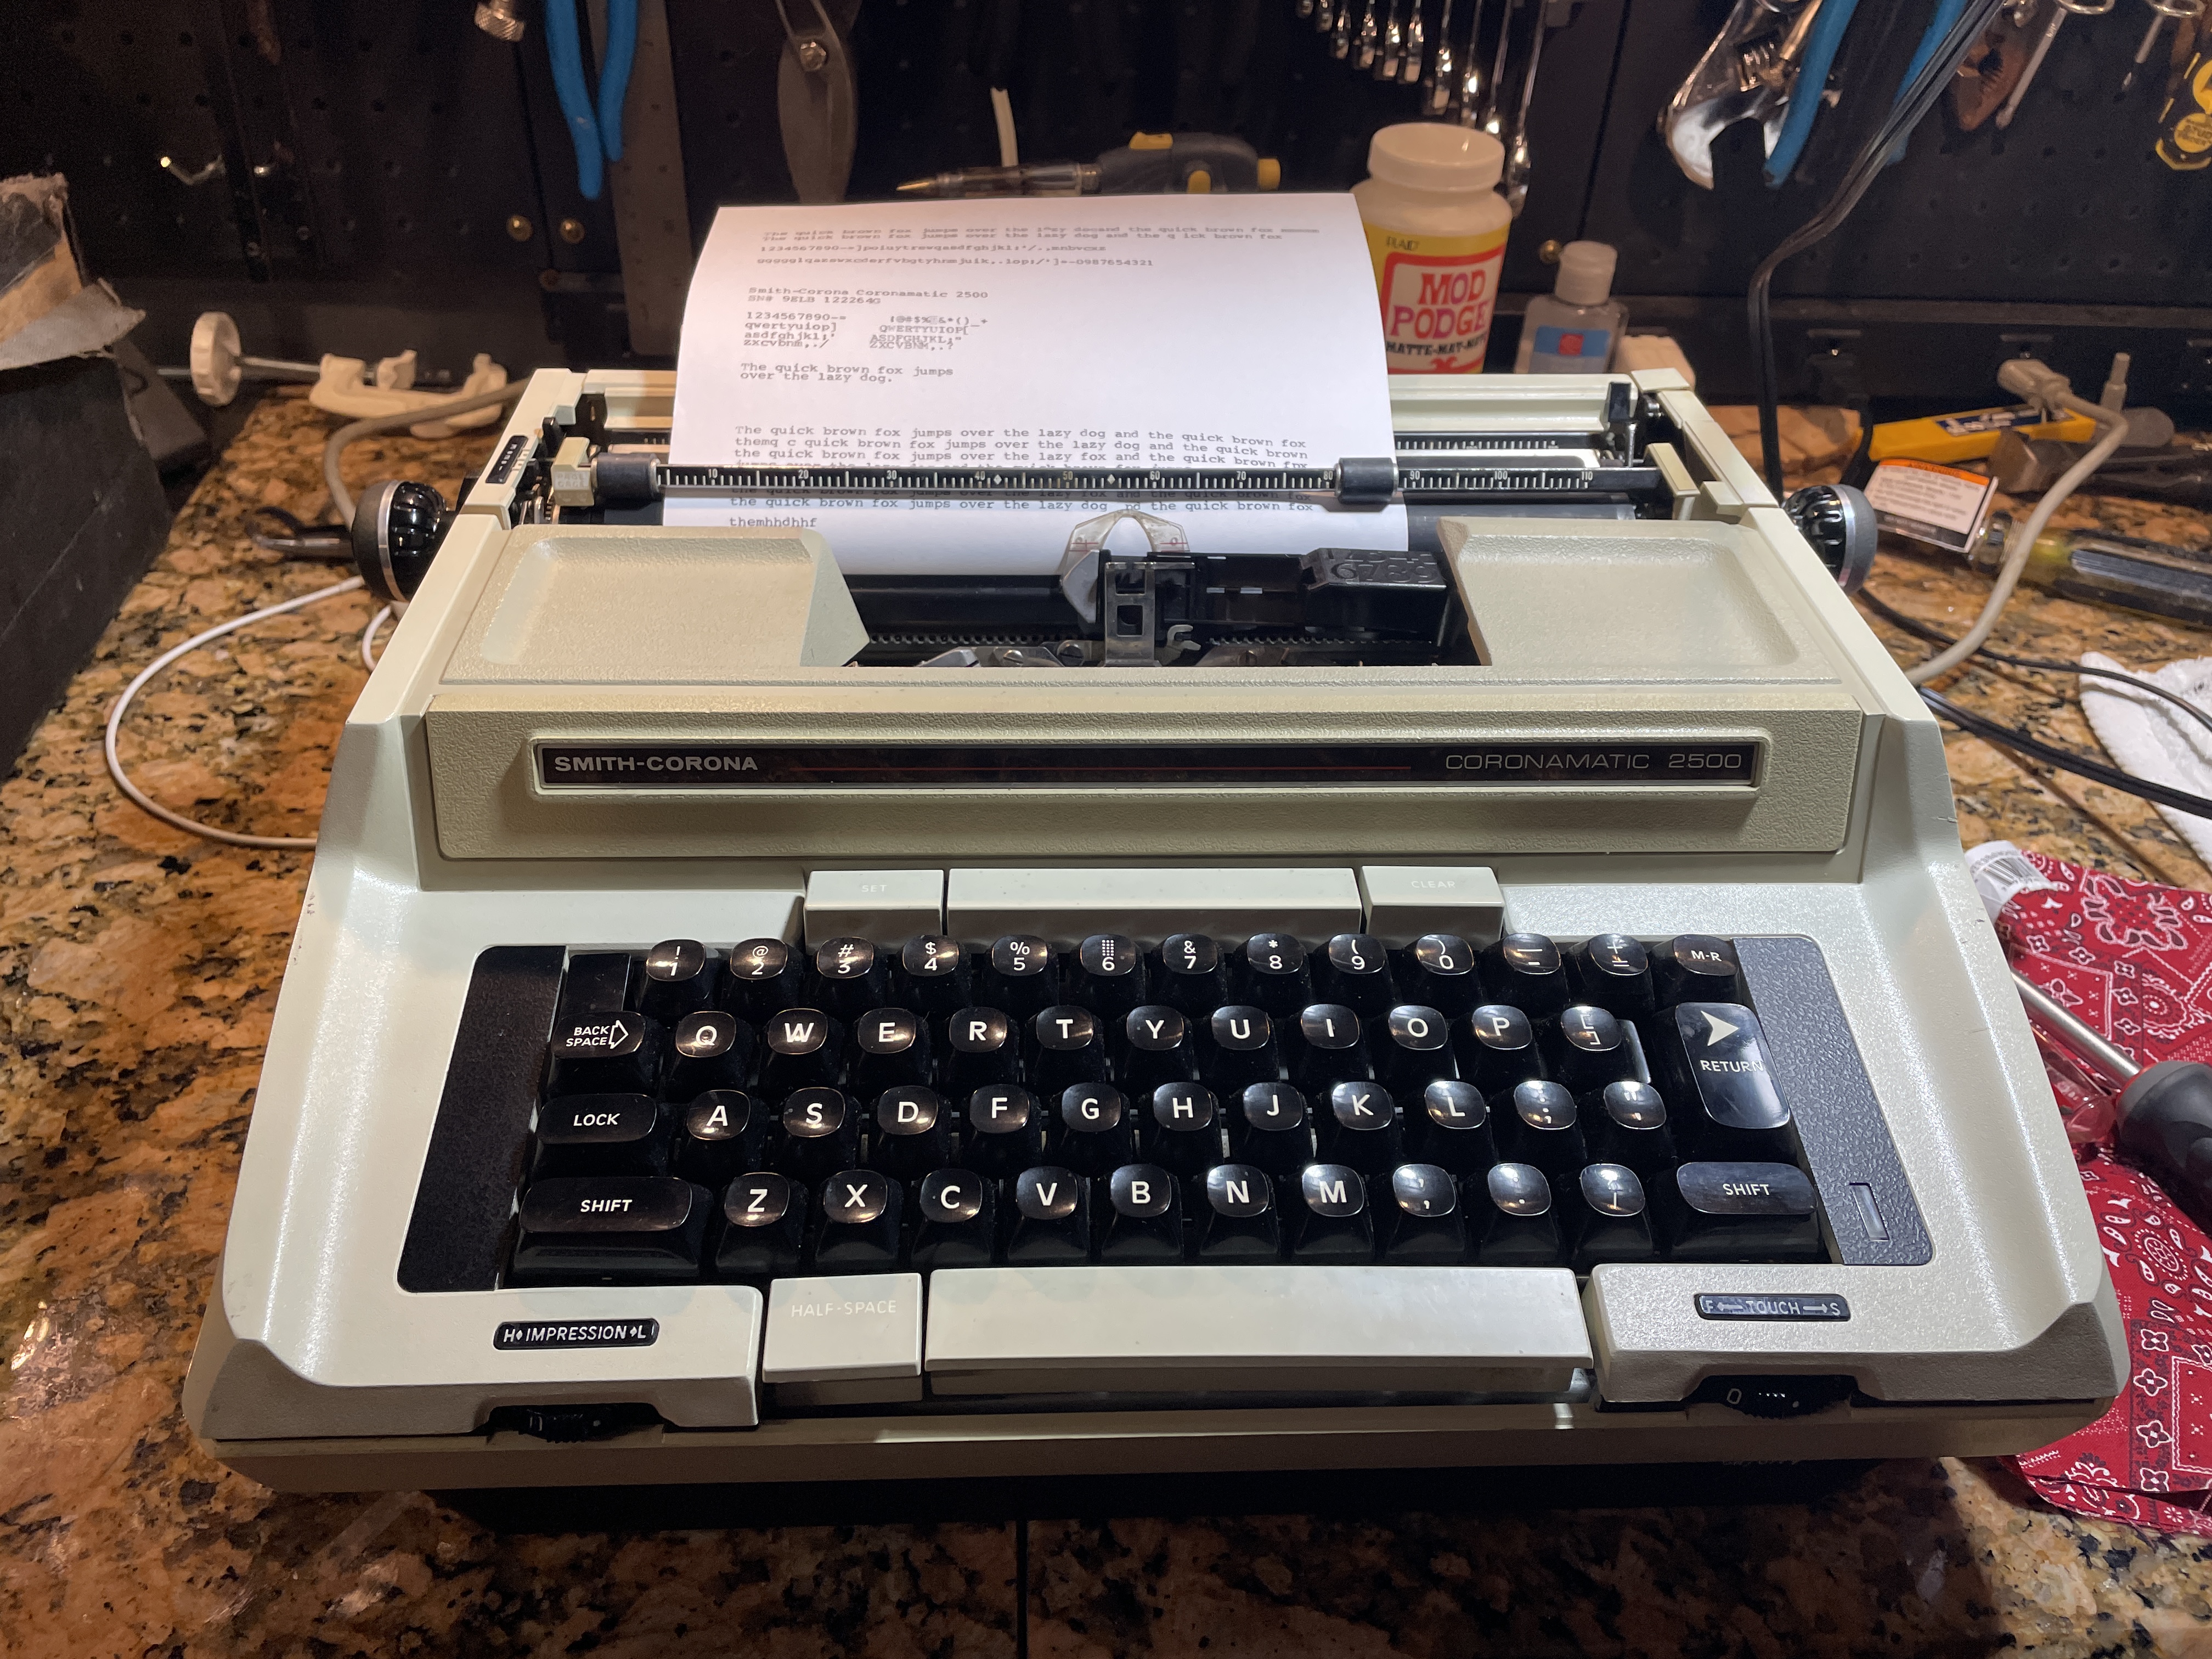
What a nice typeface! I checked out Ted Munk’s post about Smith-Corona typestyles and I think it may be “Regency”.

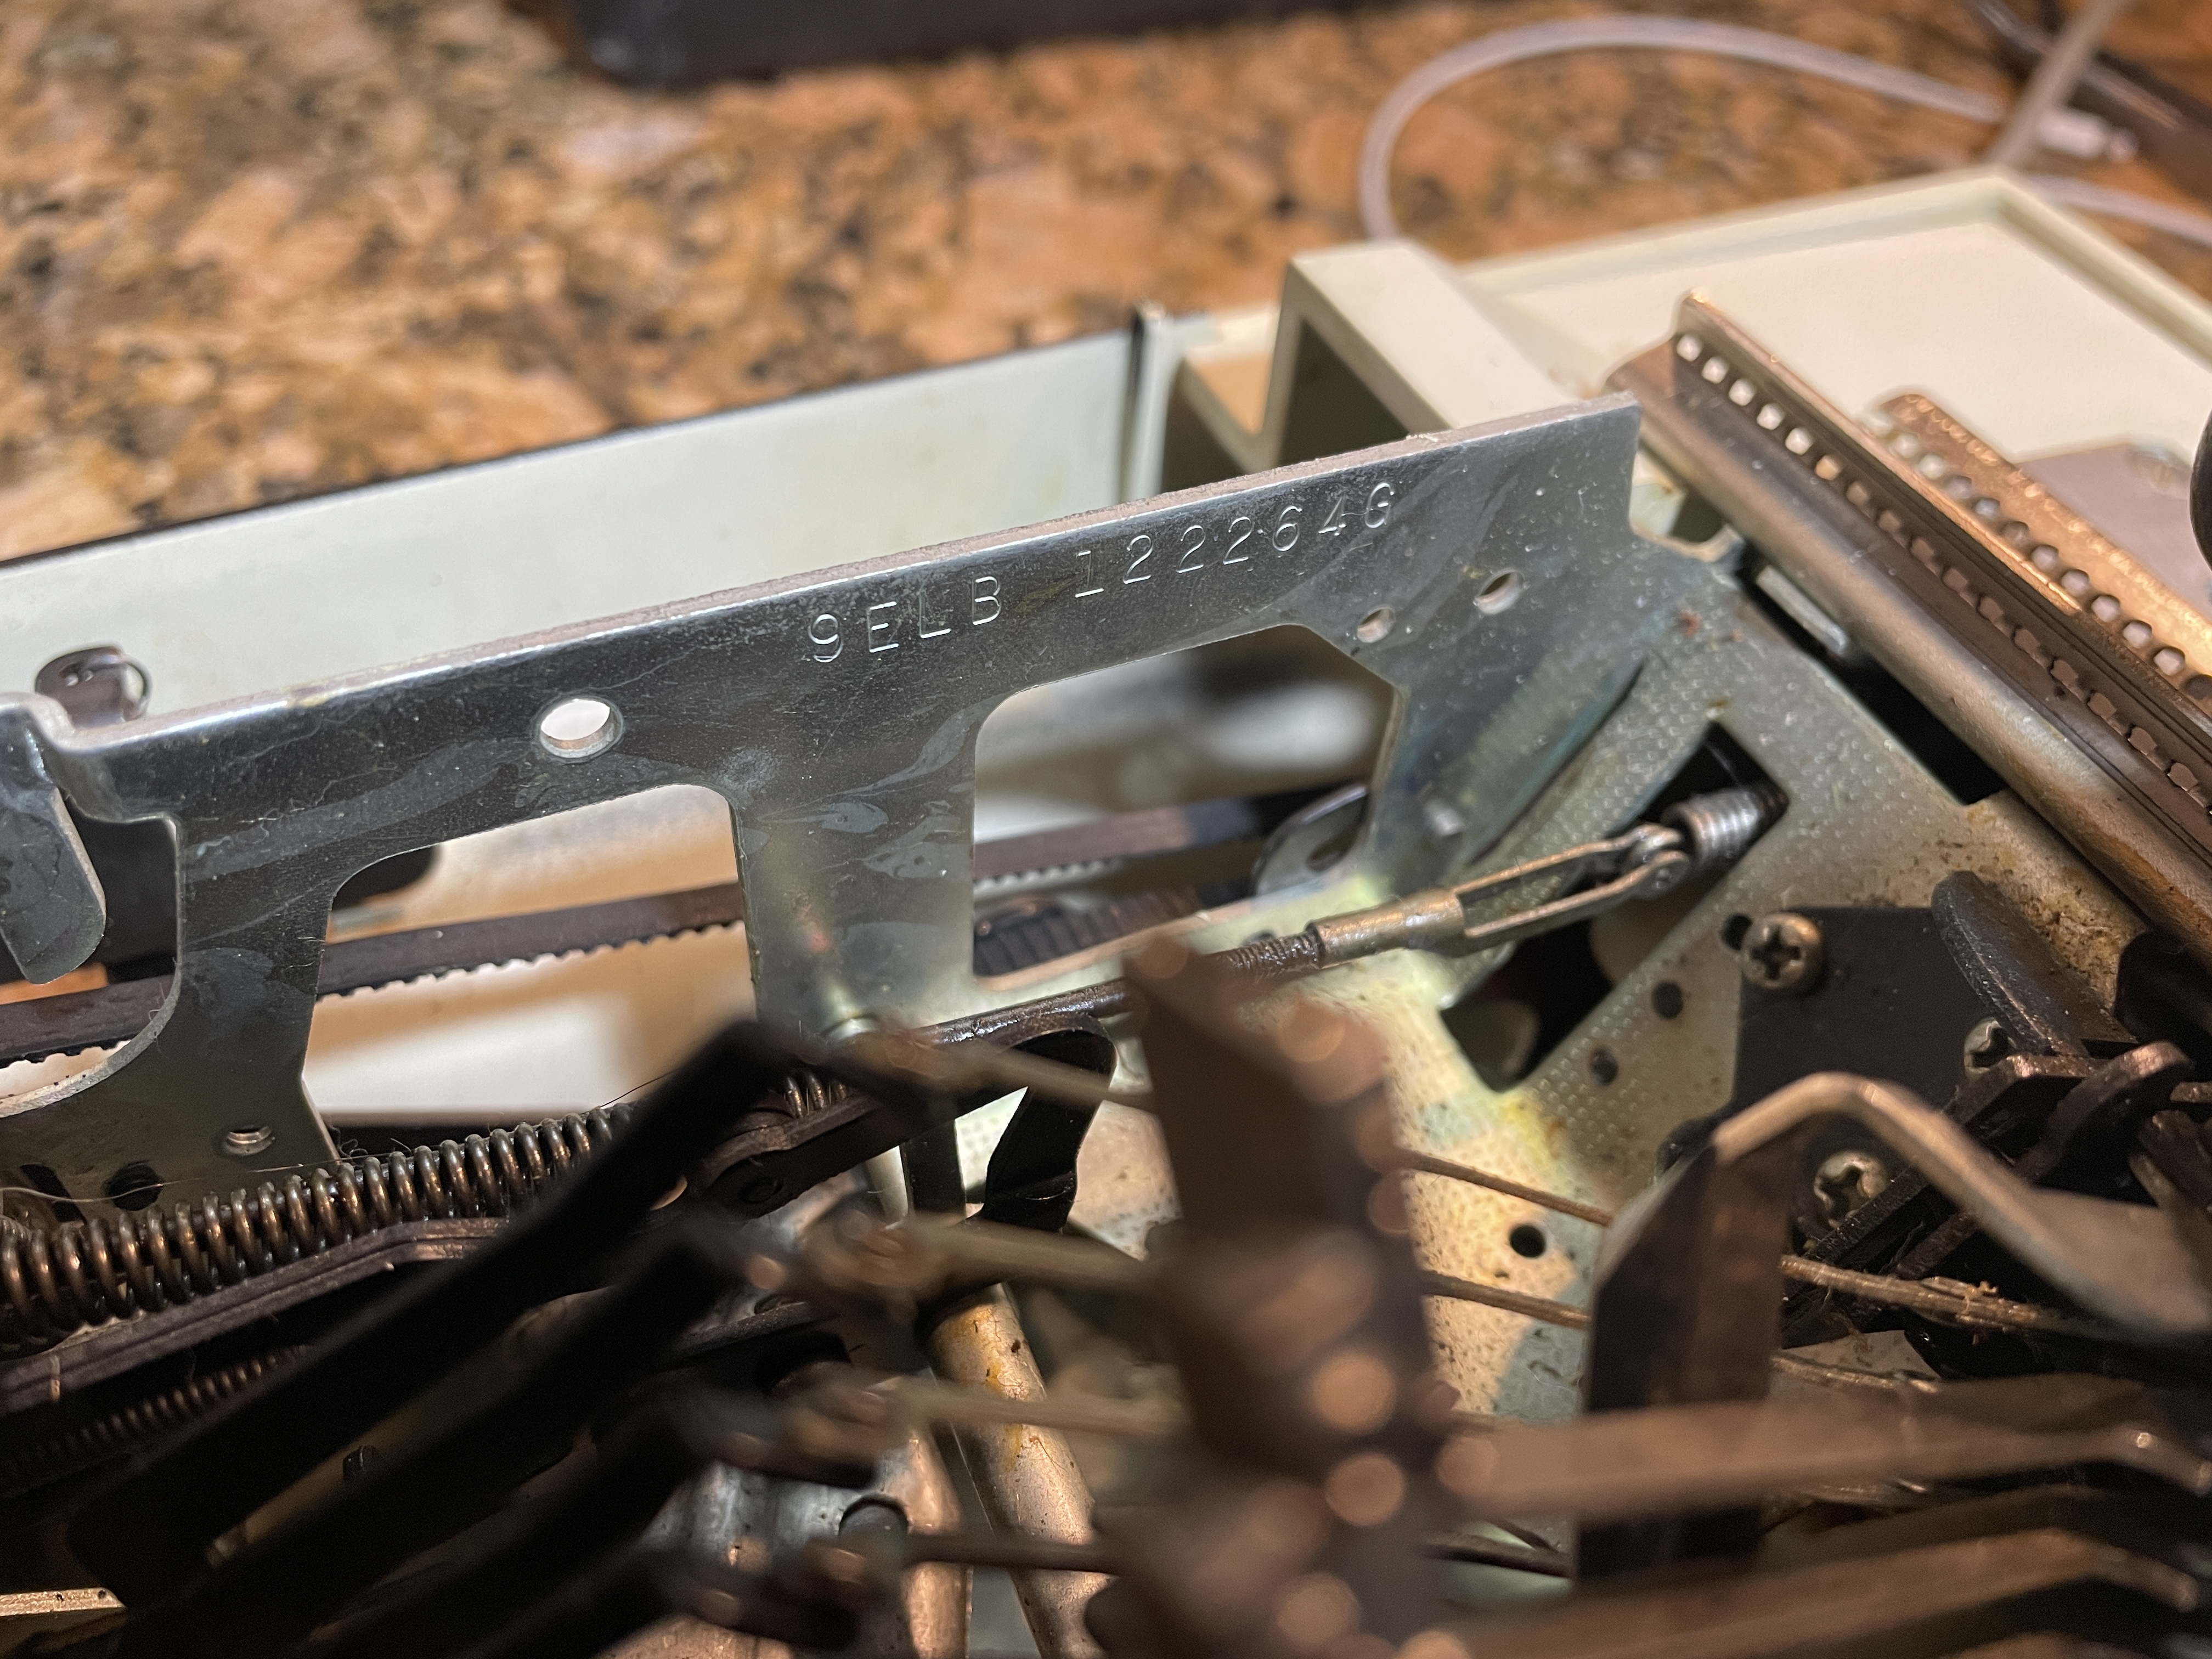
For the curious, the serial number for this Coronamatic is stamped on the frame on the left under the ribbon cover.
Yesterday, we had band practice in the basement. A member of my husband’s band shyly asked if he could borrow a typewriter. He needed one to fill out a tax form, and I was pleased to offer the use of this Coronamatic since it needed some testing. He’s a touch typist:
The typewriter passed muster, so I got it back into its shell. It’s going home next Saturday.
I have such a soft spot for Smith-Corona electrics, and this big beige beast really won me over.

Not sure I can comment. WP is getting like Blogger. I could not post the first one.
Congrats on your repair. That is one nice looking electric.
Sad to hear of Daune’s passing.
LikeLike
Good news. Your comment made it.
Duane’s passing is a loss to the community. I will miss his careful, considered problem solving. The 24 minute video below exemplifies typewriter repair for me: lots of thinking and suddenly the burst of insight and the fix:
Duane says “Two of my favorite things: Rush on the radio and a broken typewriter on my workbench.”
LikeLiked by 1 person
Very informative and well-written!
LikeLike
That’s my Tan Devil! Thanks, Mary, for bringing it back into the land of the living. I’m putting it through it’s paces every day and am thrilled with the results!
LikeLike
Glad to hear! Your green Coronet is typing now – stay tuned.
LikeLiked by 1 person
That’s wonderful!!!!
Thank you!!!
LikeLike