A Tropical Breeze: Voss Bel Air

Here’s a quick recap: about a month ago, I bought a Voss De Luxe in terrible cosmetic condition but in good mechanical condition.  My daughter had requested a “project” typewriter that we could paint.

2

No regrets

I wanted a machine that I wouldn’t feel guilty about repainting.

I sandblasted the lower shell of the machine at a local community workshop called TechShop:

IMG_4965

Also at TechShop, I powder coated the lower shell in a color my daughter picked out: Tropical Breeze.

IMG_4977

The result: a typewriter with a strong resemblance to a 1957 Chevy Bel Air:

By GTHO (Own work) [CC BY-SA 4.0], via Wikimedia Commons

By GTHO (Own work) [CC BY-SA 4.0], via Wikimedia Commons

The Pearl of the Antilles

Now that it’s all back together, this Voss brings to mind the Yank Tanks of Cuba, those carefully maintained classic American cars that prowl the streets of Havana to this day. My daughter is (mathematically speaking) a quarter Cuban. Her grandfather left Havana around the time this Voss rolled off the assembly line in Wuppertal. Perhaps my daughter’s genes are calling out for the Tropical Breezes of Cuba.

I leave you with the tropical sounds, colors, and cars of Cuba:


The Painted Voss

I must admit – I kind of loved the Venus of Wuppertal in her sculptural nudiness.

IMG_4968

I would like to do a painting of this image – it has the grace of an odalisque on a divan. Maybe over Christmas when I have a little time on my hands.

I want to hold onto this pure vision of cool, sculpted elegance because my daughter has chosen the color she wants to paint the lower shell: Tropical Breeze.

IMG_4977

I know. I was hoping for something more…understated, but I did tell her she could pick any color she wanted.  No backsies.

We have decided to keep the cream top and accent pieces since they cleaned up very nicely with soap and degreaser:

before-after

The ribbon cover had a few scrapes, so I pulled out some old paint samples from the storage shed. Lancaster Whitewash and Millington Gold didn’t look good on my walls, but mixed together, they were a nice match for the cream of the ribbon cover, so I did a little touching up.

IMG_4974

There was a large scrape here - this is a good color match.

There was a large deep scrape here – this is a good color match. It needs light sanding and a second coat.

The carriage return arm was bent a little too low and was scraping the ribbon cover.  I removed it from the machine and gently bent it while holding the stem in the vise in the garage.

IMG_4981

After cleaning the internal mechanics and getting it to type smoothly, I put the typewriter back together, re-attaching the paper table, paper bail, platen, knobs, carriage return lever etc.  I had the presence of mind to take detailed photos when I disassembled the typewriter, and there were several points during re-assembly that I referred to the photos (“Does That Thing go over That Thing or under That Thing?”)

Time to Powder Coat

Fortified with pumpkin pie from Thanksgiving, I was ready to take on powder coating.

This is how powder coating works:  you apply electrically-charged powder coat paint to grounded parts and then cure the coated parts in an oven to allow the paint to “flow” and form a tough coating.

  • High voltage is involved when applying the powder coat paint – I would be working with around 25KV. I needed to be careful not to get too close to the part with the tip of the spray gun as that could cause electrical arcing and shock, explosion, fire, and/or apocalypse.
  • High temperatures are involved – I would be baking my parts in a closet-sized oven at temperatures 400°F – 425°F.

I like my leisure-time activities with a dollop of DANGER.

IMG_5002

0 KV to 100 KV

IMG_4999

The oven

Since my paint will cure at 400°F, I preheated my cast aluminum parts for 45 minutes at 425°F. This allowed gasses within the cast parts (which could cause defects in the cured surface) to escape and allowed any grease to burn off. It took a while for that huge oven to warm up.

IMG_5001

While I waited, I wiped my parts down with denatured alcohol and masked off sections I didn’t want painted with special heat-resistant tape. I then threw them in the oven to preheat.  I set up my paint booth with an initial setting of 25KV for voltage and 5 psi for pressure. That seemed to be enough pressure for my paint to flow well. I did a test on a scrap piece of aluminum and coverage seemed good.

IMG_5003

Once the parts finished heating, I hung them in my powder coat booth and did my powder coating. The paint comes out in a powdery mist.  I applied an even layer, keeping my gun more than 6 inches away from the parts to prevent electrical arcing.

IMG_5004

And then I put the parts in the oven to cure at 400°F for 12 minutes.  I nervously opened the oven after 12 minutes and…success!

IMG_5005

No pinholes, no fisheye, no craters!  Just sleek, beautiful, powder-coated parts.

IMG_5010

It may not be my choice of color, but I am so happy with the coverage and the powder coated surface.  I am looking around the house for other items I can powder coat. I have a lot of aqua left over.

This Voss De Luxe is going to look a lot like a 1957 Chevy Bel Air:

By GTHO (Own work) [CC BY-SA 4.0], via Wikimedia Commons

By GTHO (Own work) [CC BY-SA 4.0], via Wikimedia Commons

More Voss pictures to follow.

From Stone Age to Space Age: the Blasted Voss

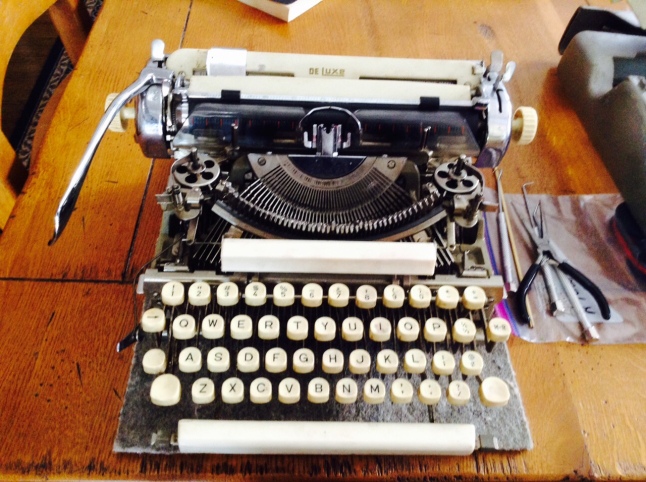
The Voss De Luxe AKA The Venus of Wuppertal AKA Swamp Thing was going to the blasting cabinet at Techshop to remove the lichen-like painted crust from the shell.  But first, we had to get all the painted metal parts off the machine.

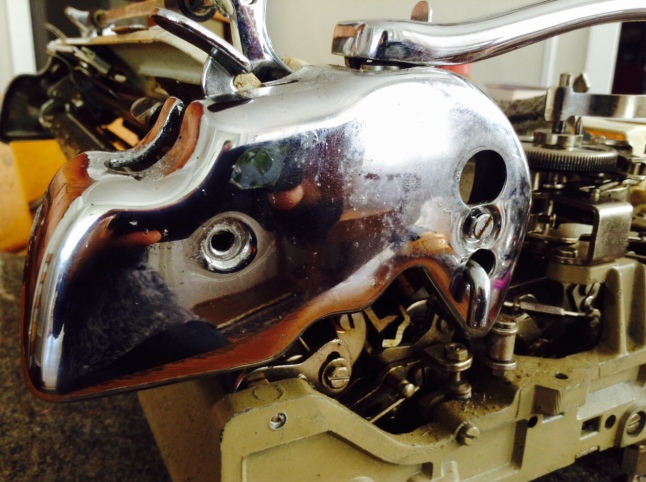
The main body casing was easy to remove. There are small clasps inside the shell in the center front and center back.  Once these are undone, the shell splits in half. Nifty. The only sticky part was navigating the ribbon color selector arm on the left half of the casing. I pushed the selector lever toward the back of the machine and shimmied off the left half of the shell with some care.

The paper table and painted metal piece on the paper bail were more challenging.

6

I had to remove the platen. First, I removed the platen knobs.  Turning counter-clockwise and holding the platen with hefty pliers, they came off.

Next I had to remove the chrome platen cover plates – two screws on each side.

b

I flipped the paper release lever and eased the platen out.

platenOut

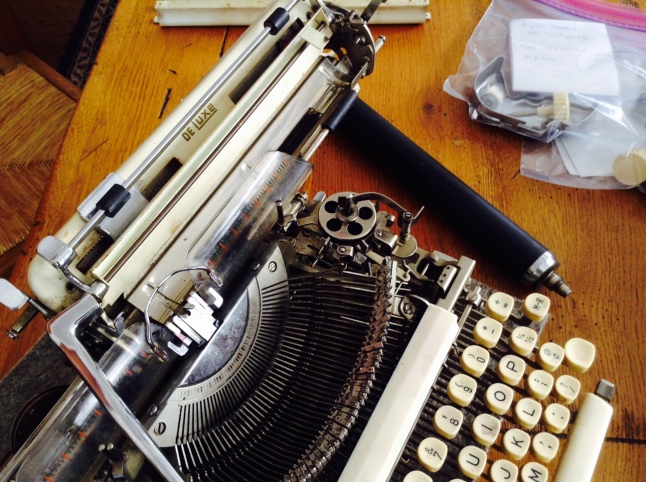
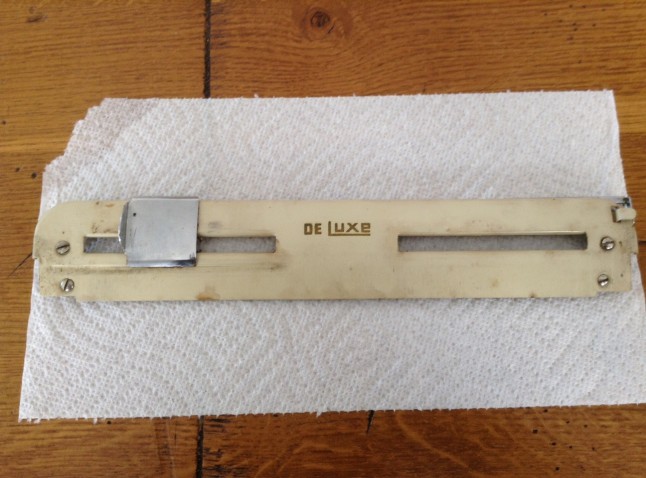
I unscrewed the paper table (four screws) and it was off.

part2

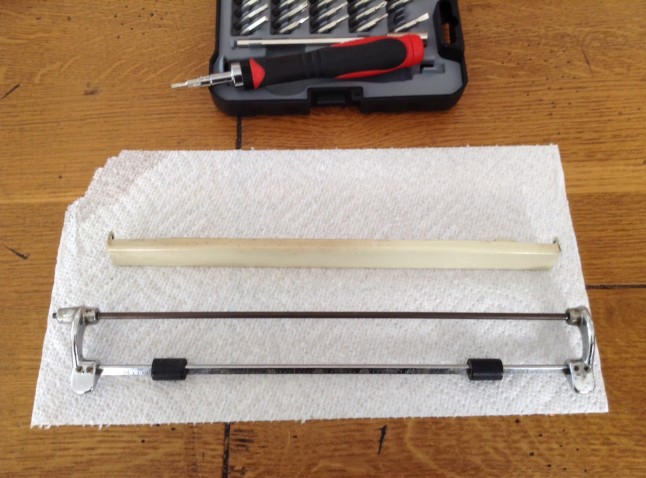
I removed a screw on the right holding the paper bail in place and removed the paper bail with its attached metal piece.  I then removed two tiny set screws that held a rod that secured the smaller painted metal piece to the paper bail.

part1

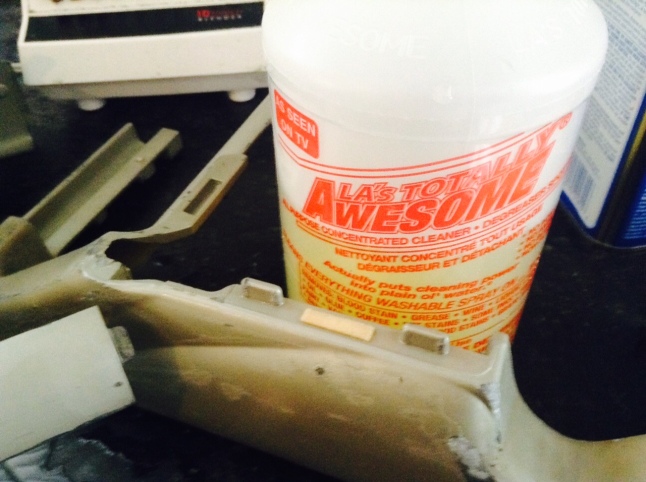
The instructor of my sand blasting and powder coating class said that you should never put greasy parts in the blasting cabinet. It contaminates the blasting media and causes problems for those using the cabinet when the nozzle sprays out greasy gunk instead of clean recirculated media.

I first washed the lower casing parts in warm soapy water to get the worst of the grunge off. I had bought some dollar store degreaser (LA’s Totally Awesome for $1.00) that was recommended in an automotive forum.  I washed the lower shell with it. I  rinsed the shell and then went over the parts with acetone for good measure.

degreaser

The blender (once again) watches with interest from the sidelines.

Degreased, the parts were now ready for the blasting cabinet.

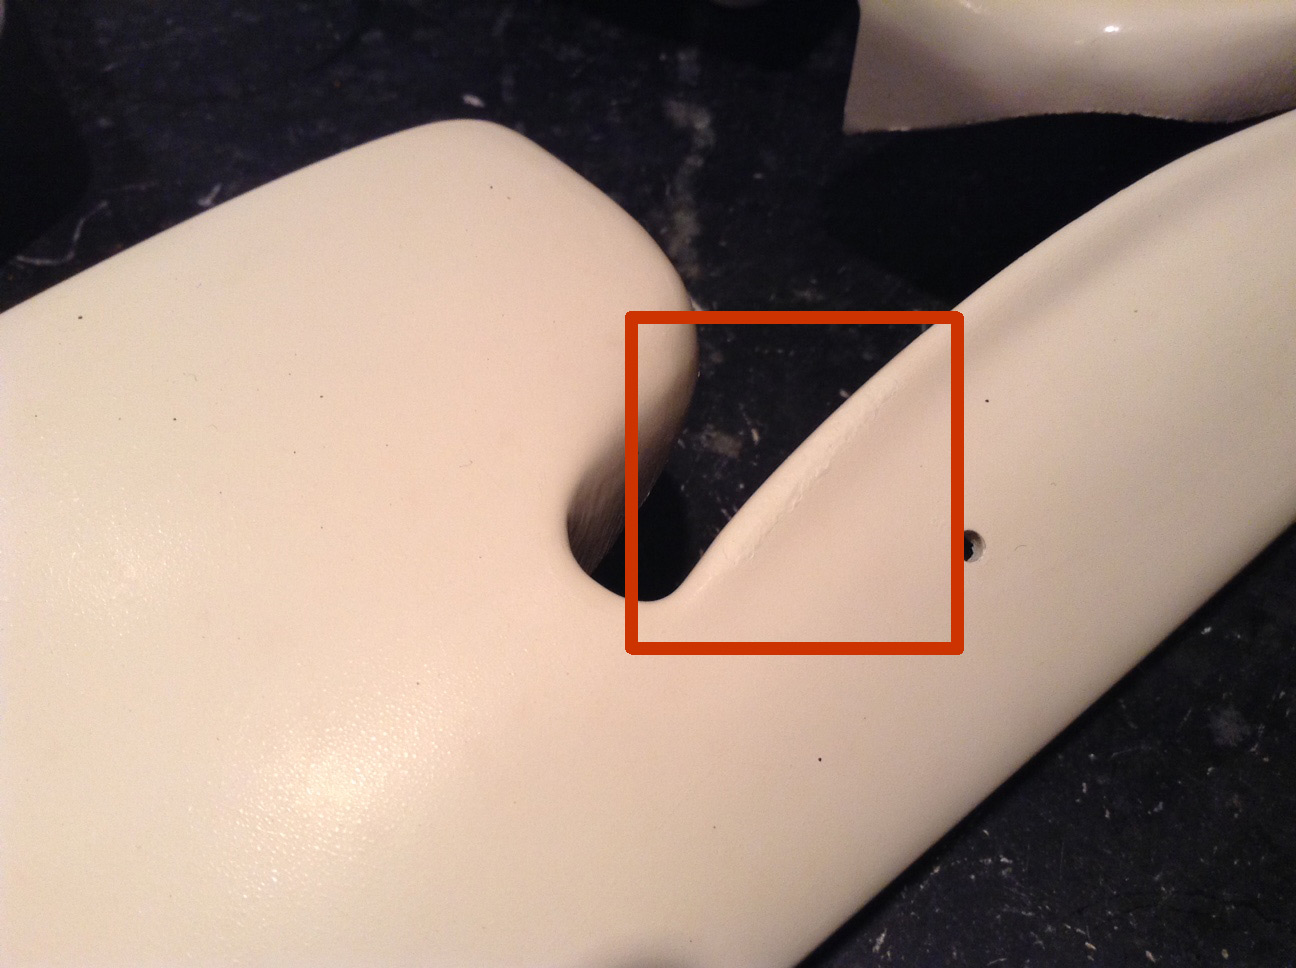
I decided to sand blast just the lower shell halves. Those we are definitely painting.  I haven’t decided whether I will repaint the cover.  It’s in OK shape though it has some scrapes and crazing in the paint. I’d like to retain the original decals, so I may keep the original cream top and cream accent pieces.  If I can get a good match on the cream color, I will sand blast and powder coat just the cover the same cream color and clean the accent pieces with decals thoroughly.

Hello, cabinet, my old friend. I've come to blast with you again.

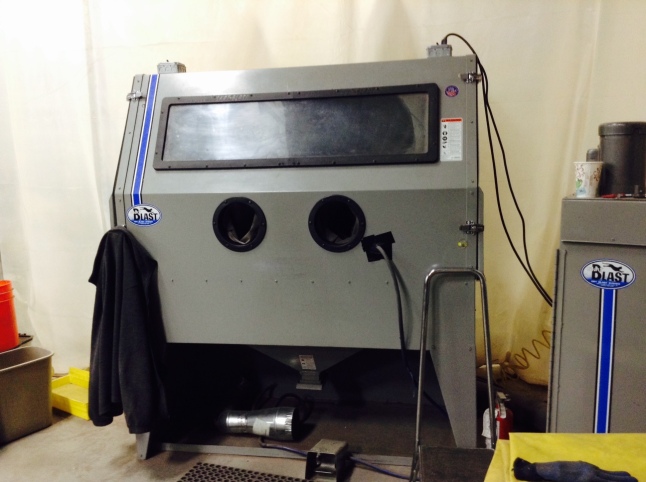
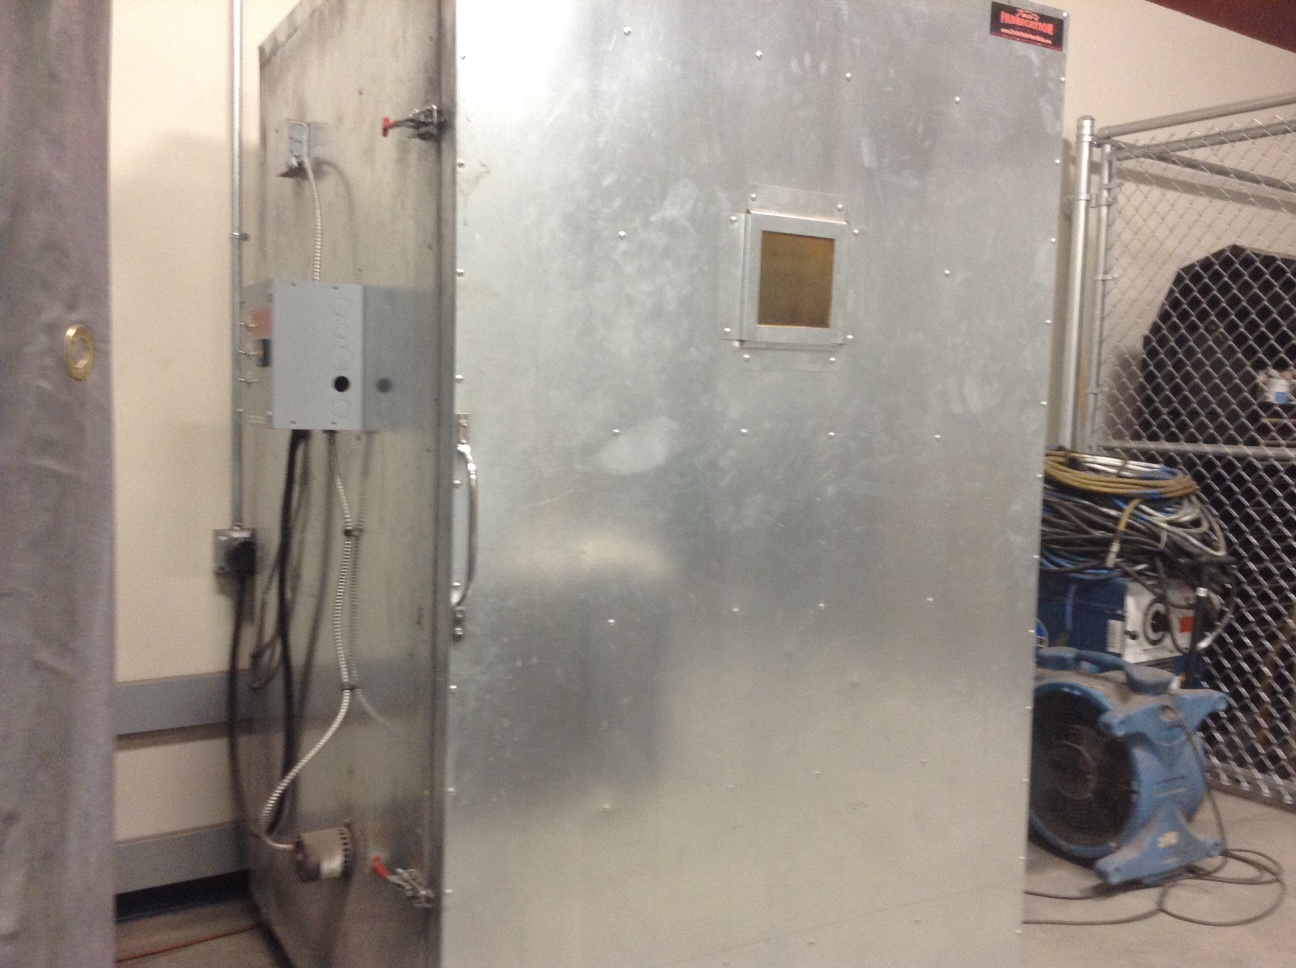
Hello, cabinet, my old friend. I’ve come to blast with you again.

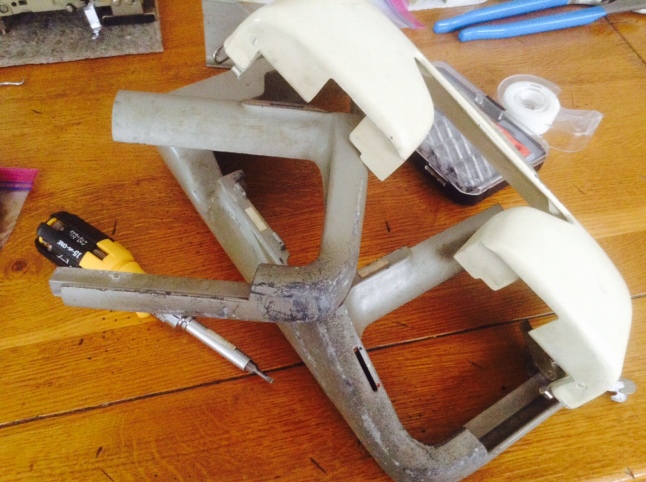
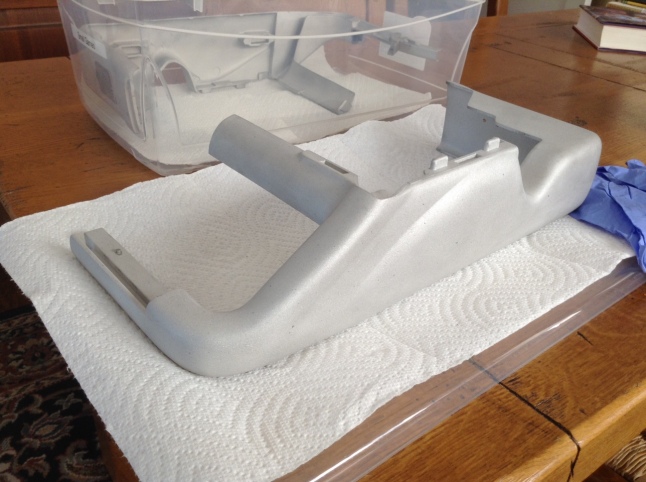
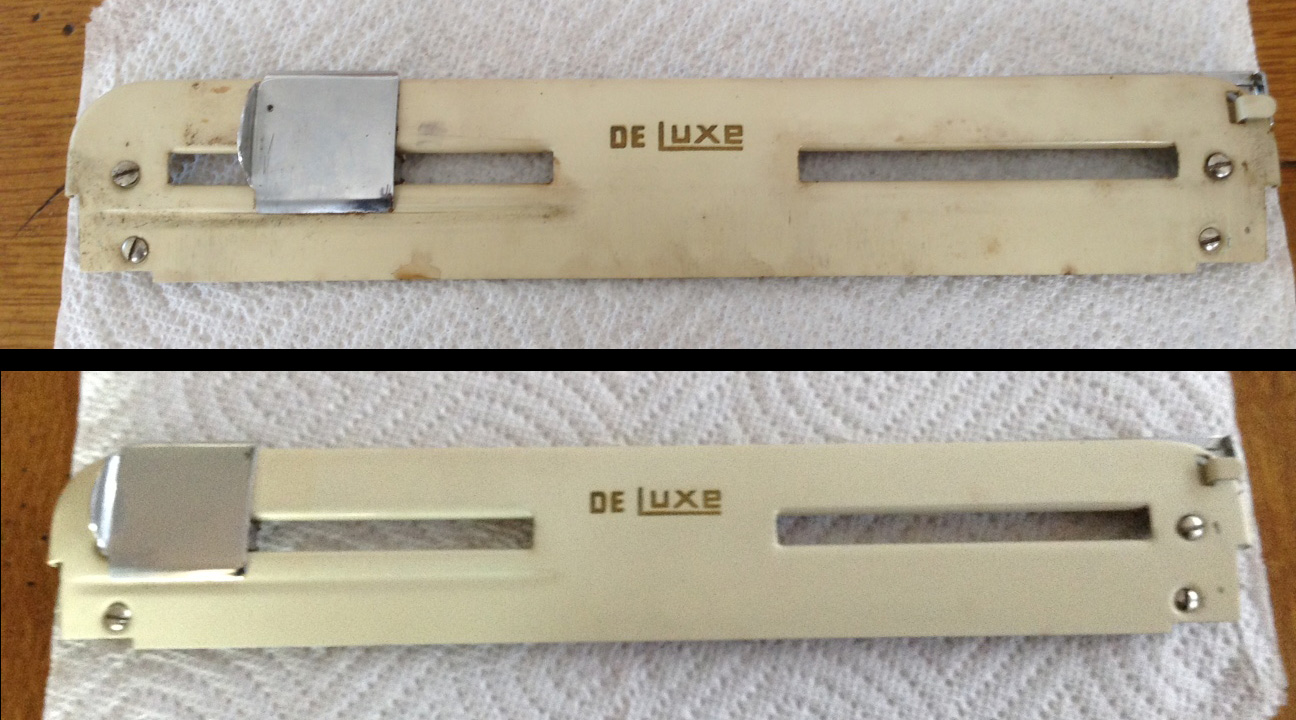
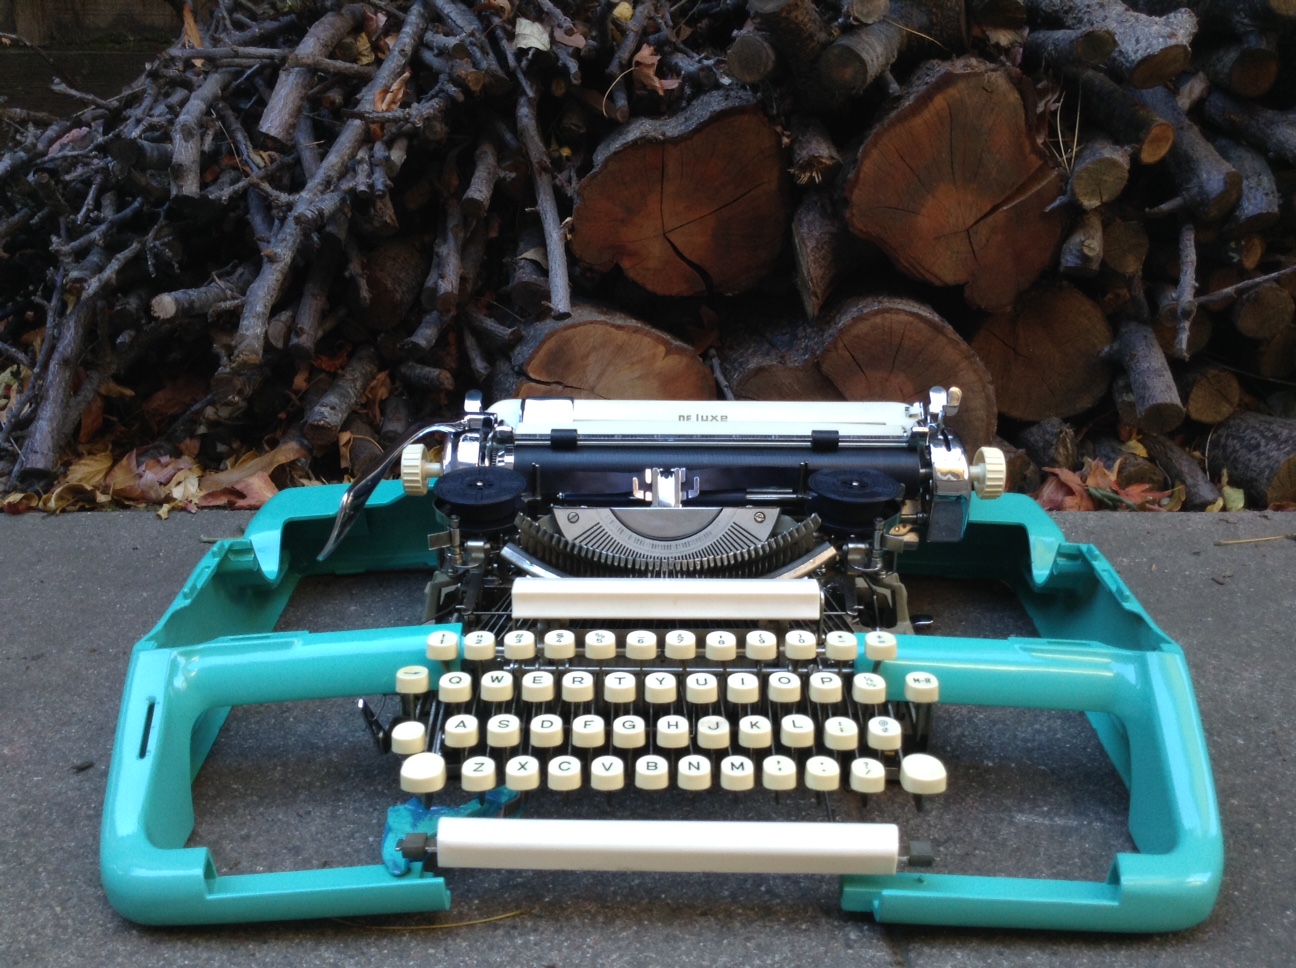
Here’s what the lower shell pieces looked like before sand blasting.

casing

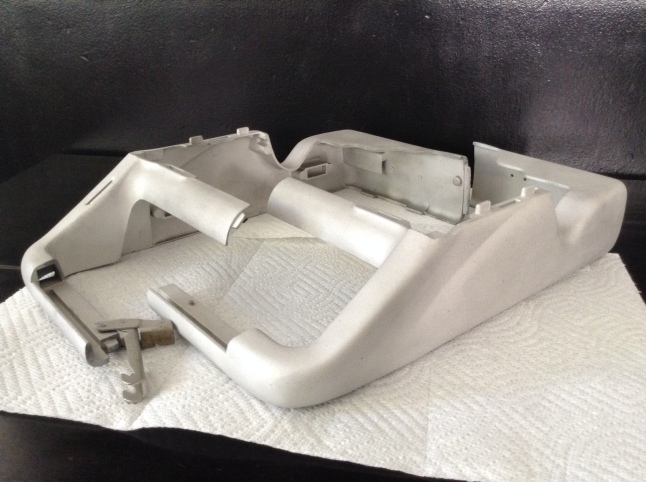
Here’s the photo after media blasting.

IMG_4965

Very cool – very Area 51

The shell looks decidedly more Space Age now that the crust of centuries has been removed.

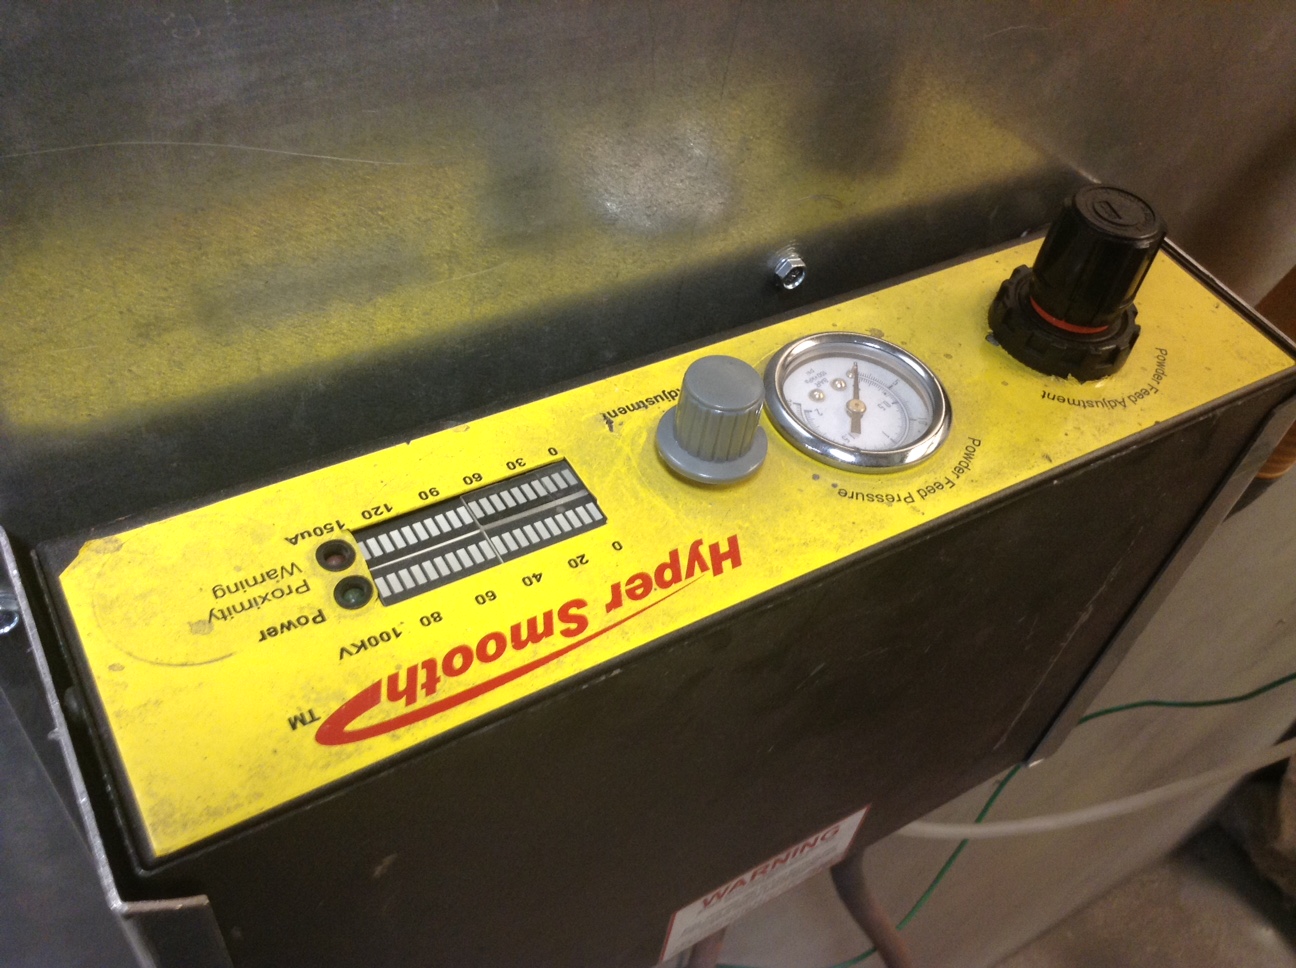
It took me 1.5 hours to blast the first half of the lower shell inside and out.  Though it appeared crusty and battered, the hard, baked-on enamel paint was well-adhered.  It was slow going. Unfortunately, there was no pressure regulator on this cabinet. I was using 60-80 grit blasting media, but a little bit more pressure might have sped up the process.

My technique improved and the second half took me about an hour to do. Next time, I will bring ear protection. The compressor and fan are very noisy. I will probably do one more quick pass over the pieces to clean up any residue before I powder coat.

After blasting, I was very careful not to touch the pieces with my bare hands.  Oils from the hands can interfere with powder coated paint adhesion later. Donning gloves, I placed the blasted pieces carefully into a clean plastic box to take home.

IMG_4968

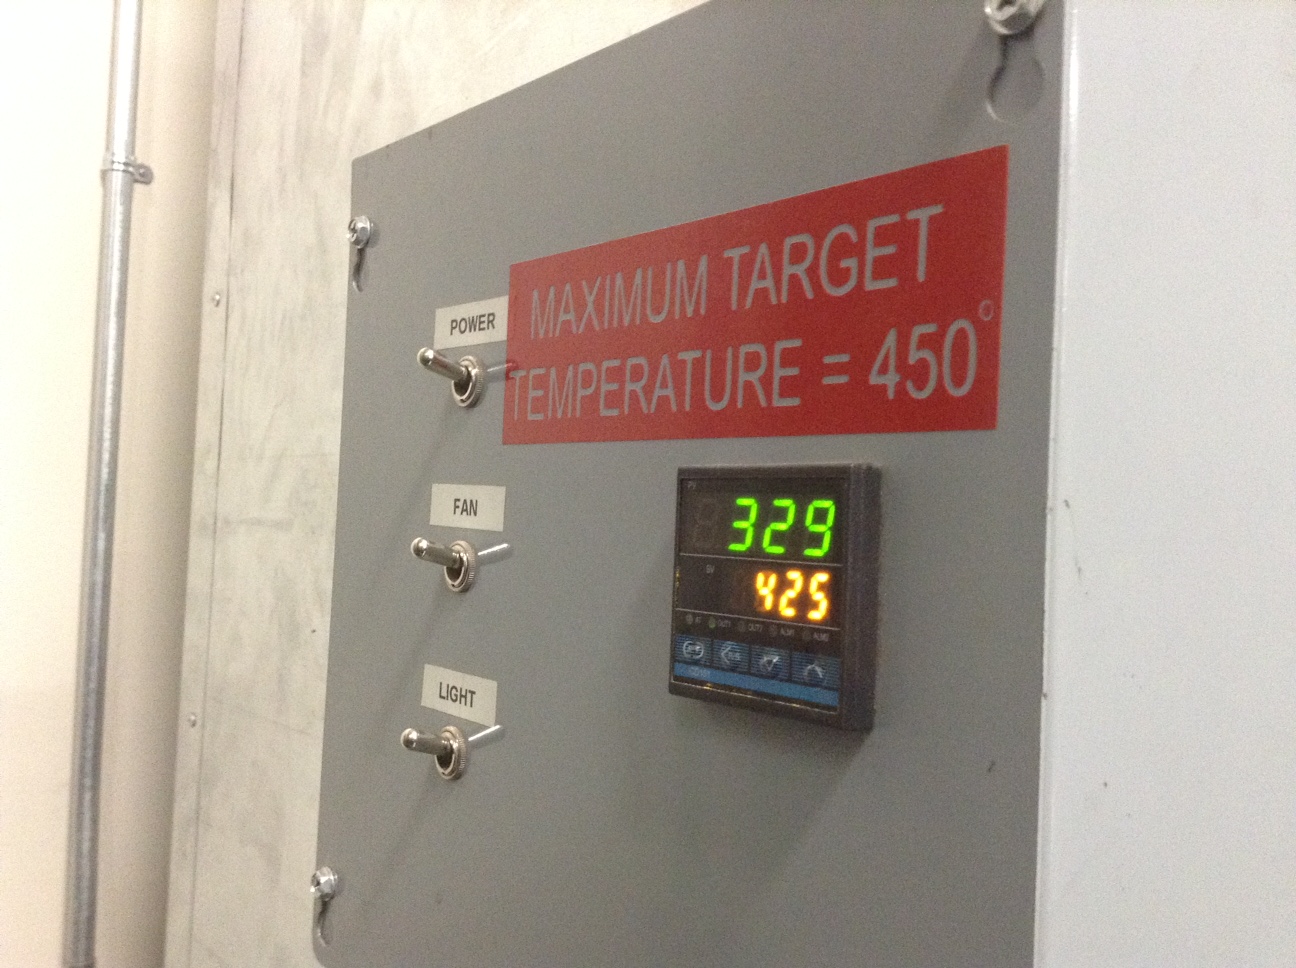
I may run into problems with powder coating the cast aluminum parts.  Cast metals have gasses trapped inside.  When baked to cure after powder coating, outgassing may cause bubbles, “fish-eye”, and pin-holes in the painted surface.  The work-around is to preheat the parts in an oven at a temperature higher than your cure temp for a good long time to allow the parts to outgas. The other issue is that aluminum is notoriously porous and will soak in grease like a sponge.  Pre-heating the part is once again the fix, as it allows the grease to burn off.

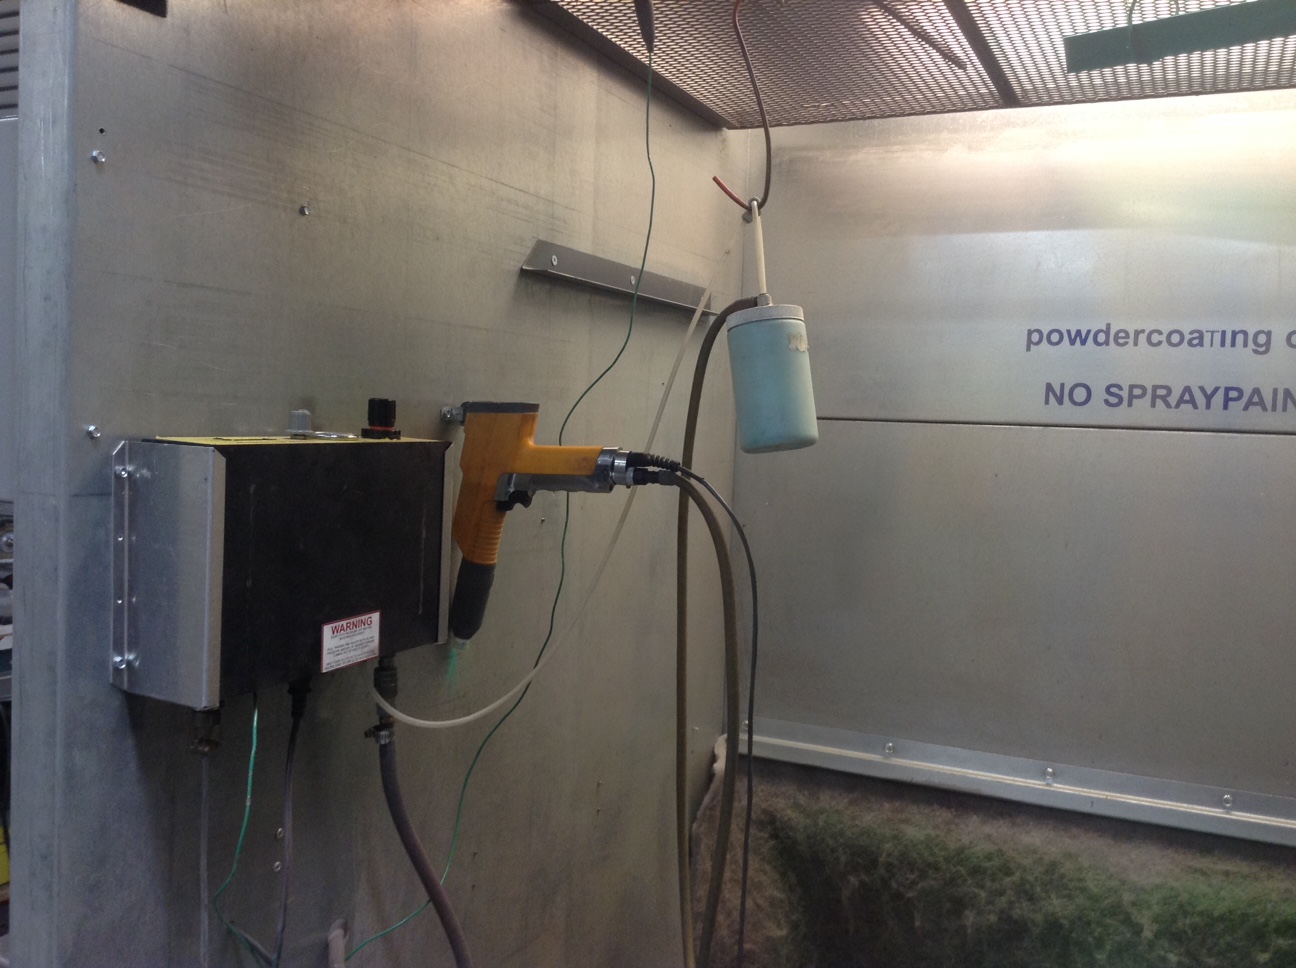
I am just so curious to see what kind of results I can get with powder coating.  In the end, I may have to resort to re-blasting the parts and spray painting, but at least I can say, “I tried powder coating”.

I am still carefully cleaning and de-gumming the internal mechanics.  My personal favorite solvent is denatured alcohol. I know other people prefer mineral spirits, but the formulation of denatured alcohol that I use cuts quickly through gum and grease and evaporates almost immediately.  I have to be careful when I use it because it will eat into painted surfaces.

IMG_4964

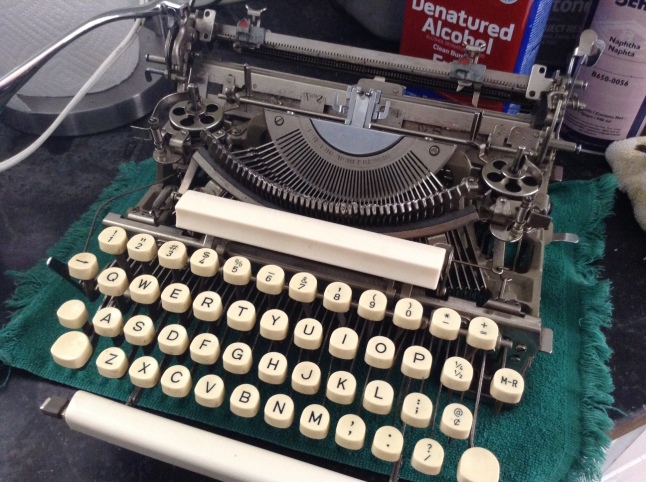
Mineral spirits is a great degreaser, but the formulation I have takes forever to evaporate.  Sometimes I will clean slugs and segment with mineral spirits and unevaporated droplets will spray everywhere when I test typing. I hate that. Naphtha works pretty good too, but it’s slower to evaporate than denatured alcohol.

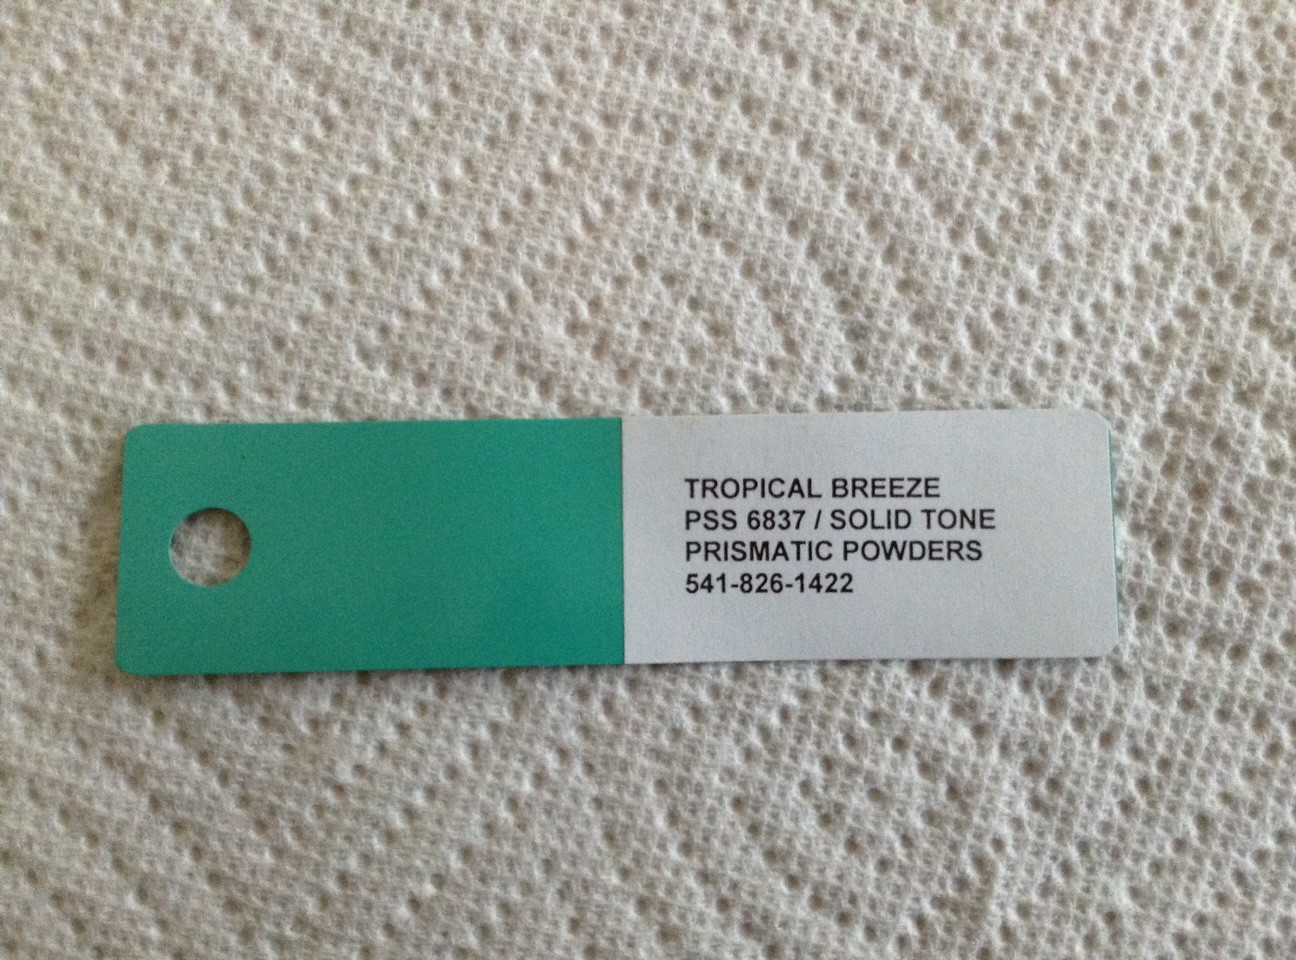
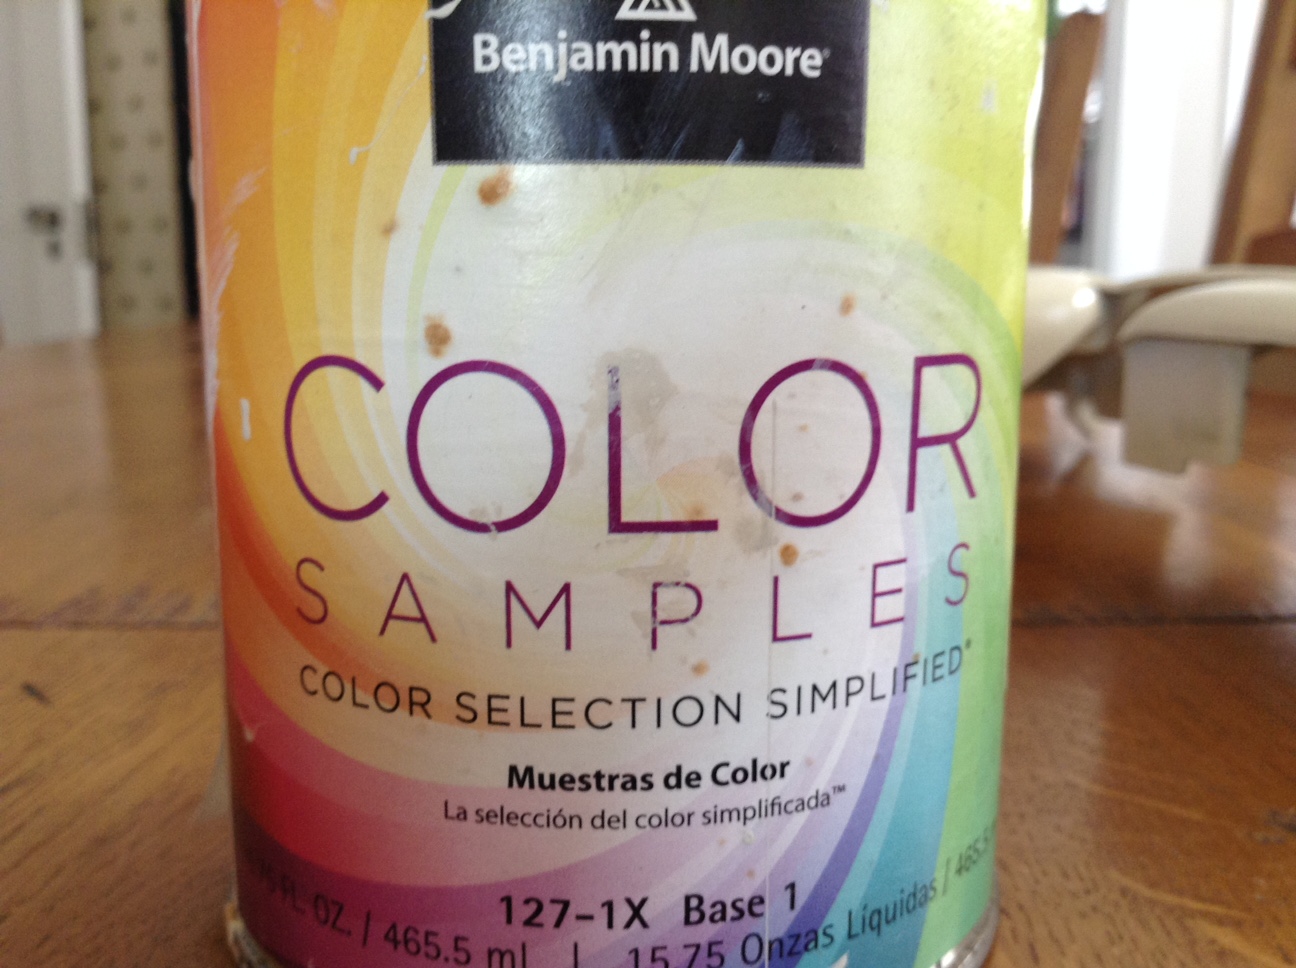
We are in a holding pattern until we get the mailed paint samples from the powder coat paint company and decide what we will order. I impatiently await their arrival. I will spend some time with my other project typewriter, the LC Smith No. 8, while I wait for the paint samples.

The Venus of Wuppertal: Voss De Luxe

As if one “project typewriter” weren’t enough, I now have two in the works.

My daughter wanted a project typewriter, and I can deny her nothing.  Her requirements:

  • a portable
  • something we could paint
  • something with a case

My requirements:

  • a solid, high quality typewriter – only the best for my little daughter
  • something interesting that I don’t already own
  • something in terrible cosmetic condition that I wouldn’t feel guilty about repainting

We looked around on eBay even though I’d sworn off eBay.

Initially I was leaning towards a very beat-up Olympia SM3, but then this terrible looking “Sad Face”  Voss De Luxe appeared on my screen.  Yes, that will do nicely. The fact that the main shell is easily removed in two pieces sealed the deal. Also, it had a cursive typeface which my daughter loved.  Me, I am pretty meh about cursive and script typefaces because I am an old crabapple. I find cursive and script hard to read. My fantasy typeface is 6 cpi Gigantica.

Like a Voss
196X Voss De Luxe serial number 231065

The typewriter arrived from the eBay seller intact and I breathed a deep sign of relief. The crusty painted surfaces are in TERRIBLE condition. It has the patina of a Stone Age artifact, as if it had been excavated during an archaeologic dig on the banks of the Rhine.

But did I mention that I like junkers?

Superficial cosmetics aside, this thing can type like a son-of-a-gun.  It’s all stiff and gummy now, but I can tell this one will type very, very well once I clean it up. It has a satisfying, tight little *SNICK* when the escapement engages. The solid and classy mechanics remind me of my Torpedo. The carriage shift feels a little heavy to my sensitive lady hands. If it had basket shift, it would be extra perfect.

The weird tabbing mechanism (you push the tab bar in, not down) was all gummed up and stuck, but just playing with it a bit (without cleaning) loosened it up. It has a very classy tab brake system that gently assists the carriage as it whirls to each set tab point.

Despite being stiff and gummy, the machine seems to be in almost perfect typing condition.  The only issue it had is that the carriage return lever hits the ribbon cover as it rolls by – it sits just a wee bit low.  Perhaps some gentle bending will do the trick? This thing probably took some hard knocks to the head in its lifetime and the case – adorable though it is – is just soft plaid fabric with a broken zipper.

case

The robust aesthetic is growing on me.  This typewriter has solid curves – ample hips like a typewriter fertility goddess. It is the Venus of Wuppertal, recently unearthed – the typewriter of good fortune, good harvest, and plenty.

2

That Paleolithic patina

The plan is to remove all the painted casing parts, sand blast them and then powder coat them.

To that end, I attended to a two-hour class on sand blasting and powder coating at Techshop in Redwood City.

4

Roomy blasting cabinet

5

Our instructor demonstrates powder coating technique

1

This is the sand blasting / powder coating sample I did – I am very pleased with the result. The enlargement and bright lighting of the photo makes it look like there is more “orange peel” than there actually is.

So now I am certified to use the equipment and can come in any time and sand blast and powder coat to my heart’s content.

casing

My daughter is thinking about colors. She is young, and her Tasteful Design Modulator is not yet fully matured, so we’ll see where this goes. I would like something understated and classy.  At Prismatic Powders, there are 6,500 colors to choose from. Your suggestions are welcome.

My druthers: I would like to try to match the cream of the cover and repaint just the very beat-up cover and gray lower casing.  It would be nice to preserve the “De Luxe” and “Voss” decals of the paper table and cream back panel.

decal1

decal2