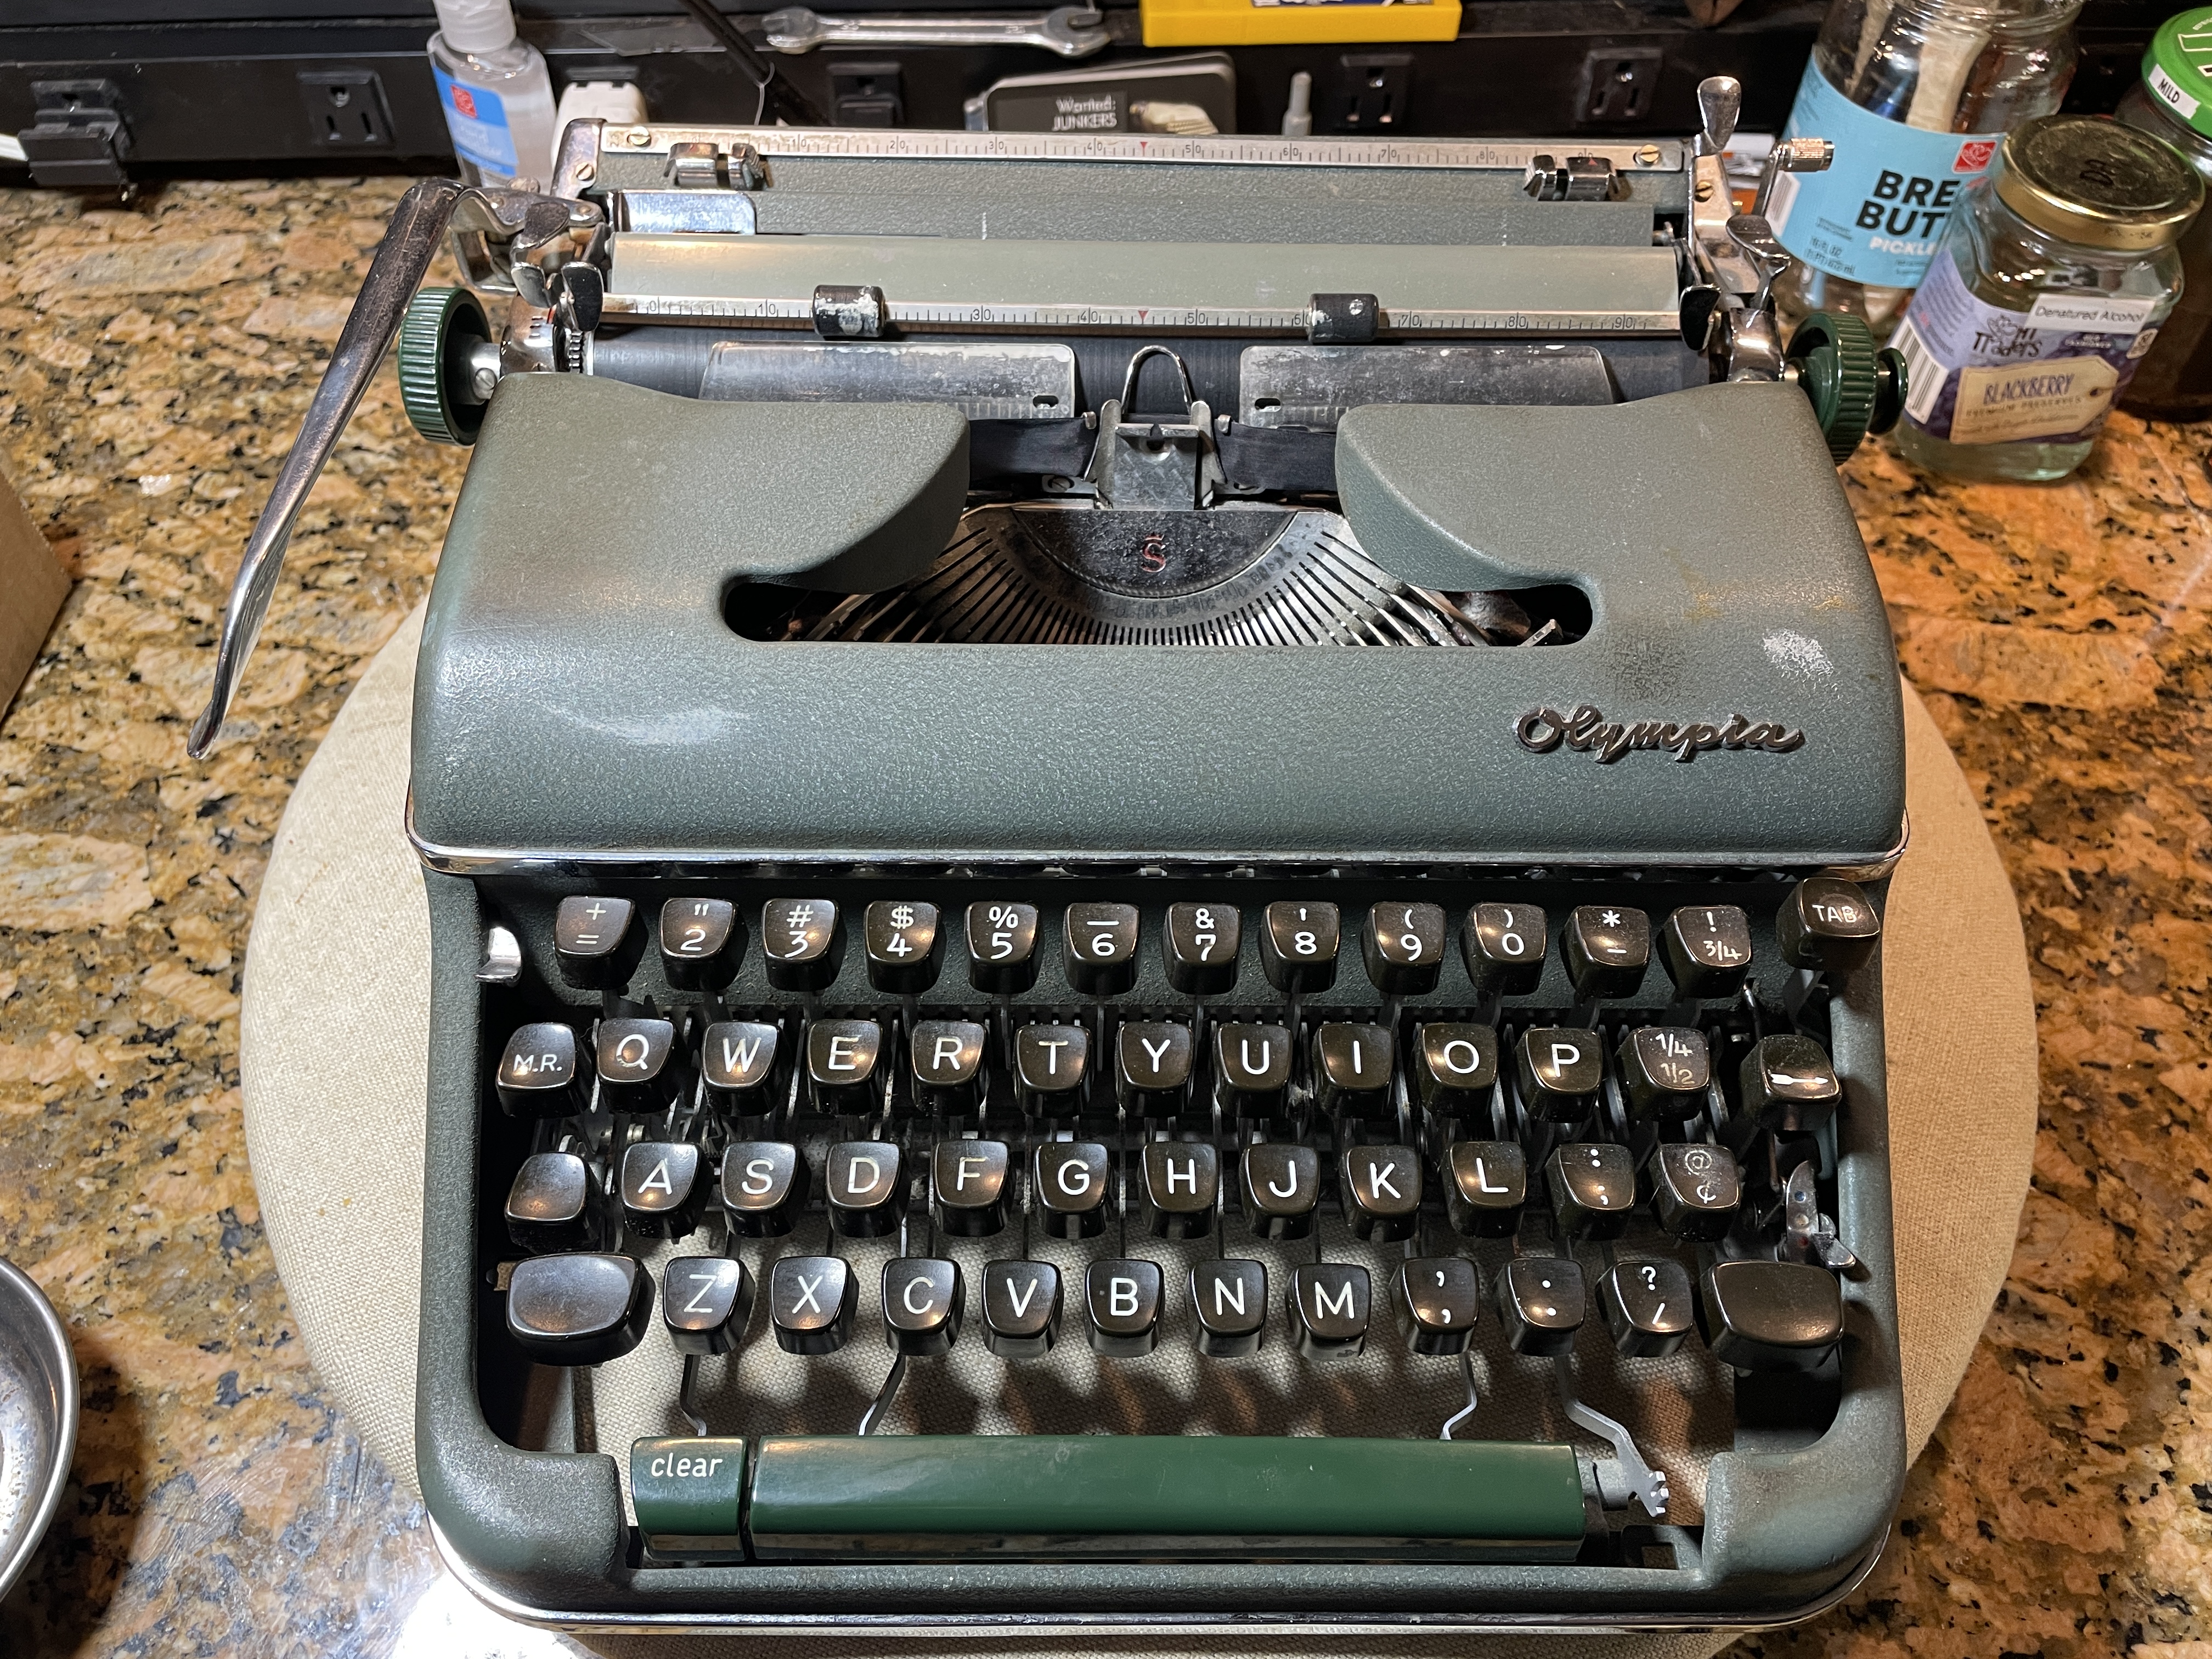
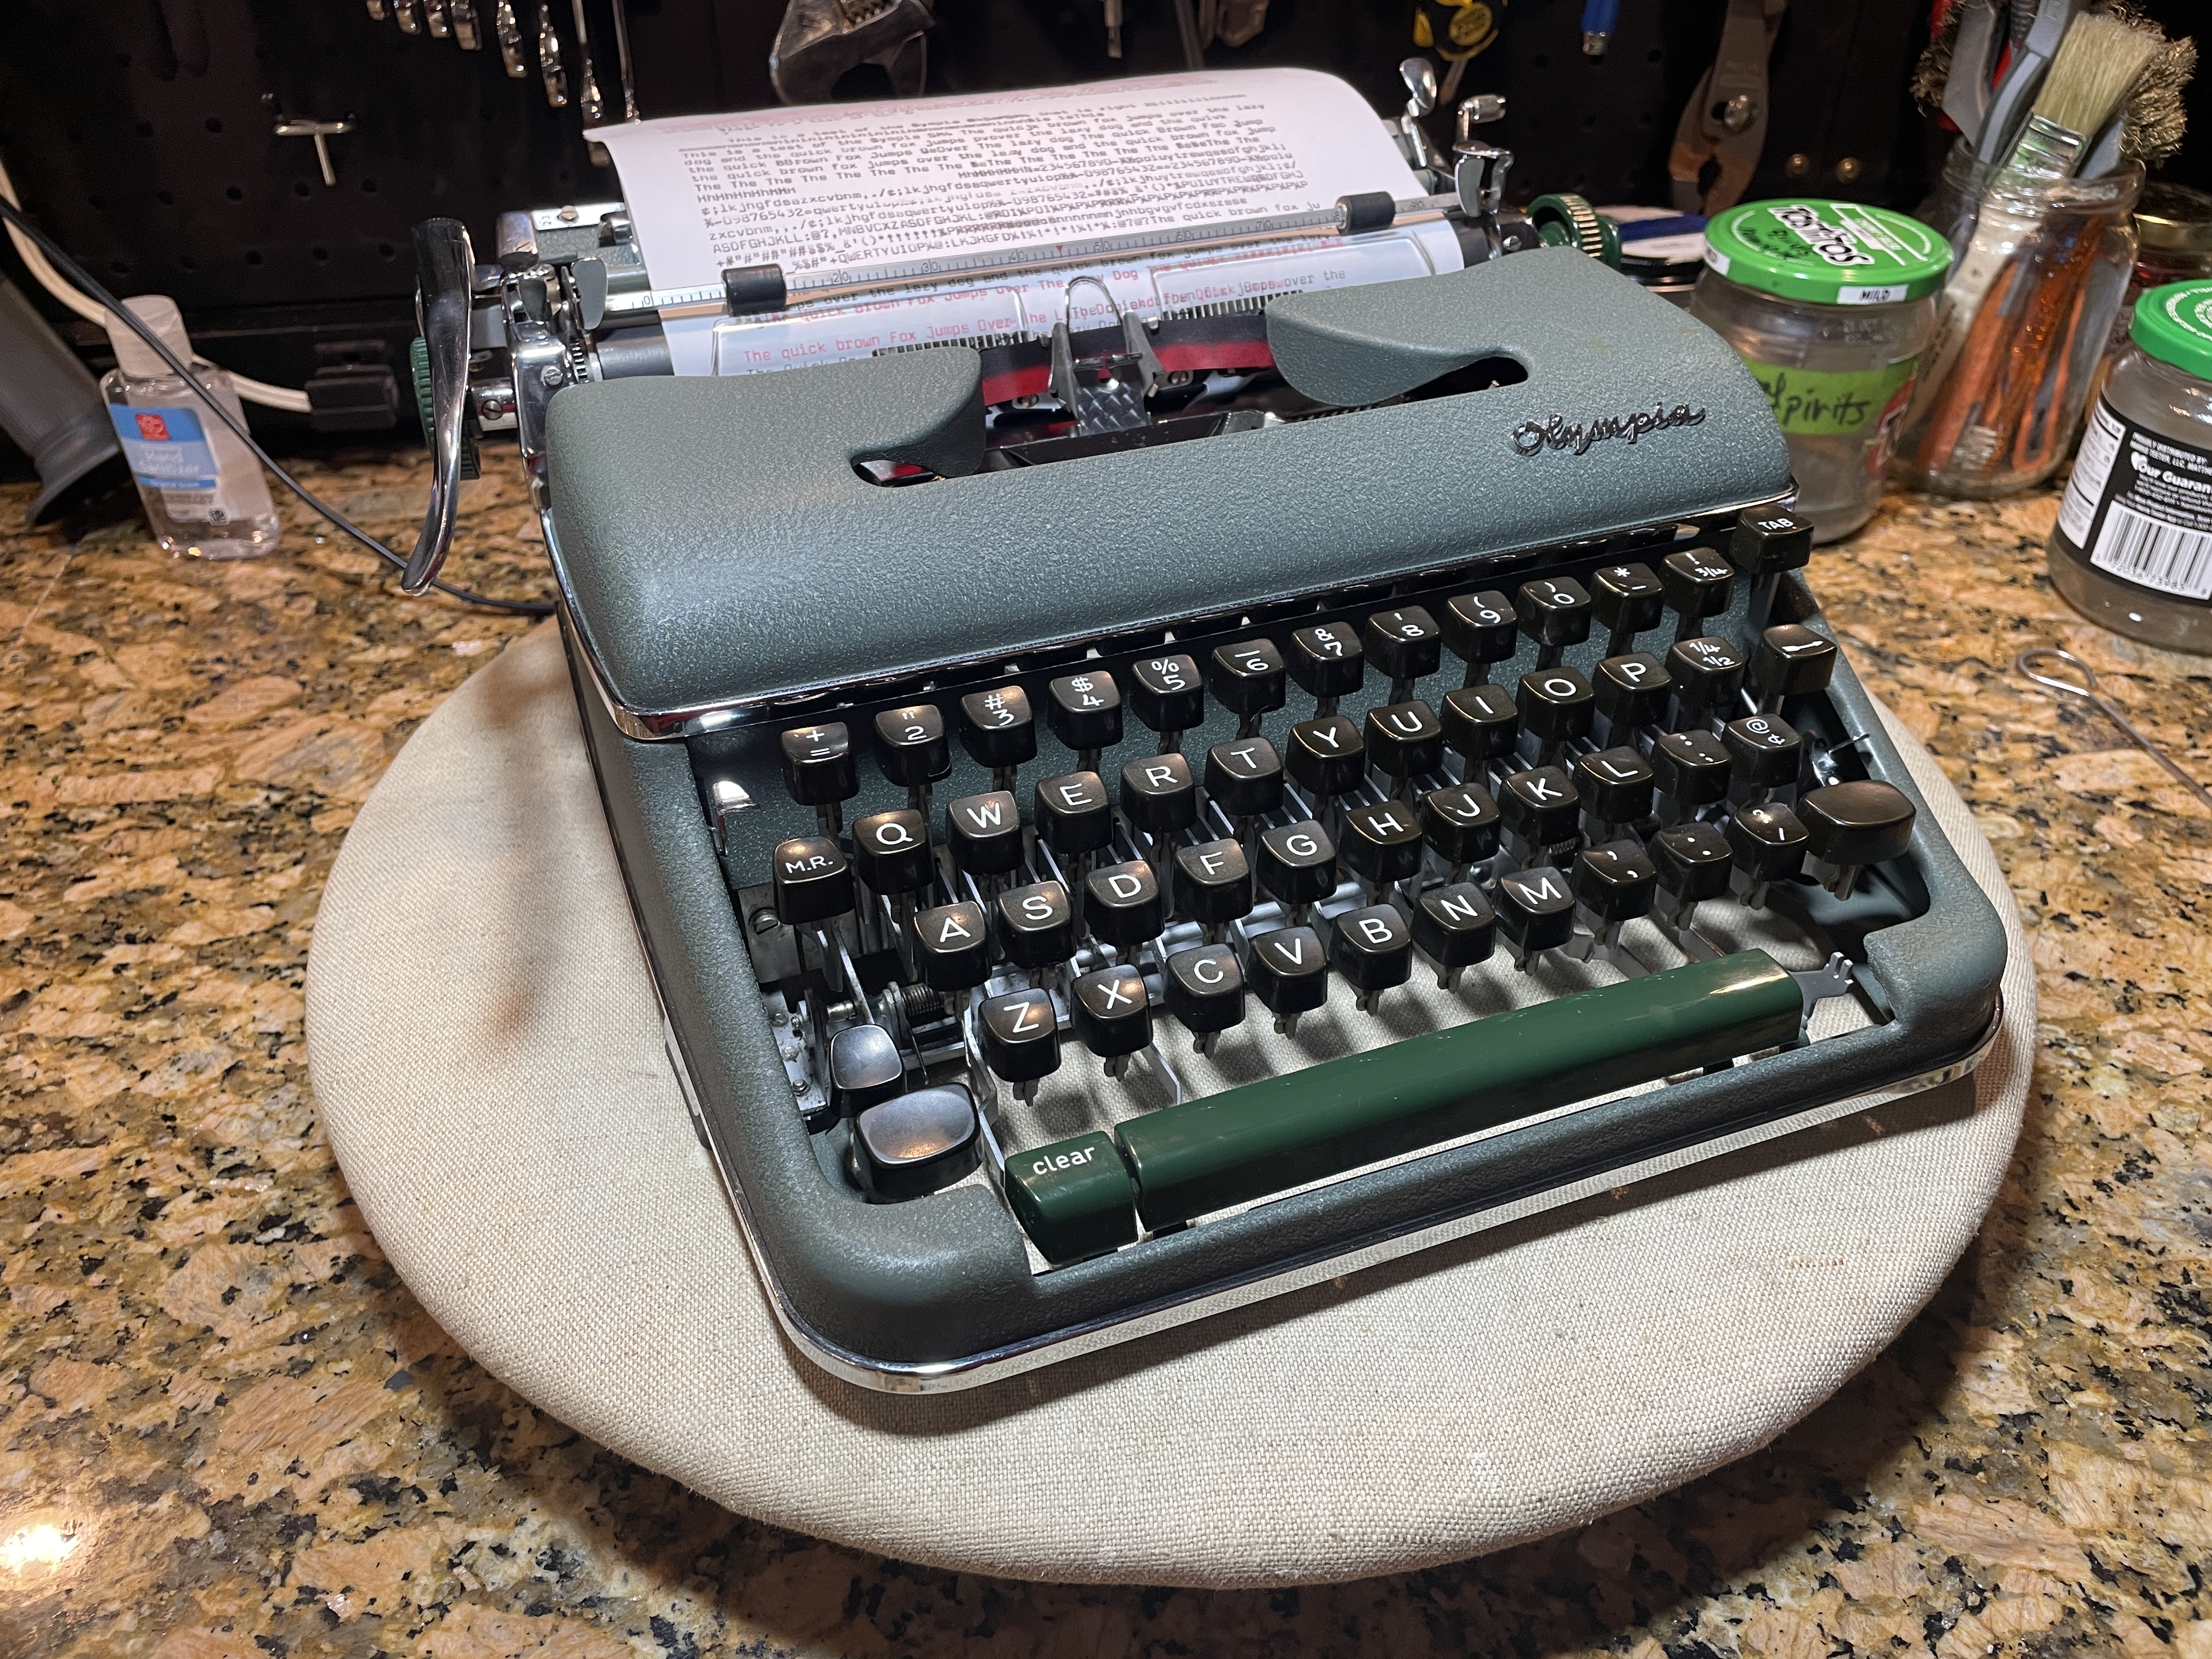
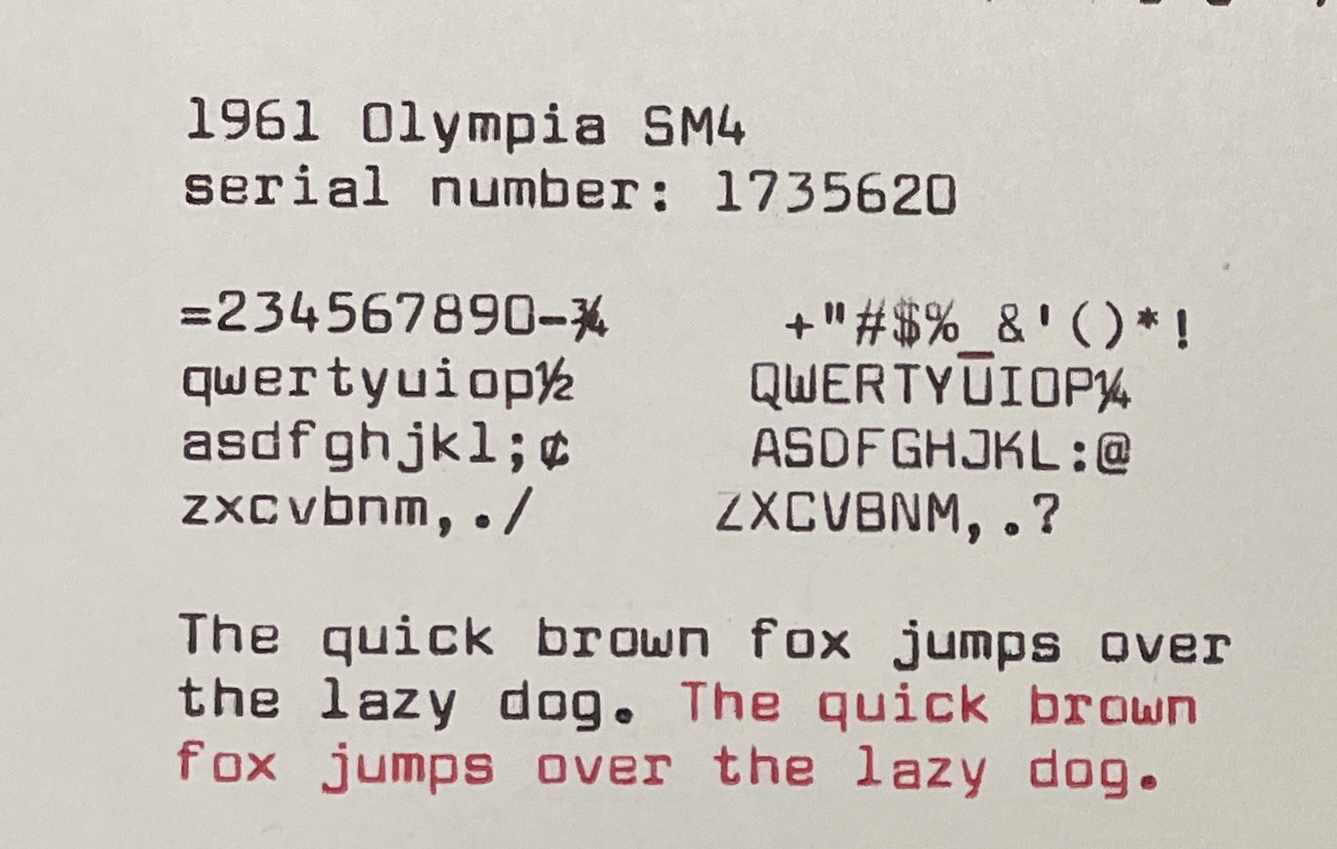
A 1961 Olympia SM4 with a jammed carriage arrived on my workbench a couple weeks ago. I started calling it Murderbot. It’s a long story, so I’ll start at the beginning.
The Olympia belongs to Monica and Stephen, a delightful pair of local typospherians who have been a veritable font of dysfunctional typewriters for me to tinker with. Usually typewriter enthusiasts have long-suffering partners who put up with the weirdo hobby. However, somehow in this wide and wild world, Monica and Stephen found each other and found typewriters and now pour all their combined infectious enthusiasm into their hobby.
They always name their typewriters, sometimes after the typewriters’ previous owners. I’ve worked on a Barney, a Ziggy Stardust, a Phil Roche, a John Hartley. Their seemingly nameless 1961 Olympia SM4 showed up in my garage for an evaluation.
Right now, the Olympia has a disabled governor module (tabulator brake) which makes me think of Martha Well’s SecUnit, Murderbot. I have some Murderbot on the brain since book 8 of the Murderbot Diaries series, Platform Decay, comes out this week. This sci-fi book series is about a depressed human / robot construct who has hacked its own governor module. Murderbot spends as much time as possible watching its favorite soap opera, The Rise and Fall of Sanctuary Moon, and trying to avoid detection as a rogue SecUnit.

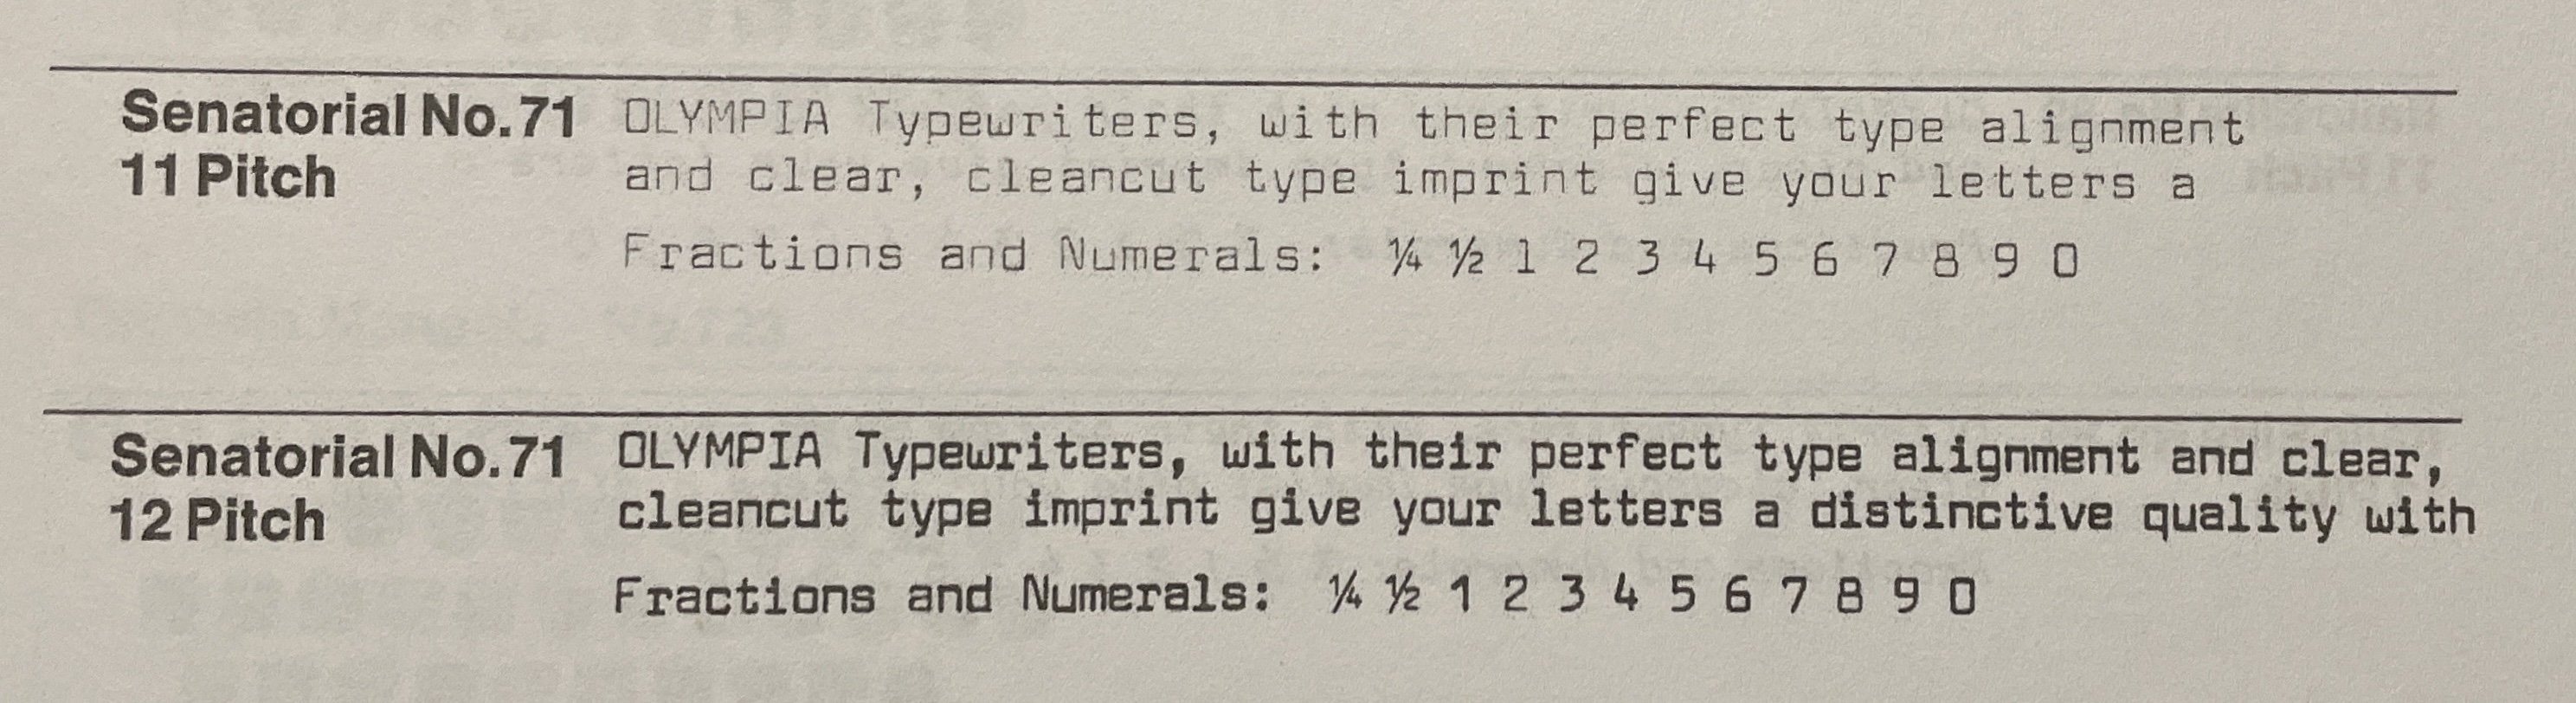
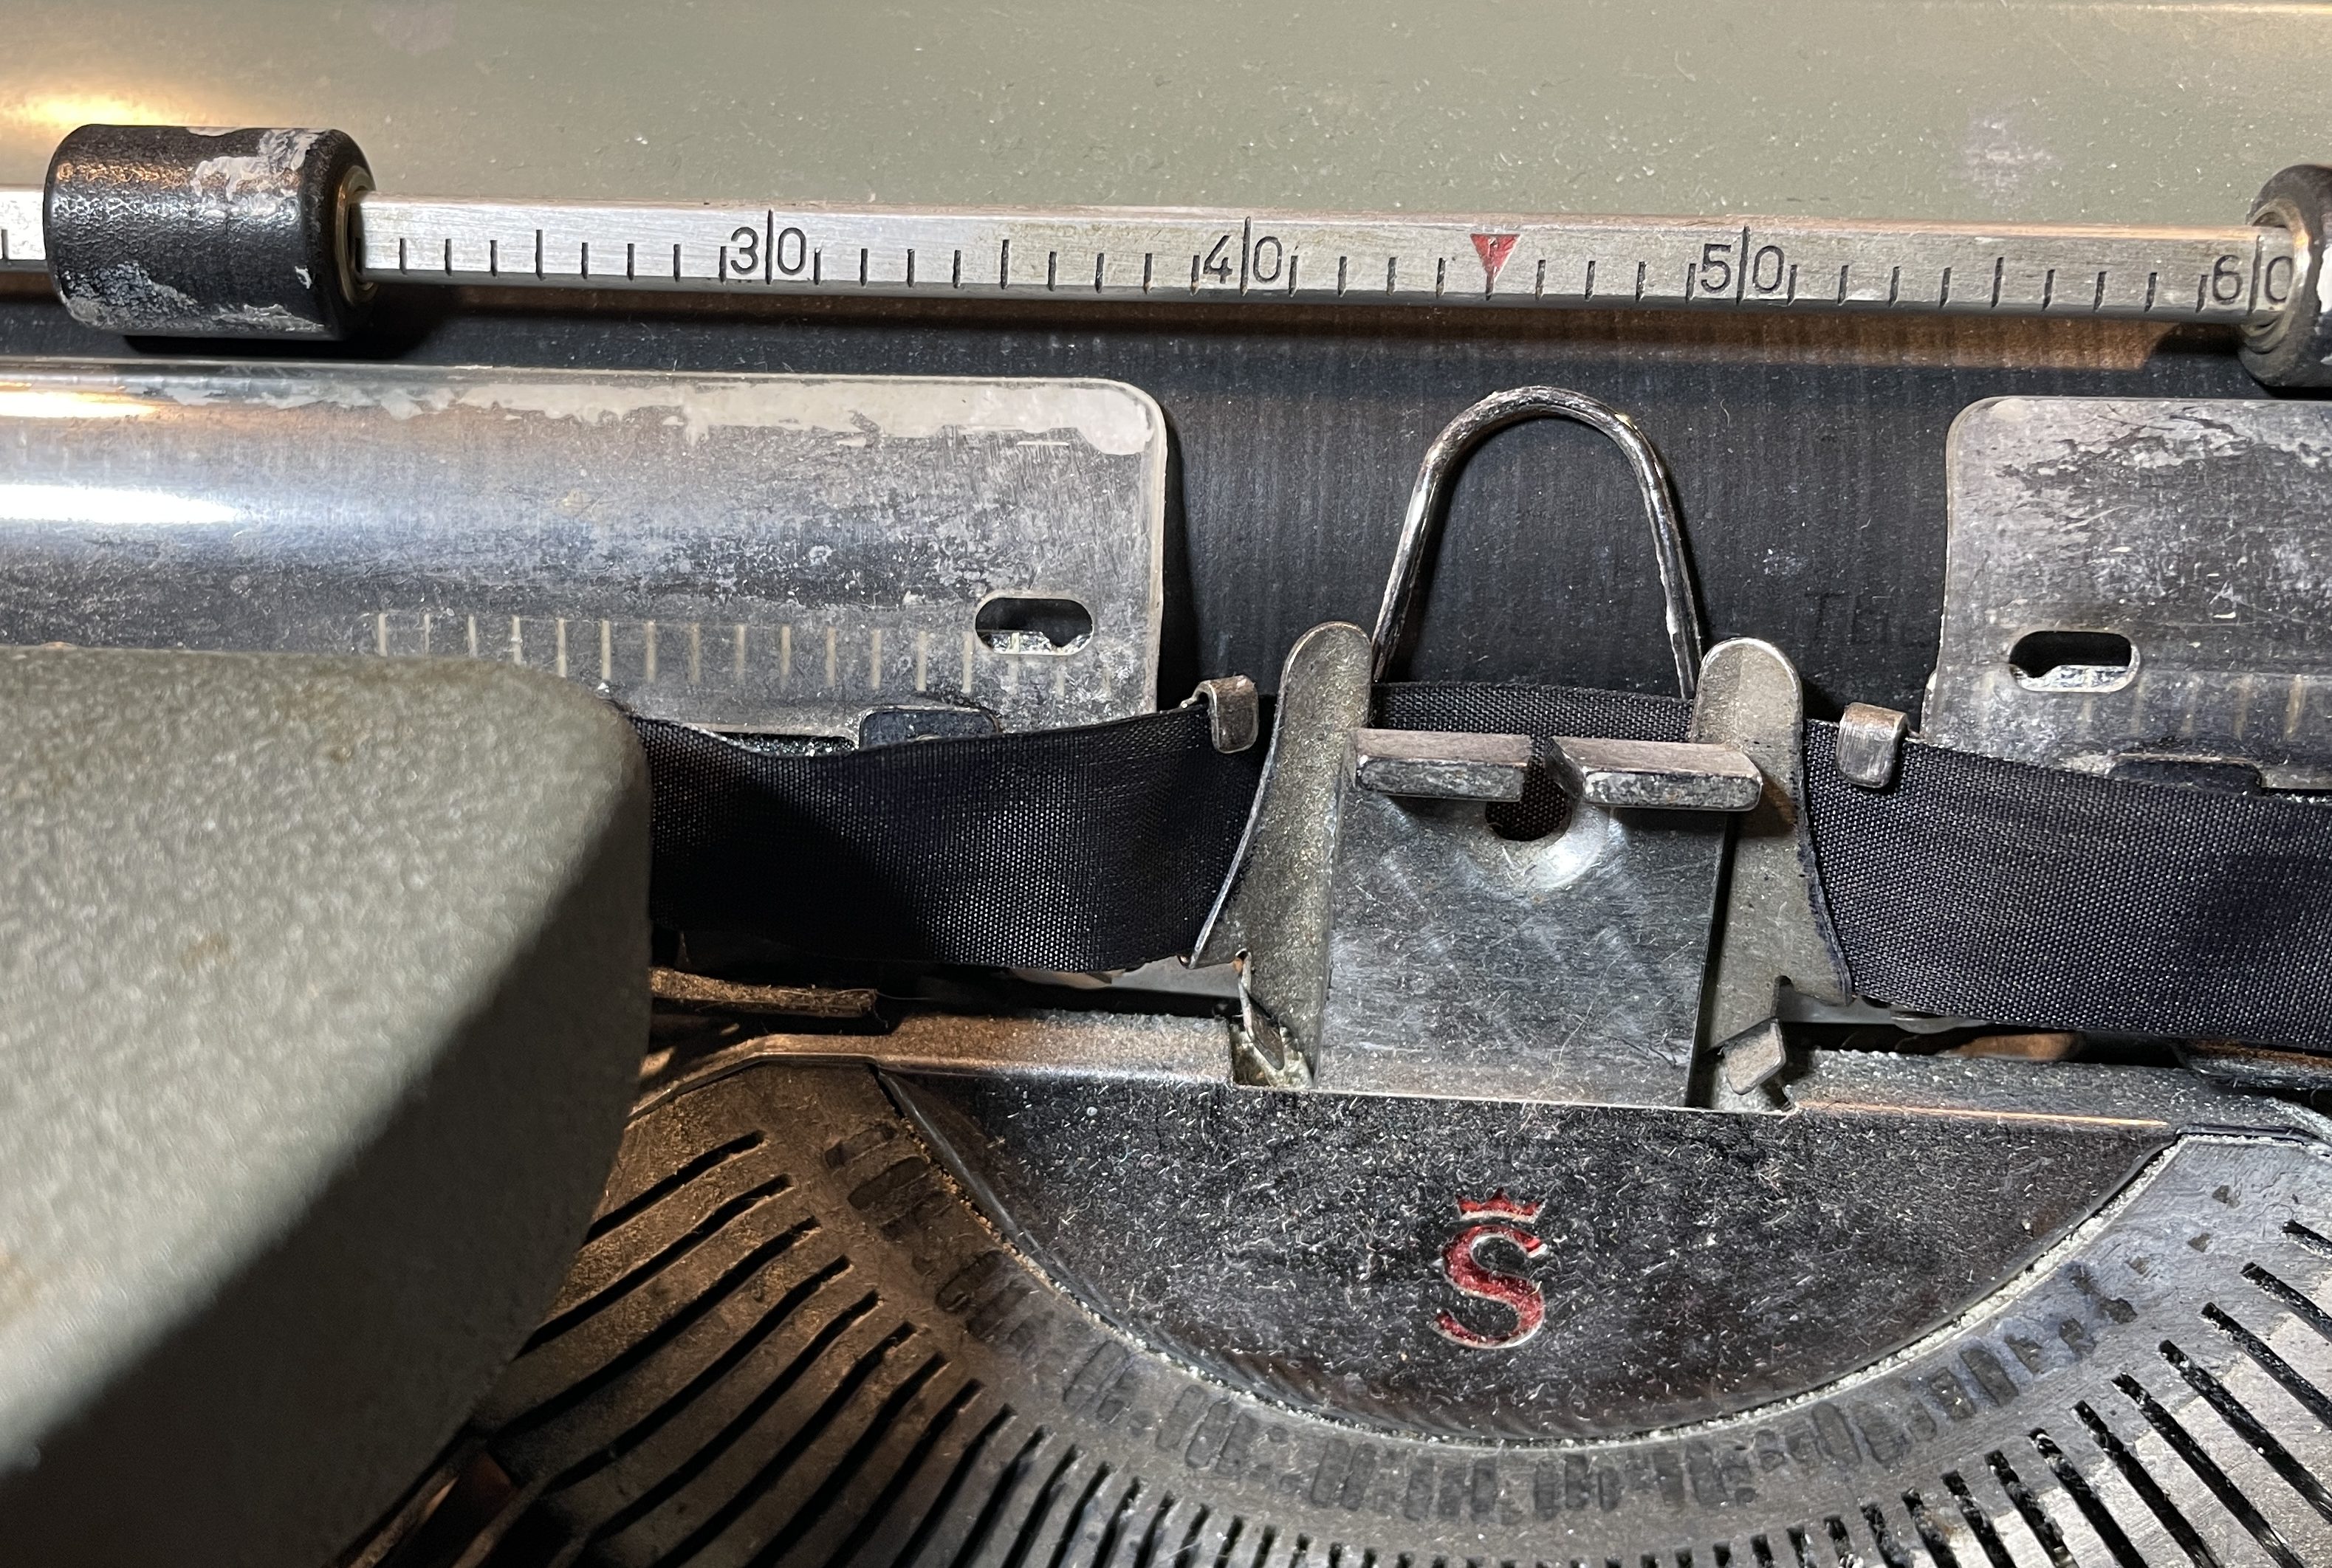
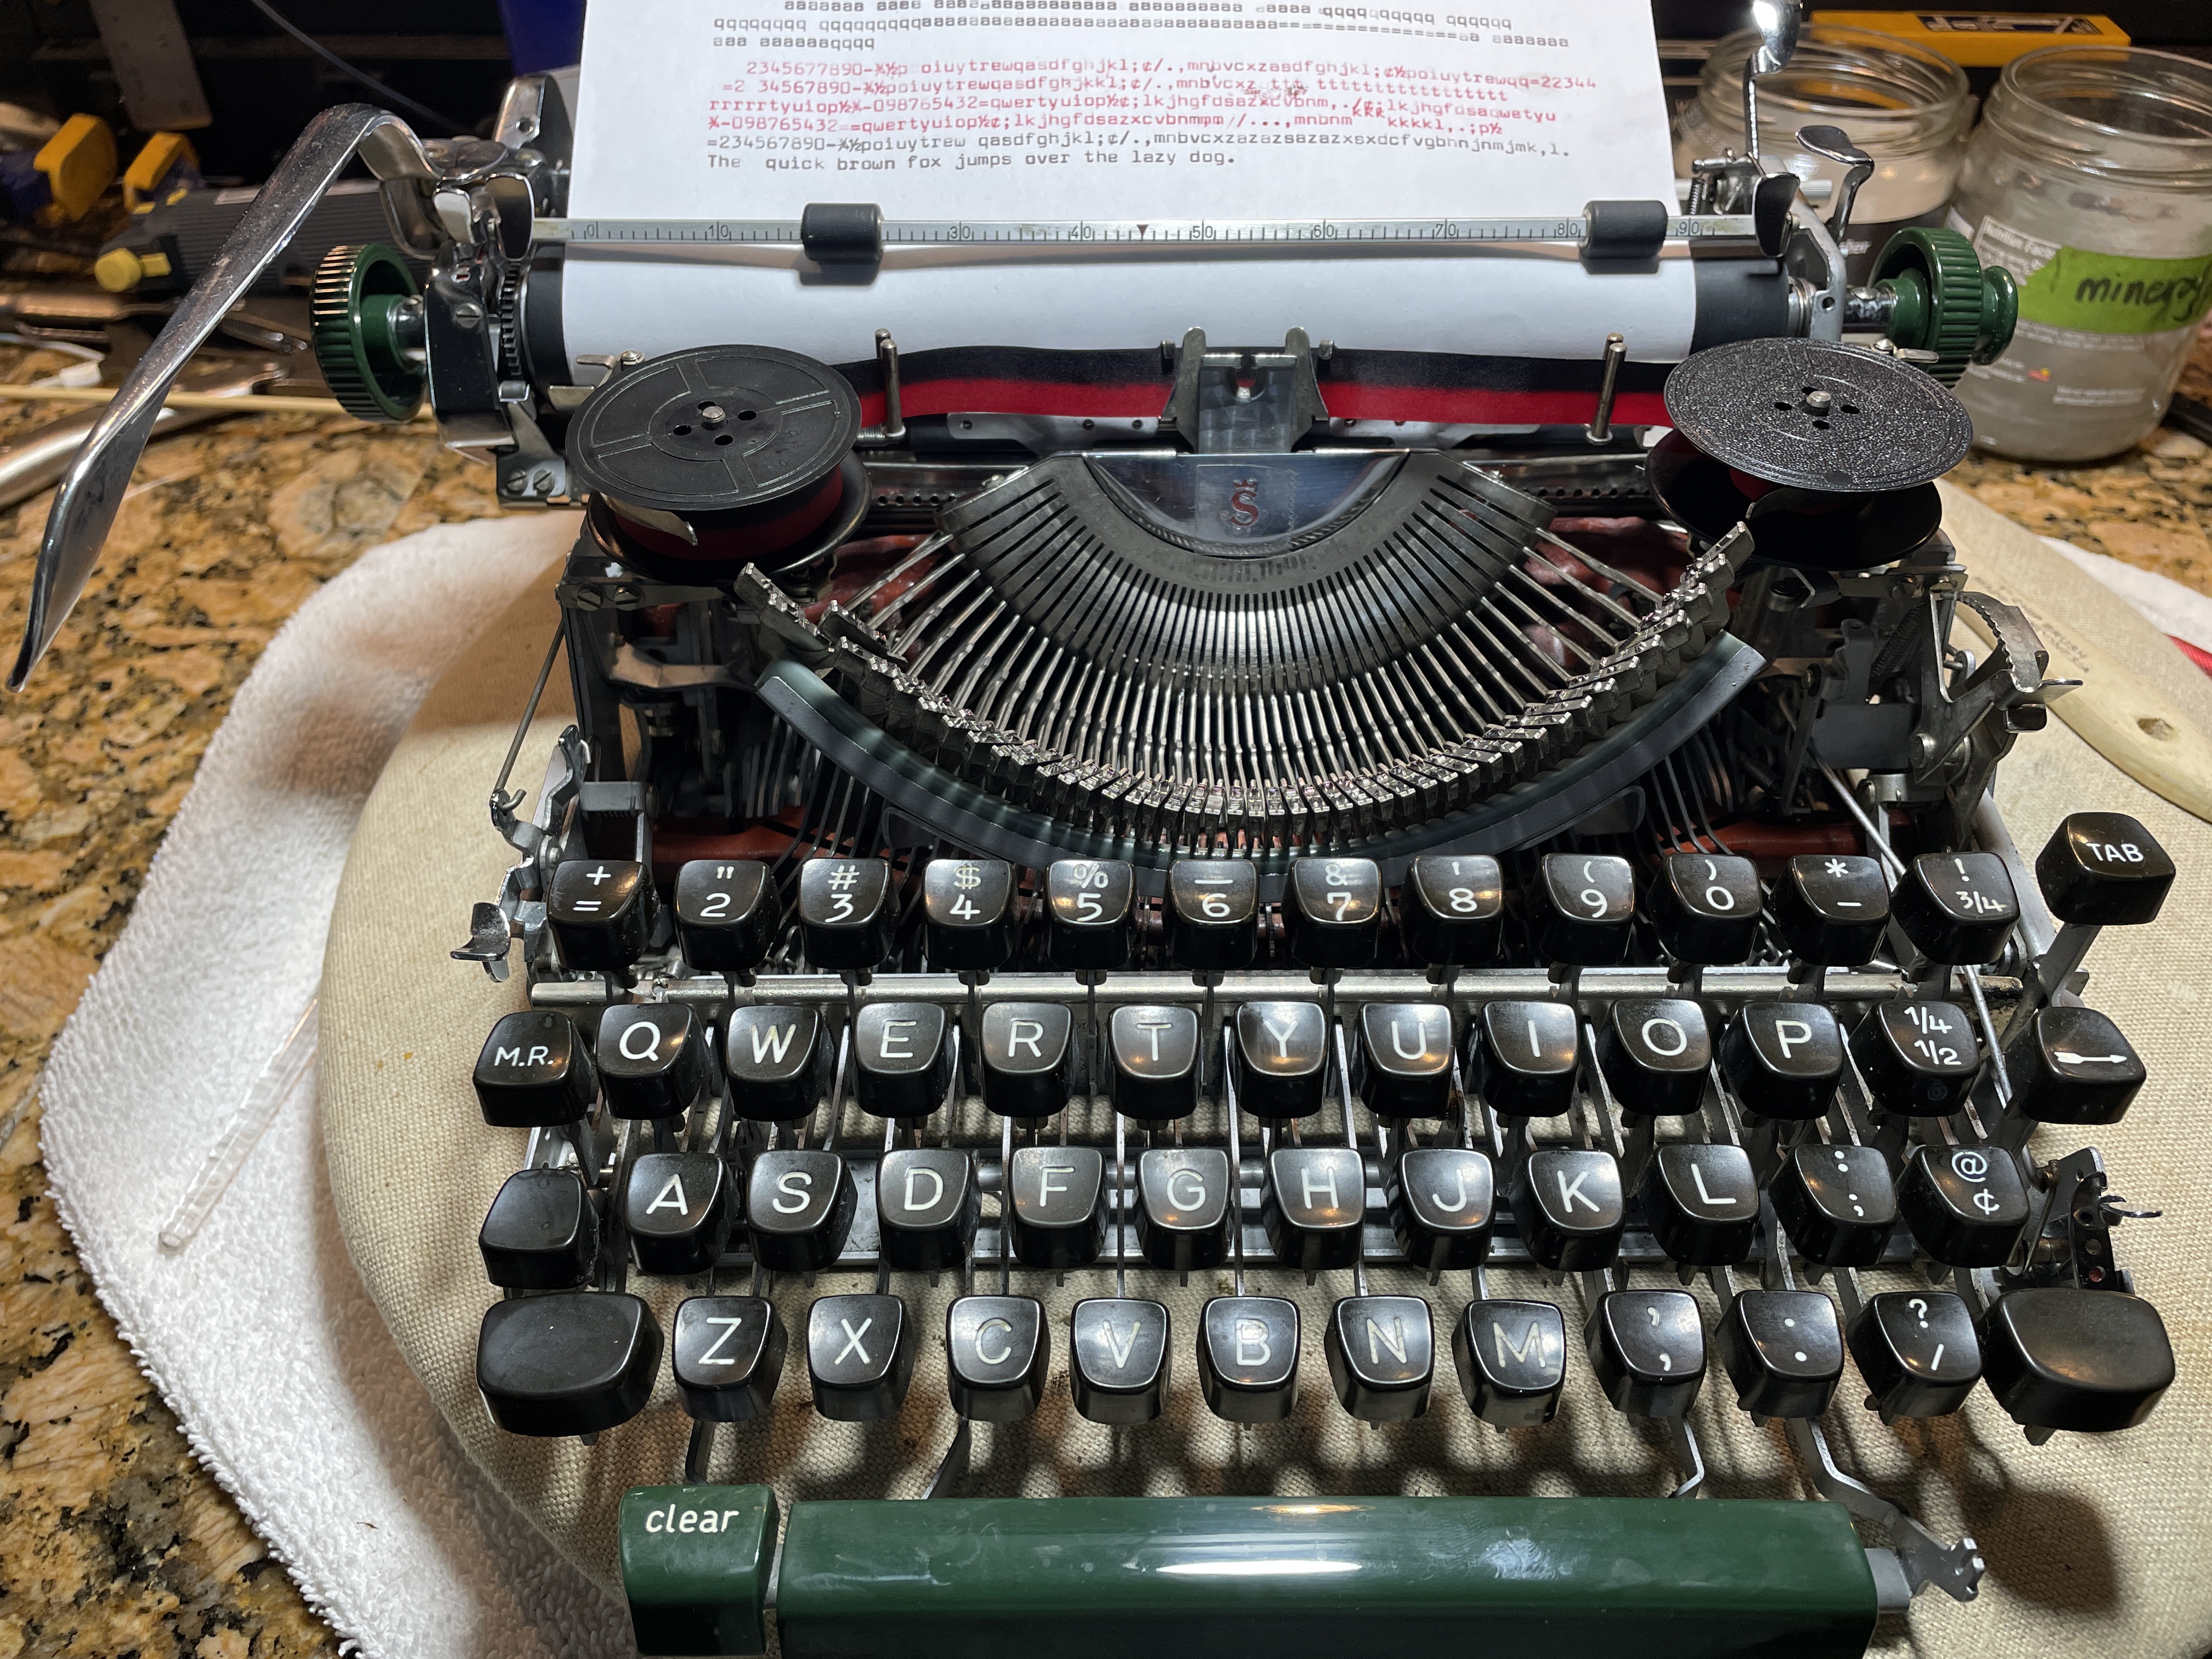
This Olympia SM4 has that futuristic, robotic typeface, “Senatorial”. It feels like a Murderbot to me.
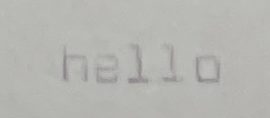
So this Olympia’s carriage release wasn’t working, and the carriage was jamming. I could get it unstuck by pressing and holding the tab key. The escapement seemed to be tripping, and it could sort of type before it quickly jammed again, so there was hope. I knew we needed to save this one. I LOVE Senatorial.
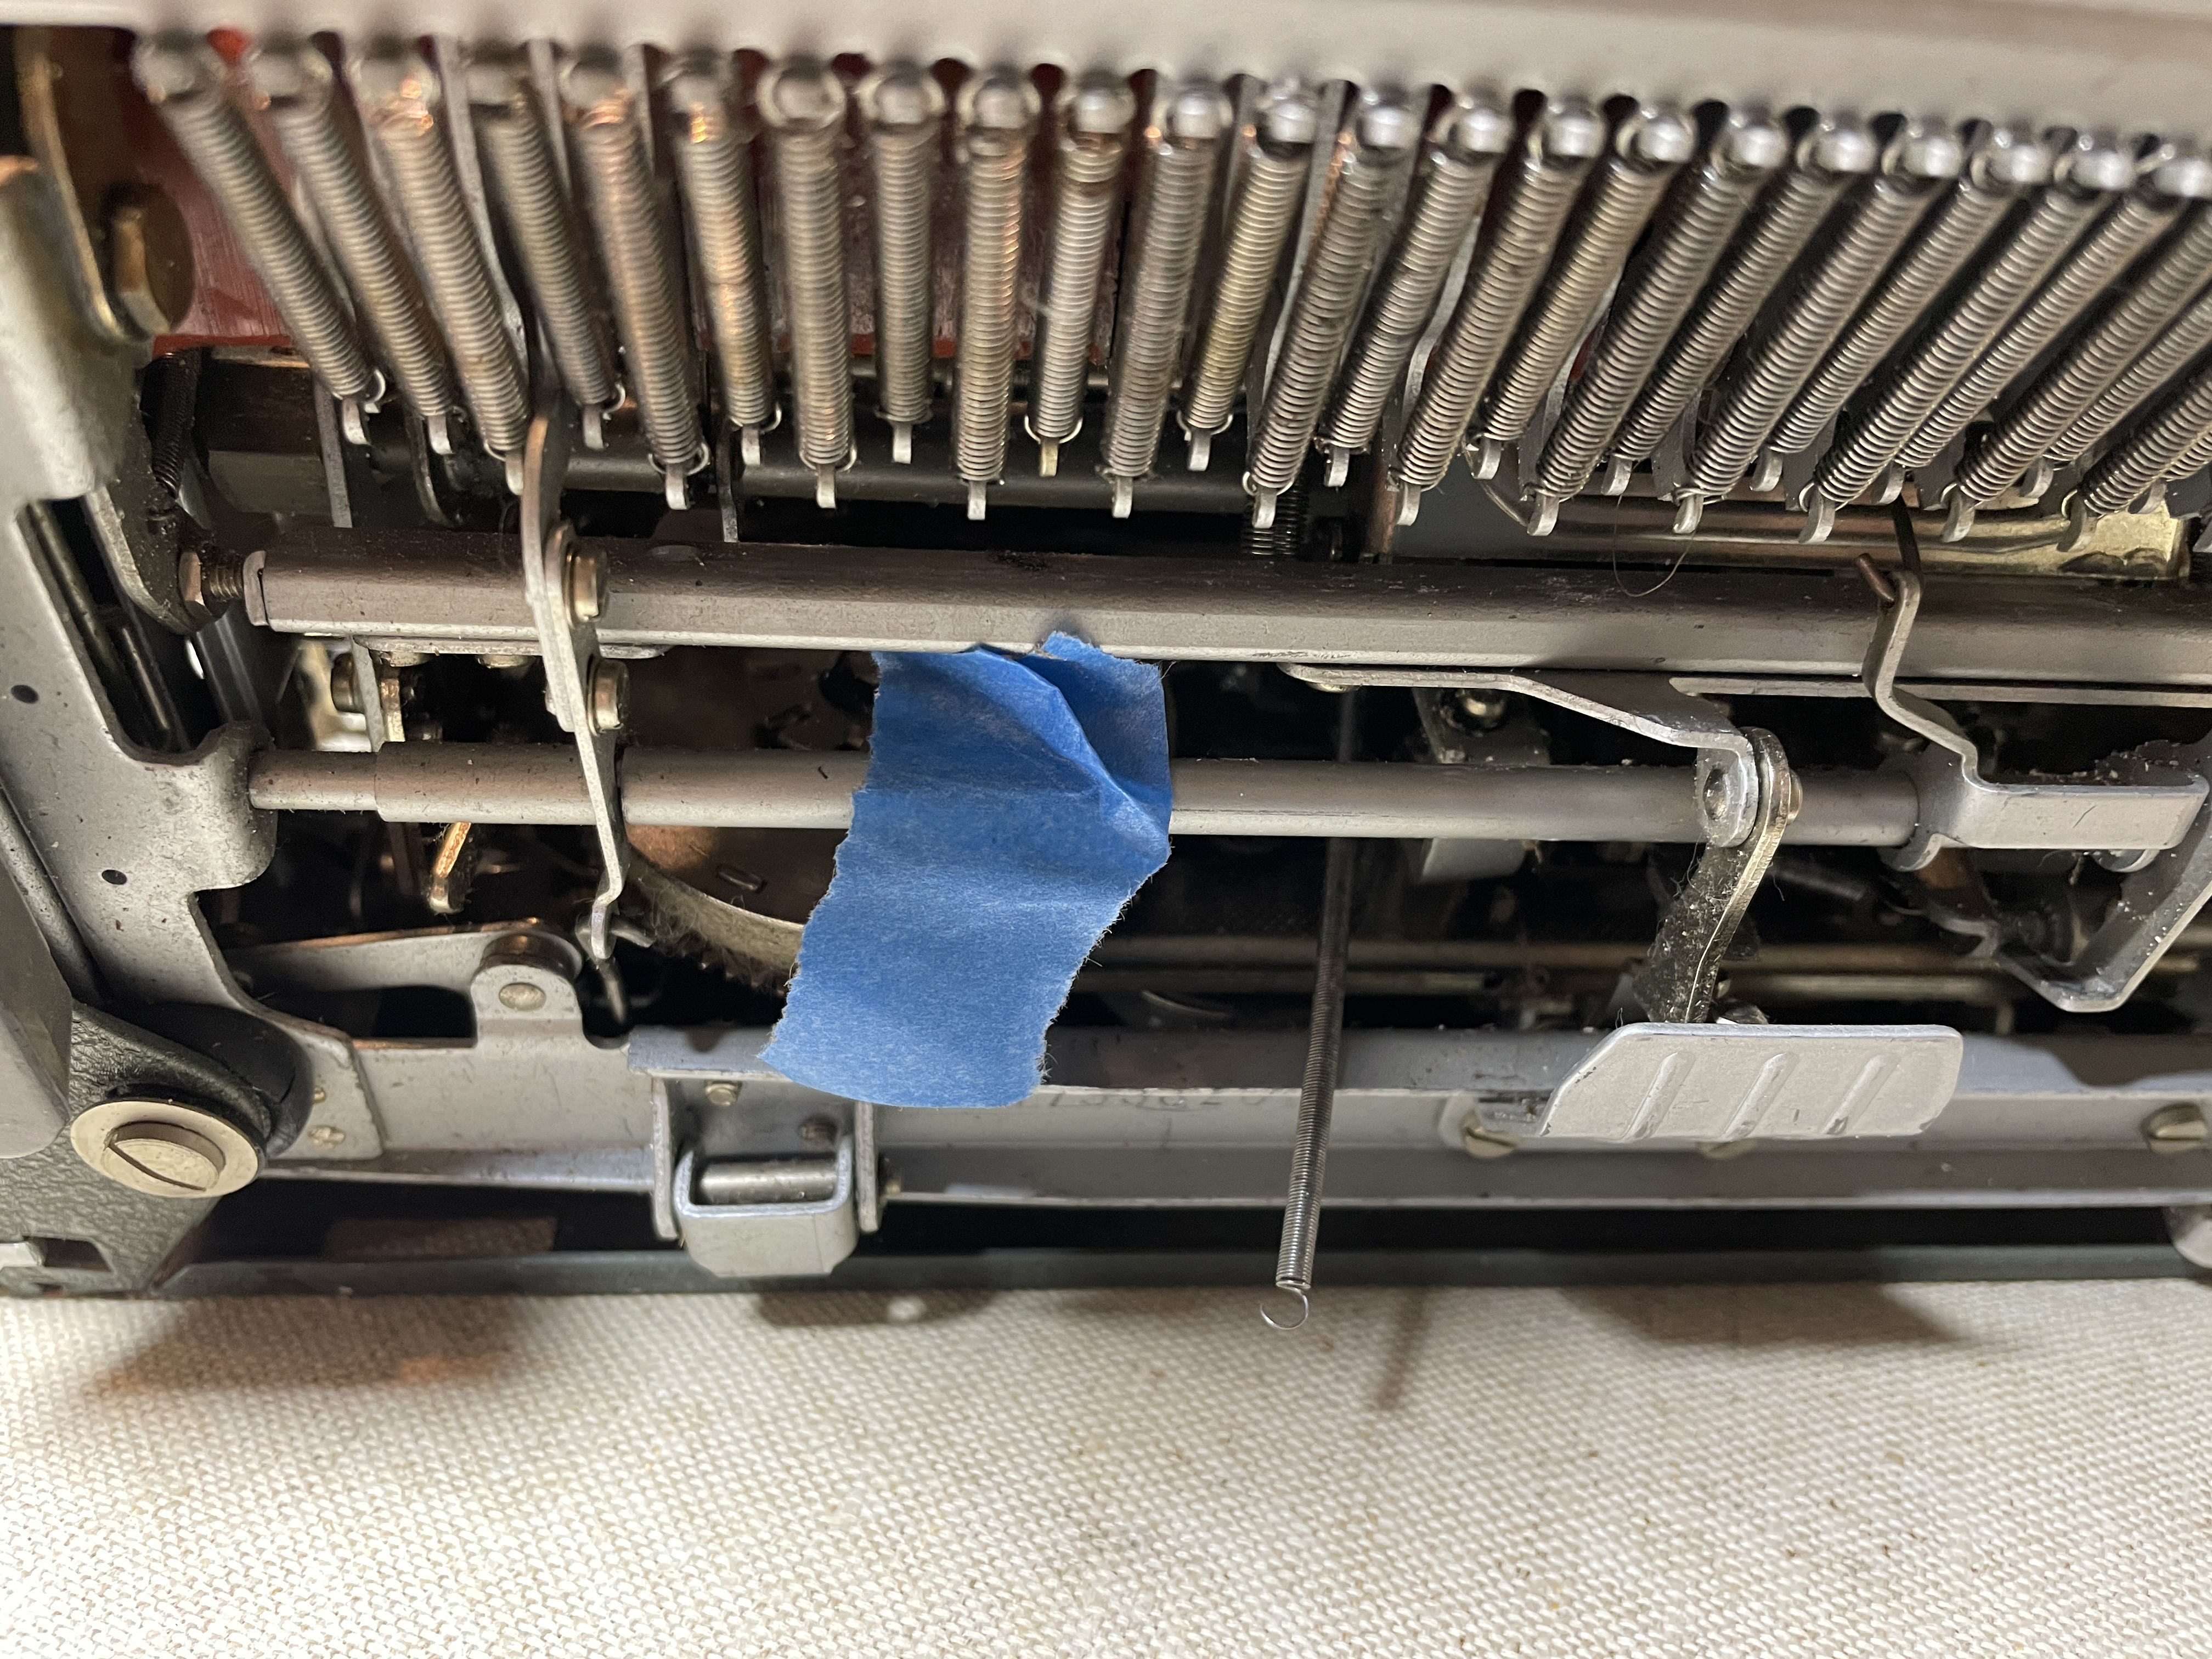
The machine had a long detached spring. I hoped this would be a simple fix for the jammed carriage, but it was only a detached spring from the backspace mechanism and once re-attached, did nothing to solve the carriage jamming.
The exterior of the machine was splattered with Wite-Out, and the interior of the machine was filled with a sticky white dust that did not blow out.
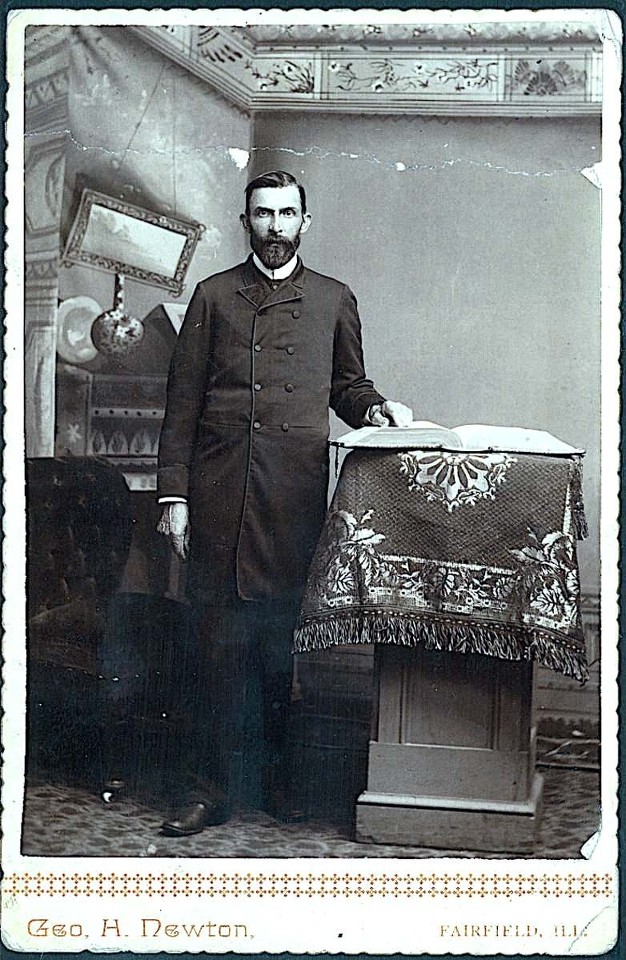
The Olympia had belonged to a man of the cloth. I can imagine him hunched over his Olympia on a late night, sweating over his Sunday sermon, an extra-large bottle of Wite-Out in hand. The good man did not know the error of his ways, even as he tried to correct.
My great-great-grandfather was a minister, a Presbyterian missionary. He preached against the sorrows of Wite-Out and considered it an abomination.
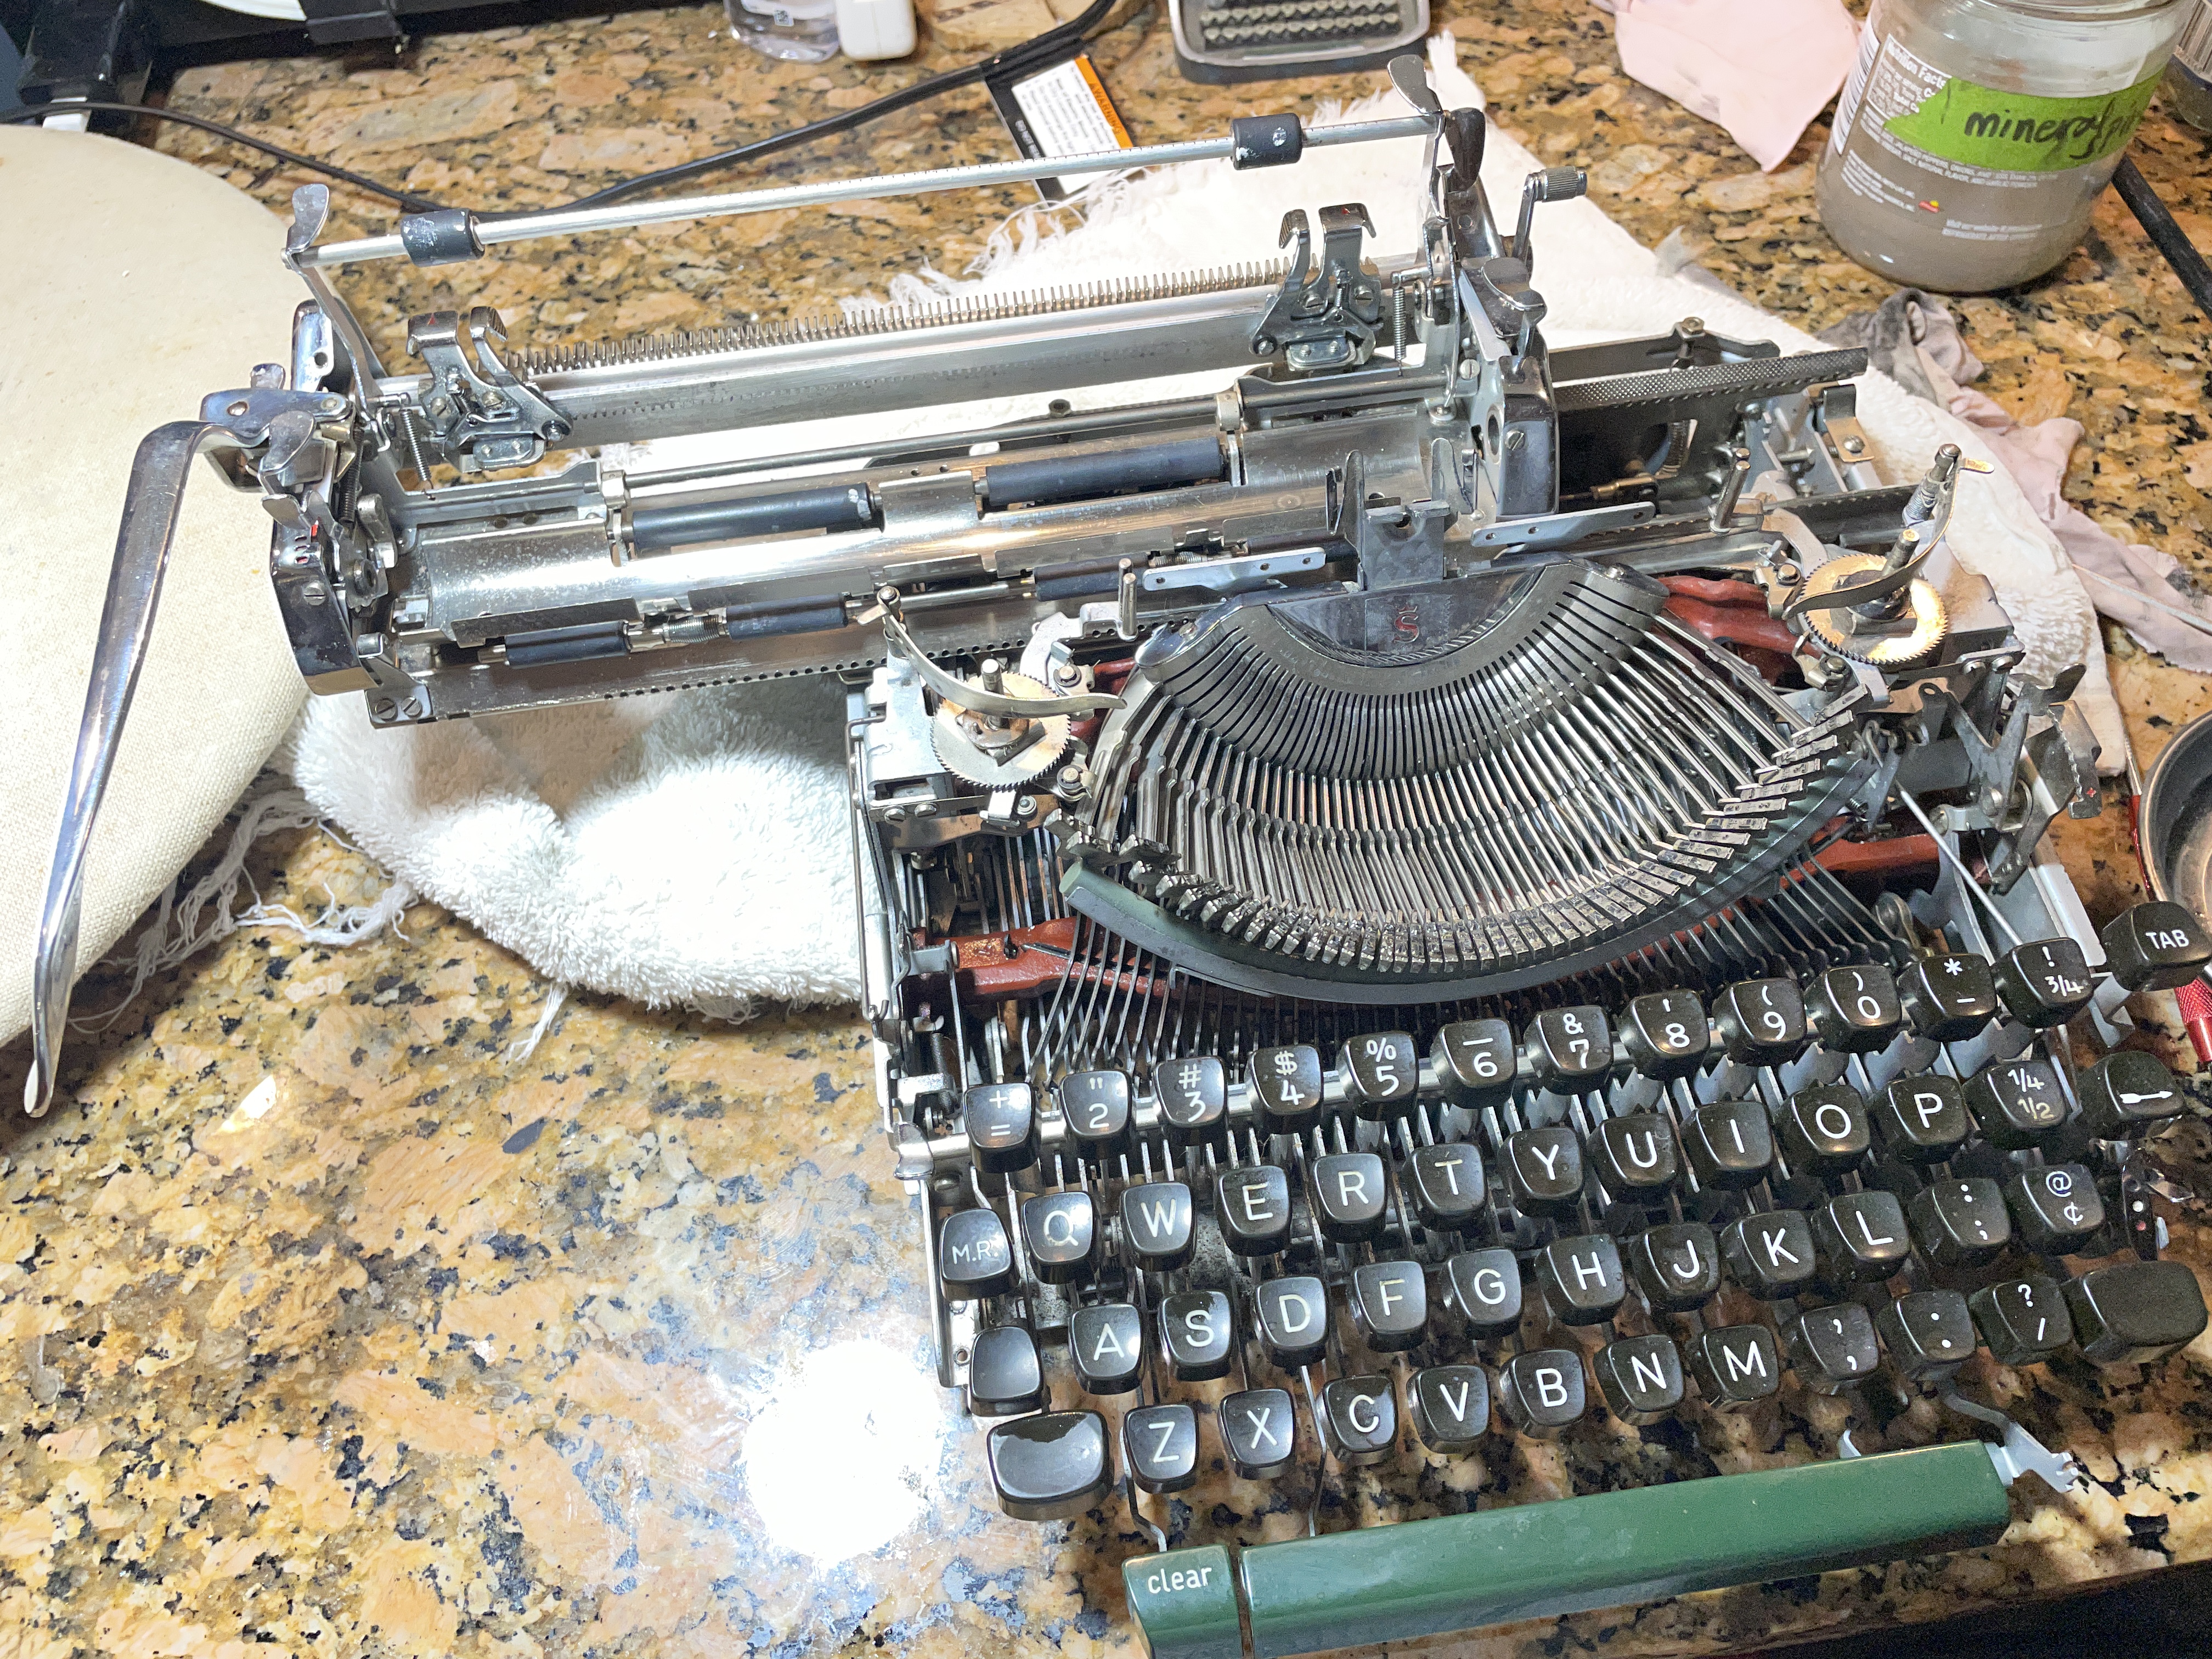
I couldn’t dust or blow the sticky Wite-Out away that was inside this Olympia SM4. It needed to be scrubbed out, so I removed the cover plates.
Here is a video from HotRod Typewriter about removing the cover plates on an SM of this style:
I got the shell off the machine and was able to look more closely at it. The carriage was stuck and the carriage release was not working. Well, it was kind of working: when carriage release was pressed, the carriage advanced one space and then got stuck again. I could free the carriage and move it from side to side by pressing the tab key and holding. Hmmm.
So we had a “Carriage Stuck / Jammed” issue. Here are the possibilities I was thinking about:
- Body spacers problem – a very frequent issue with Olympia portables. It was still jamming while out of its shell, so that wasn’t the problem. Also, this SM4’s rubber spacers were not badly flattened.
- Loose or bent carriage covers binding on the body
- Dirty, gummy, rusty rails or escapement
- Drawband tangled in guts
- Rack problems / binding
- margin rack
- tab rack
- escapement rack
- Escapement issue
Here’s a video from HotRod Typewriter about checking your racks:
I popped the platen out. Be mindful of the spacing washers on the right end of the platen. Note: HotRod has a very helpful video on reinstalling the platen and spacer shims.
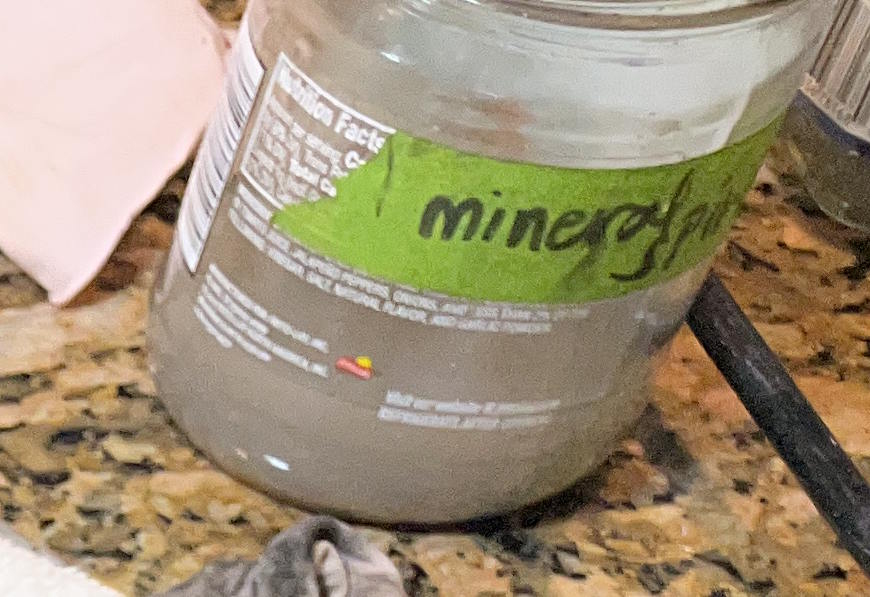
I went through each of the possible causes of the jamming, I cleaned and cleaned and cleaned. Check out how dirty and cloudy with Wite-Out my mineral spirits became.
The racks seemed okay. I decided to remove the paper pan under the platen so that I could get a good visual on the escapement without taking the carriage off. The paper pan, Good Grief. Here’s Typewriter Justice talking about the paper tray/pan so you get an idea of what you’re dealing with. Honestly, you may want to just take the carriage off at this point.
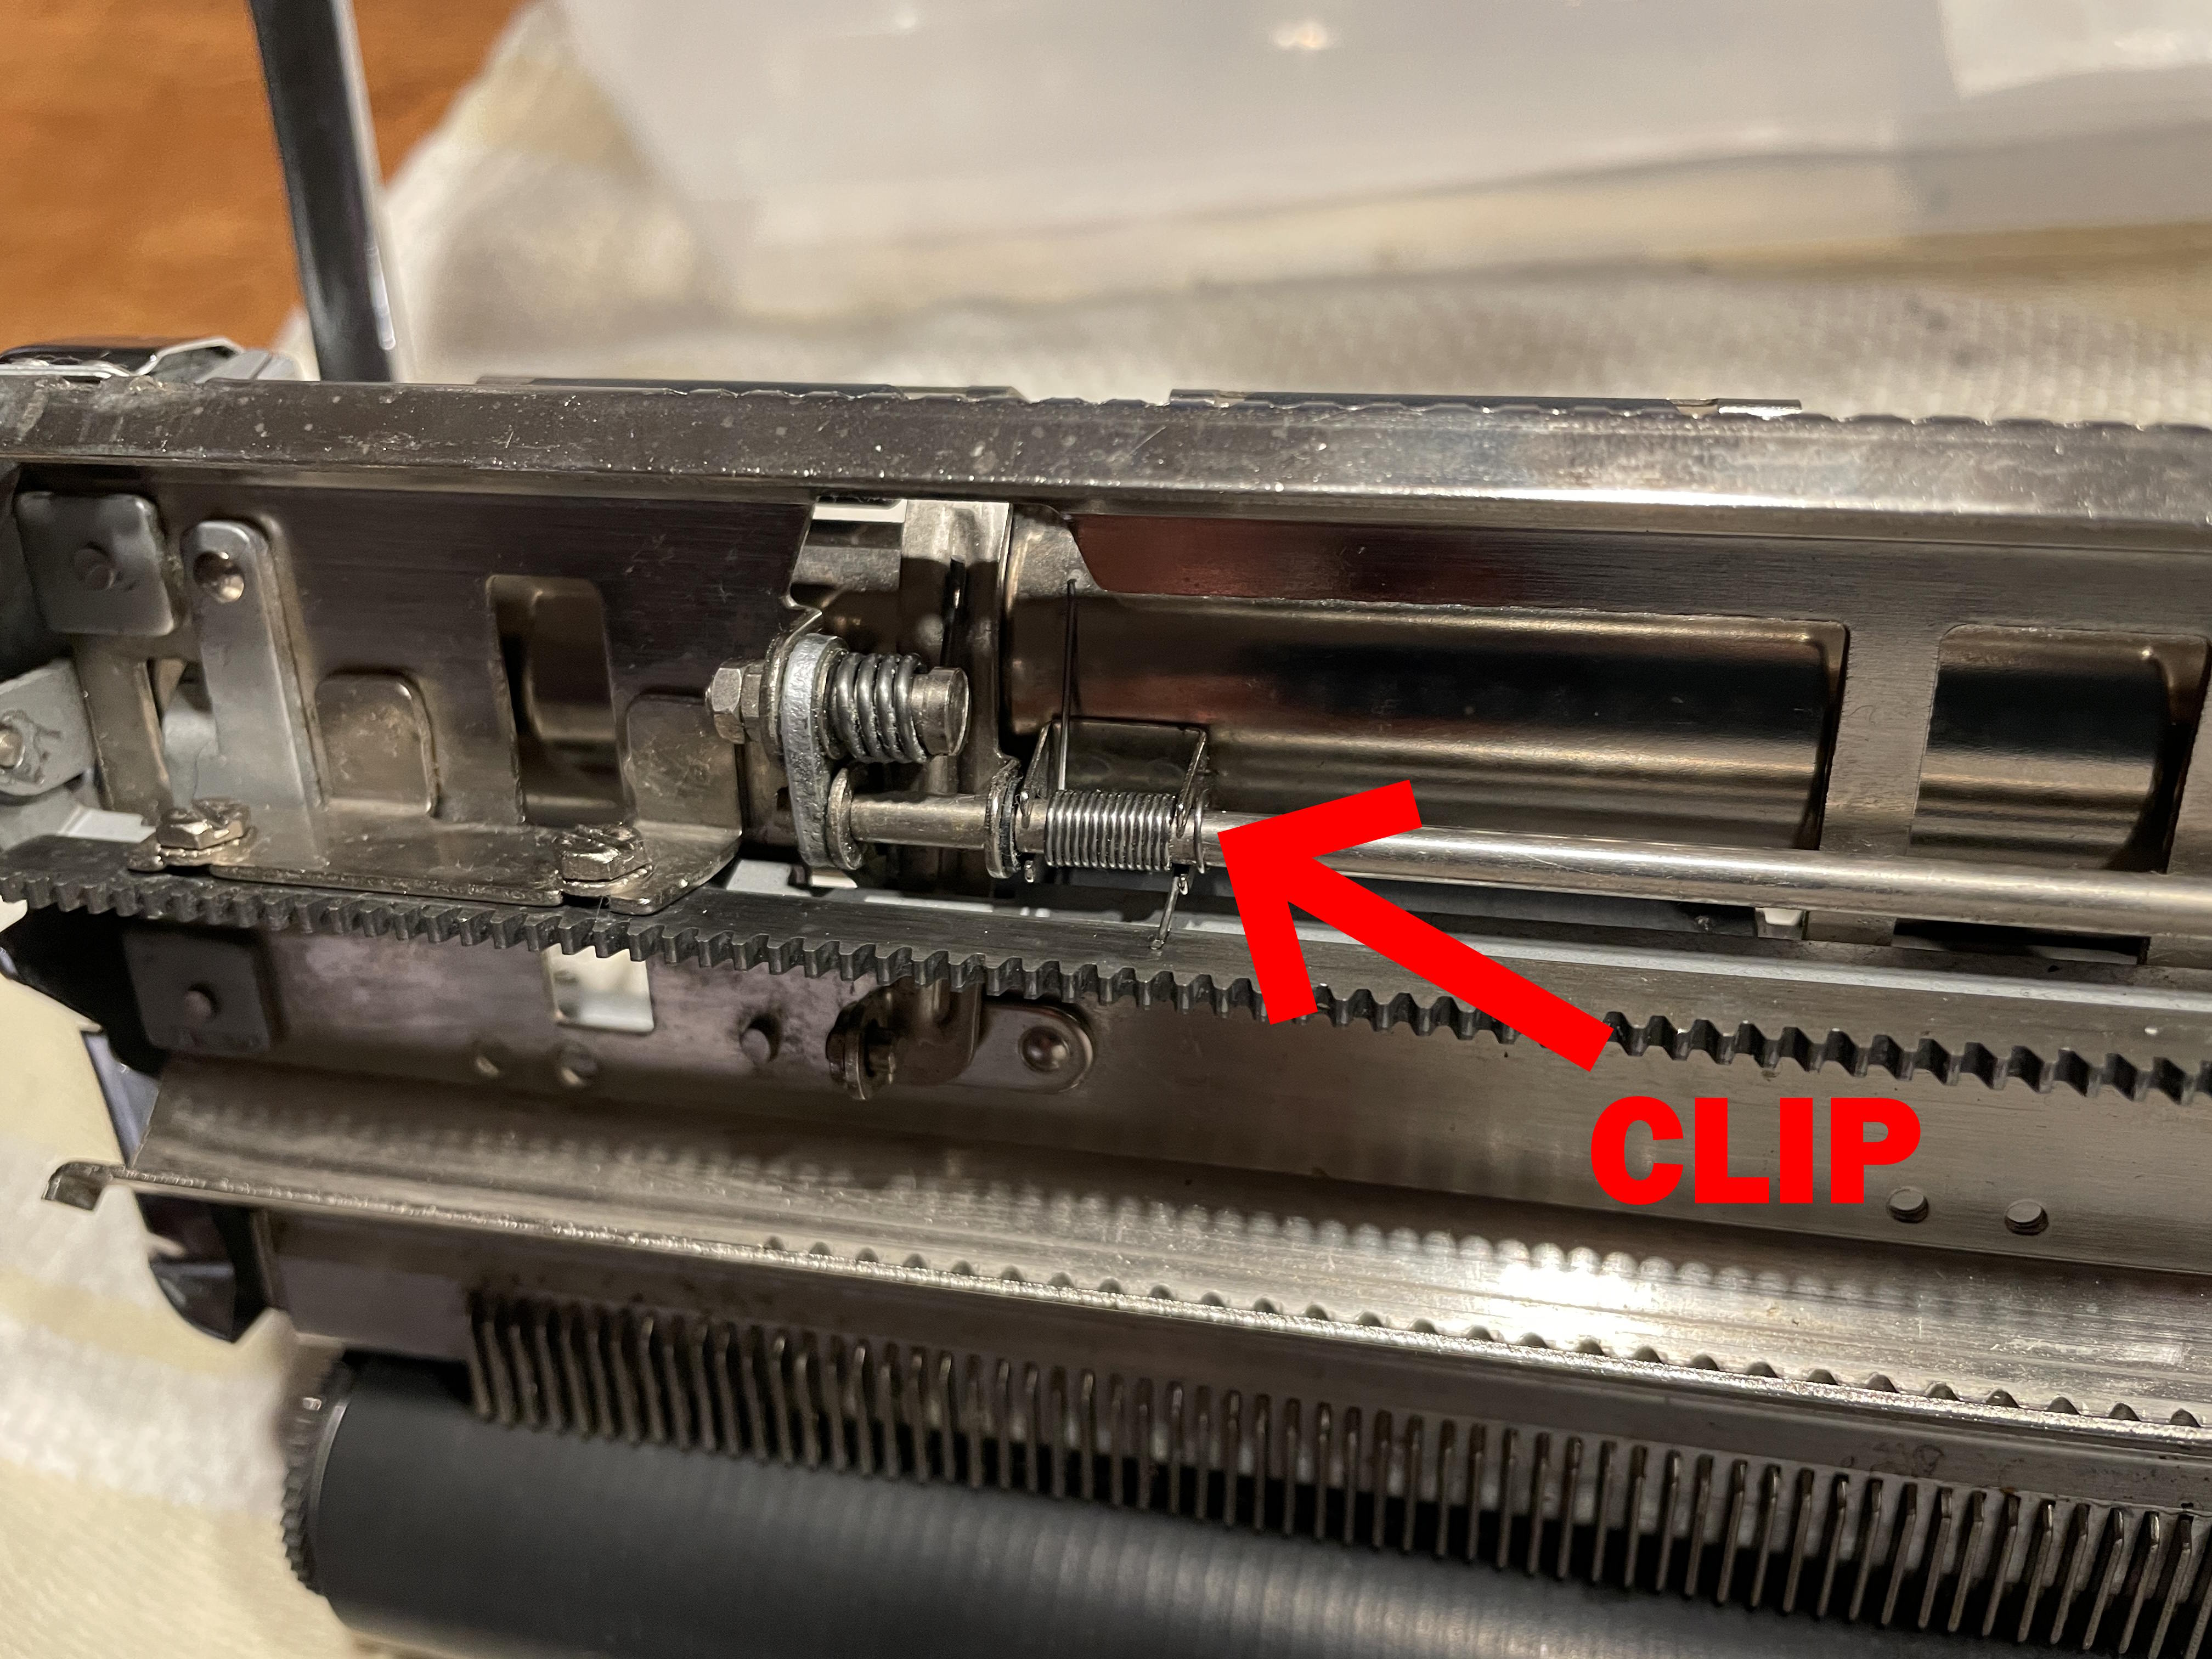
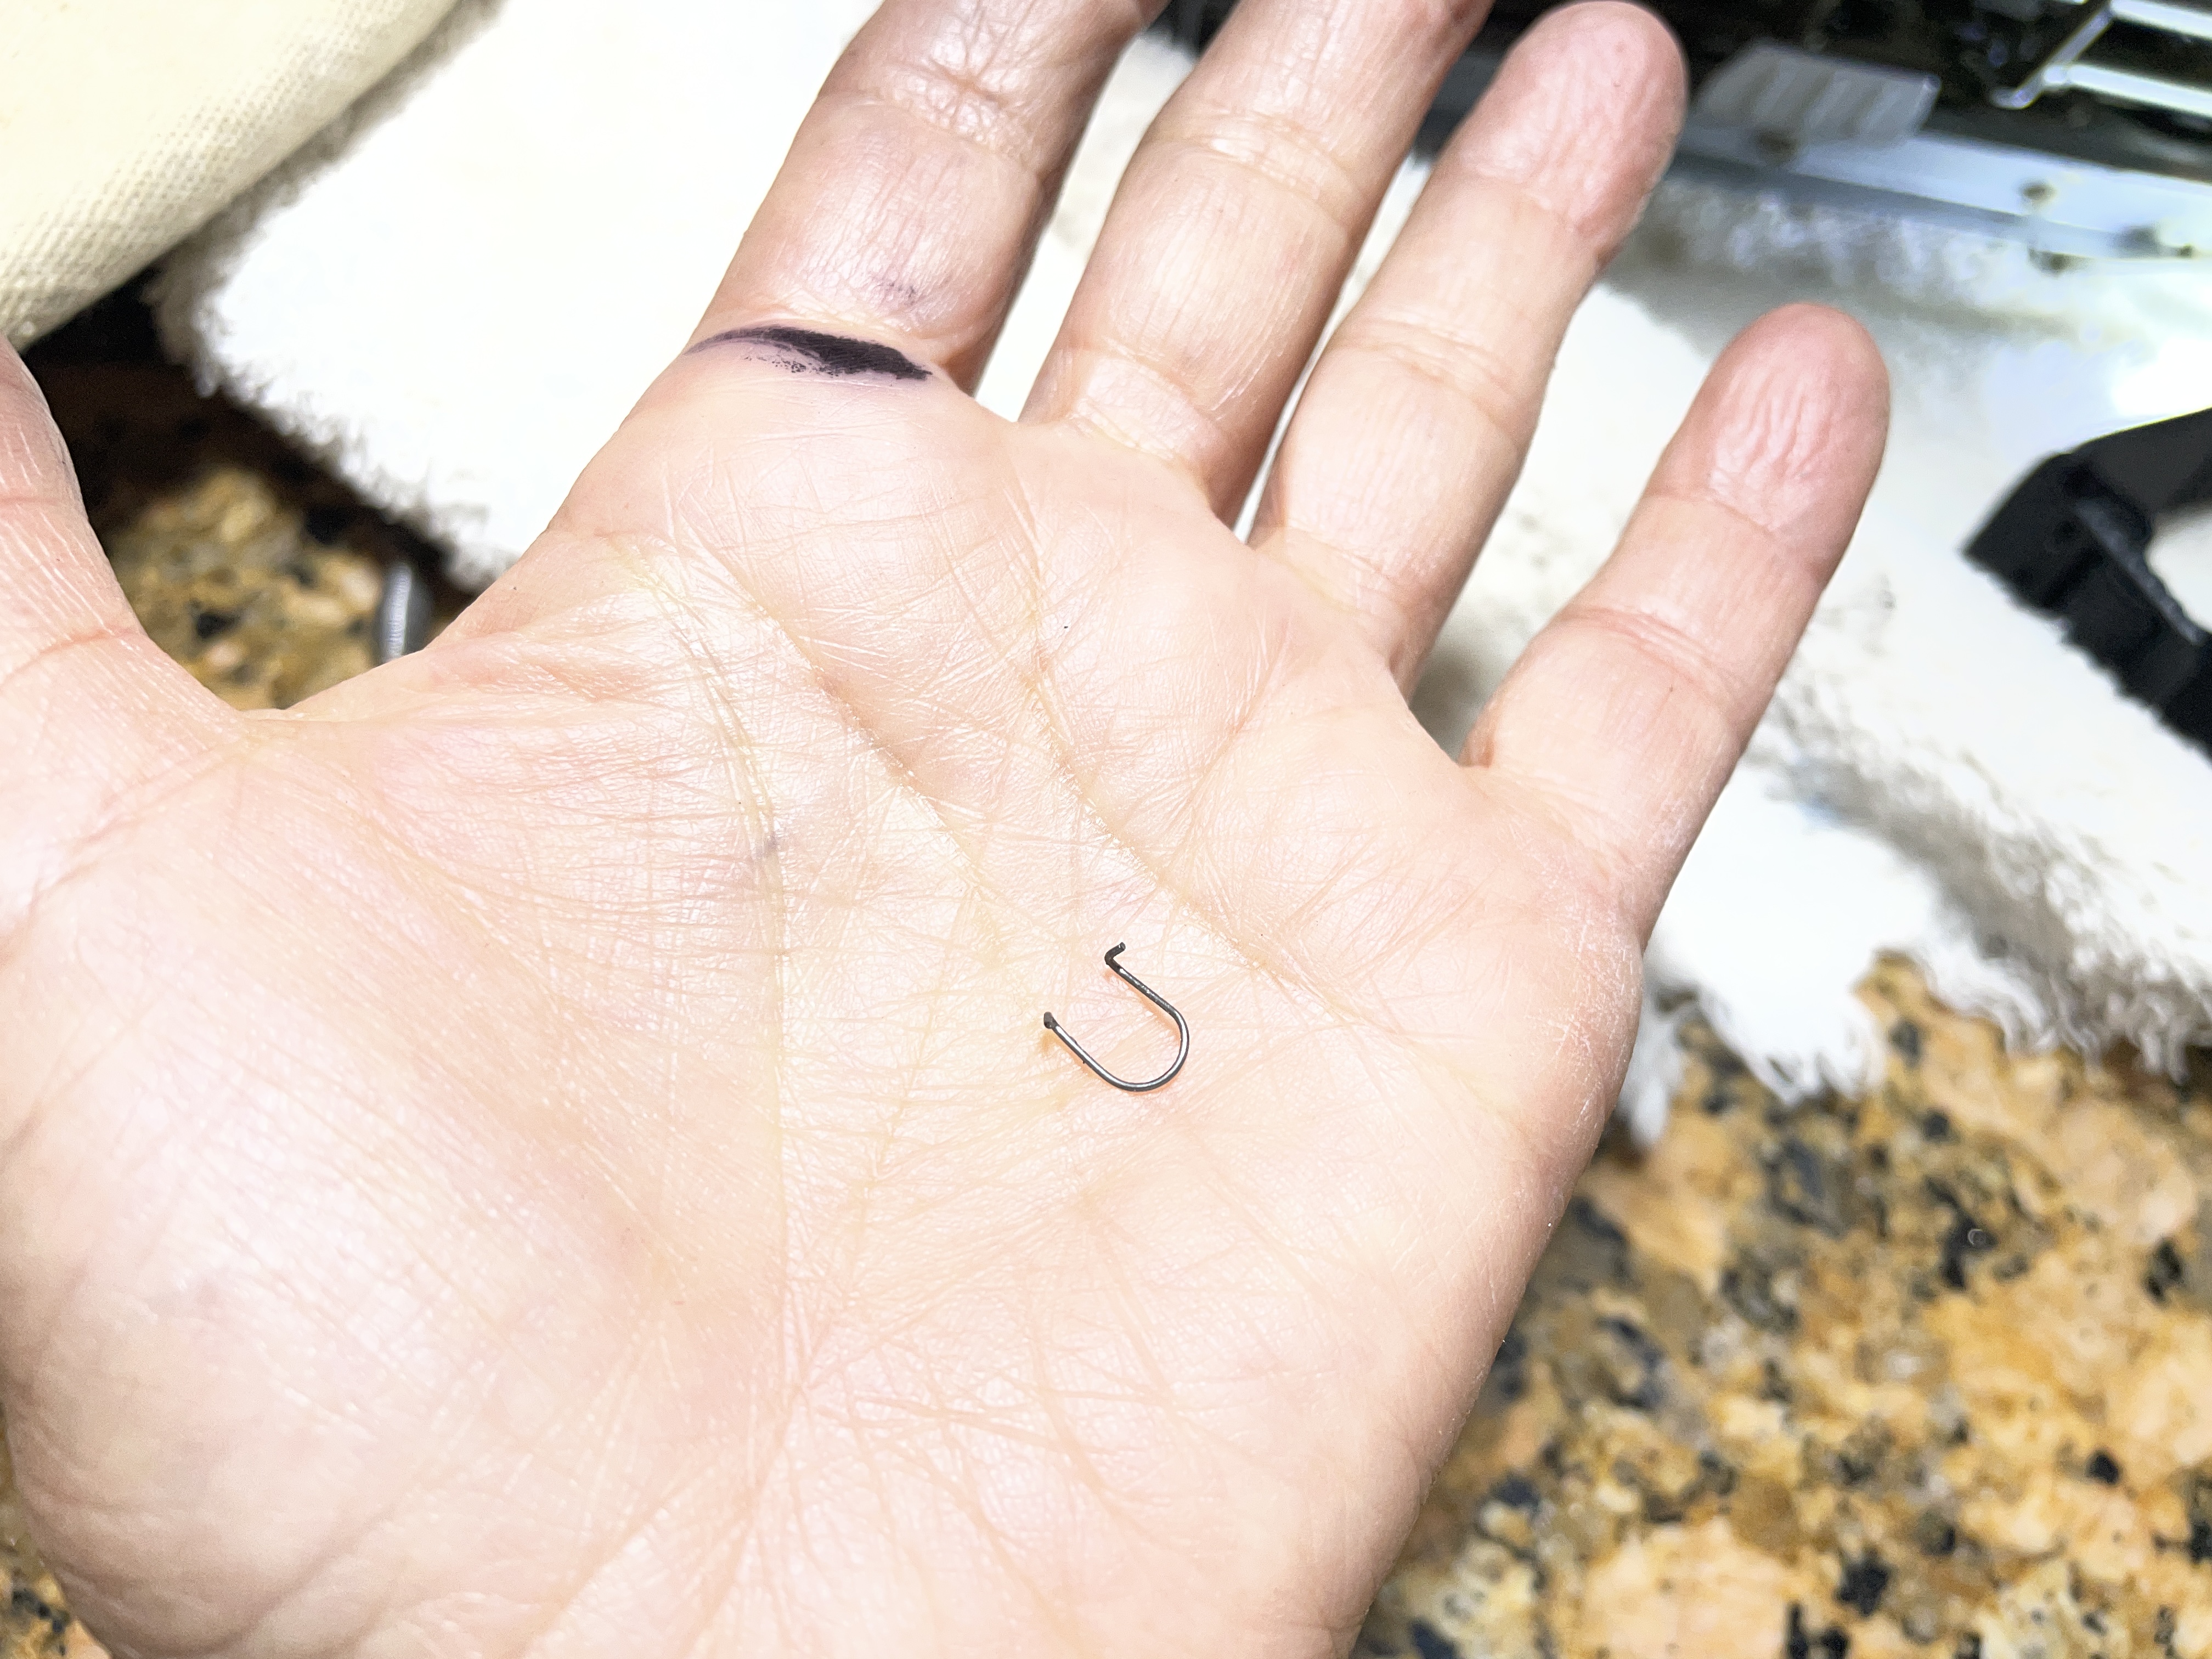
So I took the paper pan / tray out and one of the little “U” shaped tension clips went zing and disappeared into the machine. UGH. After a great deal of searching, I found it. Keep your fingers on those tension clips at all times.
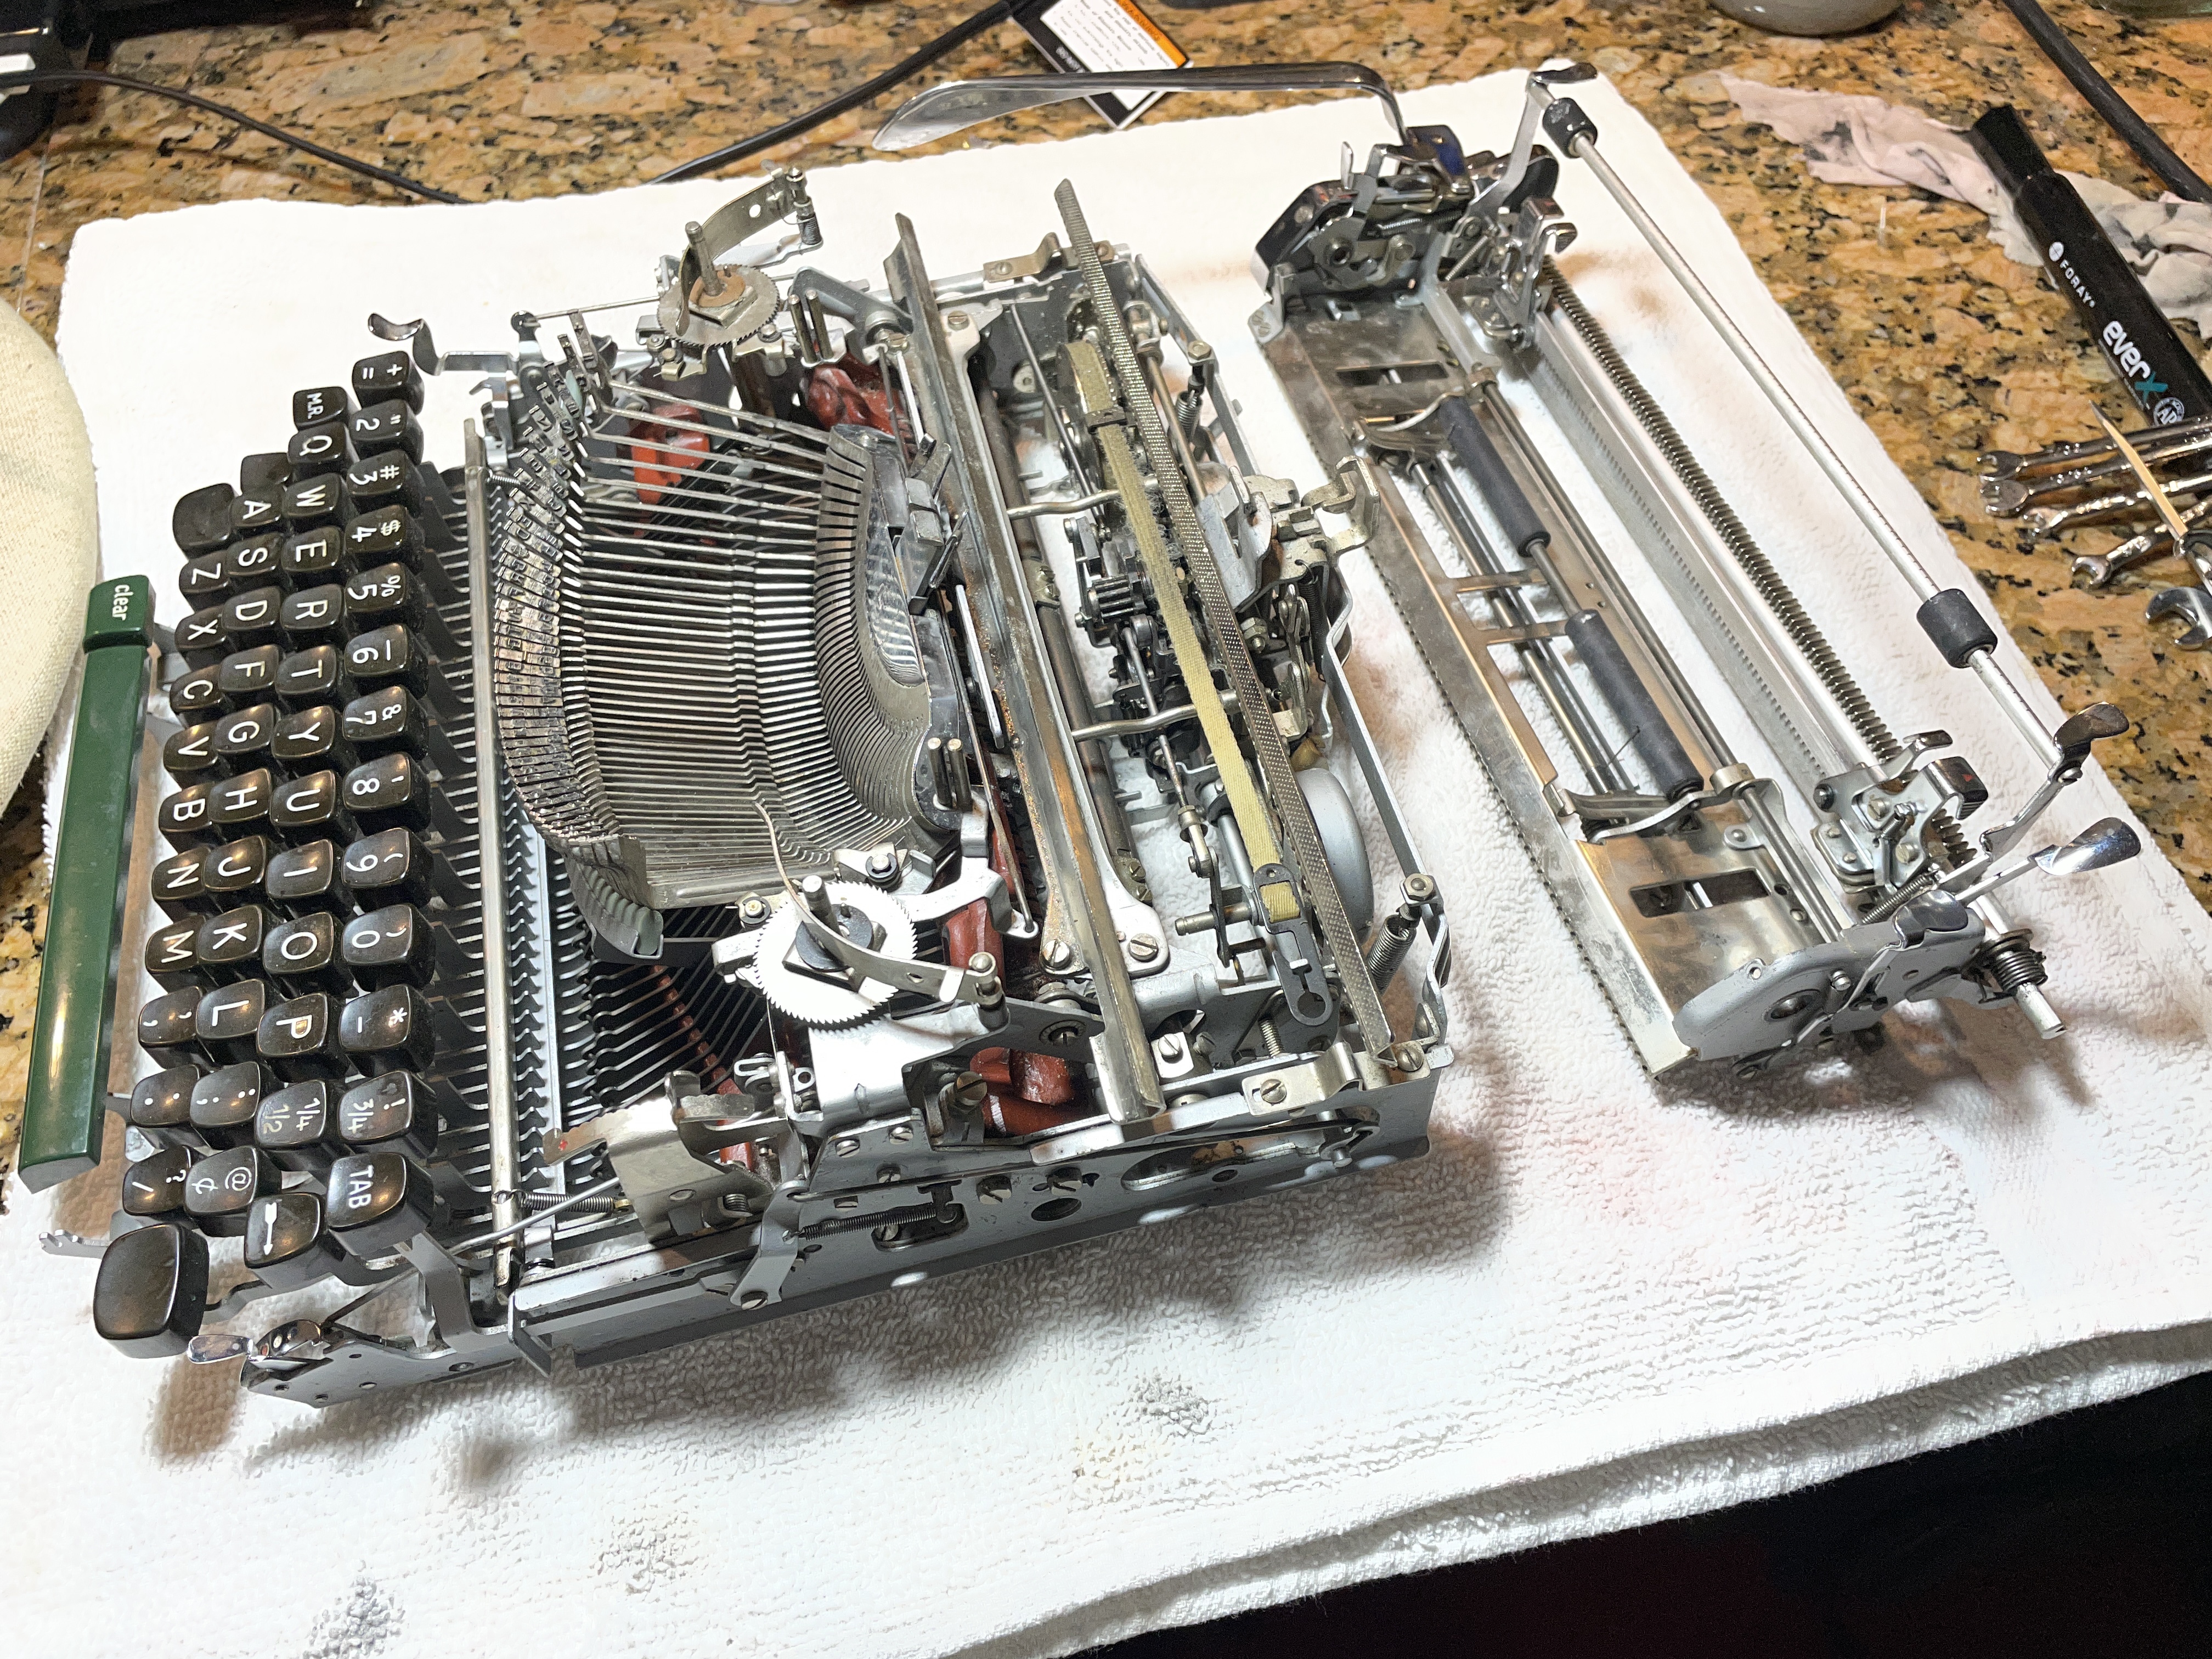
I had a better view of the escapement with the paper pan out, but not clear enough. It was time to remove the carriage. Don’t remove carriages from machines. It is the road of sorrow and regret. However, I had a nonfunctional typewriter at this point, so what’s the worst I could do?
My experience was not as serene as the video above because of my jamming carriage issue. I was a little more sweaty and frantic during the process. I had to keep pressing the tab key because that was the only way I could get the carriage to move off the rails.
Here’s Gerren from HotRod Typewriter again. Like him, I had to press down on the escapement release roller to get the carriage completely off.
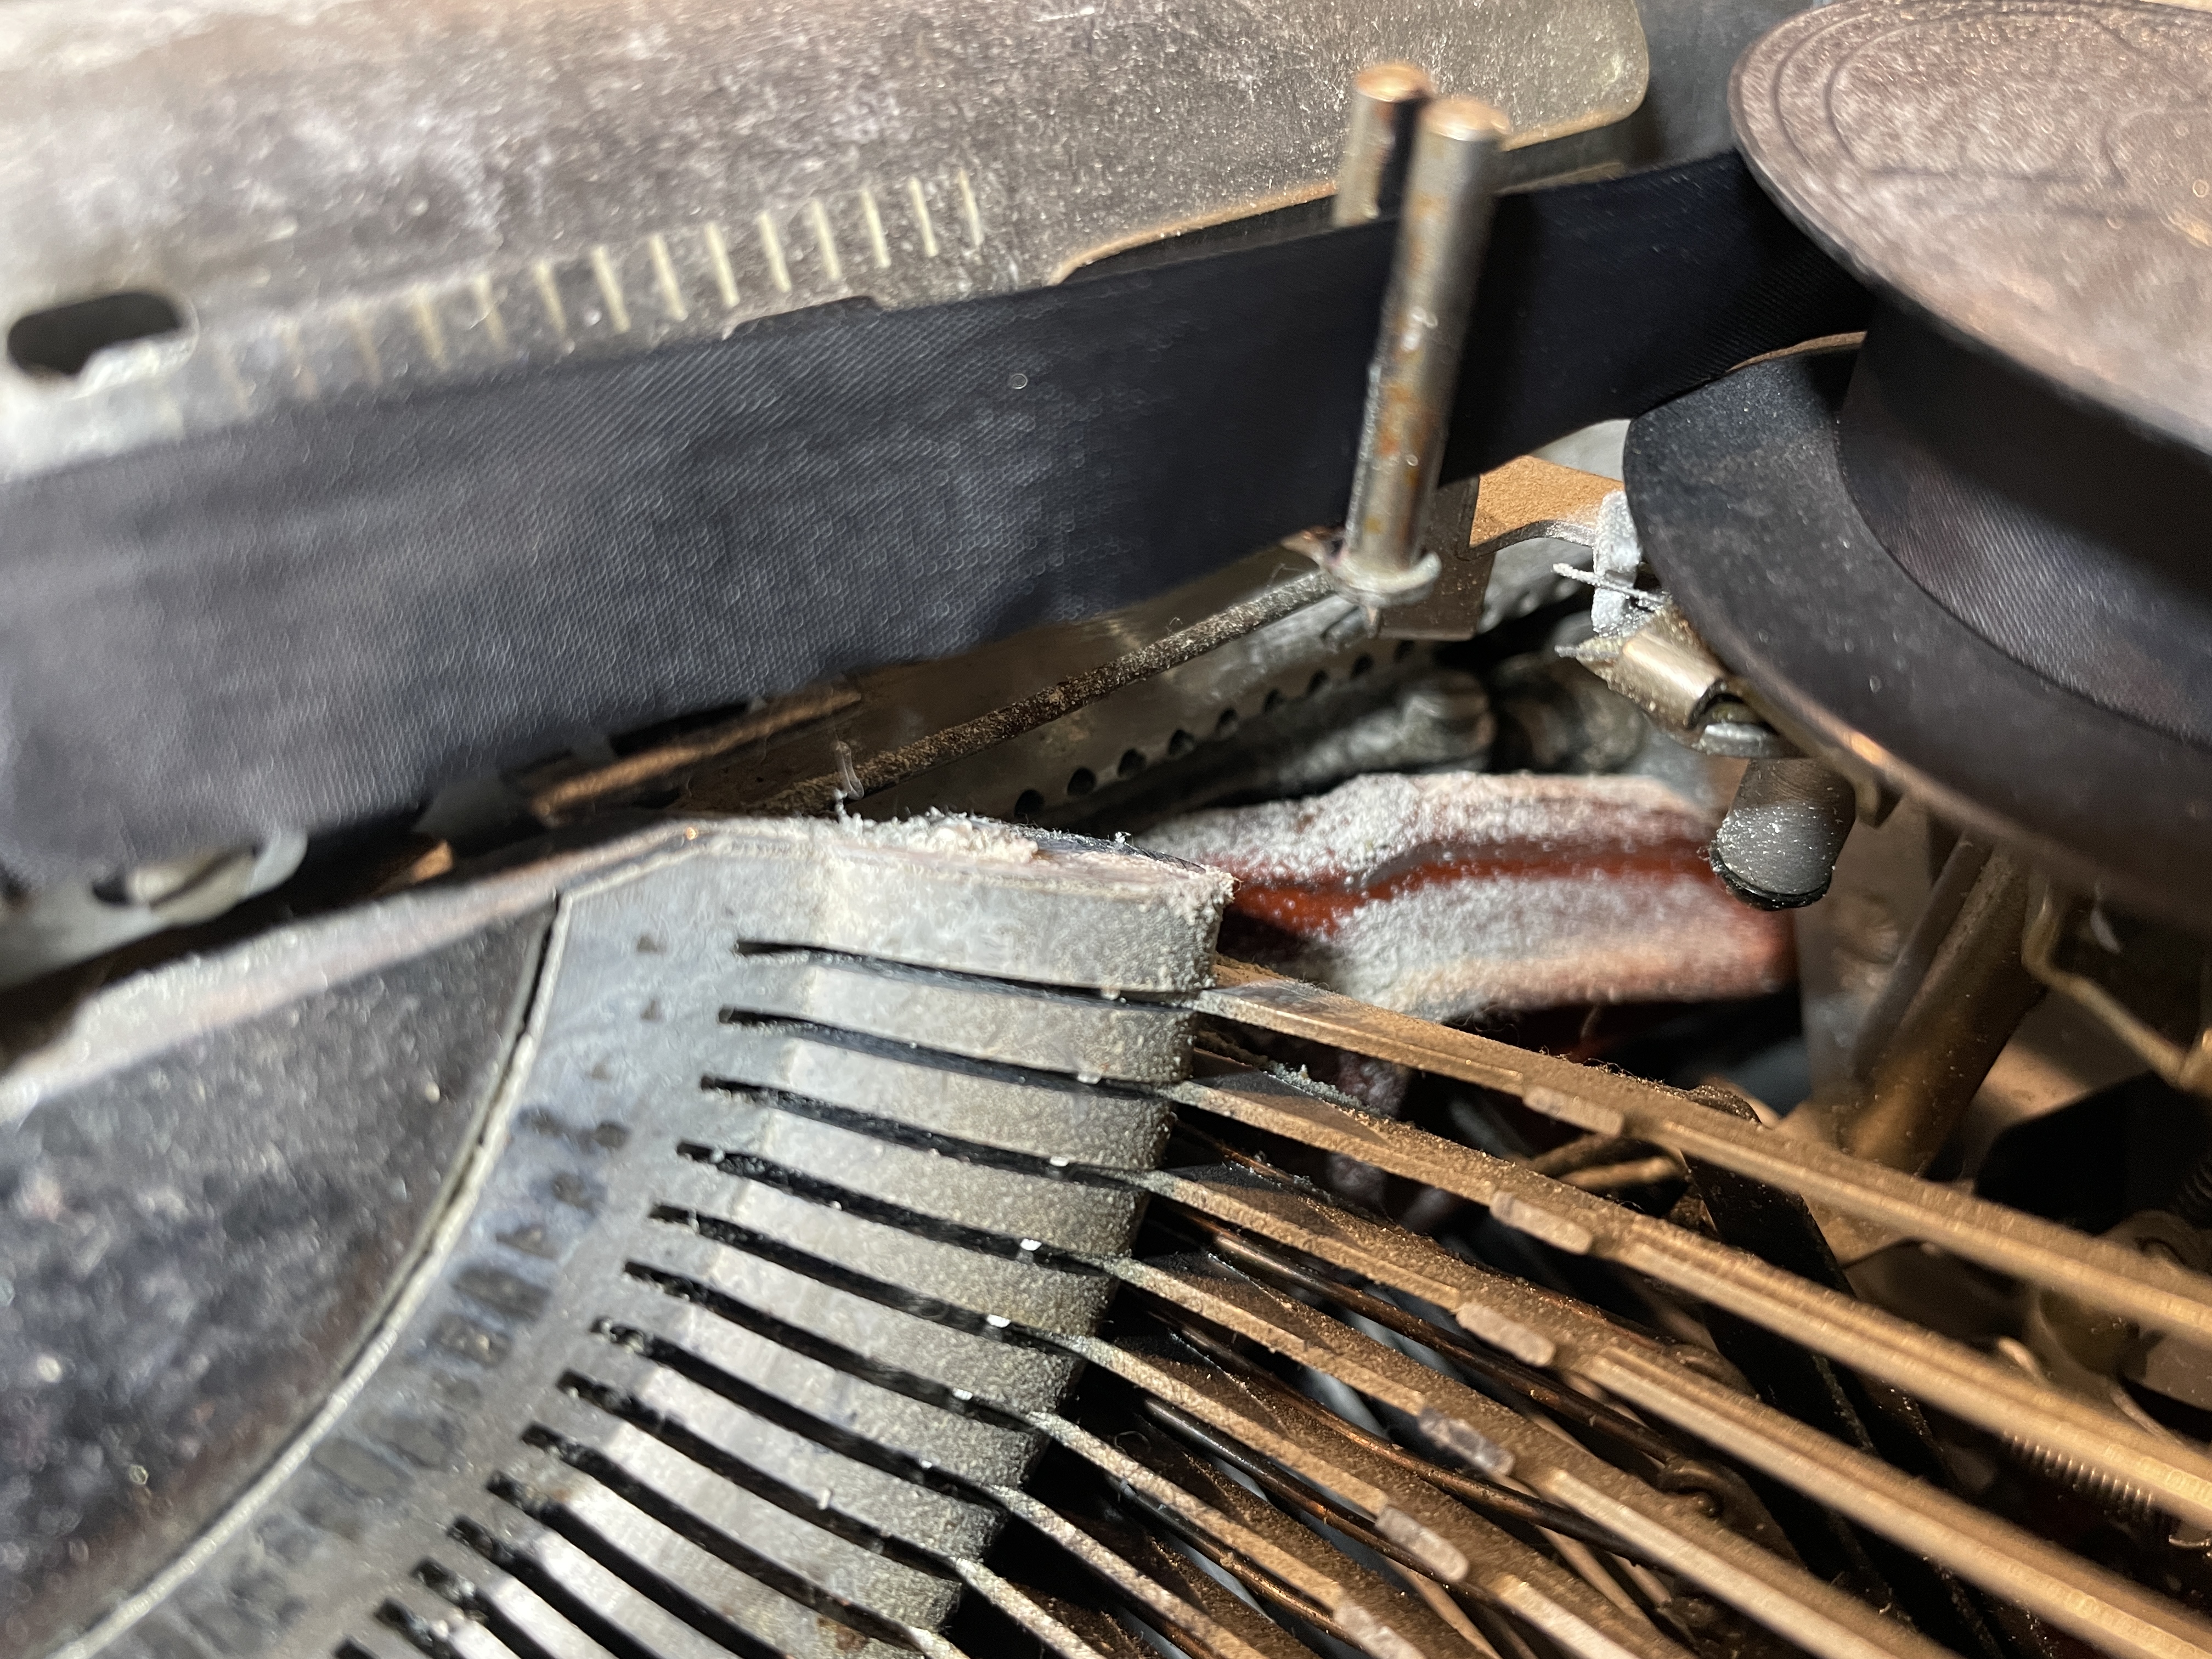
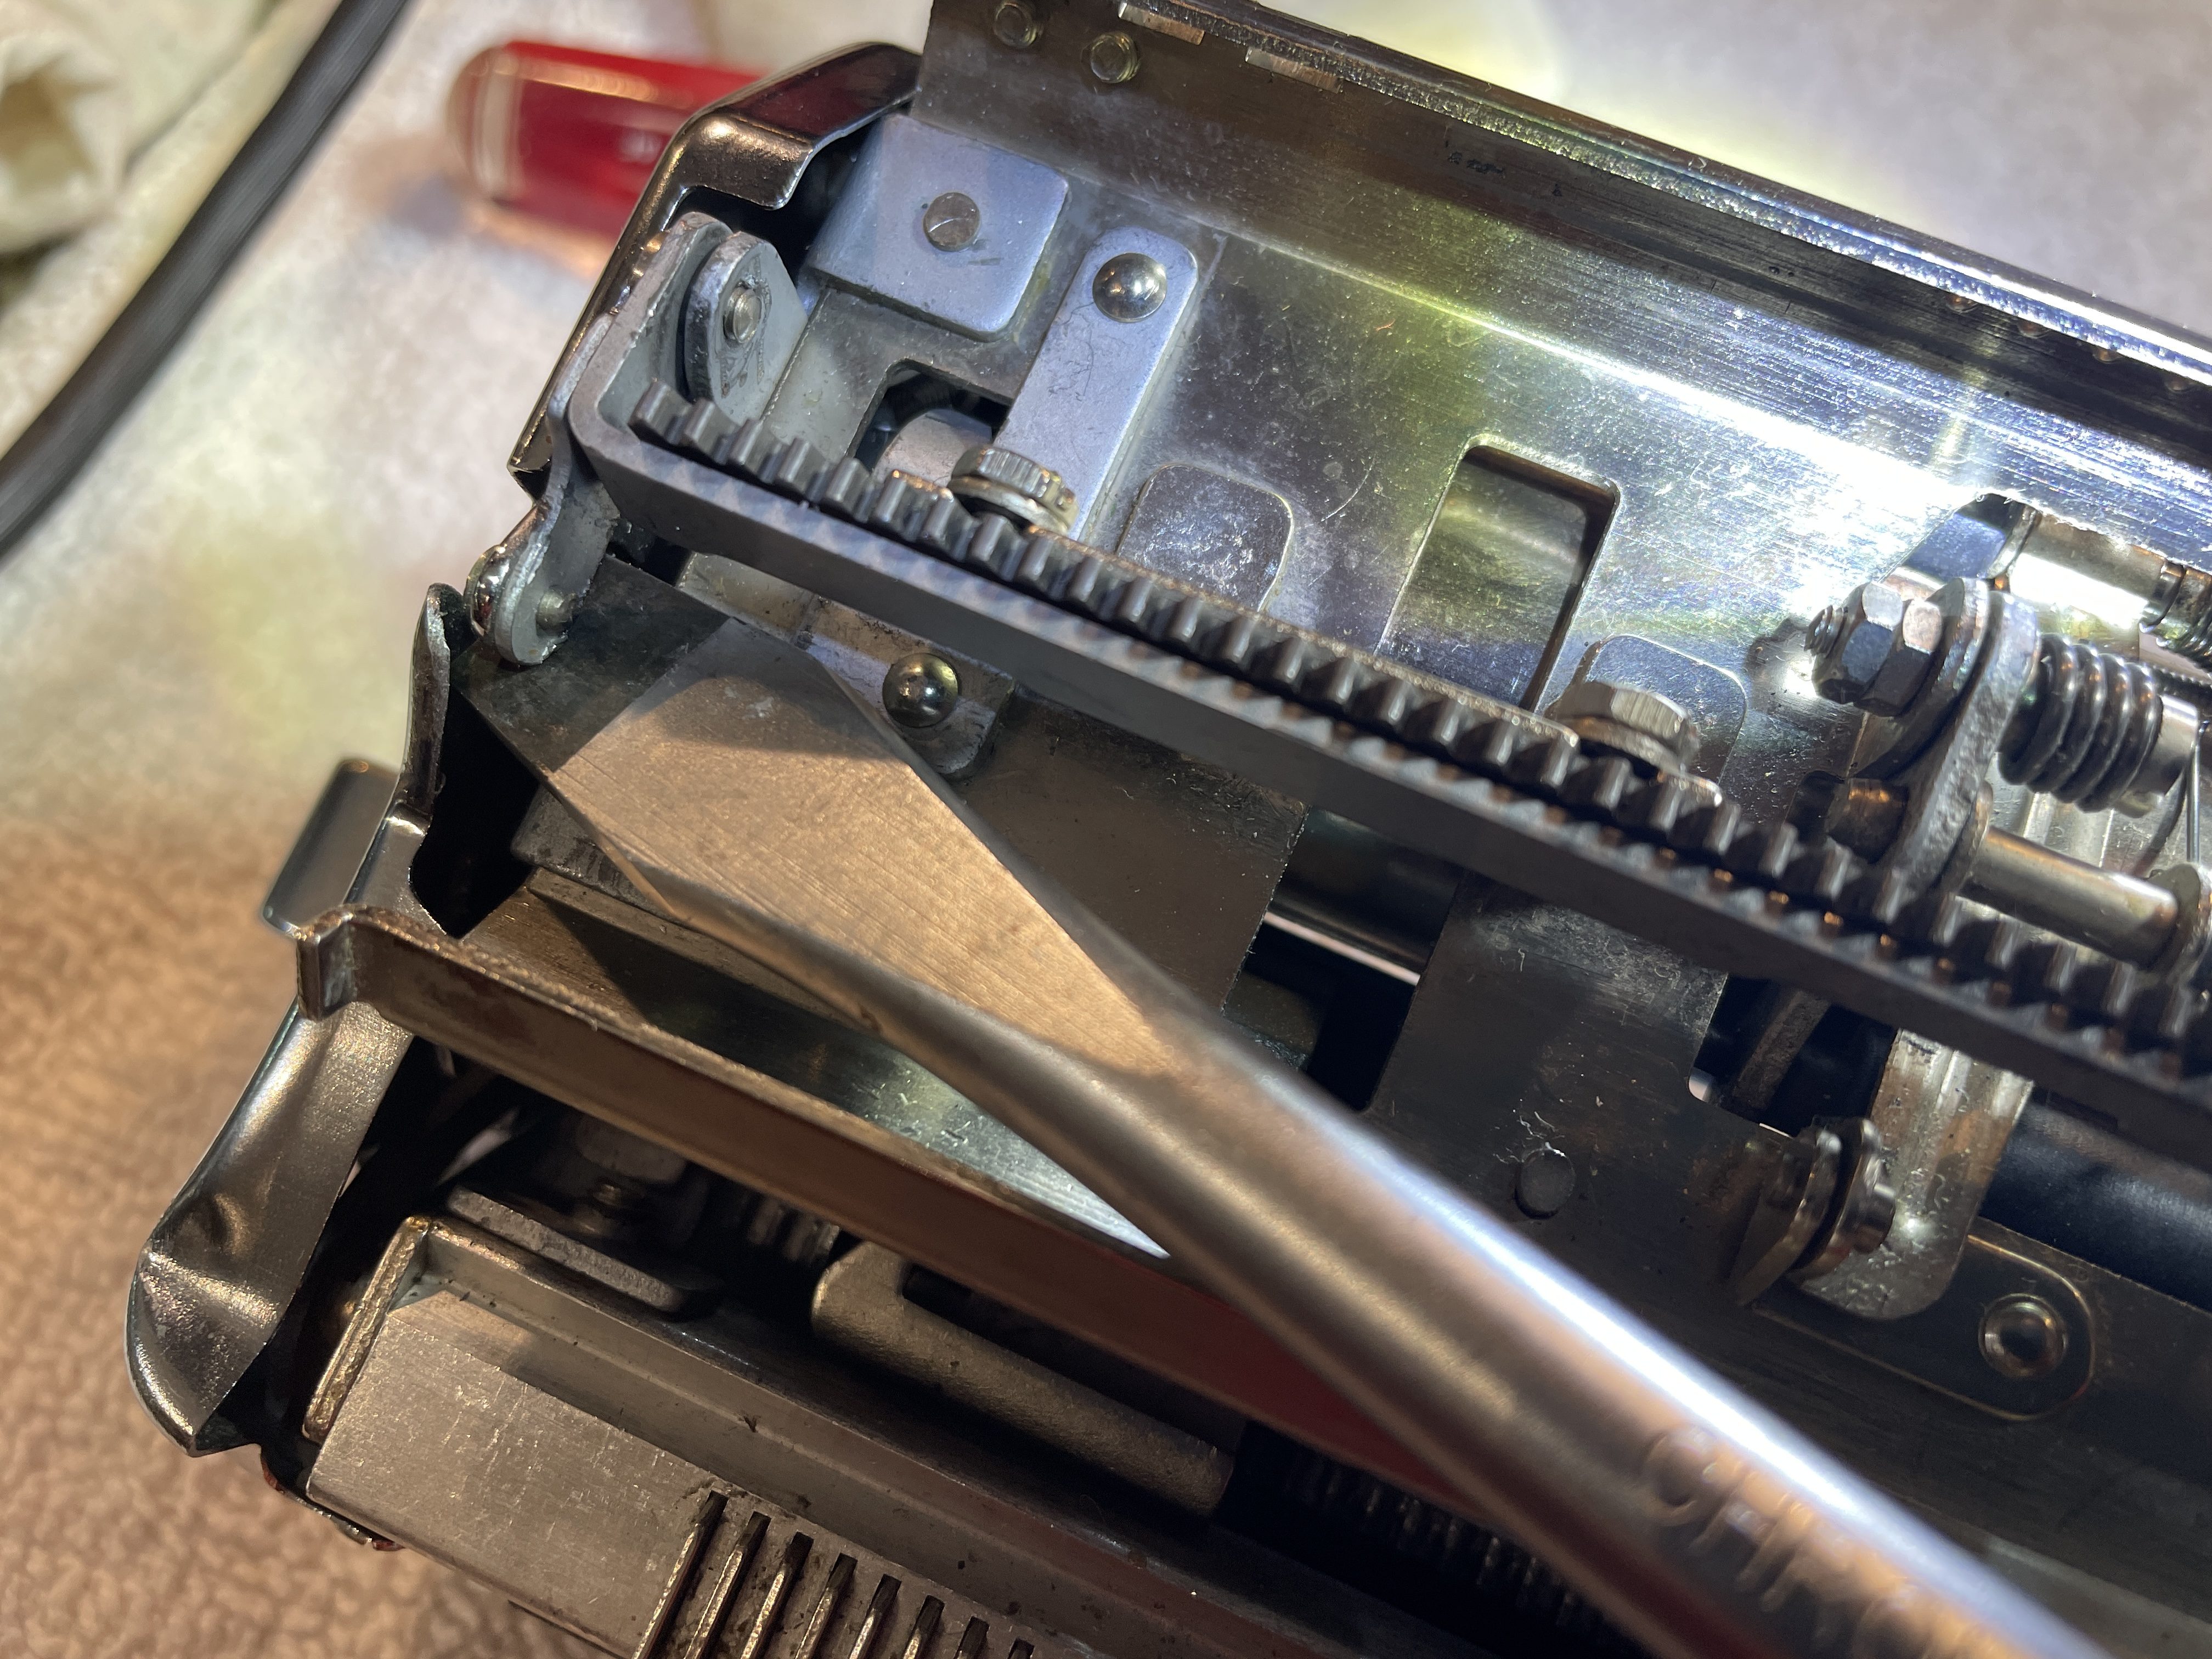
The deeper I got into the machine, the more convinced I became that there was something funny going on in the escapement. With the carriage off, I studied it while I turned the escapement star wheel by hand to simulate tension on it from the mainspring.
Loose dog binding
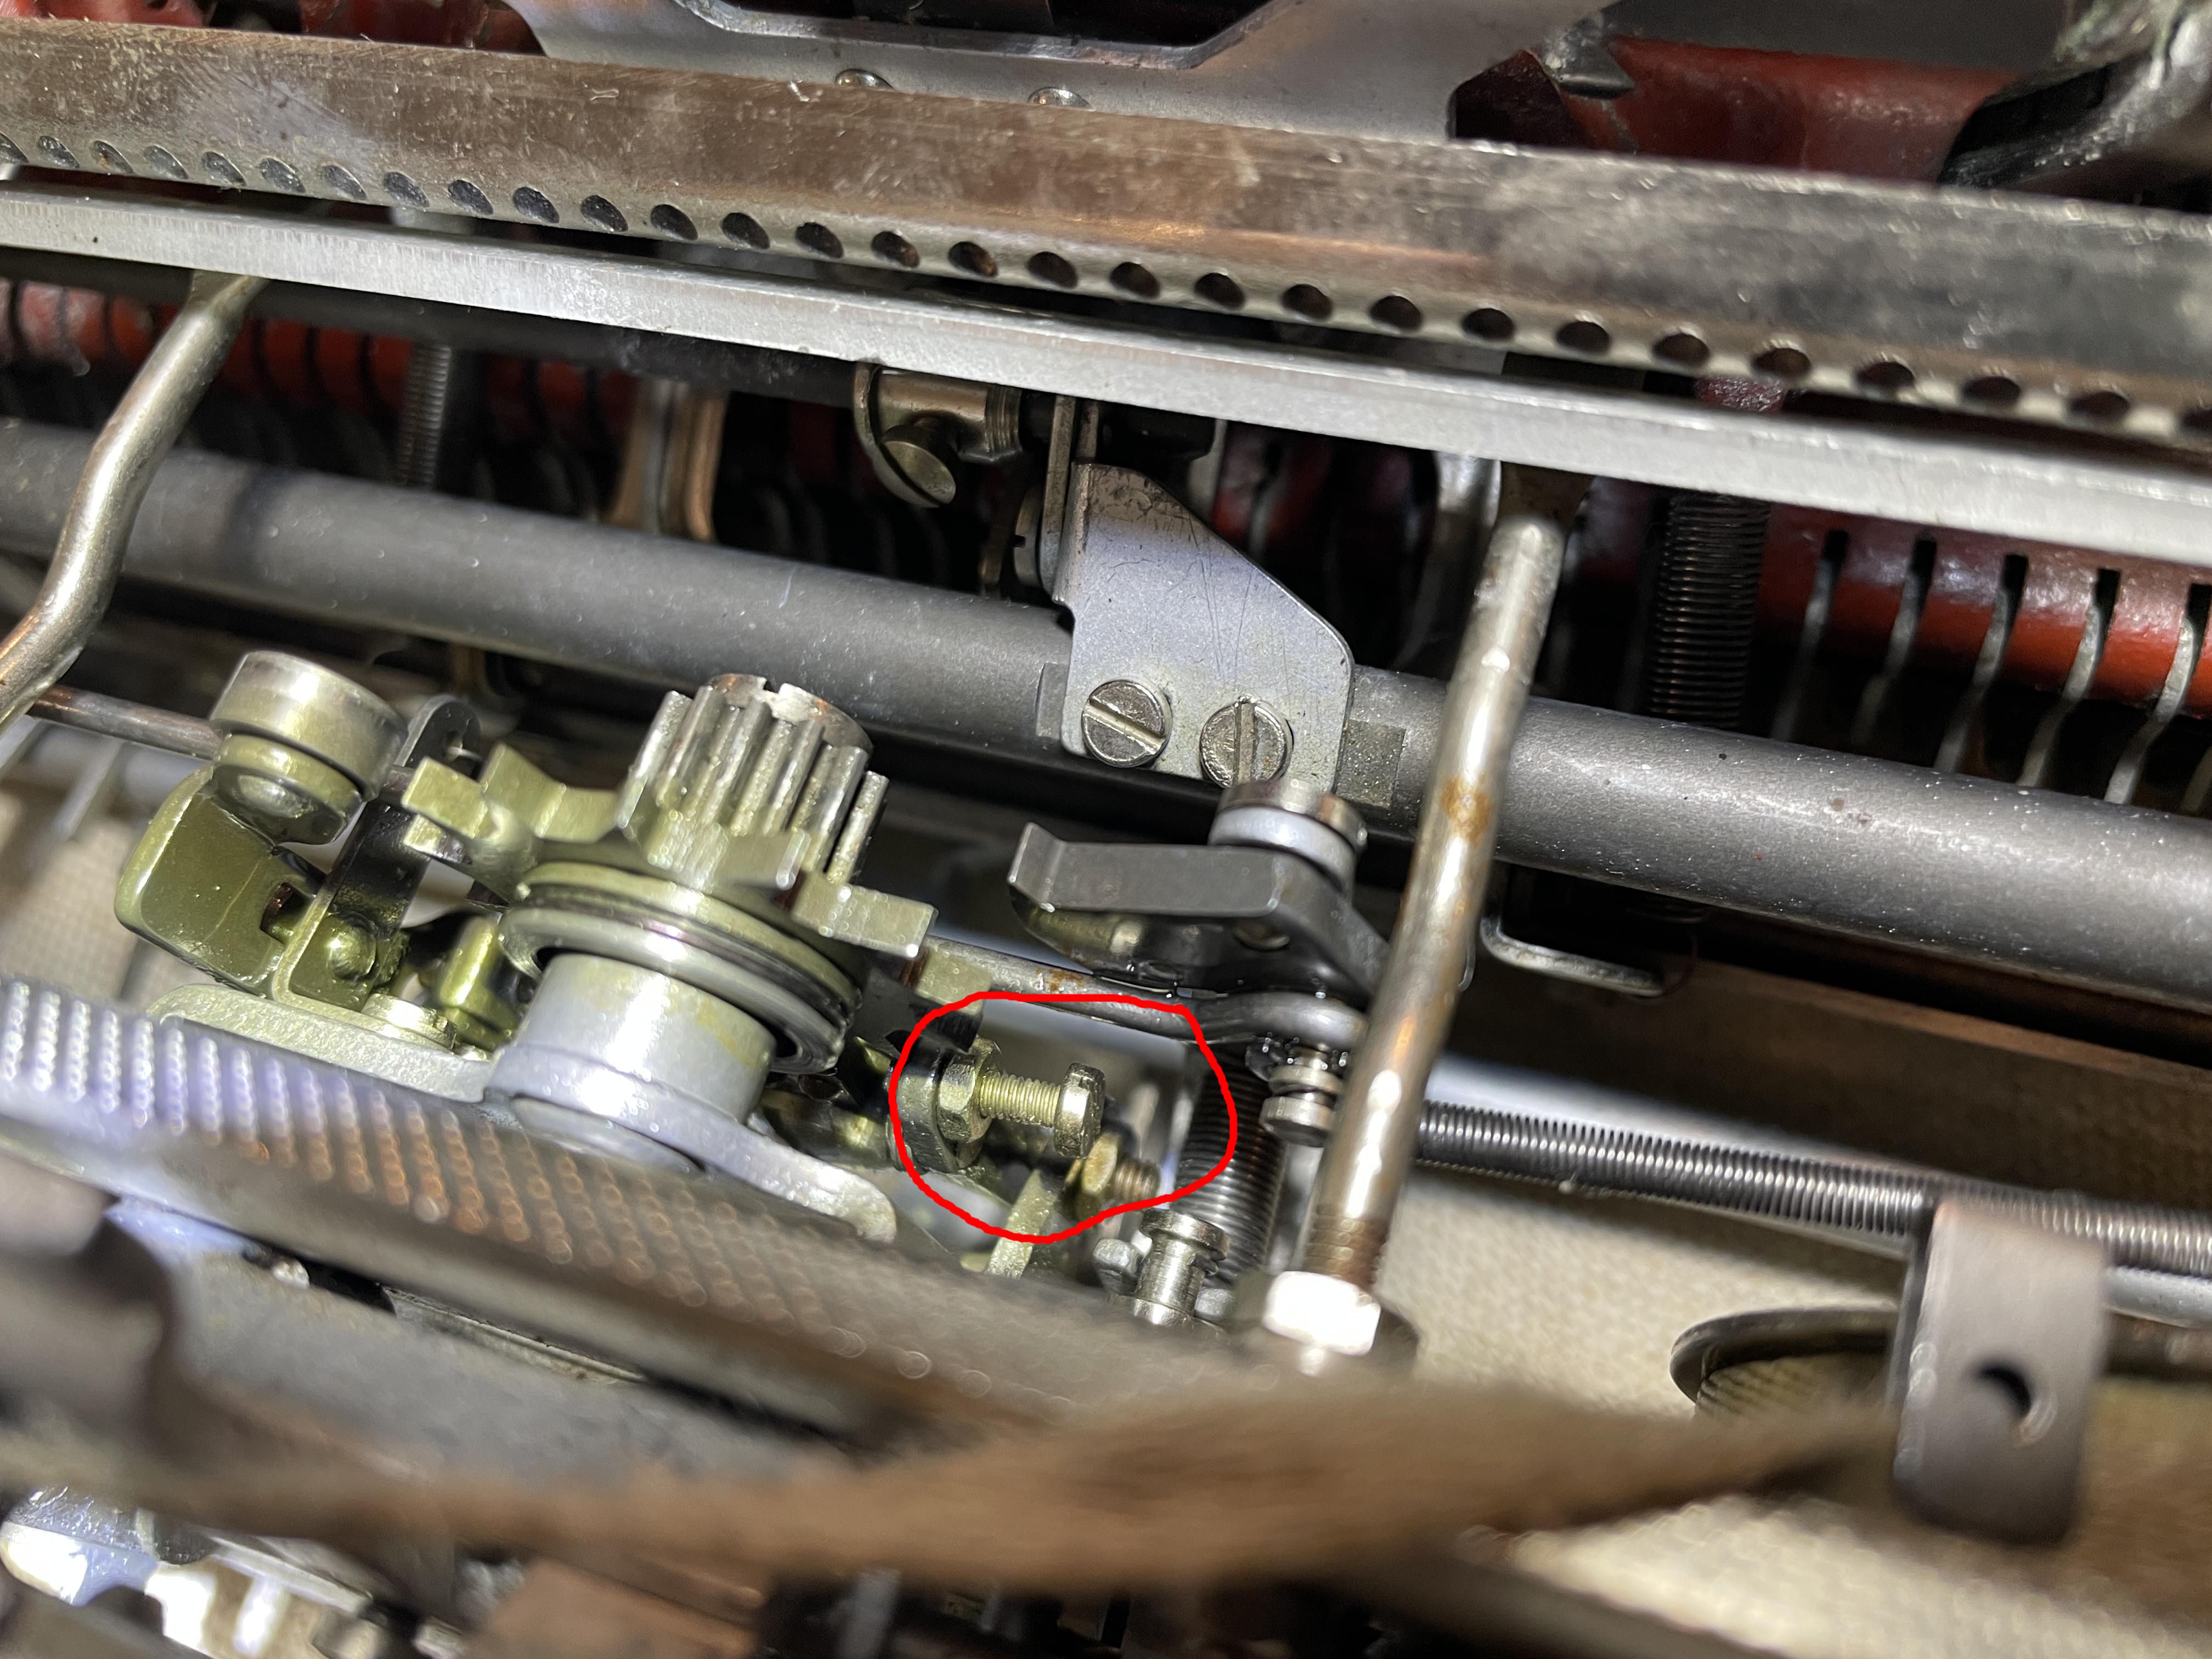
What I saw was that the loose dog on the escapement rocker was not jumping out of the way of the escapement wheel when its job in the escapement cycle was done. I decided to back out this screw:
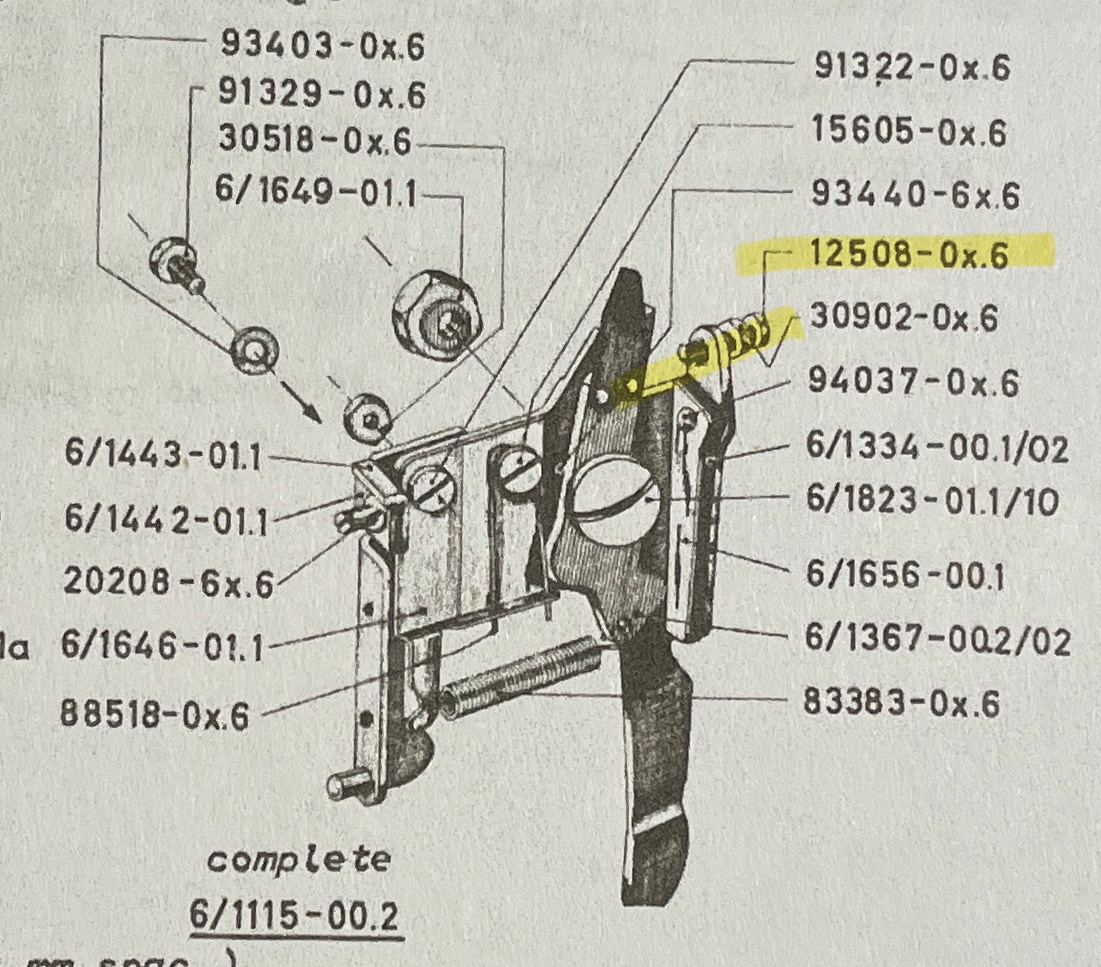
The screw doesn’t have a unique name in the parts manual, just a generic “cylinder head binding screw” but I’m going to call it a dog limiter screw with lock nut.
So I loosened the lock nut and backed out that screw a hair to give the loose dog some breathing room.
I don’t know whether I did the right thing, but I was then able simulate an unjammed carriage by rotating the escapement wheel by hand.
Note: I should have worn gloves while I was doing this because later perusal of the Olympia SM Repair Bible brought me to this page:
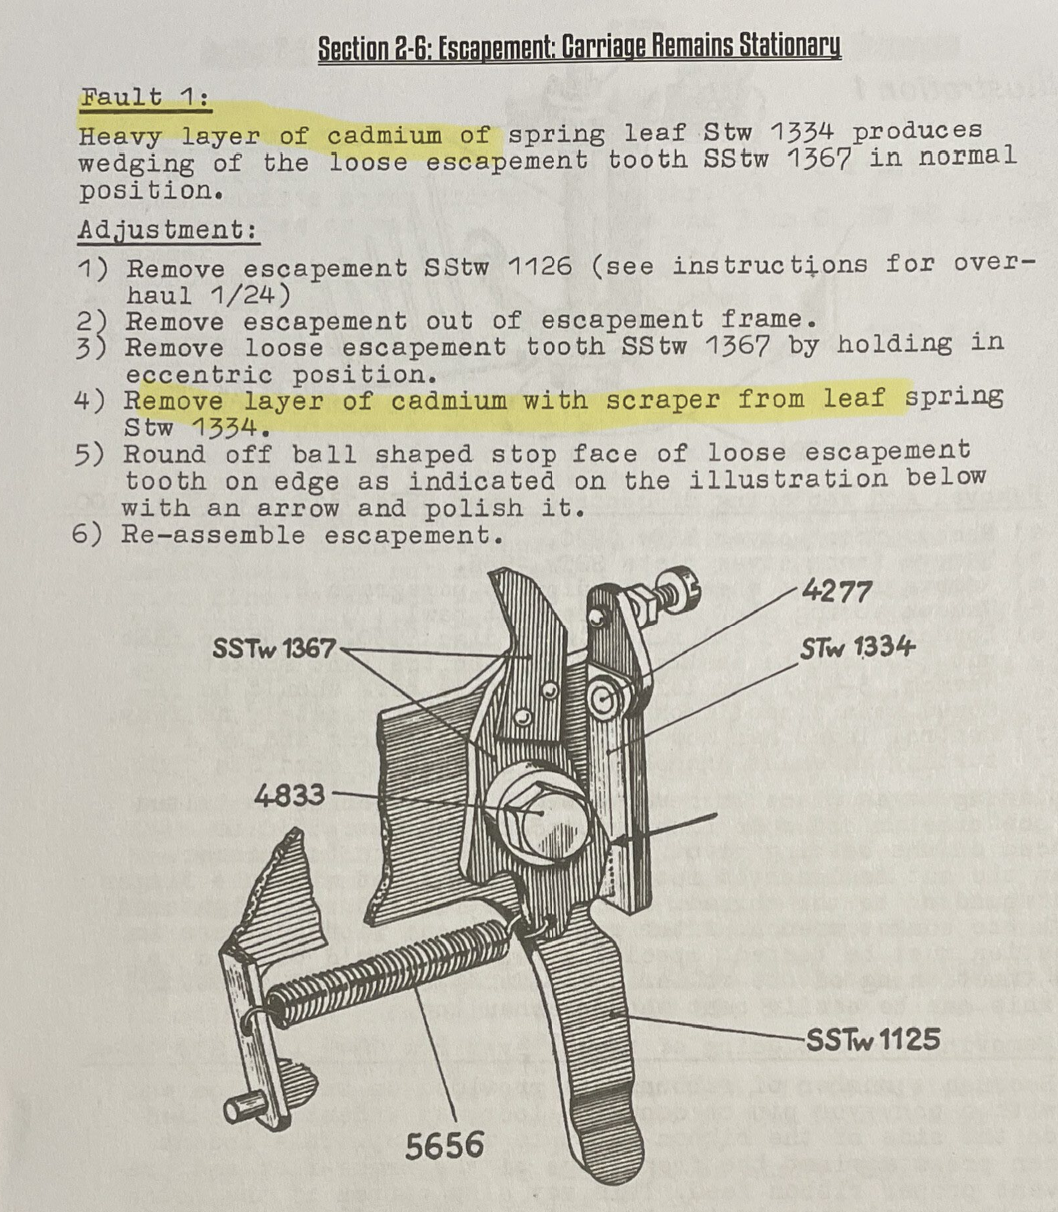
Oh, hell no. I wasn’t going to be scraping cadmium any time soon. Wear gloves, people.
I put the carriage back on, and yes, the carriage release was working! It was typing in a very gummy way, but typing. So, so gummy.
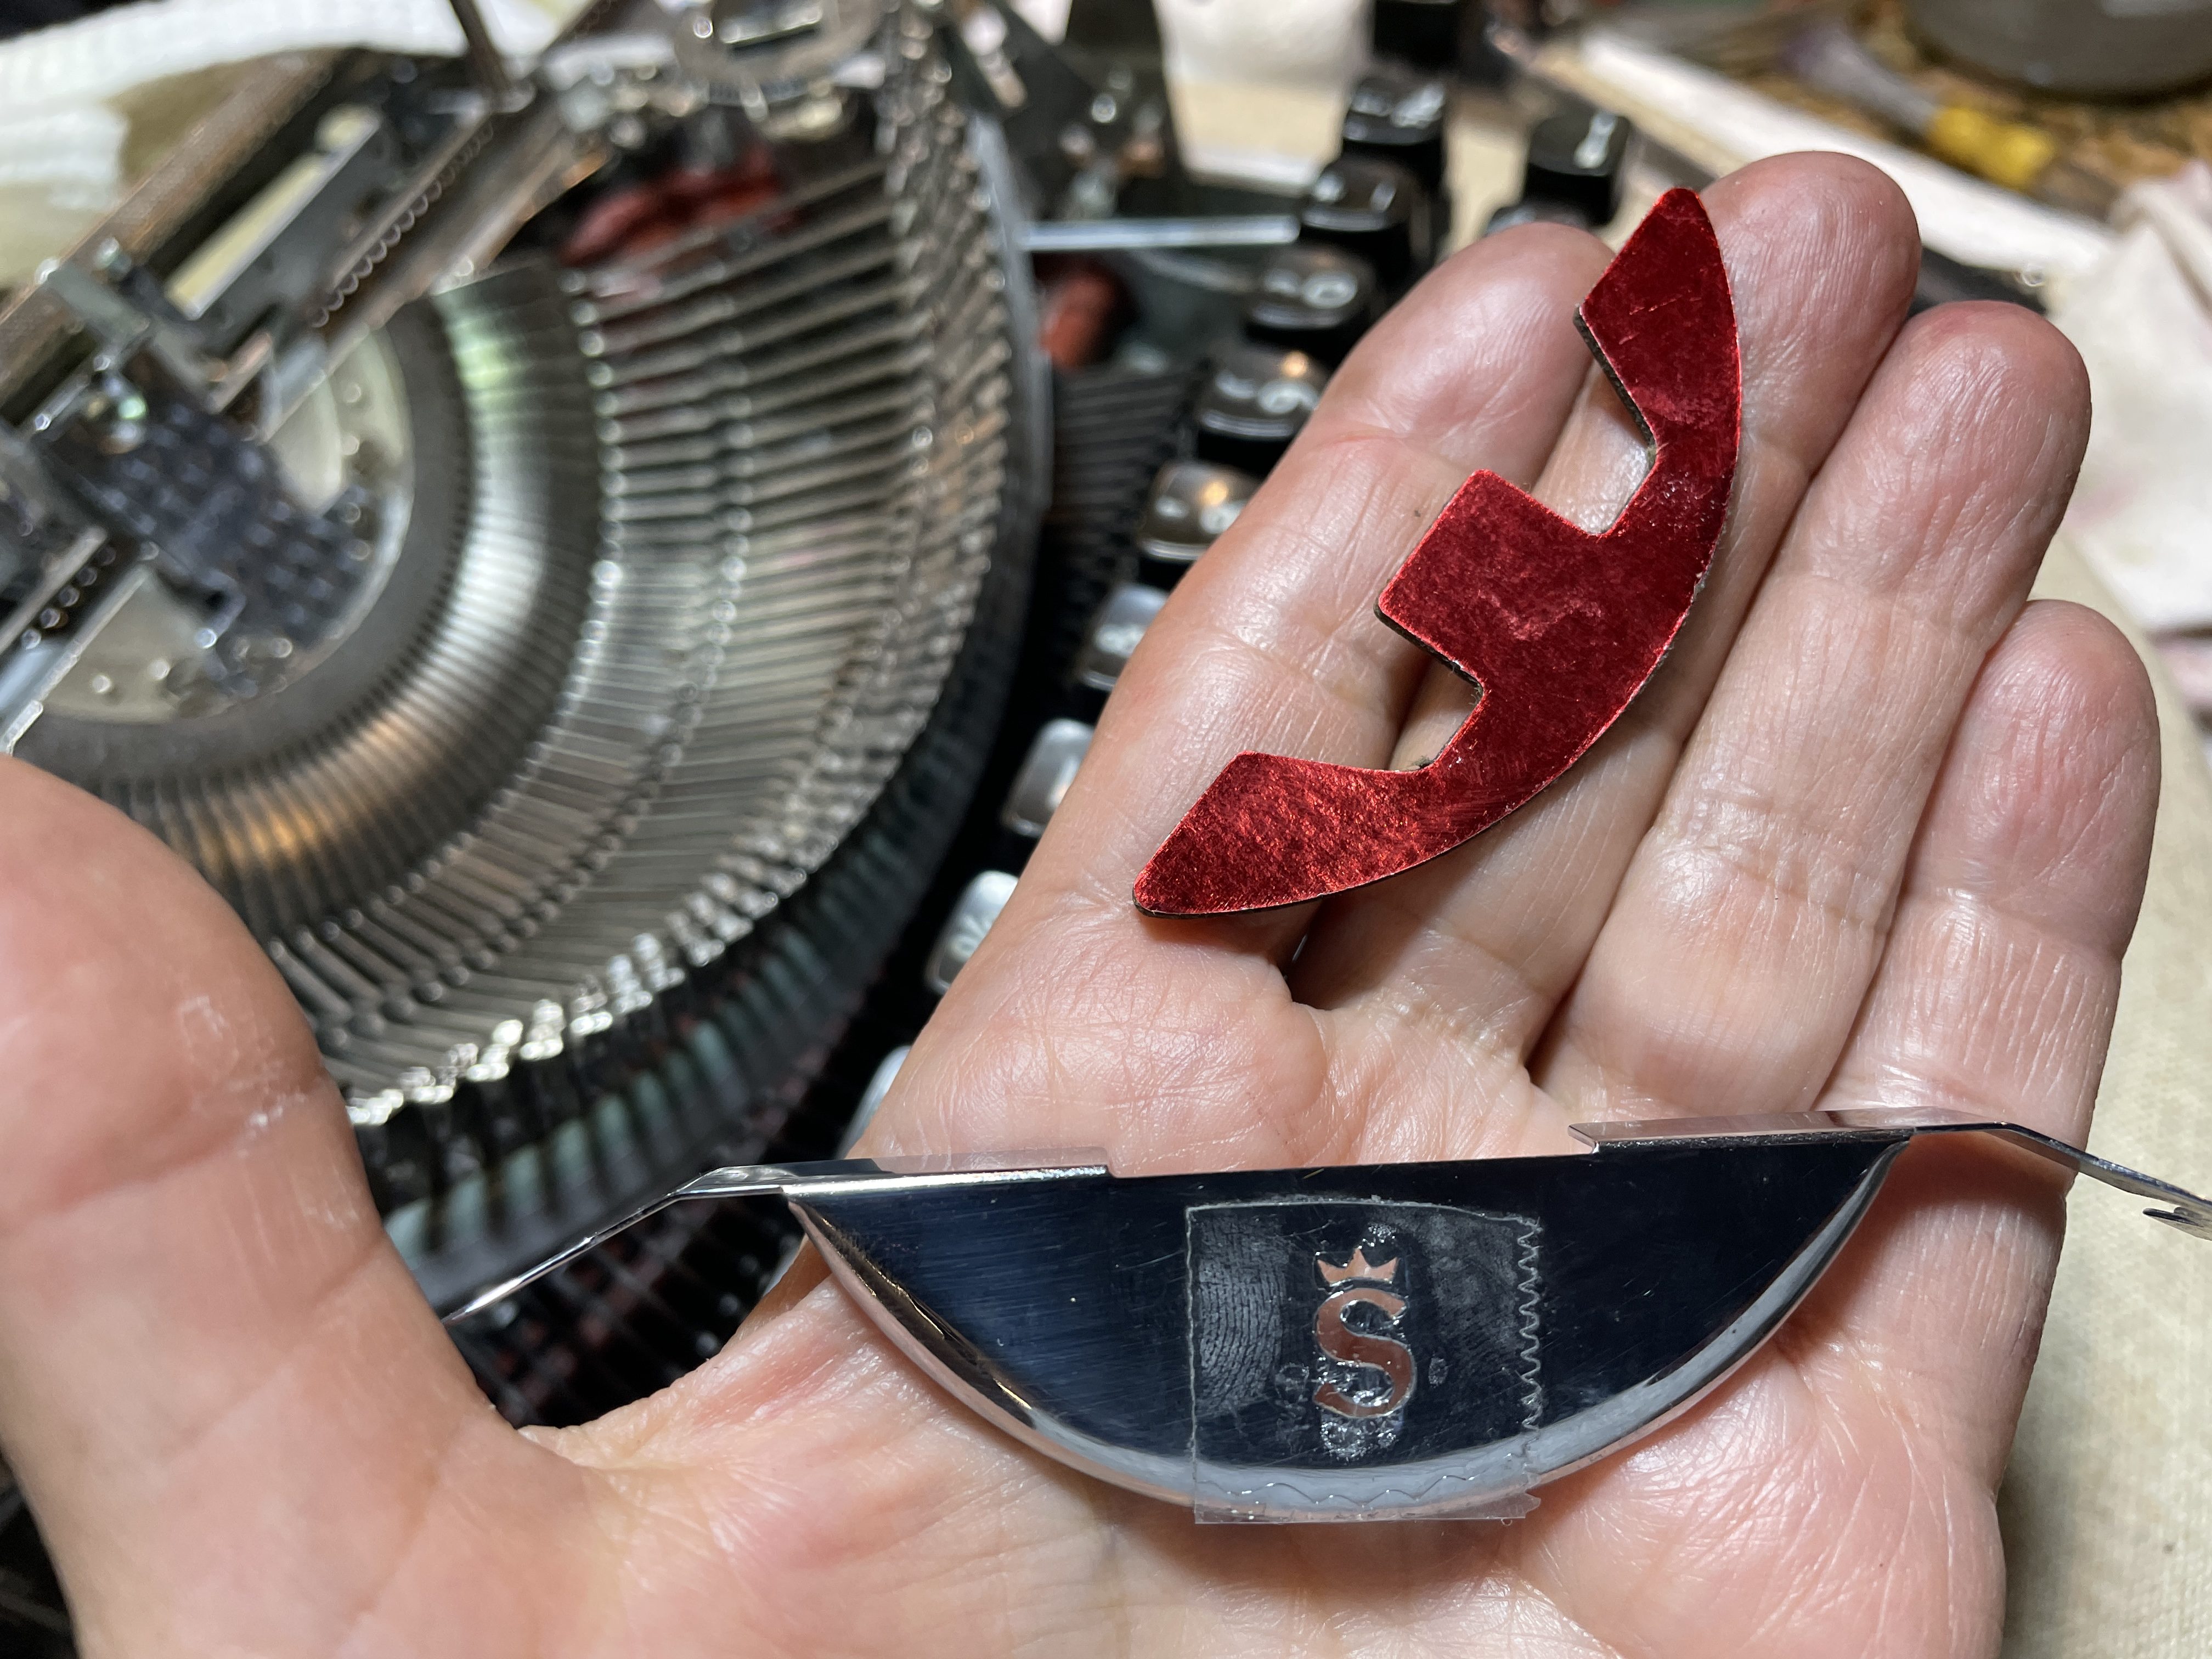
It needed more intensive cleaning, so I removed the carriage again. Here is something I should have done from the outset: remove the segment shield. There is a pretty red foil backing that could have been damaged by solvents. I had covered it with tape, but I should have removed it at the very beginning of my cleaning.
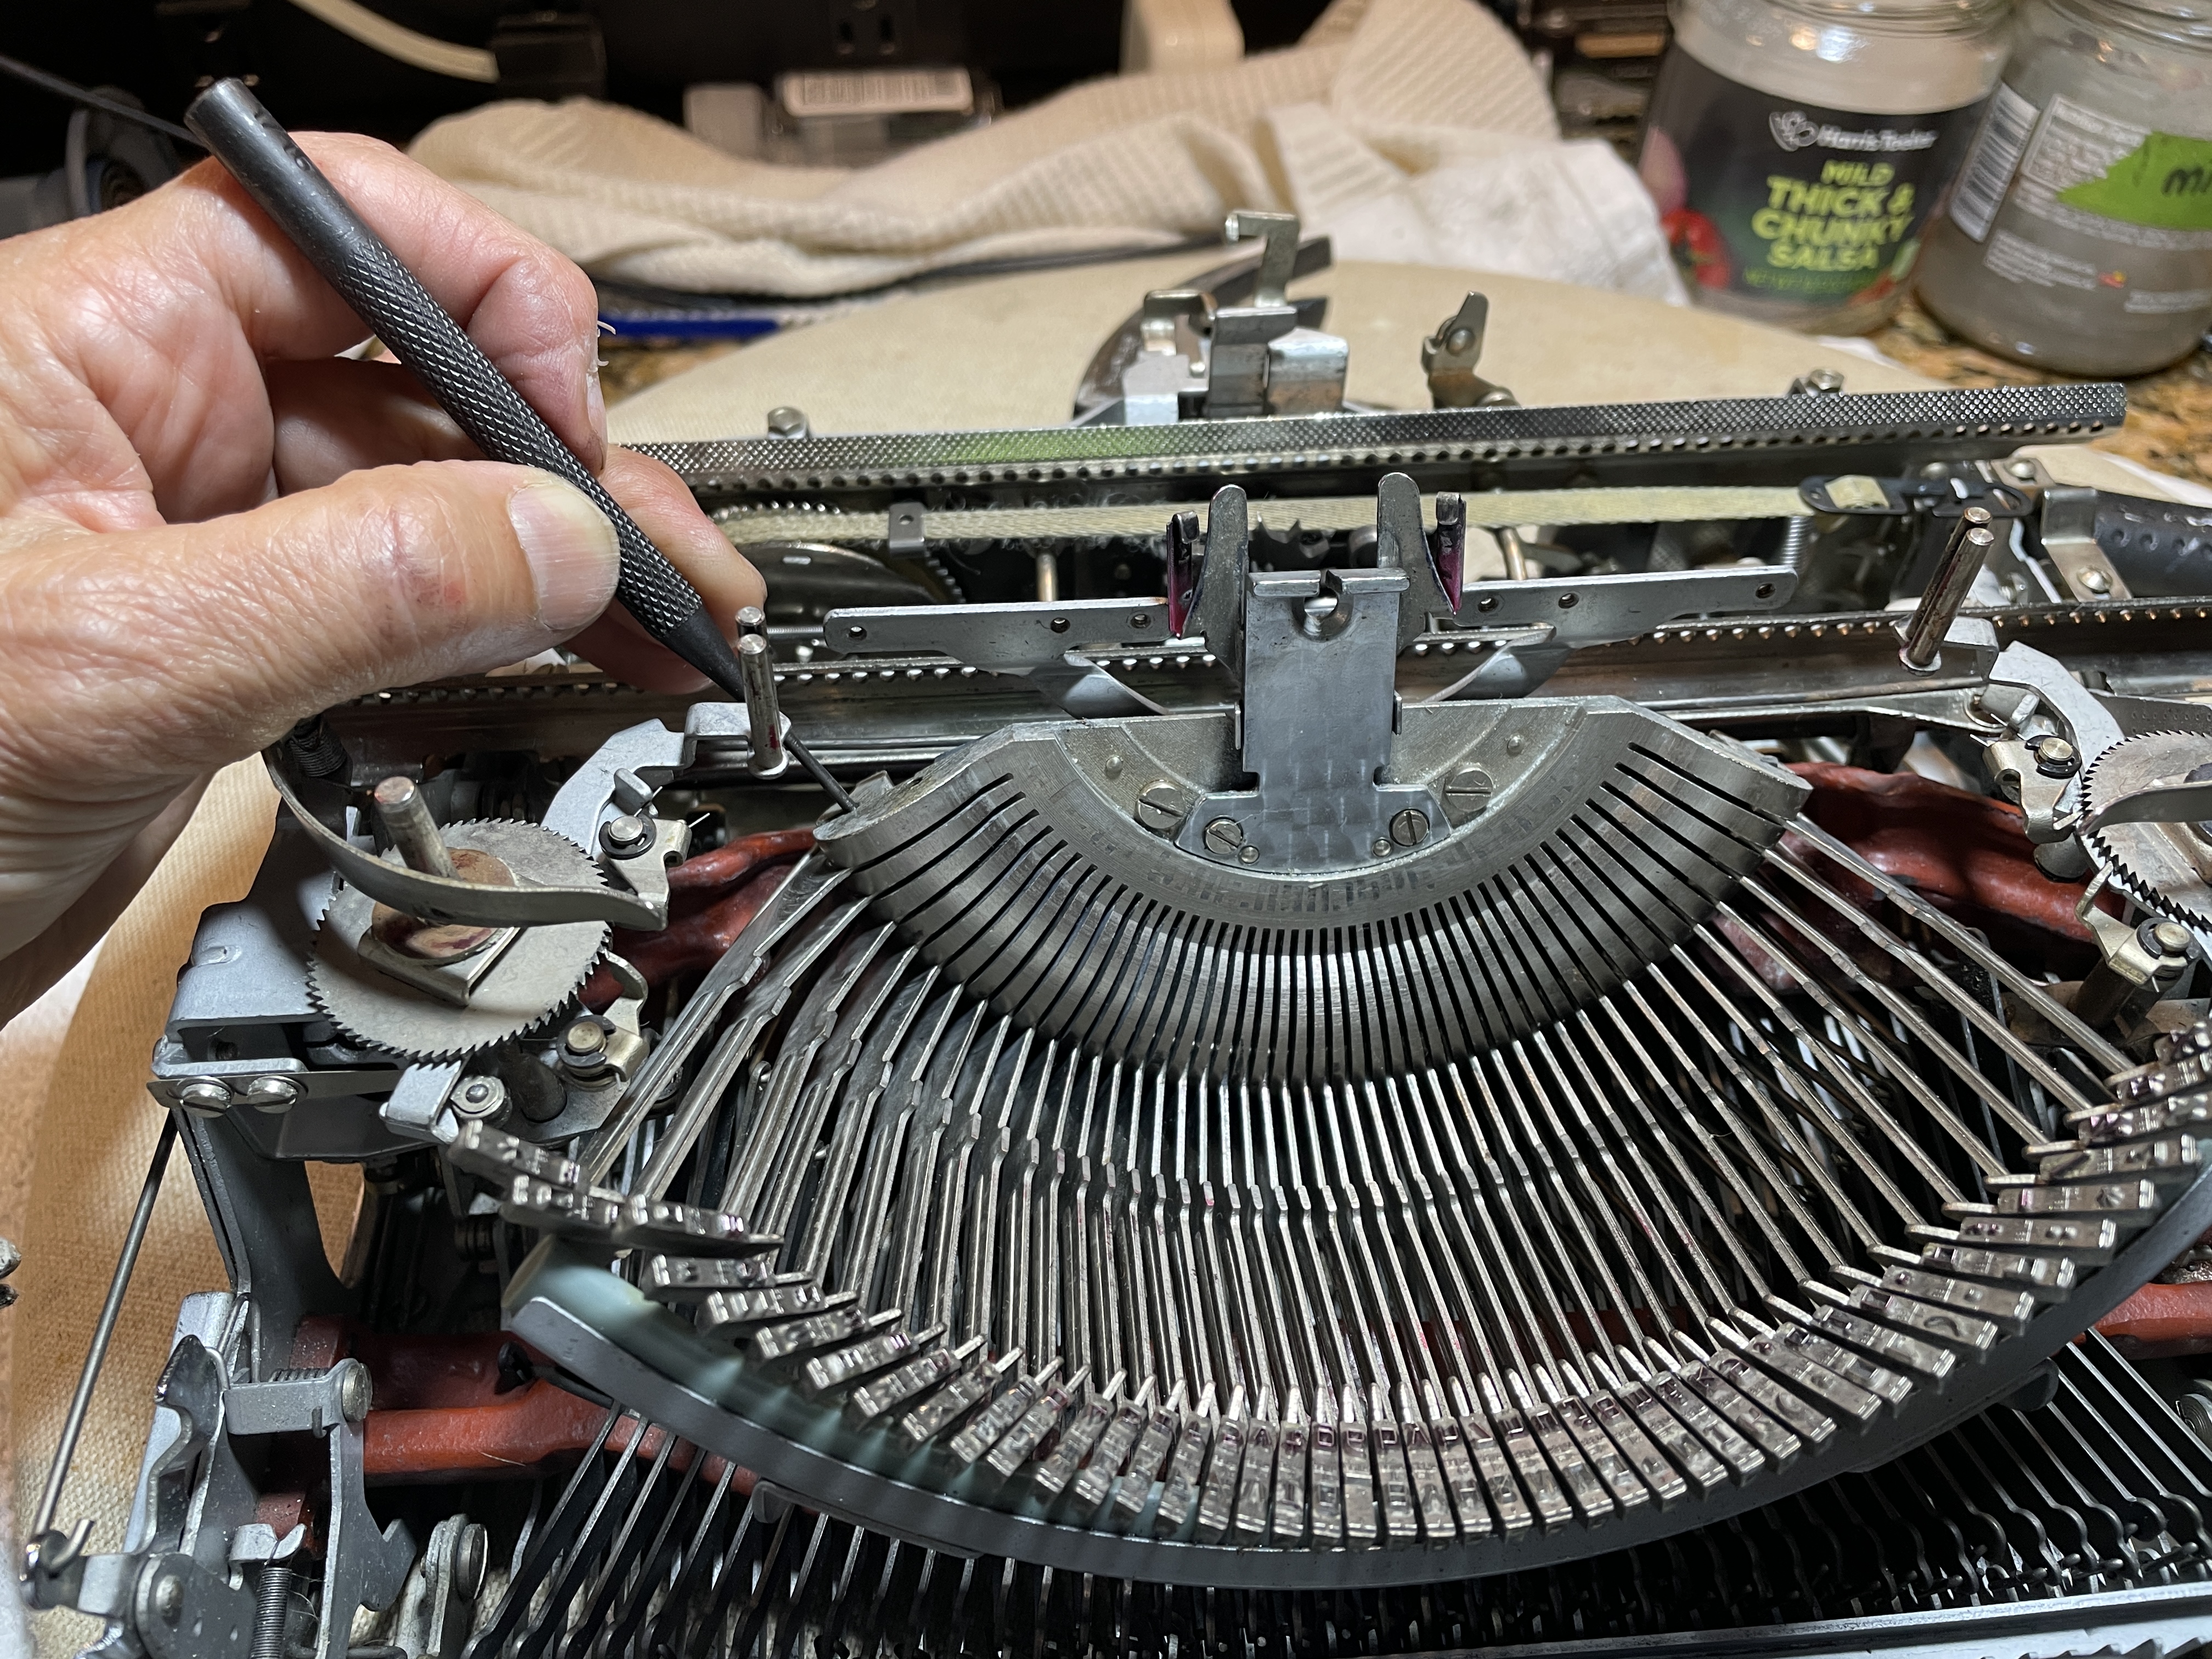
I had a couple keys on the outer segment that were frozen in place. I thought that they were gummed up with sticky Wite-Out. I put some lubricant in the fulcrum wire hole, tapped with a thin punch to get it started, and then chased the fulcrum wire with my spare fulcrum wire. BTW, take off your card guide. It’s going to make things a lot easier.
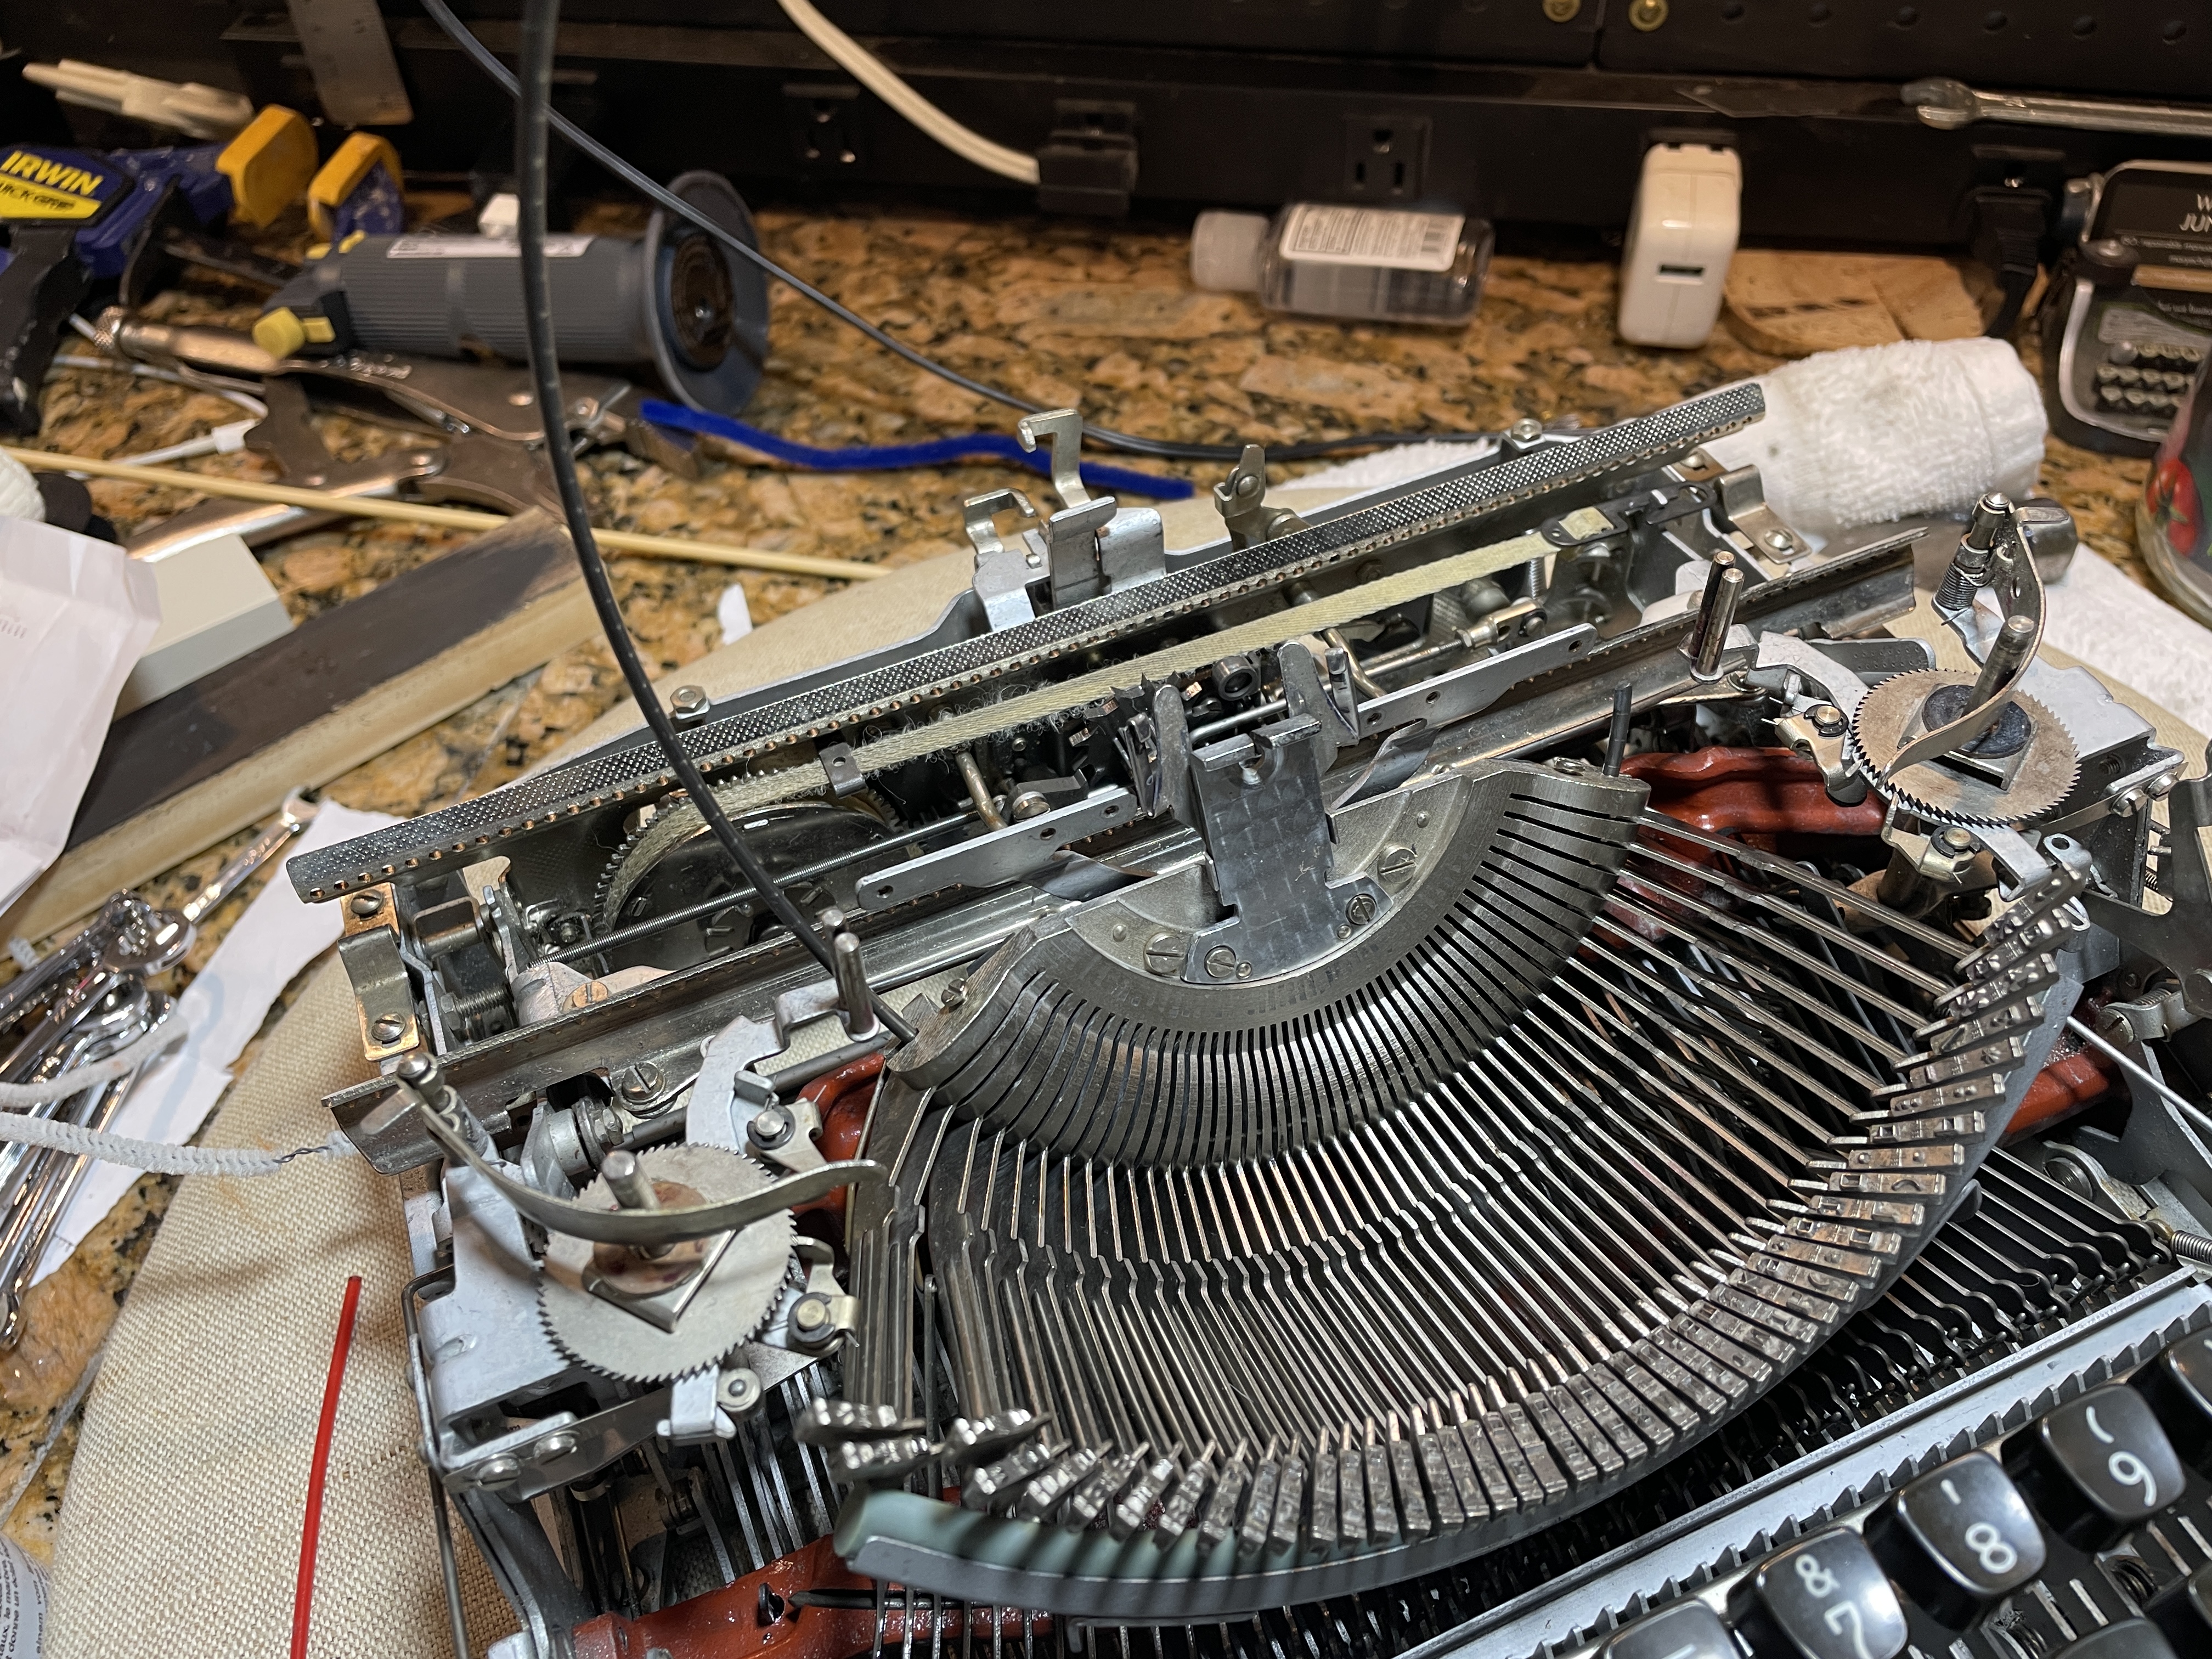
I found that the type bars and segment slots were very clean. The real problem was bent linkages. I straightened those out, and the affected type bars loosened up.
I recommend pulling only one type bar at a time. The Olympia SM manual is pretty clear about staying organized if you pull all the type bars—it cautions against mix ups or time wasting:
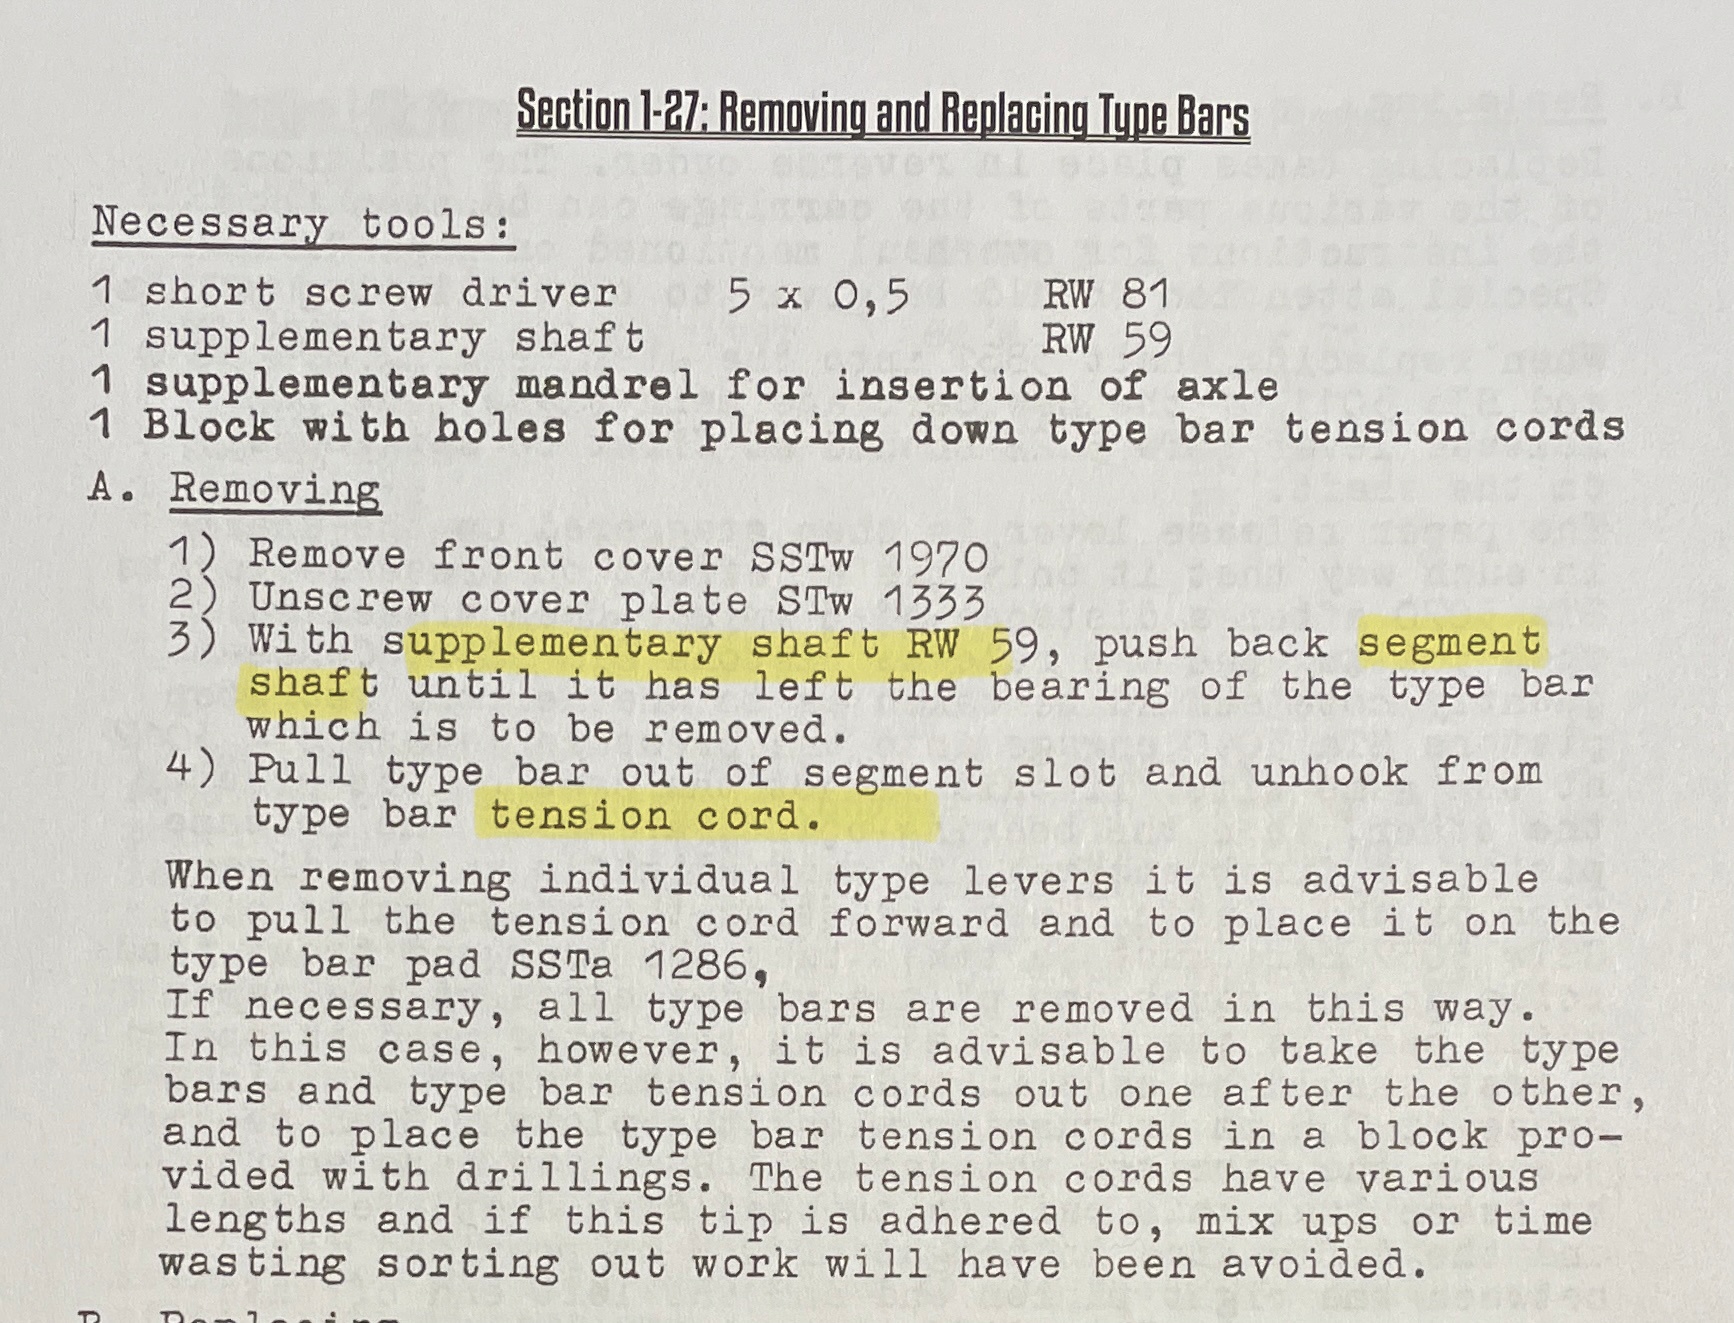
One note: the Olympia SM manual appears to have been translated from the original German to English by a person with no familiarity with English typewriter terminology, so you have to do some translations in your head. “Supplementary shaft RW 59” = a tool like a spare fulcrum wire. “Segment shaft” = segment fulcrum wire. “Type bar tension cord” = type bar link/linkage.
Here is Gerren working on a machine with all the type bars removed. It is a cautionary tale:
I put the carriage and cover plates back on. I cleaned up the plastic “aligning scale” and card holder as best I could, but there was Wite-Out deep in the crevices. Note that the card holder is held in place by four tiny screws. The screws in the center are just a hair longer than the ones on the outside to hold the tiny metal pieces that support the ribbon lift.
Here’s a picture from when I was dismantling. It was so dirty.

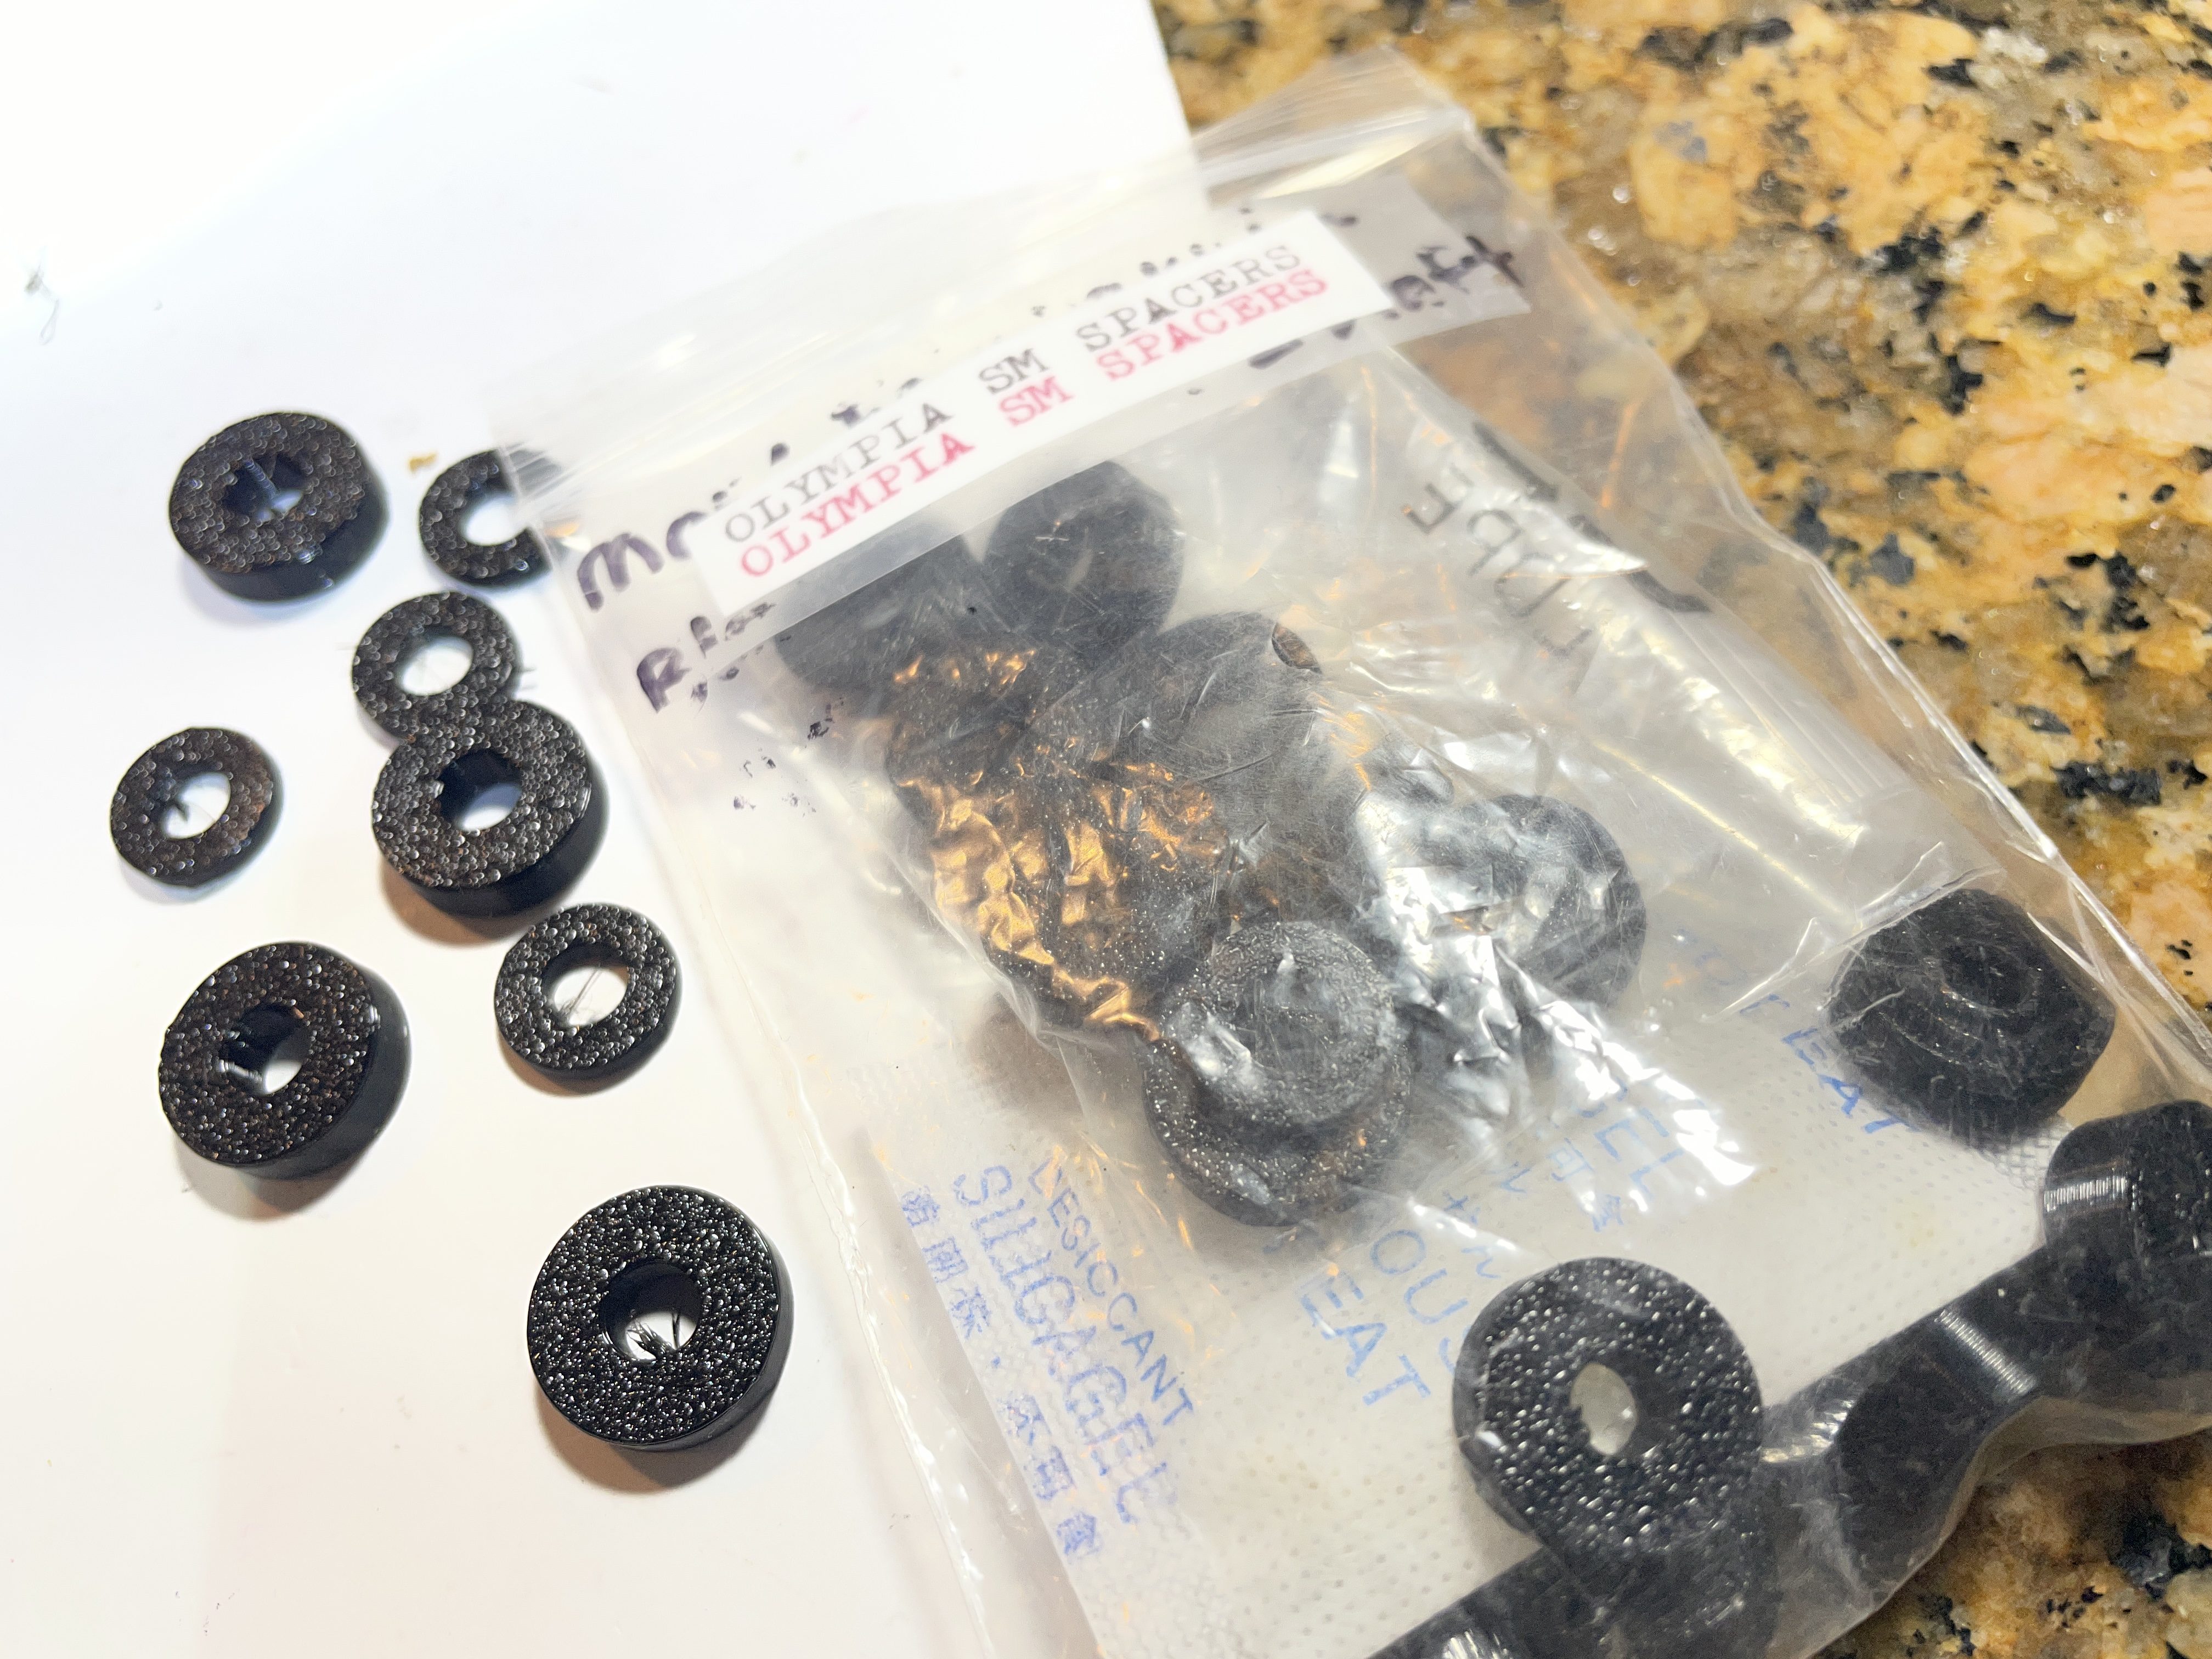
New bushings and washers
The old bushings weren’t too bad, but they were starting to flatten. I printed out body spacers / bushings and washers for the Olympia in Overture 95A TPU. I found the model files online at Printables:
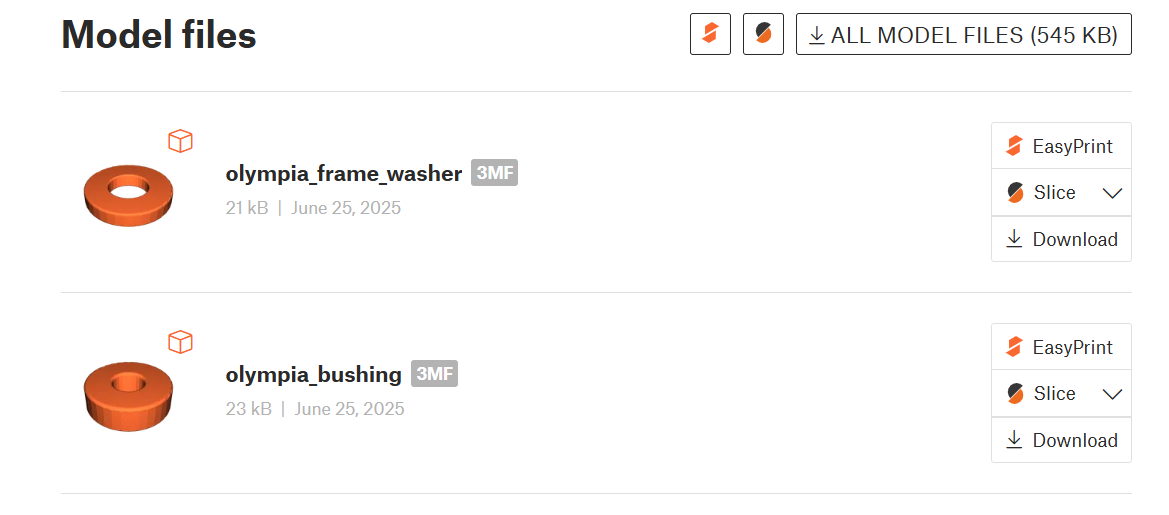
I printed out a whole bunch since I come across Olympias with disintegrating bushings pretty often.
Trip adjustment
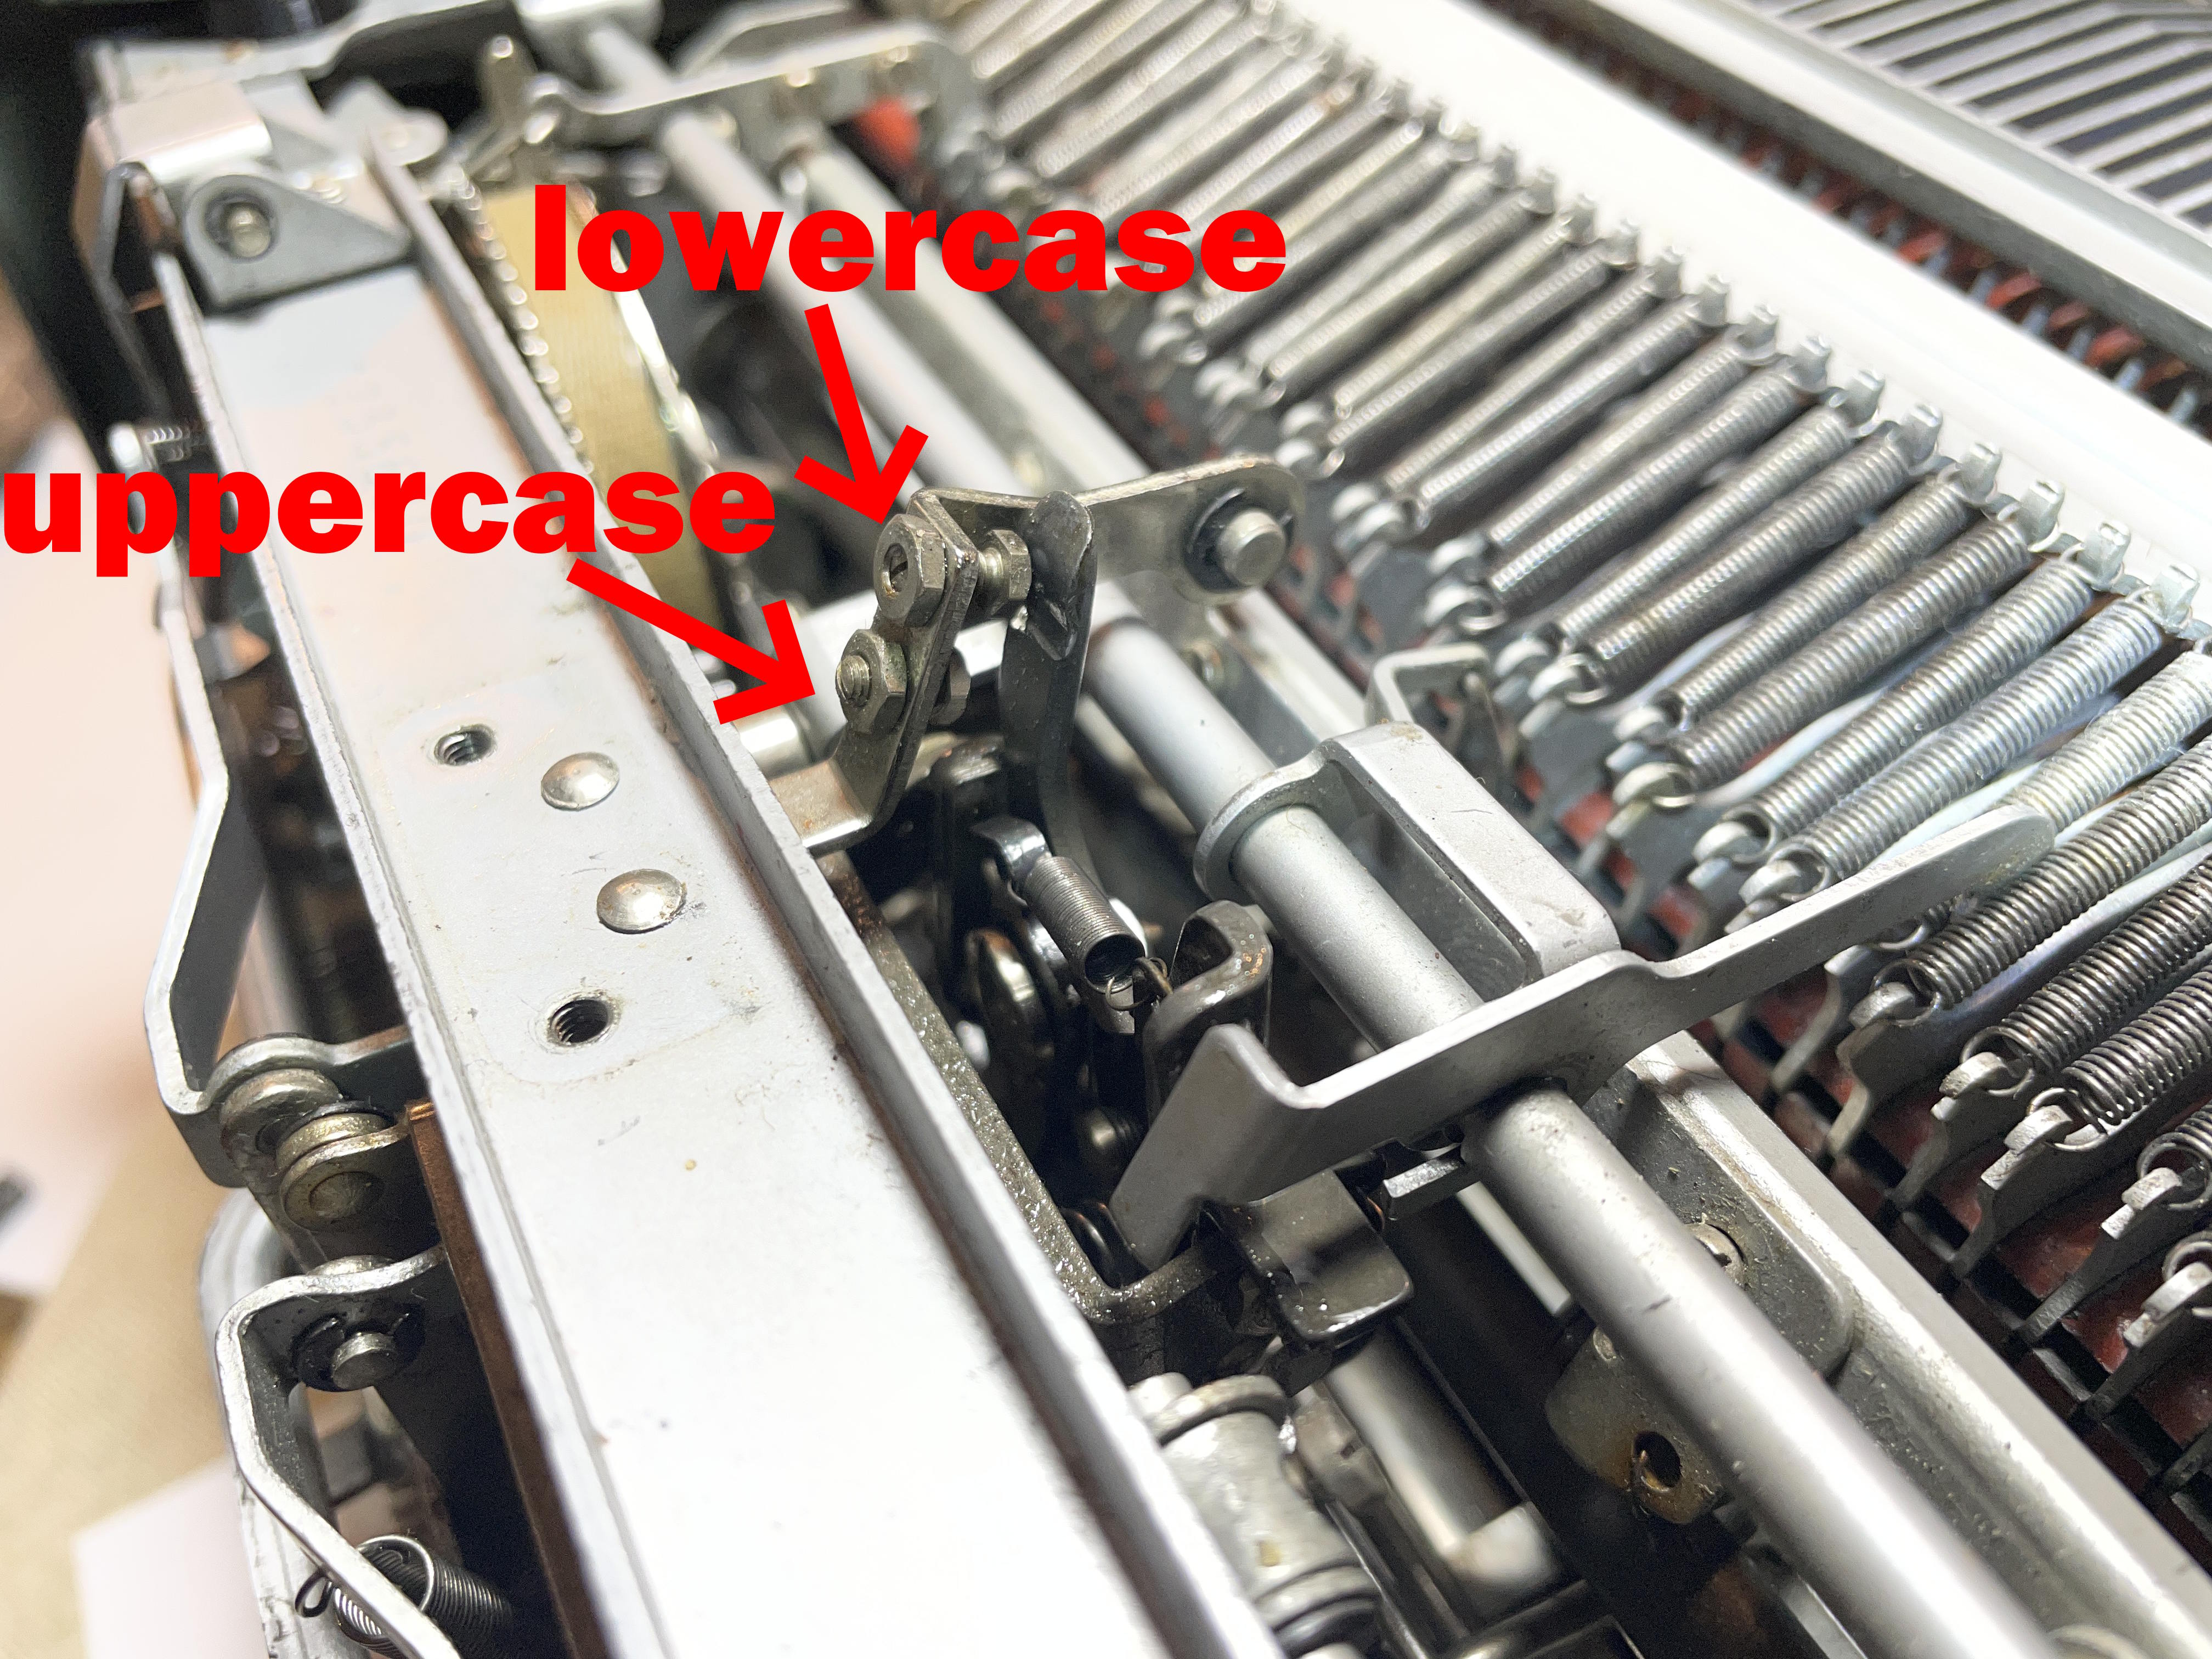
The typewriter was tripping only when I typed REALLY hard. I also had piling of letters while in caps, so I knew I needed to do some trip adjustment.

And HotRod has a video for that too:
I had to go way in with the adjustment screws to get the machine to trip away from the platen. I think this typewriter was dropped at some point, so that may account for the wild adjustments I had to make.
Shift adjustment
This SM4 is a carriage shift model and it felt HEAVY. Fortunately I found this video from the wonderful, much-missed Duane at Phoenix Typewriter:
I took mine all the way up. Shifting felt light as a feather. However, like Duane, the left bolt was hitting the tabs on the carriage and the carriage felt kind of bouncy and out of control. I backed off a little and then it was perfect.
Adjusting key tension for lighter touch
The key touch felt a bit stiff to me. Once again, Gerren from HotRod has a great video. This adjustment made the SM4 so light and frisky.
Bent carriage release lever
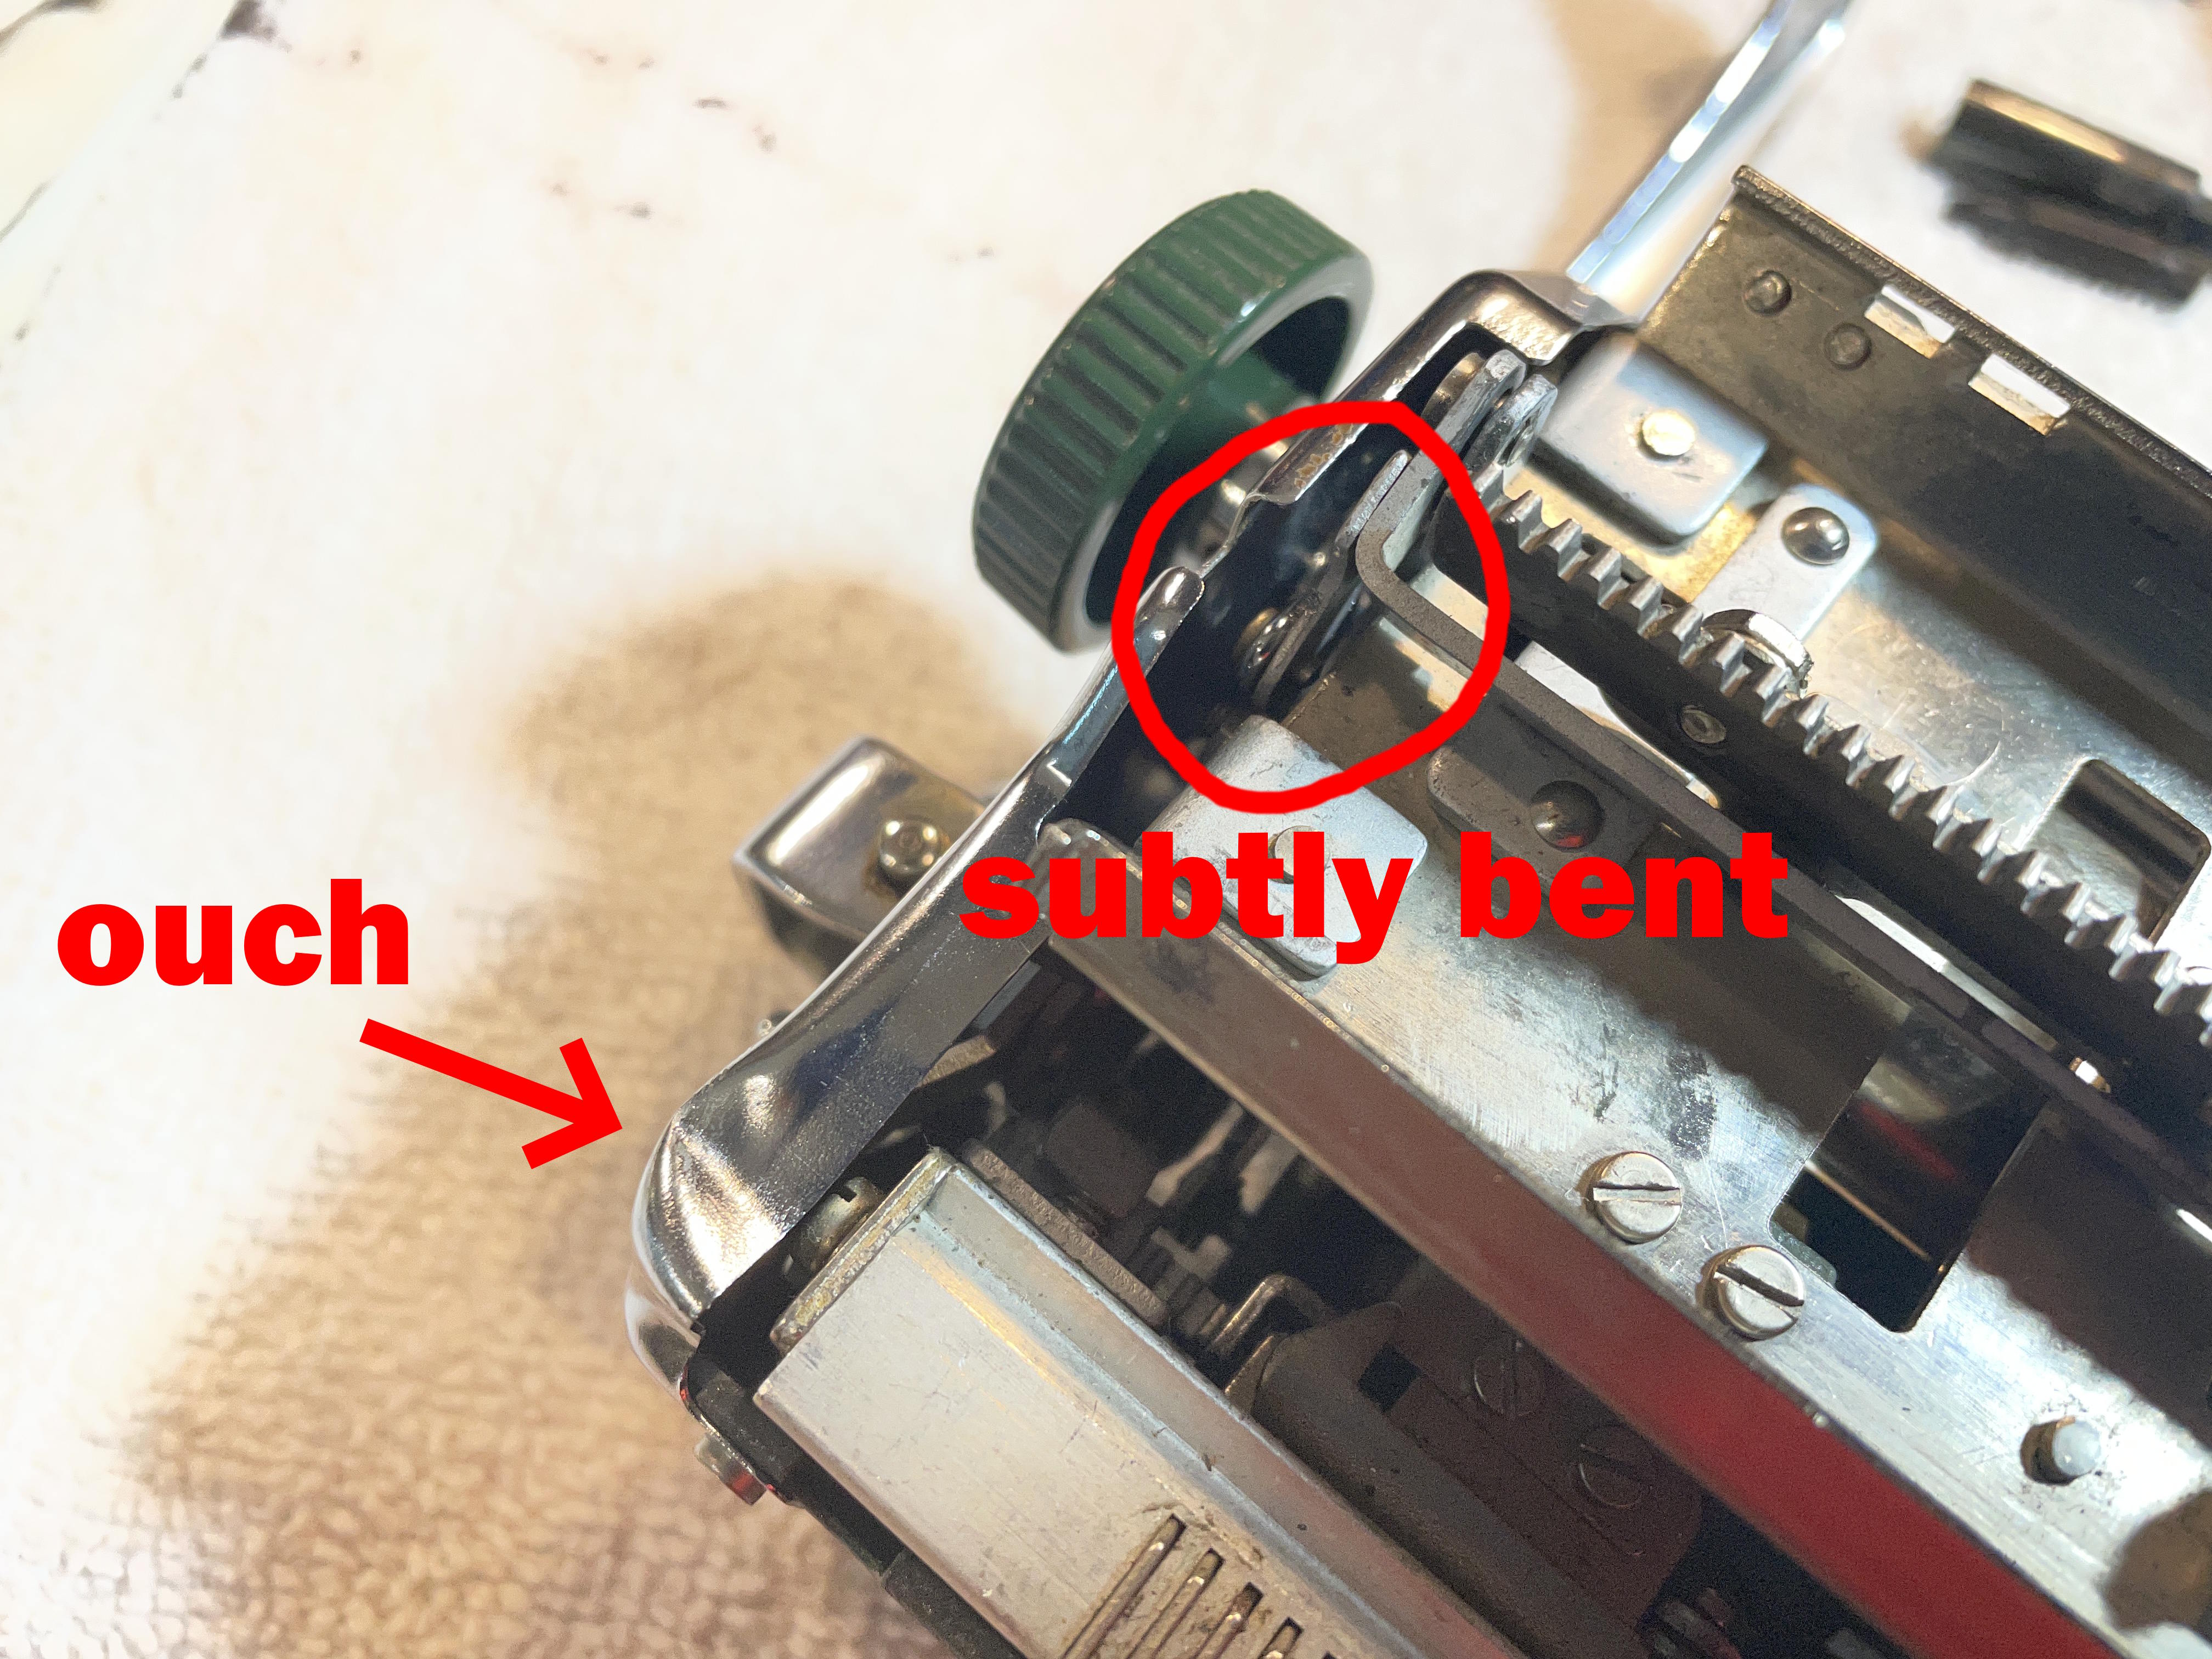
The carriage release lever on the right side of the machine was working great. However, there was a soft growl / grinding in the carriage on movement when the left carriage release lever was depressed.
I took the carriage off, flipped it over and saw that there was a big dent on the end of the carriage. It must have been dropped—and landed hard on that side. The left carriage release arm was subtly bent so that it couldn’t fully depress that carriage release rod and allow it to engage with the escapement release roller.
I sweated over this for a long time: prying at the left carriage release arm, reinstalling the carriage, testing, removing the carriage, prying again. I was soft-soft with my prying because I didn’t know how brittle the 65-year-old German steel was and whether it would snap. Each time I tested after prying a bit, the grinding improved incrementally.
At last, the grind was completely gone, and the left carriage release lever was functional.
The tabulator brake issue I couldn’t ignore
I knew I had a tabbing problem that I should address. I could set and clear tabs, no problem. However, the carriage choked and halted when the tab key was depressed even when no tabs were set. I suspected the dreaded Olympia SM Tab Brake Problem. Unfortunately, the Olympia SM Repair Bible doesn’t have a tabulator brake section, so I scoured the internet for any and all information I could find.
A long, long time ago, an Olympia SM7 with a tangled drawband came to me. Tom Lucas of Typerwriter Man in the UK added this insightful comment to my post:
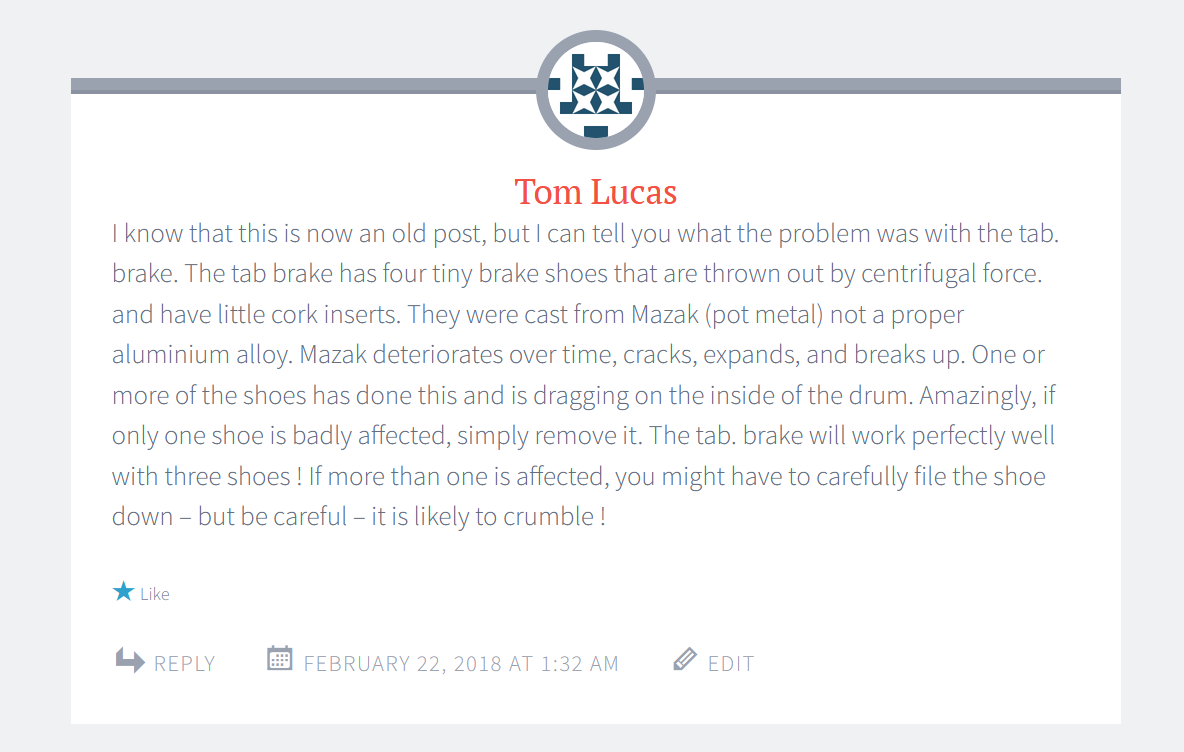
And here’s a video from Gerren of HotRod Typewriter saying just about the same thing.
I don’t think you can fix this with degreaser or penetrant. Sometimes the pot metal segments of the tab brake fall apart. Or the rubber/cork inserts in the tab brake drum swell and deform. I think that those rubber/cork inserts need to have some grippy friction for braking. I recently had some brake work done on my car because the brake pads had gotten contaminated with axle grease. They had to be replaced. Cleaning them was not an option.
I am a sort of “meh” when it comes to tabs. I can live without them. However, leaving this tab brake as-is could lead to a tangled draw band.
Options:
- Remove the tab brake mechanism and set tabs every ten spaces or so. That means that there would be no braking and the carriage would slam into set tab stops. There are a zillion other brands of typewriters without tabulator brakes. Are Olympias just a teeny bit over-engineered?
- Try to repair the brake.
My first reaction to Option 2 was, “No way.” But then I started getting really curious. Could I get the brake out? What’s inside the case??? And I did some research and found this excellent video for tab brake removal and replacement:
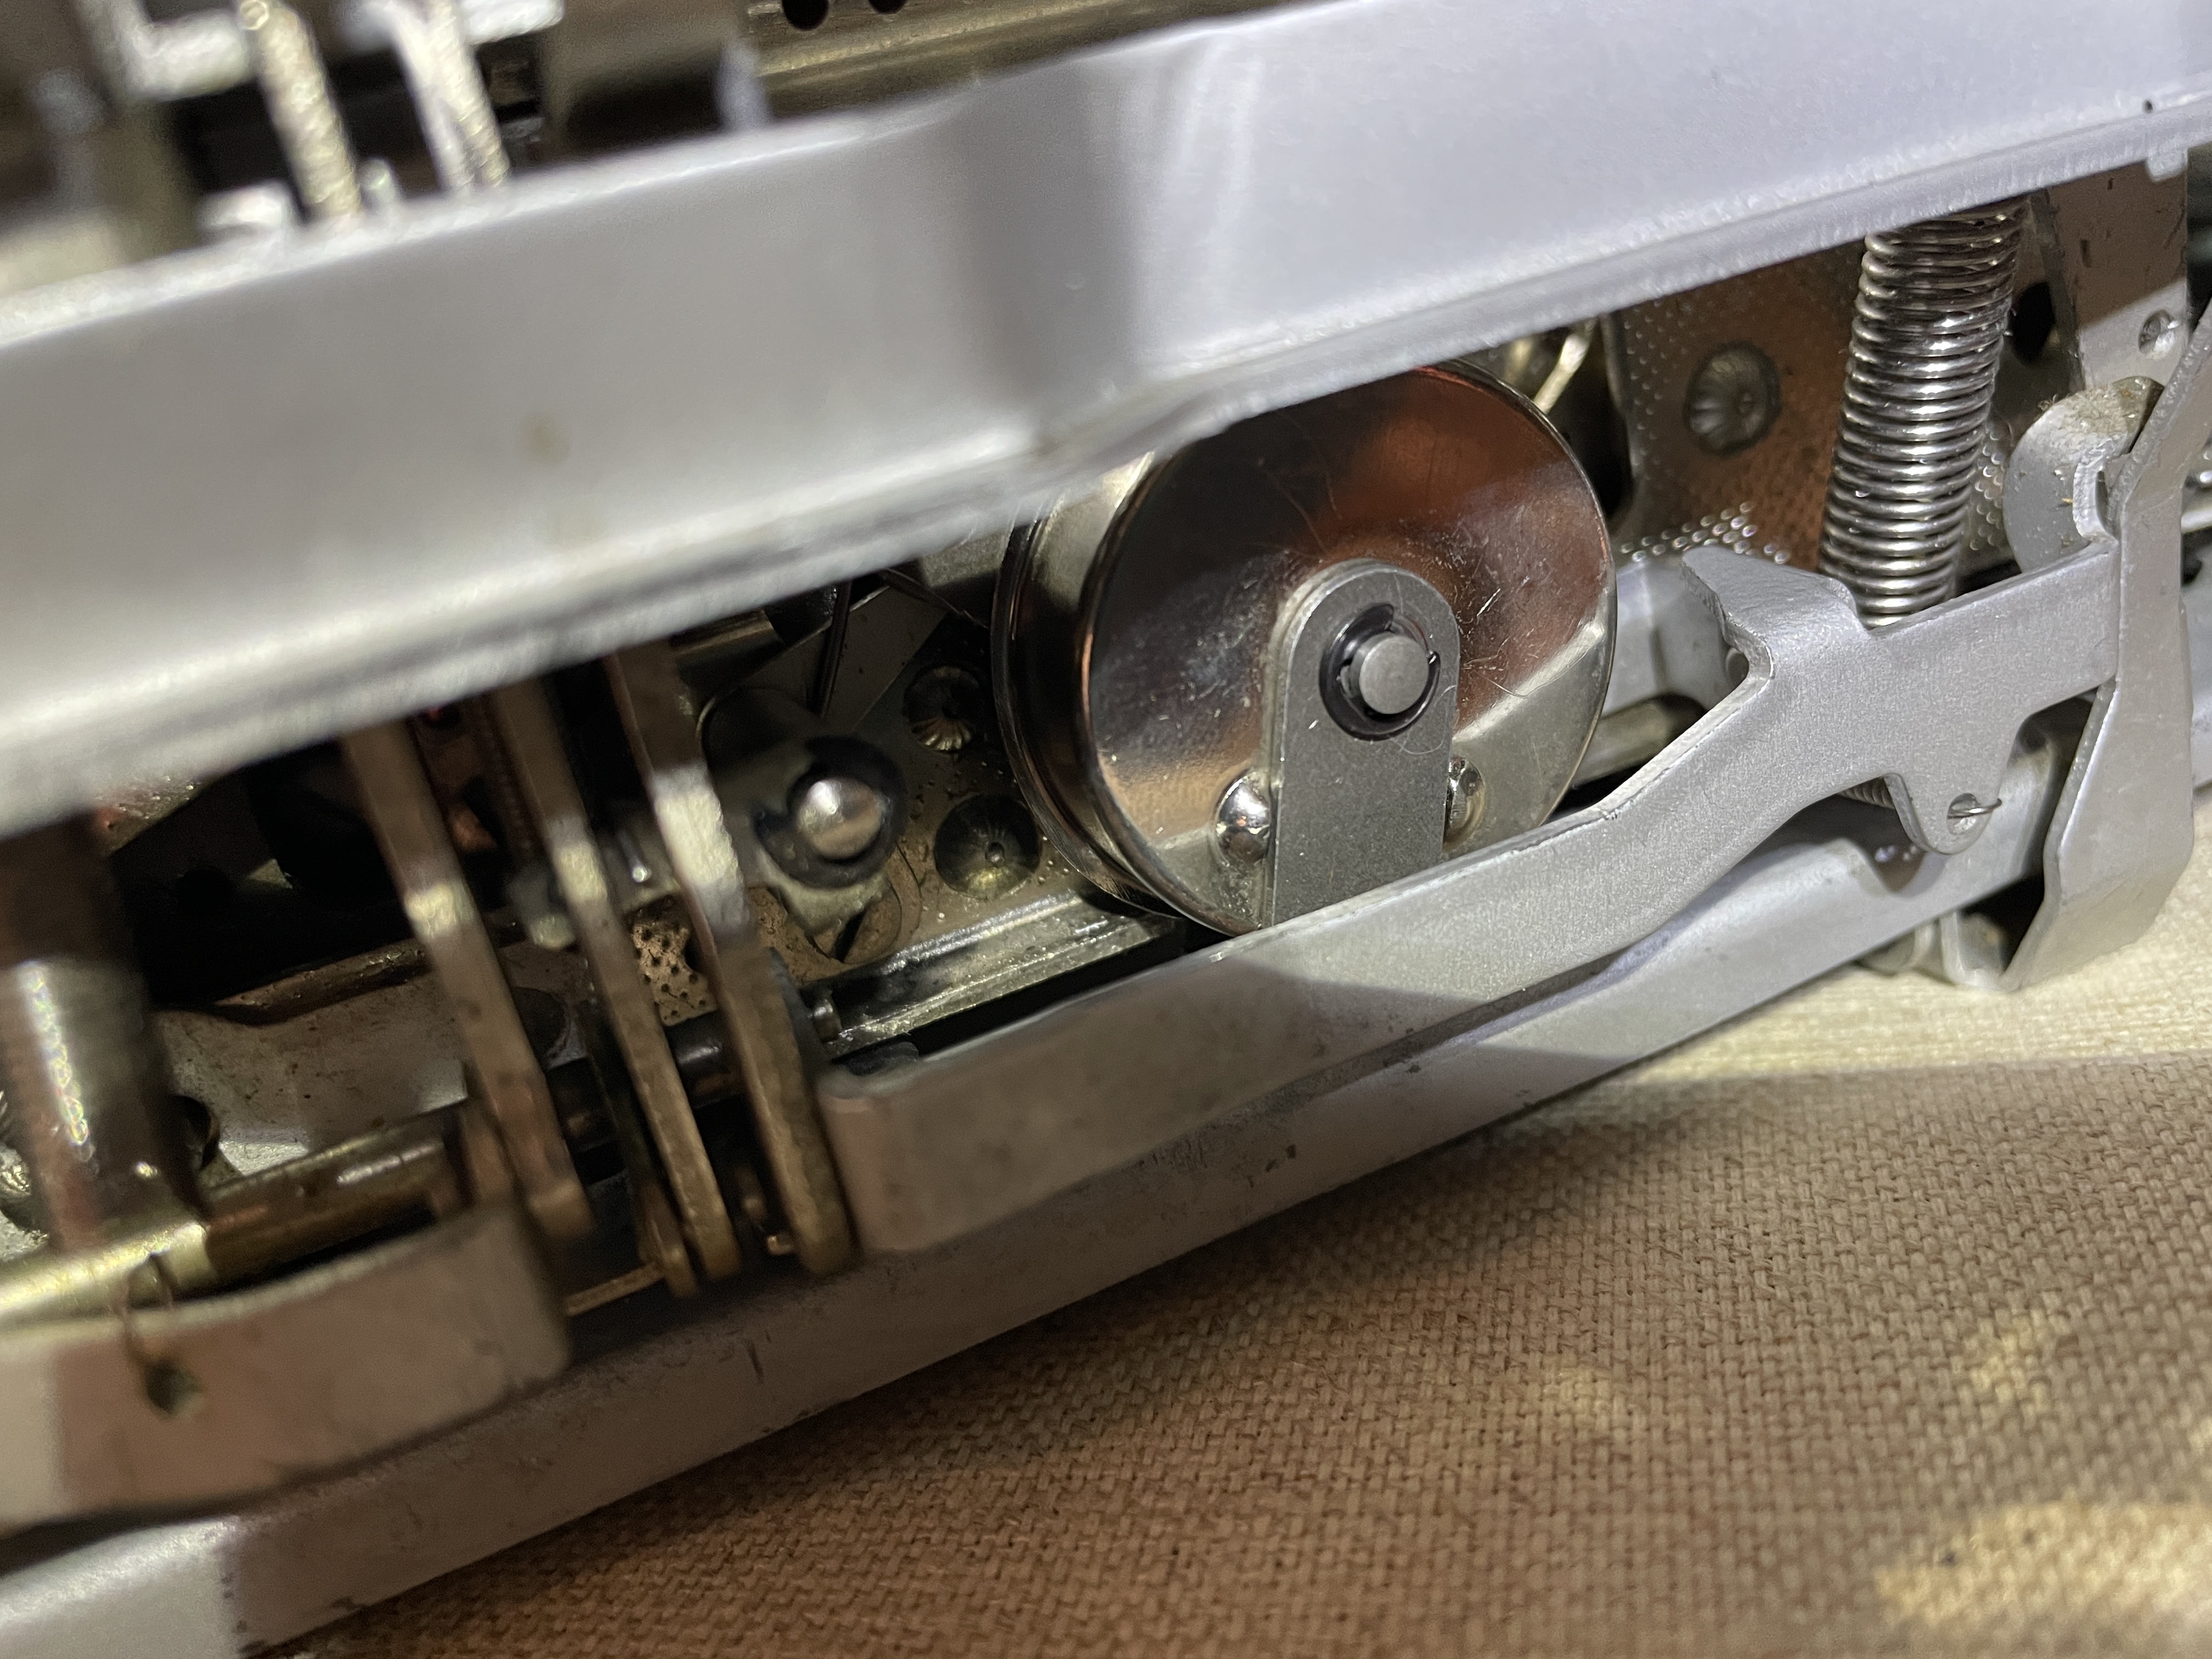
To get at the tabulator brake on the SM4, you don’t need to take off the carriage. Just move your carriage way over to the right. Take off the back panel.

Know that you will cut up your hand trying to access that pinion gear from between the carriage rails (from above and below). It would be loads easier with the carriage off, but I am hard-headed and impatient. I wanted to test as soon as I reinserted the brake.
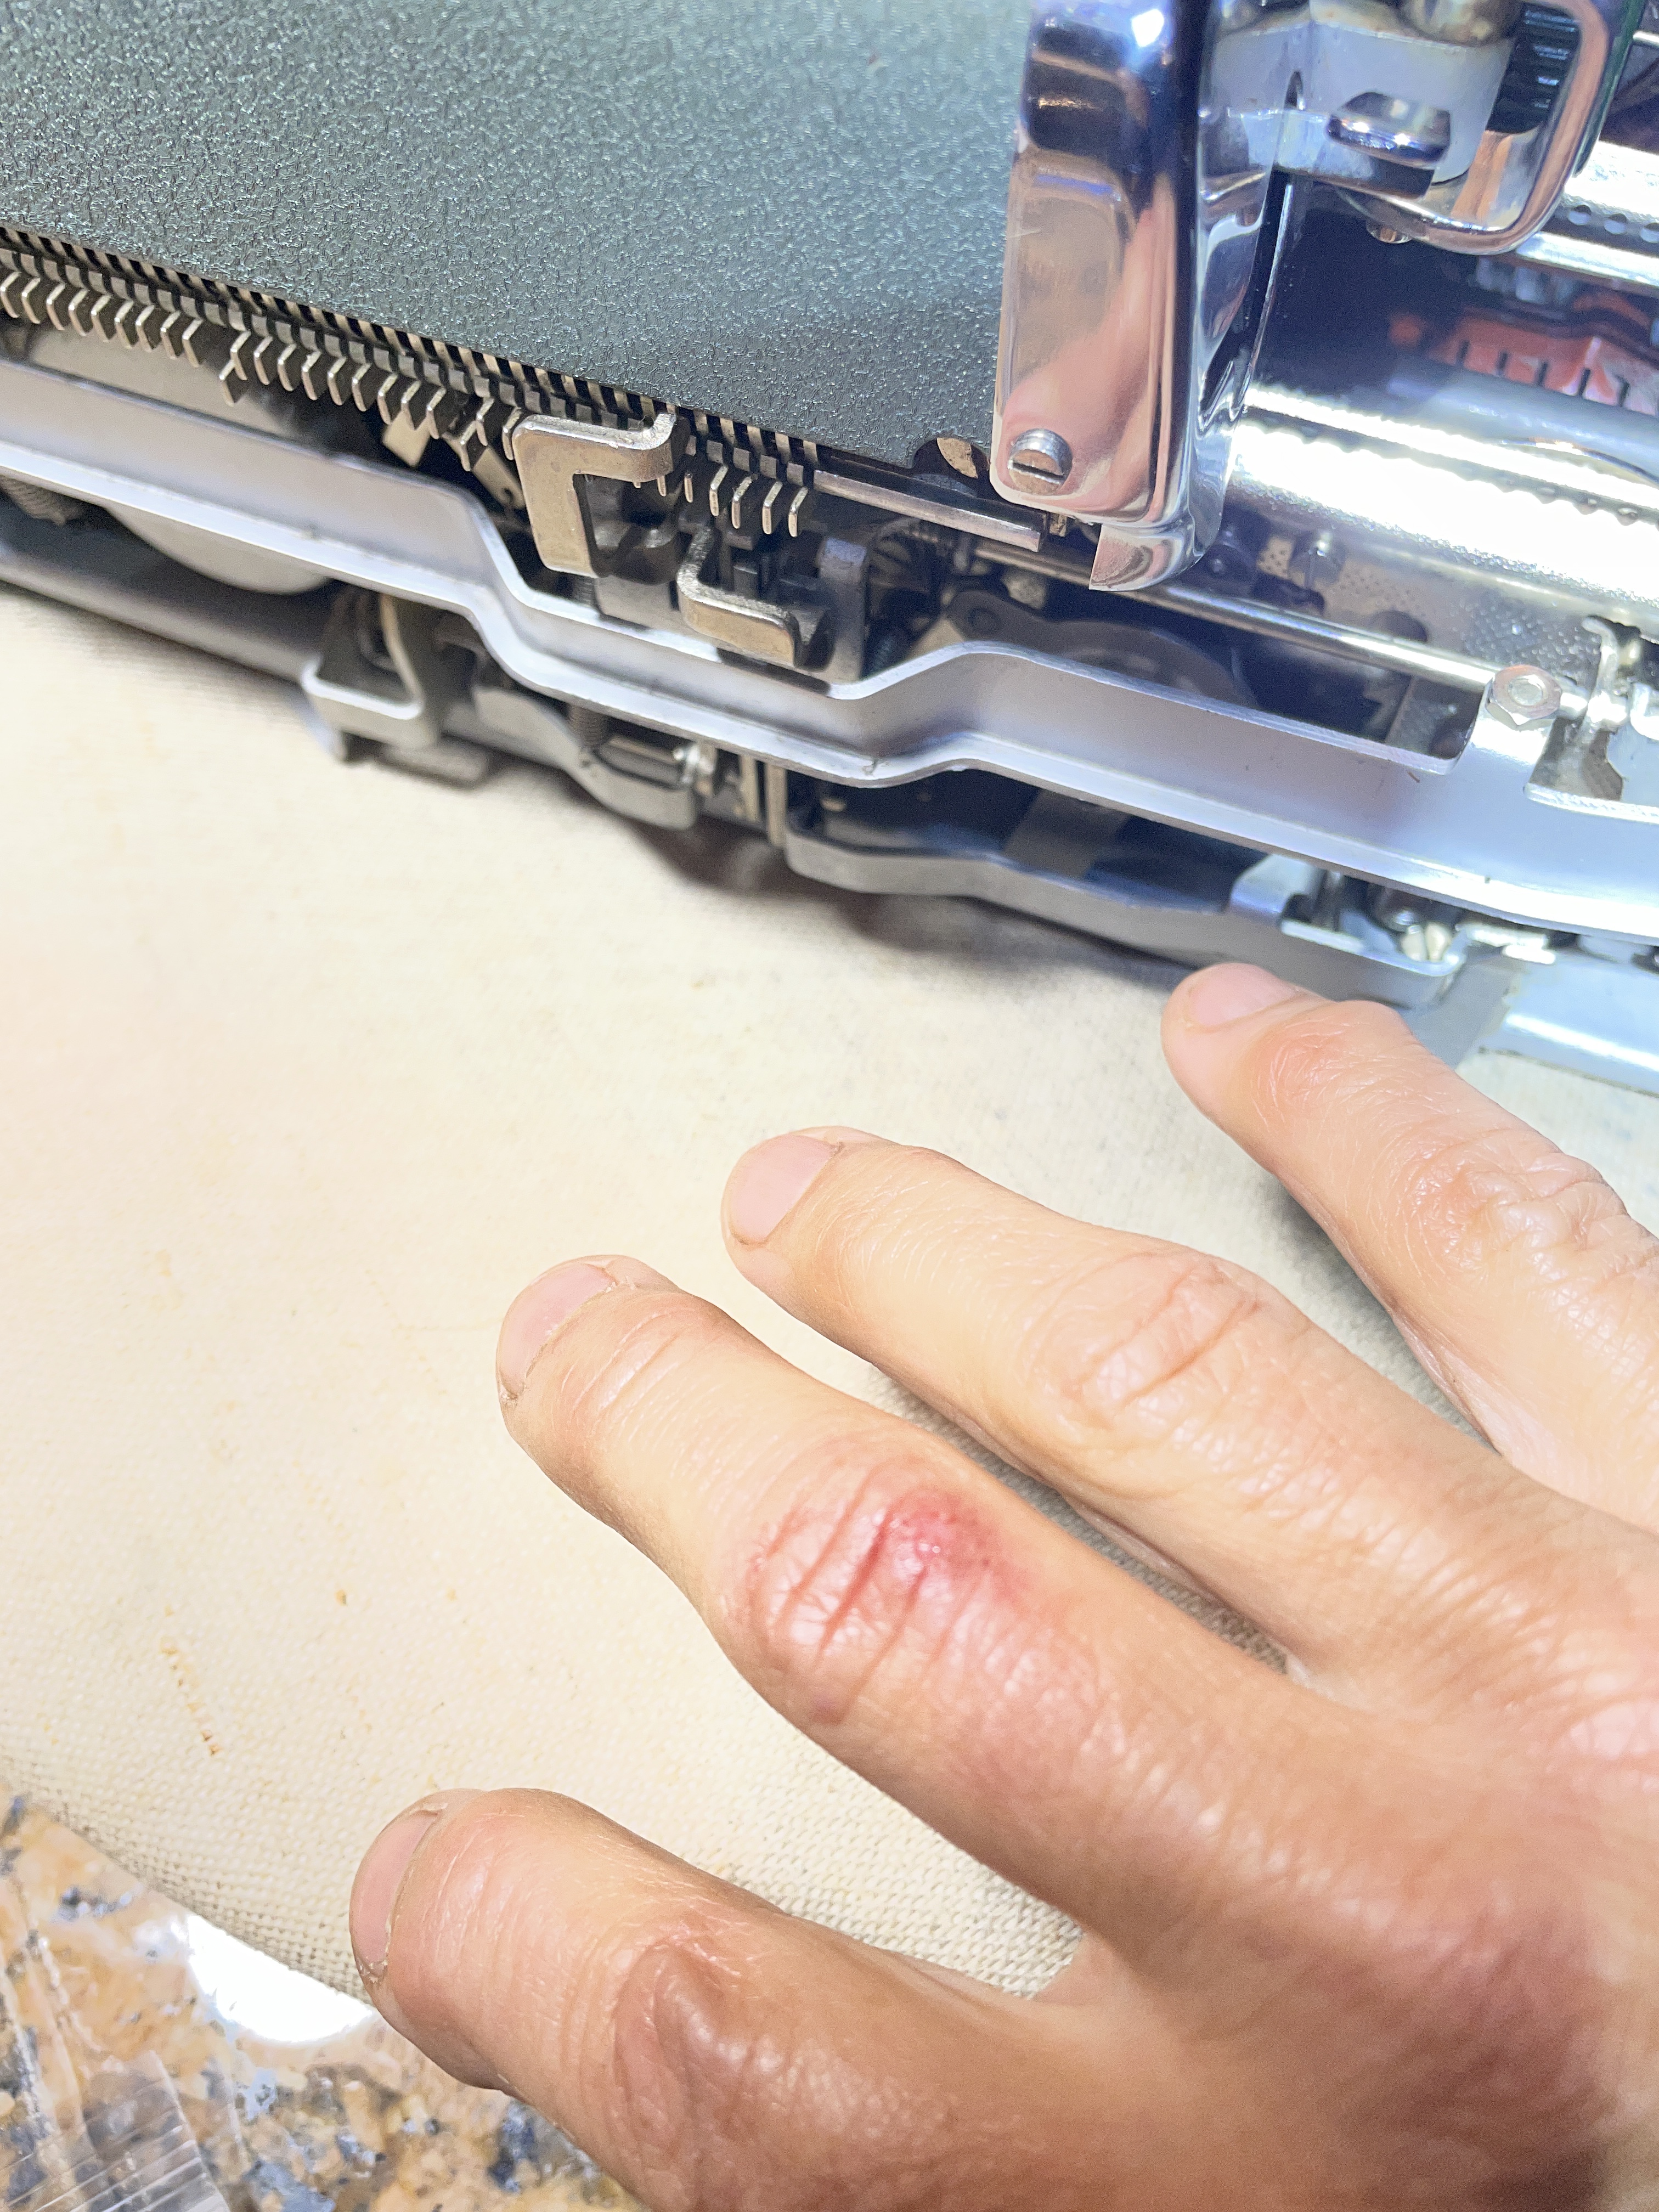
Murderbot, you’re killing me.
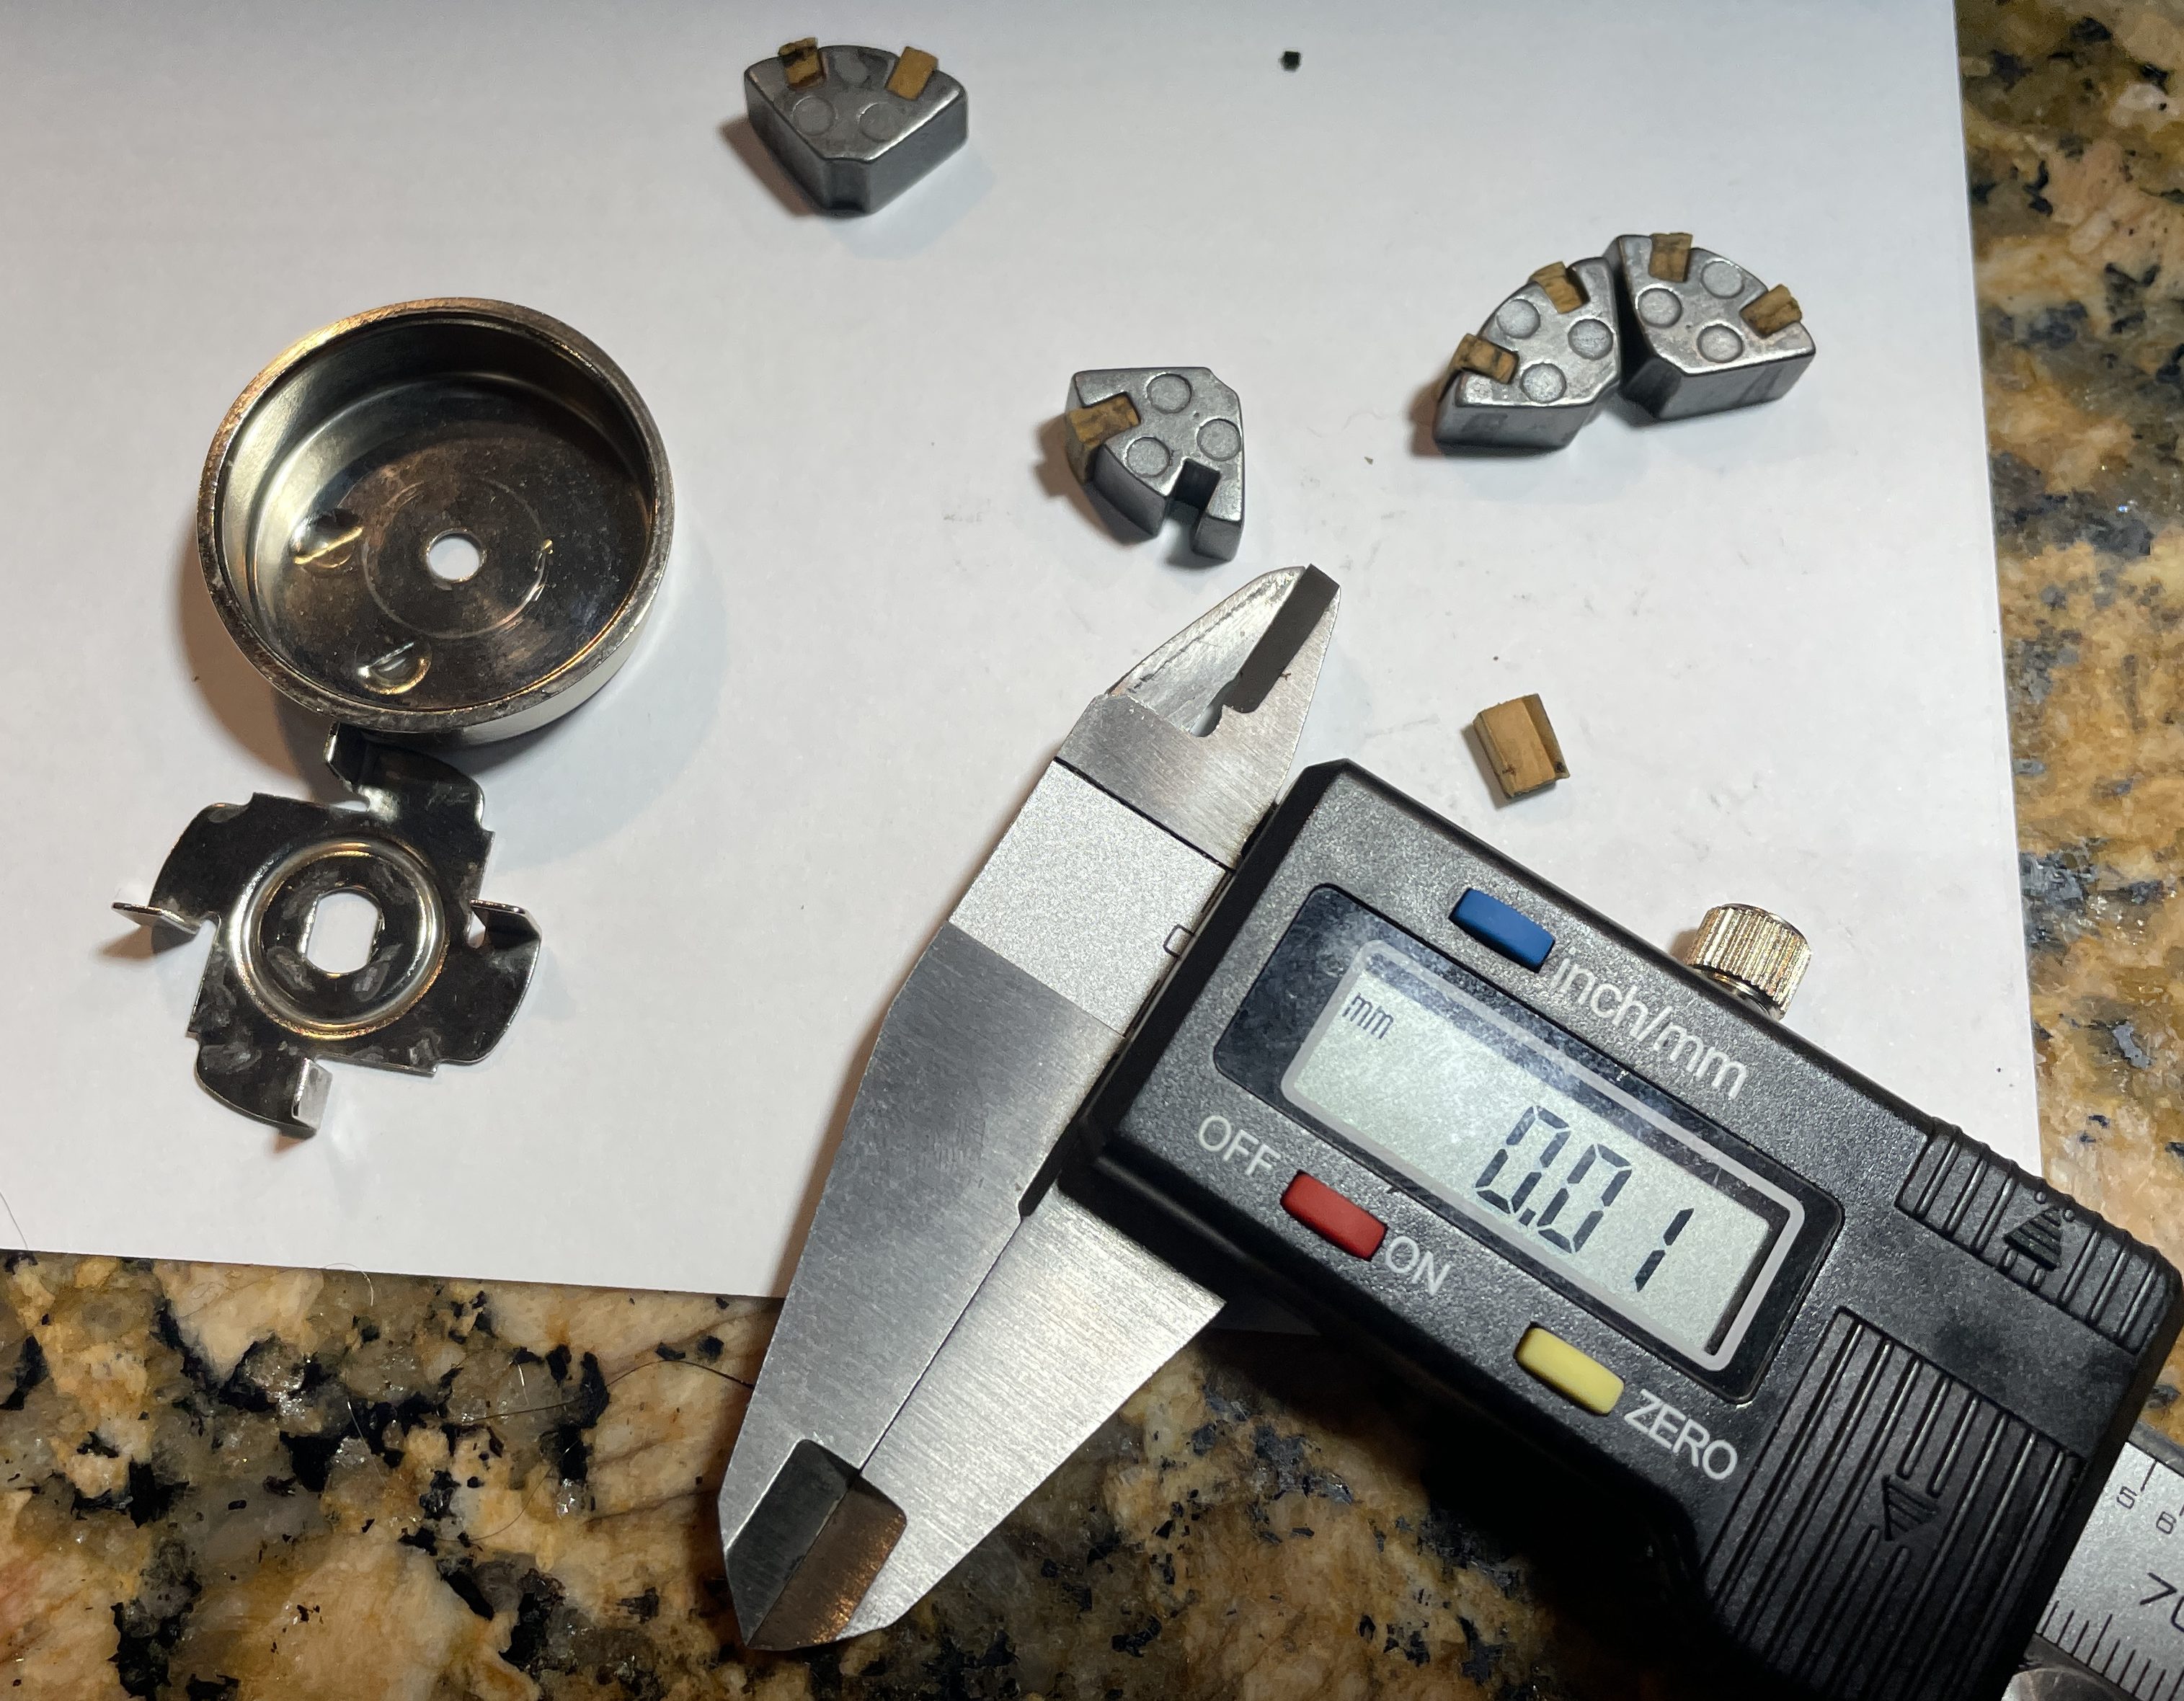
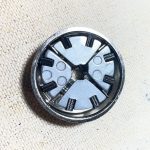
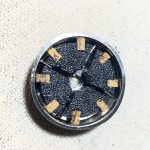
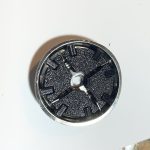
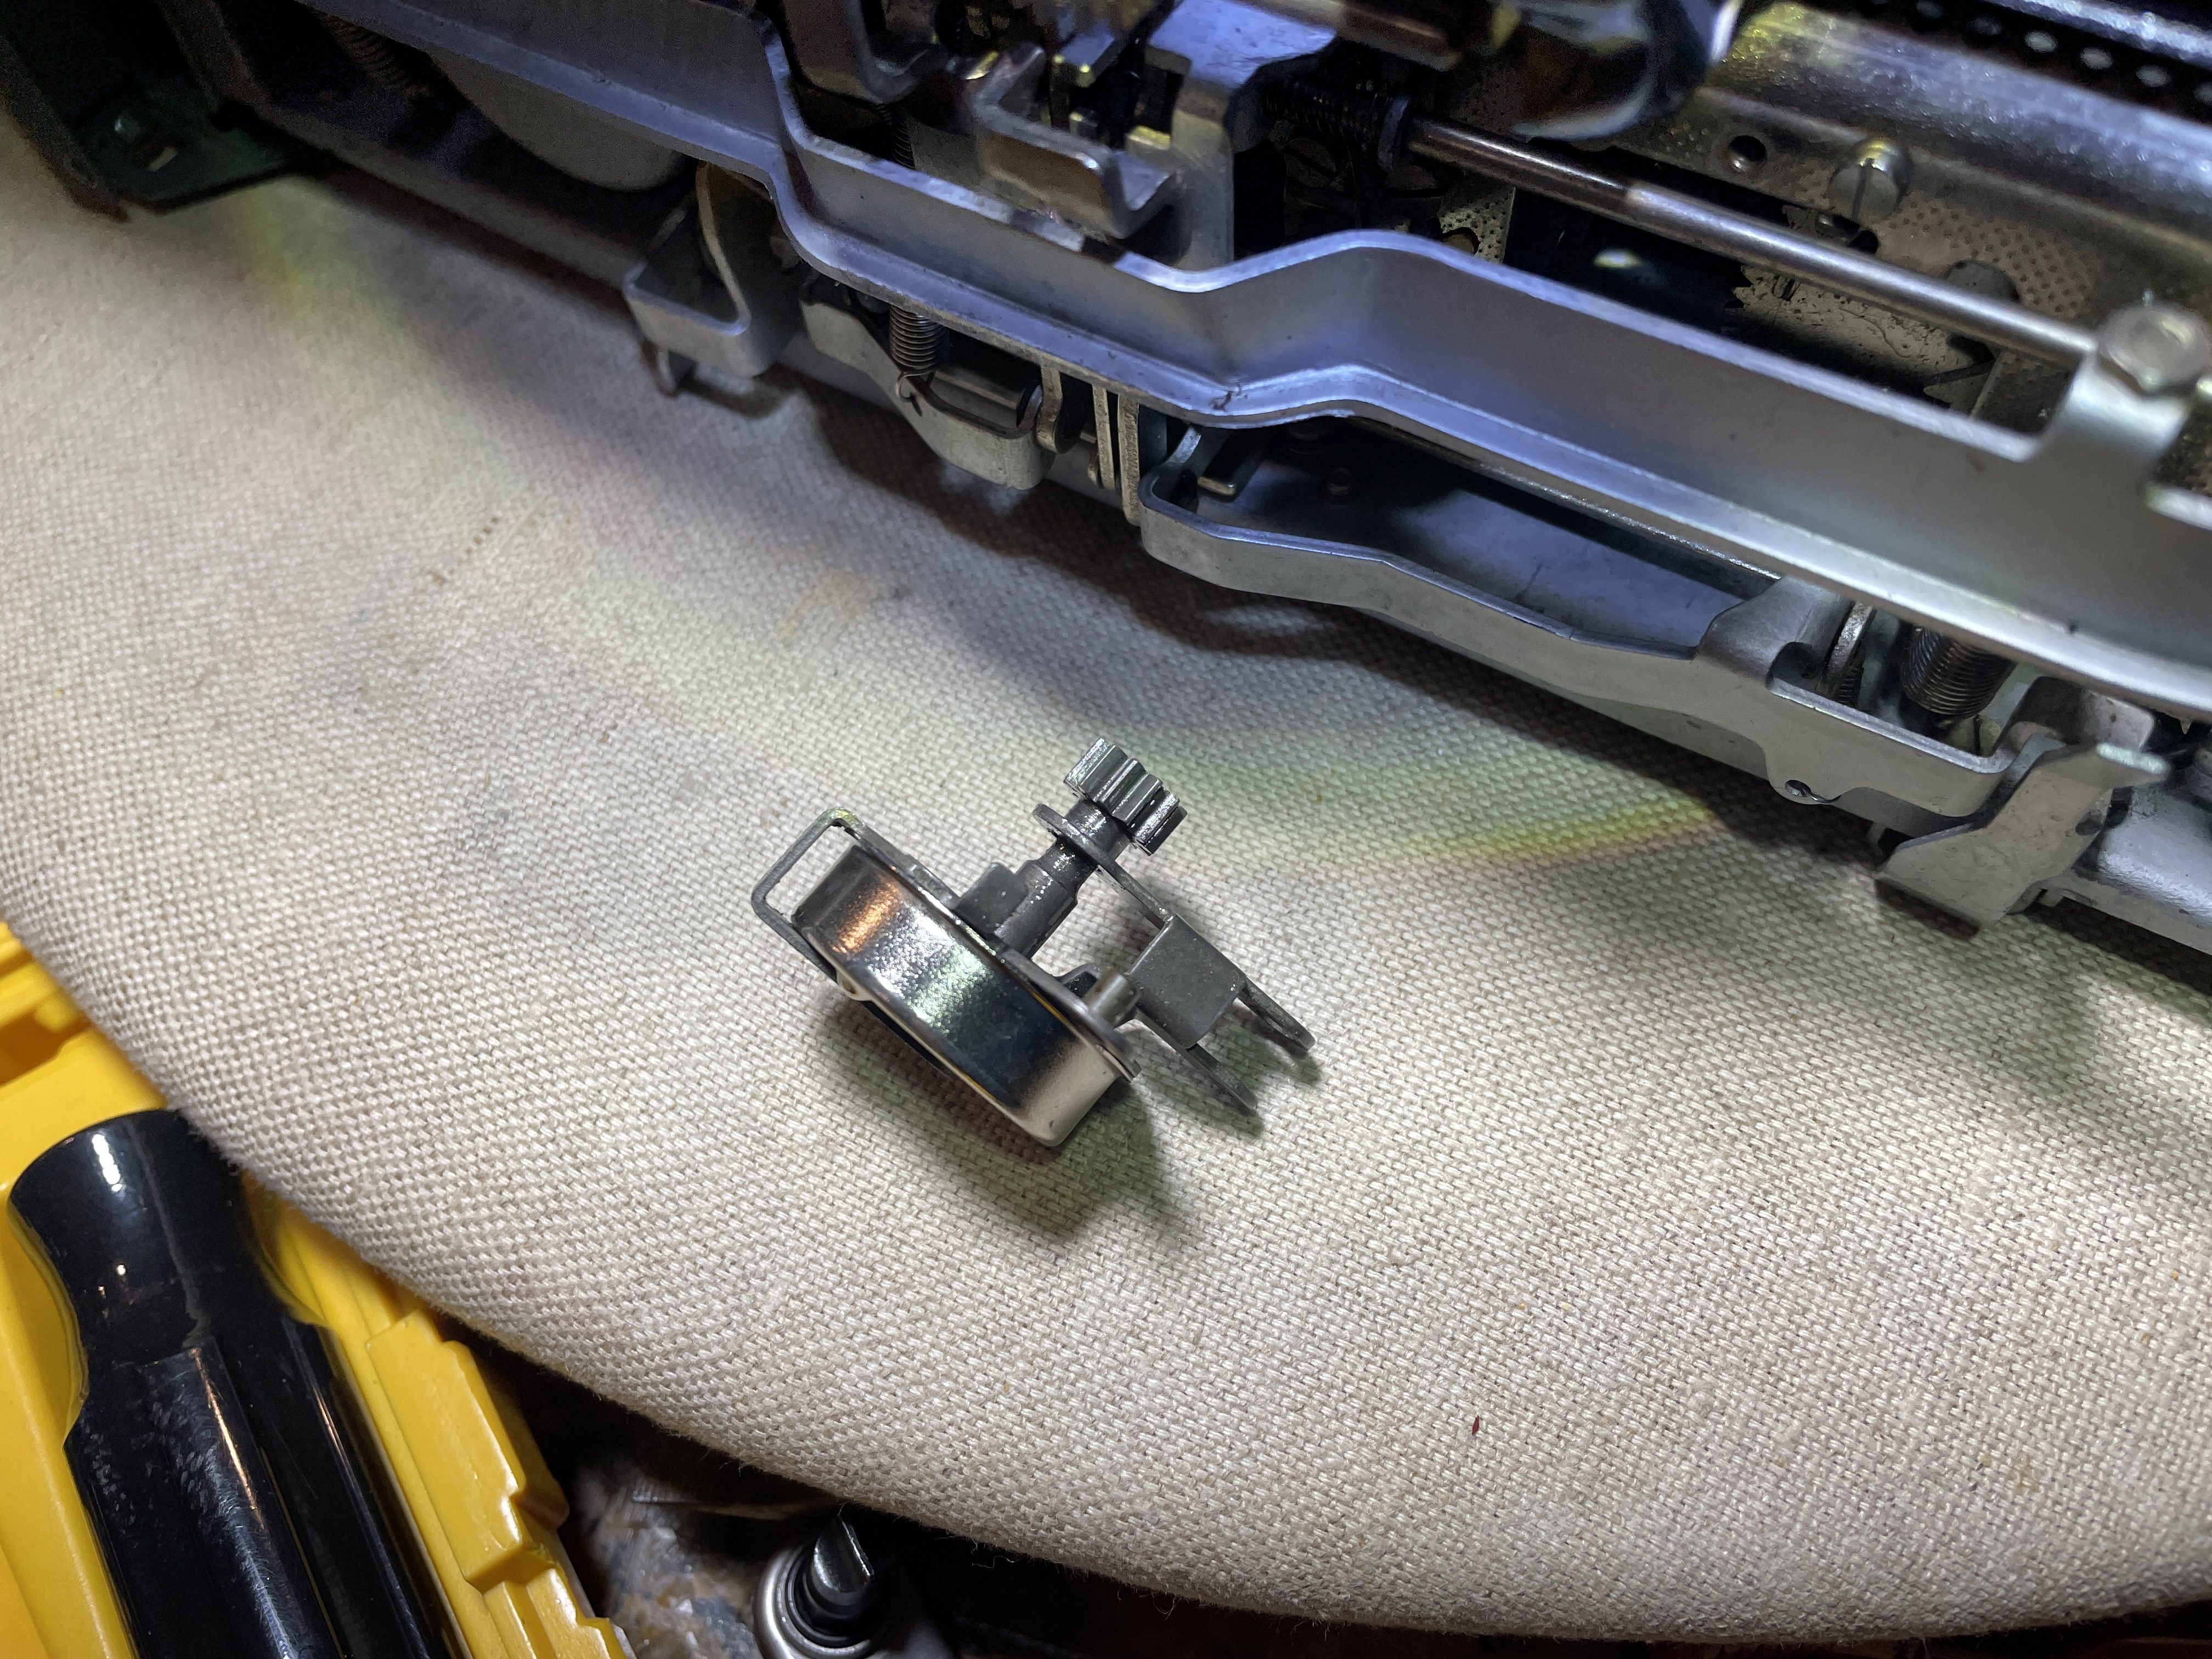
I followed the instructions in the video above, careful not to lose the E-clip. I pushed the pinion rod through and pulled out the tab brake. The pot metal body parts were…fine.
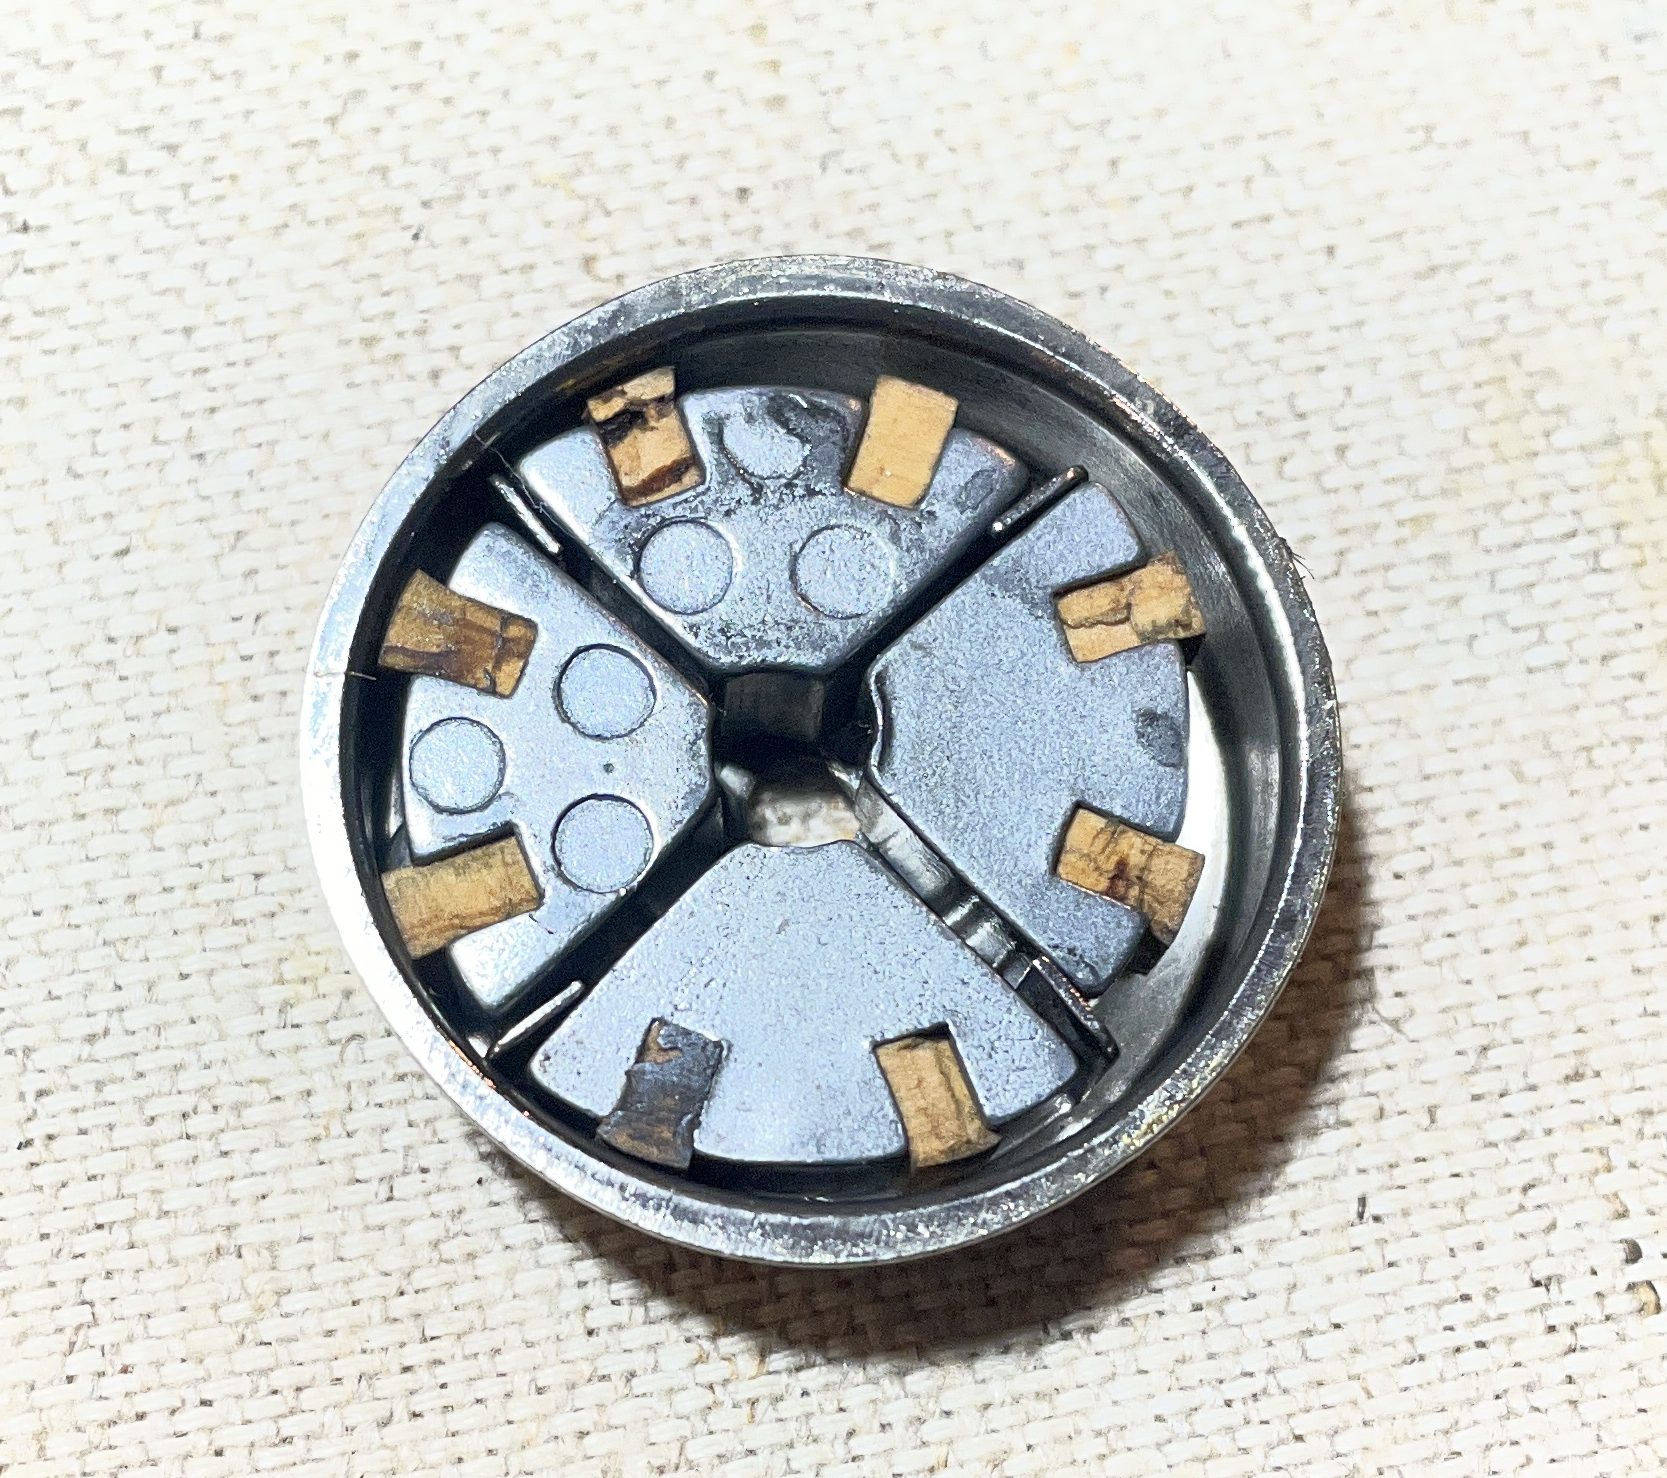
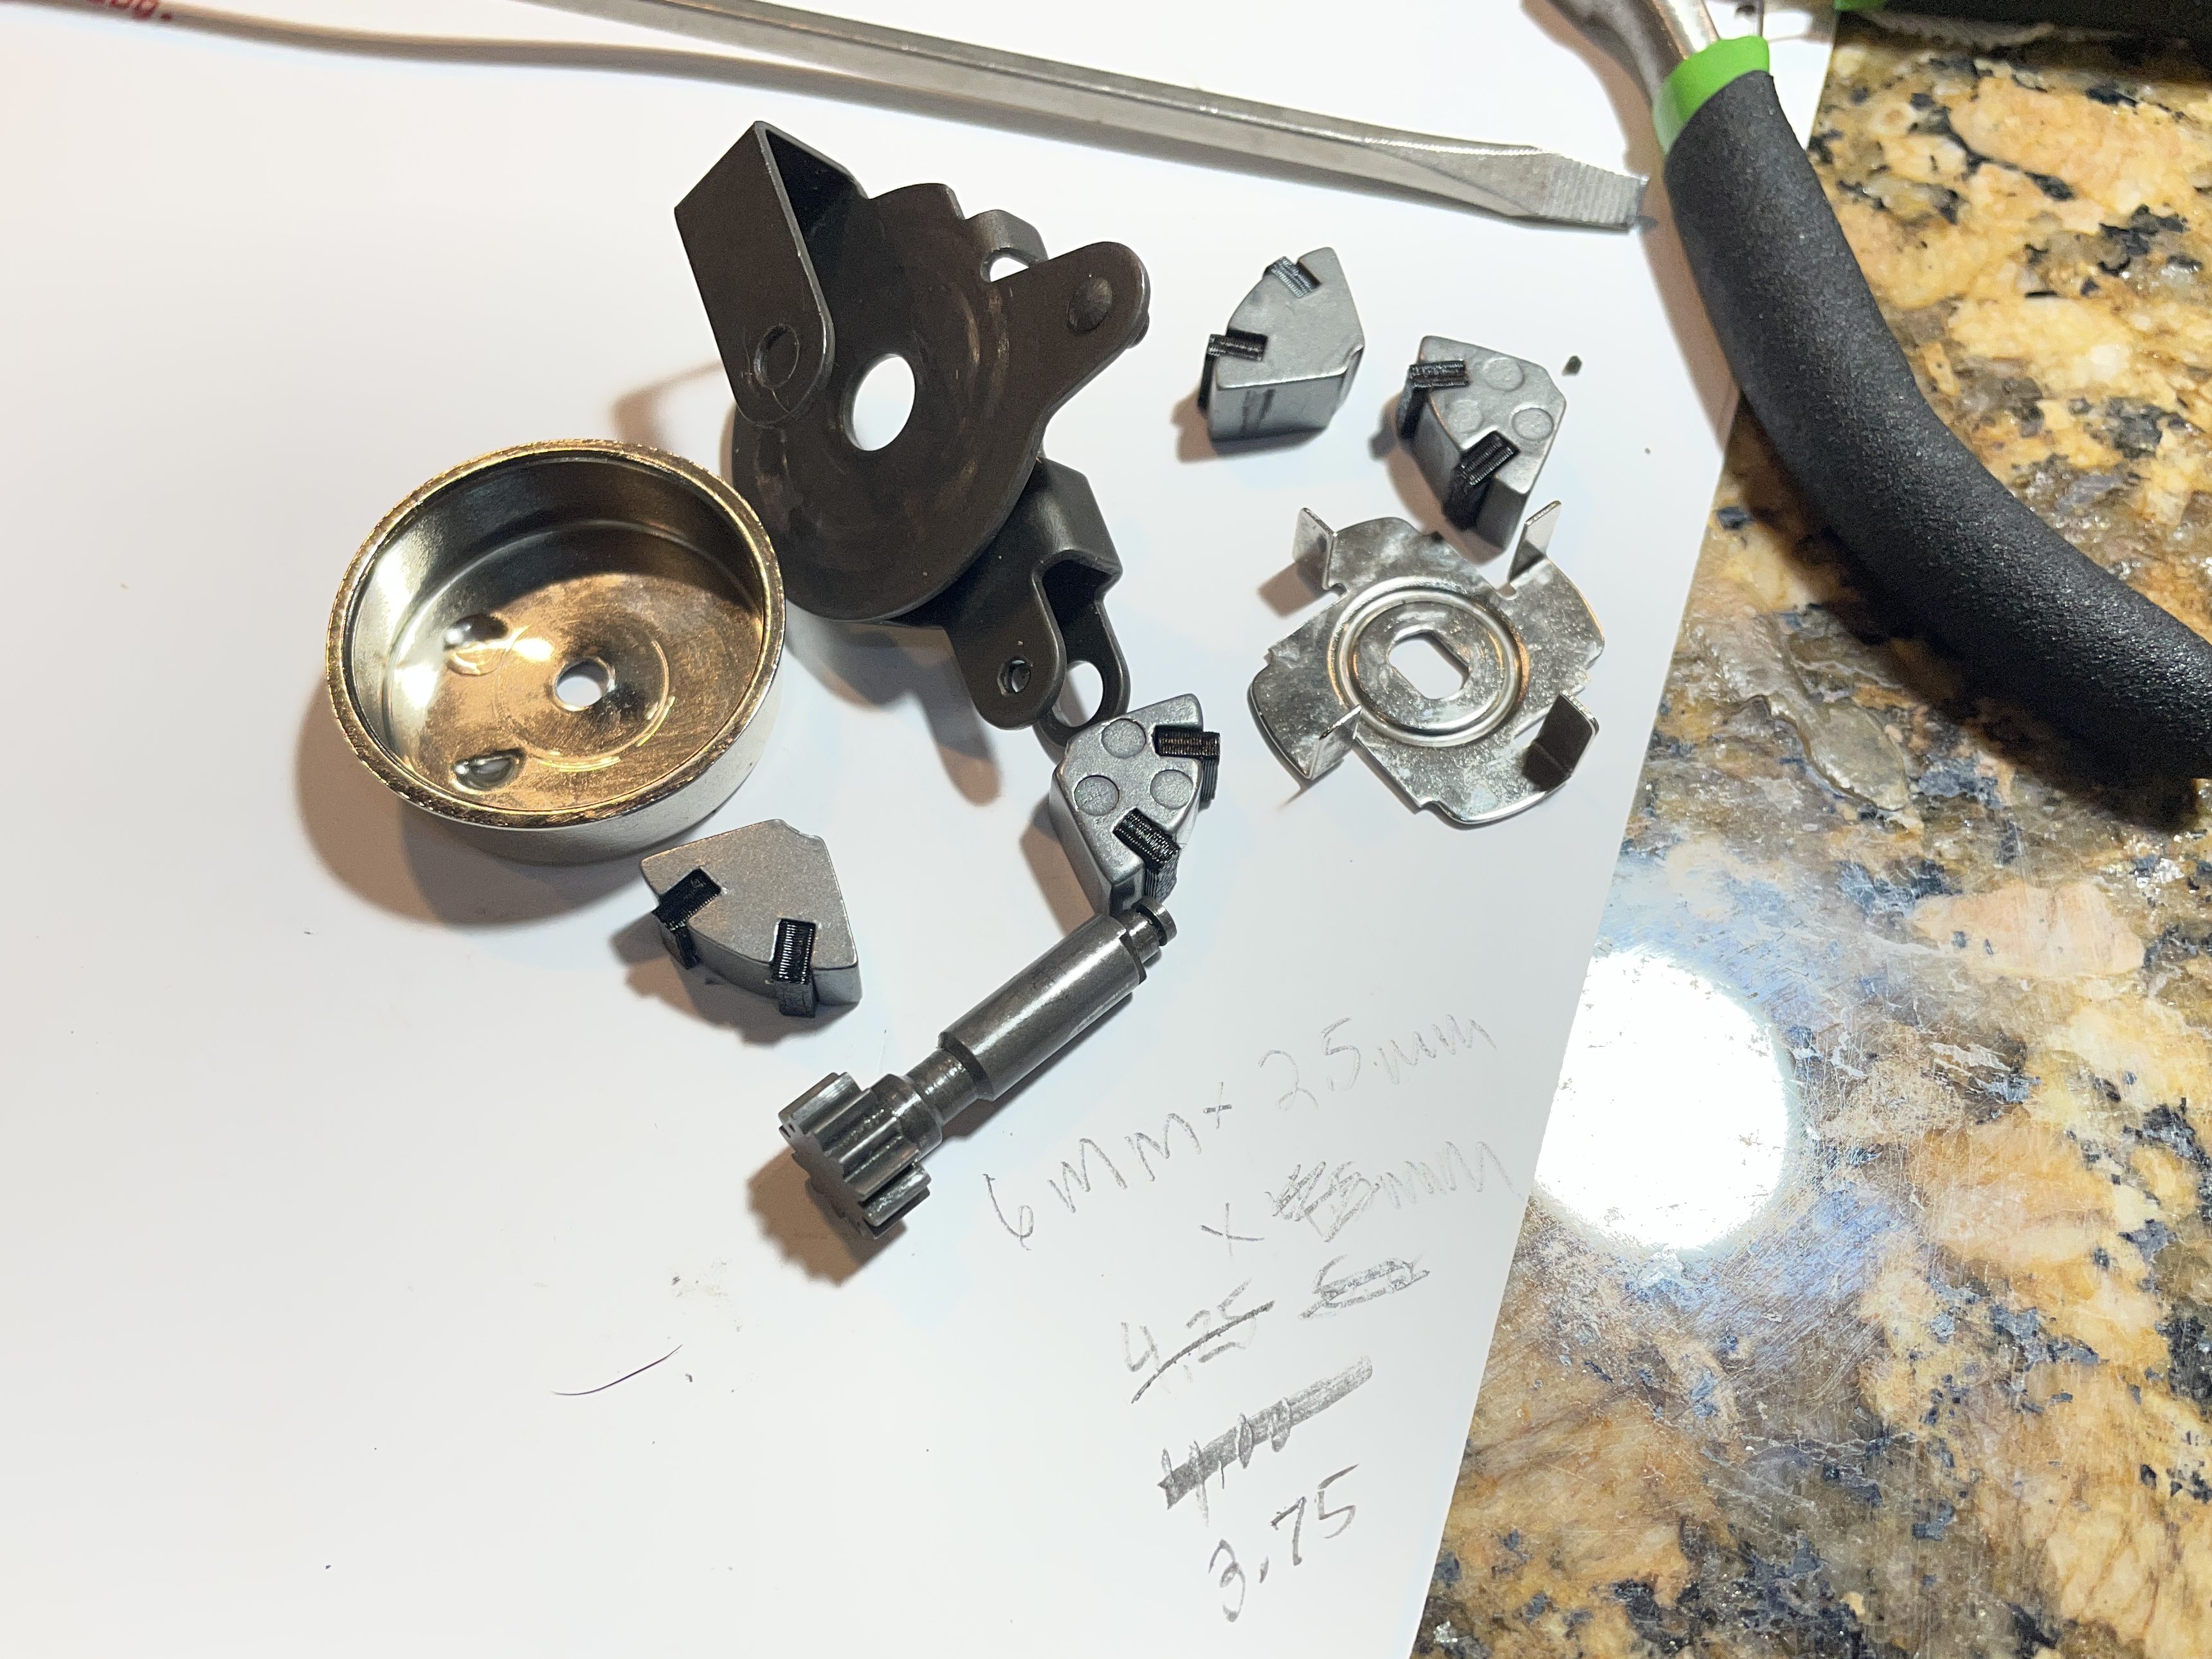
The cork/rubber (what are those pads made of?) was a bit crumbly. I went ahead and pulled the pinion rod out. Actually, it fell out. Anyhoo, here are all the pieces that you are working with. Note the rectangular slot in the brake case that needs to match up with the rectangular shape on the pinion rod so you are going to do some wiggling to get it back together.
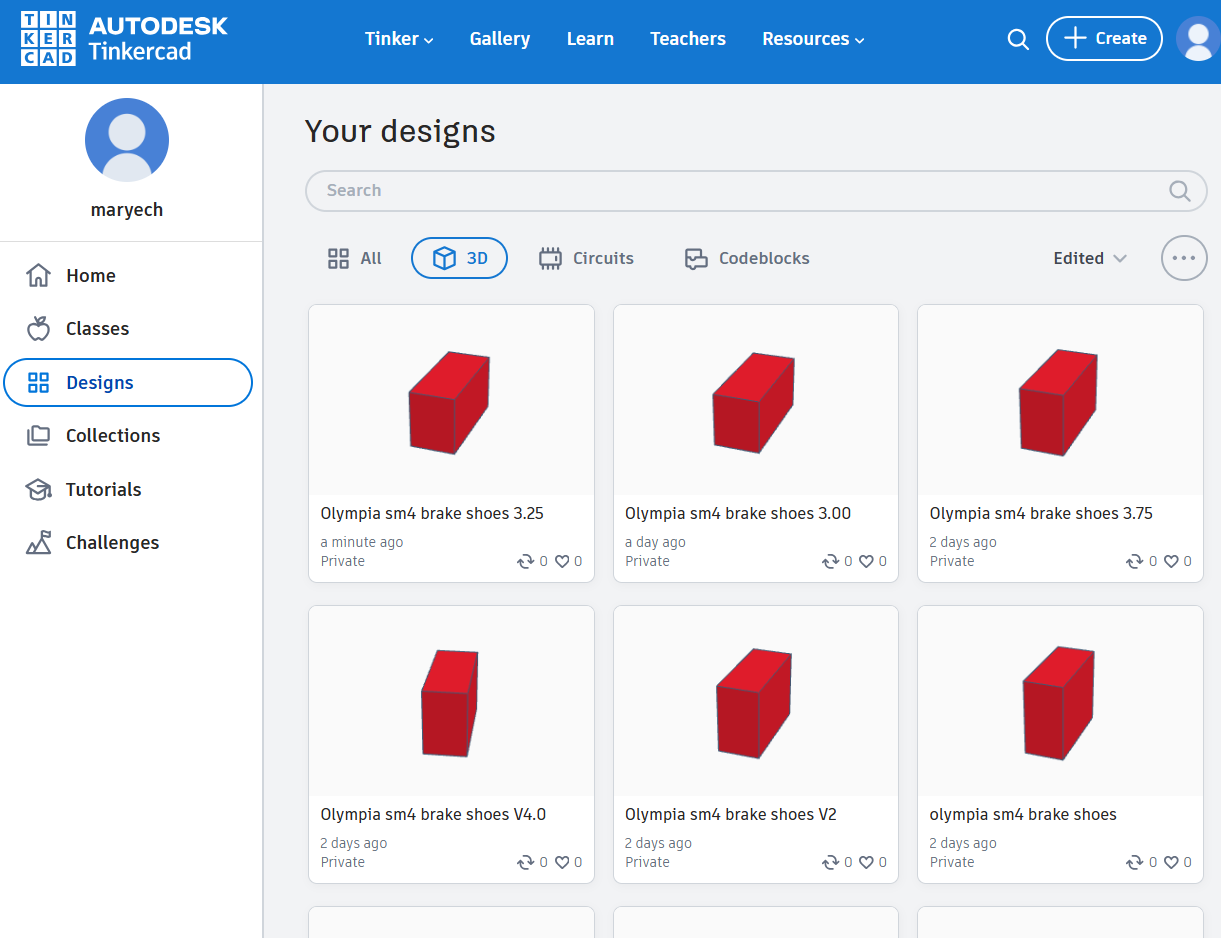
And thus started a journey where I modeled and printed various sizes of new brake pad inserts in Overture 95A TPU and tested each with the original brake body sections.
That wasn’t working. The carriage still choked and hung up when tabbing. I wondered if the pot metal segments of the original brake body were subtly deformed. I found a 3D model of a brake segment body for an SM7 at Thingiverse:
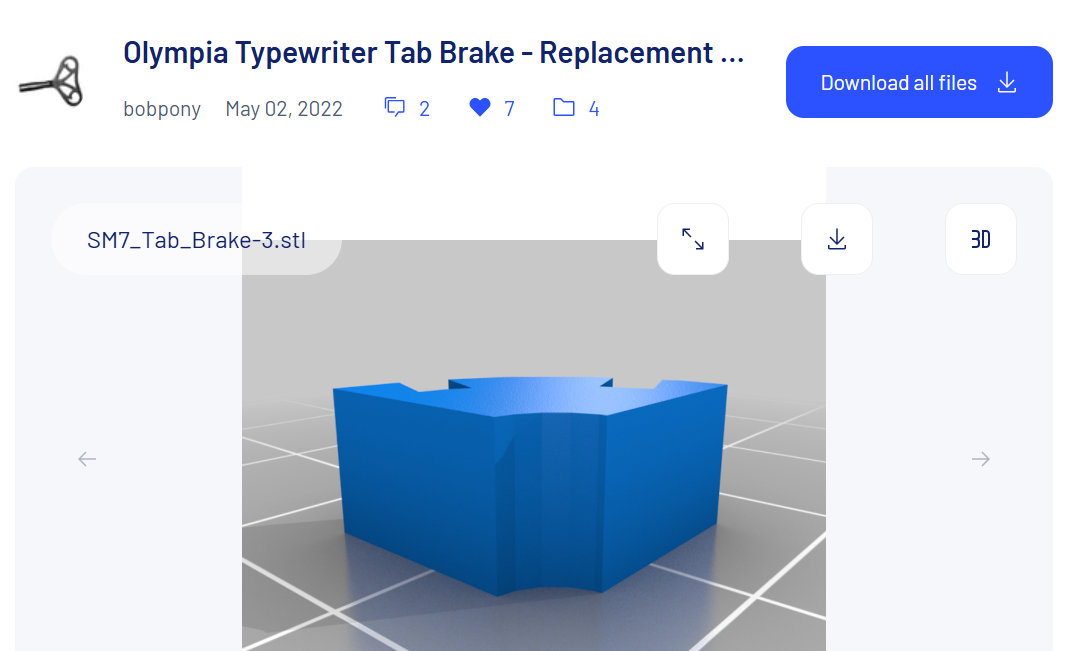
The 3D printed brake body was the perfect size. I tried various sizes for the pad inserts and tried tons of configurations:
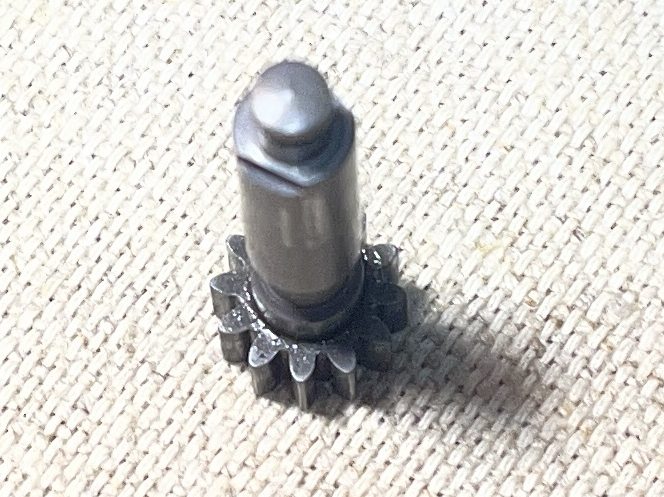
I had a side adventure where the pinion rod got stuck inside the brake drum and wouldn’t budge. UGH. In a panic, I removed the whole tab brake mechanism and mounting bracket so that I could wiggle the pinion rod out.
Terrible idea. It was extremely difficult putting the mounting bracket back into the machine with the carriage on.
If your pinion rod gets stuck, tip your typewriter from side to side to reposition the segments of the tab brake inside the case so you can free the pinion rod.
It was at that point that I said, “That’s it. No tab brake for you, SM4. Everything goes into a bag.”
However, it was still bothering me. I read through a post from the legendary Gerald Cha:
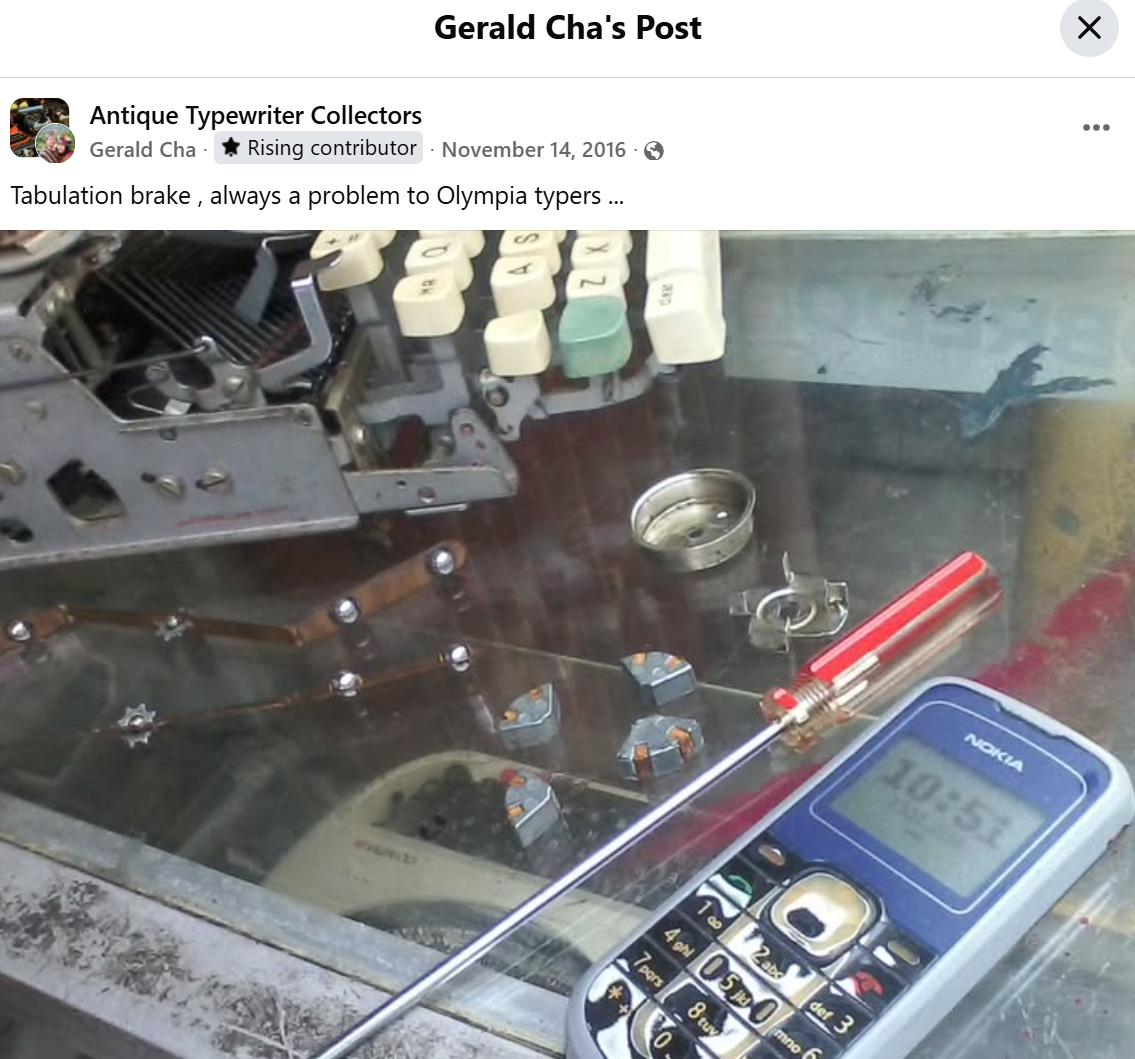

And if you look very closely, Gerald sanded those cork / rubber pads WAY down.
So I did this about eight more times. Here are the things I learned.
- It’s a much easier procedure with the carriage off—but you can do it with the carriage on.
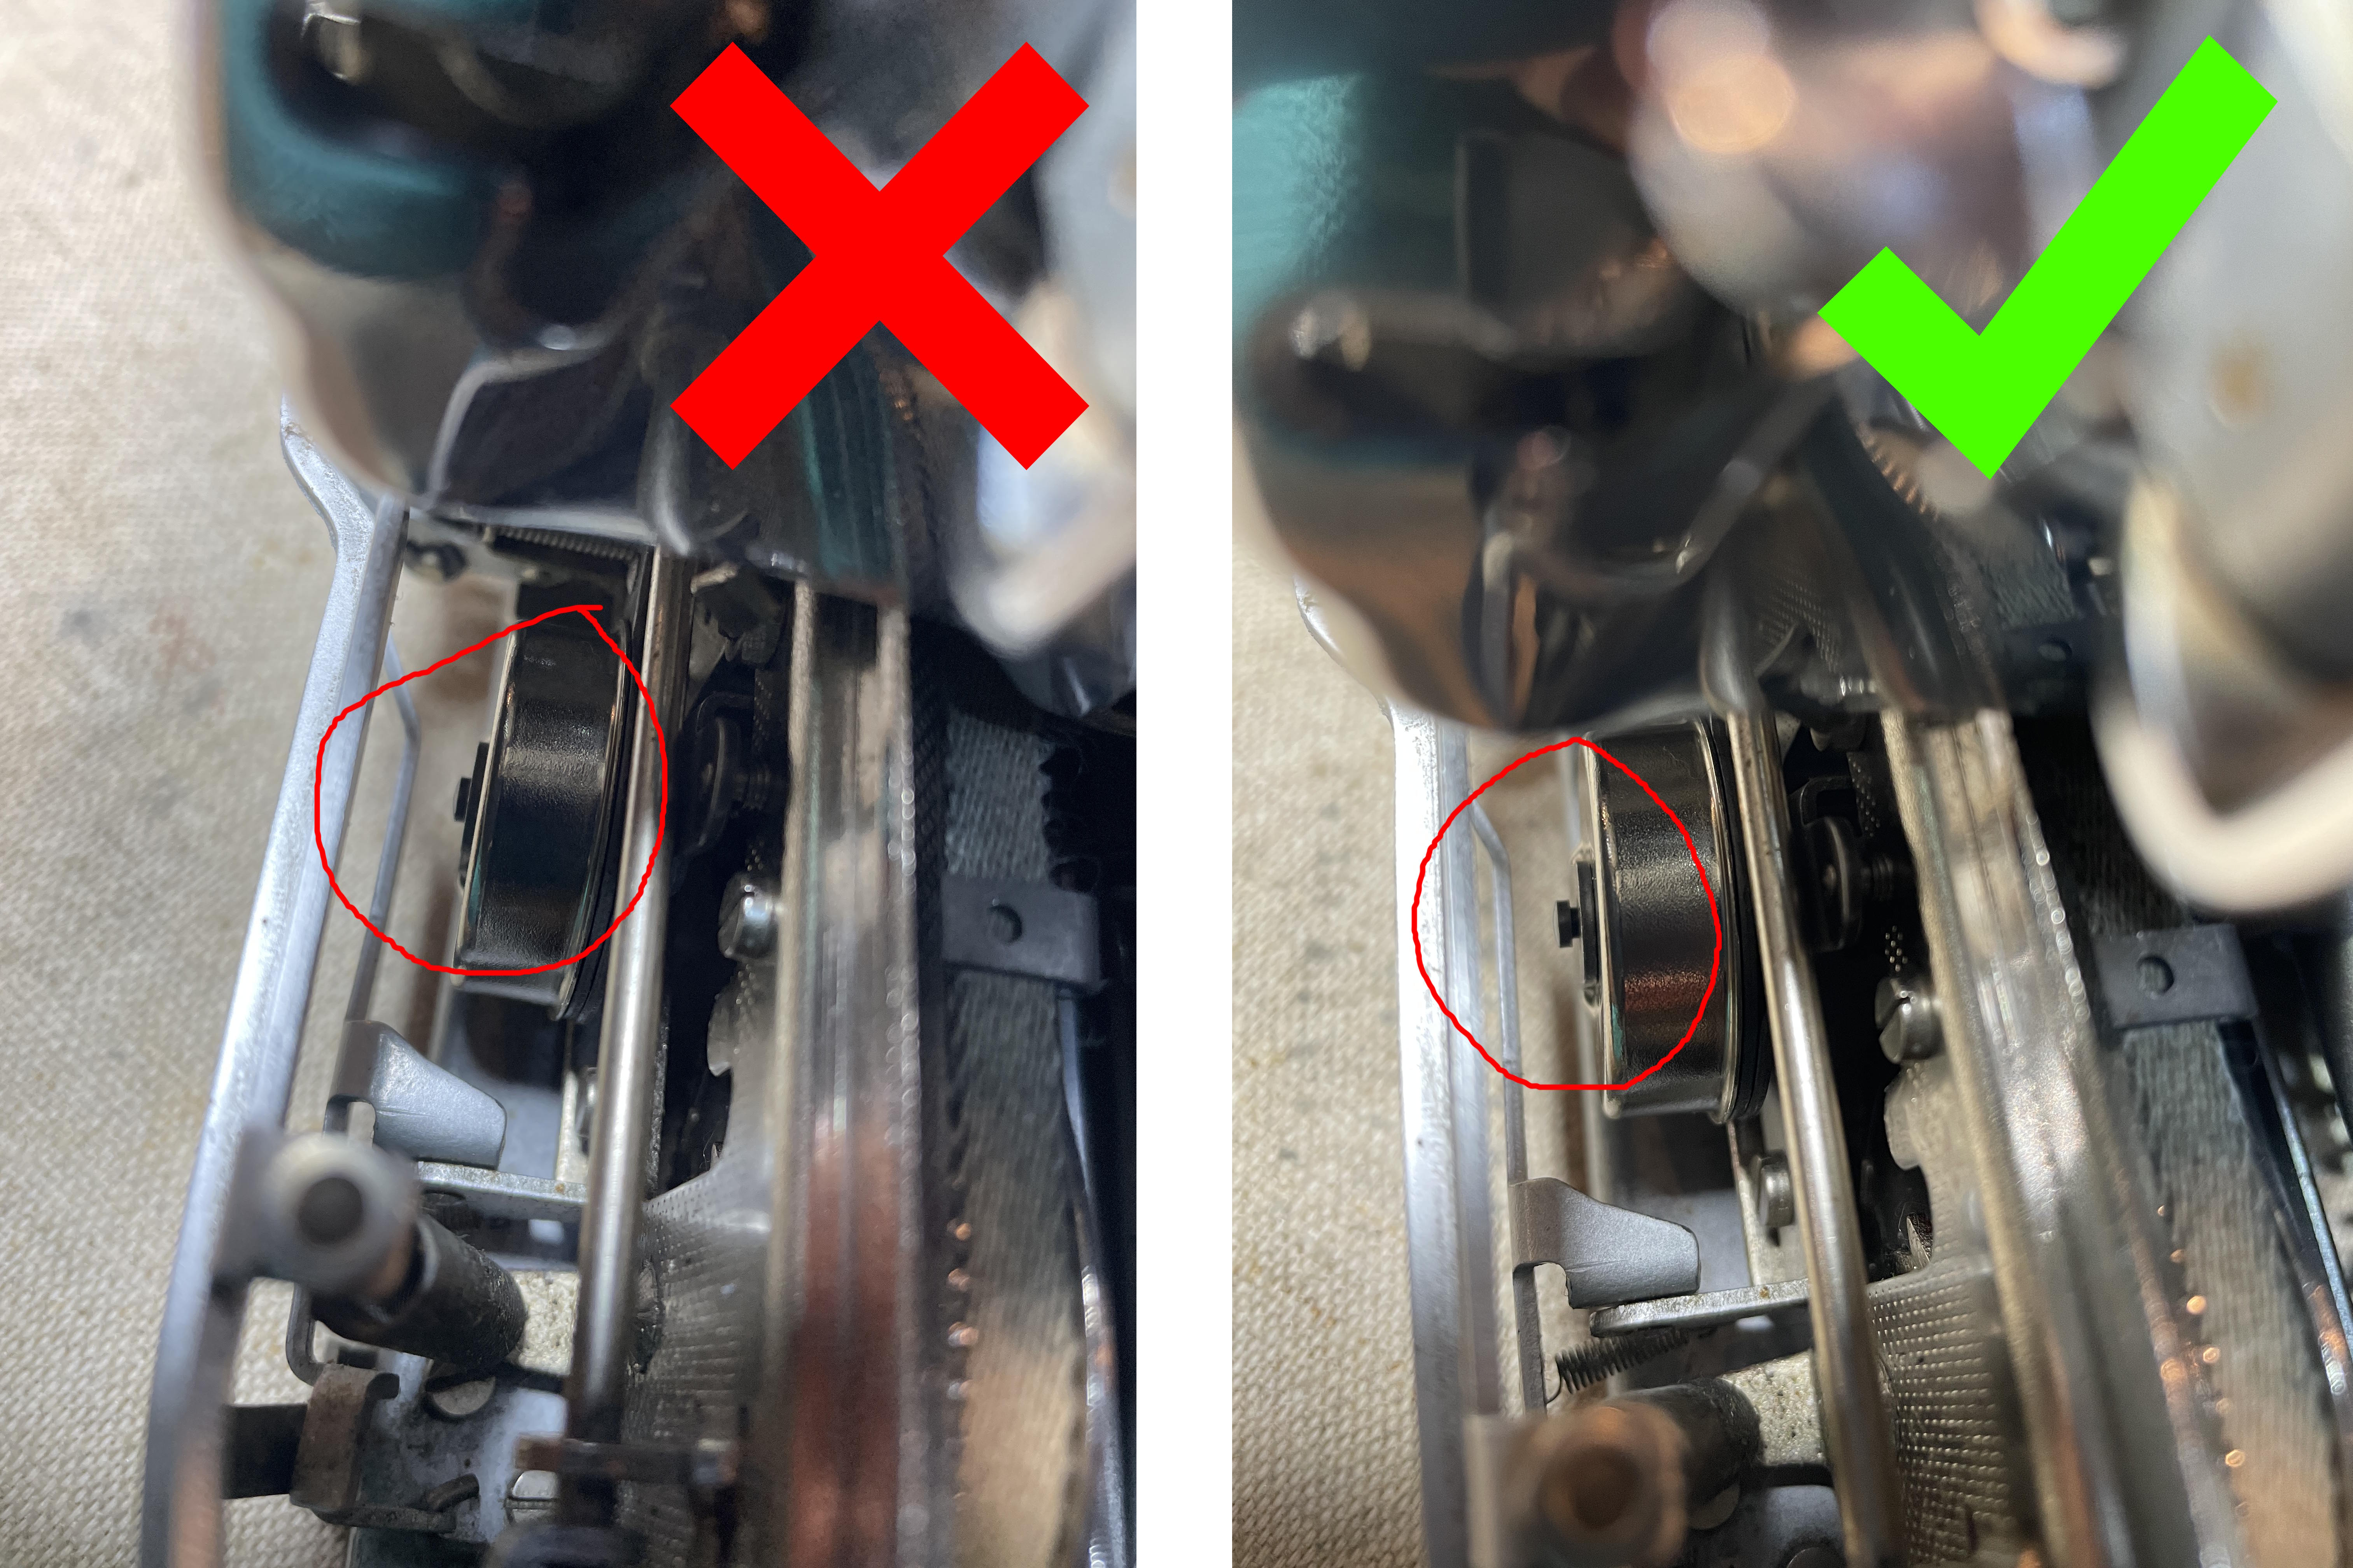
- The pinion rod needs to be wiggled through the tab brake case so that the rectangular notch in the rod matches the rectangular hole inside the tab brake case.
- The rod needs to be far enough out so that you can seat that E-clip.
I have high praise for that Olympia E-clip. Quality E-clip. I removed it and replaced it multiple times, and it never deformed or broke. And I lost it only twice *UGH* but found it on the floor. I kept it magnetized so that it would stick to the mounting bracket during fiddly replacement.
Hello, E-clip. We meet yet again.
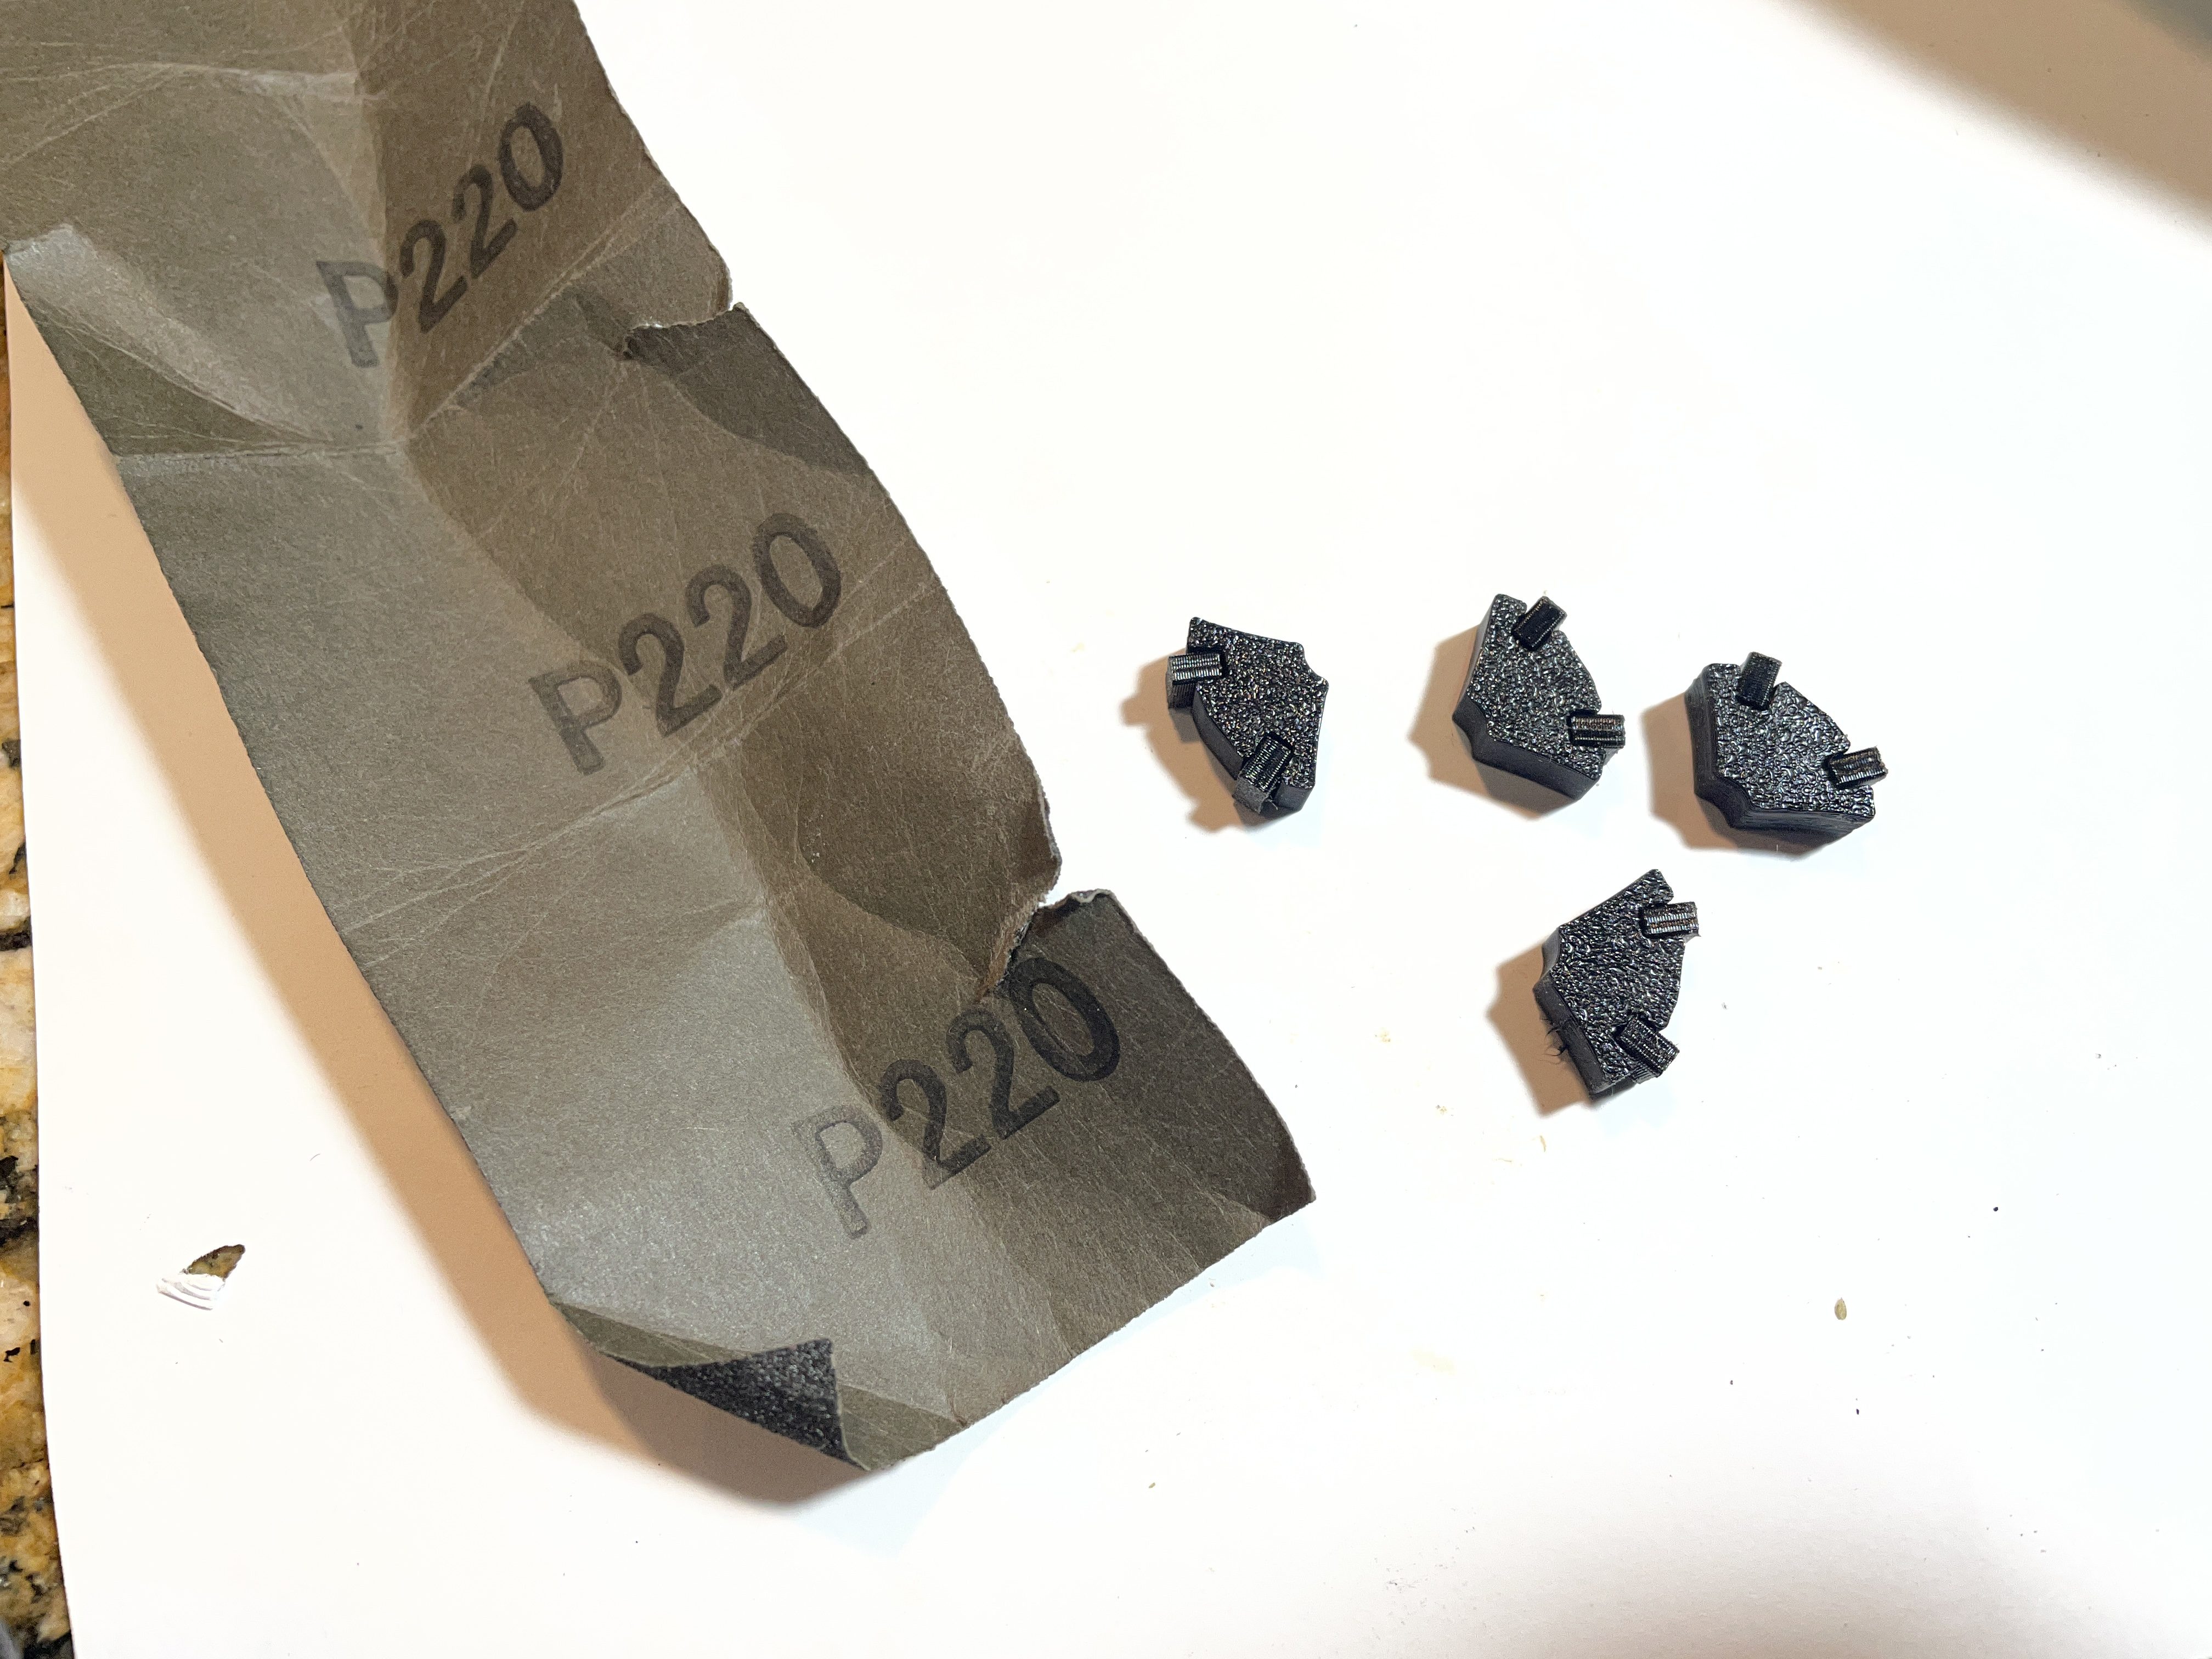
My best result was this configuration: 3D printed body with Overture 95A TPU inserts. Each insert sized 2.6mm x 6mm x 3.75mm and the side that comes in contact with the case sanded with 220 grit sandpaper.
The tabbing mostly didn’t choke or halt for long periods, and I could feel braking action. However, it was still not perfect. It intermittently choked and stalled.
I finally had enough. I ended up removing the tab brake and bagging everything. I set tabs every ten spaces. As you can see in the video below, the tabbing works great, but the carriage slams into the stops. There’s power under the hood of that Olympia.
I’m not done with that tab brake. I still have so many questions.
- Was this Olympia’s brake problem due to subtly deformed brake bodies, deformed brake pads, or contaminated brake pads?
- What did they originally look like?
- How far out are the pads supposed to stick from the brake body segments?
- How soft should the pads be? Was Overture 95A TPU an appropriate material?
- Does a 3D printed brake body segment have enough weight to function properly?
- Are the brake components supposed to be greasy or dry in the case?
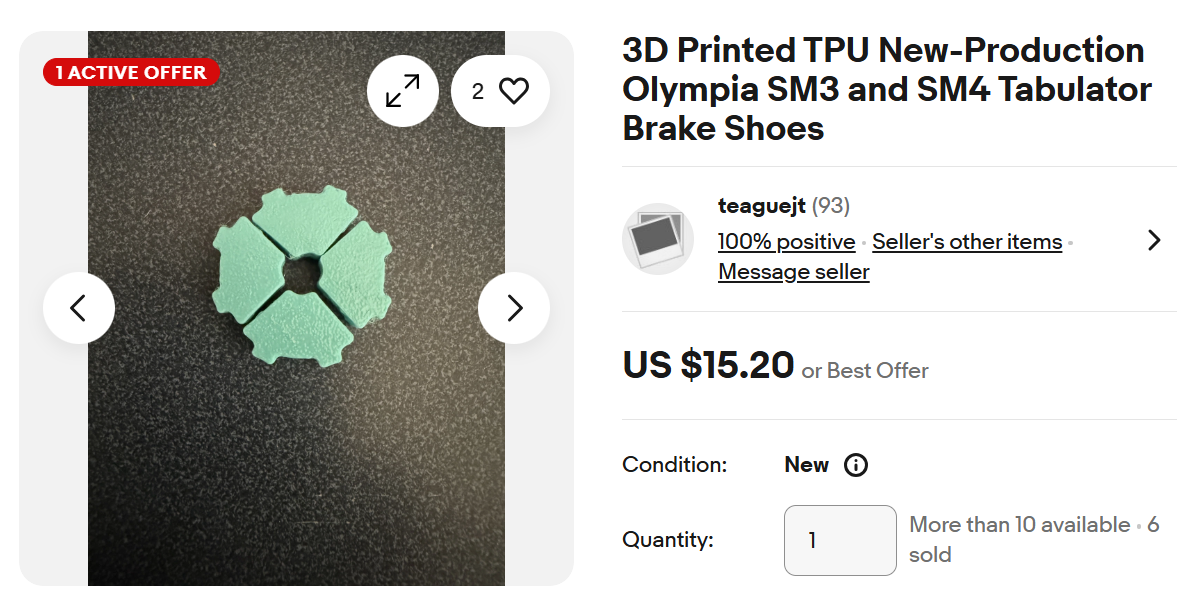
I bought these tab brake shoes on eBay and will install and test when they arrive. Expect a follow-up report. I may get better results with these.
As I was finishing up the typewriter, I found out from Monica that the Olympia actually does have a name: Fr. Tom, after the priest who had owned the typewriter. It now seems kind of disrespectful to call the Olympia Murderbot, but until I fix that governor module (tabulator brake), that’s what I’ll call it.
Fr. Tom / Murderbot is just hanging out on my workbench for the time being. It’s missing its tab “set” button. I checked with Trevor at TB Writers Plus and he doesn’t have one, so I may model a replacement and 3D print it.
The machine cleaned up beautifully as Olympias often do. The high quality materials and thoughtful design touches make it a solid machine and a joy to work on. I think I am going to look for more junker Olympias to tinker with.
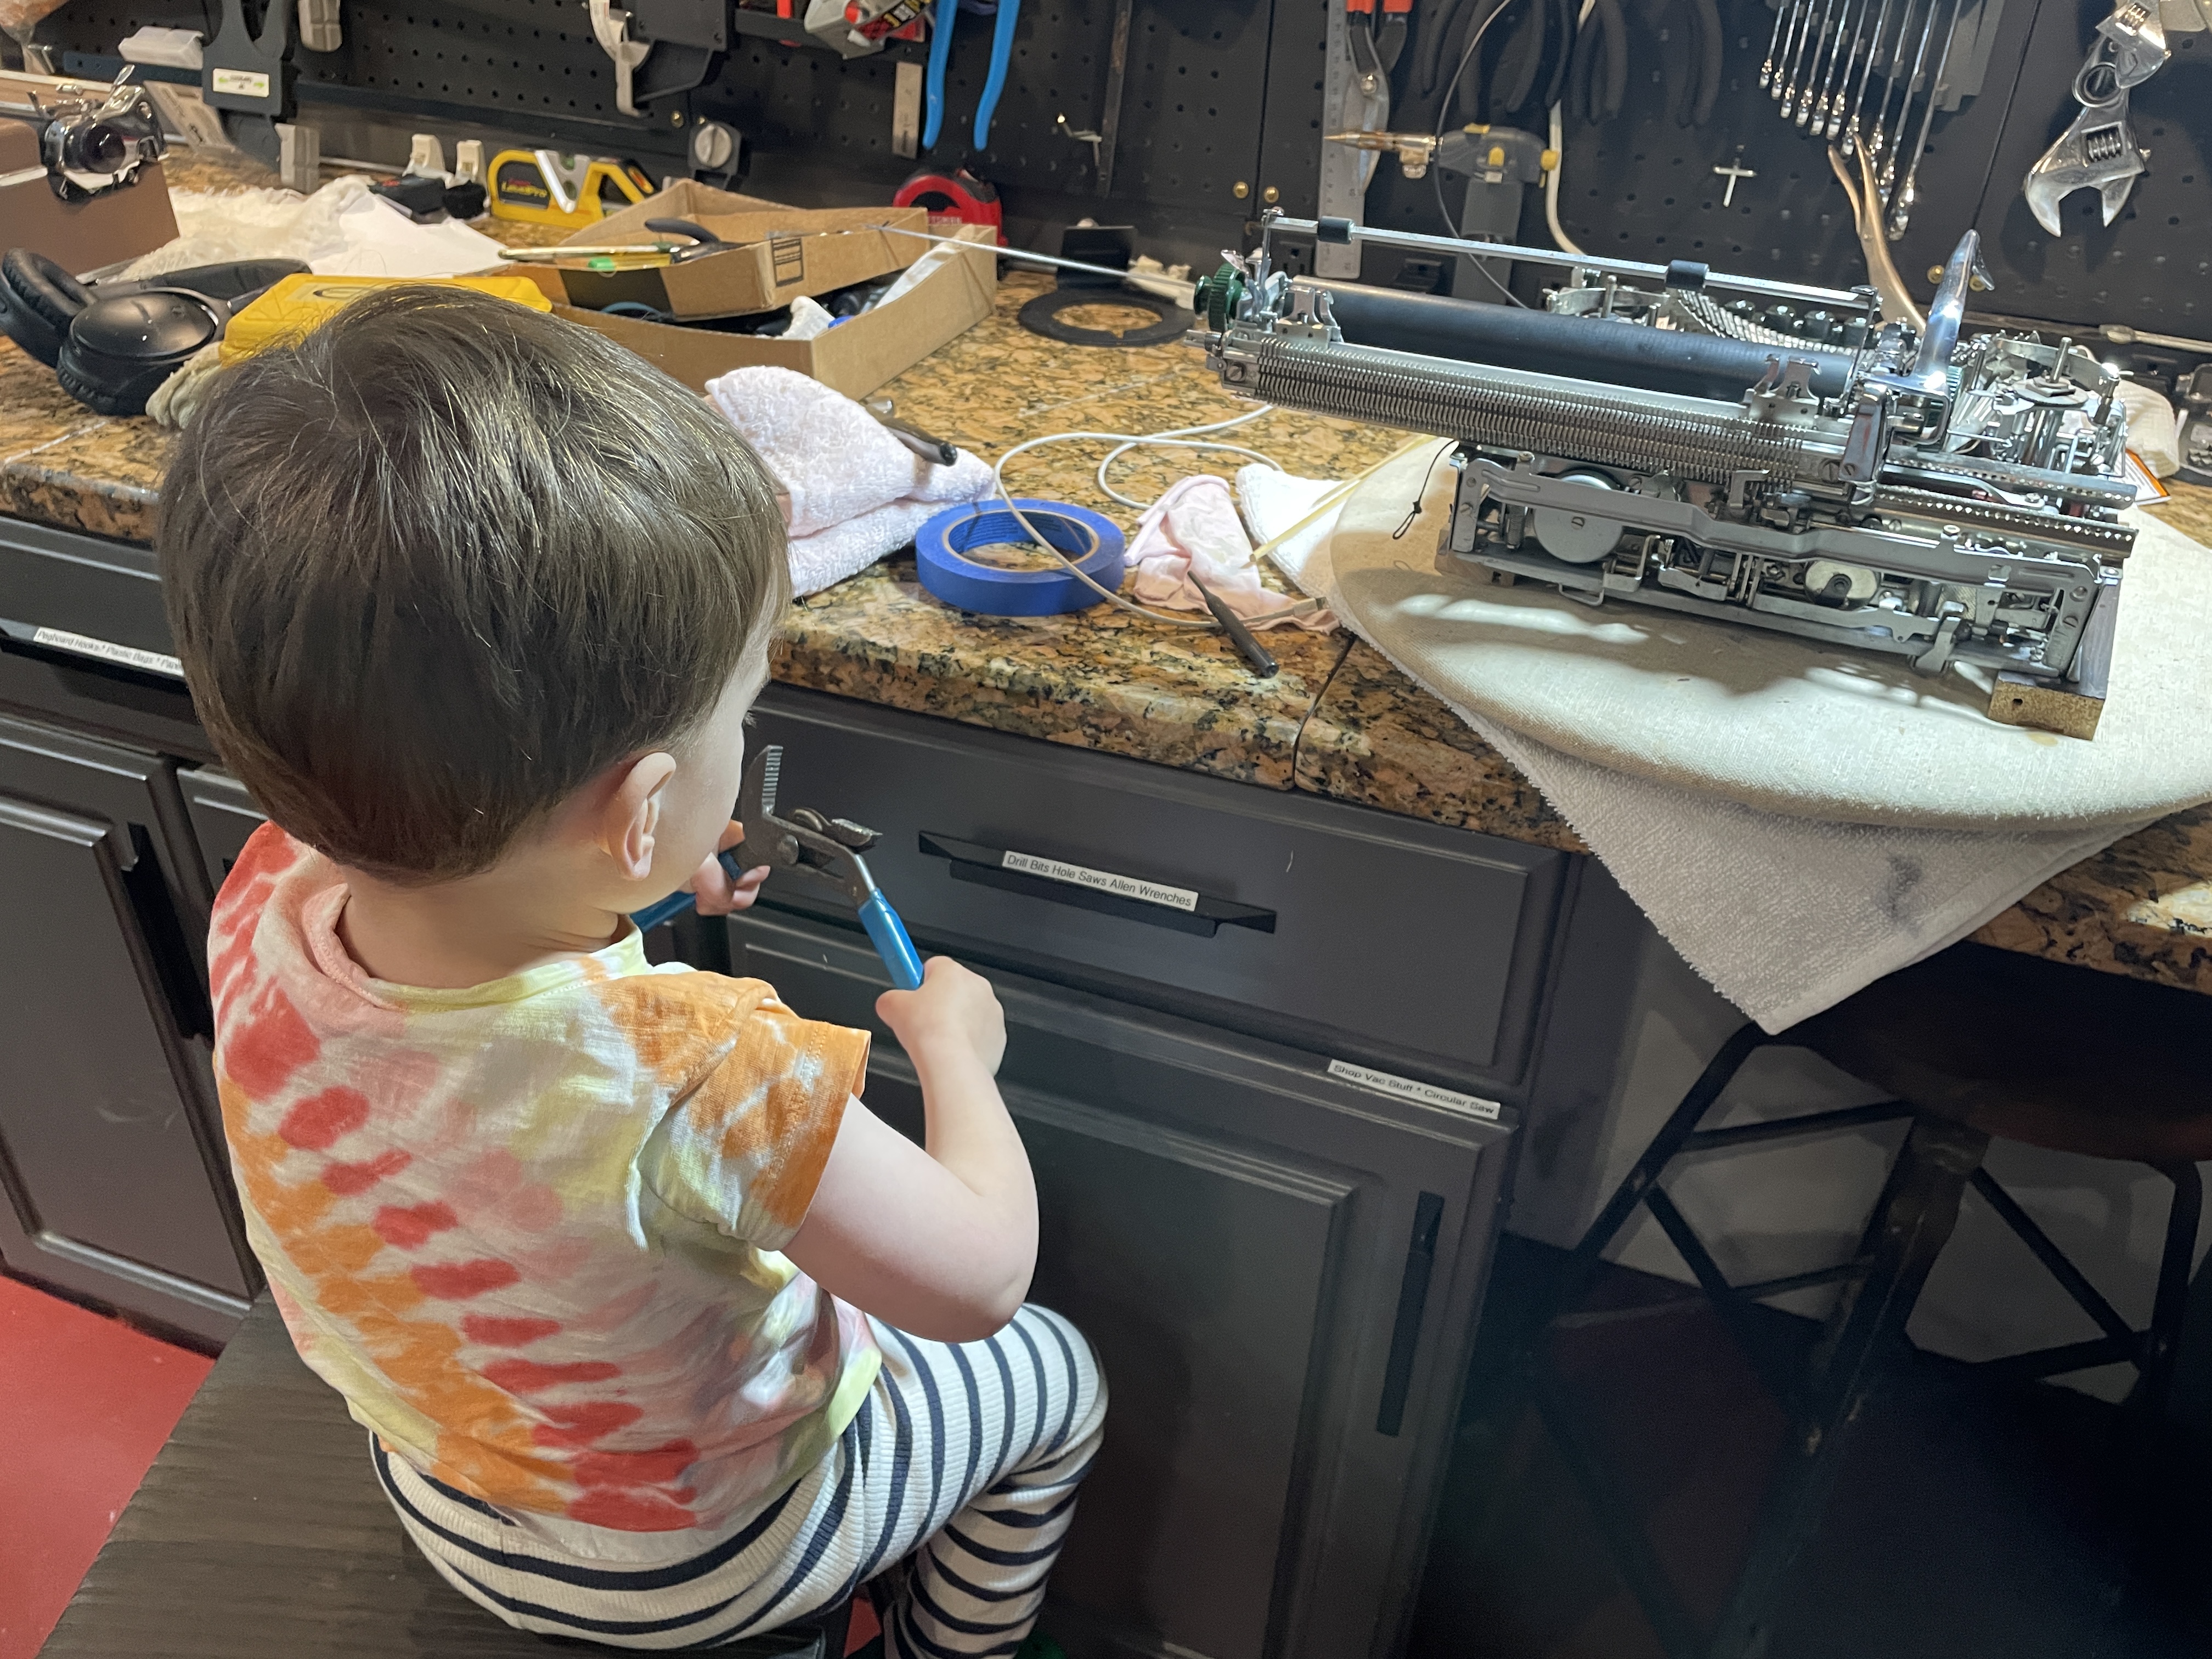
It has been a good project machine for me. I learned A LOT and am grateful to all the people who put up resources online. I also had help from my young apprentice (though I did most of my work during naptime). Note: he kept his distance from any possible cadmium-encrusted leaf springs.

yy
LikeLike
Regarding the plastic line scales, clean them with metal polish. Methylated spirits (denatured alcohol) used to be OK but some manufacturers now add acetone to the mix, and that destroys many plastics. Regarding the tab. brake, new corks can be cut from a wine bottle cork using a sharp craft knife. The best way to test if the brake shoes are binding, and perhaps need the side filing down is to remove the tab. brake again (yes, I know !) and twirl the pinion between finger and thumb.
LikeLike
Regarding the tab brake, fresh cork was the one thing I didn’t try – I wasn’t confident that I would be able to produce consistent sizing of the pads. You’ve inspired me to keep on testing.
LikeLike
I should have added….. I have no experience of using 3D printed tab brake shoes, but I would have thought that they would be too light and I do not think much of the ‘built in’ tab brake ‘corks’, which being plastic would have next to no grip on the brake drum. Like putting plastic brake shoes on your car !
LikeLike
The tab brake shoes I ordered on eBay are on their way and I look forward to testing. The description says that they are made of TPU which a rubbery material. We’ll see if they have enough grip for braking.
The brake bodies I printed out performed better than I expected. They didn’t have the satisfying heft of the originals of pot metal, but they failed much less often.
LikeLike
You are unbelievable……my GOSH. the trouble you take. At this point I avoid most mechanical fixes like bubonic plague..I just do not have the sitz fleisch or patience(maybe writing sonnets uses up most of that)….I would have dropped that sm4 outta the window….and video it smacking!!.I do remember my first SM3…binding. I spent a day (before lotta internet info)…messing…chnaged the carriage height…adjusted the caps etc etc…adjusted back…mmmm….grrrrrr…I finally reasoned that the chassis and body were too close. HAH it was those rubber bushes(I often use metal washers…no difference)…sometimes we learn the long hard way….but I truly admire your skill and focus….BRAVO…I have a mantra. for me and other typoholics….”do not EVER remove anything, any screw from a typer unless 157,000 times needed because it will take you from two to FIFTY times longer to re-attach it….PS Don’t EVER take part the return lever small housing below the lever on an Erika Modell M…unless threatened by typhus infection…well…I have two big gorgeous Ideal desktops circa ’45-50…one with a destroyed escapement for parts…other??? carriage jammed. can’t get it off….draw cord -all else looks good….next week I’ll sit down with it..(I’m still always learning more about paint restoration and polishing)..again BRAVO to you Mary!!!
LikeLiked by 1 person
You’re very kind, Nick. But I have to say, I wouldn’t be able to do much without all the online resources currently available – the forum discussions, the manuals, the videos. Long posts like this are a page in my mechanic’s notebook where I can return and read all the information I collected from others. I hope it helps others out there too.
LikeLike
I personally am very grateful to peek into your mechanic’s notes 😀
LikeLiked by 1 person
Right back at you. And thank you for keeping all those typewriter manuals alive in print and online.
LikeLike