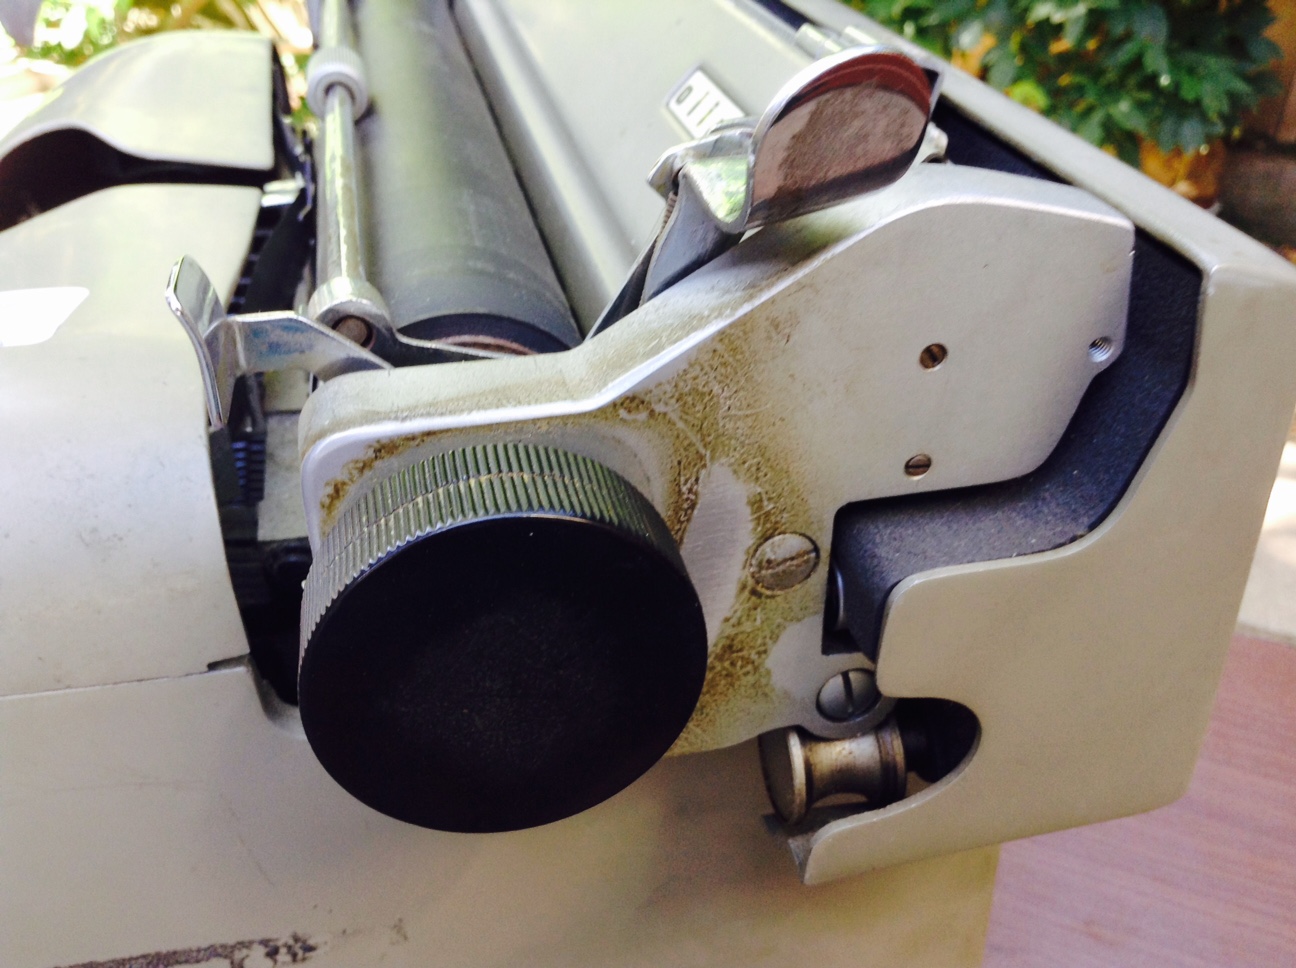
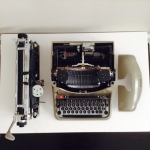
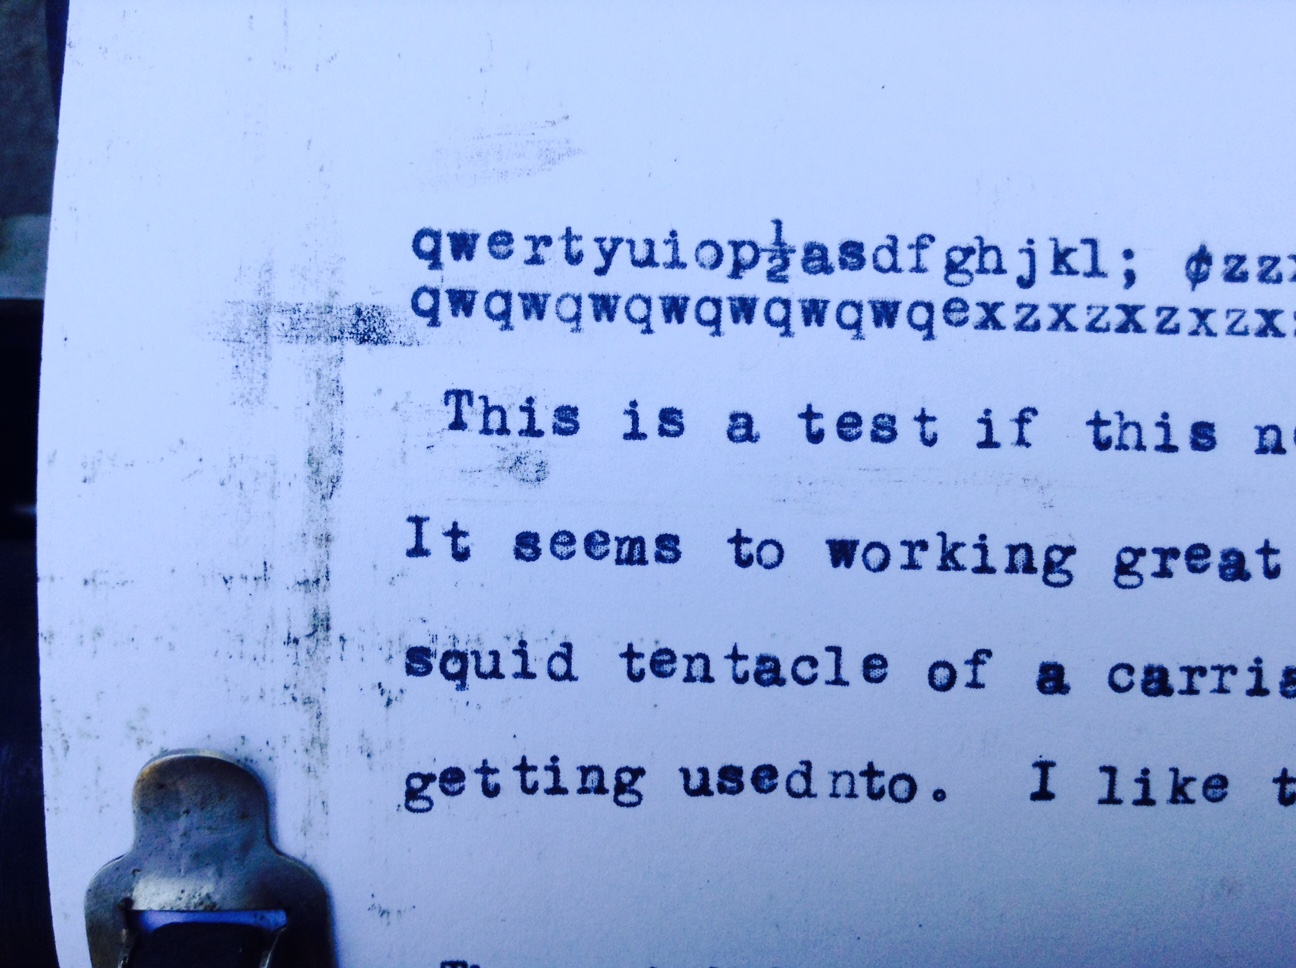
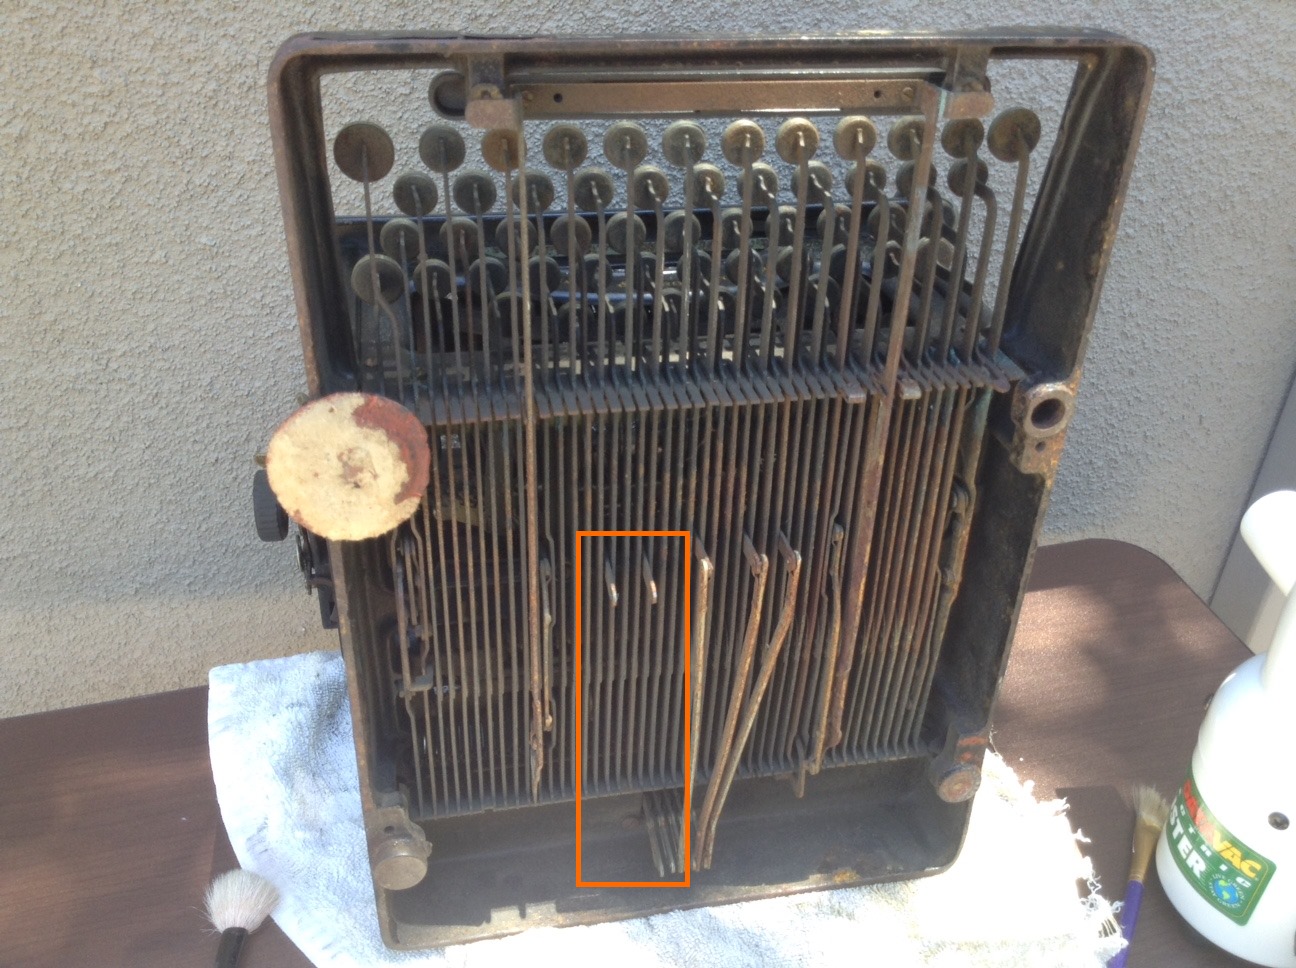
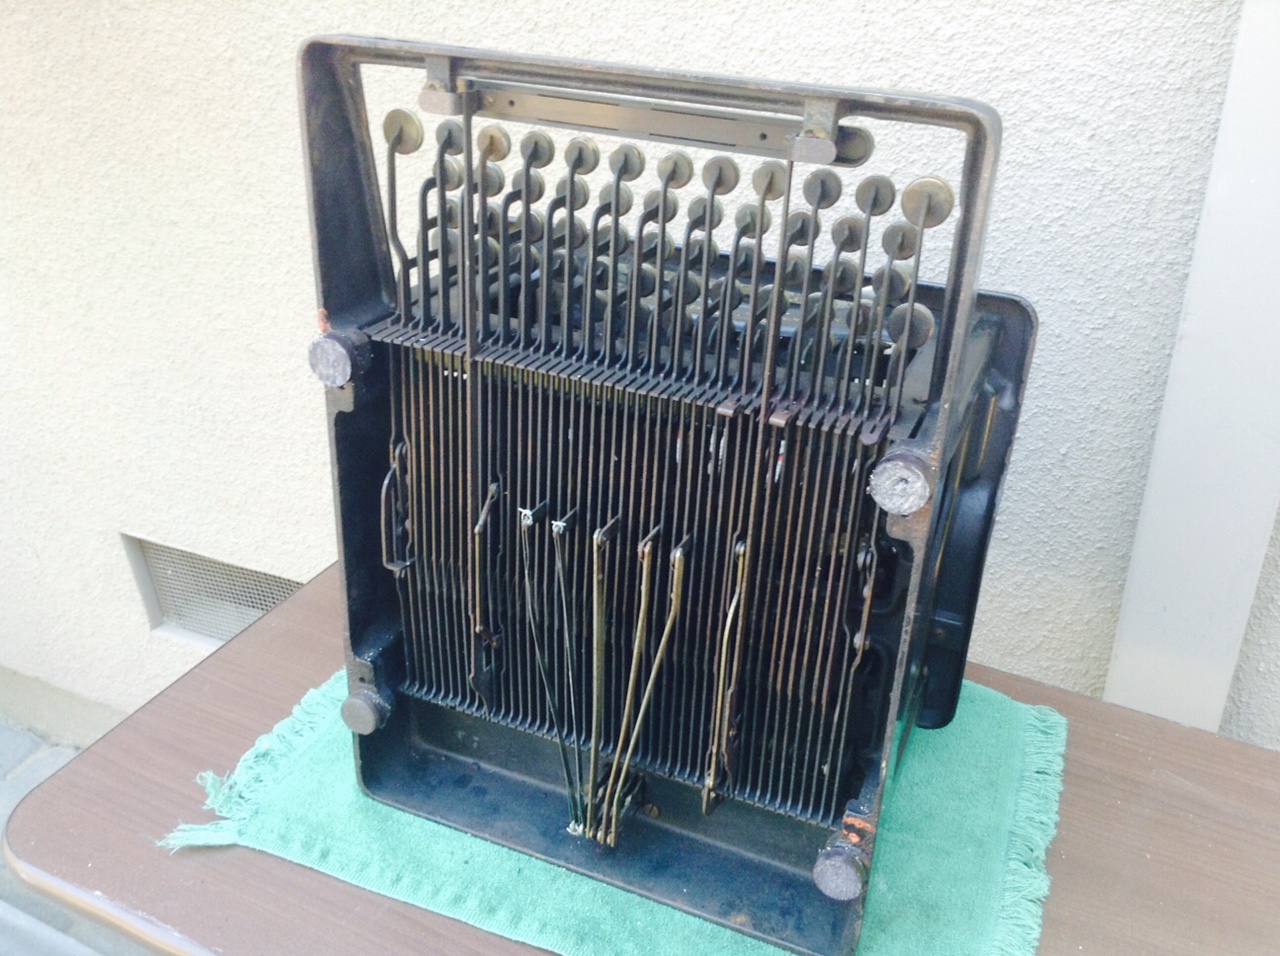
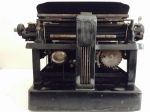
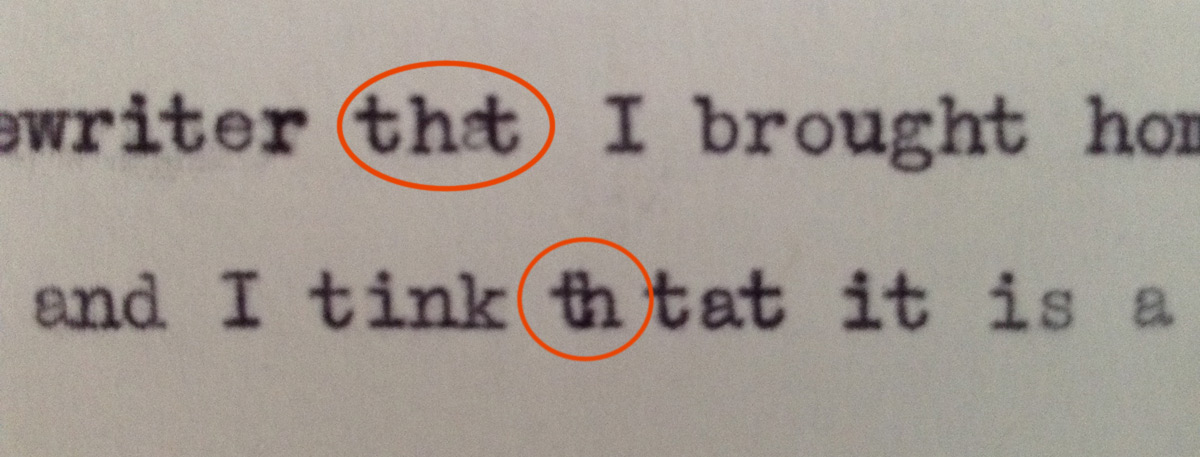
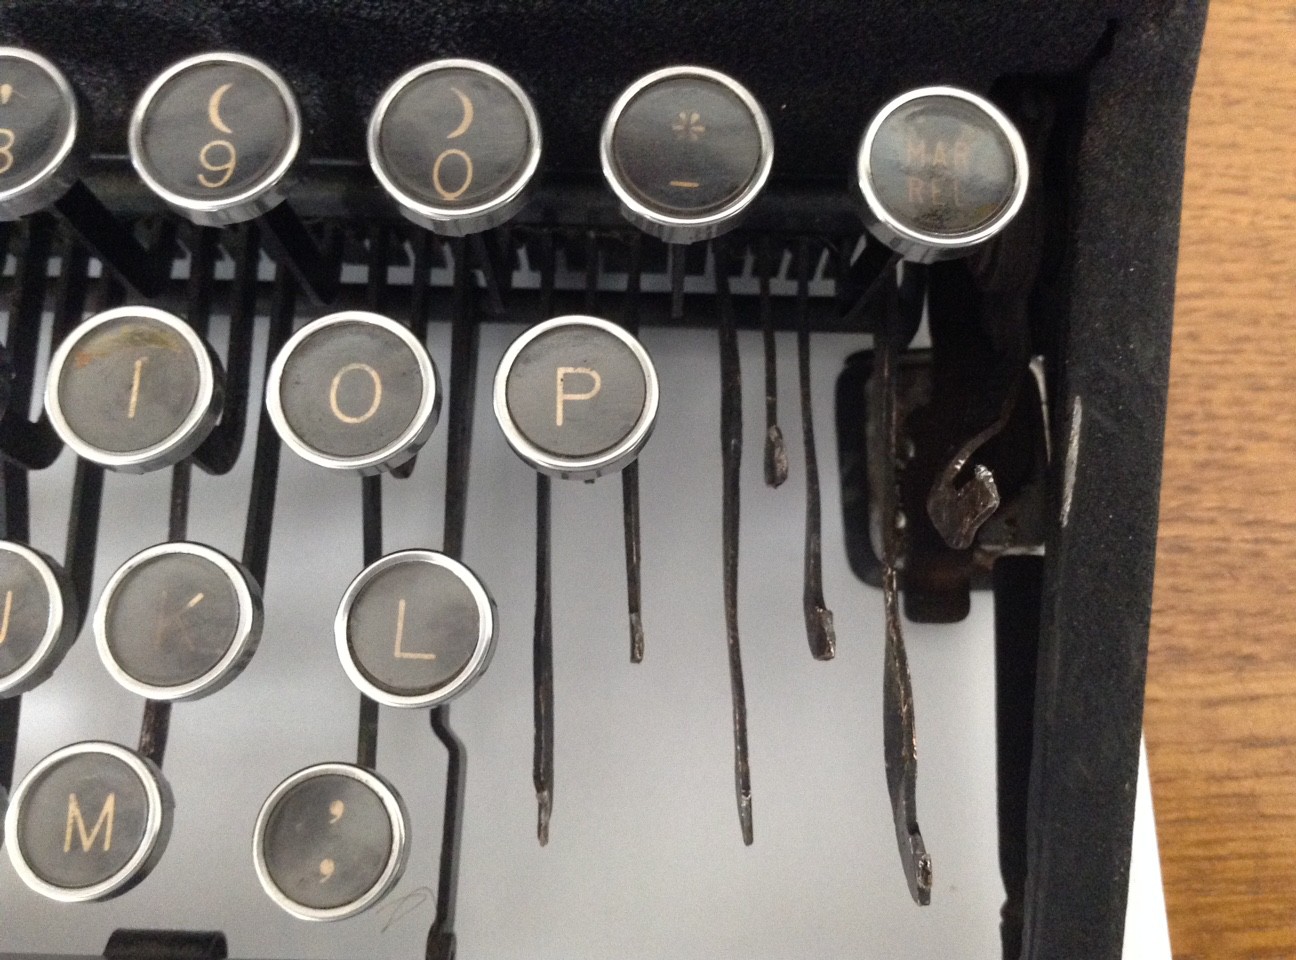
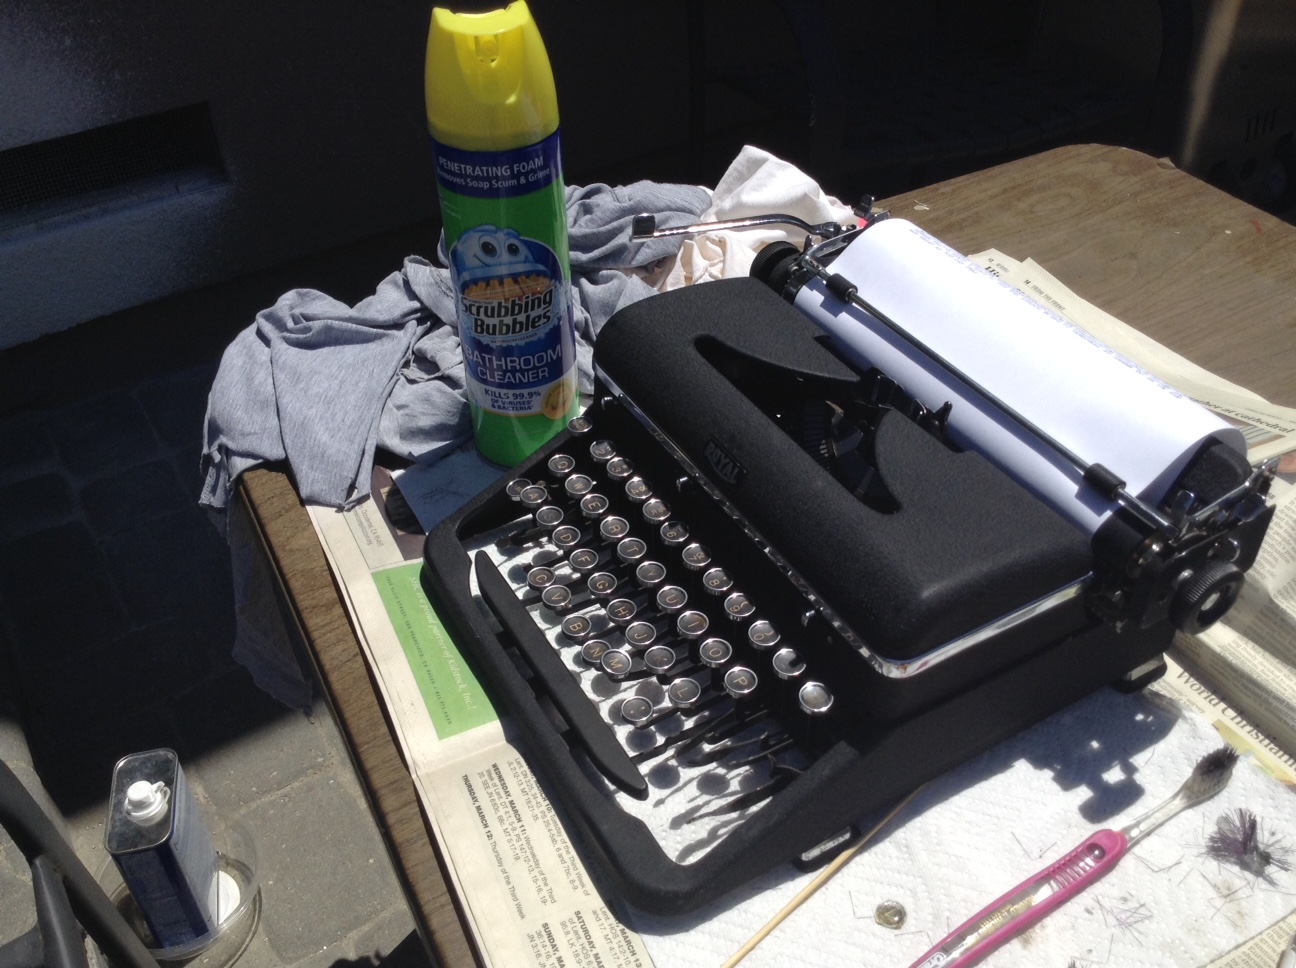
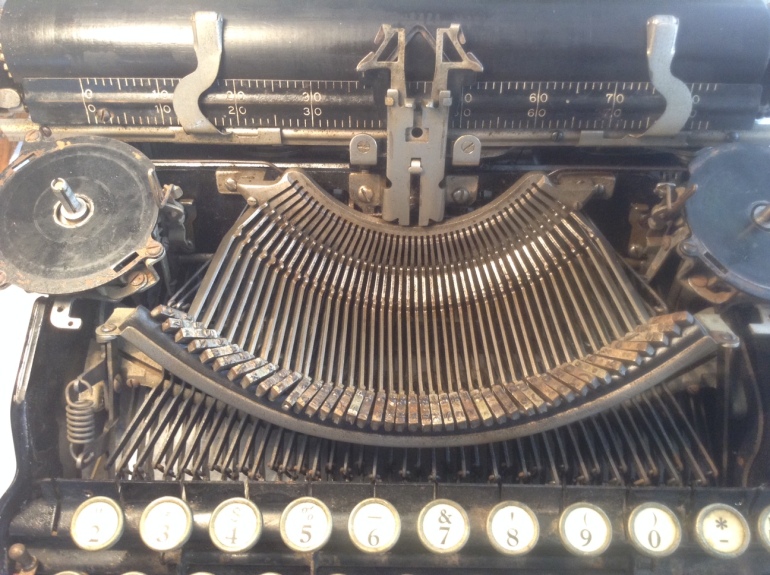
My plan last week was to clean Moe’s Oliver No. 9 typewriter on Monday and Tuesday and get it back to Moe’s shop when she re-opened on Wednesday. I hated to keep the Oliver off her shelves longer than necessary, especially since it was getting so much interest even in its nonfunctional state.
Repairs and fixes to my typewriters


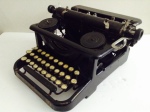
20th Century Fox: Fox No. 24 Typewriter Reassembled
I have been cleaning and tinkering with my Fox No. 24 typewriter for the past few weeks.
Sugru for Key Letters
It look like someone – in a fit of boredom – took a ballpoint and scratched out a couple of the letters on the Fox’s keys. I got some white Sugru at Target for the key tops where the lettering has worn off. Sugru is a self-setting rubber product that is removable. I pressed it into the key letter depressions and scrapped away the excess. It sets in about 24 hours. If I change my mind about the letters later on down the road, I can peel it off.


Not too shabby; now the letters are readable. The letters are a bit white; I may tone them down a bit with a yellowish glaze.
Gluing
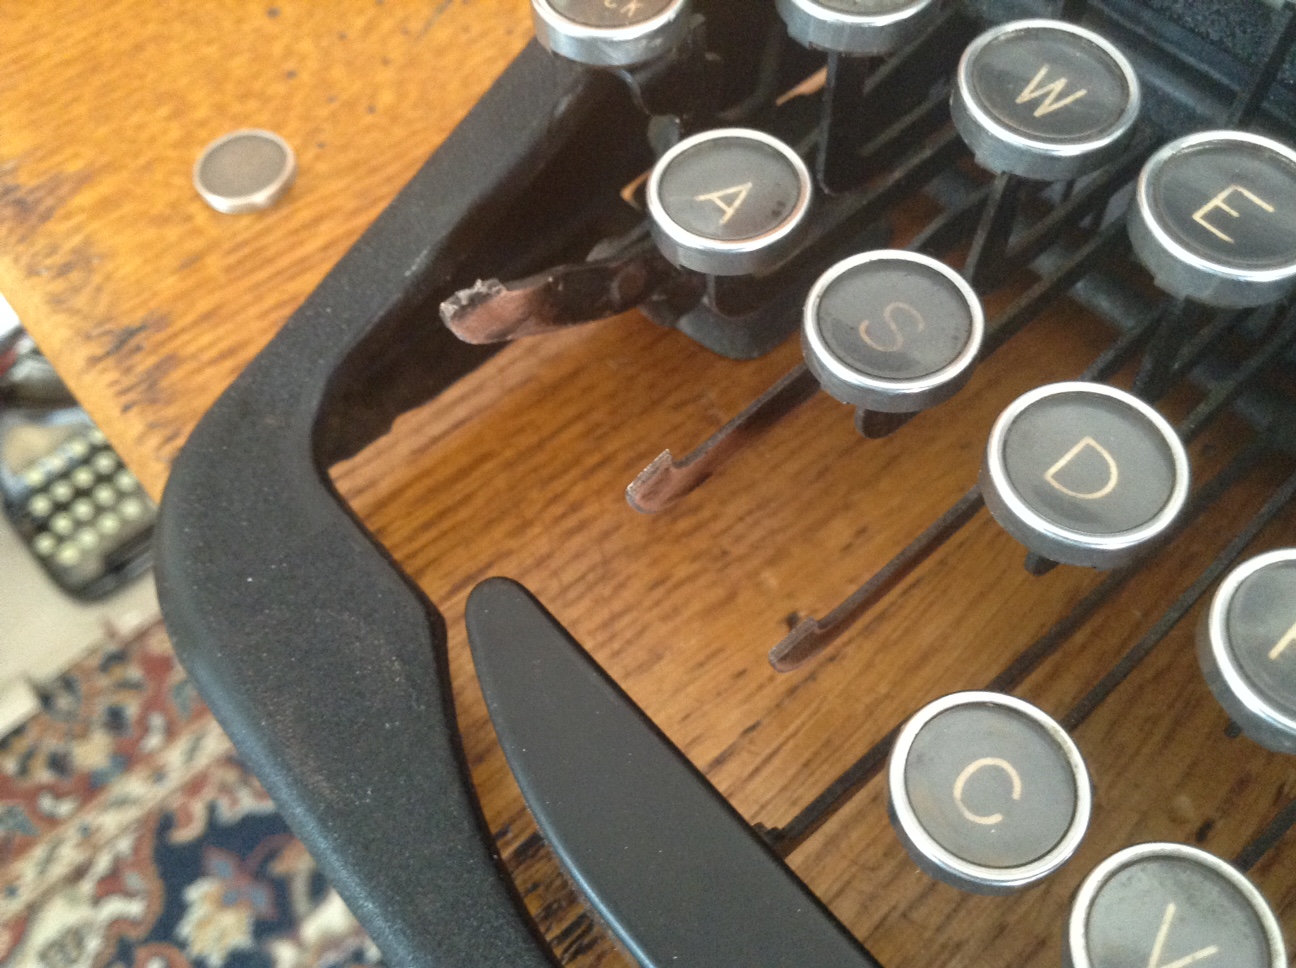
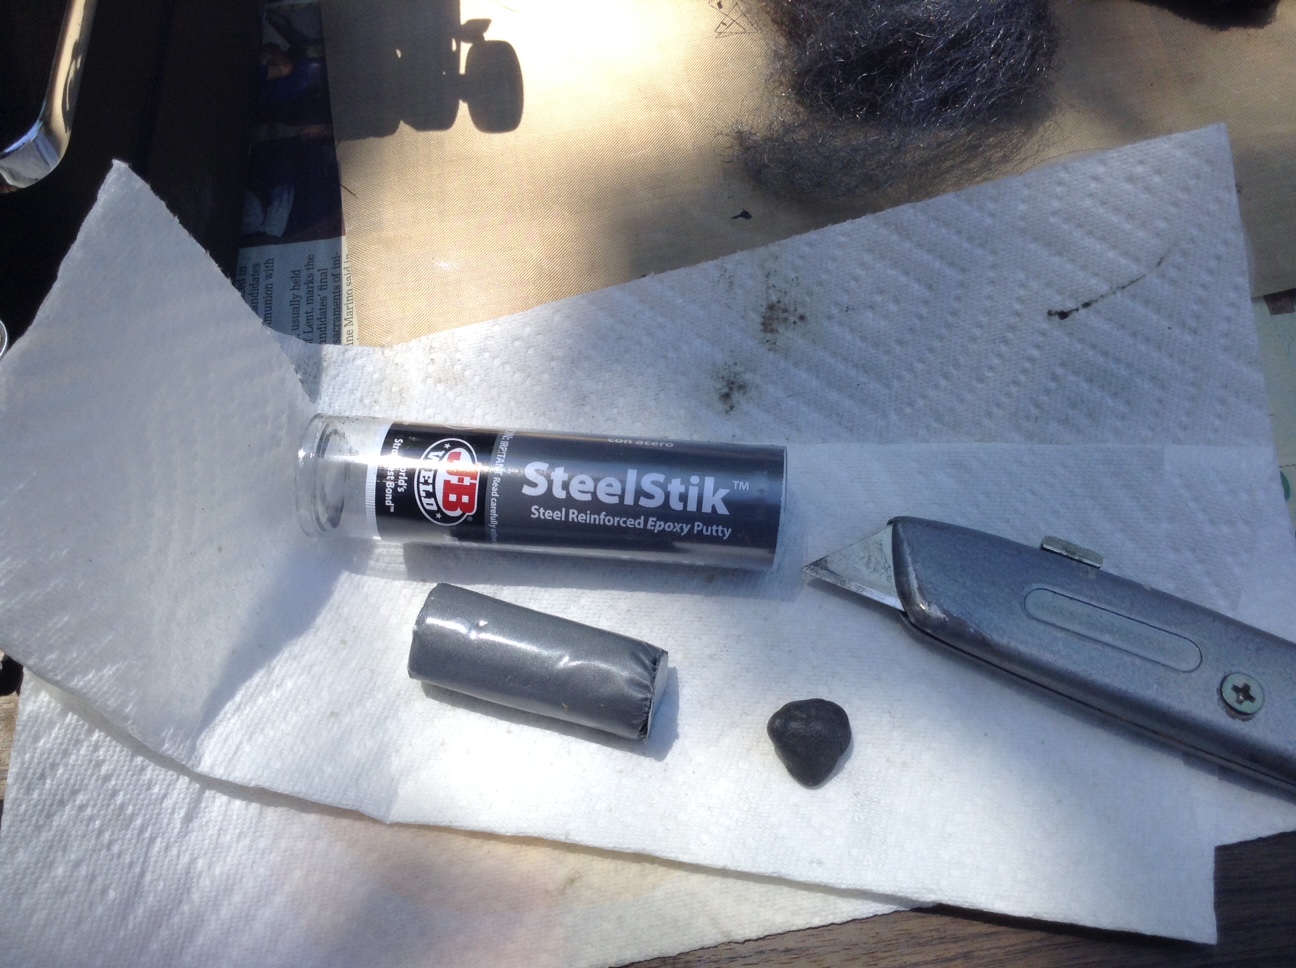
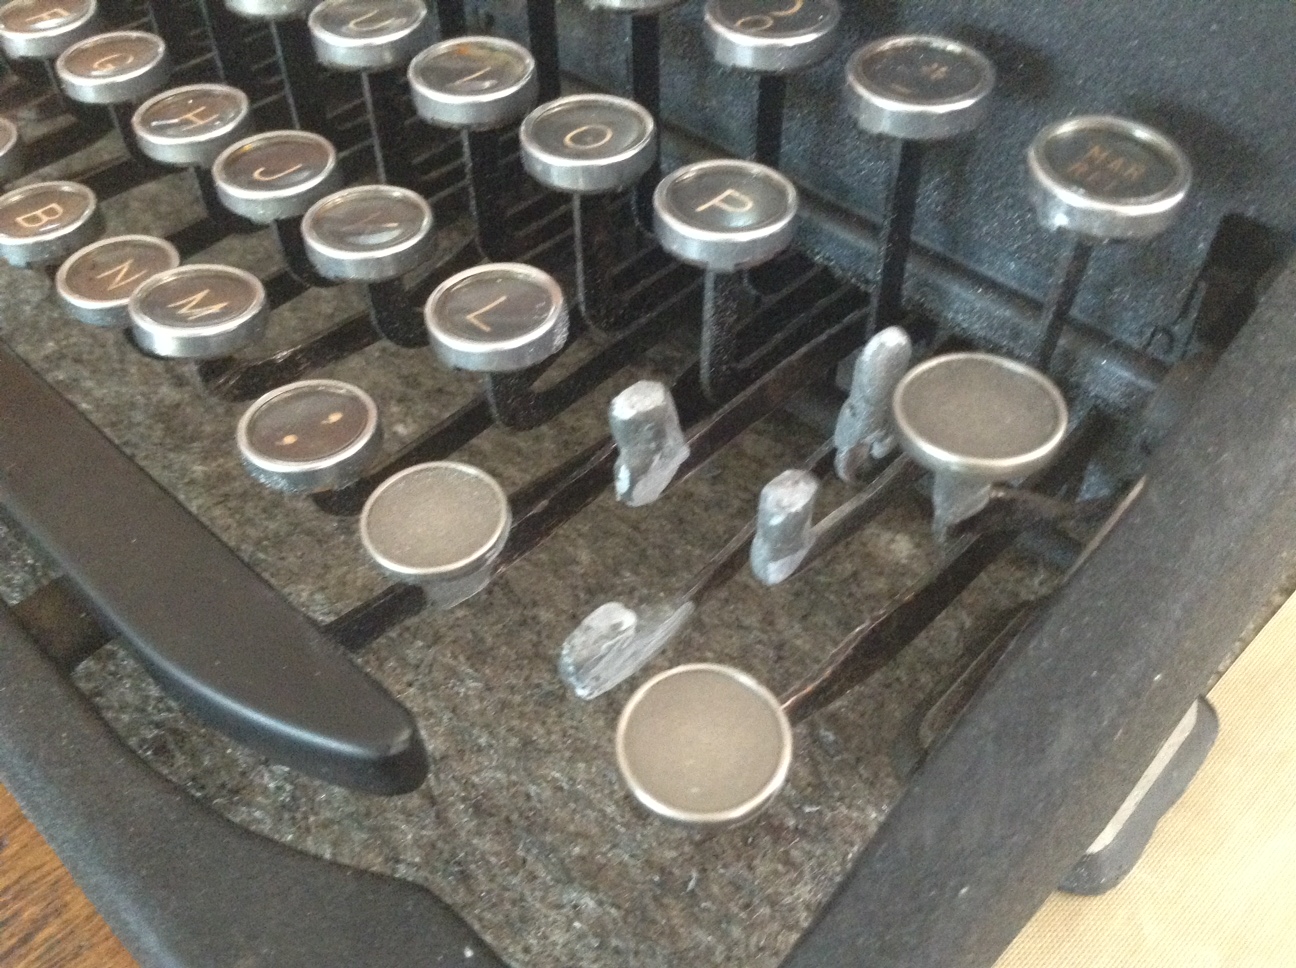
A testament to her true grit, the Fox was able to type with two broken shifting arms. The broken arms were causing typebar alignment problems though, so they needed to be re-secured. I initially tried to re-attach the broken back corner, front frame section and broken shifting arms with J-B Weld SteelStik. Unfortunately the SteelStik was not “tacky” enough and wasn’t adhering to the pieces of broken cast iron (despite sanding and cleaning), so I used J-B KwikWeld metal epoxy adhesive which is a bit stickier.

Foxini supervises the work
I had to remove the shifting arms to glue them because there was considerable sag in the adhesive – the pieces needed support while the adhesive dried.

Done broke

Broken ends sanded with rough sand paper and cleaned with denatured alcohol before the epoxy applied – it’s a little gloppy.
The rear left corner was a crumbled mess – it’s a bit better now after some J-B Weld, but it could use a good sanding to smooth out irregularities.

The Rust Blackened
There are many areas of bare metal on the painted surfaces. I was torn. Should I use Testor’s model paint which is a great match and very permanent, or should I go with India ink (encre de Chine) which is a great match and less permanent? I went with the India ink and a light coat of Renaissance Wax. Some future owner may want to undo what I have done. I want to be sensitive to the history of the machine and preserve as much vintage authenticity as possible.

Finally, I flushed out the metal internal guts with mineral spirits and compressed air. I was worried about excess PB B’laster attracting dirt and gumming up things down the line.
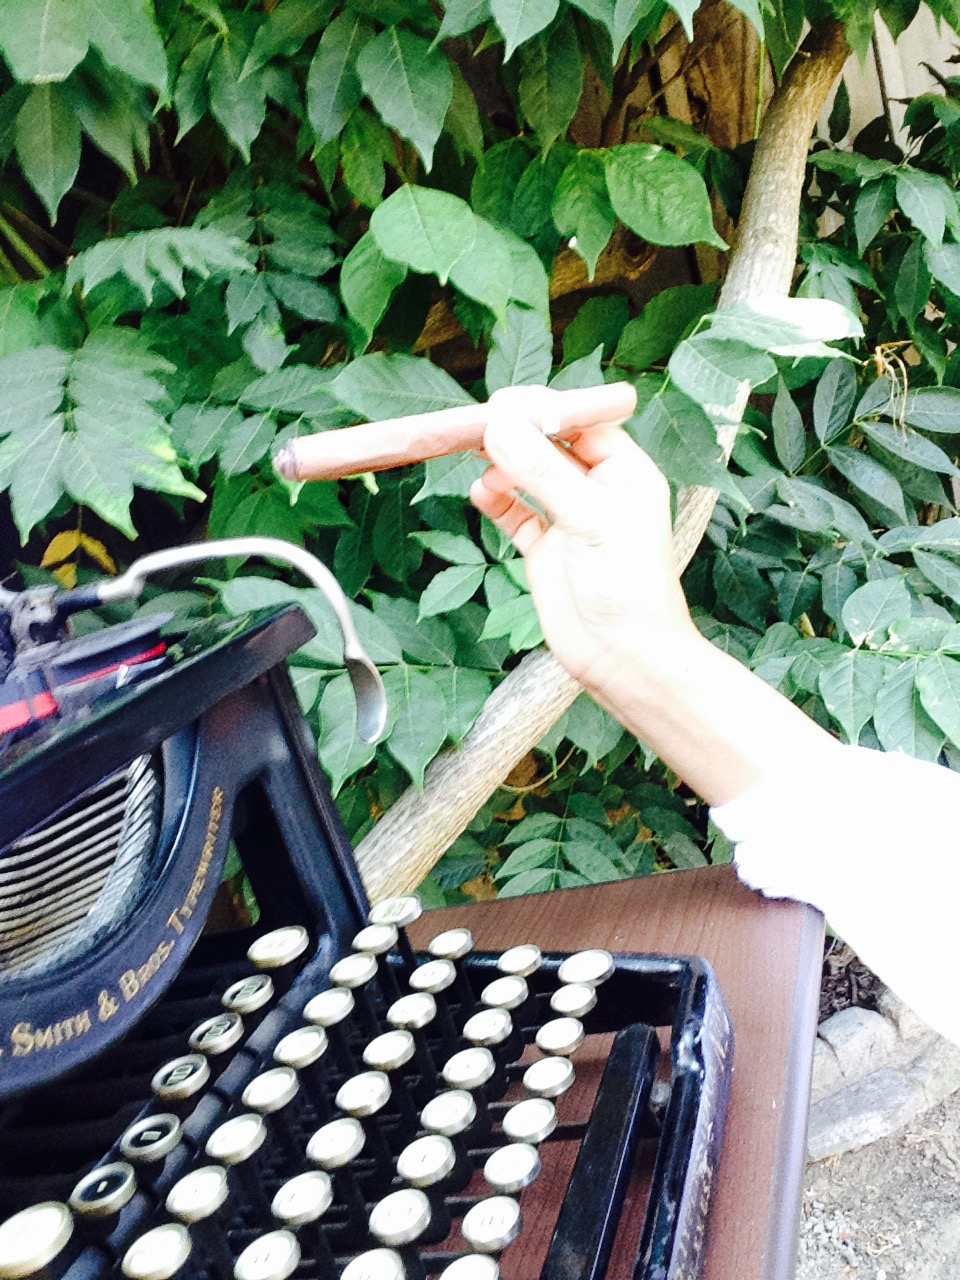
I mixed myself a stiff drink, fired up a cigar, leaned back, and drank in the physical beauty of this 100-year-old vixen. Make no mistake: this is a 100-year-old typewriter that has suffered catastrophic neglect and damage. However. She is still very fine indeed.

American Fox-es! (spoken with Festrunk brothers’ emphasis)

Model number 24 – somewhat hidden behind the keyboard:

I wish I had better luck removing the cracking layer of yellow varnish/lacquer/shellac around the decals. I tried to Soft Scrub it off, but I wasn’t successful. I will leave it to some future restorer with better products and methods.

The back decal (“The Fox”) has worn off or been painted over:

Lots of luscious curves in back though:

Baby got back
The decal on the left side of the machine is in good condition:


What Does the Fox Say?
The darn thing types like the proverbial champ:

It’s got fun special characters: manicules, pilcrow, section sign and degree characters.

It has a double row of staggered type bars. These are called pin-mounted slugs, right?

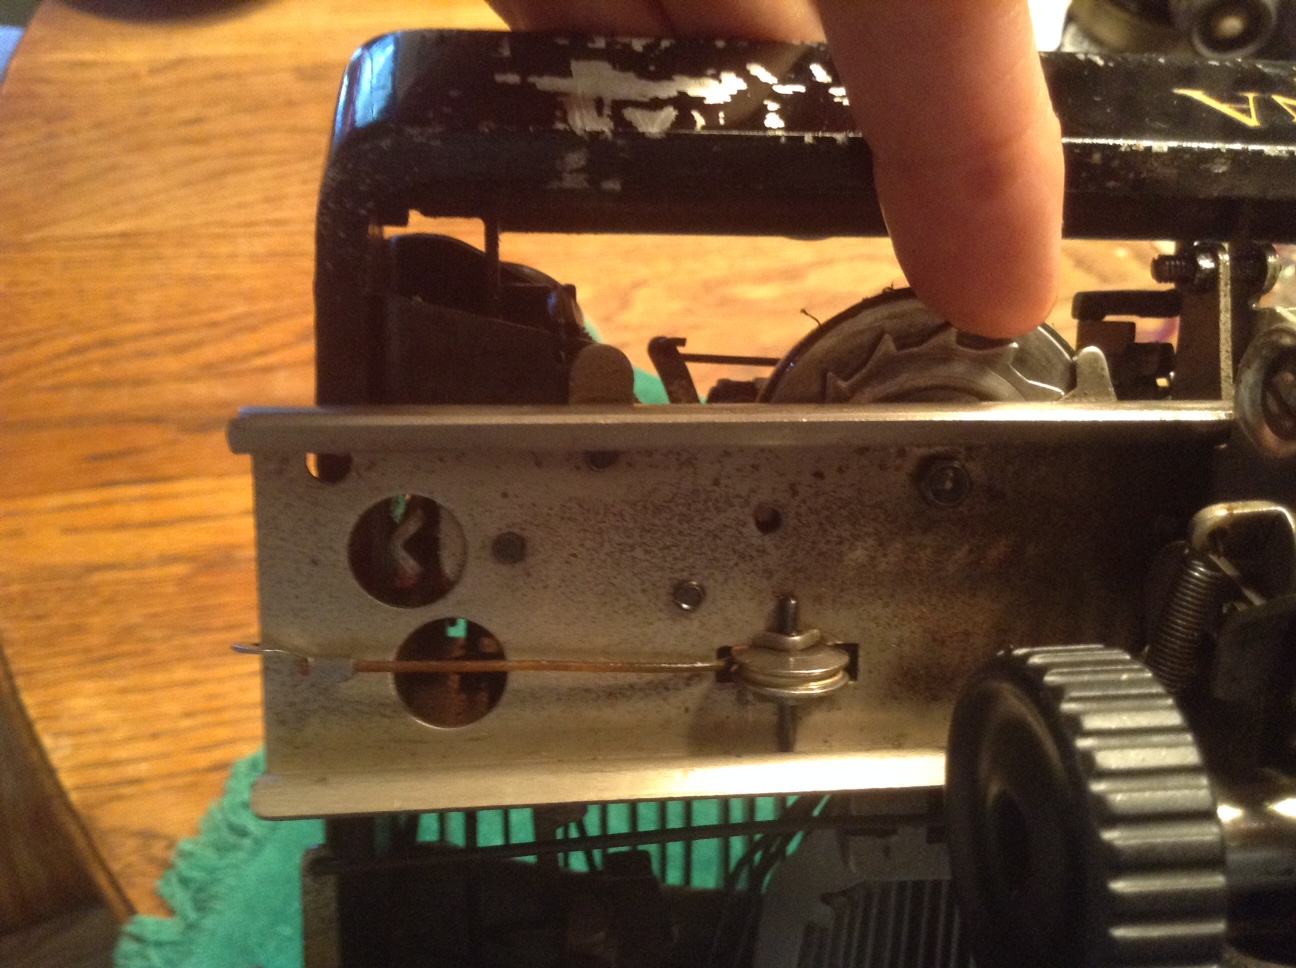
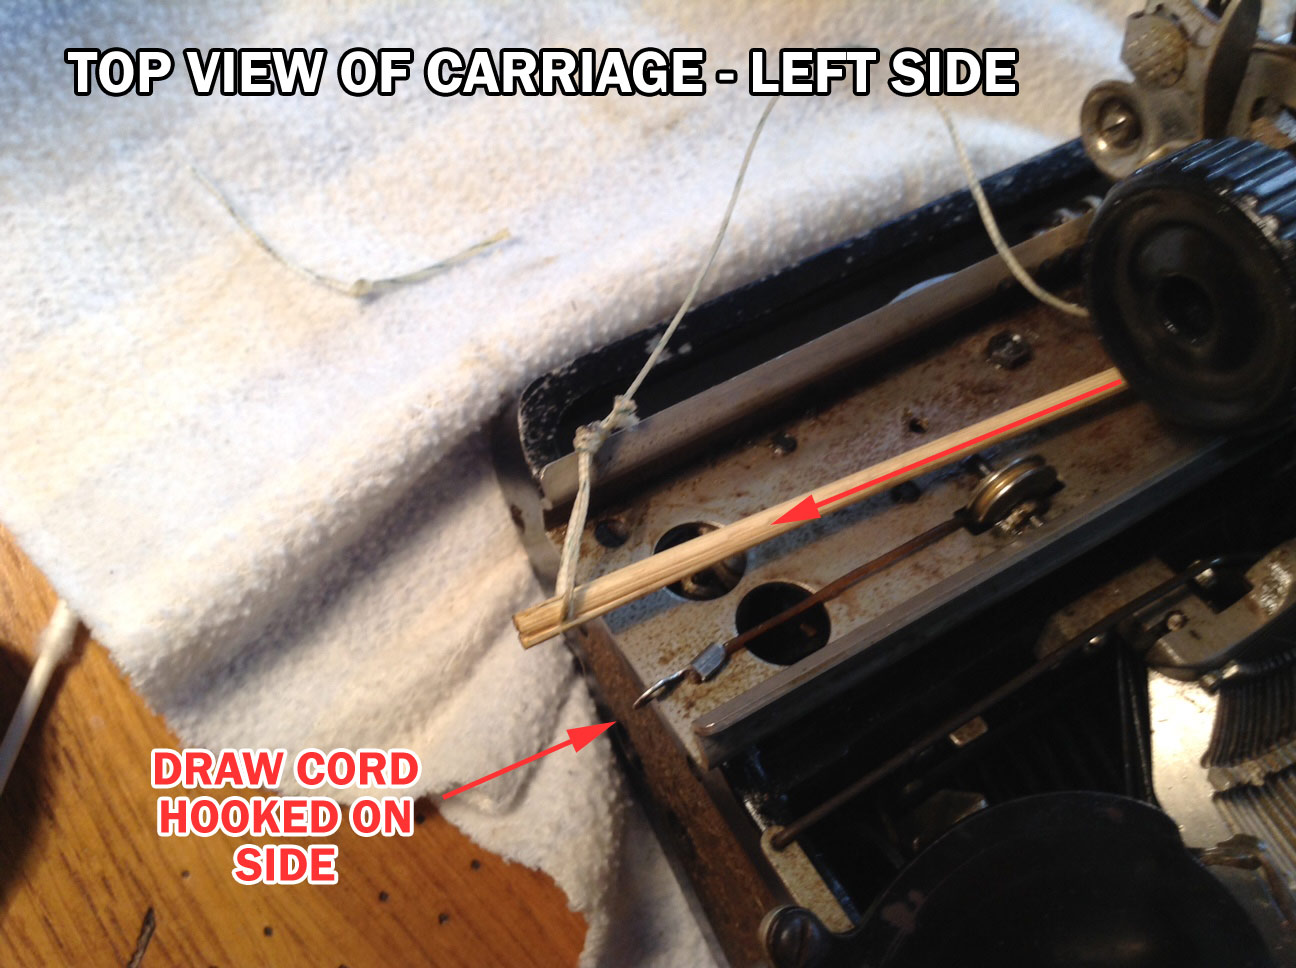
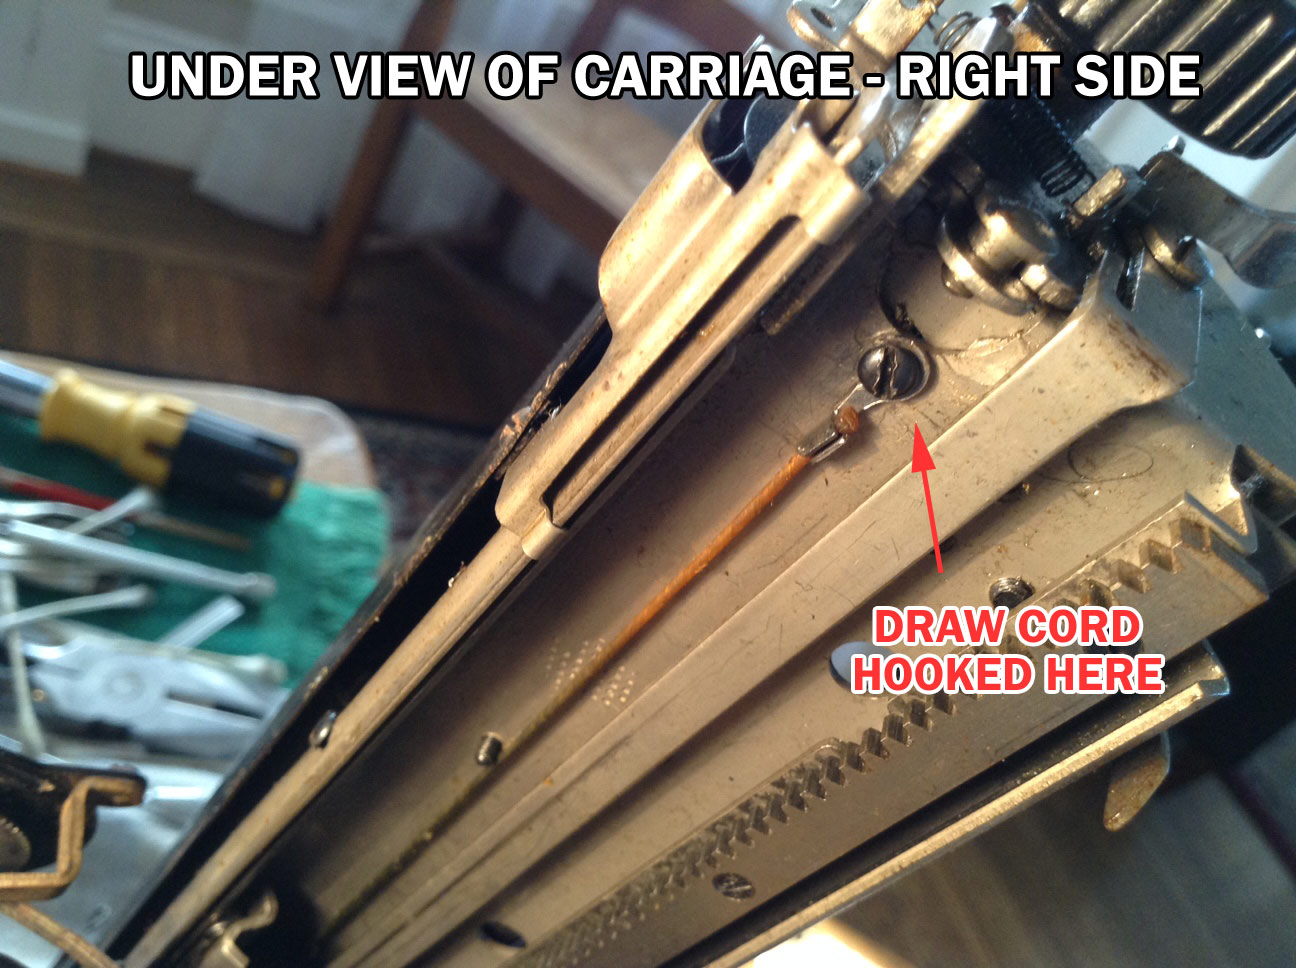
The carriage comes off with four loosened screws. You loosen the carriage scale pointer screws, slide the carriage scale pointer over and off; loosen the carriage screws, secure the draw string to the hitching post, and the carriage lifts off.

dismantled prior to de-rusting
What a wonderful machine. After spending some time in genuine appreciation, I got down to typing.
Fox on the Run
Here’s a looping six second video of me typing away happily on my quick black Fox.
How about another six second loop?
To Do List
- Continue polishing rusted and corroded parts – there is still so much to clean up. I hope I get that high-capacity ultrasonic tank full of solvent for Christmas 🙂
- Try heat shrink tubing for a couple of the feed rollers which are a bit brittle and disintegrating.
- I need to figure out the line lock set up. My Fox keeps typing at the end of the line, and I think there may be a rust problem that prevents the line lock from engaging. I am looking at the patent documents for clues.

Crumbly feed rollers and surprise! more rust
This is what I want for Christmas. Friends and family, please take note:

Typewriter Drawband Repair on a Shoestring
It is Labor Day holiday here in the US, and I labored happily over my typewriters. I tinkered with the Fox No. 24, got stuck and decided to wash my collection of typewriter rags while I thought through the problem.

Clean and ready for typewriter duty
I then read Richard Polt’s very interesting post on his Adler Universal that shows the ease with which the carriage is removed – and that jogged my memory. I needed to take my Lexikon 80 apart and fix the drawband.
The drawband on my Olivetti Lexikon 80 had slipped off recently while I was moving it. I had replaced the drawband with fishing line not too long ago after it broke, and I worried that the slippery fishing line might slide off the mainspring drum at some point since the drum had no lip to hold the draw string on. Well, it did just that when I was moving it inside after the block party.
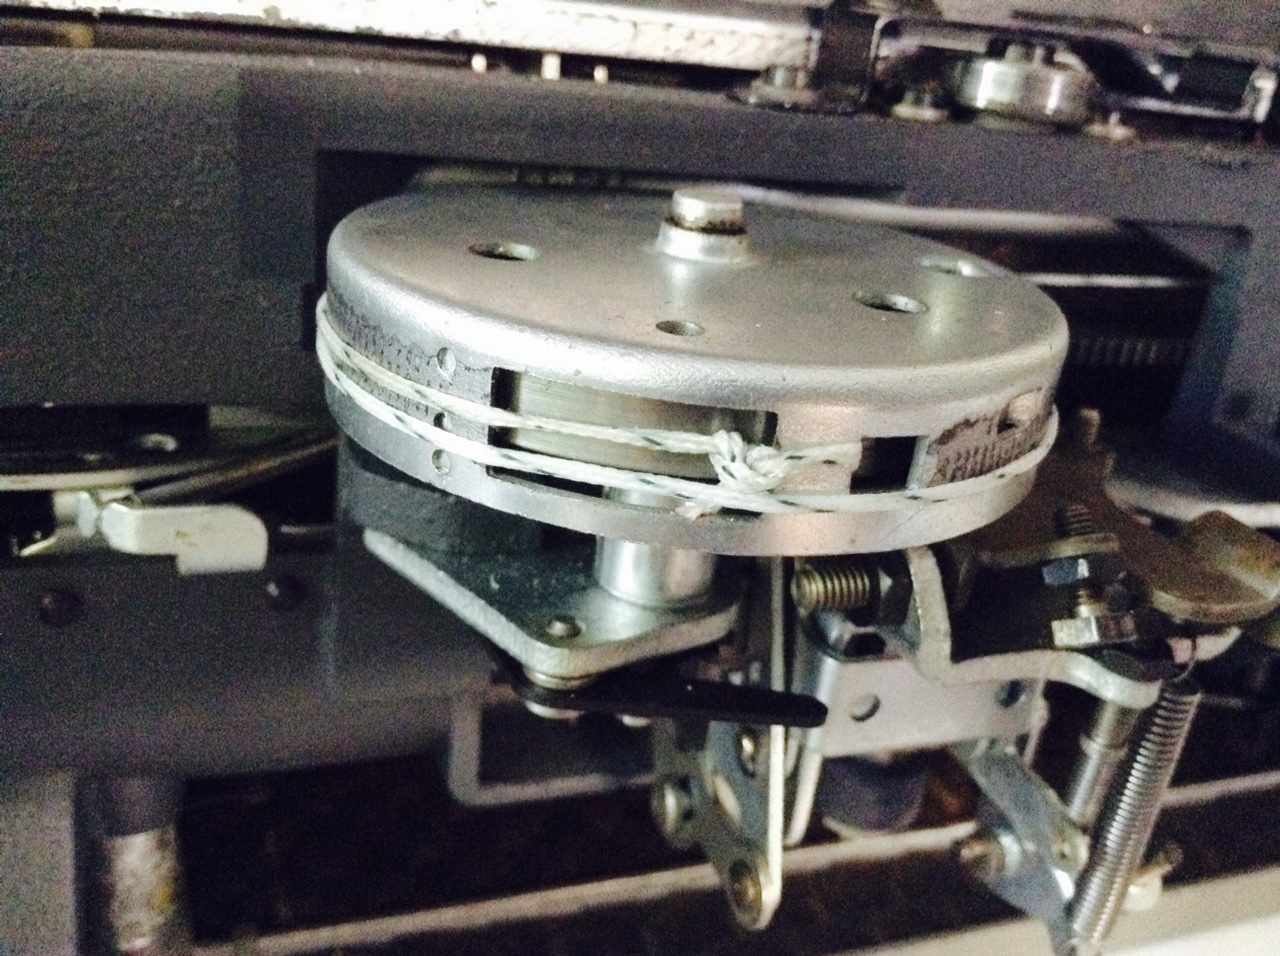
Replacement fishing line draw string that slipped off
I decided to try my luck with shoelace since it would be a bit closer to the original draw strap material. I bought some flat black shoelaces at the grocery – $1.79.

I cut a piece of shoelace about 17 inches long – which is about the length of the original draw band:

I had held onto the Lexikon 80’s two original drawstrap hooks for sentimental reasons. I found them and pried their little jaws open – these secured the old drawstrap.


I made sure that the sharp triangular teeth were poking up – these grab the draw band. I inserted my shoelace and tapped the hooked retainer closed. I repeated this on the other end of my shoelace draw band.
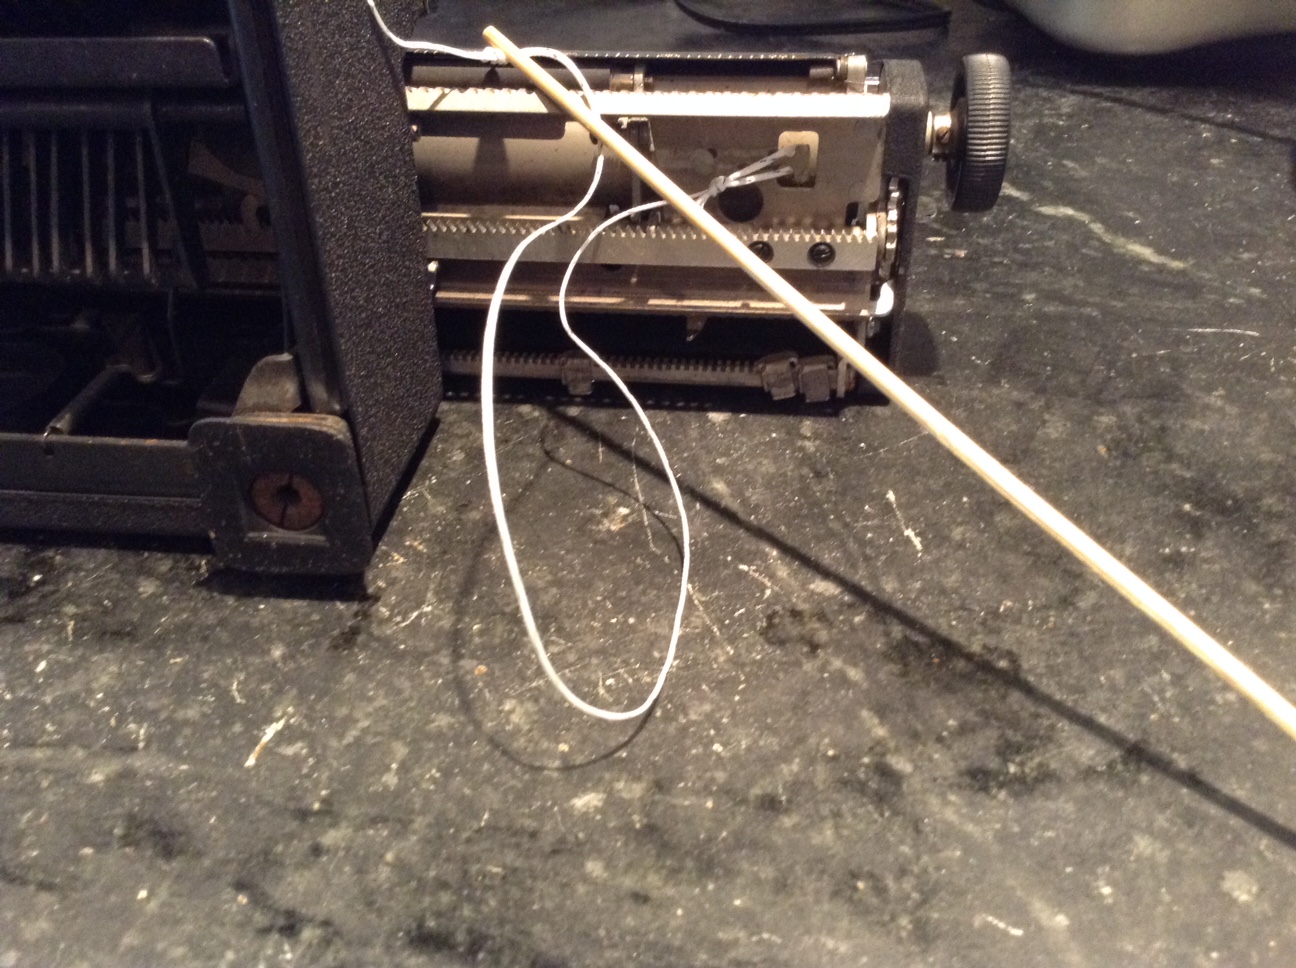
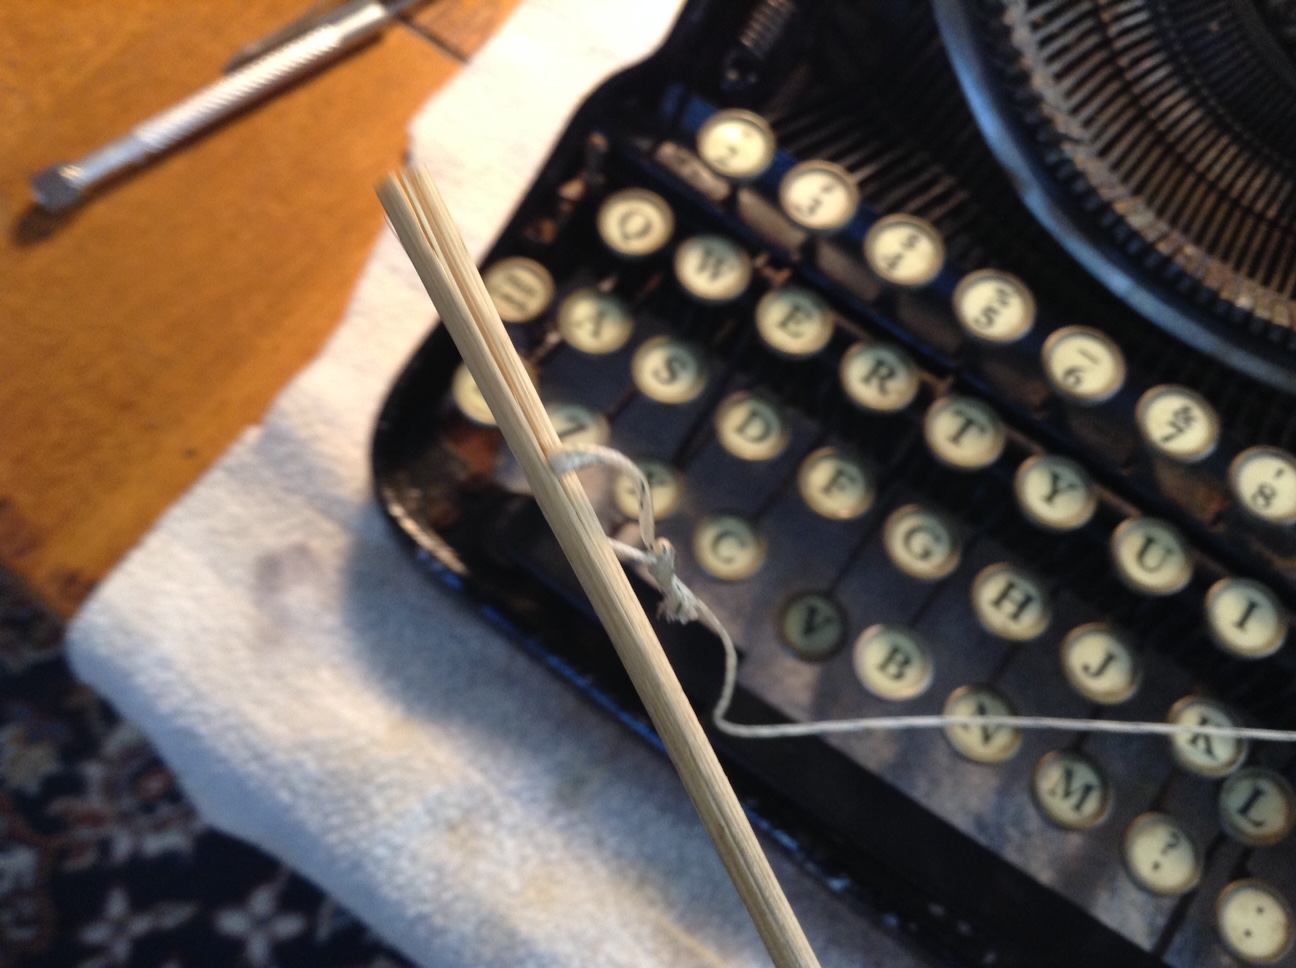
I then removed the cover and carriage from the Lexikon 80 – see Rob Bowker’s great tutorial – and pulled off the old detached draw string. Using a bamboo skewer (I will always be indebted to Robert Messenger for his documentation and use of the bamboo skewer in drawband replacement) and fed the shoelace through to the mainspring.
Here is my shoelace hooked on the right side of the carriage:

And here is the shoelace hooked onto the mainspring drum (I wound the mainspring about 3.5 rotations before attaching the draw strap:

Super classy! We’ll see if it holds up and doesn’t slip off.
While I was replacing the drawband, I reflected on the typewriter drawbands that I have known:
-

- Remington Rand KMC
-

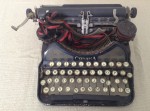
- Oliver No. 9
-

- Corona Four
-

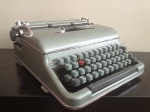
- Royal KHM
-

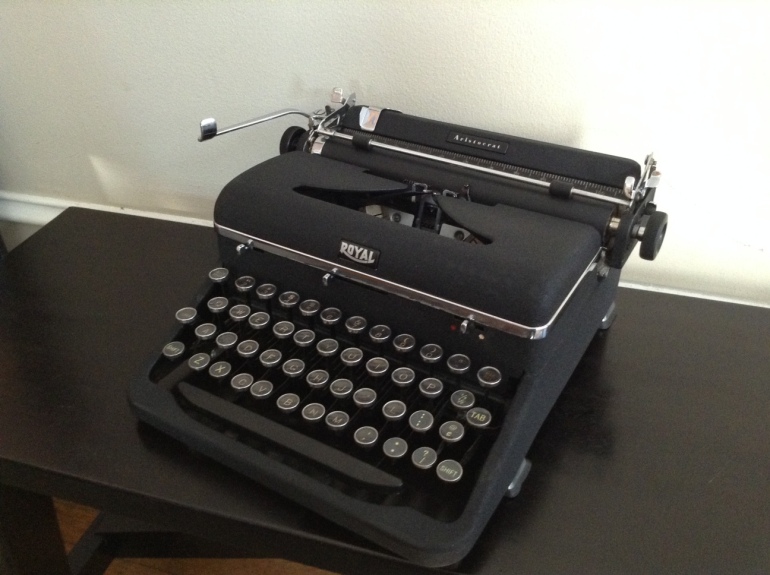
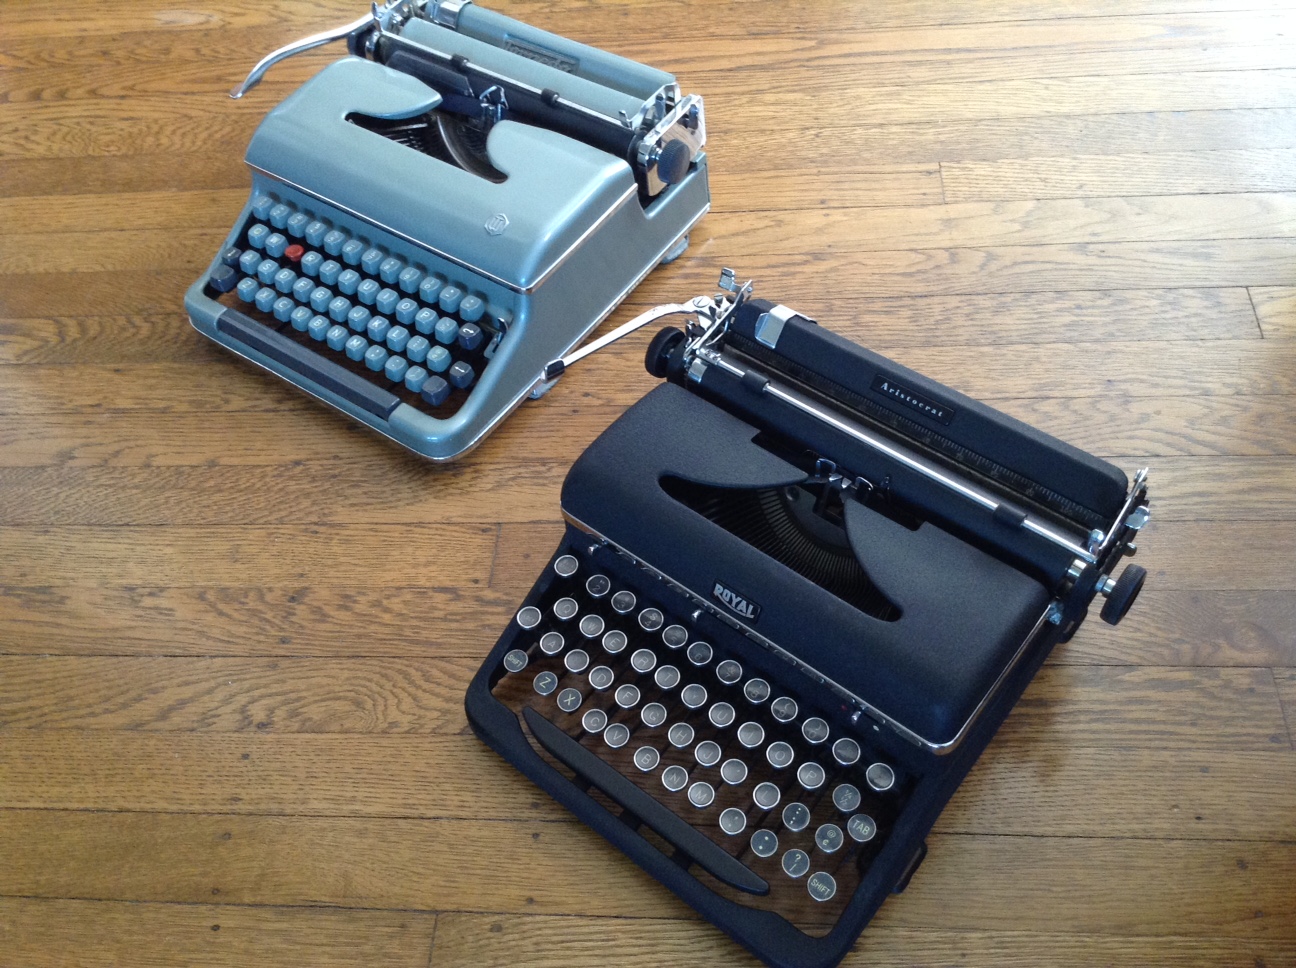
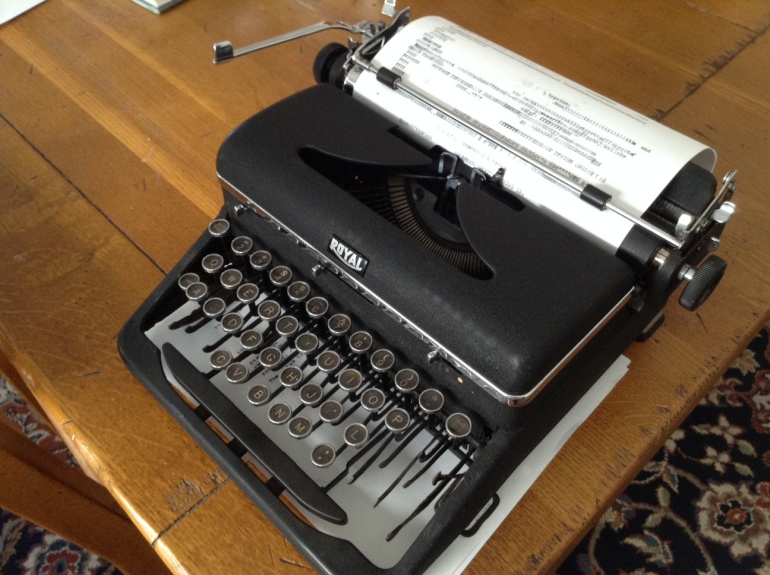
- Royal Aristocrat
-

- Olivetti Lexikon 80
-

- Fox No. 24
-

- 80lb line – overkill
I like junkier typewriters, so many of my typewriters have had drawband problems.
- Remington Rand KMC – my first…
- Oliver No. 9 – drawstring replacement and drawstring hook fabrication
- Corona Four – drawstring re-attachment
- Royal KHM – re-attachment of original drawband
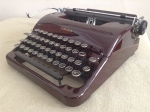
- Royal Aristocrat – drawstring replacement with fishing line
- Olivetti Lexikon 80 – initial replacement with fishing line
- Fox No. 24 – again with the fishing line
The Lexikon 80 is happy to be functional again – the new shoelace drawband is very handsome. I had hoped to make more progress on my Fox 24, but overall it was a pleasant holiday spent tinkering with typewriters.

Total Fox: Fox No. 24 Typewriter
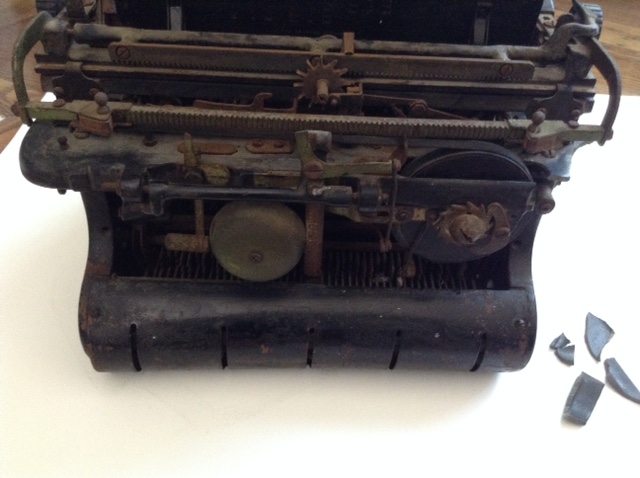
My new Fox No. 24 typewriter is a total fox – or a totaled fox. When I took it out of the shipping box from the eBay seller, I found the back left corner (cast iron) had broken off in shipment.
ACK!
It wasn’t typing, so what mysteries lay within? I felt that it could type since hitting the keys was causing a flicker of movement in the carriage as if it wanted to type. Time to take it apart.
Words Are Winged has a great photo spread on the dismantling of the Fox typewriter which was very helpful. Over at Google Books, The Expert Typist by Clarence Charles Smith (1922) is newly found resource for me. It has information on the general use and operation of Fox, Multiplex Hammond, Noiseless, LC Smith, Remington, Smith Premier, Royal and Underwood typewriters as well as more advanced typing such as stencils and mimeograph operation and the preparation of statistical reports. It’s a window into the world before word processors, spreadsheets, and printers.
The dedication of The Expert Typist is heartbreaking:

The Expert Typist has a section on how to remove the carriage from a Fox typewriter on page 12:
“Carriage. – Carriages of the Fox typewriter are interchangeable, and different lengths can be kept on hand and used as the work requires. To remove the carriage, first remove the carriage scale pointer (No. 2312), unfasten carriage drum strap (No. 189) and attach it to hook (drum strap post, No. 133), then take out, or nearly out, the two screws (No. 558) found near each end of the carriage.”
The Expert Typist
By Clarence Charles Smith
Google books
Following the carriage removal instructions, I took off the carriage scale pointer:

I removed the two rusty screws that hold the carriage scale pointer in place
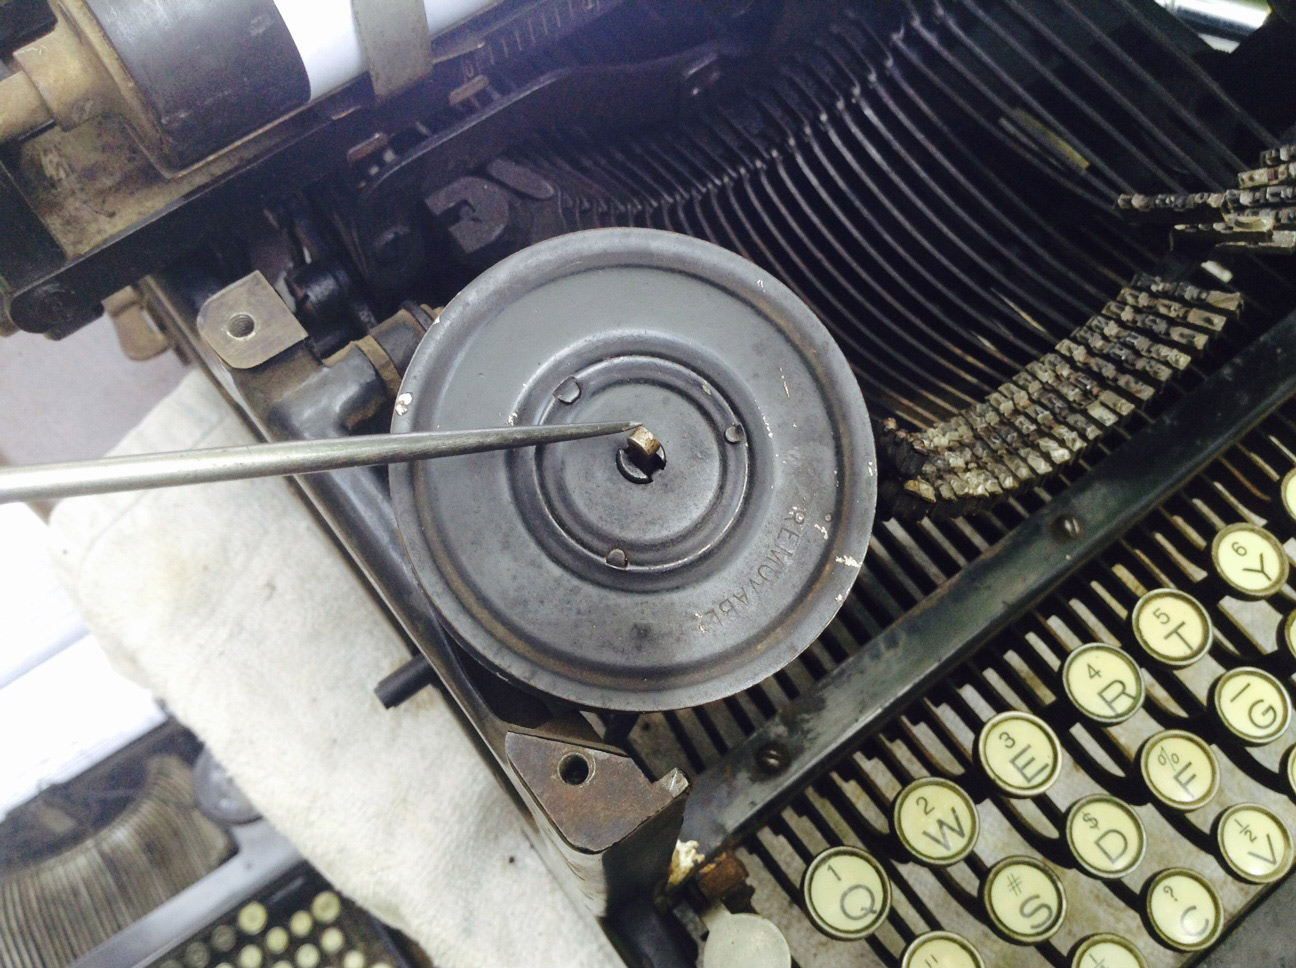
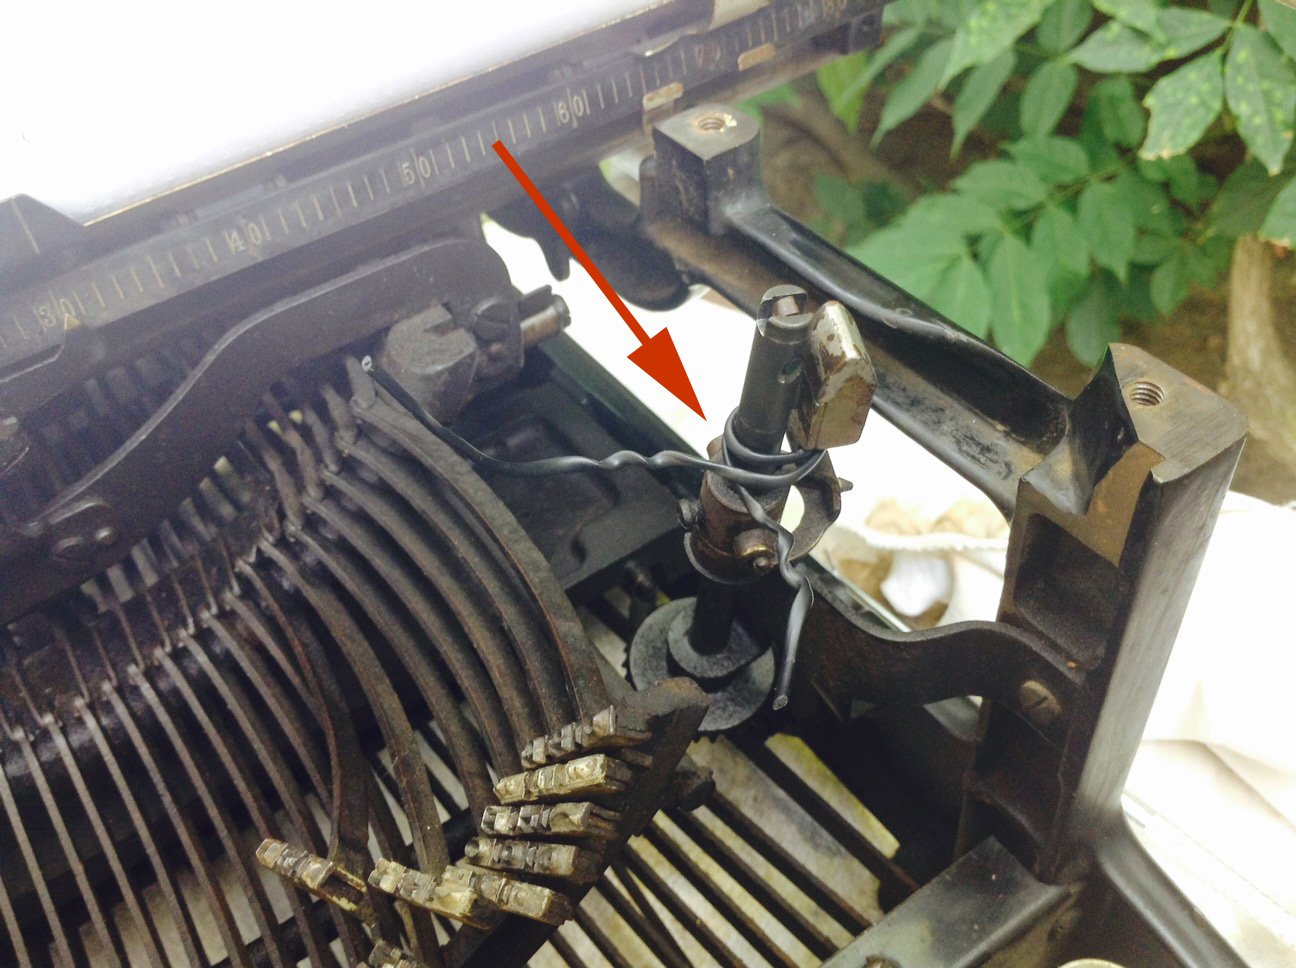
I was unfastening the carriage strap and the draw strap done broke.

Oh. Heck. The ancient draw strap disintegrated when handled
Carry on. Backed out the two carriage screws on the back on the rear left and right:

Check out the green corrosion. There is a matching carriage screw on the left that I backed out enough to removed the carriage. This photo was taken just before I lifted the draw band (drum strap) from its anchor. As I moved it to the drum strap post, it fell apart in my hands.
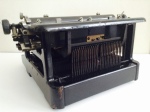
I then lifted up the carriage to reveal large pieces of broken cast iron on both sides of typewriter. Good. Golly.
These two pieces should be one:

And the other side was broken too:


Well. Heck.
It appears that those two cast iron bars are part of the shift mechanism though I am not sure of their purpose. They seem to support the basket during shifts. If you know the name and purpose of these broken parts, let me know. I’ll be using JB Weld SteelStik or an epoxy adhesive to re-secure them.
Onward: the platen pops out after you loosen a screw on either side and move the platen slide back:

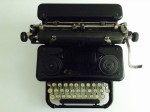
Here’s the machine dismantled (I re-attached the carriage scale pointer after I cleaned it because I was worried that I would lose it).
Fresh Hell: then the front bar fell off. I hadn’t noticed that it was cracked and broken as well:

First thing first: I blew out the inside of the machine with my small air compressor. It wasn’t terribly dirty – just very rusty and corroded.

The front carriage rail was rusted and the carriage moved with a painful screech. The escapement wheel and pinion wheel were moving but stiff with rust. Many of the typebars were paralyzed with rust. The ribbon vibrator was rusted into an “up” position. Everything that should move smoothly was crunchy.
I saturated everything with PB B’laster Penetrating Catalyst, let it sit for a few hours and then began to move the parts gently with my hands. They started to loosen up.
The detached carriage was stuck at certain points along the rail – a star shaped wheel on the rail was not moving smoothly along the rail so I doused everything in PB B’laster and moved the carriage back and forth manually until I felt something akin to a gliding sensation.


Carriage – upside down view: star-shaped wheel that moves along the rail was sticking.
I got the feeling that this thing might type since hitting the keys was moving the parts of the escapement assembly attached to the machine (the loose dog and rigid dog?). Cleaning and lubrication had freed those parts up nicely.

View with carriage removed: cleaned and lubricated loose dog (?) now moving and able to slip in and out of teeth in the escapement wheel during typing.
The escapement wheel looks battered – the beveled teeth are a bit chipped and worn.

Chipped tooth
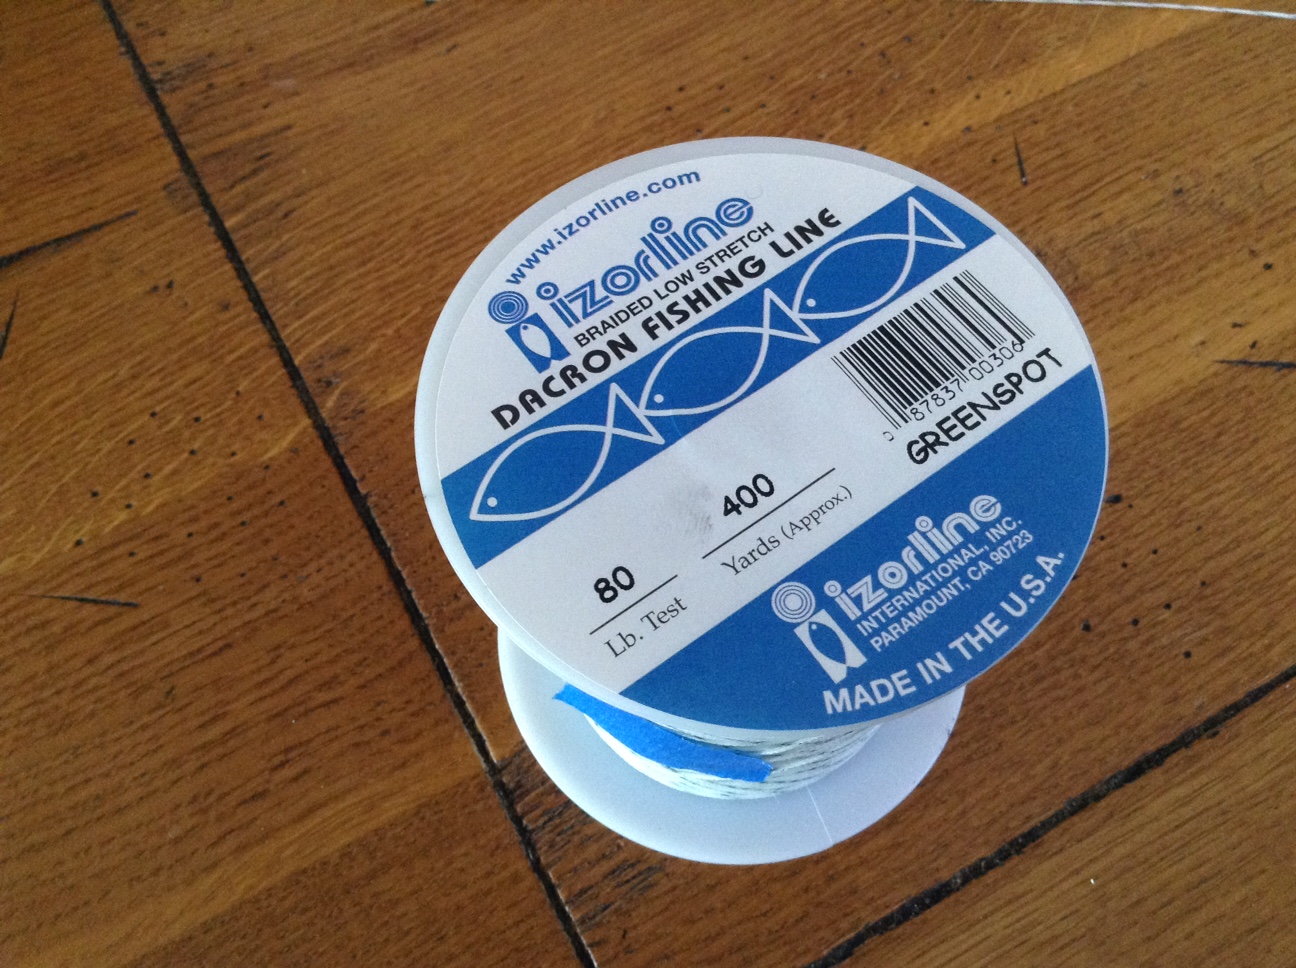
I made a new draw strap out of 80lb fishing line and set the carriage back on the body.

I need classier drawstring material. The fishing line works but it’s a little down-market.
I tested typing. The carriage advanced one space for each key struck. I burst into song.
I spooled new red and black ribbon onto the old spools and tried her out.

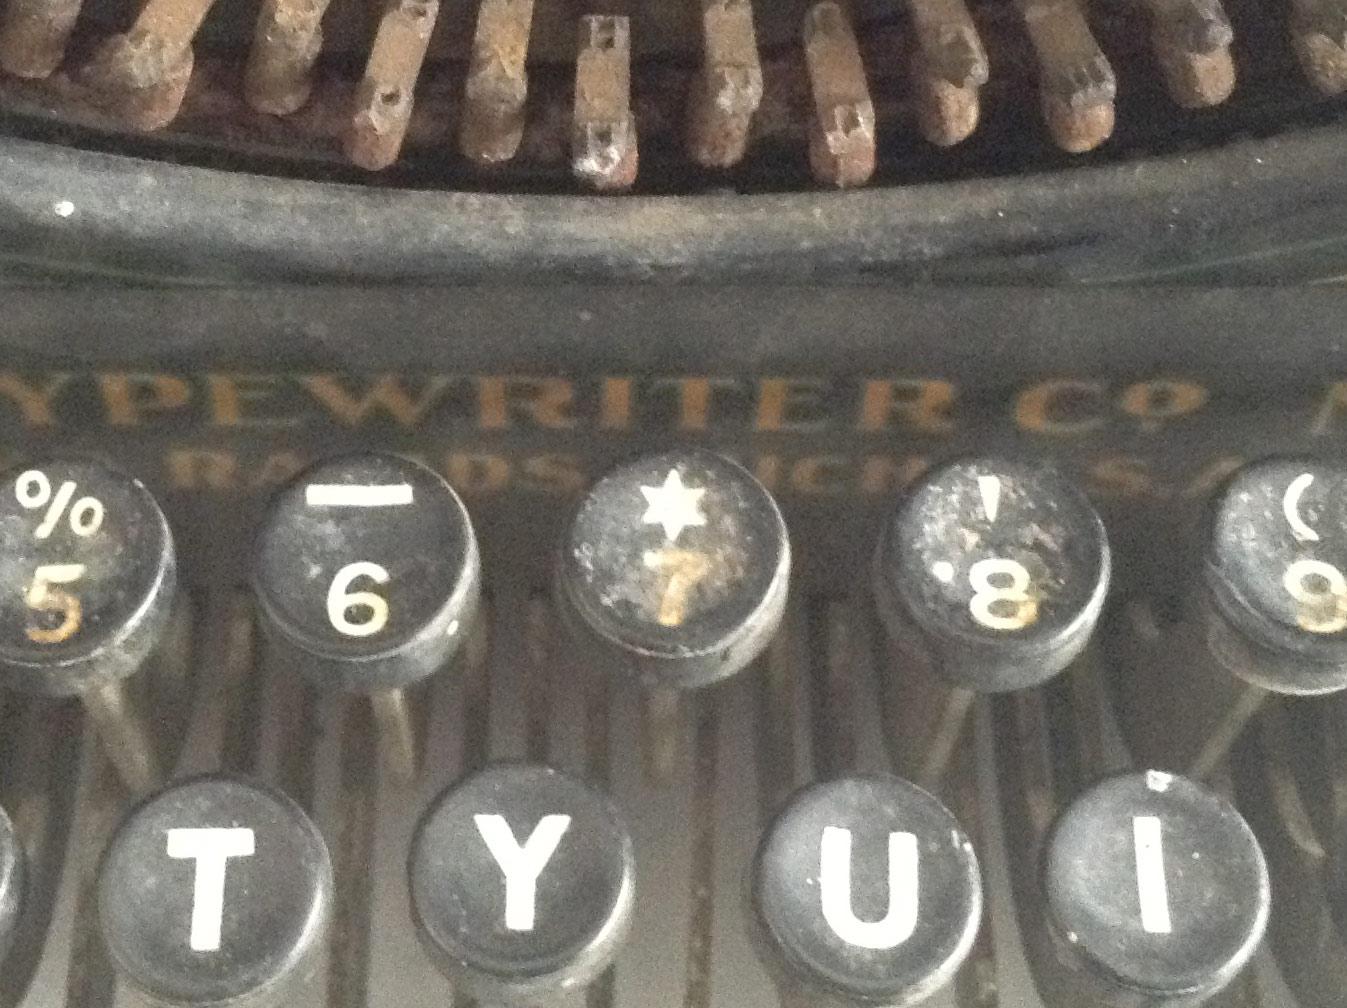
Looks like my Star of David is indeed an asterisk. Sometimes an asterisk is just an asterisk.
The Fox has a beautifully simple ribbon color switcher: a red key for red typing and a black key for black typing. Even I can figure this one out.

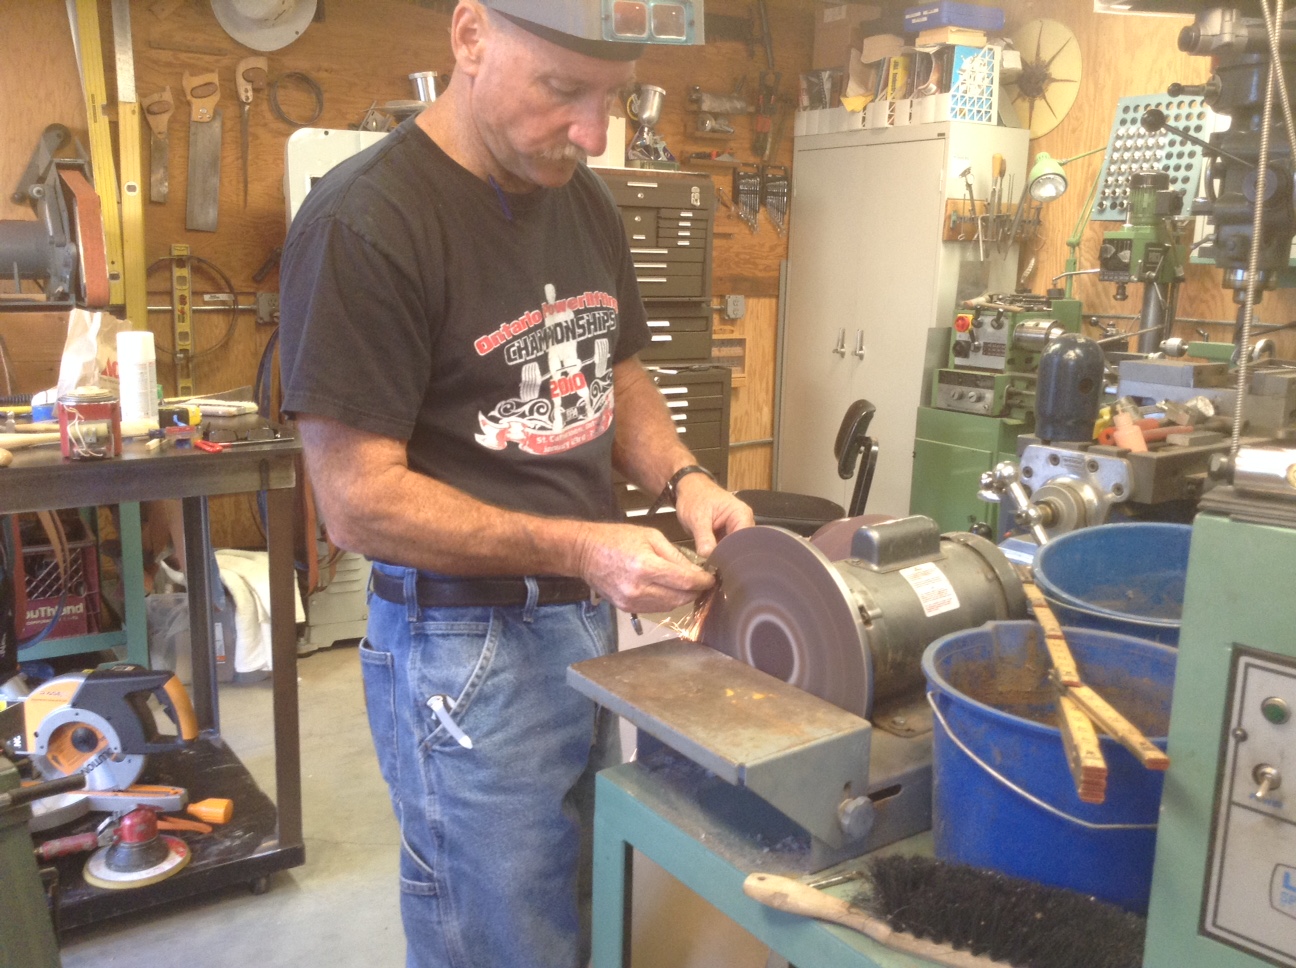
Once I had the machine typing, I began cosmetic improvements. I took my bell and carriage return lever over to Good Neighbor Brian’s shop since he wanted to get in on the fun. He got to work right away.

Brian used a slow buffing wheel (about 1800 RPM) and pink buffing rouge to polish the bell. It cleaned up beautifully.

I was amazed at what he did with the carriage return lever. I had gotten most of the green corrosion off, but it was dull. He polished it to a mirror-like finish with a small 4″ diameter buffing wheel at 1800 RPM and pink buffing rouge:

Remember – it was really bad before:

This makes me want to get my own variable speed bench grinder and buffing wheel.
I had removed some of the old brass / nickel / chrome pieces that were easy to detach and soaked them first in Evapo-Rust and then in Lime-A-Way.
The Evapo-Rust took off surface rust but did nothing for the green corroded parts. I had tried chrome polish on the greenly corroded pieces, but it wasn’t doing anything. I dug around in the garage and found Lime-A-Way which has a list of powerful acids in it. It was the Lime-A-Way that removed the green corrosion. Unfortunately, it also turned some of the pieces slightly pink after a prolonged dunk. The acids in the Lime-A-Way are a bit much for the metal I am dealing with here and caused copper leaching/displacement that was then deposited on the surface of the metal (I am guessing here).

I found an interesting post on a home barista website that described the chemical reaction and fix, so I started polishing to remove the copper deposits with my Dremel and a polishing disc. There wasn’t much shiny chrome on the paper fingers to begin with and less after my polishing. I may walk it over to Brian’s and see if he can put a shine on the metal. I’m planning to wax all the parts to prevent future rust and corrosion

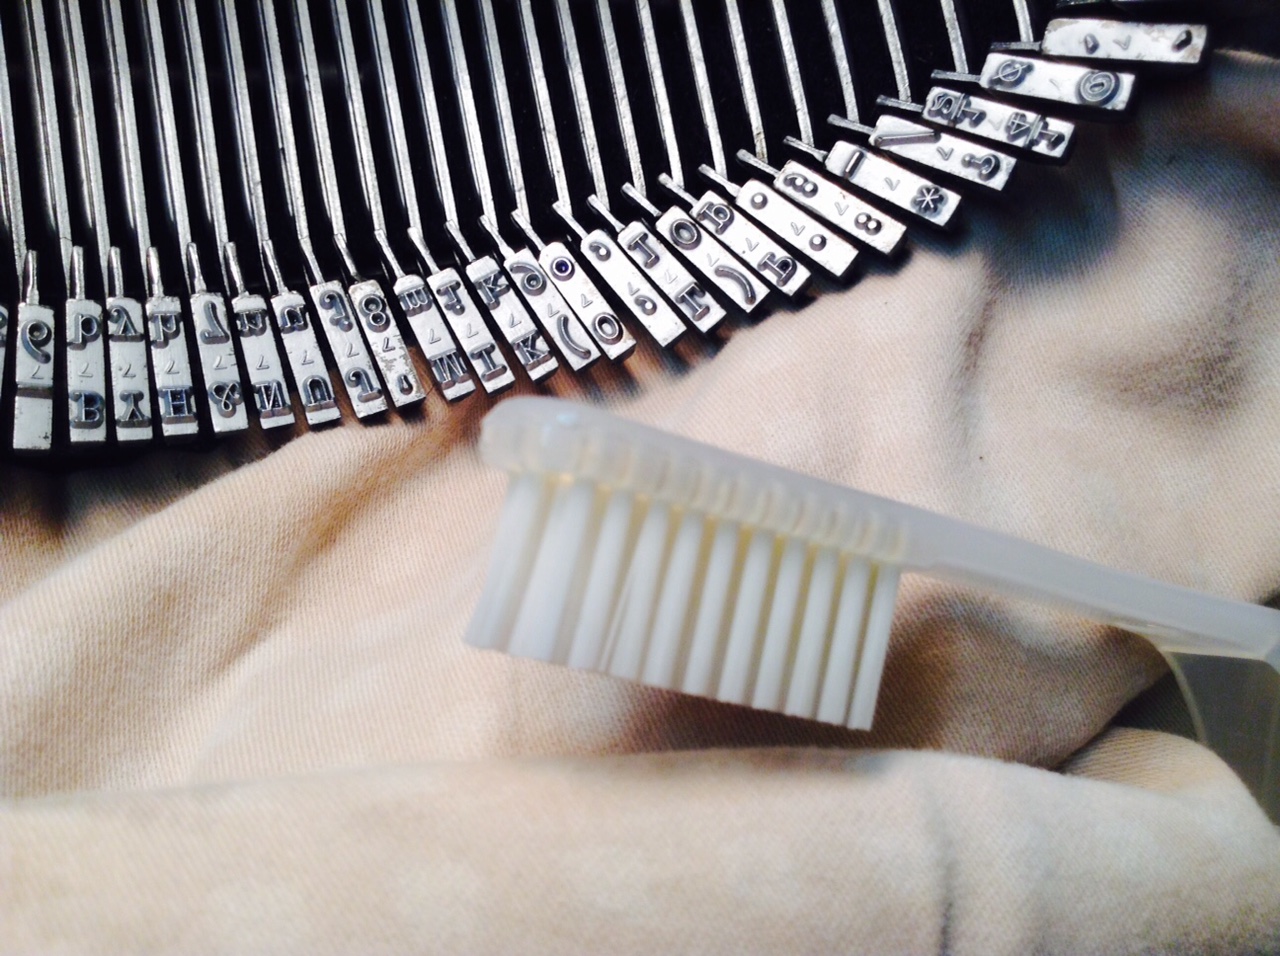
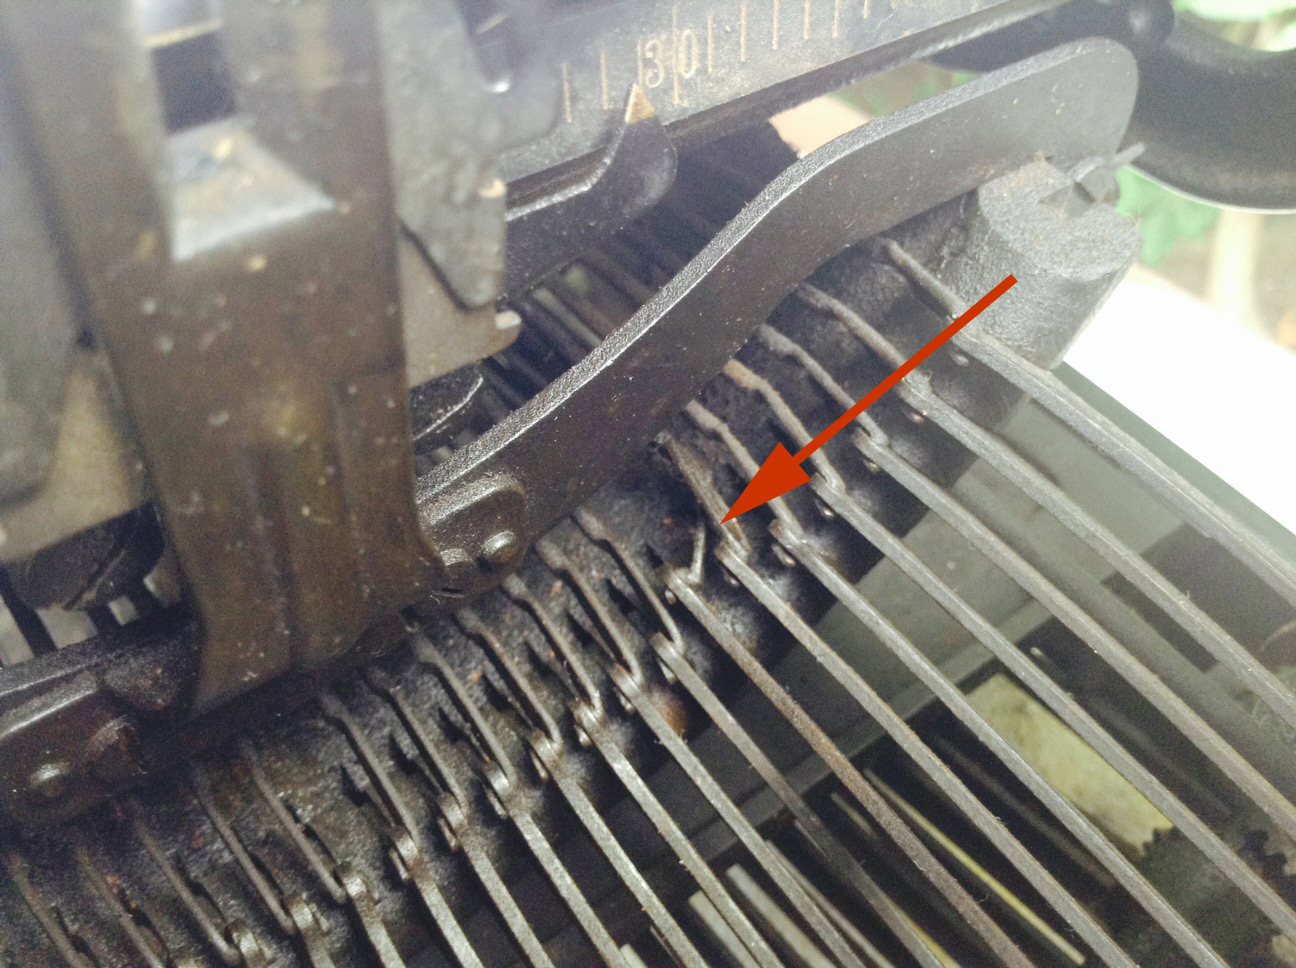
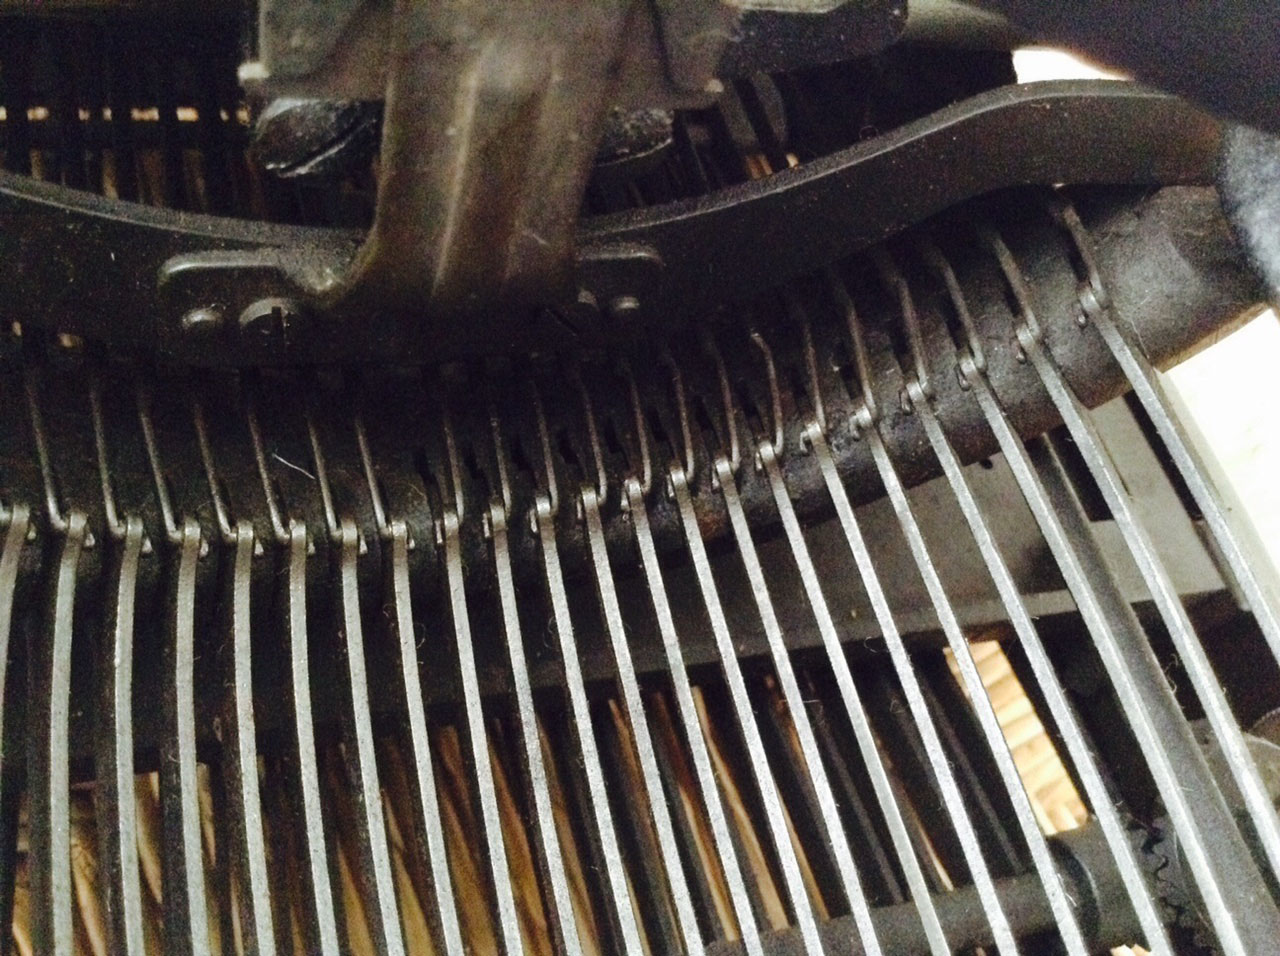
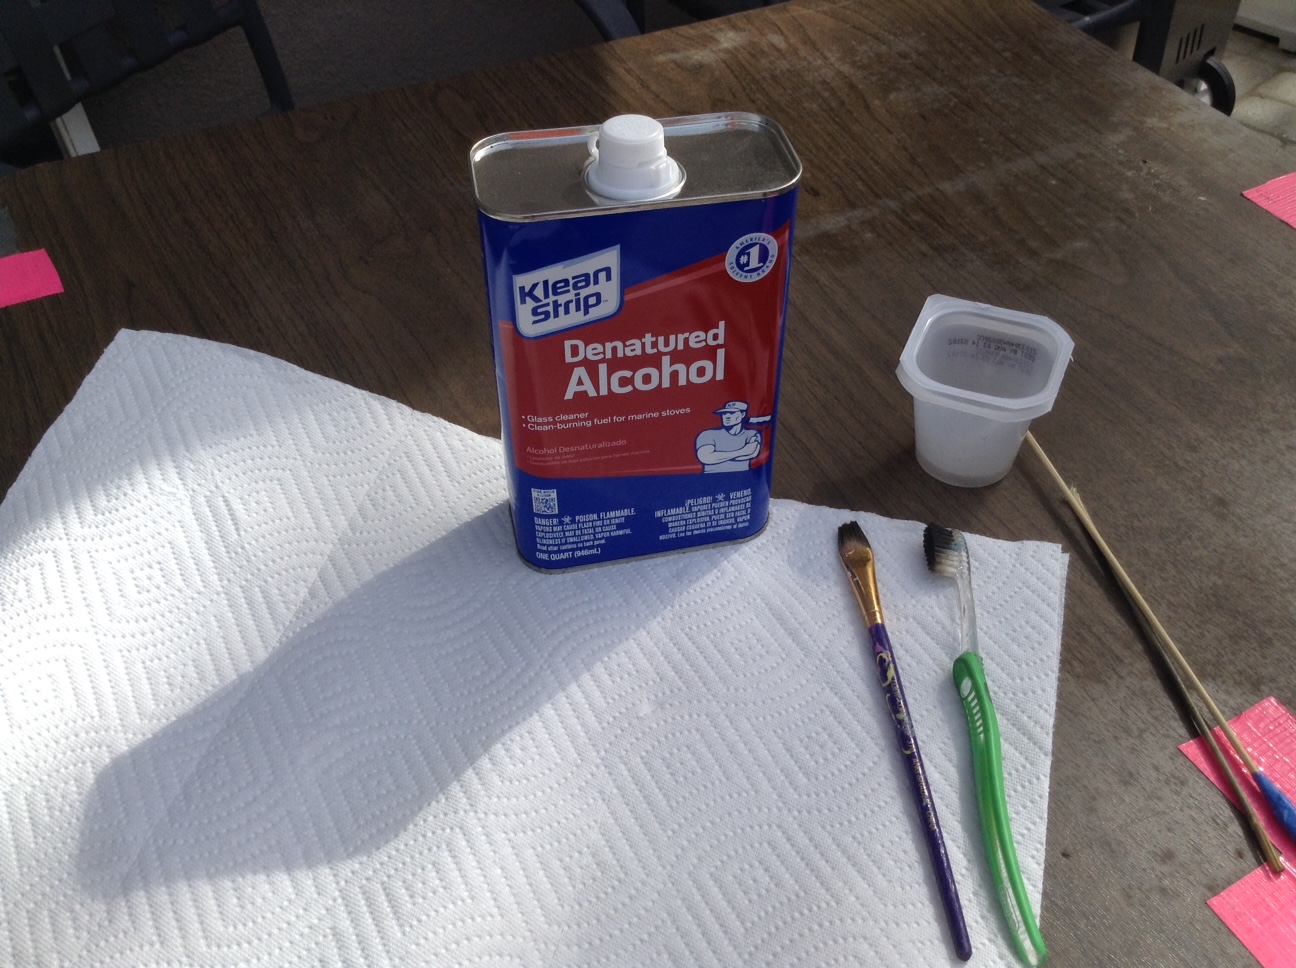
Onto the rusty typebars: they look bad but don’t really affect the functioning, but I wanted to clean them up anyway. I drenched the typebars and their joints with PB B’laster Penetrating Lubricant. While it doesn’t make rust disappear, it seemed to loosen up rust for removal. I scrubbed the sides of the rusty typebars with super fine Scotch-Brite and super fine sandpaper to get the worst of the rust off them. I followed up with my Dremel, polishing the sides with a 512E Finishing Abrasive Buffs 320 Grit and a 442 Carbon Steel Brush. I scrubbed the type itself with denatured alcohol and a toothbrush and got century-old ink out of the crevices. The typebars are still looking “vintage”, but a little less rusty.

I am still perfecting my methods – though trial and error is not the best way to go about dealing with a fine old machine. I’m a little worried that my very liberal use of PB B’laster will come back to haunt me in the form of solidified gunk and dirt attraction. I may follow up with a flush of mineral spirits, a blow-out with compressed air and then very targeted lubrication. I would love to dunk the metal machine guts into a high-capacity ultrasonic tank full of kerosene or solvent – though it sounds like the makings of my very own Superfund site.
Coming up next: gluing her back together and taking glamour shots of the foxy lady.
Grimy Whale: Olivetti Lexikon 80
The 1952 Olivetti Lexikon 80 that I brought home from Goodwill looked pretty bad on arrival. It was covered in grime and dings and scrapes and sticky tape residue. To me this is evidence of a very hard worker who really used his/her typewriter – and who took lunch breaks at the desk (bologna sandwich, a cup of black coffee, and a cigarette) .

Scaly grime
Fortunately I had come across Typewriter Heaven’s post on Lexikology which details how to remove the cover and carriage from the typewriter so that I could pursue a good cleaning.
I followed the steps and pretty soon I had a neked typewriter.

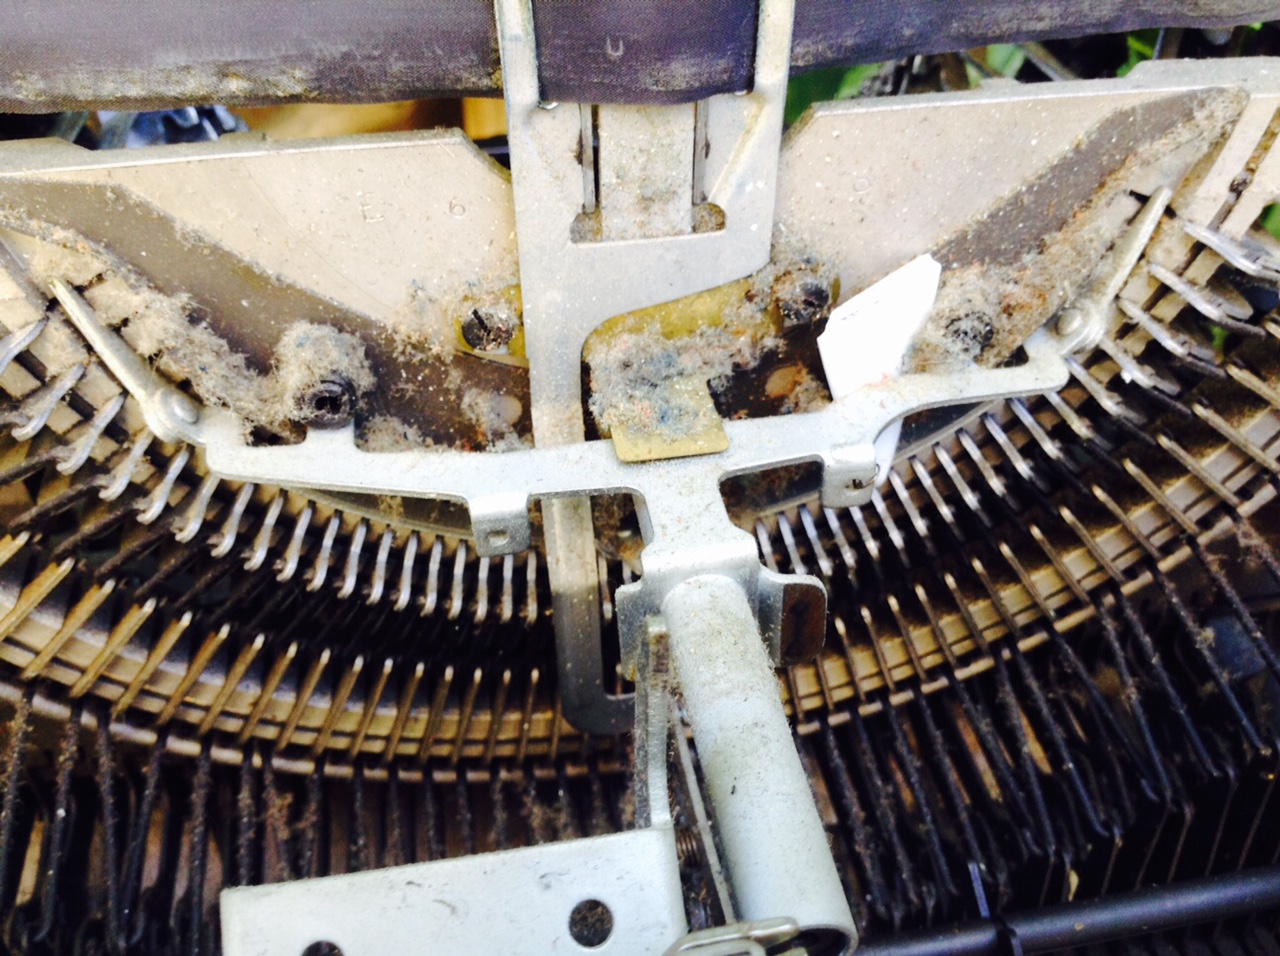
There was a lot of debris behind the segment – including a shard of white pottery.

The stripped-down machine innards are pleasantly alien. I have been submerged in pre-war cast iron for the past few weeks and the Lexikon 80 is a blast of fresh modern air. I would assume that for 1952, it was very cutting edge.
I scrubbed the type slugs and type bars with denatured alcohol and the grease dissolved beautifully. I was careful to drape plastic and painted areas.
I cleaned the segment with denatured alcohol first and because the keys still felt sticky, mineral spirits afterwards. The keys on the right were particularly sticky. Did someone spill a Slurpee® into the segment?

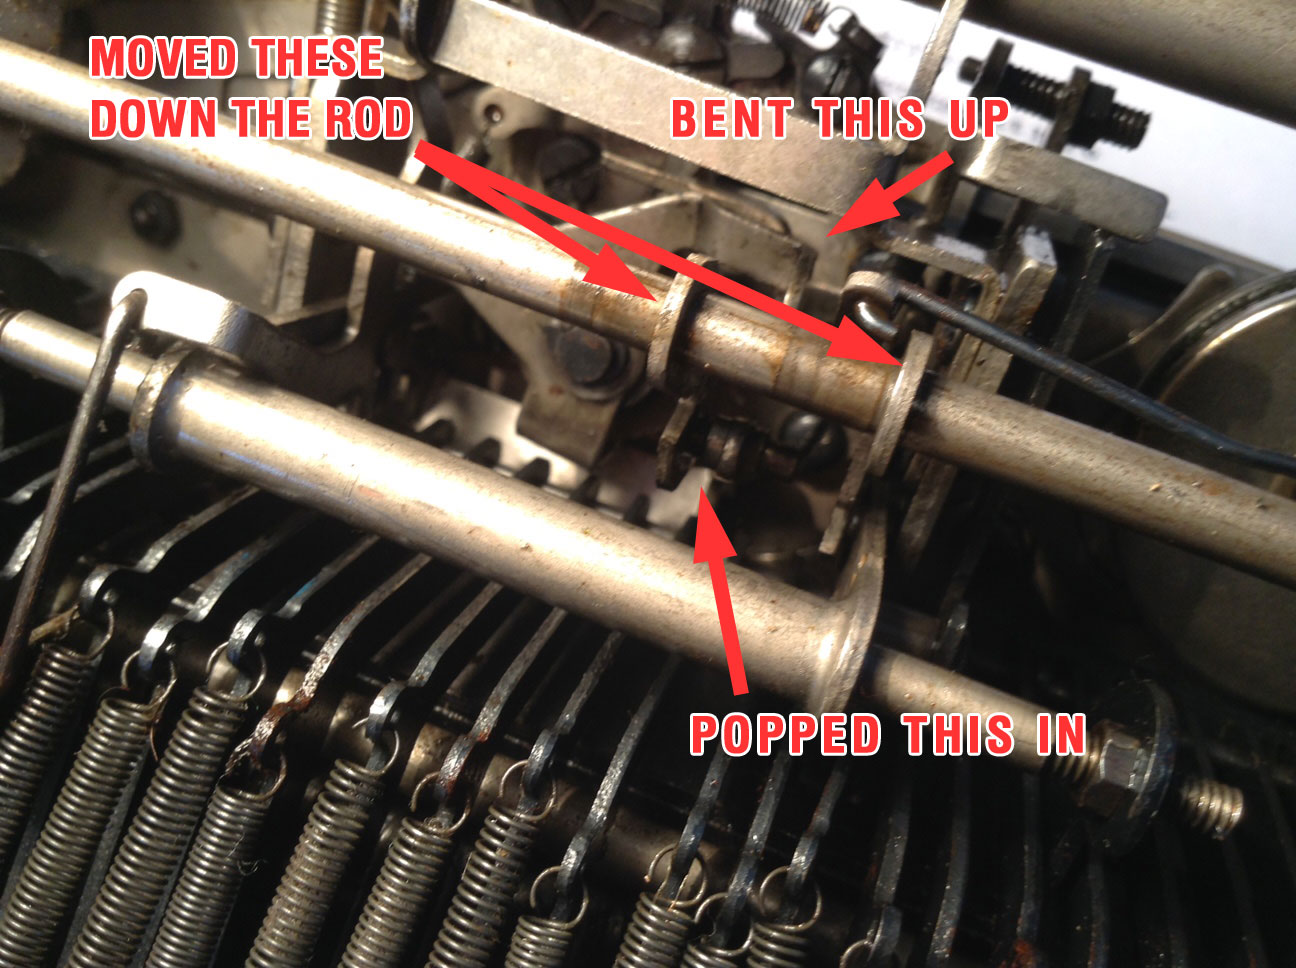
The margin release key was sunken – I followed the connector down and found that the lever had migrated out of its slot – popped it back in and all was well.
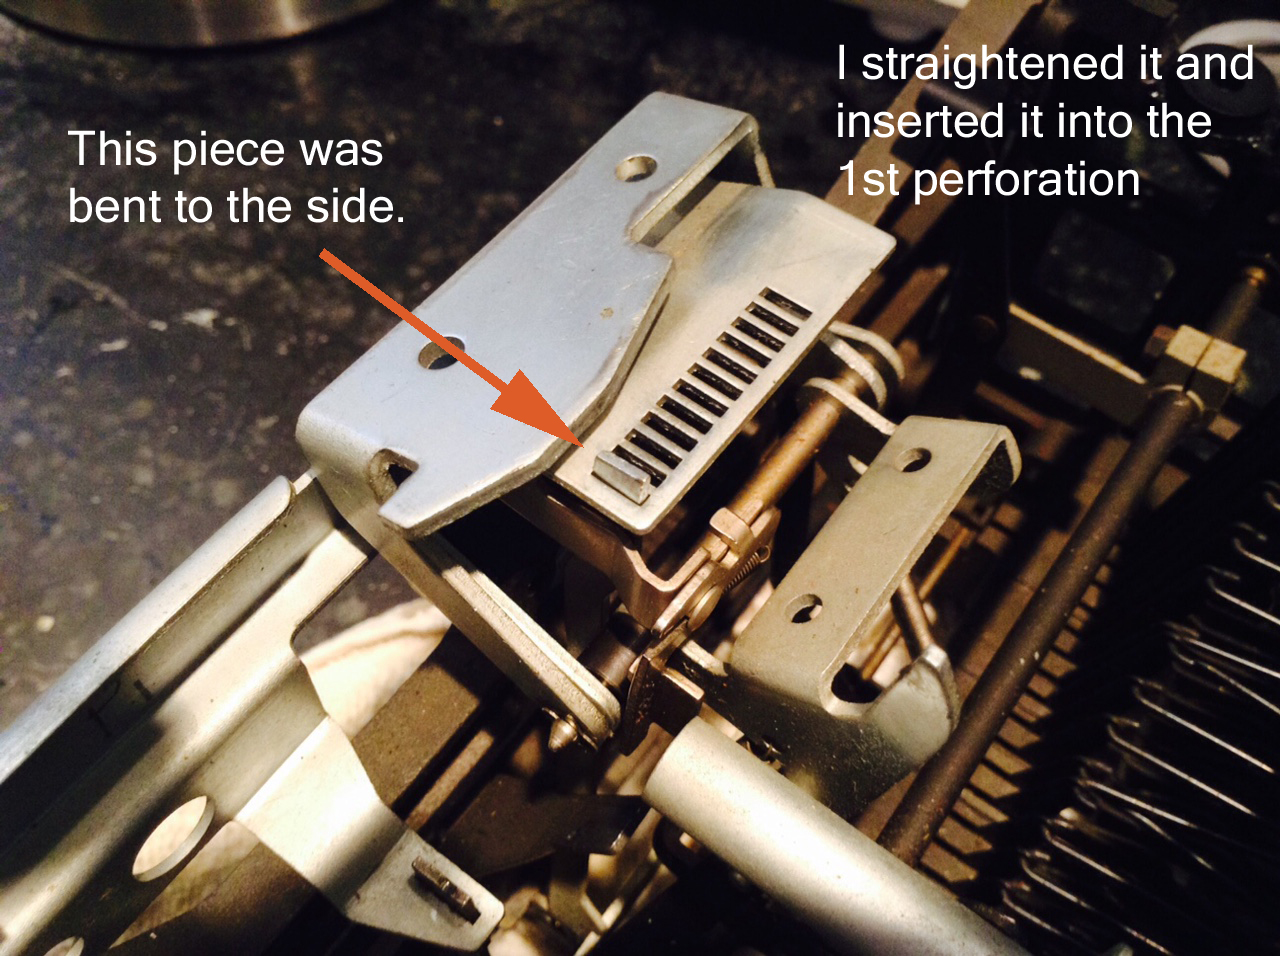
I don’t understand the tab mechanism very well. While cleaning the keyboard, I pressed on the tab key and it got stuck in a depressed state. I found that a small metal piece attached to the tabbing mechanism in back was bent to the side. It didn’t look right, so I straightened it out and it seemed to be work better. However, the tab key still felt gummy and the tabs weren’t working reliably.
“Not working reliably” is an understatement. After I put the machine back together, I tested setting and using tabs. It seemed to be working gummily but OK. Then I made the mistake of clearing all the tabs and hitting the tab key. Bad idea. the carriage whirled to the end of the line and upon return, did it again and again. I ended up manually lifting up on the gummy tab key and that seemed to correct the problem. I immediately set a tab so it wouldn’t happen again.
After the fact, I stumbled across Rob Bowker’s post on Graphika and Lexikon tabulator eccentricities. Good to hear that I’m not the only person to experience the strange tab behavior. My tab key felt stiff and gummy, so maybe gunk was causing a problem.
So I took the cover and carriage off again and examined all the moving parts of the tab mechanism. I applied PB B’laster Penetrating Catalyst to all the areas below and worked the tab mechanism with my hands. The gumminess receded and the tab key began to move freely.
No set tabs – no problema! Works great now that it’s a bit cleaner and lubricated.

I applied PB B’laster to these areas. I had to hold a flat plate down with my finger so that I could freely work the tab key.
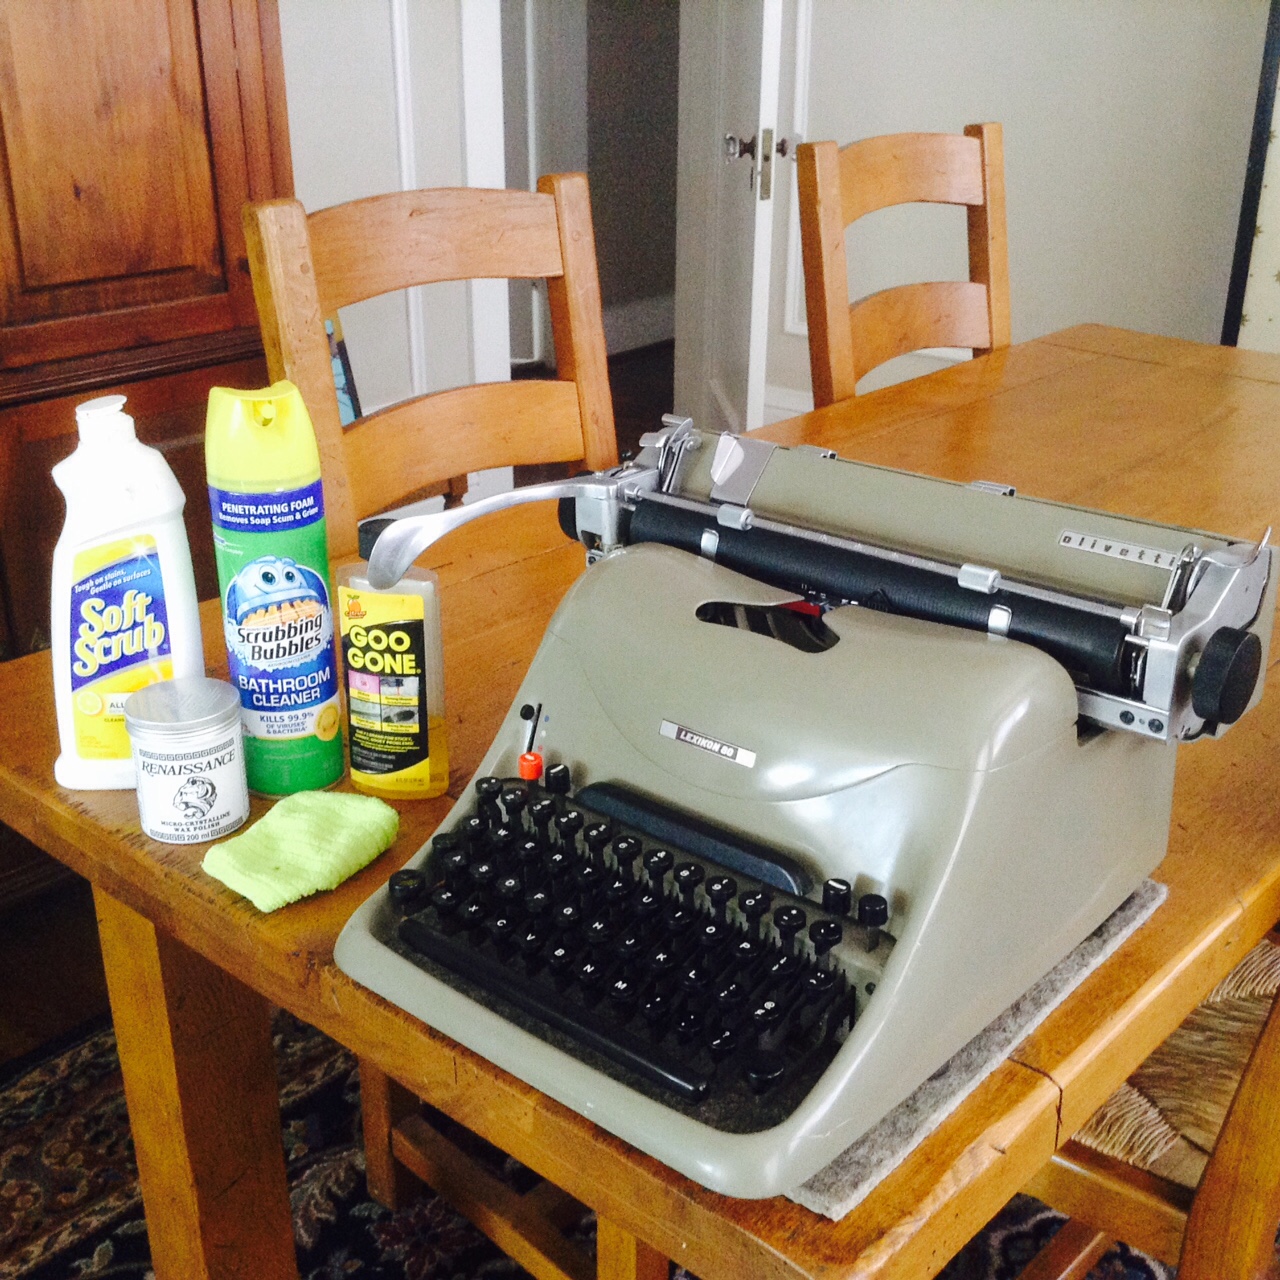
And more cleaning: I cleaned the cover with a little Soft Scrub – it’s a mild abrasive. It did a great job on the scaly grime, but I found that it was the Scrubbing Bubbles that really tore through the discolored dinge-colored grime. The hard enameled paint withstood the Soft Scrub and Scrubbing Bubbles treatment. I was cautious because some typewriters have very delicate paint. I used Goo Gone for thick areas of rubber and tape residue. Areas of the cover that I thought were scraped and damaged were actually just scaly with grime. After cleaning, the Lexikon looked a little vulnerable and naked without her covering of scaly grunge, so I gave the cover a good protective coating with Renaissance Wax. I love the pretty greenish-taupe that was hiding under the dirt.


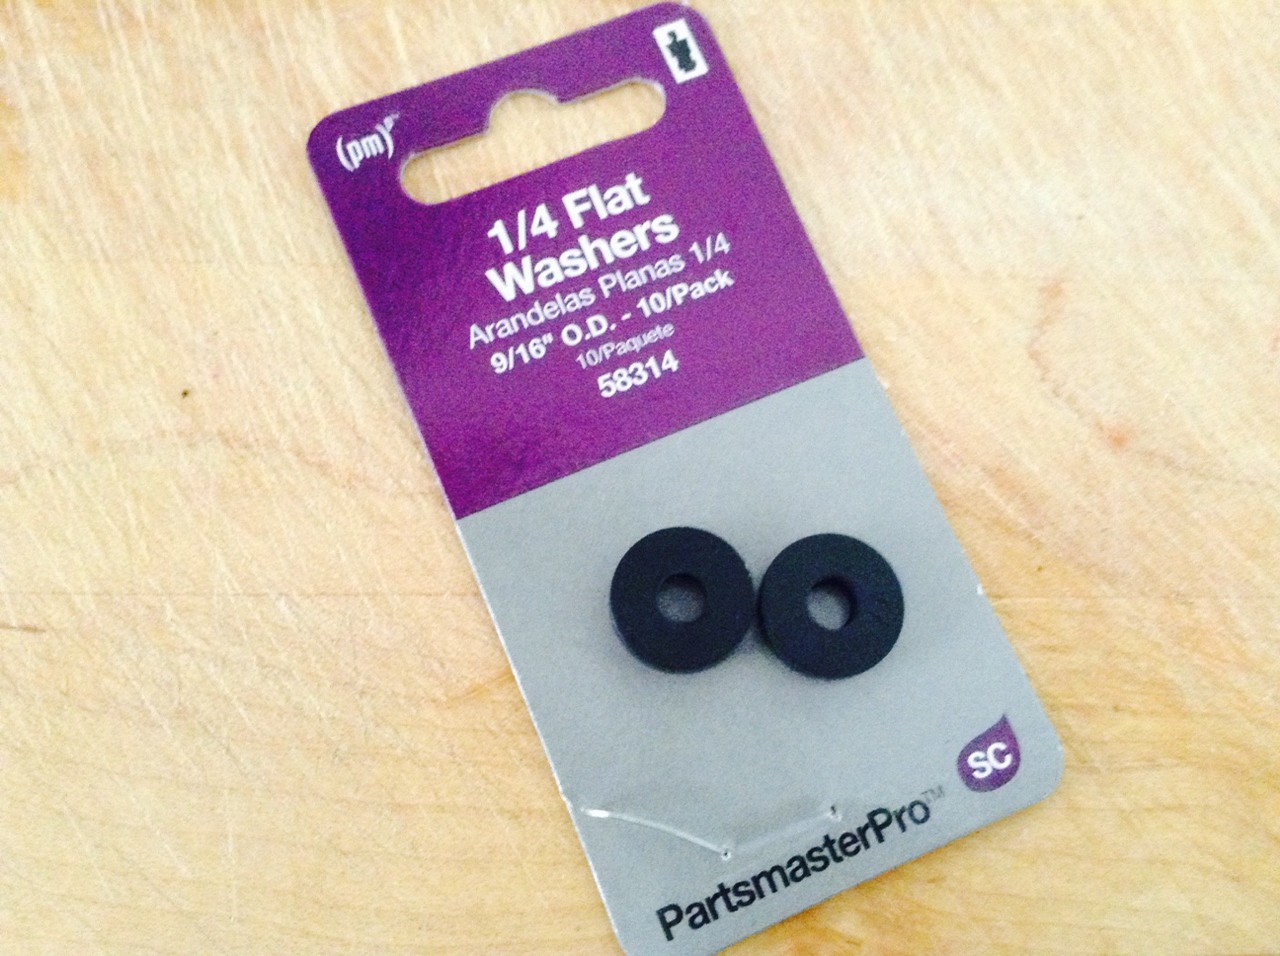
The originally washers were sticky globs of melted goo – a horrible mess. I scraped them off and cleaned the areas with Goo Gone and denatured alcohol.
I found replacement rubber washers at Home Depot that were sort of hard to the touch, but they did the job.

I was able to reattach the carriage without much drama. A good wiggle and it was back on. I inserted a new ribbon and fired up the machine.
Clean
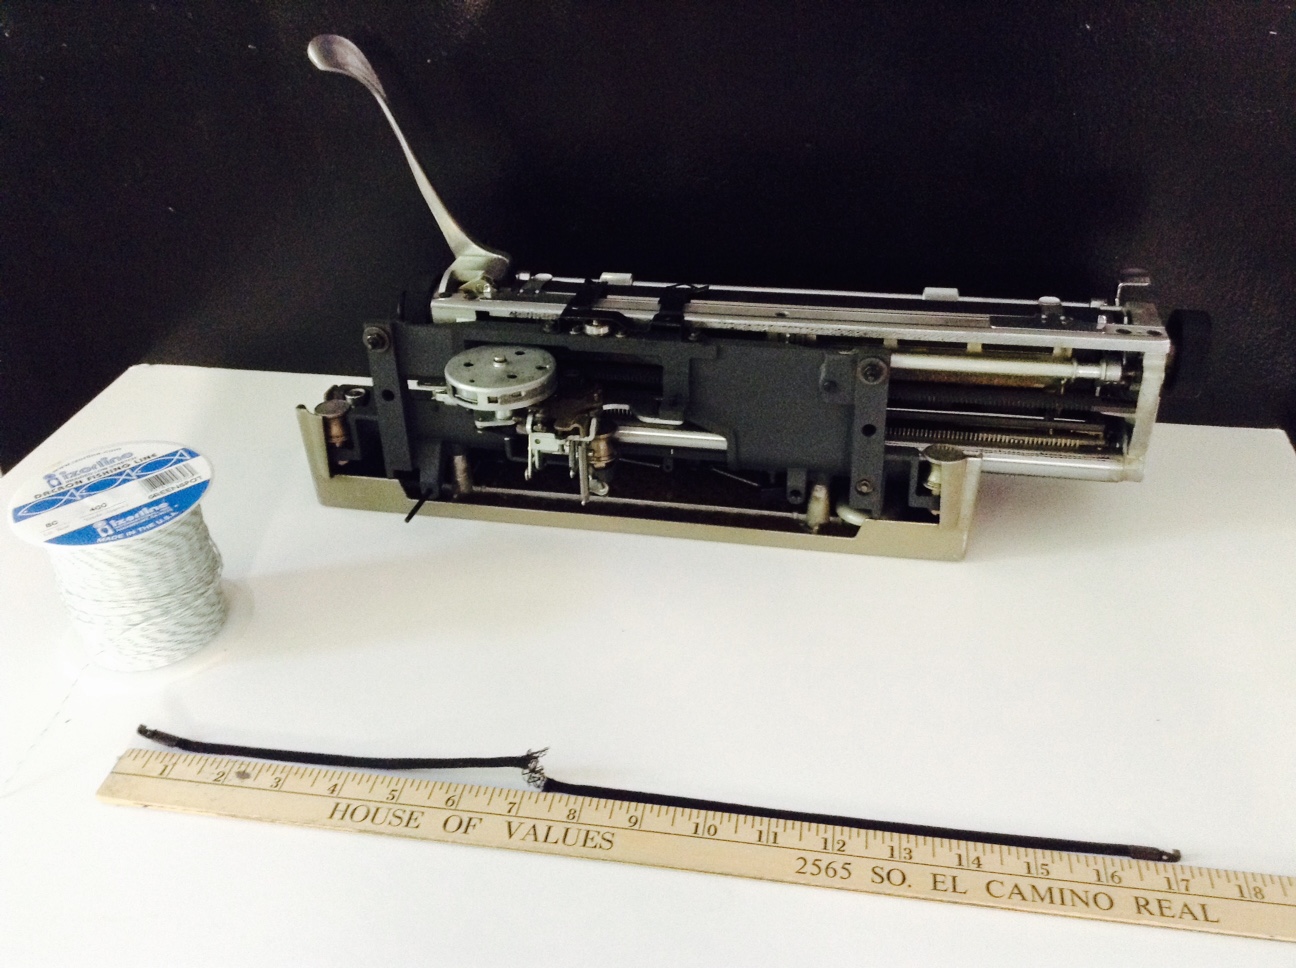
I wanted to give the keys some exercise and began a letter to a fellow typospherian. I got halfway through the first page when I heard a snap and a zing and found the draw band snapped. Good Grief, Charlie Brown!

I sighed, pulled out my 80lb fishing line (suitable for deep sea ocean fishing and typewriter repair) and got to work. I decided to salvage the end hook that attaches to the carriage frame.
 Salvaged hook
Bamboo skewer to feed the line through to the mainspring
I wound the mainspring 3.5 rotations and tied the fishing line to the mainspring. I did it by myself, but it would have been easier with a second pair of hands. The typewriter is happily typing again.
This Olivetti Lexikon 80 cleaned up so nicely. I swear I didn’t put Vaseline on the lens.


This typewriter has some special keys I haven’t had the pleasure to possess before: accents – acute and grave – umlaut, and circumflex.
Here are some things that I couldn’t type until now:

Addendum: a family member requested that I include this sample of the creative use of the umlaut:
One final note: be sure to check out Vintage Technology Obsessions’ post on Olivetti Lexikon 80 production lines. There are some fascinating images there – I love the Lexikon 80s rolling along on a conveyor belt. I went to the Italian site referenced in the post and found this great image of Enrico Fermi inspecting the innards of a Lexikon 80. I may hang it above my Lexikon 80.
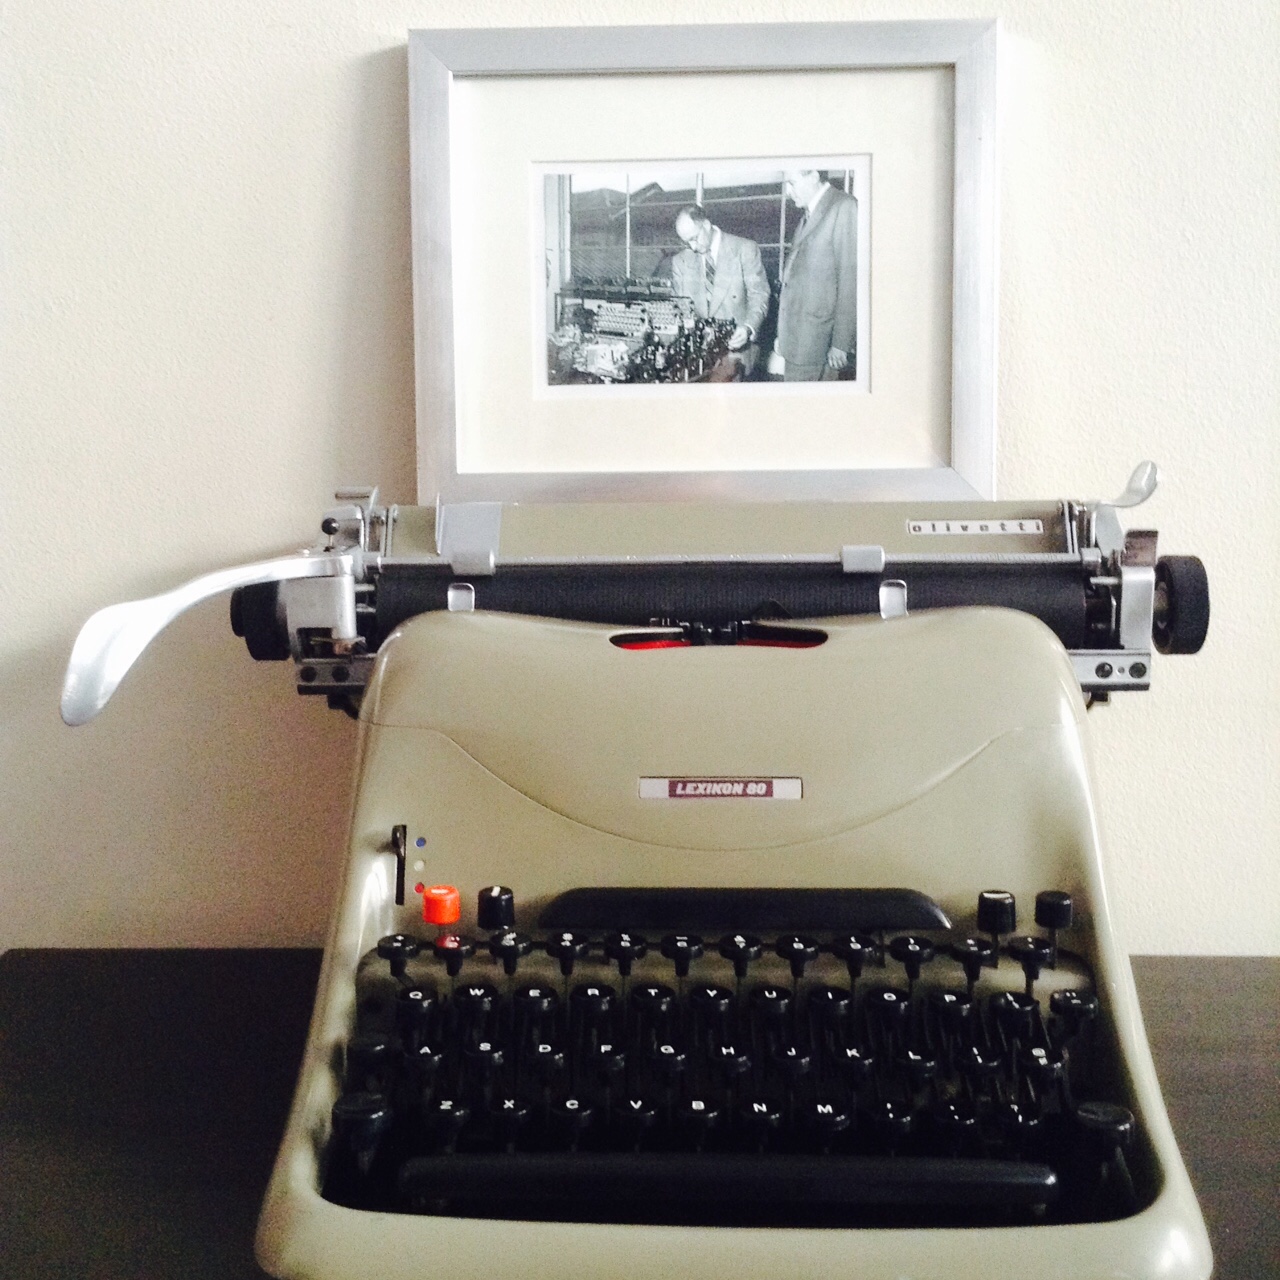
Ivrea, Italy, 1949: Enrico Fermi’s Nobel-caliber mind is blown as he examines a Lexikon 80 carcass.
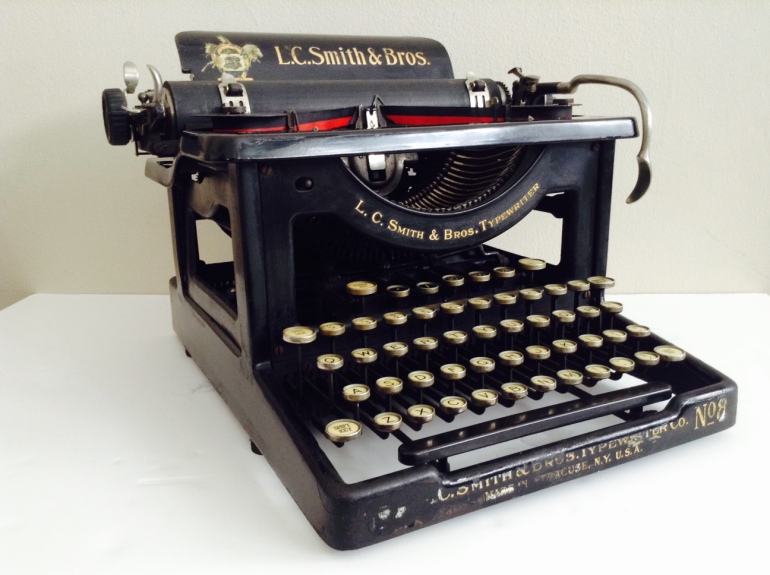
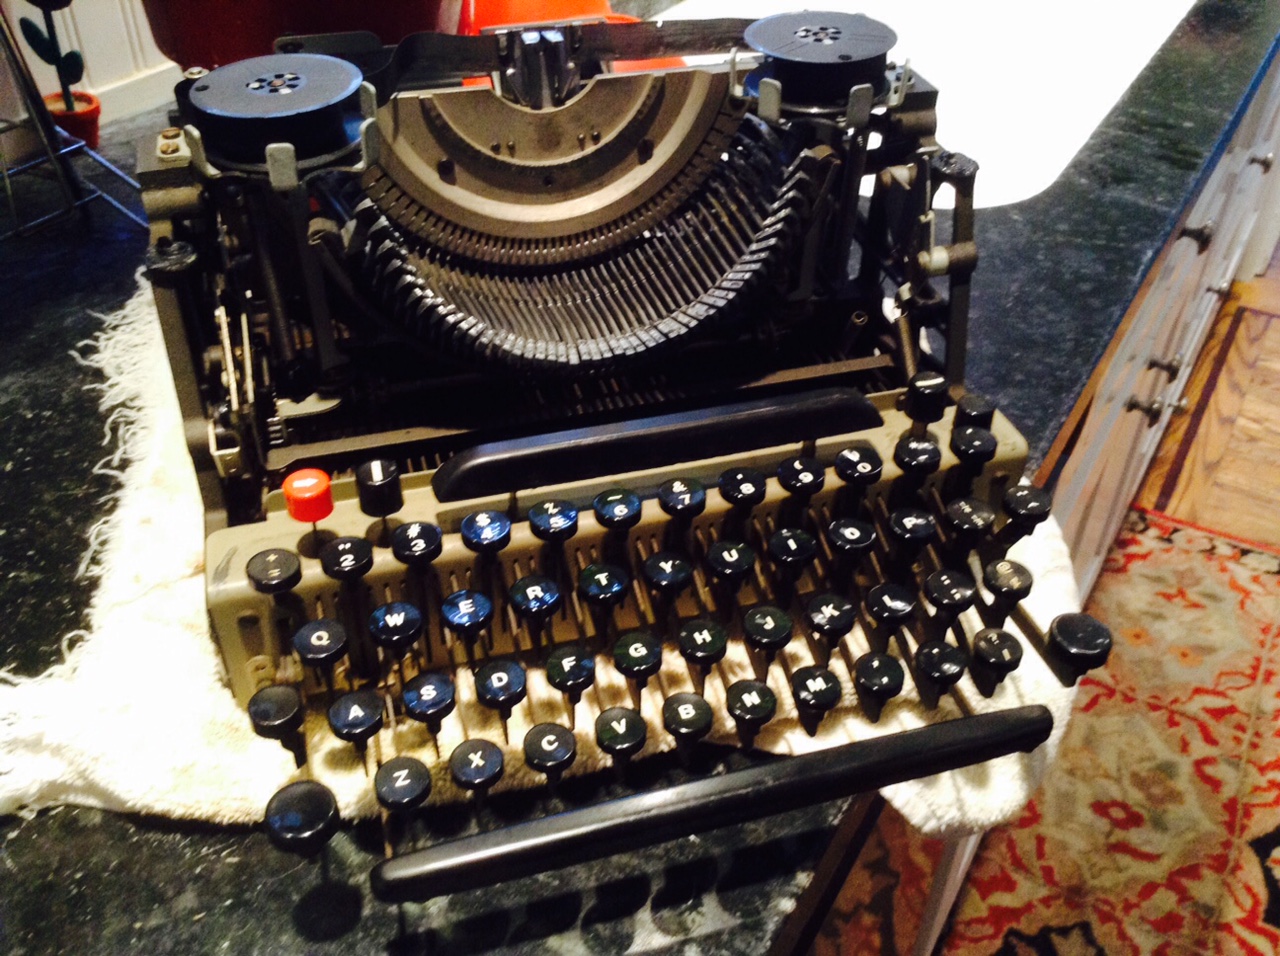
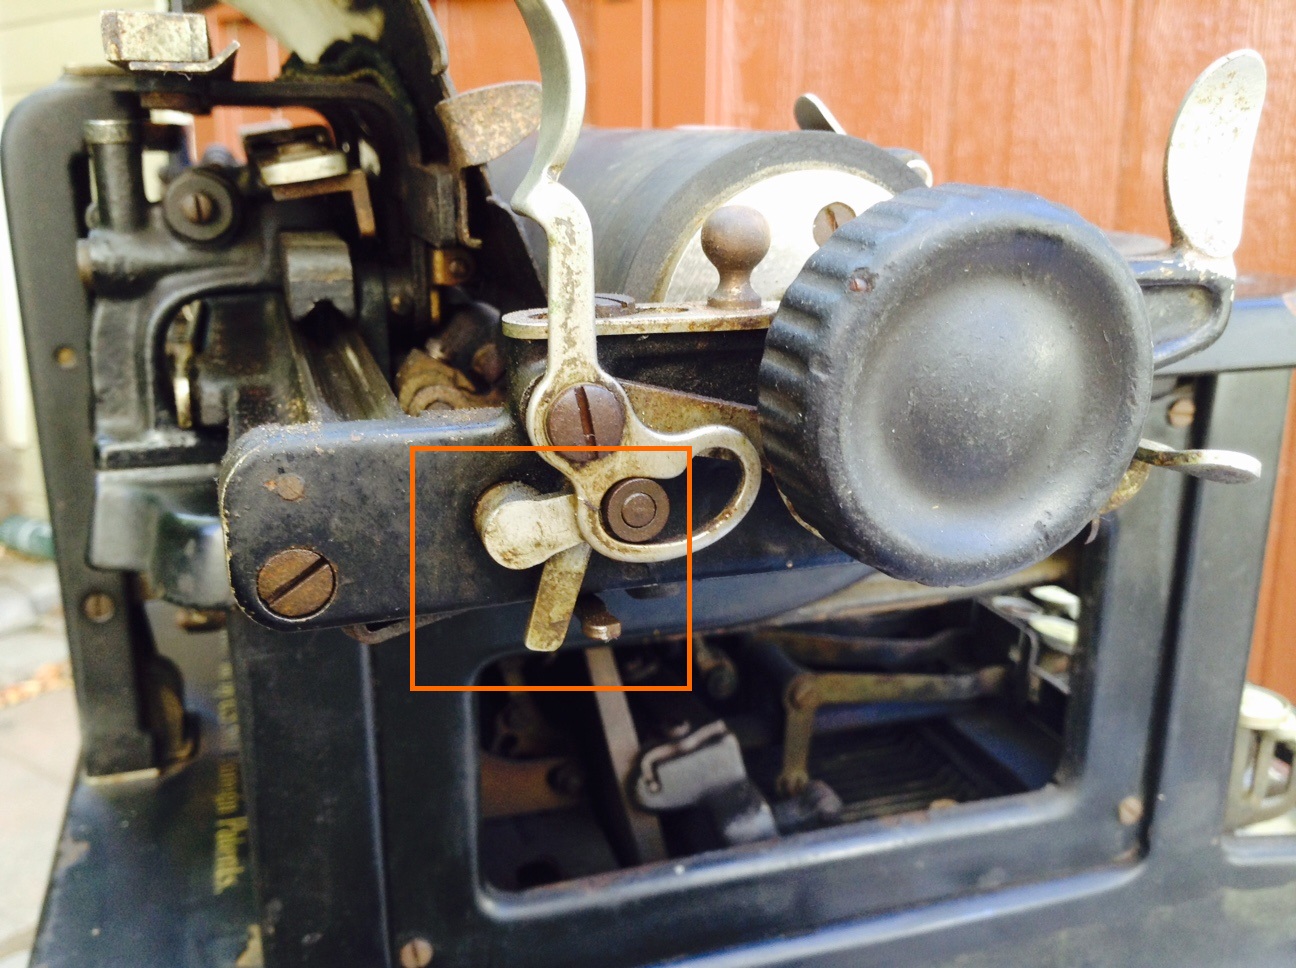
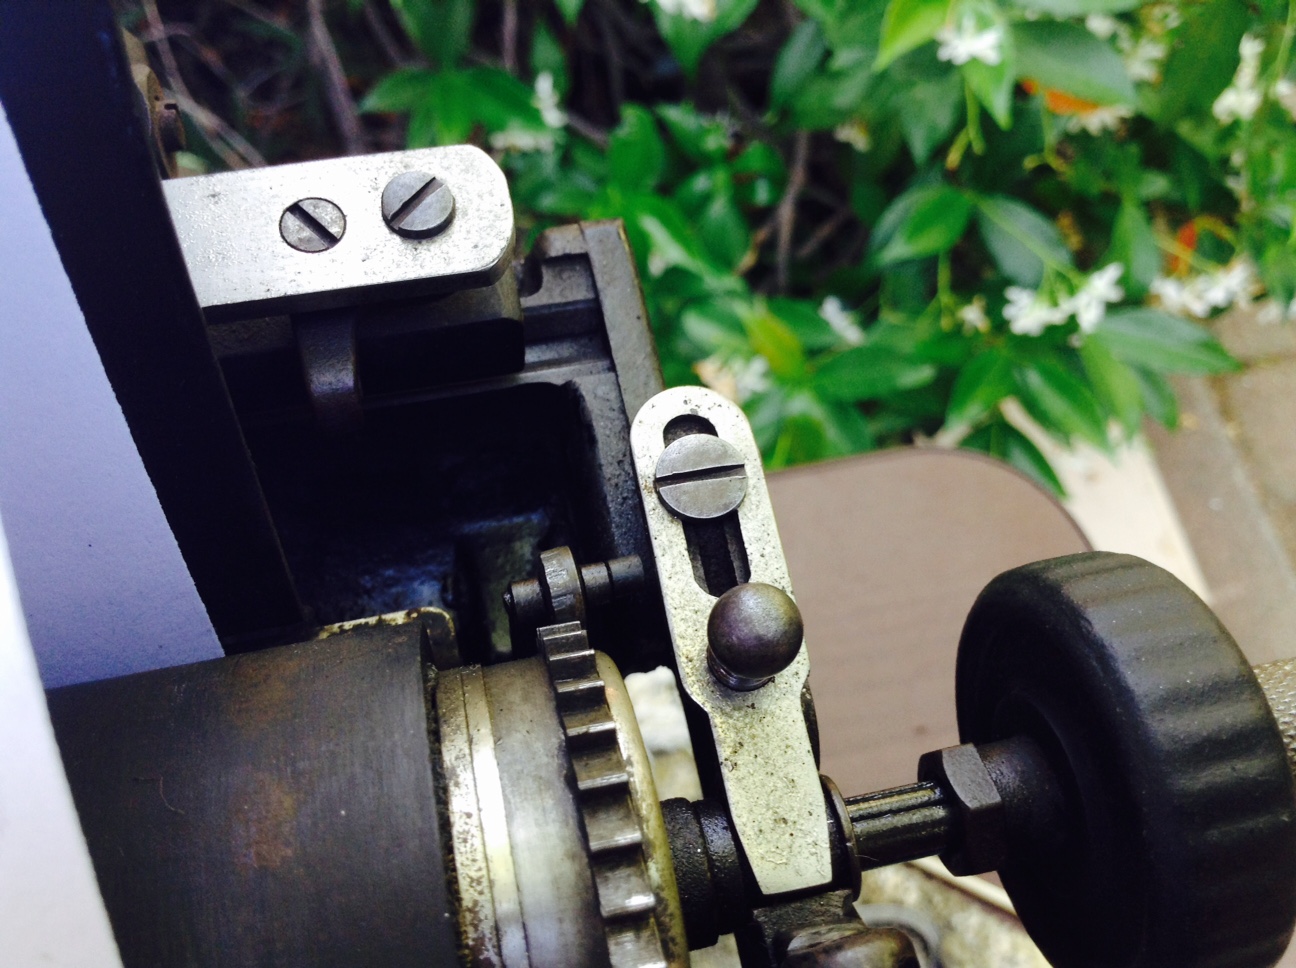
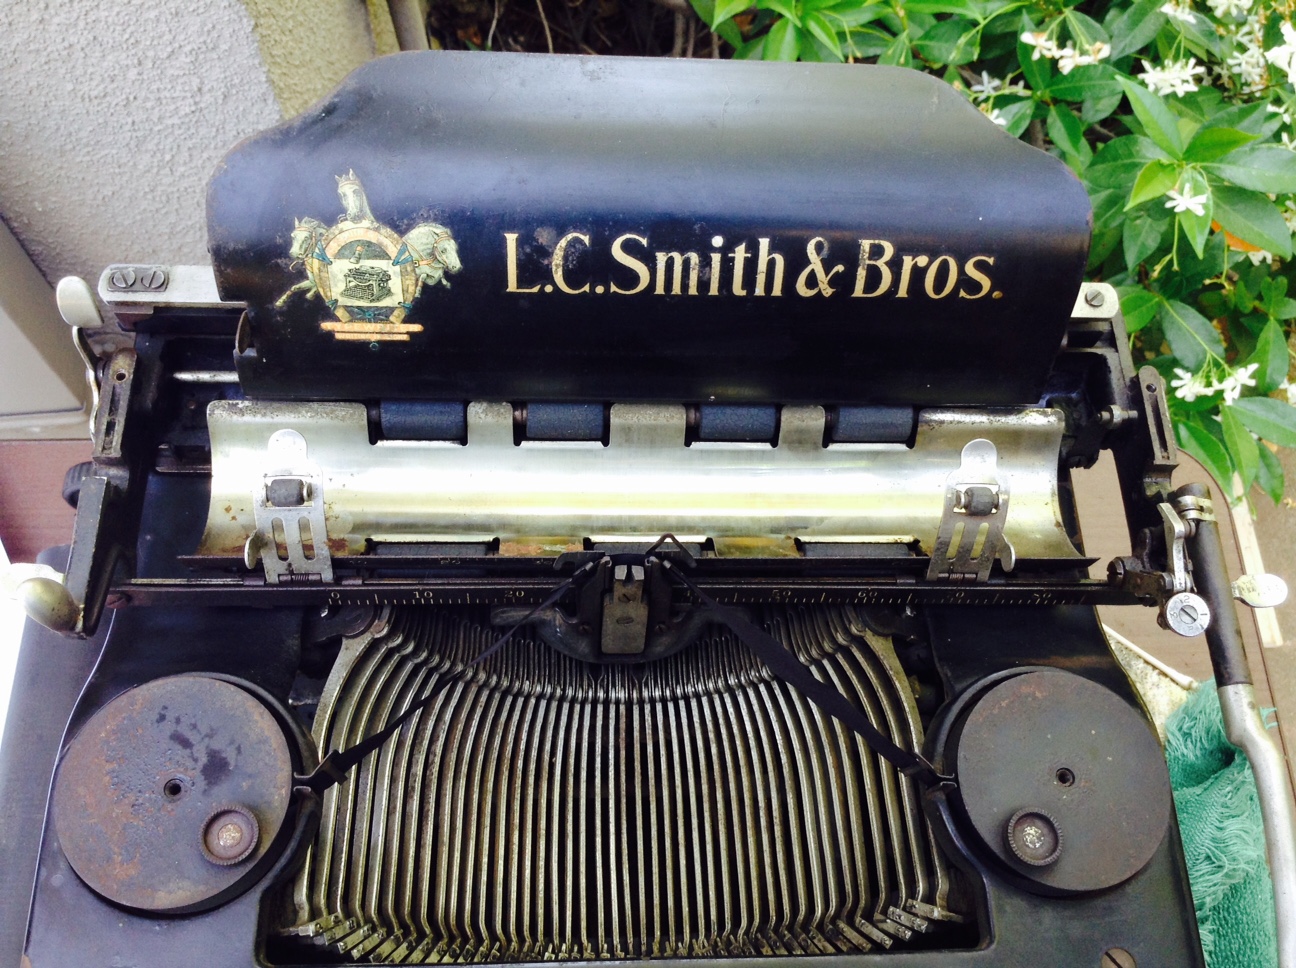
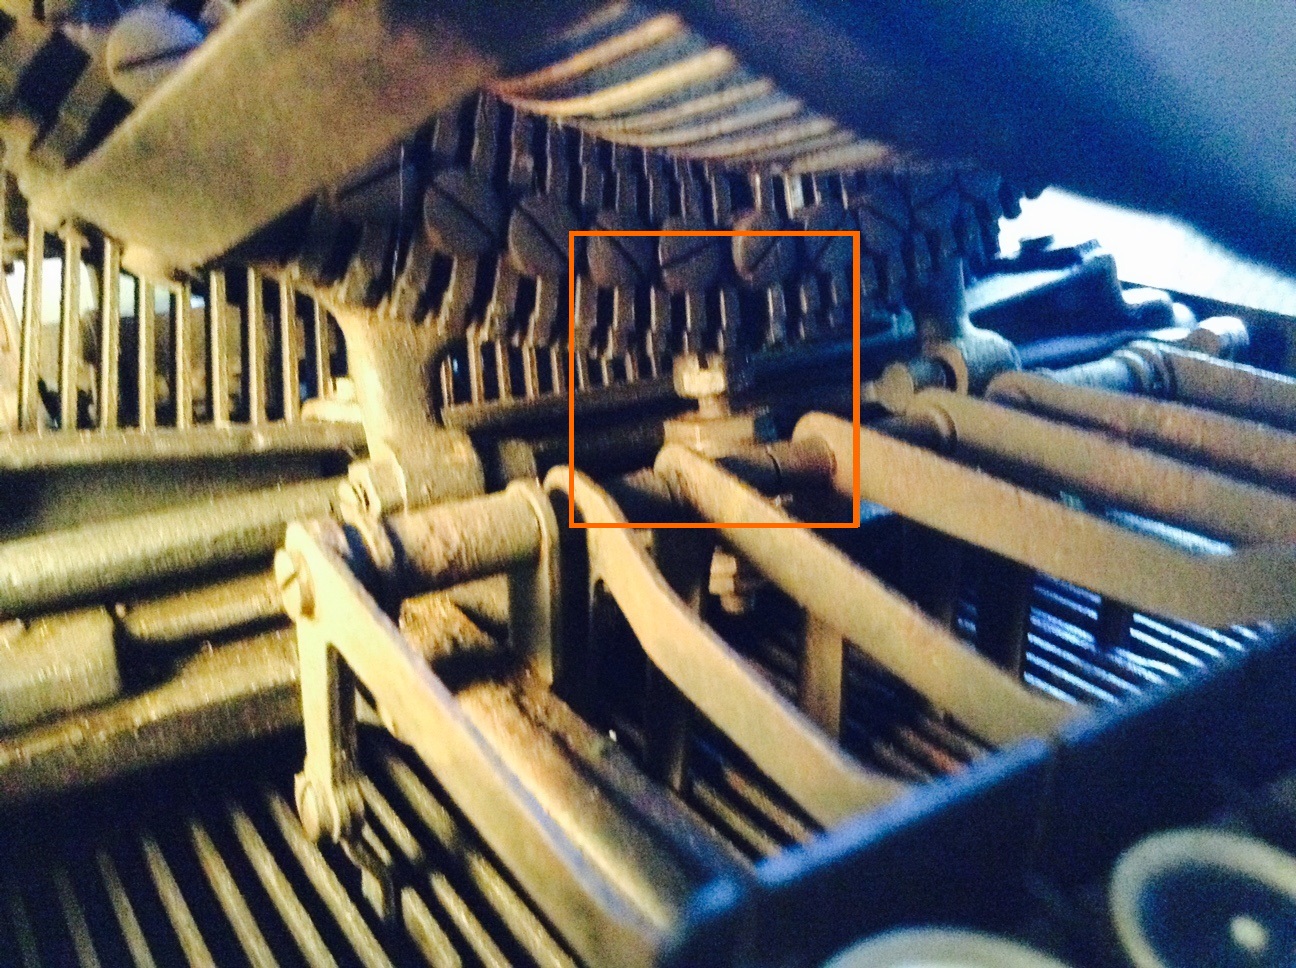
Smokin’ Ball Bearing Action: L.C. Smith No. 8
Since I got back from a recent family vacation, I have been alternating working on the 1922 L.C. Smith No. 8 and the Century 10. I have been switching back and forth. When I run out of ideas on one, I move to the other.
Ball Bearings at All Frictional Points!
When I first brought the L.C. Smith home, there were several immobile keys – the basket was dusty, rusty and gummed-up. And there was a circa 1920 cigar cutter jammed between the universal bar and the line lock bail.
After cleaning with denatured alcohol, the typewriter began to type and type beautifully. I happily typed out a long letter and it loosened more and more with each printed line. It has a light, springy touch which I assume is due to the ball bearings in the typebars. It is a joy to type on. Robert Messenger has a great post on his L.C. Smith 8 typewriter that includes images of early advertisements which extol the virtues of the L.C. Smith’s “ball-bearings at all frictional points”. If I were a decent typist, I could go smokin’ fast on this one.
My L.C. Smith’s most major problem is rust, especially underneath the machine. I would love to dunk her in an Evapo-Rust bath, but unfortunately Evapo-Rust is not friendly to paint – it softens up the paint quite a bit. It also leaves a messy, sticky sort of residue. I use it only for parts that I can remove, soak, and polish up afterwards.
So here is all the fun I had with the L.C. Smith:
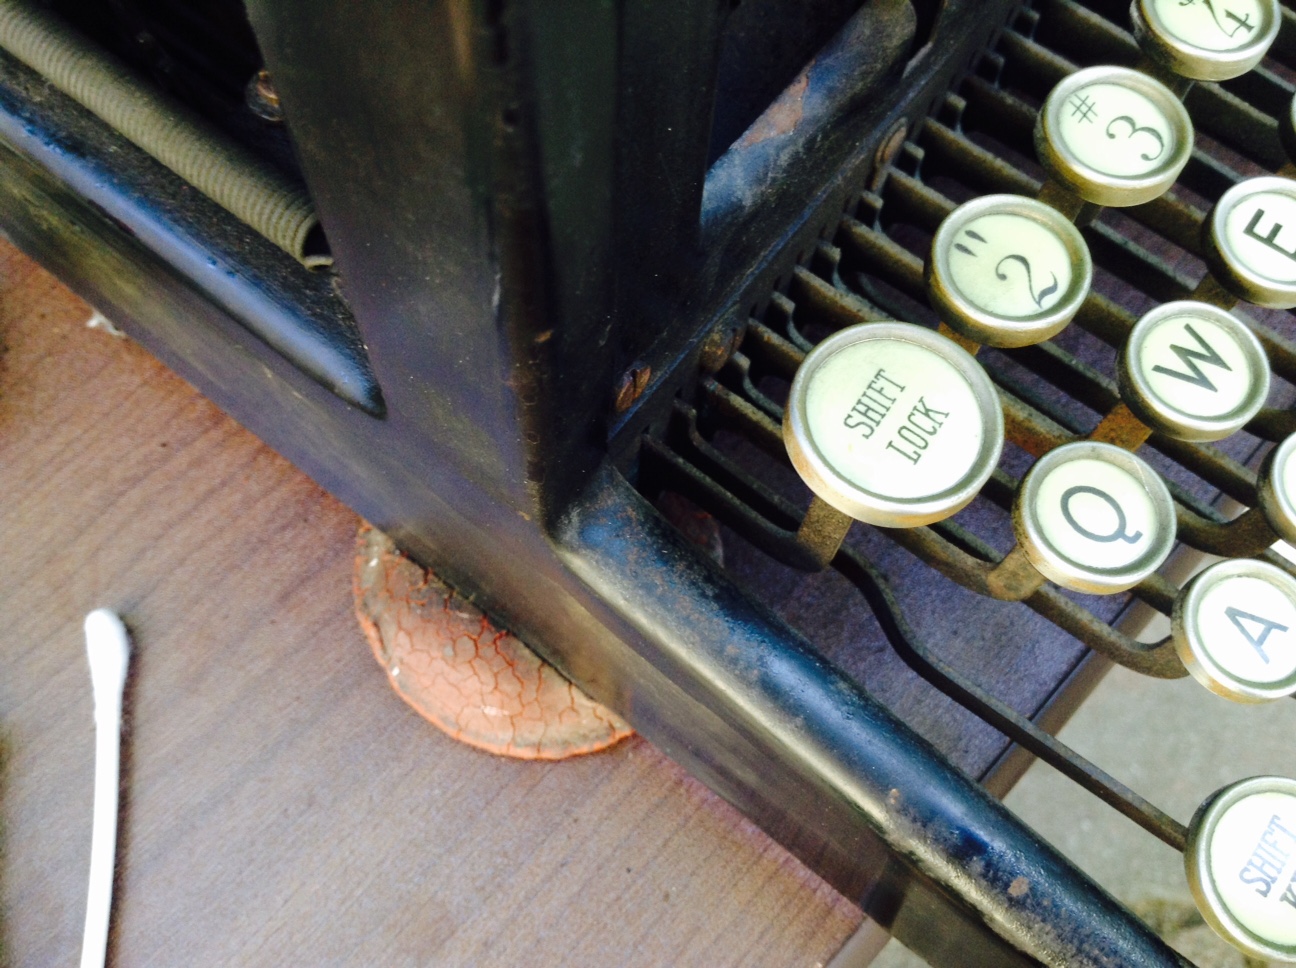
Shift lock not holding
Could it be that the Enormous Grotesque Foot is interfering with the motion of the shift lock? Why, yes. I removed the foot and the shift lock was able to move.
The machine needed three feet, and I cut some really classy looking feet out of cork and colored them with black Sharpie.

Original foot on left. On right: cork replacement foot being carved into shape. Covered in Sharpie.
Thanks for the cork replacement foot idea, JustAnotherGuy.
Left carriage release not working
I compared right and left carriage release mechanisms and determined that a lever wasn’t in the right spot.
Wrong.

Right.
I loosened a screw, moved the lever to the correct spot, re-tightened the screw, and all was well.
Dirty platen
Yes, it was FILTHY. I typed a letter to a fellow typospherian and there was debris all over the page.
It is very easy to remove the platen from an LC Smith No. 8. It it held in place with a screw at each end in a knobbed plate and then pops right out. So easy – I wish they were all like this.
The platen is nice and soft and cleaned up beautifully with a little Soft Scrub. From the Craigslist pictures, I thought there were rips in the platen, but it was just crusts of rust.
Missing tab connectors
Functional tabs are little low on my list of priorities, but the missing tab linkages and sunken keys bugged me.
Missing tab linkage

Resulting in sunken tab keys
I cut some thin pieces of metal to size to temporarily replace the missing connectors. I need more rigid metal if I want to use the tabs, but these work for keeping the sunken keys up.
New tab connectors made from thin metal
Tab keys sunken no more
Outstanding Issues:
Malfunctioning line lock
This is still an issue I haven’t been able to resolve. I get to the end of a line and the typewriter allows me to continue typing, piling letters on top of letters at the end of the line. The line lock should engage at the end of the line, but doesn’t. The line lock bail is rusted into position and does not move at all. I am getting some Liquid Wrench today to see if I can free it.
Missing tab stops
The tab stops are nowhere to be seen (and I didn’t see them under the universal bar with the cigar cutter). I went to internet and asked about it. I am not the first person to run into this problem.
I love Knife141’s posts at Instructables: this guy Gets It Done. I have run across his very informative posts before:
Knife141 has a post called, “Making tab stops for an LC Smith Typewriter”. I have bookmarked this page so that if ever I get ambitious, I will make those tab stops.
The vertical alignment of the capital letters is a bit high
This typewriter is basket shift. The capital letters are printing a little high:
Thanks to Knife141, I believe that I need to make an adjustment to the nuts directly under the segment to bring it to the right height with shifting. I just don’t have the right size crescent open end wrenches, but Good Neighbor Brian has offered the use of his set. First off though, I need to get some Liquid Wrench because the nuts are very rusty.
Cleaning, touch up and waxing
I cleaned the exterior of the typewriter with soap/water and a little Soft Scrub. I was very careful around the decals – cleaning all around them.
I touched up the bare metal spots with a very thin layer of Testor’s black paint pen that I rubbed on. Sharpie was not a good match, but the paint pen was very close. On future projects, I’d like to experiment with India Ink (Encre de Chine) which was suggested by RobertG as it is less permanent and is an almost perfect match.
I bought some Renaissance wax polish and shined up the typewriter. I avoided the decals as I was worried that I might rub them off. I don’t know if this is a legitimate worry with the Renaissance wax, but I didn’t want to take the chance. I love those insane horsies so much.
1922 L.C. Smith No. 8
Serial number: 460128-8
-

- Cleaned up nicely
-
- Typebars still corroded looking
-
- Red and black!
-

- Replacement feet made with wine corks
-
- Squidward carriage return tentacle
-

- Horsies a-stompin’
-
- Missing tab stops
-

- Cigar cutter found in typewriter
-
- Serial number behind back space key
I’ve attached the cigar cutter with a ribbon to the typewriter for easy access. I believe that the “best practices” use of this machine involves cigar smoking, so I lit up a stogie and enjoyed an afternoon of typing en plein air.

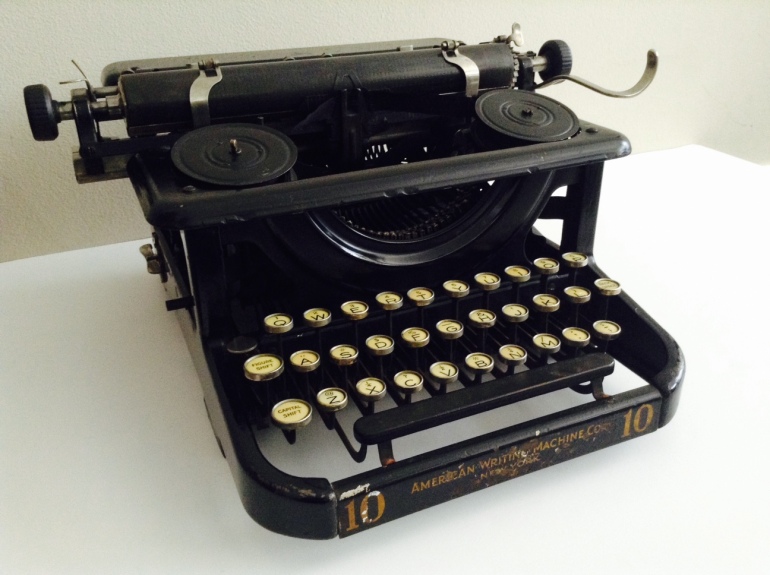
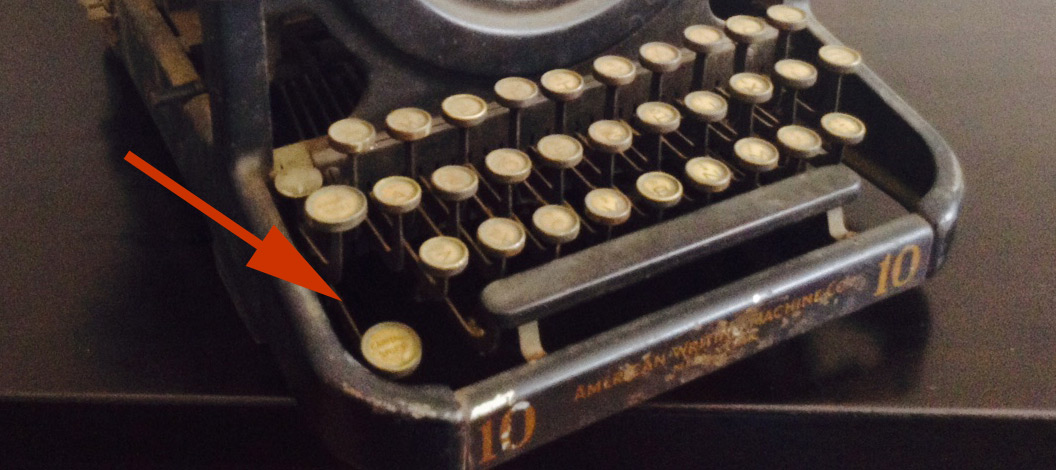
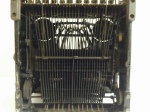
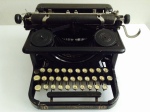
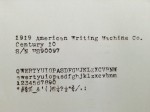
The Sorta-Portable Century 10 Typewriter
A recent family vacation meant that I was parted from my typewriters for two weeks. I missed them a lot and thought about them every day.
I happily dove back into it upon my return. I alternate working on the L.C. Smith 8 and the Century 10. I’ll get stuck on one machine and move over to the other and switch back and forth.
I initially cleaned the Century 10 with a damp rag to get the dust off, and it immediately looked much better. It is such a petite little beast – a cute 17 lb package. Although it feels like it has a cast iron frame, it may actually be made of pressed steel like its cousin the Remington Junior.
The old grease formed a protective skin over the entire machine, shielding it from rust – a happy situation. In my limited experience, I’ve found solidified grease and heavy grime are much easier to deal with than rust and corrosion.
The sunken shift key
When the typewriter arrived, I noticed the shift key was sunken and nonfunctional. I followed the connection up and found a loose lever but I couldn’t figure out what it was supposed to attach to. I went to Typewriter Database and studied the Century 10 there and noted that the connector should be positioned vertically straight up and down. With this information, I found the spot to re-attach and all was well – the shift key works now. I love TWDB for the wealth of information in its images.
Shifting is old-timey high tech: a three bank keyboard with segment shift. The basket shifts down for uppercase letters and up for figures. It actually feels very light and snappy when typing and I can maintain a good pace. I can type a lot faster on the Century 10 than on my Oliver (I know that’s not saying much).
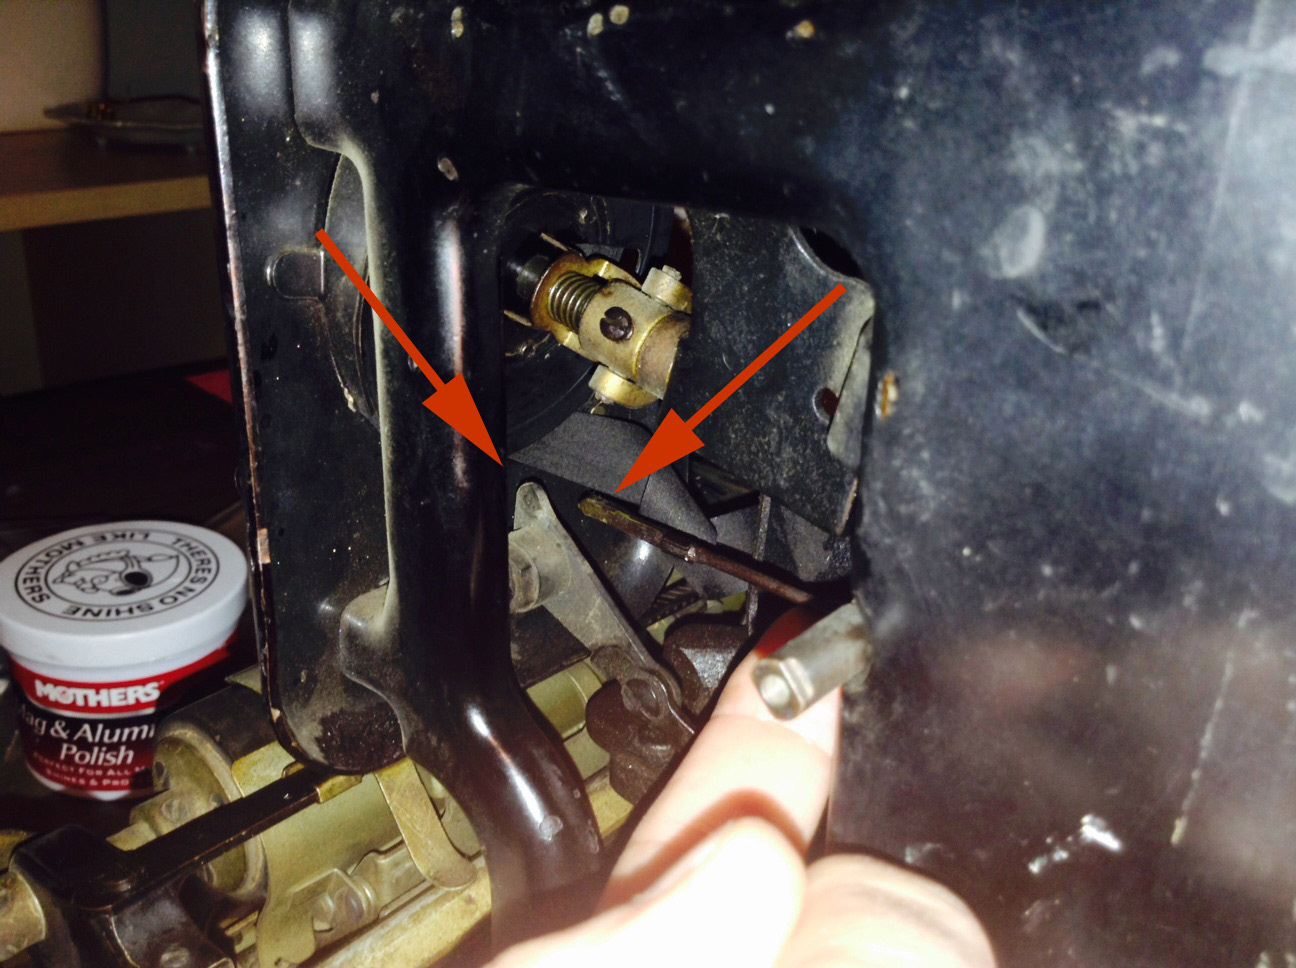
Loose spring
There was a loose spring directly underneath the machine – I re-attached it to a likely hook. I believe the spring helps the ribbon vibrator return to a resting position while typing.
Ribbon Spool Mysteries
Tolstoy once said “All happy ribbon feed mechanisms are alike; each unhappy ribbon feed mechanism is unhappy in its own way” or something along those lines. Since I gravitate toward the junkier end of the spectrum in my typewriter collecting, I have run into a fair number of unhappy ribbon feed mechanisms. In each case, I will eventually figure it out and think to myself, “Finally. Now I understand ribbon feed mechanisms!” Unfortunately, that’s never the final word. Every feed mechanism that I have had to deal with is different from the last.
I removed the old dried ribbon from the weirdly tilted ribbon spools – and then noticed the spools weren’t rotating properly. The ribbon feed direction is controlled by a switch on the left base of the machine. Once switched, the ribbon spool would rotate a few turns and then the ribbon driving gear would work its way out of the ribbon spool shaft pinion and all would stop.
There isn’t a whole lot of documentation on Old Weirdy. As a not-very-popular and briefly manufactured machine (1919-1924), it came and went and took its user, parts and repair manuals with it. Its closest cousin, the Remington Junior, has a rear-mounted ribbon spool system set up. I used a Remington Standard Model 12 diagram from the D. E. Fox Typewriter Repair Manual, 1950, TWDB Documents Library for reference as its ribbon feed is quite similar to the Century 10’s.
I had problems just getting the spools off the machine. I removed the top and front plates to get a better look.
You can see the LC Smith 8 lurking below the workbench, waiting its turn.
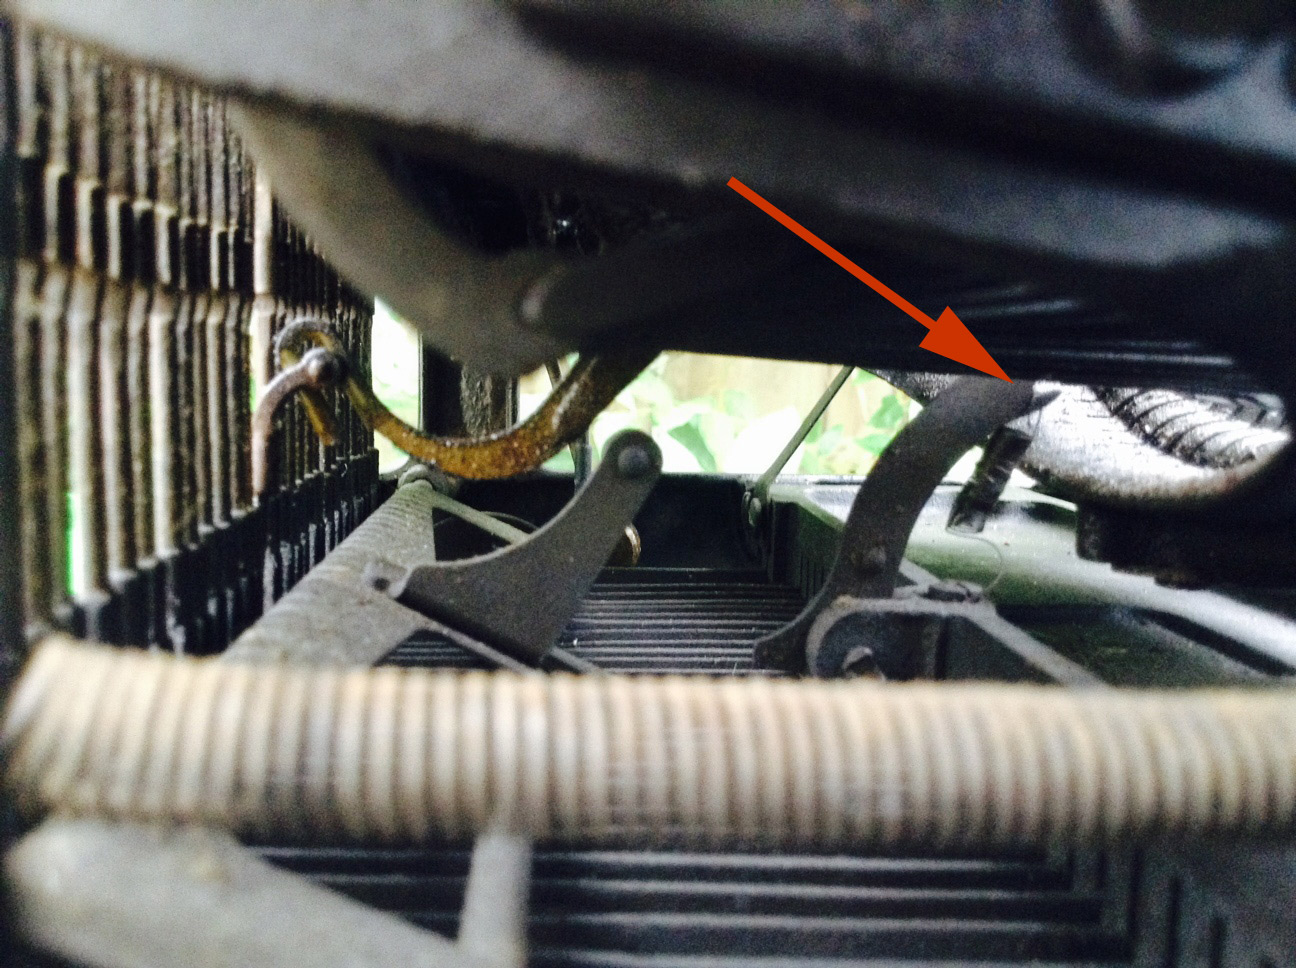
There is a metal piece in the center of the spool shaft called a Snap Catch that needs to be tilted to the side of the shaft to remove the ribbon spools.
Snap catch
Once off I noticed that the right and left spooling mechanisms were different. The right spool is marked “Right” and the left spool is marked “Removable”.* There is a drop weight on each spool shaft which is part of the feed reverse system. The drop weight flops freely on the right and is firmly attached on the left.
Right side, floppy metal drop weight
left side drop weight is firmly held in place.
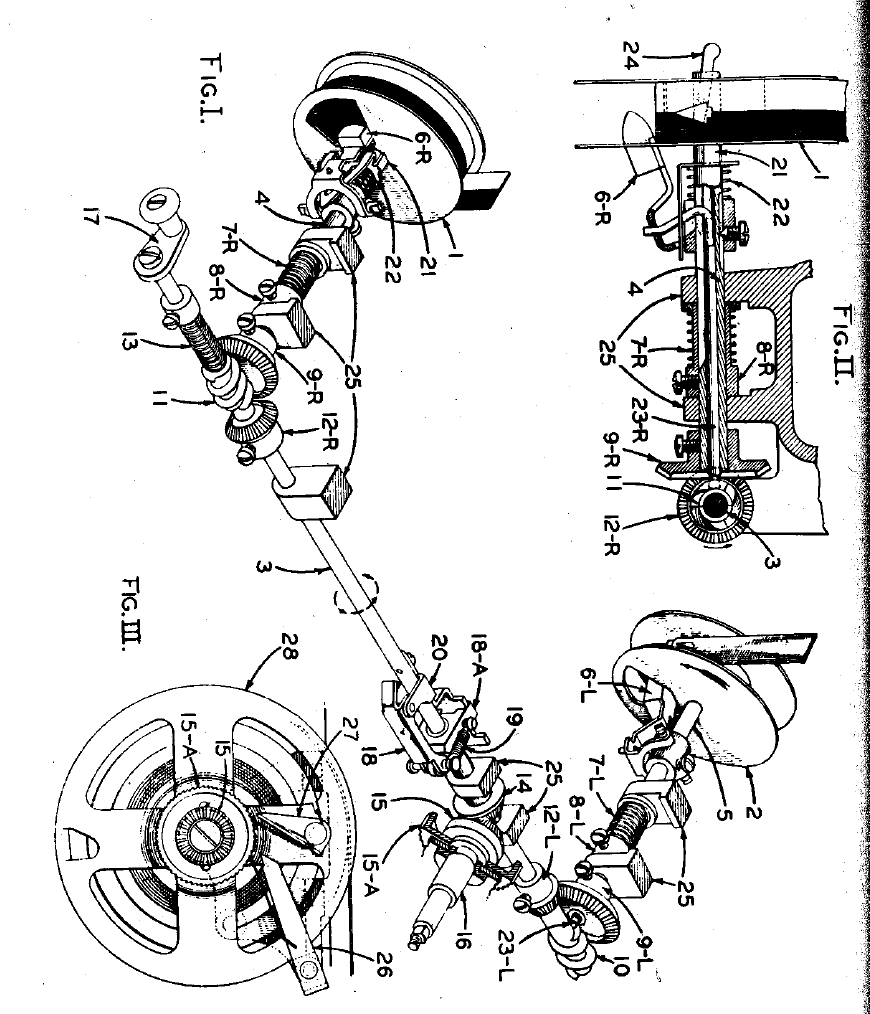
Remington Standard Model 12, D.E. Fox Typewriter Repair Manual, 1950, page 112. TWDB Documents Library. I found this diagram of the Remington spool system very similar to the Century 10 mechanism.
Figure II in the diagram above shows how the ribbon reverse is triggered once the ribbon fills the left spool and runs out on the right causing the weight to drop.
I found was that if I manually held the floppy weight on the right, the ribbon spools rotate properly. I put a temporary bread tie to hold the floppy weight for testing and found that the ribbon feed works great. I *think* I understand this system now. Once a ribbon is on the machine, it will hold the drop weight against the core of the spool and allow for proper feed.
I am glad that I found the Remington 12 diagram in D.E. Fox. I love TWDB for the wealth of information in its documents archive.
Simulating a full spool with a bread tie.
*I am starting to get the uncomfortable feeling that perhaps my understanding of what is “right” and what is “left” is mistaken. My left and right spools may be reversed as the ribbon feed is still at times a little balky. I may be confused by whether I should be thinking in terms of my right and left side or the machine’s right and left side.
Noisy carriage return
Click click click click clickclickclickclickclick. Time for a Polt Silencer™? This is pretty bad, right? Not normal? I can’t see the escapement to get a feel for what’s going on without taking this thing apart more. I am hesitant to do that.
Bentley
The letter “I” had a bent typebar connector that caused it to collide with its neighbor. I can’t imagine how that would have happened except maybe a spear in the guts – but there it is.
I gently tapped from the right side with a thin pick to get the connector back into position – my smallest punch was too large for the small space. The connector popped back into position after a few gentle taps. It may have been an unorthodox way to approach the situation, but it straightened out nicely and the letter “I” and its neighbor key are now working.
All better.
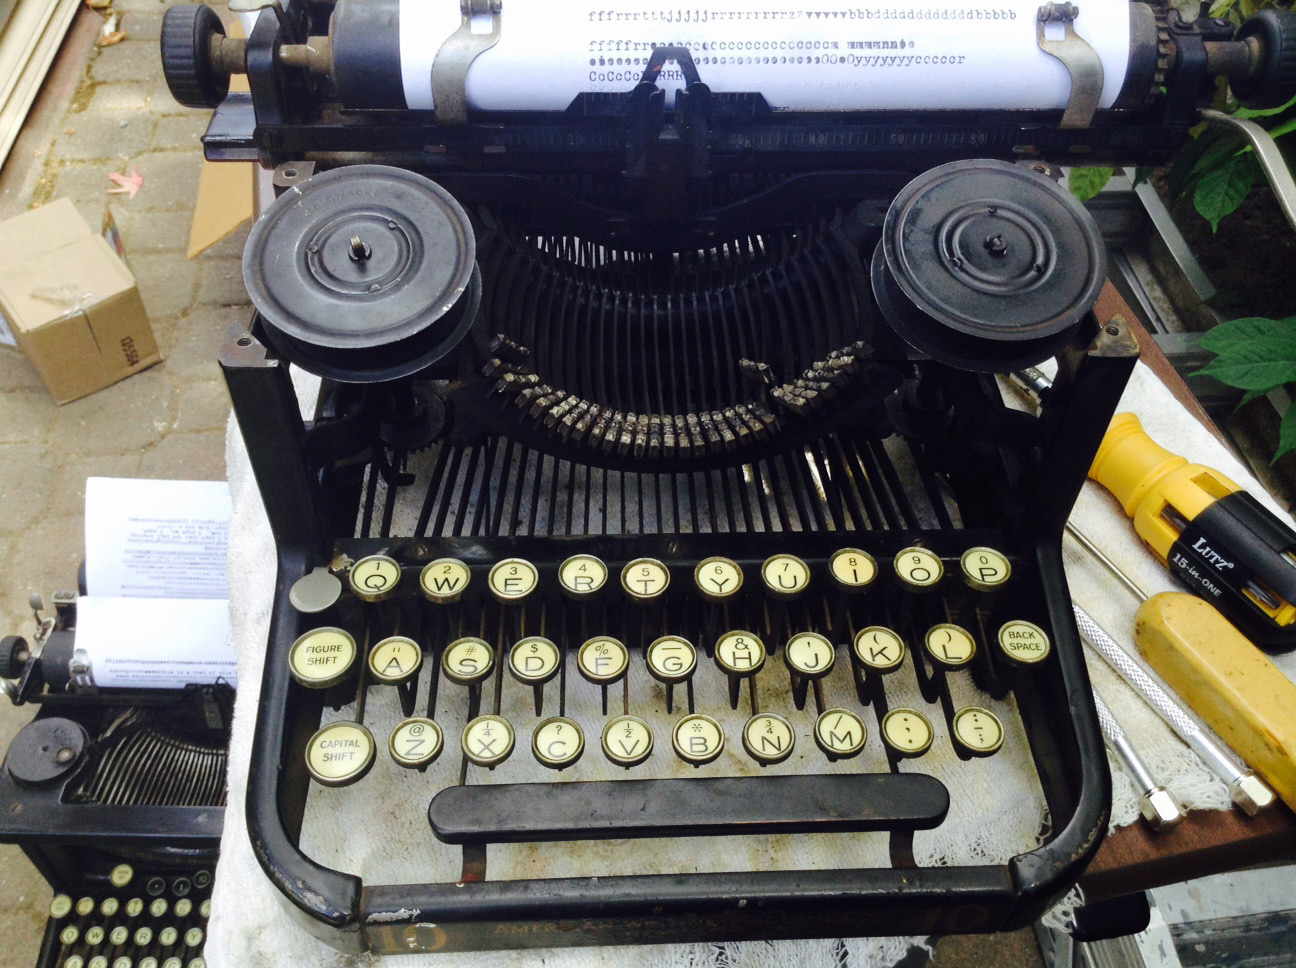
Now that the Century 10 is fairly clean and I have given her a light coating of Renaissance Wax, I took some photos:
-

- Winding key for mainspring tension adjustment
-
- paper release lever head broken off
-
- missing the paper table *sigh*
-
- back feet missing
-
- And she types!
I regret that this Century 10 is missing the paper table with the large “Century” decal. I double checked with the eBay seller who said that the typewriter was part of building clean-out in an old part of St. Louis, MO and it did not have a paper table when they got it.
Google image searches for the American Writing Machine Co. Century 10 typewriter pull up a handful of results. What’s very curious is that one of those few hits is of a typewriter in Spain also missing its paper table. The Powerhouse Museum’s Remington Junior on Robert Messenger’s blog is also missing its paper table. Maybe these three typewriters can start a support group: Typewriters without Tables. Is there something about the way their paper tables were secured that made them so apt to go missing?
And here are a few seconds of me typing away happily on Old Weirdy:
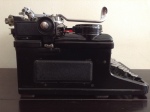
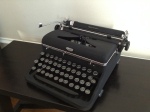
The Foster Typewriter: Royal KHM
Typewriters may come and typewriters may go, but I’d like to keep my standing in-house collection under double digits. We’re a family of many hobbies and collections and our home is already bursting with fun stuff. I could use a barn.
Also, I’m not really into amassing a huge collection of typewriters – I’m not looking to acquire a Corona Four in every color. And I really like junkers – I like to clean and make them functional. It’s very satisfying. For the most part, once they are working, they start to lose their grip on me.
Last week I saw a very dirty, nonfunctional Royal KHM at my favorite neighborhood junk shop. I found it utterly COMPELLING:
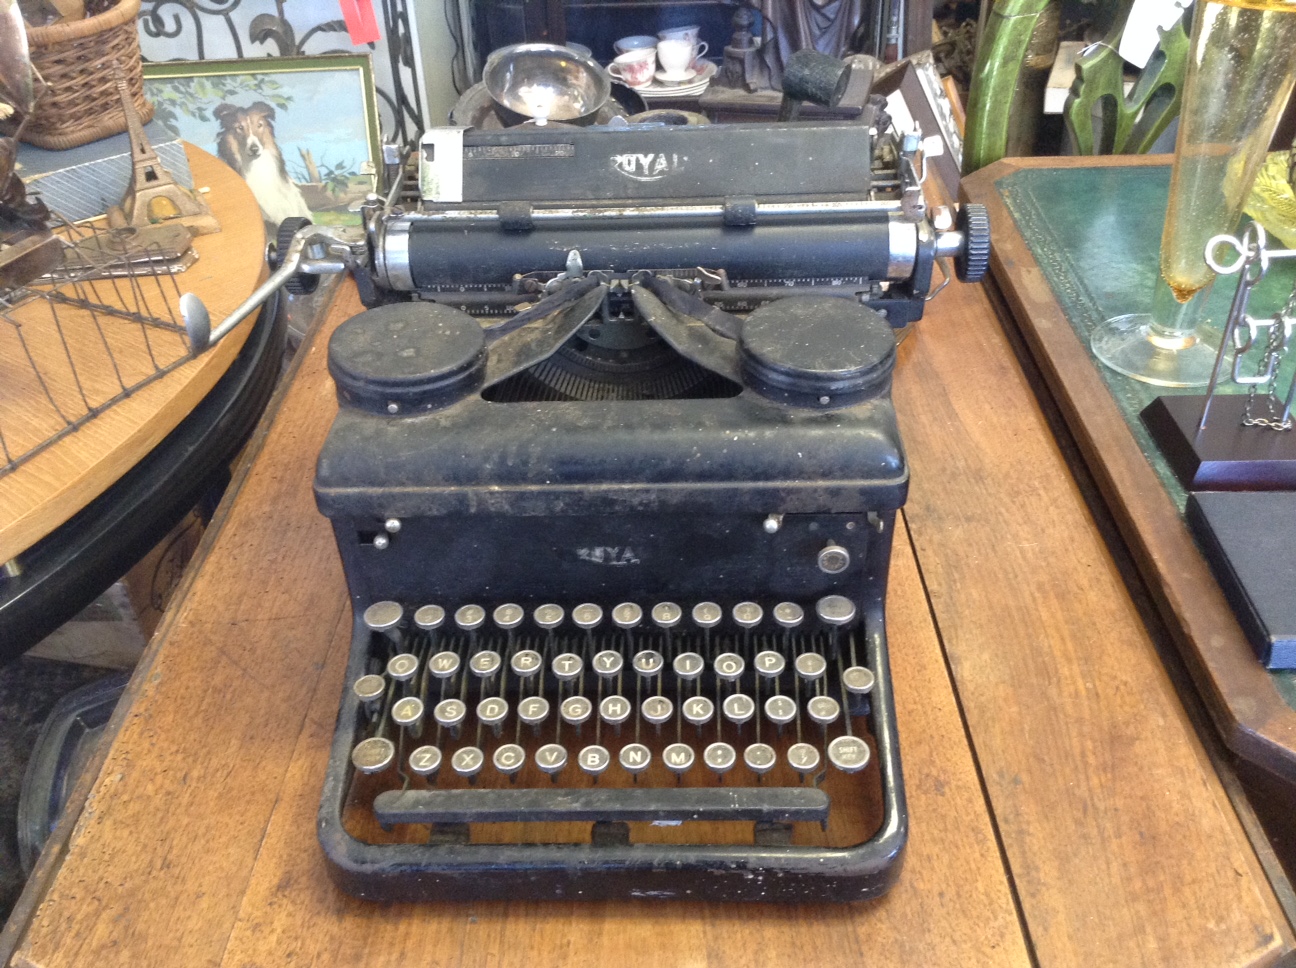
It was really dirty – gunk inside and out and dried mud on the top cover. She wasn’t typing at all. The draw band was off and wrapped under the carriage. All the keys were frozen in time. So bad. So very bad.
The shop owner saw me staring at it longingly and told me I could have it for $25. I told her that I didn’t want to own it, I just wanted to clean it up. She told me I could take it home, clean it and bring it back if that’s what made me happy. Yes, that’s what makes me happy.
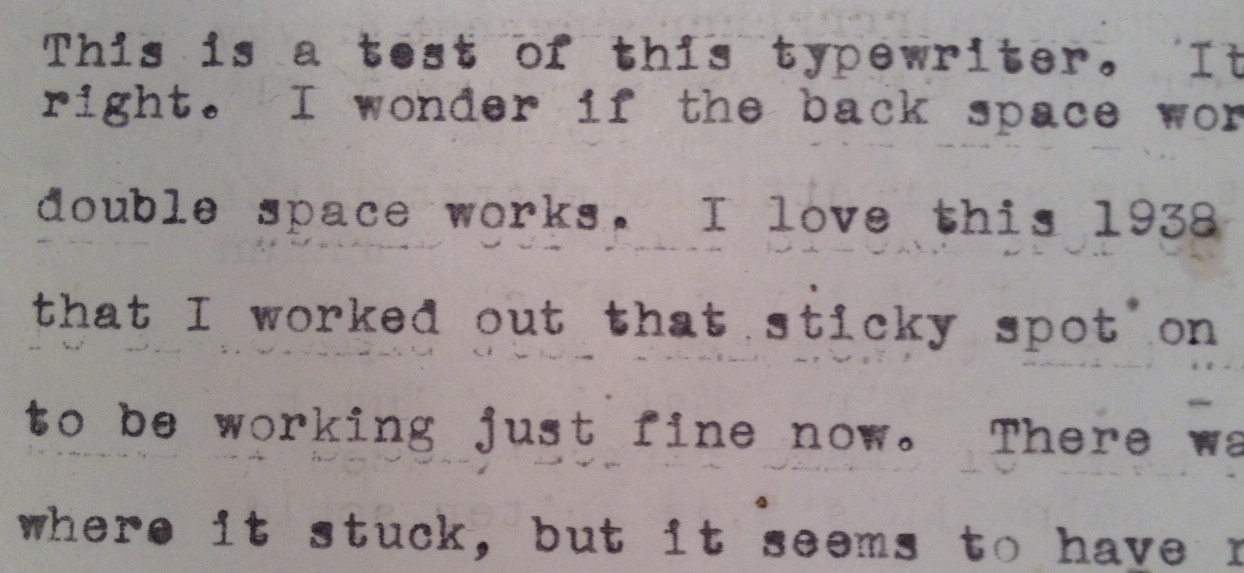
1938 Royal KHM (Kinda Hardly Moving)
I brought the typewriter home and pulled out my handy-dandy air blower thing and blew out layers of dust and cobwebs, being careful to work in a semi-enclosed area outside in case I blew out a loose part. As I examined my foster child a little more my closely, my heart sank when I realized that not only was her drawband off, but her mainspring moved very reluctantly. That’s why her intact drawband had fallen off. The drum wasn’t moving. No zip. It turned as if it were moving through dried gum and did not bounce back. I doused the mainspring drum with PB Blaster penetrating lubricant and hoped for the best.
I removed the drawband since it was tangled up under the carriage and cleaned and lubricated the rails. I was flummoxed when I got to the the top cover. It didn’t pop up like my other typewriters. I had to remove four screws to remove the top cover – one inside each spool container and one at each back corner of the cover. Rob Bowker has an excellent post on accessing the insides of a Royal KHM that I unfortunately found after all was done.

Everything under the cover was very rusty and gummy. I doused the segment, spooling mechanism, ribbon vibrator with PB Blaster and started scrubbing the typebars with a very fine Scotch-Brite pad:

I started working the keys, loosening things up and flushing the segment with denatured alcohol.
The keys looked better after just a clean with a Q-tip:

I tested the mainspring and HURRAY! It was loosening up after PB Blaster treatment and was winding and zipping with some authority. I re-attached the drawband and off we went. The carriage was a little grudging at first, but moving it back and forth repeatedly freed it to move smoothly. What a great feeling.

Hooked up and spinning again
I washed the outside case with warm soapy water first to get the worst of the mud off. I then used Scrubbing Bubbles to remove the residual grime, being very careful to avoid the decals (which were already very faded).
I rejuvenated the old, ripped ribbon with WD-40 and carefully rewound the ribbon. I put the top cover back on temporarily and tested the typing.
The type seemed a little dirty, so I scrubbed the type with denatured alcohol. I was very careful to drape the painted surfaces of the typewriter since the denatured alcohol will eat into the paint.
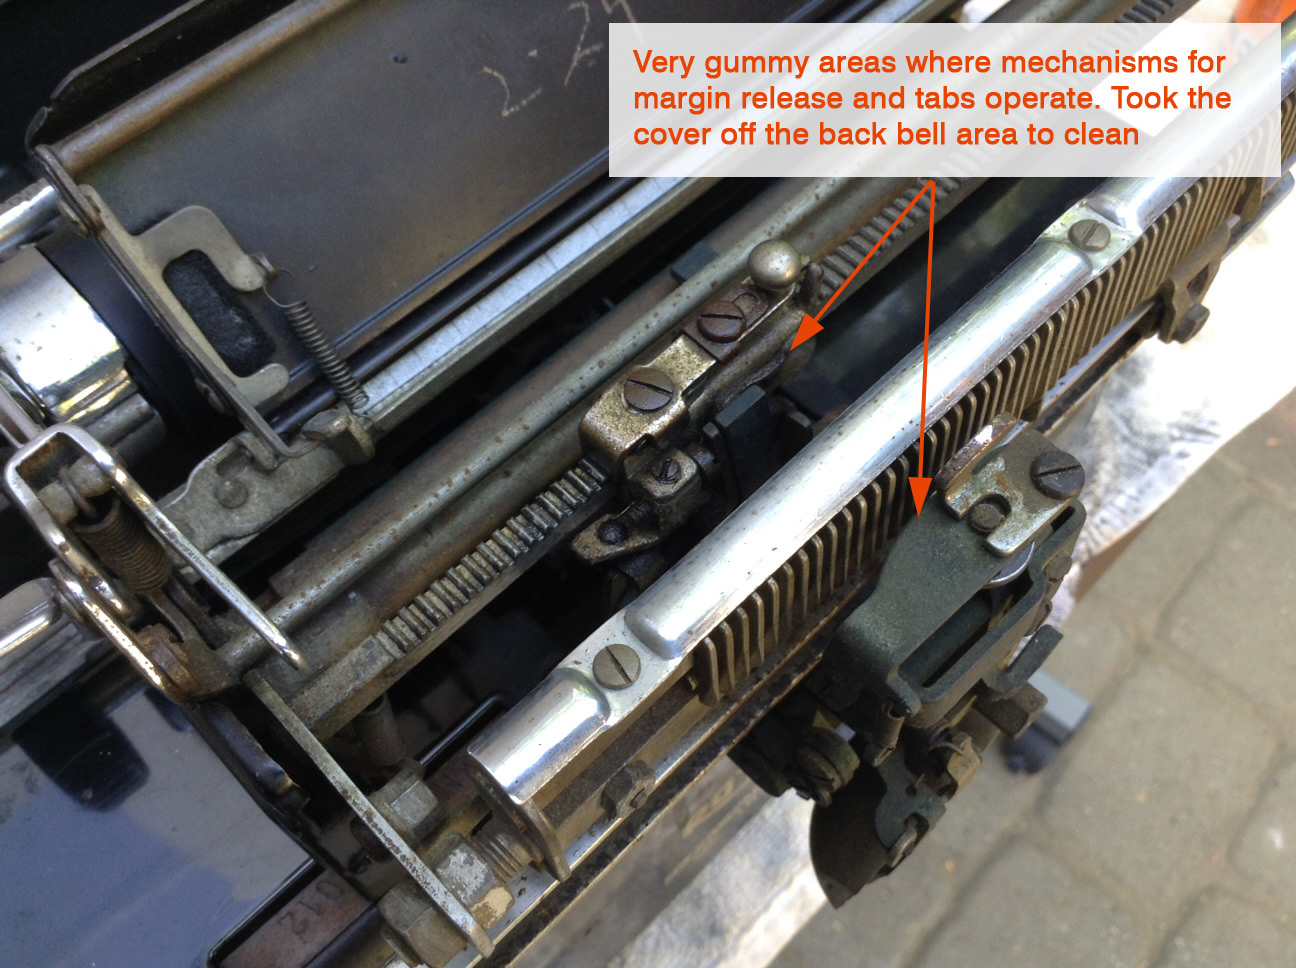
The margin release and the tab system use shared parts and neither system was working. From what I could see, everything was in an advanced state of gumminess. I cleaned and lubed all the moving parts of the margin release and tab system and worked them with my hands. Slowly the tabs began to work and the margin release was pulling back properly.
The Royal KHM is typing like a champ right now. No letter piling. When I first put paper in her, she had a couple lines with an erratic left margin, but that disappeared and I have typed out two full pages single-spaced without margin issues or letter piling. It makes me think that I should re-visit my Royal Aristocrat with margin issues and give her a second deep cleaning.
I felt bad about the ratty WD-40ed ribbon – it was printing OK, but it was sort of rotten and holey.
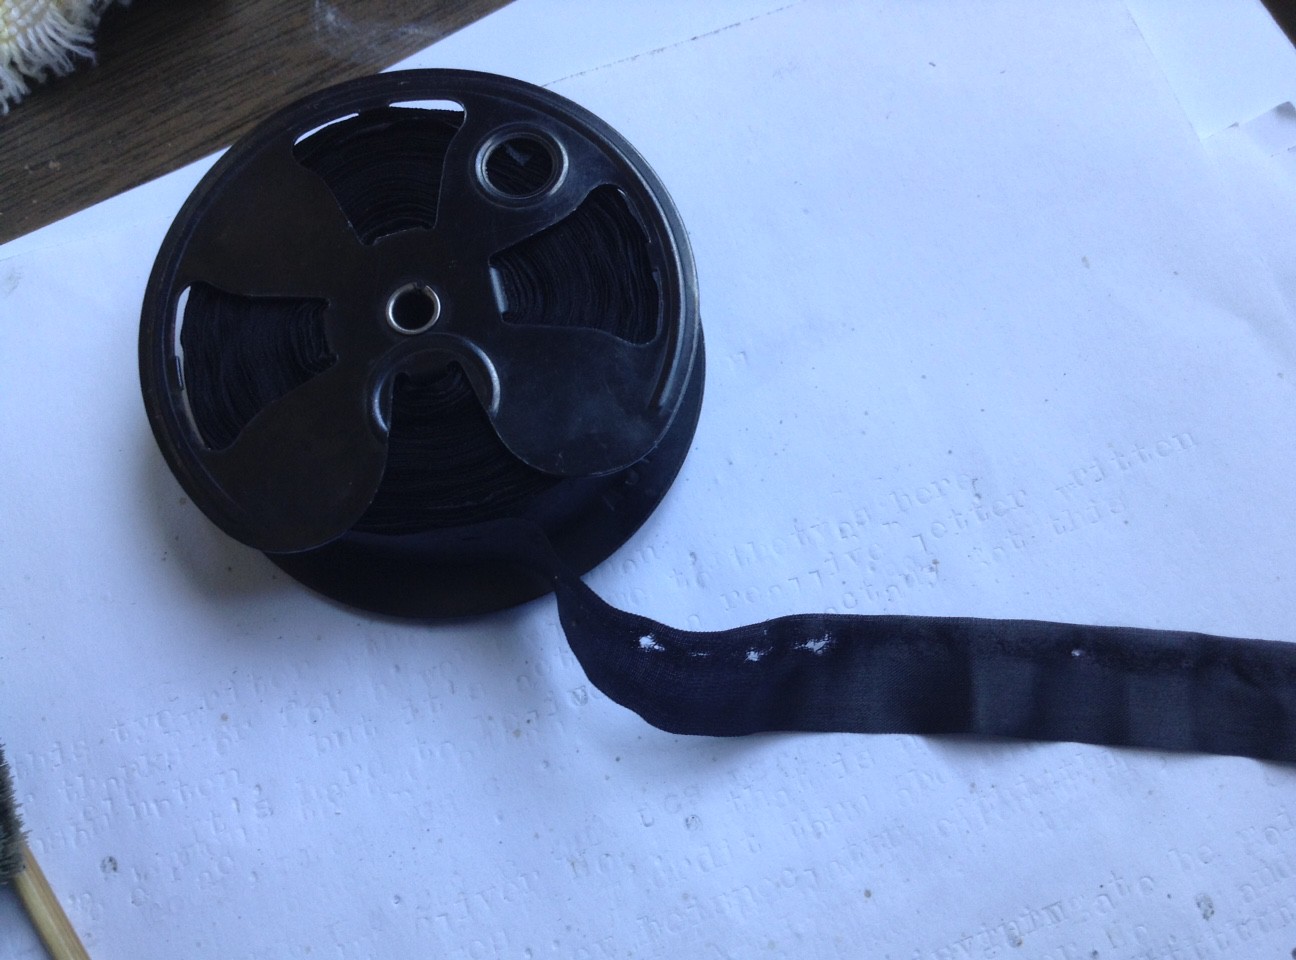
I had just ordered some ribbons from Amazon so I threw in a new red and black one. Classy!

I had some auto wax and spiffed up the outer case. Here are some glamor shots I took before I returned her to the junk shop:
-

- Hey Baby
-

- Hey Foxy
-
- Hubba hubba
-

- Hey Lady
-
- Can I talk to you?
-
- What’s your number?
Moe at the junk shop was thrilled to see the transformed KHM. I took a page from TypetheClouds’ book and sent the Royal KHM back out into the world with care and feeding instructions. In the future, Moe will gladly let me take junker typewriters home for clean up.

I was reluctant to let this Royal KHM go. She went from congealed paralysis to being my fastest, snappiest and springiest typer. What a bright, happy typewriter! I have read about the Royal’s quick and snappy touch. It lives.
I think this new system of catch, clean and release may really work out for me. I get to experience new and exciting typewriters regularly without typewriter accumulation and the world gets functional typewriters. Typewriter fostering is a win-win in my book!
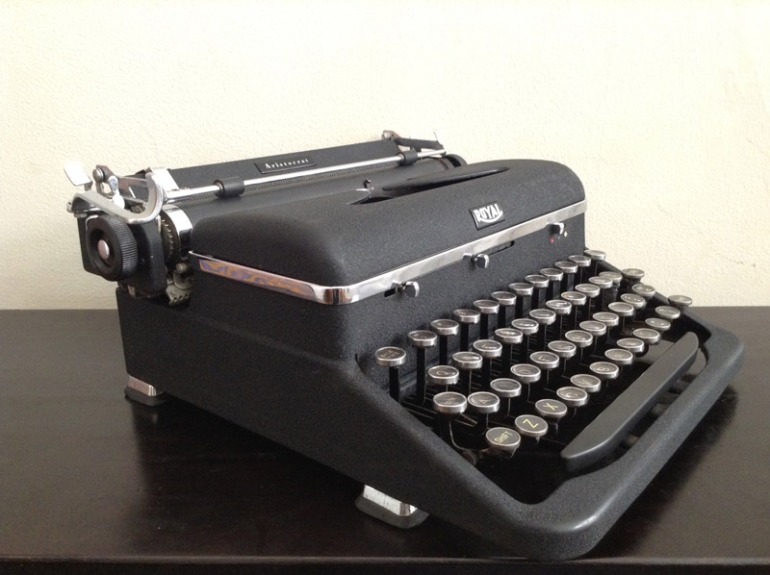
High Riding Ribbons, Royal Margins and a Small Quibble
Lady Royal Aristocrat is looking a lot better after her key top reattachment surgery, and the J-B Weld Steelstik bonds are holding great after a few days of typing – I need to get some neighborhood kids to put her through her paces.
She’s looking good, but has/had a few lingering issues.
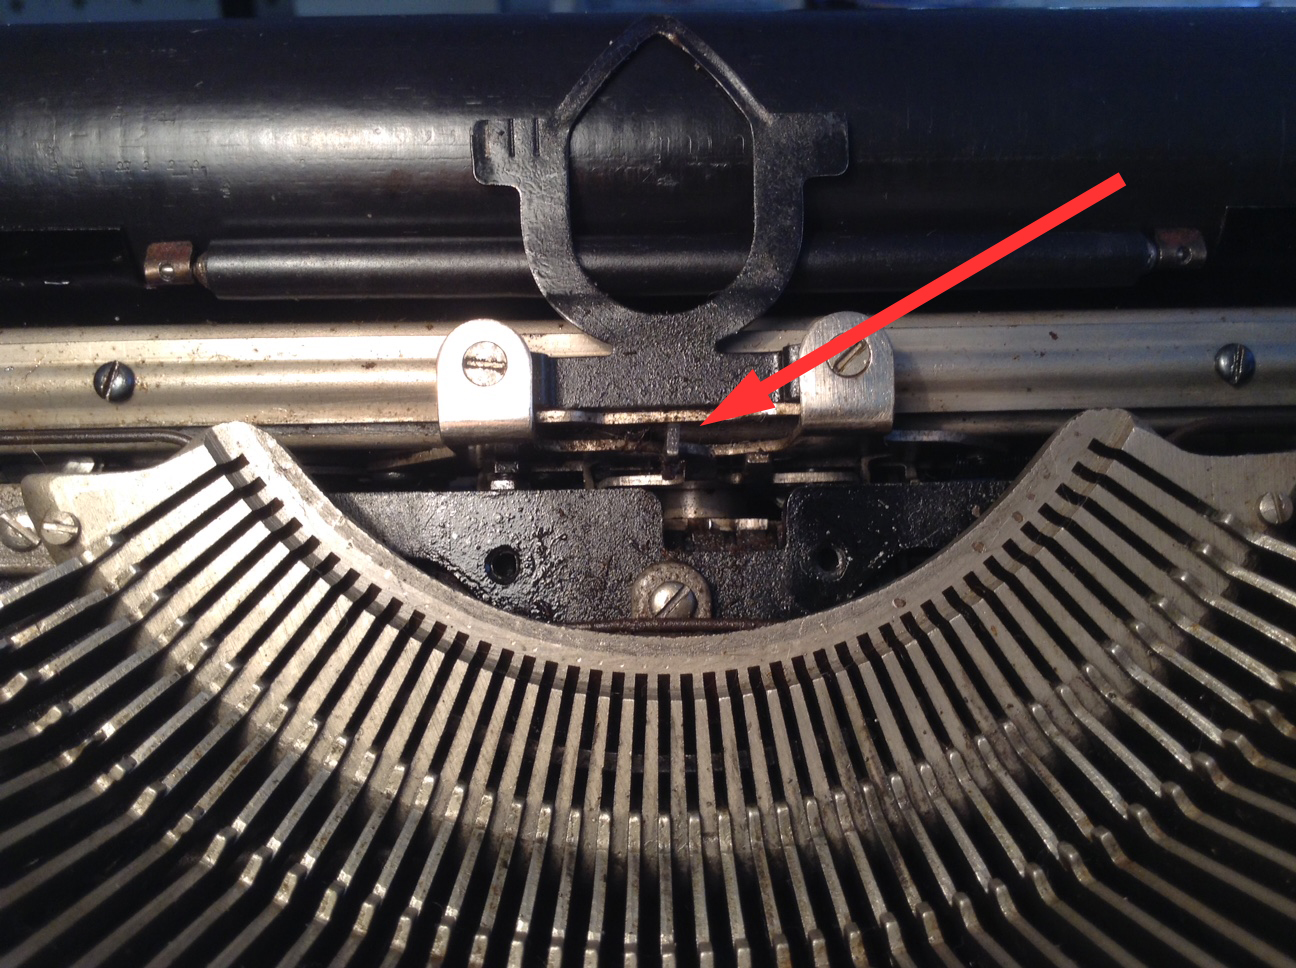
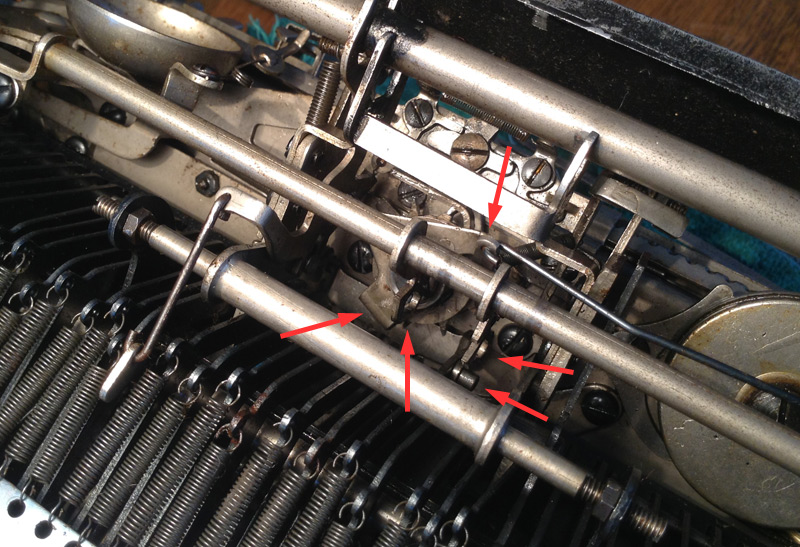
Sticky Ribbon Vibrator
First off: I couldn’t see a thing as I typed because my ribbon carrier wasn’t returning to its lowest position with each stroke. The ribbon hid all the typed text.
What did I just type?
My online research indicated that the sticky ribbon vibrator problem was probably due to either dirt or binding or both.
I cleaned the ribbon vibrator carefully, scrubbing with denatured alcohol and using a penetrating lubricant (PB Blaster). Things looked cleaner and the ribbon guide began to flicker and move up and down as I typed. Upper case typing wasn’t a problem because the entire basket moved down with shifting, but lower case typing was still obscured by the high riding ribbon.
I read that gentle bending of the ribbon guide could free it so it would move smoothly up and down, but what to bend and which way to bend it?
Let’s Go to TWDB
Because I am a member of Typewriter Database, I can access its documents library. I get a lot out of the manuals. Knowing the name and function of parts helps me a lot; otherwise, I’m just staring at a lot of small, mysterious metal pieces.
One interesting manual that I seem to have passed over in the past is called D. E. Fox Typewriter Repair Manual, 1950. Perhaps I had foolishly assumed that it was a repair manual for Fox typewriters. No – it isn’t. It covers standard and portable Underwood, Remington, LC Smith, Smith-Corona and Royal typewriters.
In the Royal portable section about the ribbon vibrator it says:
“The Ribbon Carrier (Vibrator) must operate freely. Examine the ribbon guiding wings of Ribbon Carrier (1) to make sure that they are not fitting too closely to Type Bar Guide (2)”
D. E. Fox Typewriter Repair Manual, 1950, TWDB Documents Library
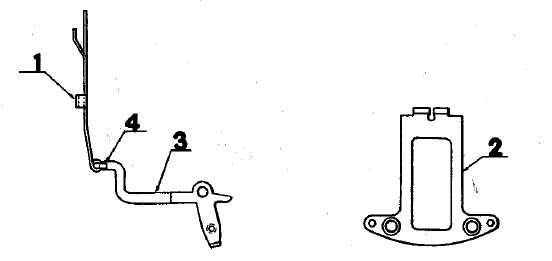
image: D. E. Fox Typewriter Repair Manual, 1950; TWDB
Those “guiding wings” were fitting a little too closely to my type bar guide on my machine. Very gently pinching the ribbon carrier forks together at the top loosened the “guiding wings” grip on the type bar guide and the parts of the ribbon vibrator mechanism began to slide freely.

Perhaps at some point in its life the typewriter had take a hard hit to the top, splaying the ribbon vibrator forks open and causing the binding.
Success: the ribbon moved properly out of the way with each key stroke and I could see what I typed.
Off the Rails: Royal Margin of Error
I have heard tell of the Royal typewriters’ reputation for erratic left margin behavior, and now I get to experience the Royal “soft margin” first-hand:
It is said to be fixable.
According to a Yahoo Typewriter Group post:
“The soft left margin was easily adjustable with the margin stop screw.”
And according Typewriter Maintenance, TM 37-305, 1944:
“Margin Stop Banking Screws may be made accessible by moving carriage to the extreme right or left, whichever is necessary, disconnecting Bail Lift Screws, and swinging Margin Release Bails back out of position.”
Ok – I just need to find that easily adjustable margin stop screw. I am still on the hunt for that.
A Little Letter Piling
I’ll admit it. I am terrible typist. I am a two-fingered keyboard hunt and pecker with an inconsistent slamming flail that drives just about anybody watching or hearing me nuts. I type like a high-energy ten year-old kid set loose on a typewriter at Goodwill. You would not trust me with your fine collectible typewriters.
To the point: seven of my typewriters put up with me and my ways. Big Betty the KMC, Olive Dammit the Oliver, Corona McDraggle, Posh Spice, Camper Van Pancake the Skyriter, Mrs. Hudson the Torpedo, Marge the SG3 – they all tolerate my touch.
-
- Big Betty the KMC
-
- Olive Dammit
-
- Corona McDraggle
-
- Posh Spice
-

- Camper Van Pancake
-
- Mrs. Hudson
-
- Marge
-
- Lady Royal Aristocrat
Lady Royal Aristocrat – not so much. If I type too weird and too fast on the Aristocrat, I get letter piling. It trips, the door opens and then there’s a drunken pile of two letters who snuck in. If I type like a normal person, everything is fine. However, as soon as I show a little “flare”, I will get the occasional letter piling. None of my other typewriters do this to me. Is this yet another Royal hallmark or something unique to my machine?
It doesn’t bother me too much – it’s a smallish quibble. I still love Lady Royal Aristocrat.
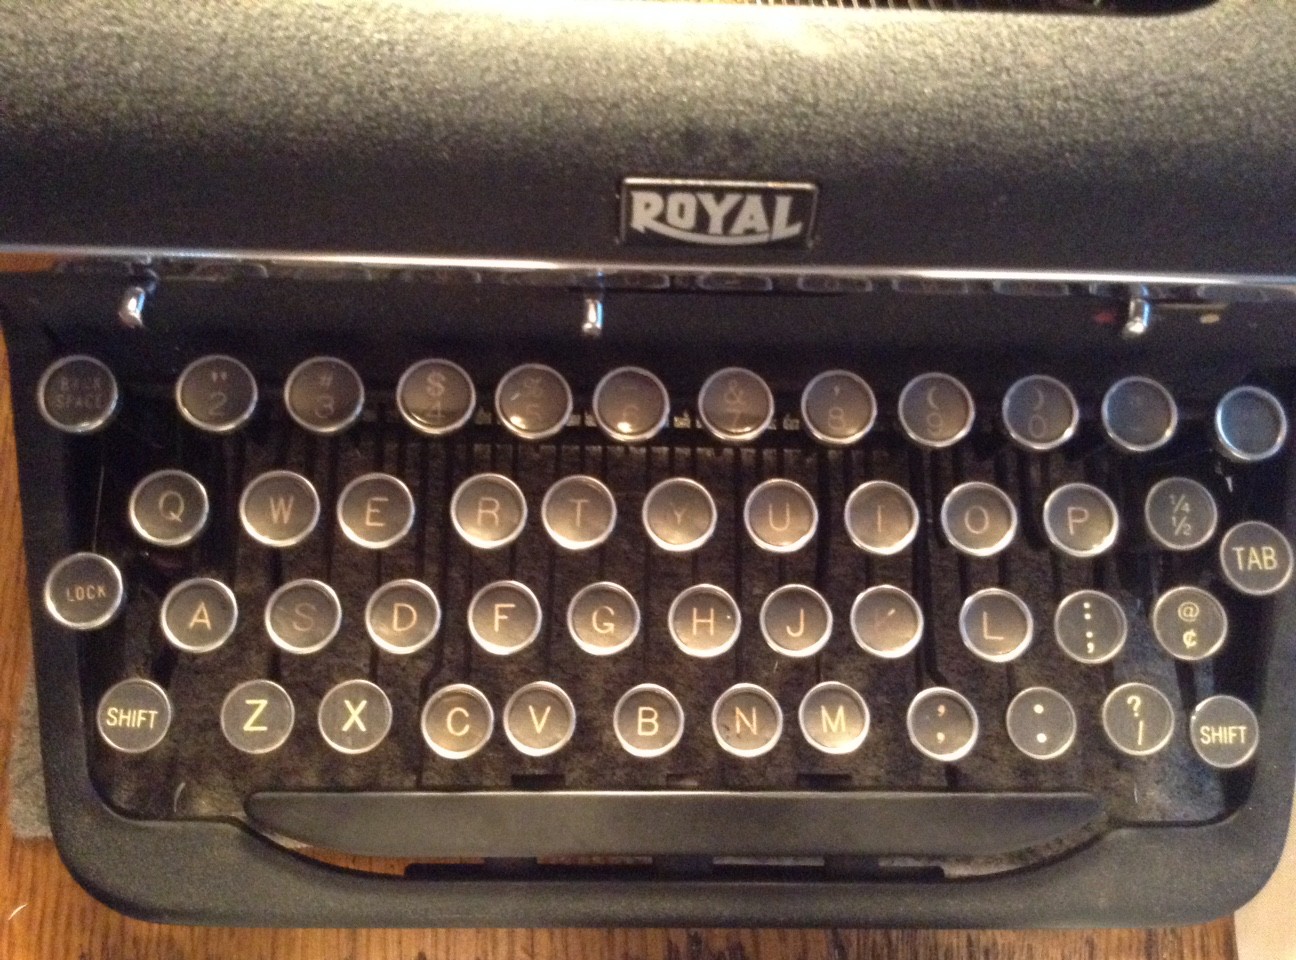
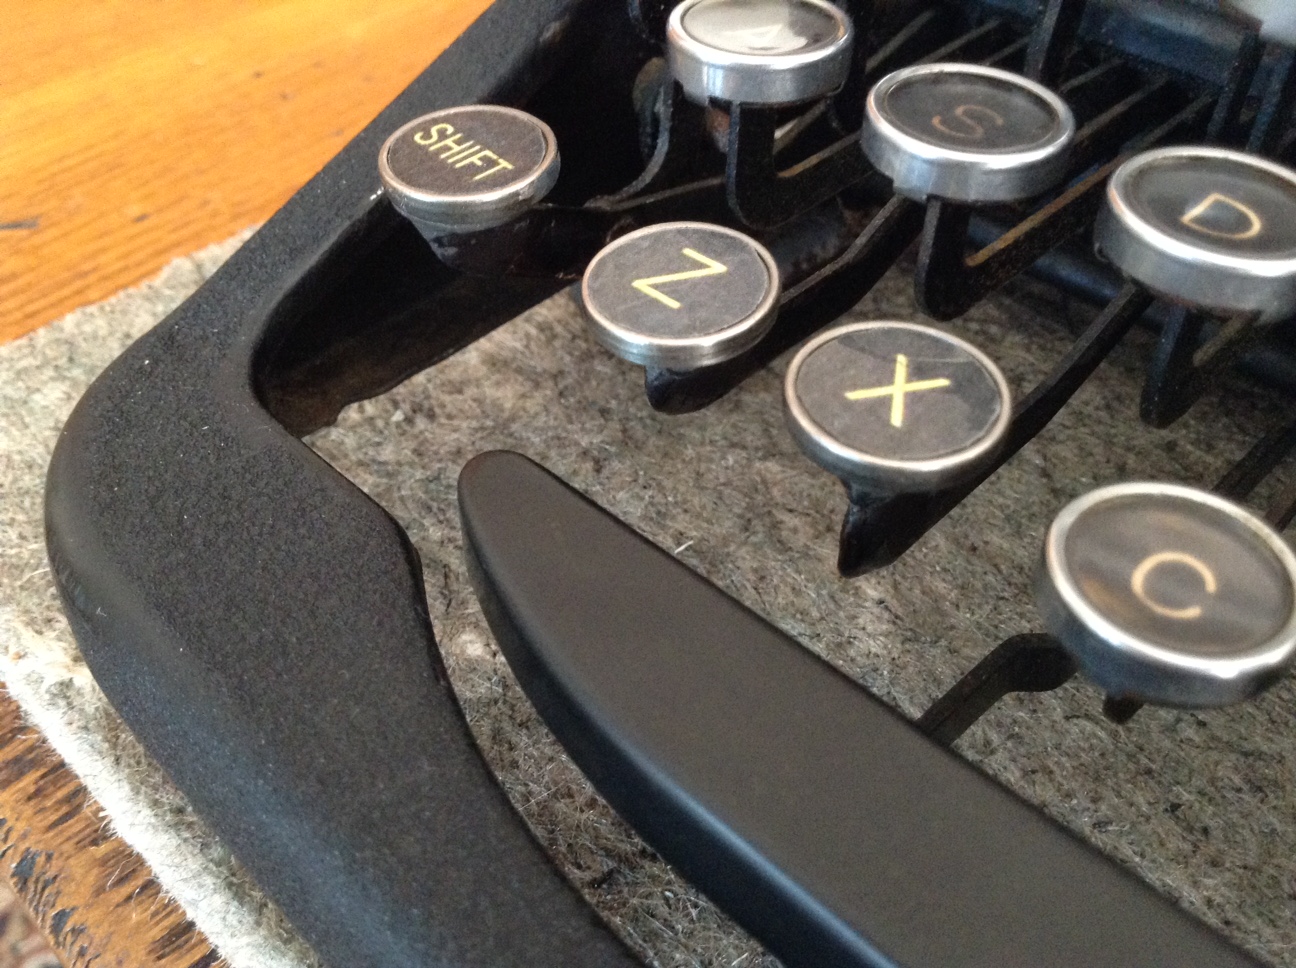
New Key Tops for a Key Chopped Typewriter
It was a crafting weekend here at home. We had a paper maché project going and a typewriter repair in progress on the dining room table.
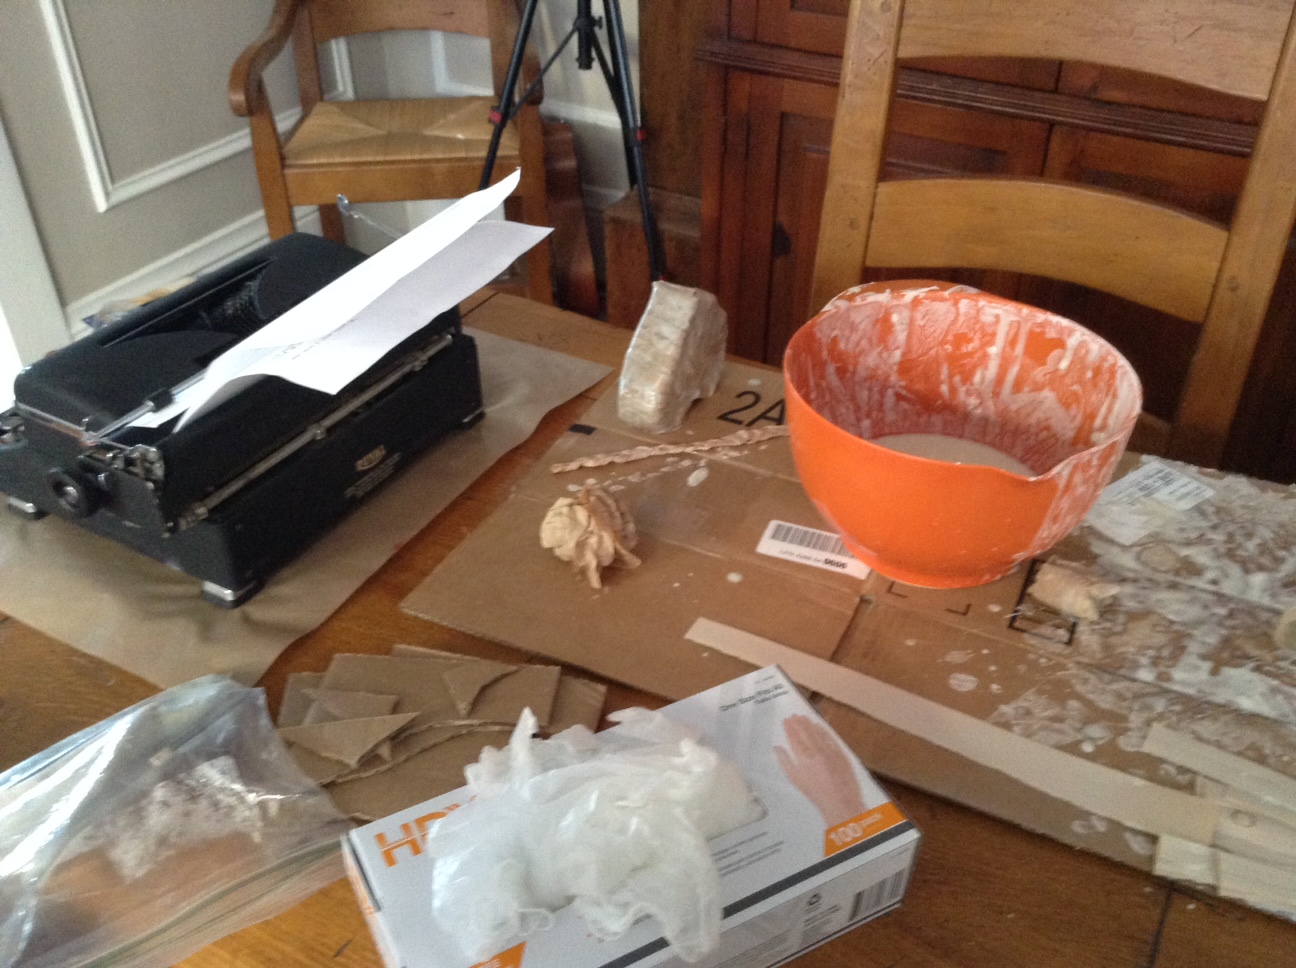
There were 10 key tops that had been chopped from Lady Royal Aristocrat that I needed to re-key before I developed tetanus from hitting the broken key levers.
I first straightened out the levers which were very twisted from their violent chopping:

GAH! Bent and bad.
Better and a little straighter after using needle nose pliers
I picked these faux typewriter keys up at Joann Fabric:
I clipped off the little loop on the faux key and sanded the edge smooth.
They were almost a perfect match in size.
I had some J-B Weld SteekStik metal epoxy putty around the house.
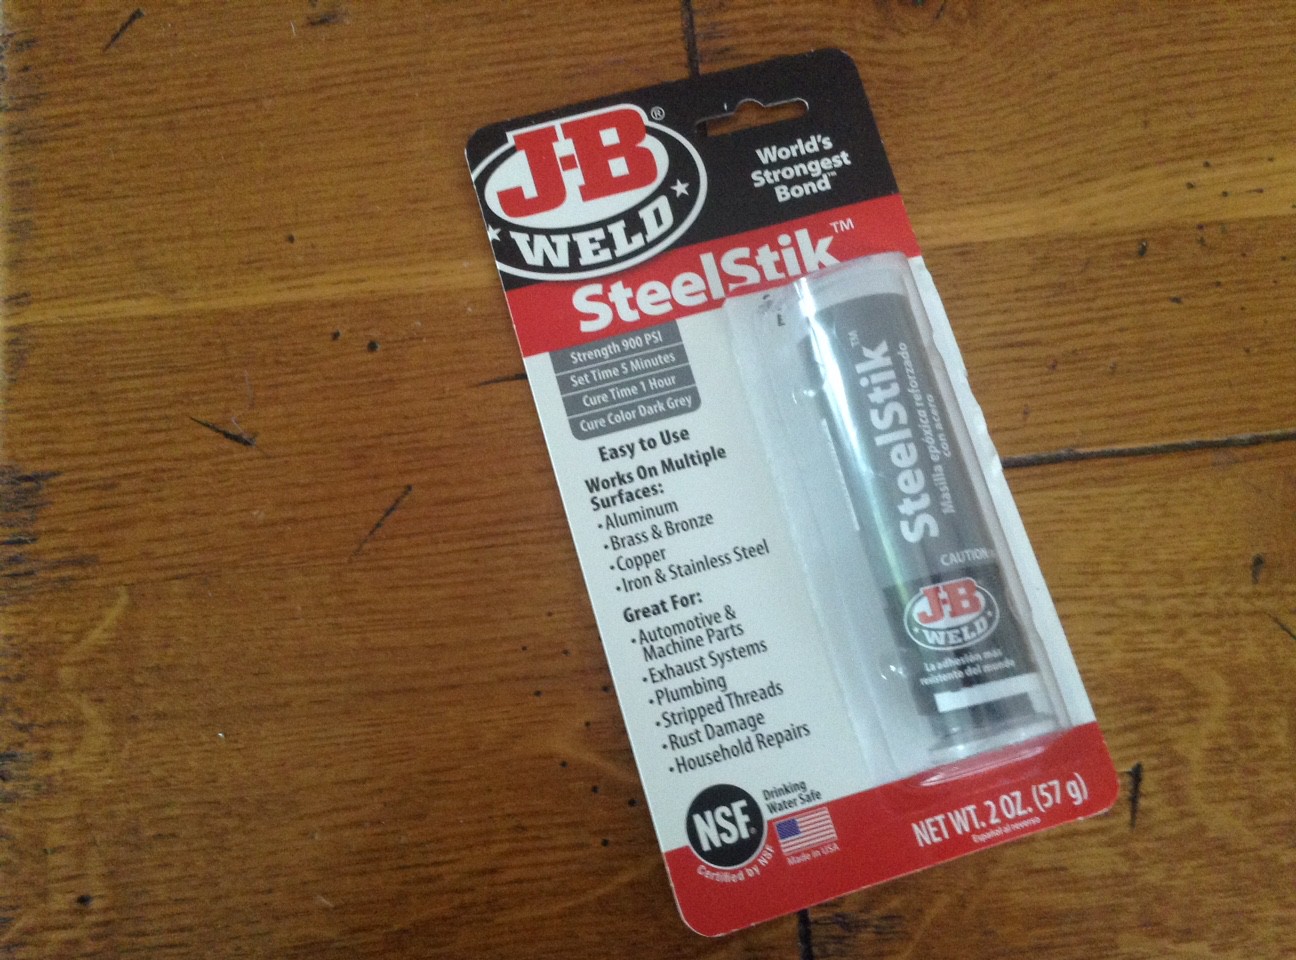
I sanded the broken key levers and the backs of the faux keys so that they’d have “grip”.
I cut off a little of the putty and kneaded it until it was a soft ball of a uniform shade of gray. You have to work fast and use a little at a time because this stuff sets in five minutes and is sandable in an hour. It dries rock hard. I did one key at a time.
Worked great! Here are the first three:

The broken stems on the right side of the typewriter were broken off shorter than those on the left side so I had to build up the stems in a first step. They were a bit lumpy so I had to sand them a little.
I added the faux key tops in a second step.
I printed out some key labels that I made in Photoshop, trying my best to replicate the font and coloring of the Royal’s keys. 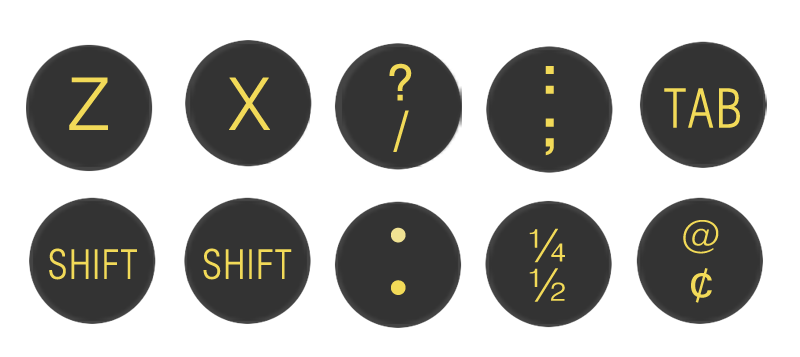
I covered the printed sheets with clear laminate, cut out the individual keys and glued them to the key tops – pretty close!
It’s not perfect – some of the stems are a little lumpy and the font color is just slightly too yellow, but it’s close. If it starts to bother me, I’ll pull out the dremel and sand the lumpiness and replace the letters with a new label.
Many, many thanks to the clever Mr. E at Typewriter Talk who found these craft keys and used them to re-key his chopped typewriter. His project inspired mine.
She is such a pretty little thing. I couldn’t help but notice how similar my 1939 Royal Aristocrat and 1957 Torpedo 18a are in terms of size and shape though they were manufactured almost 20 years apart on different continents. I think I need to get an Olympia SM3 so I can do more extensive comparisons 🙂
Lady Lazarus the Royal Aristocrat
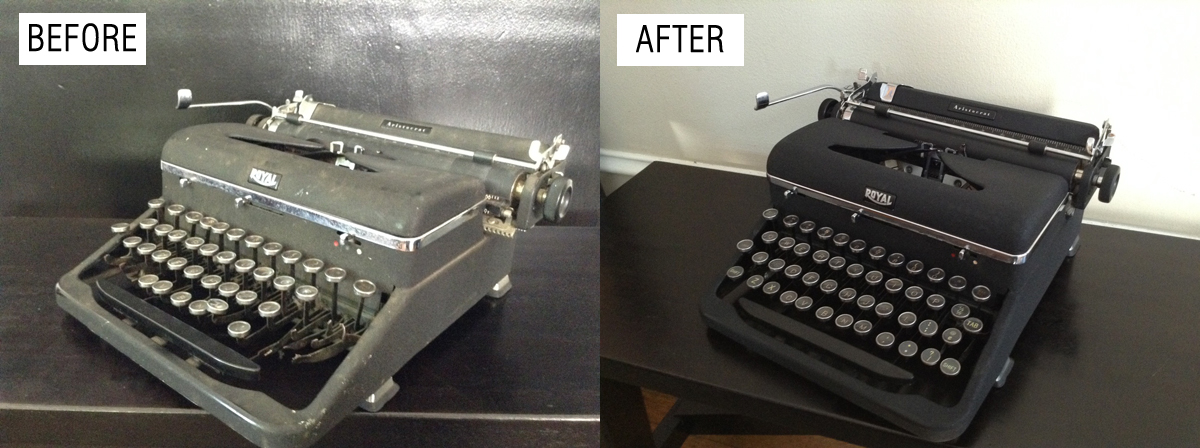
Lady Royal Aristocrat (a redundant name, no?) is looking and feeling so much better after a few days here at the spa enjoying typebar yoga, methylated spirits cleanses, Scrubbing Bubble massages…
This typewriter was really dirty when I got her last week.
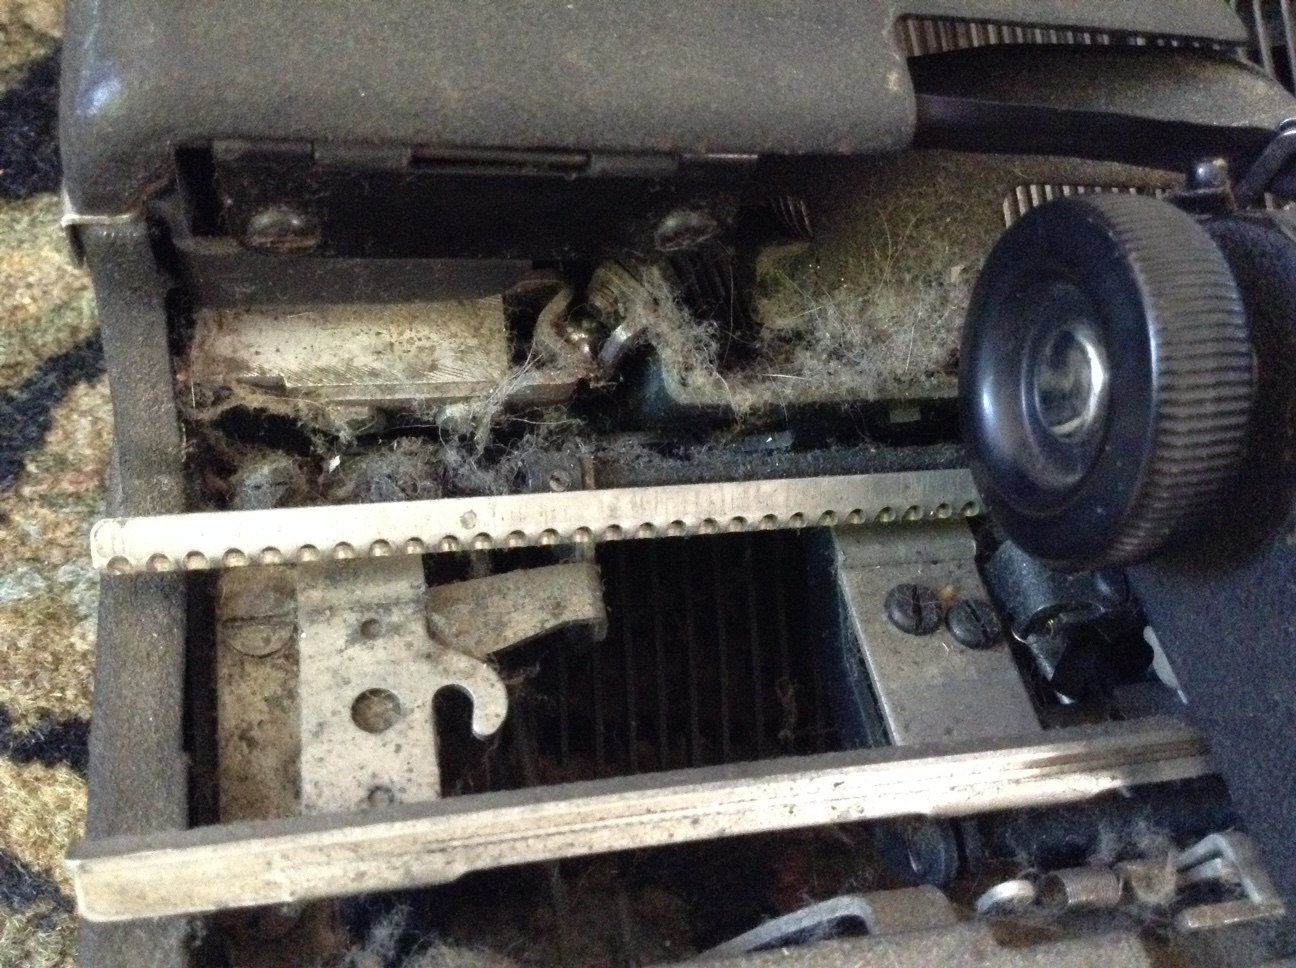
Grody
First things first, I took out my handy hand-held air blower thing and blew out the inside of the machine.
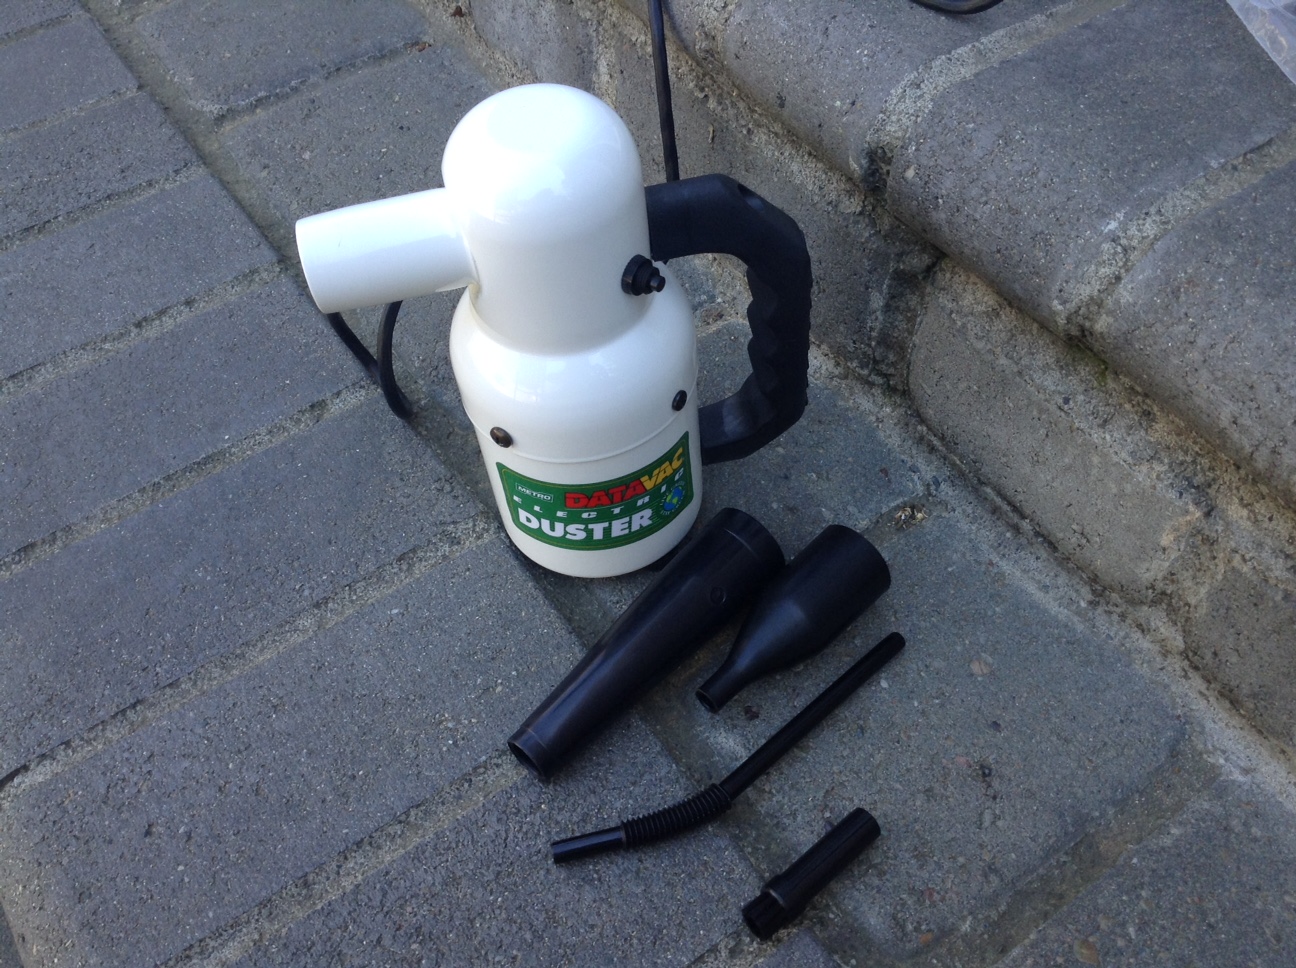
I always do this outside against a wall corner so that if there is something loose that blows out, it will hit the wall and not get lost.
A good five minute blast treatment took care of years of grimy dust, cat fur and cobwebs.
I thought the Royal Aristocrat was a charcoal gray – but lo and behold after a some work with Scrubbing Bubbles she is a beautiful crinkle paint black.
Soaking up the sun
I doctored the guts with PB Blaster and let her sit outside overnight since the keys and ribbon vibrator were very gummy and sticky. The next morning I flushed everything out with denatured alcohol and scrubbed the segment with a paint brush and tooth brush (being careful not to get the denatured alcohol on the paint). Brown and black gunk dripped from the insides.
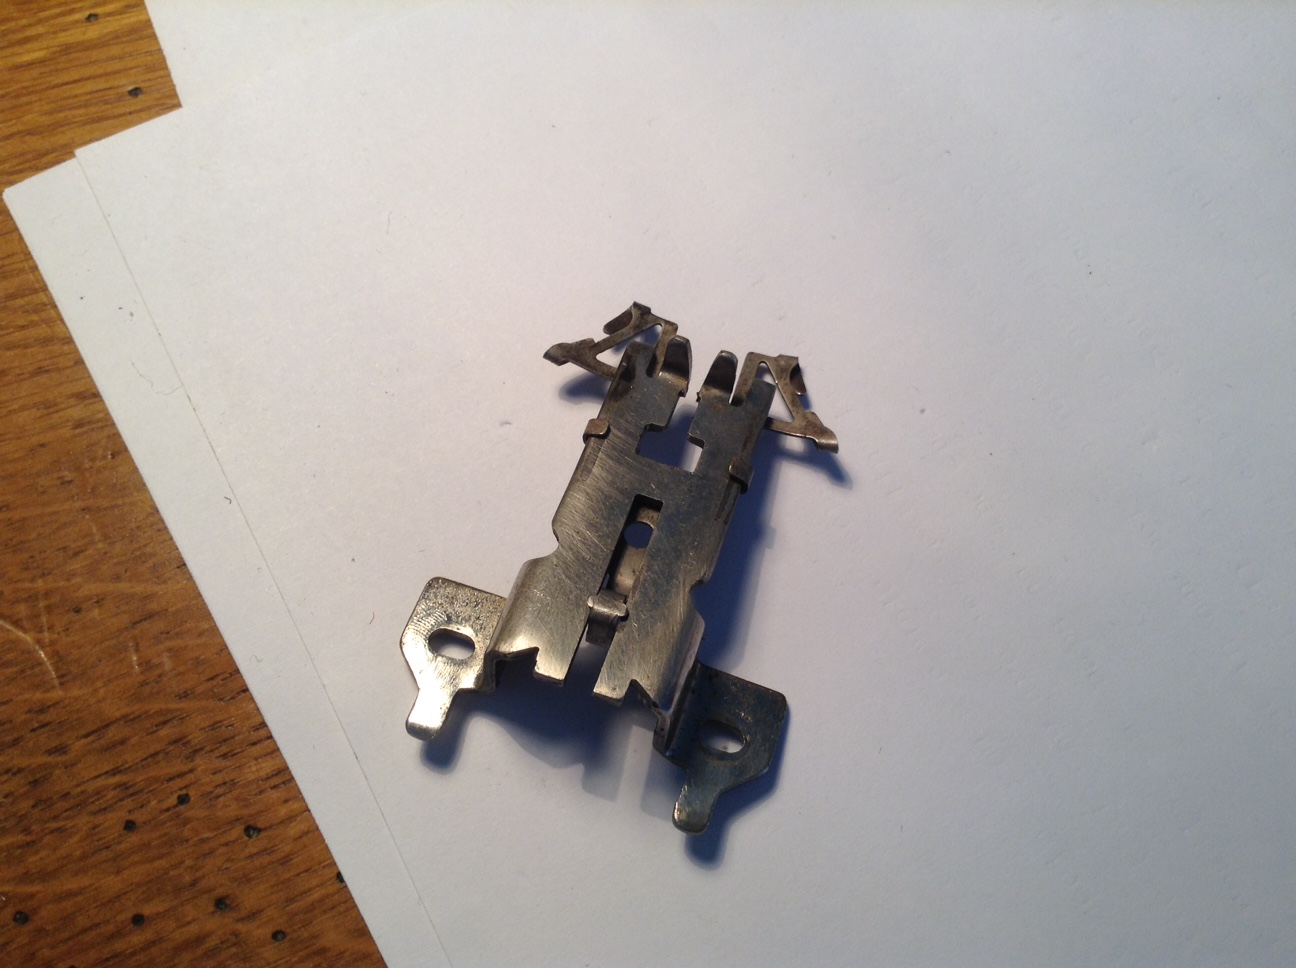
I fixed the broken draw cord using the inspired Robert Messenger wooden skewer tool. Since my typewriter tastes run to the junkier end of the spectrum, four out of my eight typewriters have needed a carriage draw band / draw string / draw cord repair: Remington Rand KMC, Oliver No. 9, Corona Four and now this Royal Aristocrat
I have close to 400 yards of of 80 lb fishing line – it’s heavy enough to land a marlin – or to replace a broken draw string on a typewriter. I cut a length of about 13 inches for my new draw cord and made a loop at one end which I hooked onto a likely projection under the right side of the carriage.
I hooked my draw string onto a projection on the right side under the carriage
I tied a knot at the other end and inserted it into the slit at the end of my wooden skewer. I fed the string from right to left under the carriage using the wooden skewer as a guide and emerged on the left side of the carriage with my knotted end.

I wound the mainspring 3.5 times and inserted the knot into the mainspring. I got a set of three dental-like tools at the hardware store for about $6.00. This pointy one helped me push the knot into the mainspring while I held tension on the mainspring with my pinkie.

With a new draw string, this 1939 typewriter is typing great. Enjoy six seconds of looping fun while I try to avoid those sharp key levers. Ouchie!
Now onto those missing key tops.
M-m-m-my Corona: Draw String on the Loose and I Love TWDB
My Corona 4 seemed like a hopeless case. I confess there was a weak moment when I was tempted to put her in a box and donate her to Words Are Winged – that fellow has a knack for dismantling, reassembling and documenting old typewriters.
Rusty, grimy, and jammed, the Corona 4 still had a winning personality and bedraggled charm, so I continued to work on her.
When I first got the Corona 4, the carriage was frozen in place – it did not move an inch. I doused it in PB Blaster and let it sit overnight. The next day, my husband manhandled the Corona, exerting enough force to move the carriage. It loosened up and the carriage began to slide grudgingly along its rails.
The Corona 4 had a scary whistling carriage screech that put the Edison talking doll to shame.
As you can see, I had a very sticky carriage and hitting the shift key left the carriage hanging in the air – I had to push the carriage down manually after I hit the shift key.
After I could move the carriage, I found the draw cord all tangled up under the carriage. It must have come off at some point in life and the carriage rusted into place.

When I was finally able to move the carriage back and forth the draw cord with its hook slipped down to the pulley area.
In a maneuver I call the Reverse Munk, I re-attached the carriage draw string.
I first wound the draw string tight on the mainspring drum using the ratchet pawl to maintain tension.
I hooked the draw string temporarily onto the side of the carriage rail.
I then made a lasso out of fishing line and fed it with a bamboo skewer which I ran under the carriage from right to left to retrieve the draw cord.
I got my lasso to the left end of the carriage where the draw cord was hooked temporarily on the side of the machine so it wouldn’t slip down the hole near the pulley.
I attached the draw cord hook to my fishing line lasso and pulled it under the carriage from left to right and re-attached it to a likely screw under the carriage on the right side.
Though the draw string was re-attached with good tension, the carriage failed to move freely. Hmm. The carriage advanced with typing or hitting the space bar if I pulled HARD to the left as I typed. Based on this, I gathered that the escapement was OK, but perhaps something was rusty or gummy or…?
Typewriter Database to the Rescue
There was something strange about the ribbon vibrator – it was in a permanent “up” position and would not go down. I went to Typewriter Database (TWDB) and compared my Corona’s ribbon vibrator position to all the Corona Fours at TWDB. Yes, something was very fishy. My ribbon vibrator did not look like other ribbon vibrators. So off came the ruler thing and the ribbon vibrator.
The ribbon vibrator itself was fine – the two pieces of it slid easily together.
However, a projection from the escapement assembly that moves the vibrator up and down was locked in place:
I flipped the machine over and examined the escapement mechanism. I opened up TWDB again and searched for a Corona 4 listing in the archive that included an under machine photo. I found one and noted that there were subtle differences between my 1930 Corona 4 and the 1931 Corona 4 on TWDB.
My Corona seemed to have bent and out-of-position parts – right around the escapement rocker bracket assembly and connected pieces (thank you, TWDB for the Corona parts manual).
This piece – escapement rocker bracket assembly – was all bent to hell:
illustration from Smith-Corona Parts Book, TWDB
Carefully studying the TWDB Corona and using my best judgement and some lucky intuition, I bent part of the escapement rocker bracket assembly, trying to make my typewriter look like the Corona 4 at TWDB.
Long story short: that did it. Here she is, partially disassembled and no ribbon but gamely putting up with my two-fingered typing.
I would still like to get close up pictures of the underbelly of a functional circa 1930 Corona 4 since my fix was mostly just lucky guesswork. I have a request for photos at Typewriter Talk if you have a functional Corona 4 and have a moment to take some detail pictures of the underside of your Corona 4 typewriter.
There is work still to be done:
- sort out the ribbon feed mechanism
- fix the backspace
- glue the space bar
- make new key lever links for missing ones
- address peeling paint
- make a donation to TWDB
UPDATE: Rev. Munk kindly posted under machine photos of his Corona 4 (“El Diablo”) at TWDB. It looks like I was lucky and popped things back into the right place. I will be using Rev. Munk’s photos again as I try to unravel my problematic back space mystery.
Straightening Bent Typebars on the Oliver No. 9
I have been experimenting with Vine typewriter videos. Vine is a short-form video sharing service similar to YouTube, but the videos are a maximum of six seconds long. It’s a great format for me since I tend to be long-winded and it compels me To. Cut. To. The. Chase.
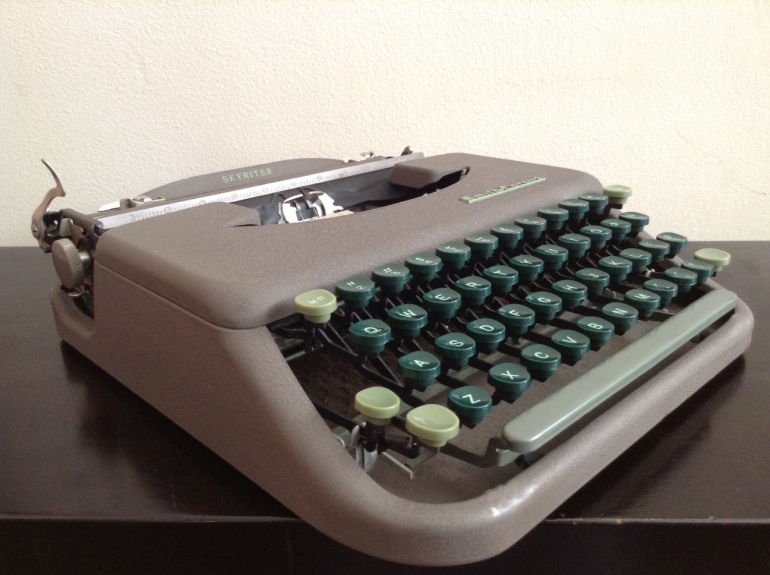
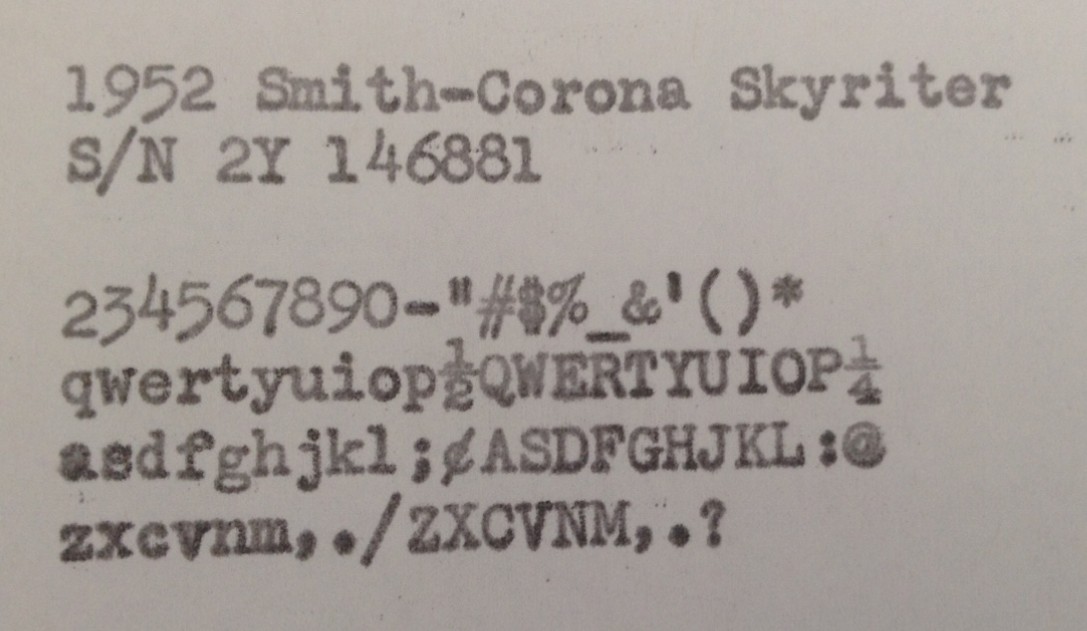
A Renewed Ribbon for the Taupe Pancake: Skyriter
My tough little pancake – the Skyriter – had a pretty dried out ribbon when I got her.
I have read that you can sometimes rejuvenate old dried-up typewriter ribbons with WD-40. I could save $7.99 and a trip to the office supply store for this:
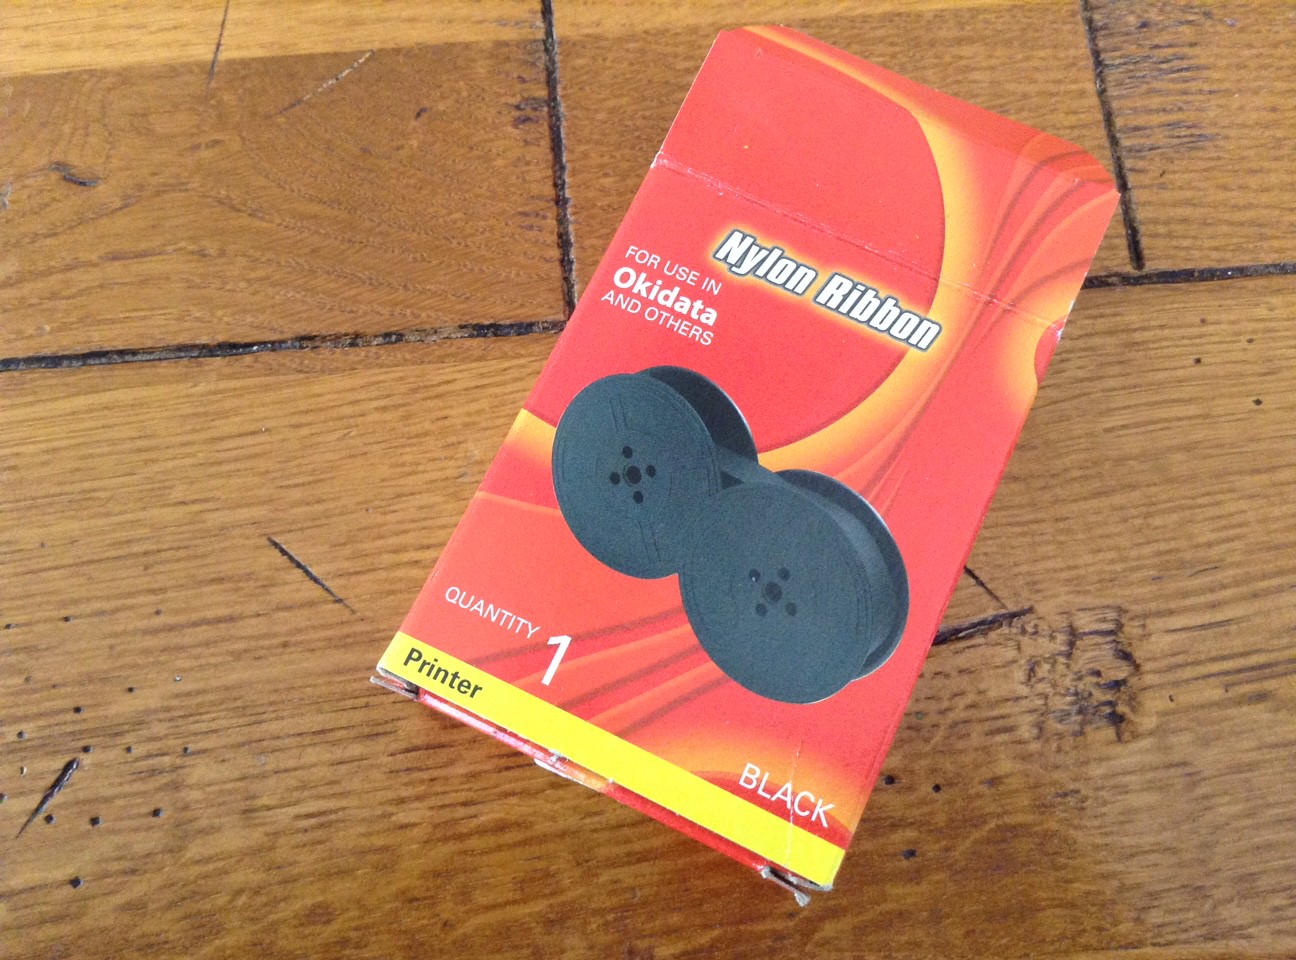
This 1/2″ black ribbon is compatible with Okidata…and others
Since I am both cheap and impatient (two qualities that have made me the success I am today), I thought I’d try it.
First I had to find a box to work in. I found a box outside but first I had to evict two Wubble-Bubbles, Charles and Dope.
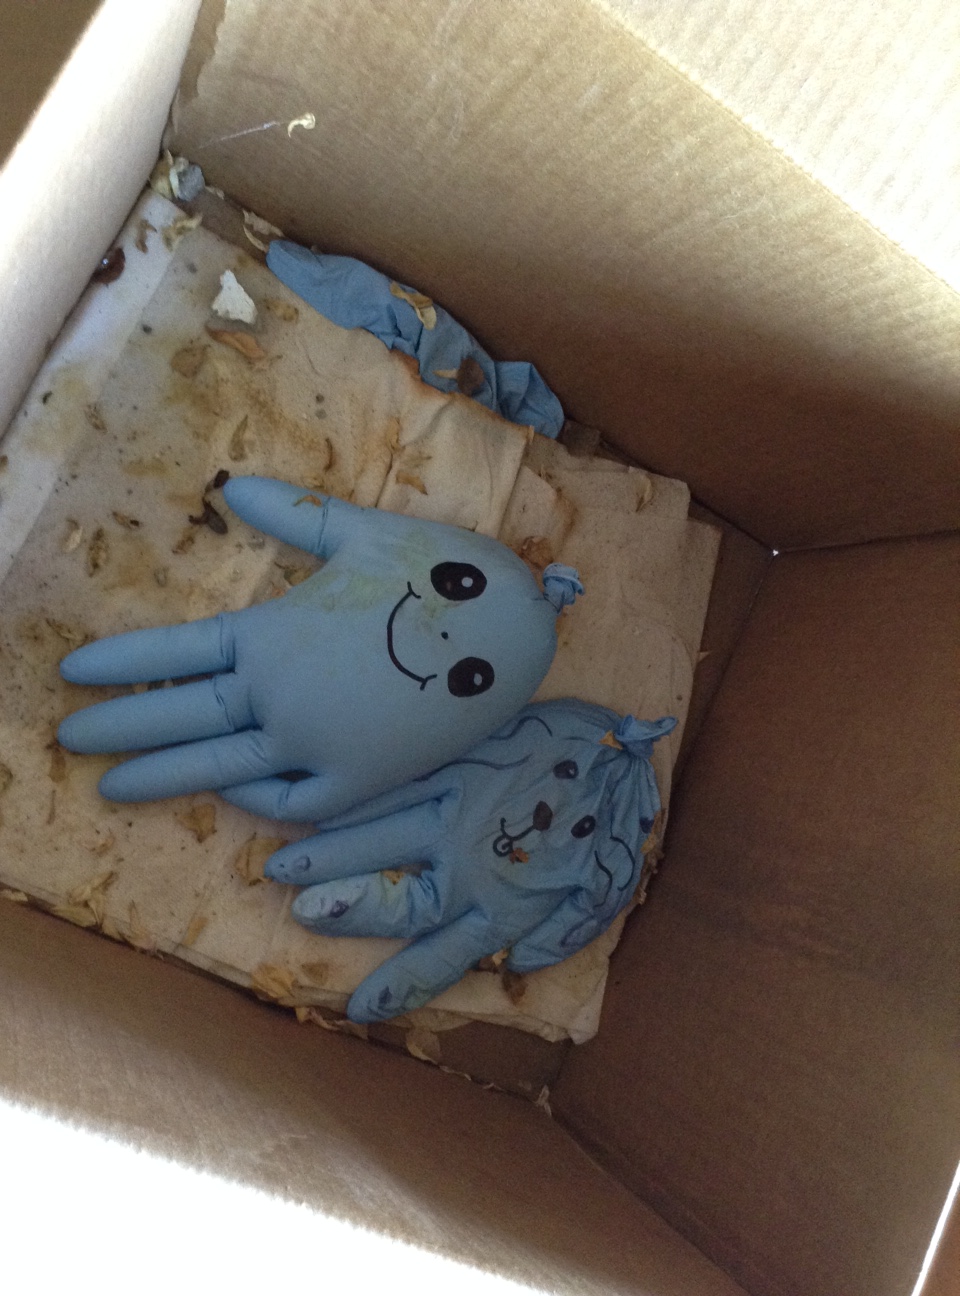
Scat, you two.
I then removed the ribbon from the machine, unspooled it and put it in the box. Then I sprayed the whole tangled mess with WD-40:
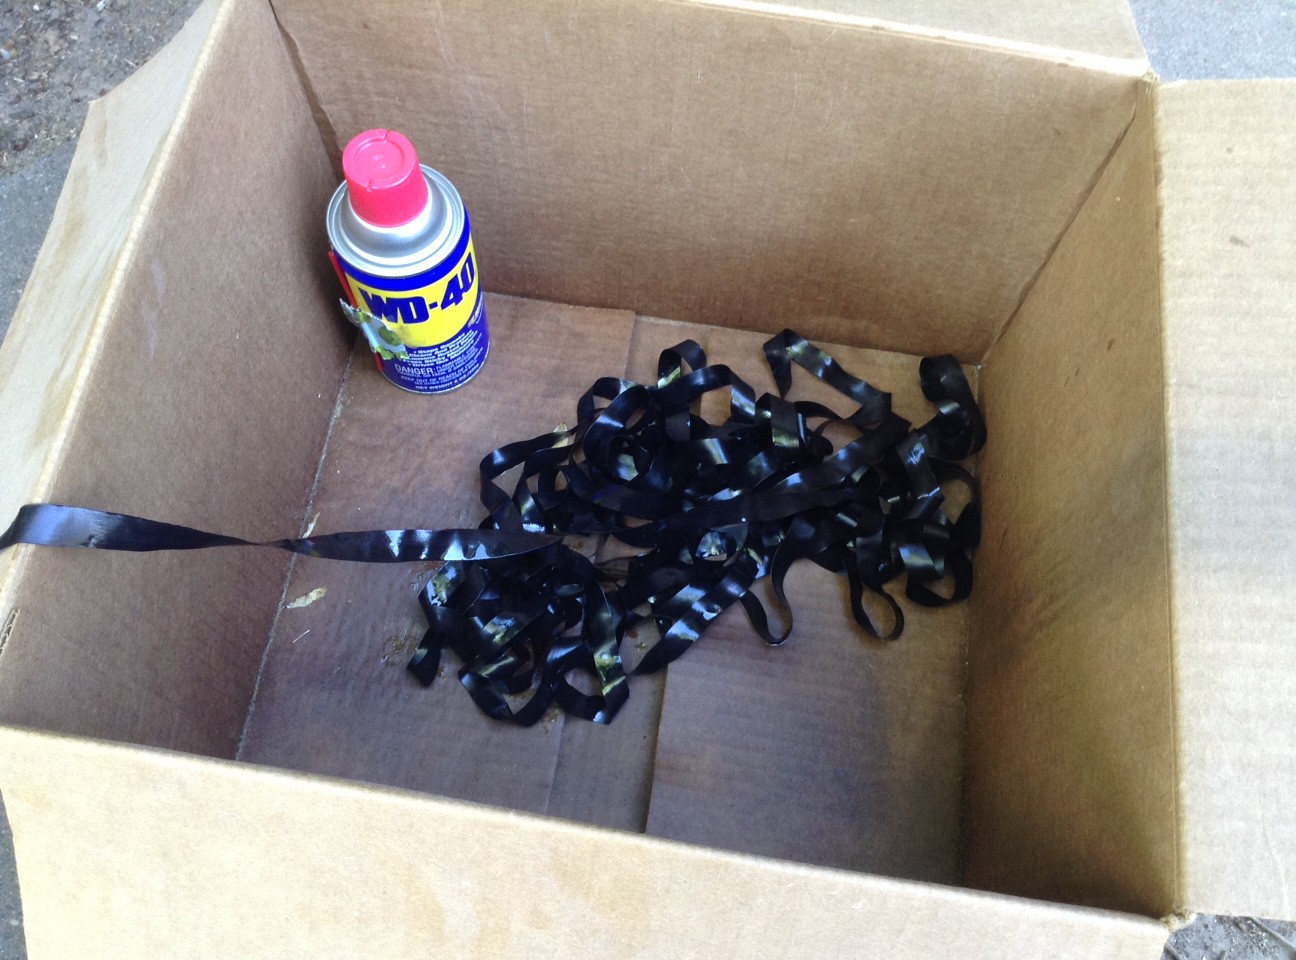
I waited about 30 minutes, then wound all the ribbon onto one of the spools very tightly. I then squirted WD-40 onto the tightly wound spool. That might have been over-kill.
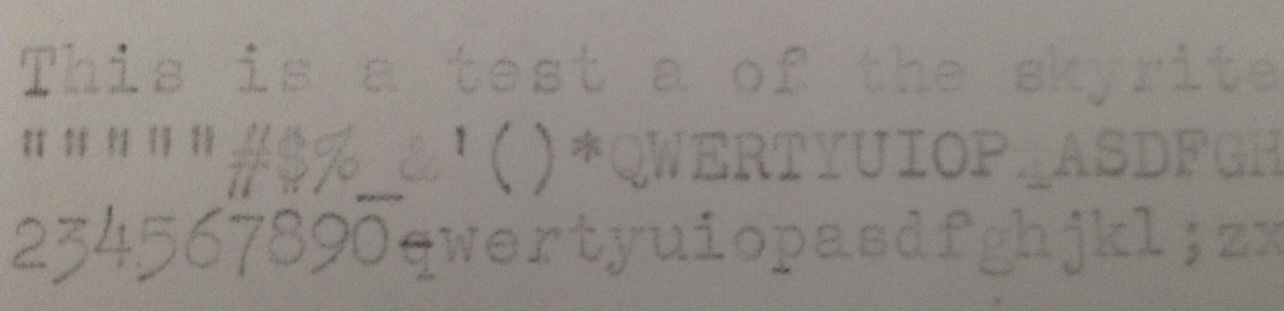
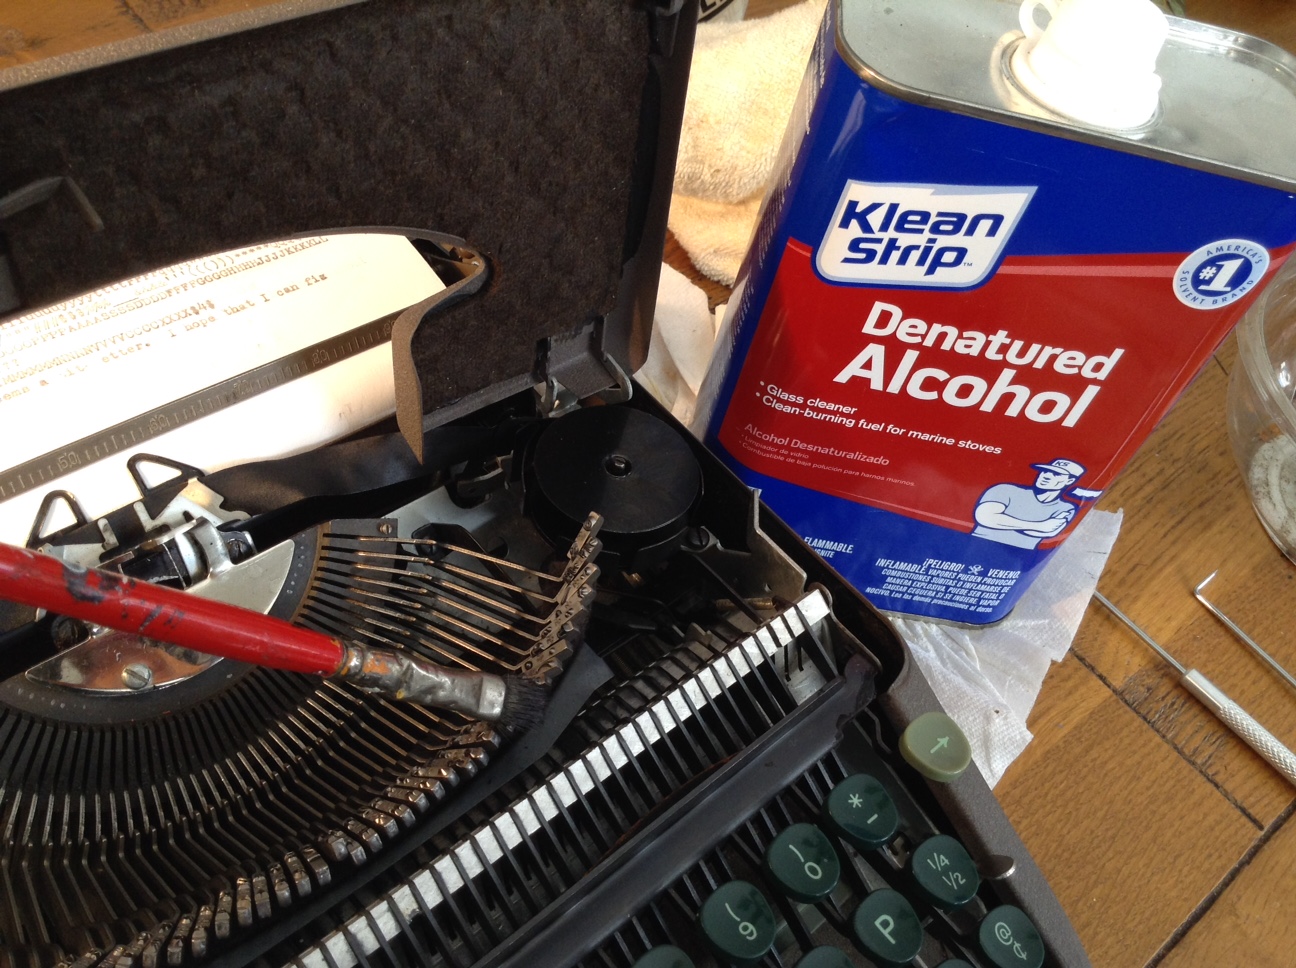
I then waited about an hour and put the ribbon spool back on the machine and hooked things back up. The first test was very squishy and gray. I had used a lot of WD-40 on the ribbon. I let the ribbon sit longer and cleaned the type in the meantime with denatured alcohol since it was a little gunky.
After about an hour, the typed page looked better. It’s a readable charcoal color, but definitely not a true black like a new ribbon would produce.
I’ll keep the WD-40ed ribbon for the time being. It works.
UPDATE: 2 weeks later: WD-40ed ribbon still typing fine – just fine – not black, but fine.
Another interesting tidbit related to ribbon spools: when I received my Oliver in the mail last month from the eBay seller, there was a mysterious piece of metal rattling around in the box. I put it in a baggie, labeled it “Oliver Mystery Piece”, set it aside, and hoped it wasn’t important.
A couples weeks ago, I brought home my Skyriter and I was cleaning and looking for the serial number when I found an almost identical mysterious piece of metal rattling around loose inside the Skyriter’s case.
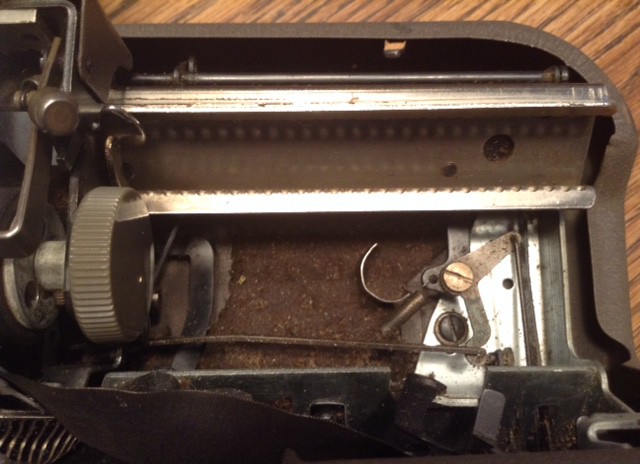
It was almost the same as the Oliver’s Mystery Piece except smaller in size.
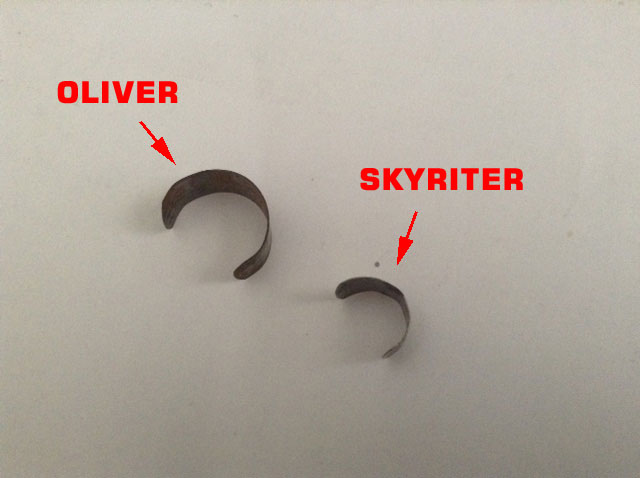
A typewriter repair specialist on the Typewriter Talk forum identified these as ribbon spool clips that secure the ribbon to the core of the typewriter spool.
I used my newly-identified spool clip to secure my Skyriter ribbon when I replaced the WD-40ed ribbon spool.
The Wayward Type Slug and the Good Neighbor
This is a parable for our times.
We live next door to Brian and his family. They have been our neighbors for almost 13 years. Brian is an incredibly decent man and good neighbor. We love Brian.
Brian is also a hobbyist knife maker. As an aspiring typewriter fixer, I know this is a good person to know as I frequently find myself in metal-related dilemmas.
For his own pleasure, Brian makes beautiful knives that look like this:
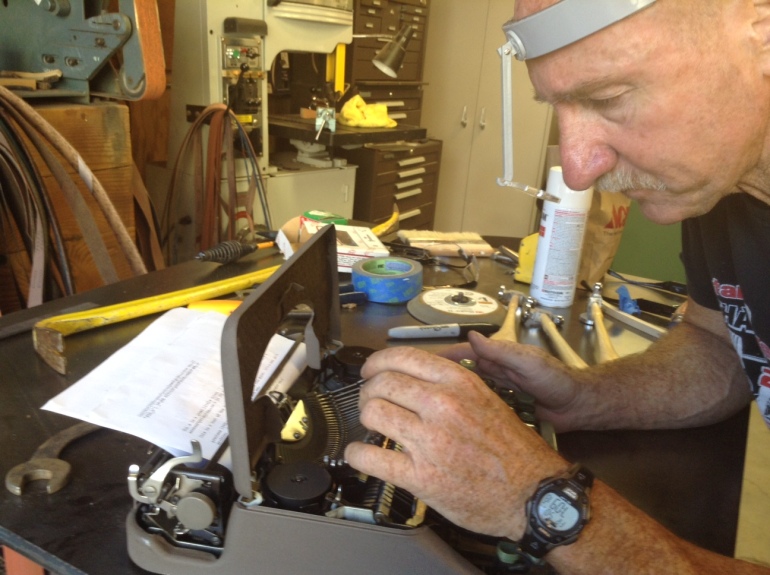
So when I purchased a Skyriter with a bent type slug, I knew just who to see.
I had tested the typewriter in the junk store before I bought it and noted that the letter B/b was not printing. When I popped the hood, I saw the problem: the B/b type slug was tilted forward.
When compared to its neighbor slug, it was very noticeably out of alignment:
I took the Skyriter home after negotiating a lower price. I carefully tried to bend the slug back into position using needle nose pliers, but it wasn’t budging for me.
So I went over to Brian’s. He has the best workshop with lots of fun equipment.

Please note: this is a human interest post – not an instructional post. I am only documenting what happened. What follows is an intense scene of type slug peril, so if you don’t have the stomach for that, stop reading right now.
We supported the typebar right under the slug so that the typebar didn’t get bent. We used a Kant Twist mini clamp to support the typebar.
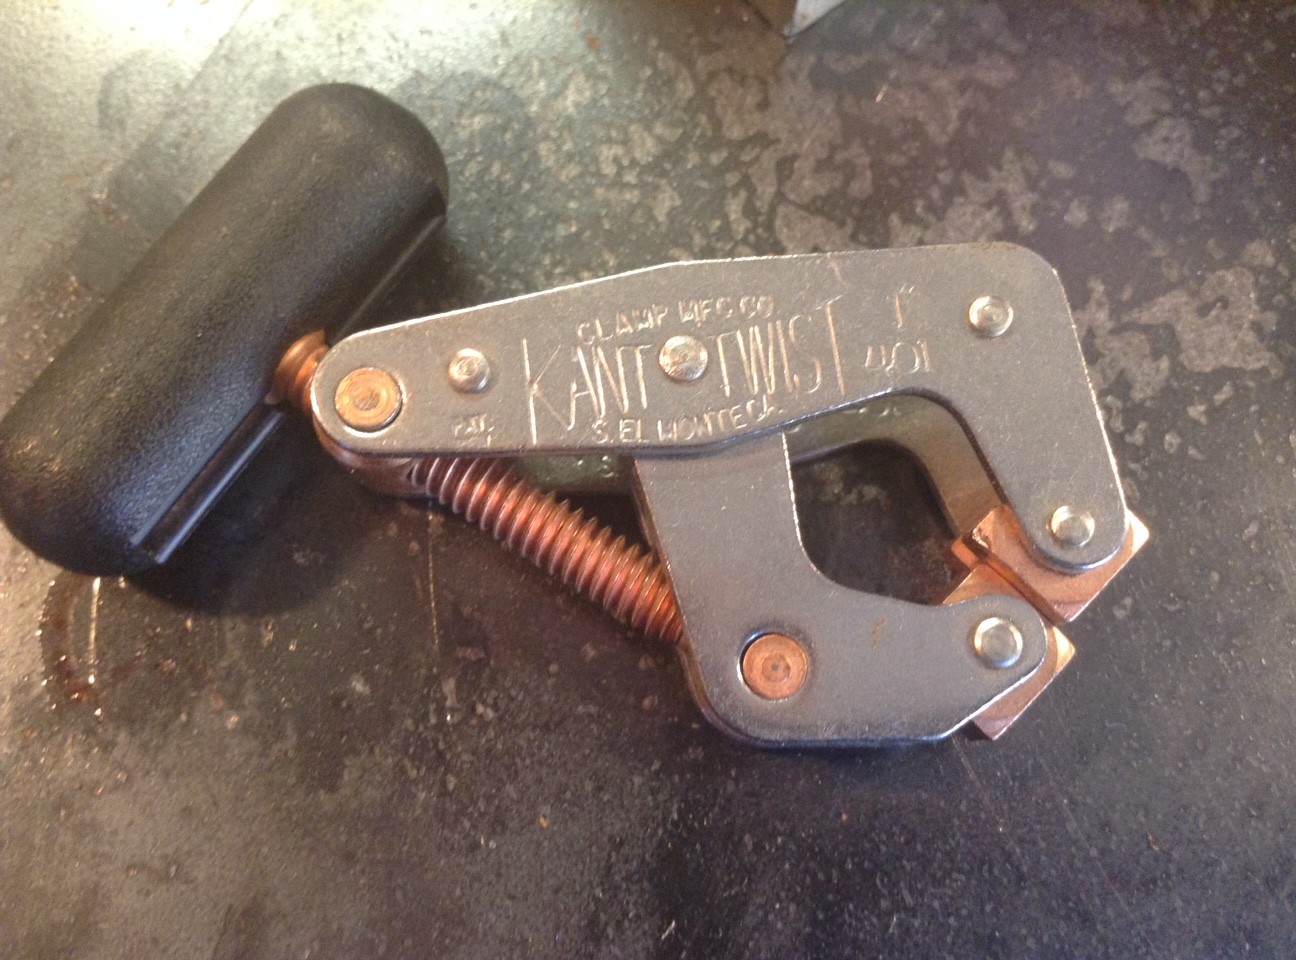
The Kant Twist is pretty cool. It has flat and grooved faces.

Much to my alarm, Brian placed a block behind the clamp and pulled out a punch and mallet.
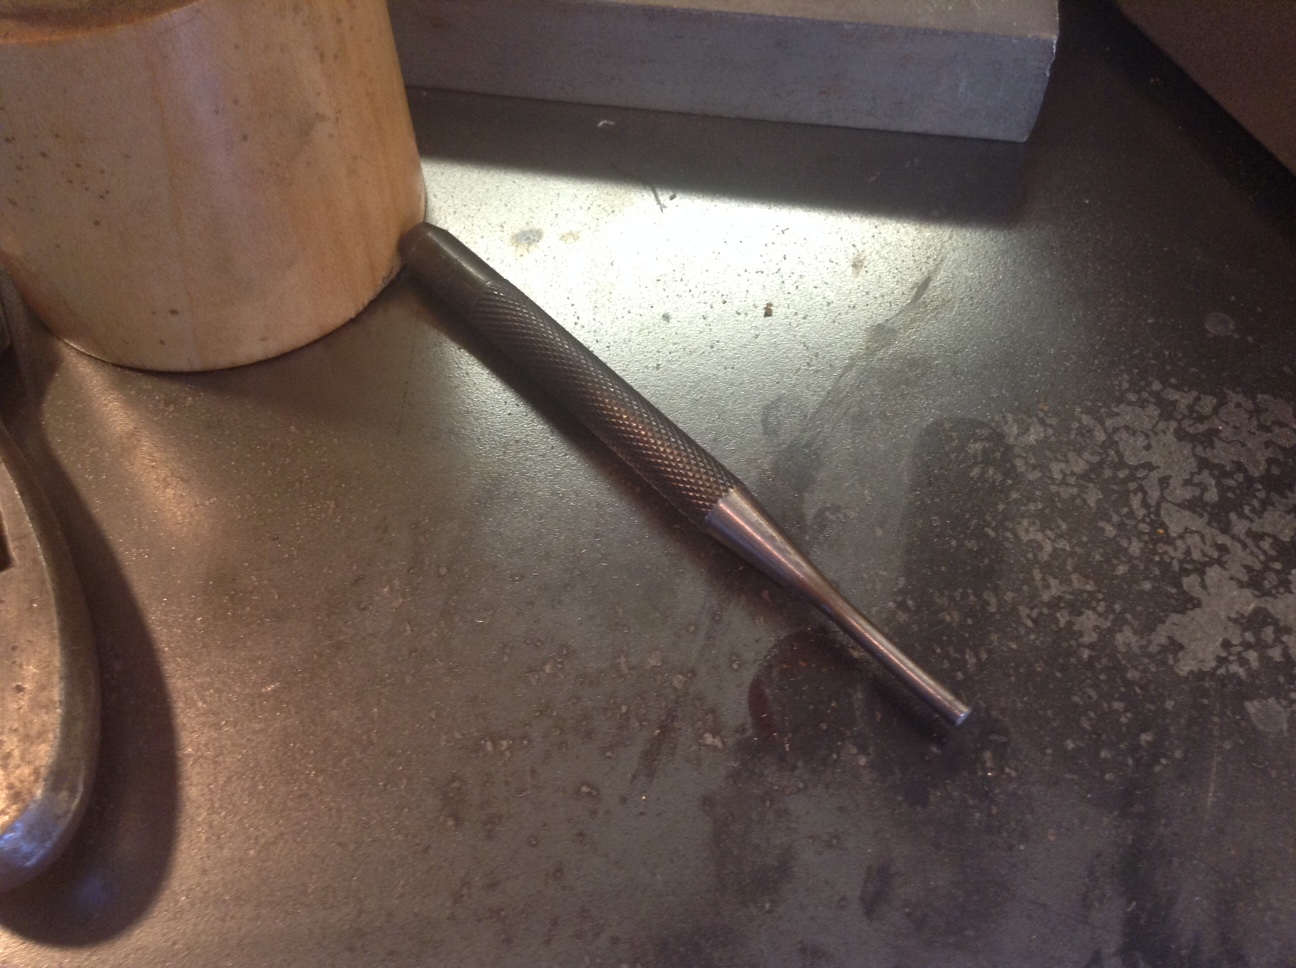
Using the punch positioned between the B and the b on the slug, he tapped gently and precisely with the mallet and the slug moved into proper position.
Kids, do not try this at home unless you live next door to Brian.
Brian was prepared to pull out a mini blow torch to soften the solder that holds the slug onto the typebar, but there was no need.
After the initial straightening, the slug was listing a little to the side. Brian pulled out an small 4″ wrench with flat, parallel gripping surfaces. It’s an antique he picked up at a garage sale. I covet it.
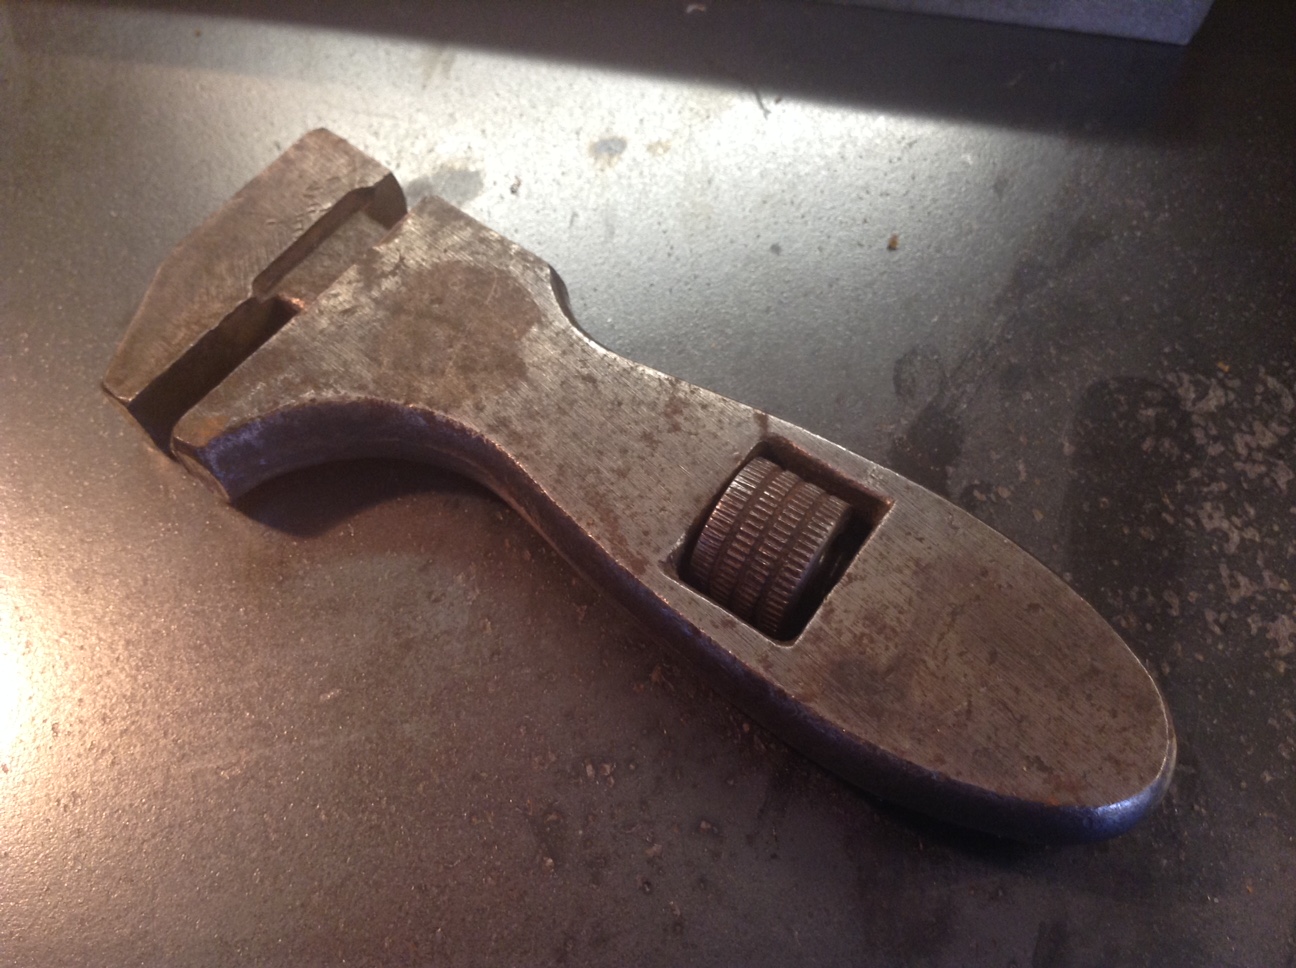
I want.
He put the typebar and slug into the wrench, tightened it and the slug pulled up straight.
Brian has a large collection of clamps and vises:
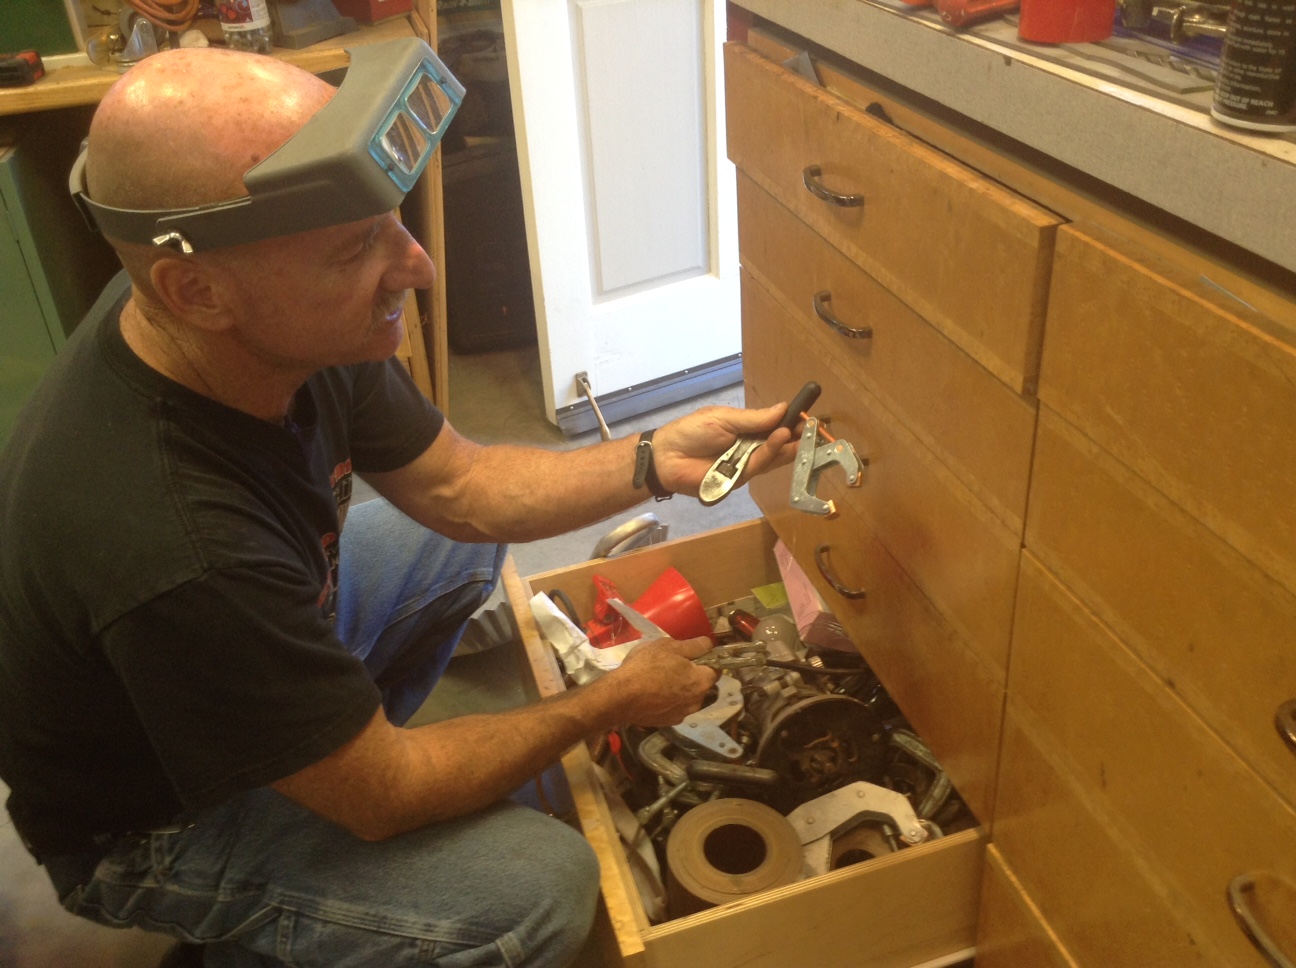
He offered me a teeny Kant Twist and a vise grip clamp that he cleaned up for me. They will be great for straightening bent pieces of typewriters.
Brian, put on your eye protection!
I came away with a straightened B/b type slug and two new tools for fixing typewriters. Thanks, Brian!
The B/b is still slightly misaligned, but the screwiness gives the typed page some character and is a reminder of the machine’s history. In the future, I will call any type slug with an eccentric alignment a “Brian B” in honor of my good neighbor, Brian.
UPDATE: Brian stopped by the next morning. Our dining room table looked like Machine General Hospital that day.
Brian had a great time helping me straighten out the type slug yesterday and felt I needed some modified pliers for use while working on typewriters. Using a pair of calipers, he determined that all my Coronas and Smith Coronas have the same size slugs.
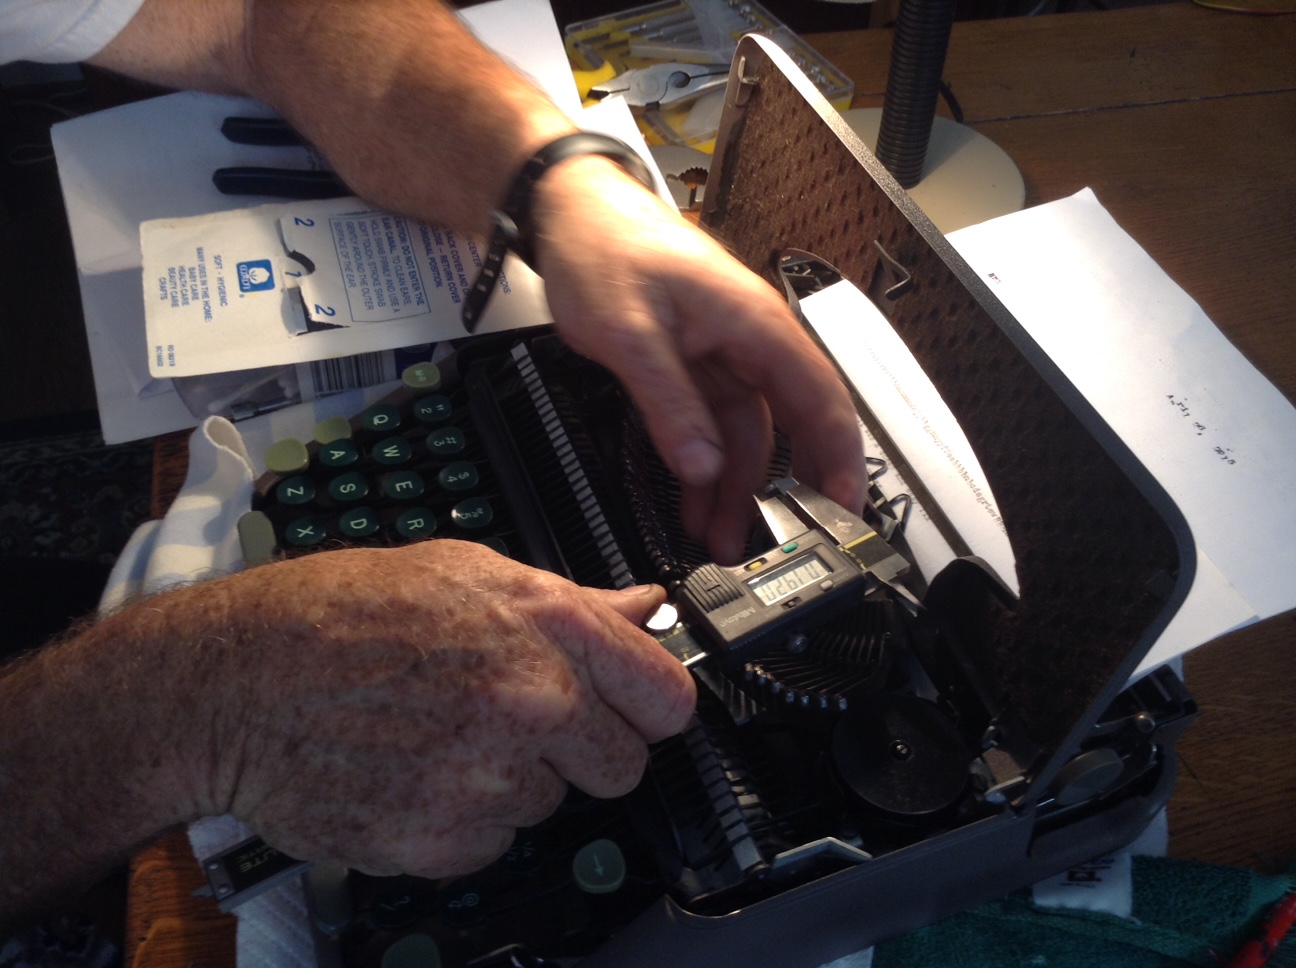
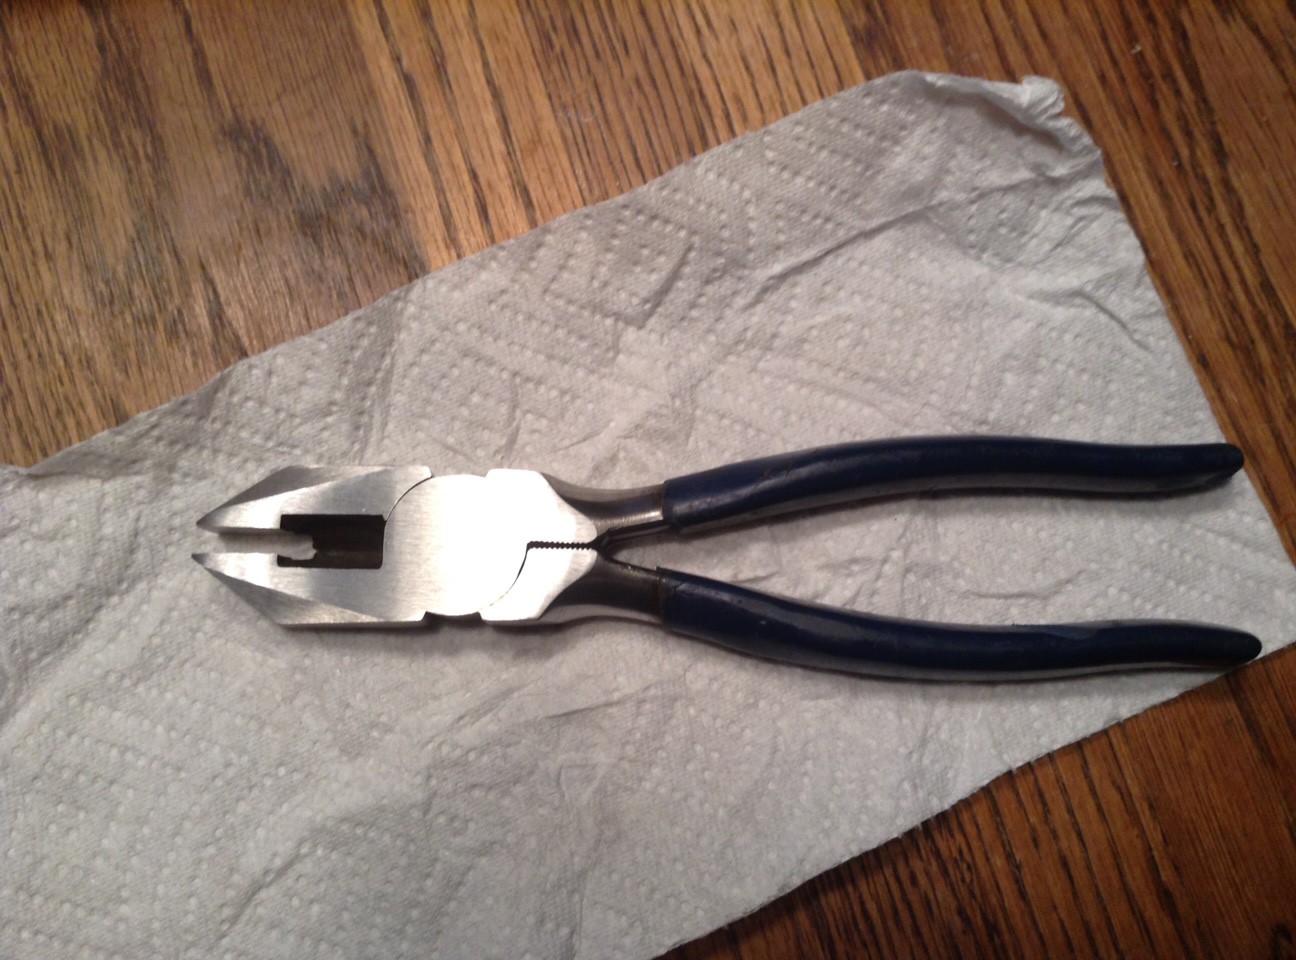
He wanted to modify some pliers so that they will grip the slugs perfectly when making alignment adjustments.
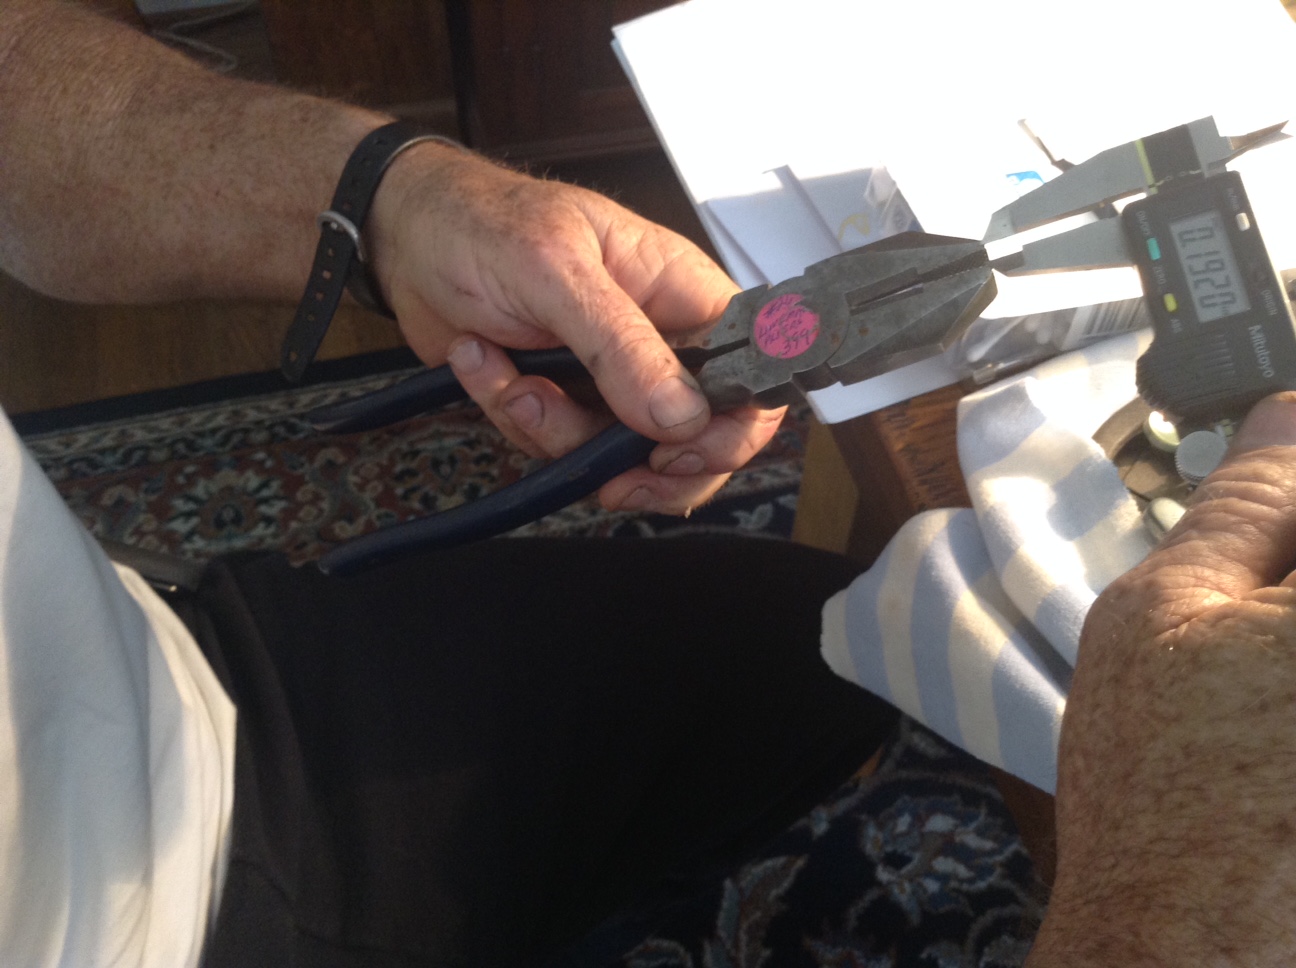
Below are the modified pliers Brian made me. They have parallel flat surfaces that are just wider than a Corona or Smith-Corona type slug so that I can insert leather padding to protect the slug when I use the pliers:
The lesson of the parable of the Wayward Type Slug and the Good Neighbor is: live next door to Brian.
