There was a very suspicious situation going down in a McDonald’s parking lot in Germantown, MD a couple weekends ago. It looked like a drug deal. But no, it was a typewriter hand-off.
I was in Germantown to pick up an ailing Olympia SM9 that a local collector named Michael wanted me to have. He knew it needed some work (it was missing all 40-some keylever springs for one thing), but he had picked it up at Goodwill for only $14.99 and noted its script typeface.

Michael was able to get all the keylever springs from TB Writers Plus. I just needed to re-attach the springs and fix its other issues which included a weird carriage grind.

The weather was pleasant and mild and we talked typewriters for over an hour. Michael then shyly mentioned that he had another “project” typewriter for me to look at—if I was interested. Ah, heck.

It was a dirty Dreyfuss-designed Royal Arrow with a flying carriage. So messed up. So deliciously awful. Of course I was intrigued.
I got both typewriters home and set the Olympia to the side. The Olympia’s issues seemed easily remedied. Little did I know. But that story is for another time.
I was drawn to the problem-child Royal Arrow like steel to magnet. So dysfunctional. The Arrow’s carriage flew all over the place—WHEEEEEE! Little Arrow, it’s time to straighten up and fly right.

No problem! I’ve seen escapement-related carriage problems before! It’s probably just a gummy pawl or a dirty something-the-other.
Uh oh.

The Loose Dog Stop a.k.a. the Loose Dog Position Limit was sheered off.
Since the loose dog stop is riveted into the escapement plate assembly, what I really needed was either a PZ-1871 or a PZ-1884: a replacement escapement plate with an intact stop.
![]()

My broken stop is highlighted in yellow. Diagram from 1955 AMES General Catalog No. 9
Below is an excellent video explanation by Duane Jensen of Phoenix Typewriter describing a Royal escapement and what that piece of broken metal should be doing and how to adjust it if it’s intact.
I needed a whole new escapement plate. I have a 1930s parts Royal P but the escapement is very different from the 1948 Arrow. I then considered my parts 1966 Royal Safari. That poor thing.

It looked promising. I pulled out the 1966 Safari’s escapement plate and found it to be a perfect match to the 1948 Arrow’s escapement plate. Retrieval was easy because the Safari was already carriage-less and cannibalized.
Here’s a picture of the two escapement plates side-by-side after I retrieved both:

I am so grateful to Fred D. who gave me the Safari. I am also indebted to Bill M. who gifted me a spring hook some time ago. It makes detaching and re-attaching springs a snap—especially in tight places.

I did some research and read through the 1950 D.E. Fox Royal portable repair information (found in the document library at Typewriter Database and accessible to registered Typewriter Hunters).


I didn’t really want to take the trip arm apart, so I kept reading and researching. I found helpful posts in the Facebook Antique Typewriter Maintenance Group.
Here’s a labeled screenshot from Duane’s video that shows what I had to work with:

I was fortunate to stumble upon Richard Polt’s description of swapping out the escapement plate on a Royal portable:
A quiz from the operating room

I like Richard’s method because he doesn’t mess with the trip arm support screws. His method boils down to “unhook the rocker spring, loosen the escapement pivot screw, and then pull out the escapement plate”.
There’s less dismantling involved than the D. E. Fox method (the trip arm support screws remained in). I don’t like to dismantle any more that I have to. It may have made installation of the replacement escapement plate a little more difficult, but it all worked out.
I took the back cover plate off.

I flipped the typewriter onto its top with the back toward me:

I removed the rocker spring from its anchor (the spring hook was helpful):

I removed the escapement plate pivot/fulcrum screw. I had to loosen the hex locking collar around the screw first and then loosen the screw. I worked with small tools. Recommendation: don’t remove the screw completely, just back it out enough so that you can wiggle out the escapement plate.

The escapement plate pivots on this funny looking screw with a cone tip. Don’t take it out all the way (like I did). Just back it out a little so that you can wiggle the loosened escapement plate out.

With the pivot screw loosened, I could pull out the escapement plate, carefully navigating through the dense mechanics. Wiggle, wiggle, wiggle.
Getting the old escapement plate out wasn’t hard. Getting the new one in was tricky. I used very small needle nose pliers, dental picks, and small surgical forceps to place it. It took me a while. I had to keep taking breaks because of sweaty frustration and a dying rechargeable headlamp. The rocker spring kept falling off the escapement plate or getting stuck under the plate. Remember: don’t take the escapement pivot screw out all the way. Just loosen it and leave it in its hole. I finally got the plate seated, fully tightened the pivot screw, and re-attached the rocker spring.
I help my breath as I flipped it over to test. It works. No flying carriage. And it typed. Sprightly. Snappy. Acted just like a Royal, infamous inconsistent left margin and all.

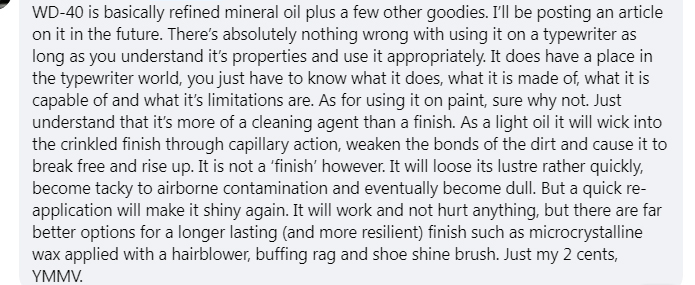
I proceeded to dust out the clumps of cat hair and sweep through the mechanics with mineral spirits. I cleaned the outside with Simple Green and water and rubbed the shell all over with WD-40 à la Phoenix Typewriter. ADDENDUM: commenters have expressed concern about the use of WD-40 on the shell. See comments below.
It purrs. It gleams.

However, I wanted to break it of its irregular margin behavior.

Come on, man. Don’t be like that.
I was able to beat the “soft” left margin out of the Royal by cleaning and lubricating the springy part (the “Margin Stop Locator”) of the center stop assembly—it felt sticky.

from my spiral-bound Manual Typewriter Repair Bible.

My first inclination is always to clean thoroughly and then fool with adjustments, and this time it paid off. I cleaned that cushioned stop area and locator until it went boing-boing-boing and the machine returned a consistent left margin.

Almost every other Royal I come across has a left margin issue. I’ve read at Facebook Antique Typewriter Maintenance Group that it may be that springy cushioned center stop that causes problems on Royals. I’ve also read that you can adjust the banking screw on the left margin stop, the one that interacts with the center stop’s locator. However, cleaning usually works for me.

All better now. Maybe this Royal Arrow was just feeling its oats, its flying carriage a temporary sojourn into wildness and freedom. After its Rumspringa, the Arrow is back to its orderly and disciplined life—though I think it may have a little wild child left in it.


After reading your post this morning I cleaned my Royal FP Margin Stop Locator. The irregular left margin behavior, which has irritated me since I acquired this machine, is now gone. Many thanks
LikeLike
Oh! Ha ha ha! Thank you for letting me know. I know it won’t help everybody with Royal left margin issues, but sometimes a good cleaning is all it takes.
LikeLike
Wow..I’m so impressed….I do n0t have your patience….and now limit my repairs to a minimum…( I Came close to throwing my ’39 Klein COntinental out of my 2nd story window yesterday. ..when the V key started sticking out of the blue…not an easy bender mender either….the linkage is being moody..I put her away for another day……I just wanted to pass along some crinkle paint revival info to you and Dwayne. I strongly advise you to not use WD 40 to spiff up the paint. .. it looks good at first..but will dry out sooner than other oils..also . I have used both baby oil. aka mineral oil and now synthetic gear oil as paint revivers. Both nourish better and last much longer than WD40.Mineral oil is petroleum based “motor” oil without detergentts and additives and stays oily longer than WD40…evaporates more slowly. The synthetics are even better in that respect.I once oiled some barn siding with regular oil and also synthetic oil. A year later the regular oil had died but the synthetic was still oily. (Red LINe brand) Anyway I’m still testing..but synthetic is my first choice until I find better.Of Course I you want to revive that crinkle a year later…rub on a bit more. MY 1940 IBM ELectromatic. black crinkle needed a few treatments..what a monster. But our beloved typers deserve better than WD40! I Will be experimenting with stand oil, sun thickened linseed oil, Venice turrpentine, Strasbourg turpentine and some museum grade acrylic varnishes from Golden. I first became obsessed with these stuffs while studying renaissance painting techniques..ala Durer, Van Eyck, Breughel , and Patinir. I mention this so you will know I’ve long been messing with oils and pigments. I”M a nut for sure…no question!! O course a varnish can shine up crinkle paint…but like Duane I like the oil wipe revivers…to me more original. I want to thank both Duane and you for kindly sharing your information. Many is the time I’ve gone to Duane looking for fixes. Best wishes from Nick
LikeLiked by 1 person
Nick – thank you for your two cents. I know you to be an expert restorer of old typer finishes. Some of your black gloss typewriters have a mirror finish.
I can always take the WD-40 off with a little soap and water or Simple Green if it dulls and try a synthetic oil instead.
Duane’s videos have saved my bacon more than once on what I thought were hopeless machines. He’s an incredible resource on YouTube.
LikeLiked by 1 person
Gosh ..after all my squawking…it may be just fine….don’t know how easily it will clean out..?? You could try other oils later if inclined….Yeah crinkle is like a dry southwestern landscape.I once splashed metal polish on some black crinkle…ewwee…it soaked in and I had a devil of a time washing it off. PS If you ever try that CRC BELT CONDITIONER..car belt stuff on old rubber >>let me know what you think. pps..My mom used her black QDL for business all my life…till her travelling typer tech(they came to your office) told her it was not worth fixing !!..and she threw it out…My town Cornwall, CT has a fantastic yearly church rummage sale ( five buildings ). and lo and behold I found a minty black QDL for her…which I Now still have! …ppps…I Call magic margins….tragic margins!
LikeLike
Sorry to say that I haven’t used any type of rubber rejuvenator.
And I agree: Tragic Margins. Not a fan.
LikeLike
Hi there,
I stumbled upon this blog looking for some insight on a silent super restoration. (I’m very much a beginner). Not sure exactly how to contact you to ask a question, so I’m asking here. Apologies for jumping onto a different thread.
Someone painted over the stripes! So I’m wondering what would be the best and most accurate way to add them. Thanks in advance.
J
LikeLike
I recommend that you join the Facebook Antique Typewriter Maintenance Group. Lots of great information for everyone including beginners. You’ll need to request admission to the group.
I dug through posts there and someone has posted a pdf of a paint template for Smith Corona 5-Series Silent and Silent-Super stripes:
https://www.facebook.com/groups/typewritermaintenance/permalink/2770016189902479/
As far as actually painting the stripes, model painting videos may be useful sources for tips on masking and painting.
Good luck!
LikeLiked by 1 person
Thank you sir much! I love your posts and how low key and helpful they are! Ispirational to say the least.
LikeLiked by 1 person
This post was a lot of fun to read–and informative, too. Since the Arrow was from “Germantown,” the reference to Rumspringa was especially fun. It’s remarkable that a part from a parts-Royal of much later vintage fixed an earlier-era Arrow. Again, a remarkable repair!
LikeLike
I like Royal’s “If It Ain’t Broke, Don’t Fix” philosophy. The bearing and pinions on the carriage rail of a 1930s Royal P are the same as the bearings and pinions on a 1966 Royal Safari:
LikeLike
Thank you for the write-up – something I’ll have in mind when pulling out my Royal DeLuxe one of these days (months, years…)
Also I sense another specialty-subject coming up; favorite finish-reviver! For old sewing-machines, an oily rag was advised (to revive the shellac). Myself now use regular oil or a bit of vaseline/petroleum jelly with a soft cloth. Vaseline evaporates slow and can always be removed with clean-gasoline/spirit.
Am suspicious of WD40, its a mixture with some fast evaporating stuff and some stuff that hardens-out; polymerised it is then very hard to remove.
And useful resource this, for Royals 🙂
LikeLike
You’re the second well-informed person to express concerns about using WD-40 to spiffy-up the shell. I’m torn between washing it off and applying a synthetic oil or leaving it on and seeing what happens (in the interests of scientific inquiry). Hmm.
LikeLike
THanks…vaseline.?…I’ll try that ,next time I’m working on crinkle paint.! Yeah old sewing machines can be tough! I Bought an old Singer ($20) Because I loved those cool gold Sphinx decals. I spent hours slaving over the finish. Old oil… years of it…had dried on it..I guess the owner would put oil down certain oil”ports”…and didn’t wipe it off well. I even used auto compound and/or Mother’s Mag polish to carefully buff away grime. I got the machine to look pretty good. Lubed the various “bearing points” .This year,,, learning how to sew is high on my list..as I have a couple of sewing machines..including a gorgeous near mint.. blue japanese made machine..a Royal!!(don’t believe it’s connected with the typers)..I’d love to sew simple typer covers. I”LL post some pix of that Royal next time its “out”
LikeLike
Sewing is a life skill you won’t regret learning.
LikeLike
Fantastic! I see you also figured out the overbanking, so ignore what I say about that in the letter you’ll be getting (:
LikeLike
I’ll read with interest what you wrote. Cleaning seemed to do the job this time, but this won’t be the last Royal with an irregular margin I’ll see. The next one may need more than cleaning.
LikeLike
Another great repair, and contribution to the Typosphere! Thank you!
LikeLiked by 1 person
Thanks for another entertaining restoration story Mary 🙂 and good luck with that 1969 Olympia “Goodwill find”!
LikeLike
The Olympia SM9 turned out great. I am working on a write-up for that one. Thank you again for the opportunity to work on both.
LikeLiked by 1 person
Congrats on another successful repair. Good to know the spring hook works.
Unsure if I’d use WD-40 or any oil on a painted surface. Both tend to yellow over time. WD-40 does harden to a protective layer in a short time though. I use it to protect all bare metal parts on my machines (not typewriters) and tools.
LikeLike
Love that spring hook – it made dealing with all those hard-to-reach springs much easier.
A couple other commenters expressed concern for WD-40 on crinkle paint as well. There is a thread at the Facebook Antique Typewriter Maintenance Group where this is discussed:
https://www.facebook.com/groups/typewritermaintenance/permalink/2989891031248326/
A moderator for the Antique Typewriter Maintenance Group who is a repairman as well as a former Museum Artifact Conservator said this:
LikeLike
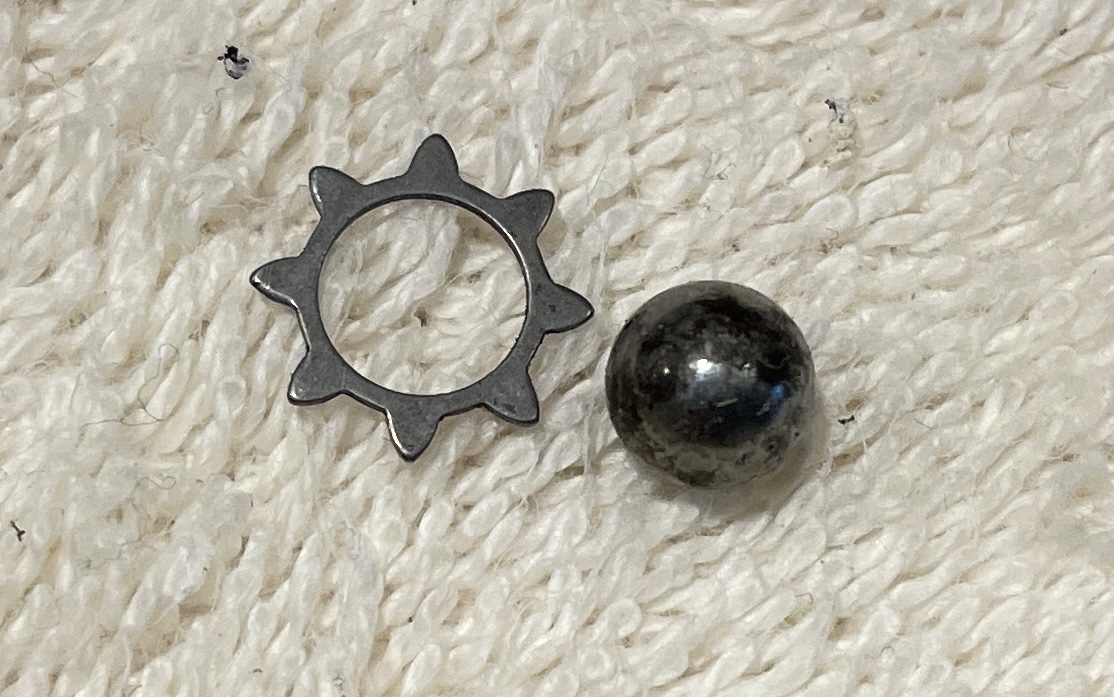
Last week I received by FedEx a 1939 Royal Arrow with no case. Because it has no carriage lock a jolt must have bent the soft metal arm so that it no longer functions to prevent the carriage from flying to the left. I want to know which direction in or out (away from me or towards me) to move that arm so that the ball stays in position to prevent the star wheel from spinning when the space bar is not depressed.
LikeLike
Hi Jim – sorry to hear about your damaged Royal Arrow. By “soft metal arm” do you mean this one? On the Royal I worked on, it was broken off:
If it is only bent, it can be adjusted. If you place the typewriter on its back, the part can be adjusted down, Duane Jensen of Phoenix Typewriter has a very good video describing adjustment of that piece:
LikeLike