Summer got away from me, and here it is mid-August already. In June, I drove out to the wilds of the DC suburbs where I picked up a couple typewriters in need of some attention. They are owned by a local typewriter enthusiast, Suzanne. One was a 30+ lb behemoth, a KMG with a tabulator issue that I fixed up, and the other was a teeny 1943 Hermes Baby.
The Baby has a gorgeous charcoal marbled finish that was only in production from 1941-1943.

Suzanne had picked it up in a shop near Ocean City, MD in April. It was in very dirty condition, but it was love at first sight. Here it is at the shop:

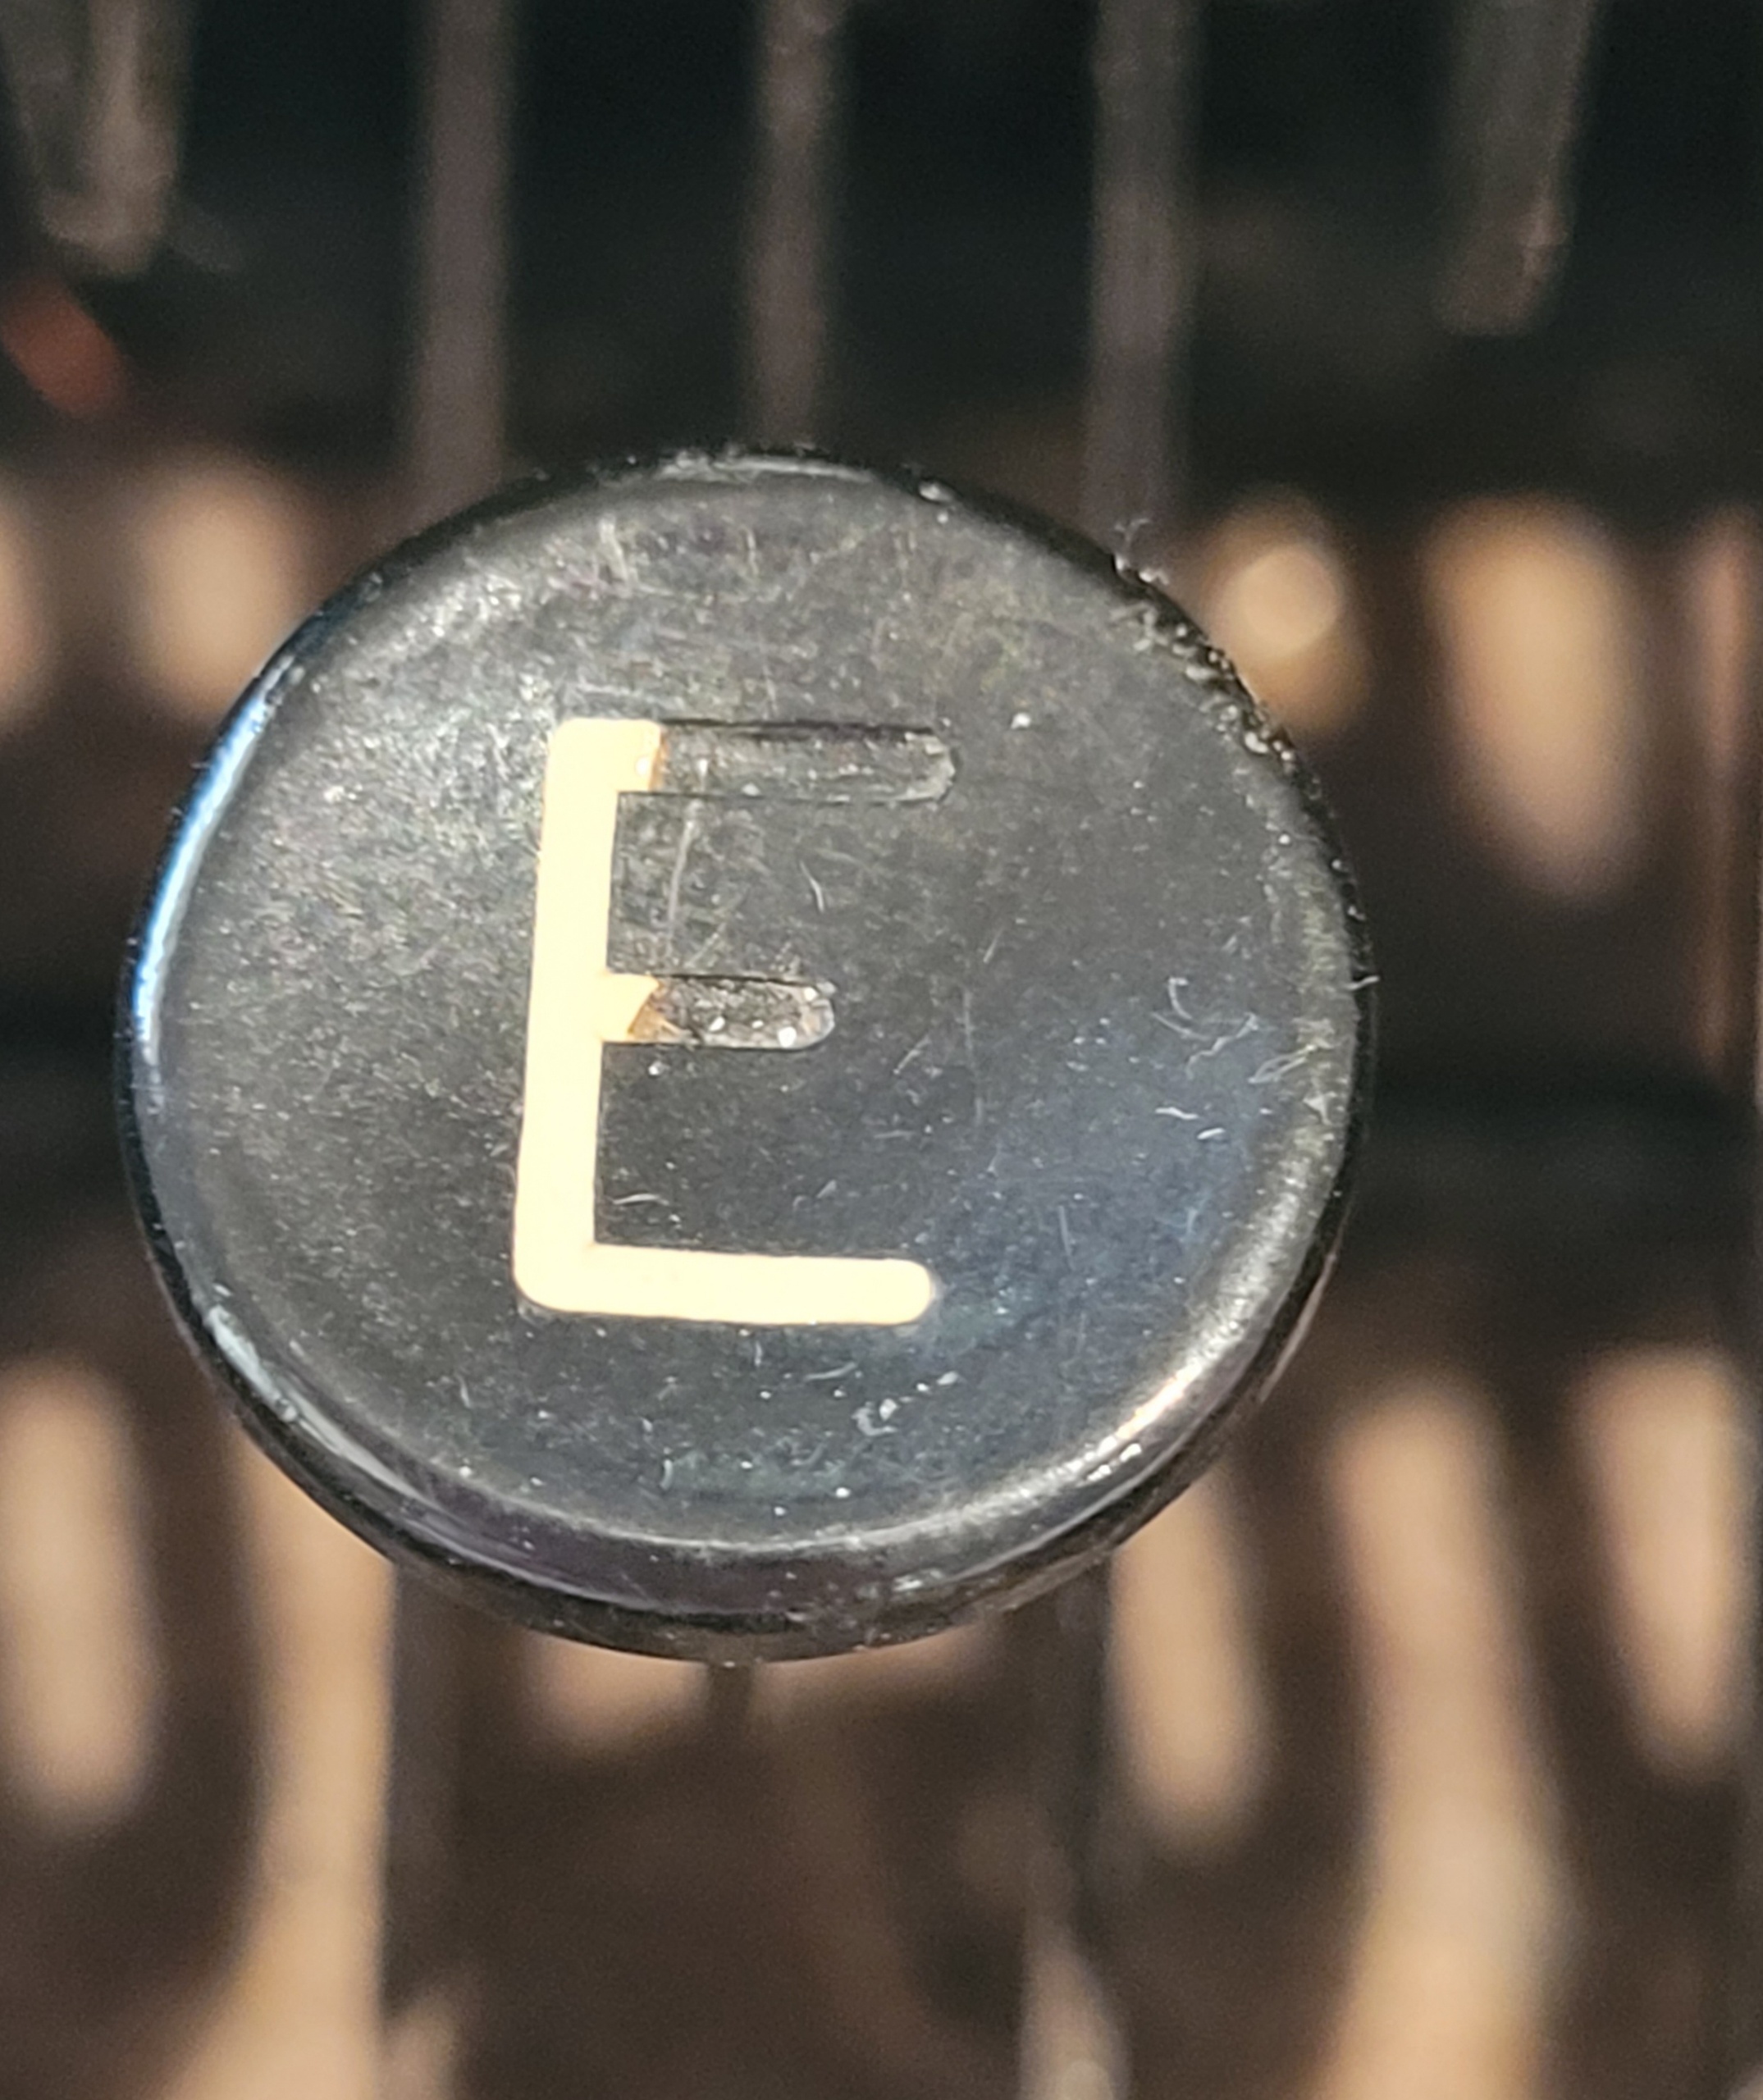
A few keys were missing their white pigment which Suzanne discreetly filled in with paint:
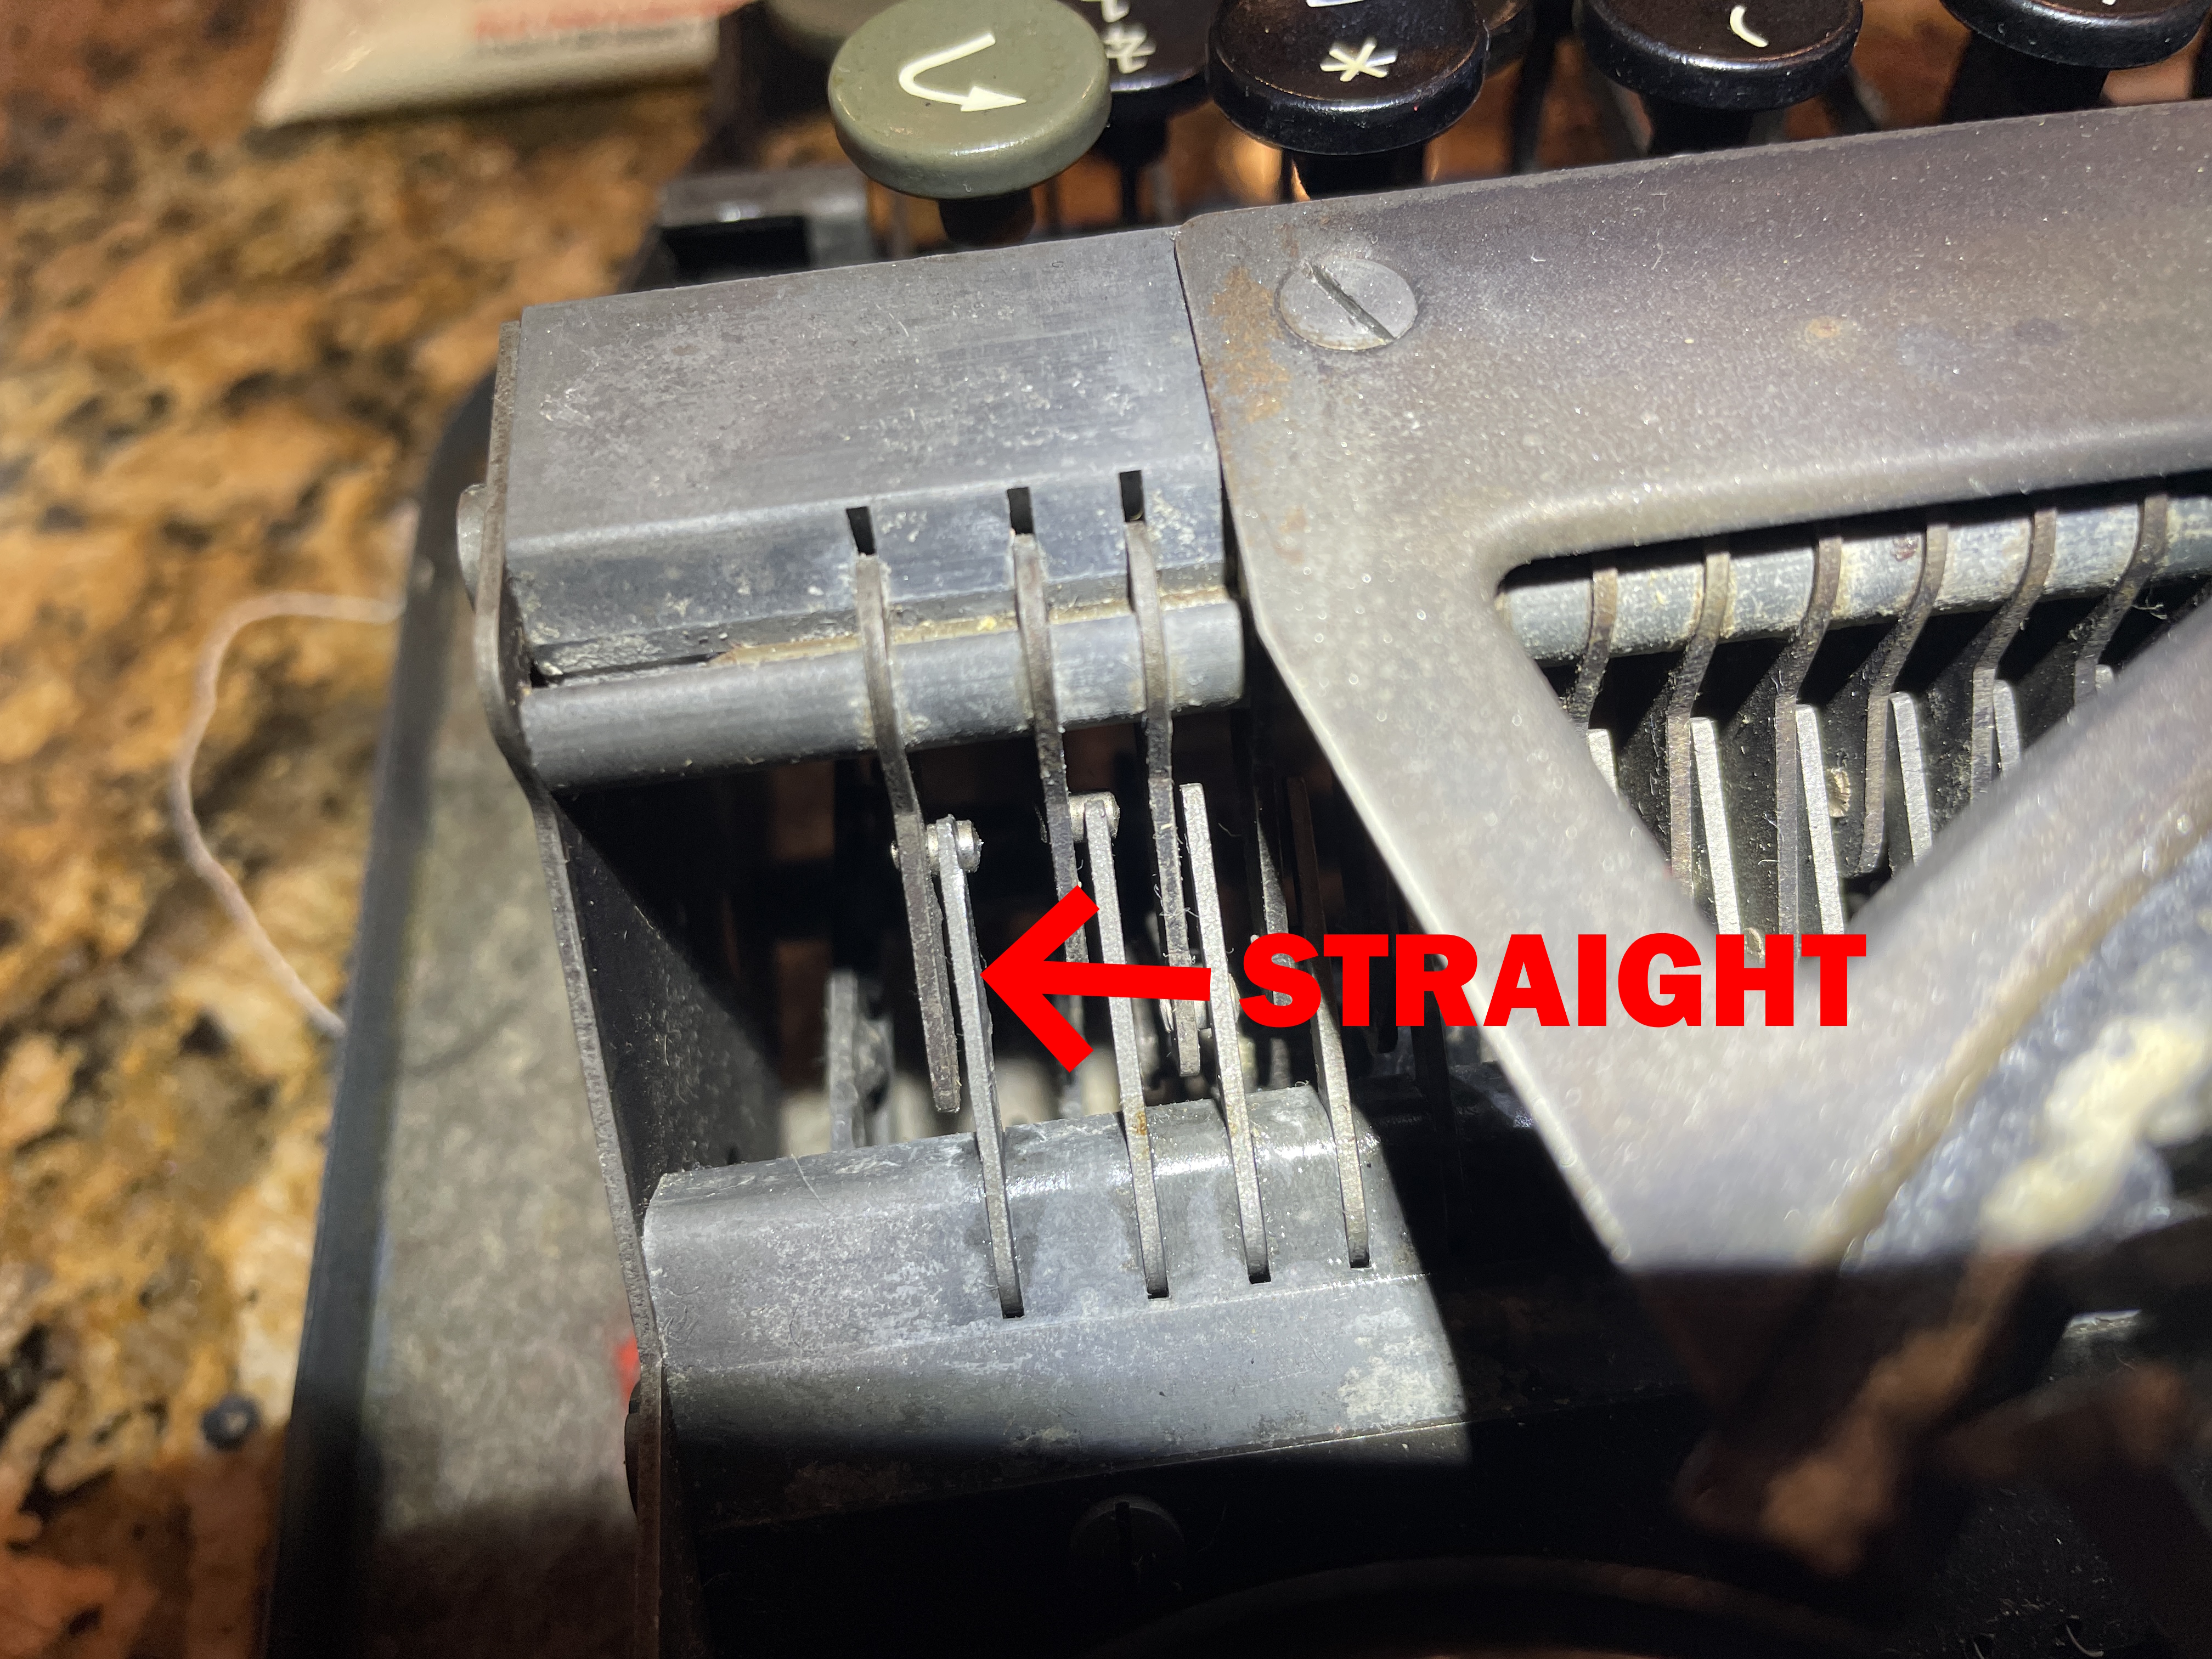
Suzanne had thought the Baby may be missing a spring from the bale assembly, and a friendly typospherian in Canada had mailed Suzanne a bale spring and instructions for installation.

Suzanne asked me if I could install the spring, and I uneasily said yes. The instructions mentioned specialized tools and fiddly torsion springs. 😬
I brought the Baby home to my workbench and started examining it and noted that the paper bale spring was not missing; it was simply detached.

I hooked the spring back up on its little bale knob, and the bale made a satisfying *snap*. Whew. I really didn’t want to deal with torsion springs.
I then removed the outer casing from the Baby. Suzanne had mentioned that the felt typebar rest had fallen out of position and was floating somewhere loose inside the case. The top, back, and bottom cover plates of this Baby were easy to remove. There are two screws on either side and two screws in the front of the machine. Once these are removed, you can lift the cover plates off and the mechanics will lift from the base.

If you have an older Baby, say from the 1930s with exposed ribbon spools, the bottom plate may be secured to the machine mechanics. You have to loosen nuts on either side to lift the machine out from the base plate. There is a Facebook Antique Typewriter Maintenance Group post about this (the solution buried deep in the replies):
Once you loosen the nuts on each side, the machine body lifts out.
I didn’t have to mess with those nuts on this Baby—it appears Hermes had simplified dismantling by the time this 1943 was made.
Once the case was off, I dusted it out and cleaned the mechanics. I found the felt typebar rest floating around loose inside the machine.

I glued the typebar rest back down with E6000 adhesive. It should be good for the next 80 years.

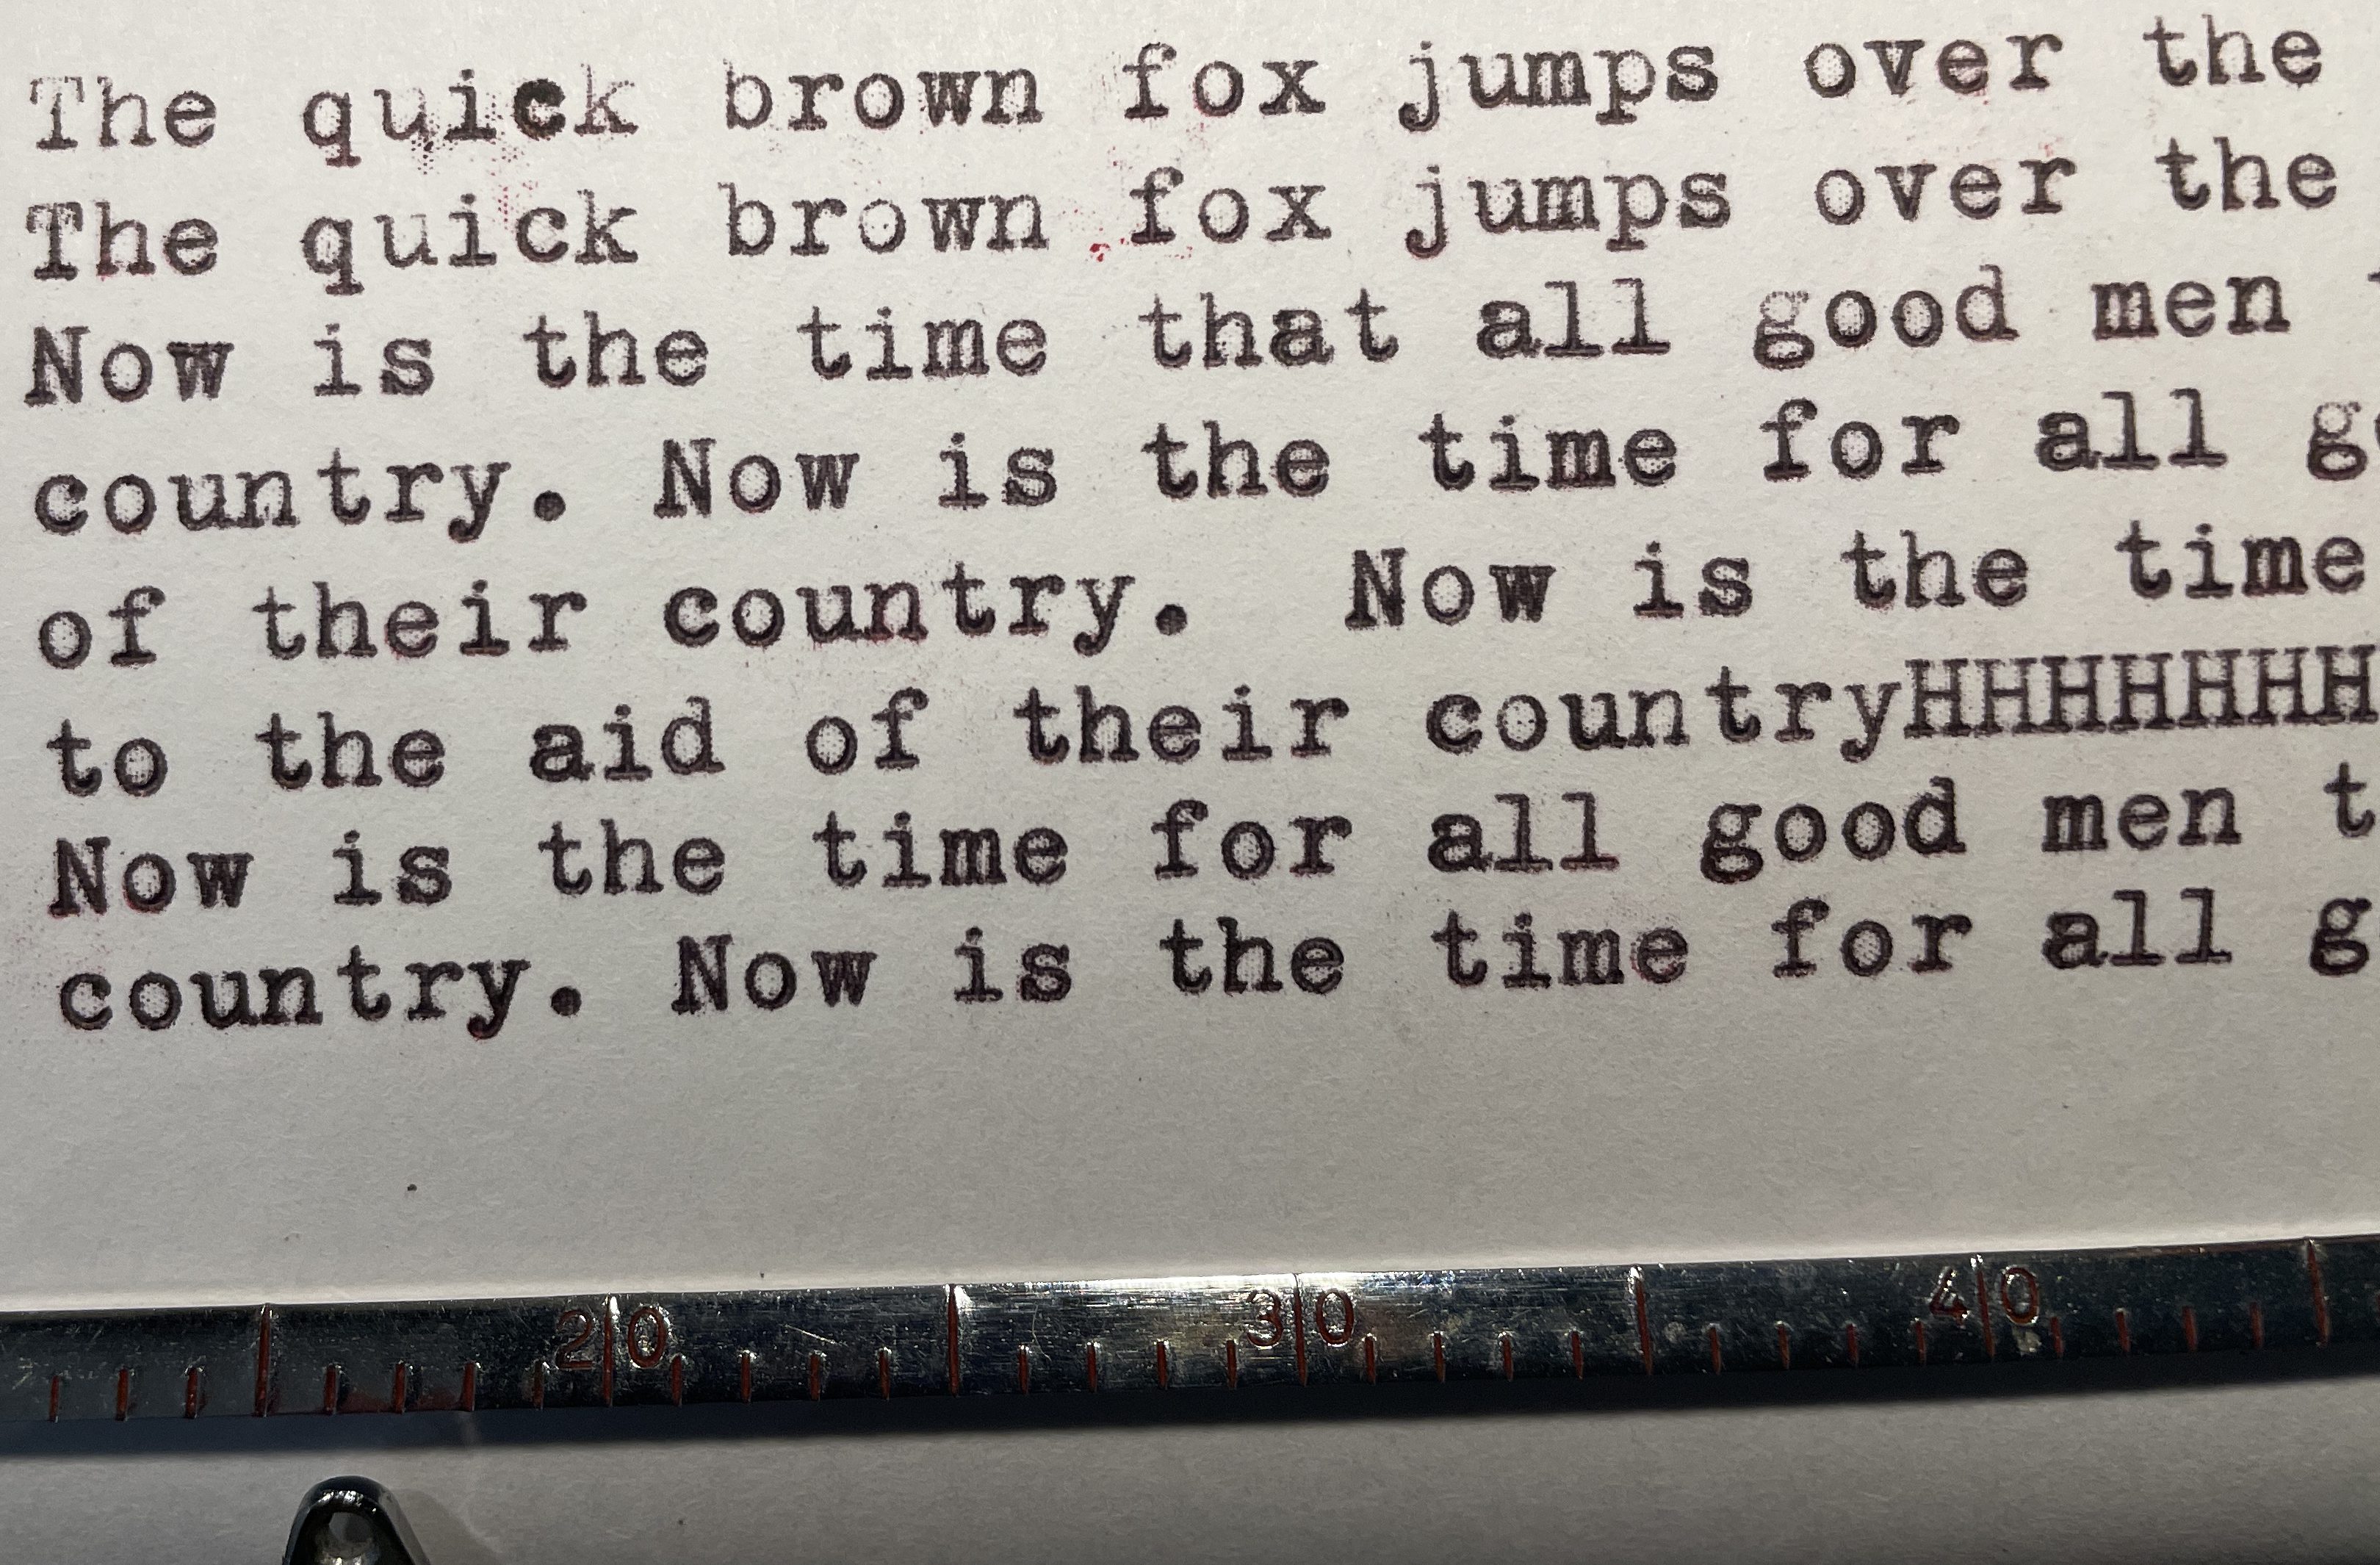
Onto the next problem: typed words drifted across the page unevenly. Most lines were drifting downward after the first few characters.

At first, I thought the downward drift was caused by a bent paper bale, one that wasn’t holding the paper tight against the platen. But straightening the paper bale didn’t seem to improve the situation.
What I eventually determined was that the the carriage return lever was subtly bent down so that line space mechanism was not fully indexing with each return. Bent carriage return levers are a common problem on Hermes Rockets and Babys because they are delicate and easily mashed. They shouldn’t be bent down. They should be level and horizontal. If the carriage return lever is mashed, you may be unable to use the line space selector settings.
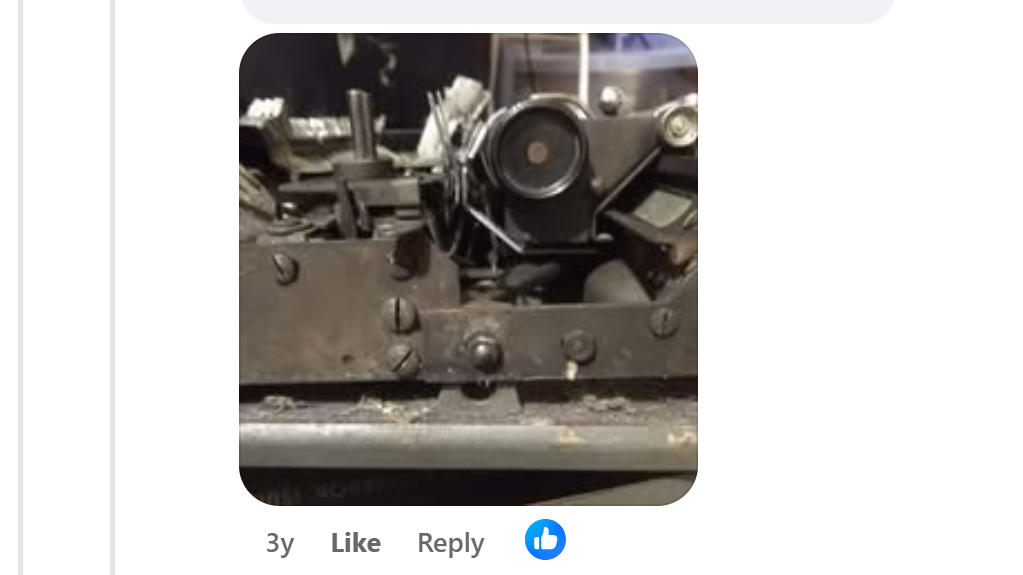
Here is a 1957 Hermes Rocket I worked on recently with an extremely bent carriage return lever:

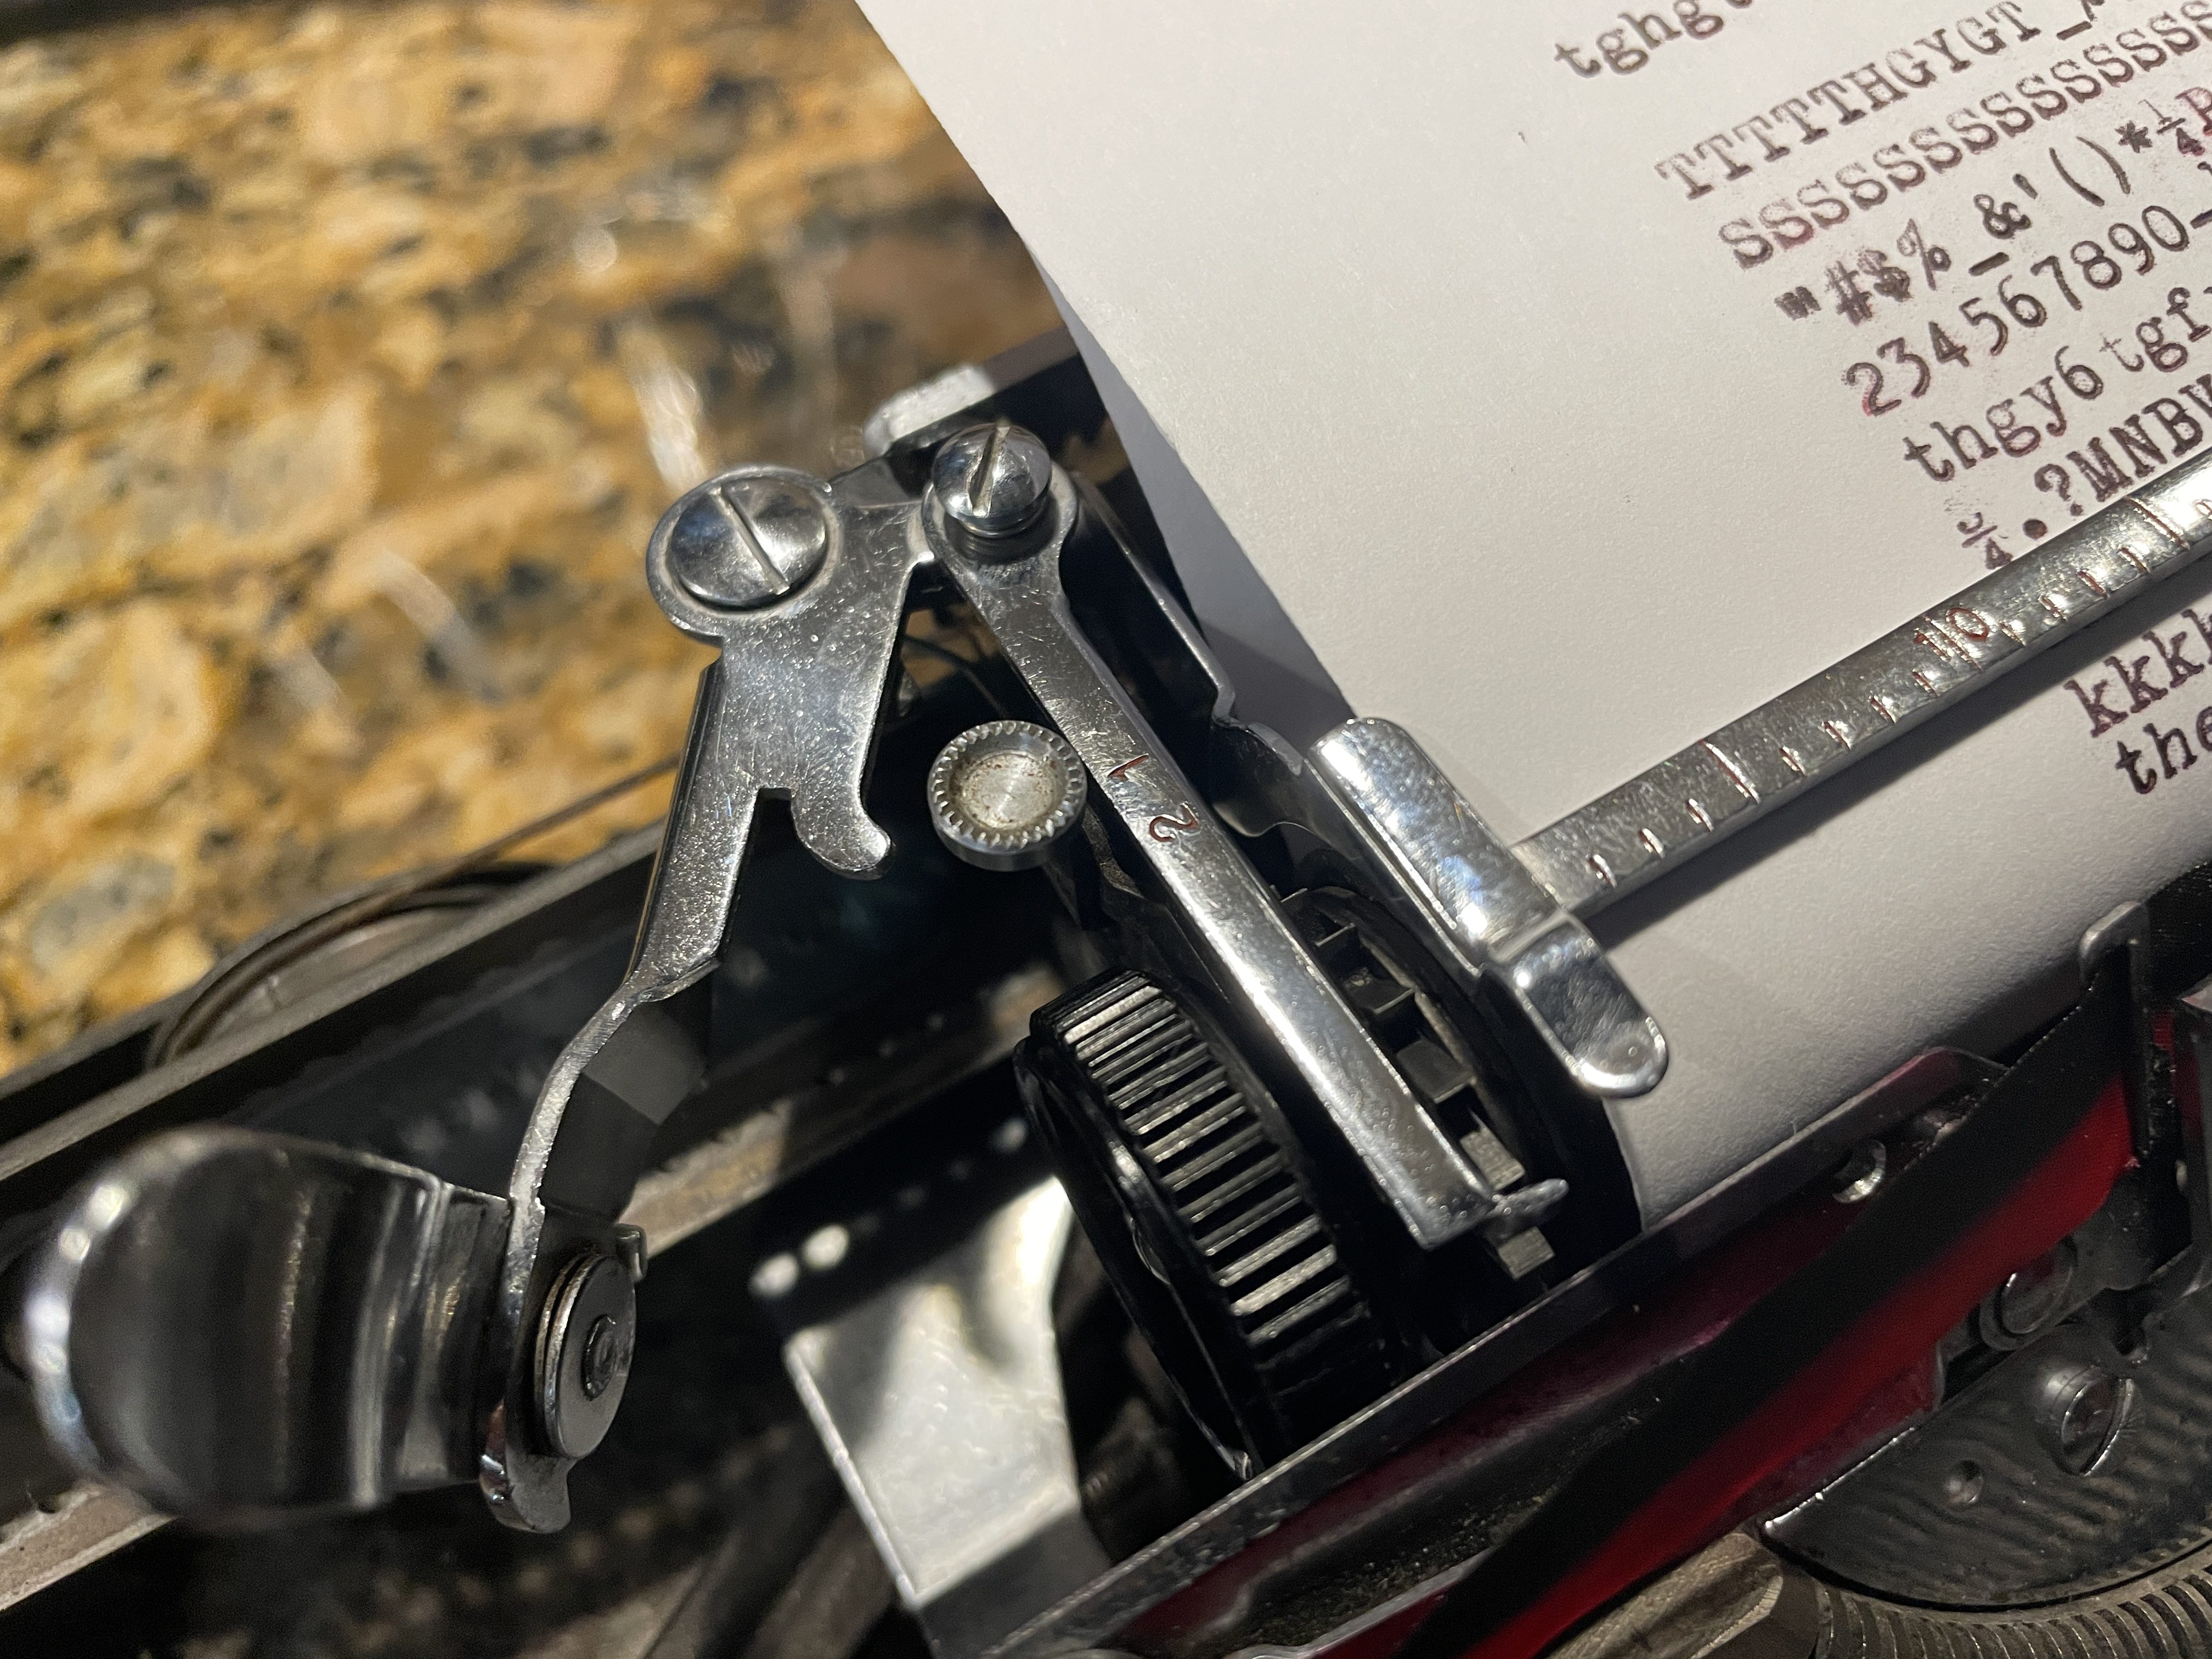
Anyhoo. I straightened out the carriage return lever. Line spacing indexing became more consistent and the typed lines straightened out.
Another problem was the shift key on the right wasn’t functional. With the case off, I could see that the shift lever was falling off its post and the post arm needed a little “forming” so that the shift key could work. I straightened that out and all was good.

Next up: the 80 year-old rubber feet were hard and crumbling away.

I inserted new feet with cheap grommets from the hardware store


The carriage release lever was missing on the right. It should have a little finger handle.

I made a makeshift handle using a “miniature” 1-72 pan head machine screw and a couple nuts as well as some rubber window screen spline that I had left over from a screen repair.

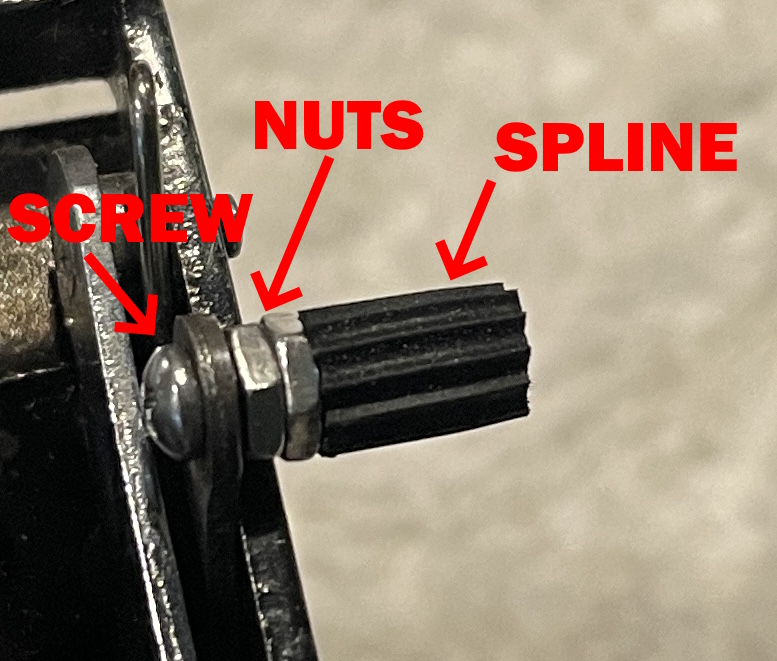
It’s not quite an OEM part, but it’s a nice little carriage release handle that blends in:

This was a nice summer project—nothing too involved but lots of little fixes that added up to make the typewriter a lot more functional.

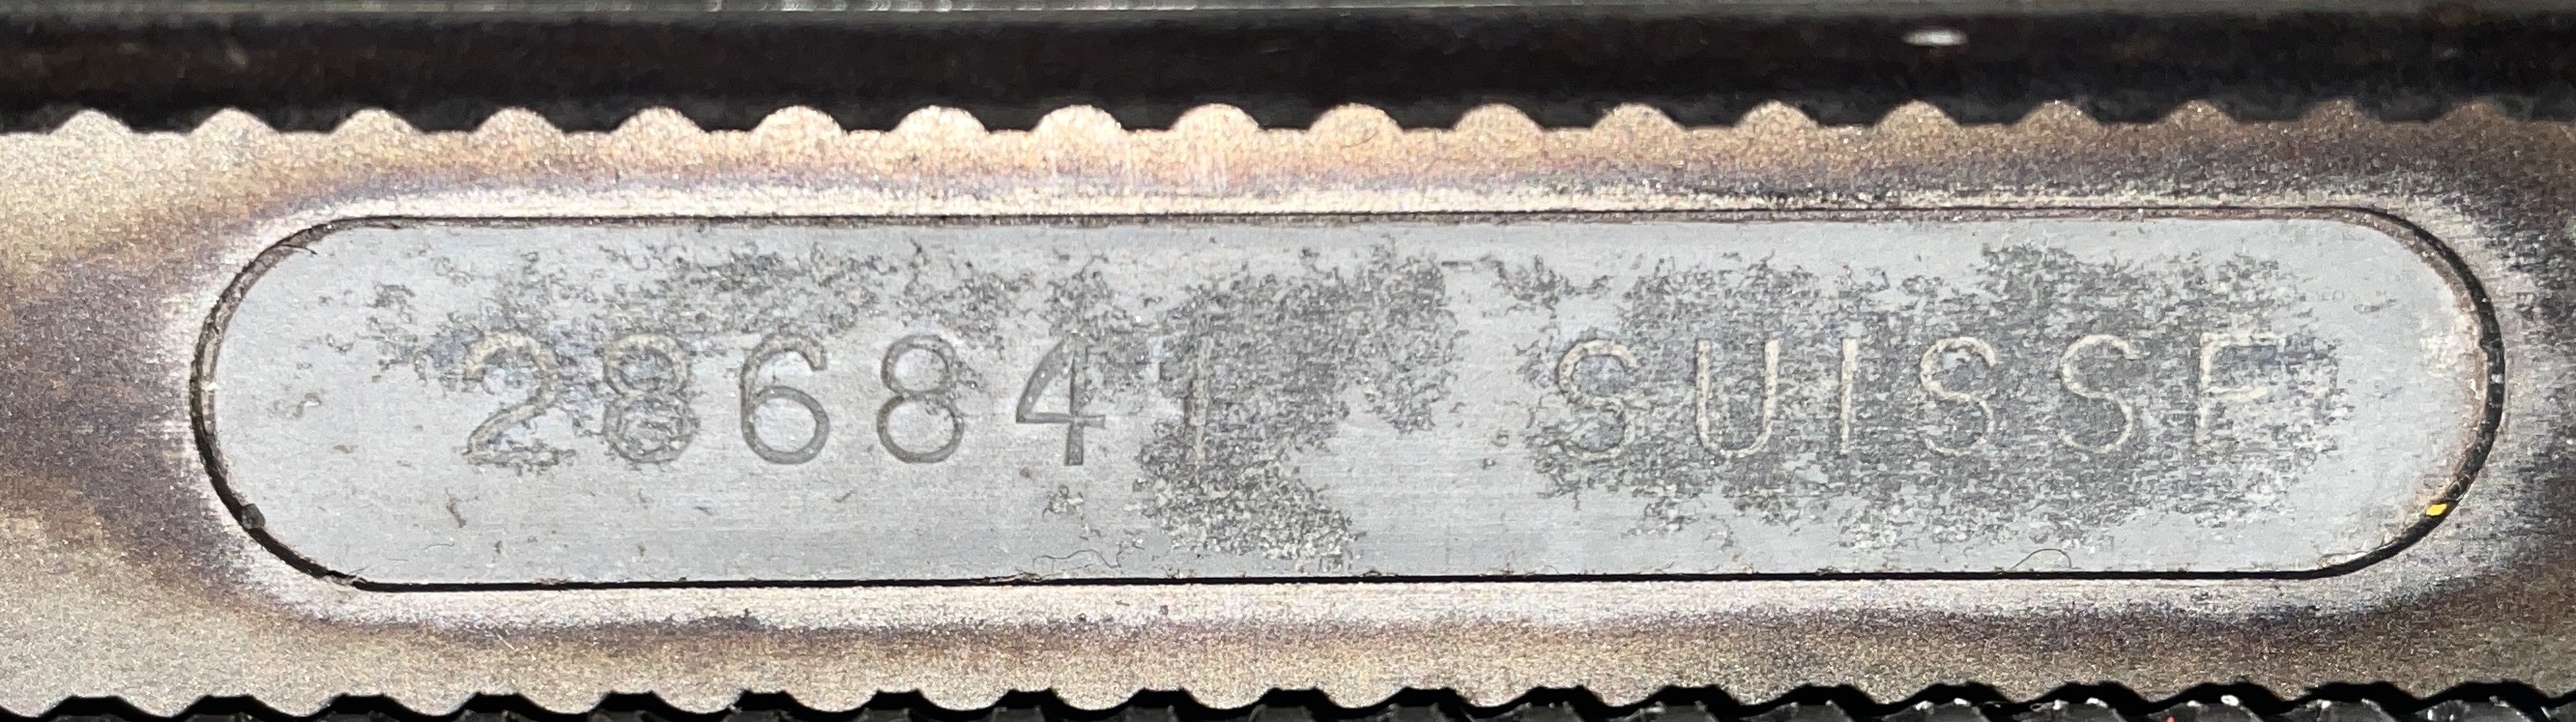
This Hermes Baby is a 1943 by serial number 286,841:
It kind of blows my mind that the Swiss were quietly manufacturing precision typing instruments with lovely marblized shells in 1943 while all of Europe was exploding spectacularly around them. I guess I do the same thing, quietly repairing typewriters and blogging about it while the ‘American Experiment’ explodes in the lab a handful of Metro stops away from me. I tinker, all the while pondering What Would You Do?


“Nobody puts Baby in the corner!” Except that’s exactly what happened once she started showing signs of age. When I found her in the shop, her case was full of dead moths- clearly she had been neglected for some time. I did the usual cleaning and ribbon replacement but didn’t have the confidence (or experience) to tackle repairs. Thank you, Mary, for bringing this Baby back! She types so much better now – no more sloping text. The new carriage return knob is brilliant. This machine is out of the corner and back to doing the work she was meant to do.
LikeLike
The Baby was a pleasure to work on. It was very satisfying to work on little fixes that improved the overall typing. Thank you again for the opportunity.
LikeLike
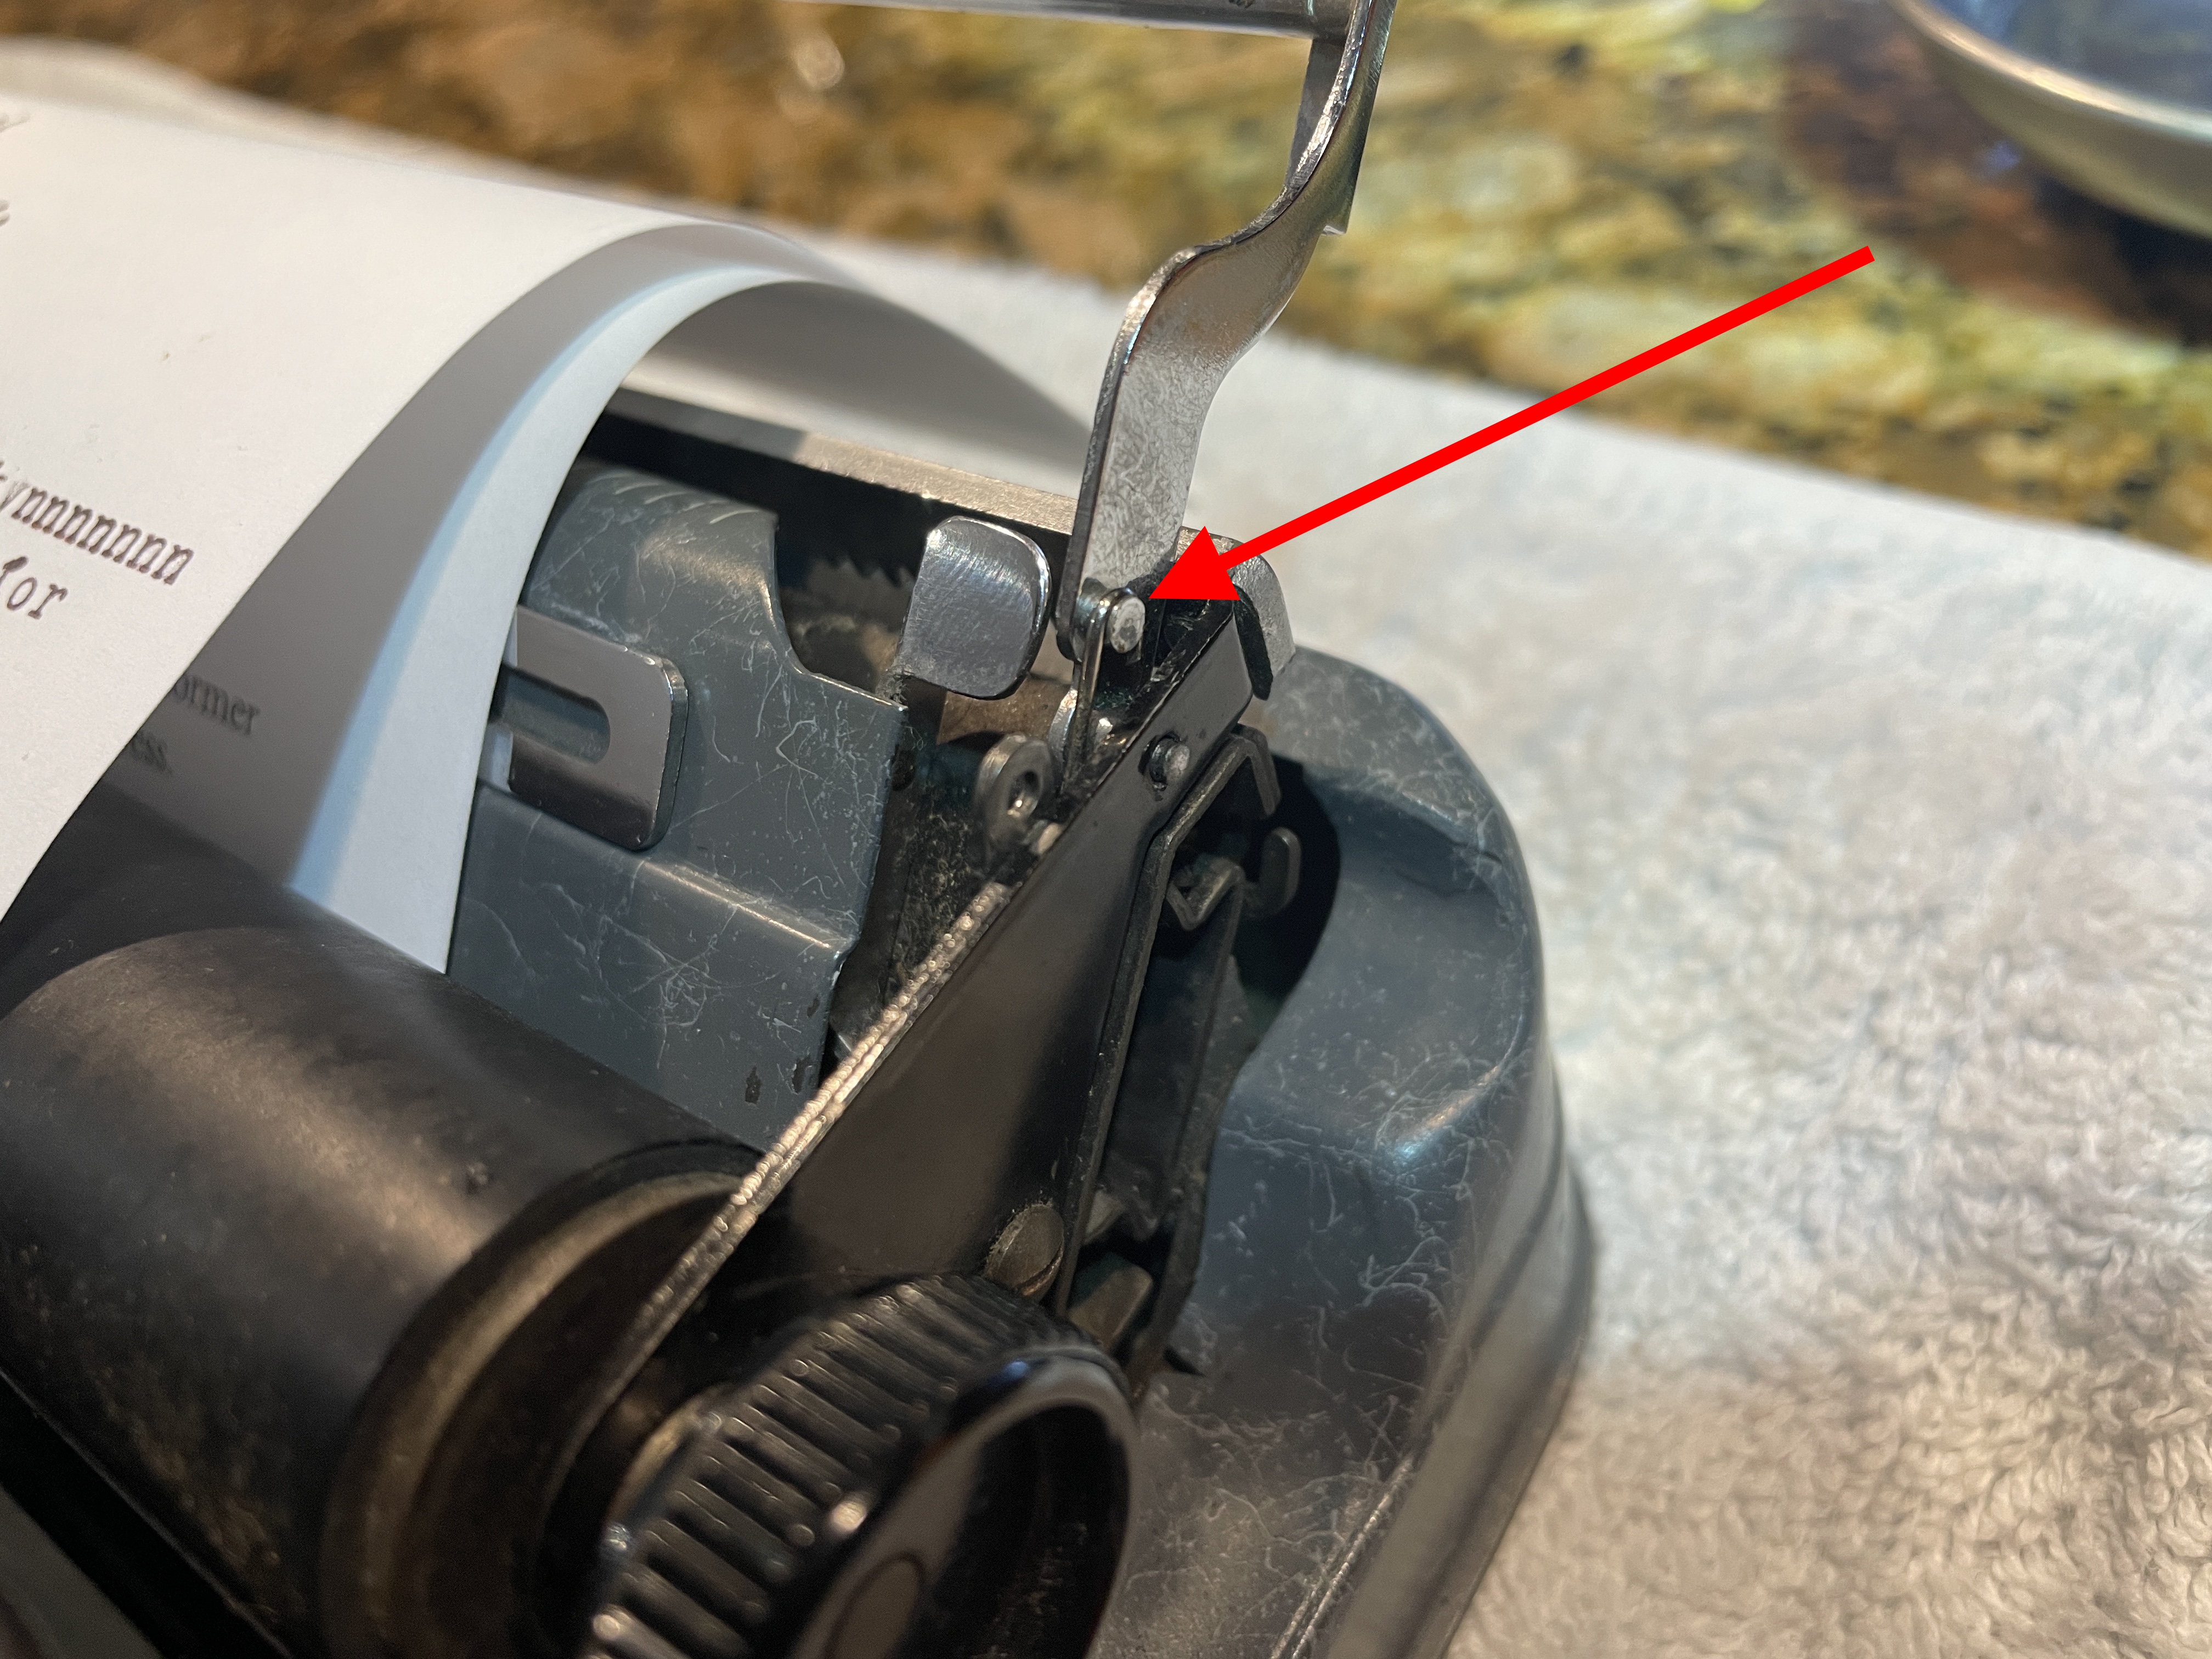
I had picked my Baby up this weekend and saw my flaccid bail. I was panicking, a little, because I thought that I would need a bail spring. It was a great help pointing out how easily the shell can be removed to get at the machine in its naked-ity. Part of it was to look for the spring as you described falling into the bottom. What helped bring me to my senses was your photo and the red arrow. Thats when I saw that the spring was partially down in the recess under the carriage release. That lit the lite-bulb for me to see how the spring end was just below the side plate. Oh, Glory be! So then with my trusty dissecting needle I was able to slip it over the nipple and have spring loaded nirvana. Seriously, your contribution and work really helped bail me out. I have to develop better material but its pure joy that you were there for me. Thanks so much!
LikeLike
That is so GOOD to hear. I keep the blog going because maybe, just maybe, a post or picture will help someone else with a problematic typewriter out there.
LikeLike
Thorough and competent as always! Thanks. I don’t think I’ve ever run across a
Baby with that attractive finish.
LikeLike
That’s saying a lot coming from a man who has seen pretty much everything.
LikeLike
That was a very clever set of fixes! Well done,
LikeLike
Bent line space levers are very common with this model. It is caused by the operator forgetting to fold the line space lever before closing the lid of the snap-over case. Grommets for feet work well, but for the ultimate Hermes Baby foot, use a grommet, then punch a rubber plug out of a piece of sheet rubber with a wad punch and superglue the plug into the centre hole of the grommet. It then looks very much like an original foot. Did you know that a perfect licence-built copy of the Hermes Baby was built in England from 1935 until 1960 as the Empire Aristocrat. Some were even made as the ‘Empire Service Model’ in the first few years of the war. The service model was a very stripped-down version without a line space mechanism. You were expected to roll the paper up to the next line using the platen knob !
LikeLike
I will have to try your rubber plug hack for the Hermes Baby foot – I have sheet rubber, so now I’m researching wad punches.
I’d heard that the Empire Aristocrat is essentially a Hermes Baby, but I had never heard of the “Empire Service Model”. It sounds very stripped-down indeed.
LikeLike
Nice work.
The Typewriter Man already stated the cause of the Baby bent CR levers. At least these bend, Olivetti levers snap off.
Use rubber cement or R7000 if you cement rubber to rubber. Superglue works, but it also hardens, and harsh to rubber.
Ace, TrueValue, and DoIt Best hardware stores often sell rubber for making washers or o-rings that can be cut and used to fill grommets (not the hard vinyl orange product used for belts and gaskets). There is a name for the bulk rubber, it’s like a rod only it is rubber and on spools like rope or string.
If you run into needing many push-in feet similar to what Hermes and many others use McMaster-Carr sells them in various thicknesses and diameters, but you need to buy minimum quantities.
I always wait until I need about $50 worth of hardware from them to make the shipping costs worthwhile.
LikeLike
Thank you for the rubber adhesive tip. I really like your suggestion to use solid rubber cord to fill the grommet holes. I see that I can buy 1/4″ diameter rubber cord which might work with the grommets I have been using on these Hermes ultraportables.
LikeLike
Recently came into ownership of a 1948 Baby which I’m intending to make my daily driver for work (I work for a railway company, and frequently travel up and down the line as part of my day job!).
This is a very useful guide for things to look as I give her a well-deserved refresh and tweak to get her back into fine fettle – as well as your platen refresh piece. I’m hoping to run for a slightly softened platen so I can keep noise levels down for fellow travellers (although I fail to understand how anyone can not love the sound of a typewriter going full pelt…).
LikeLike
Congratulations on your 1948 Baby – it’s a perfect little travel typewriter – a teeny bundle of joy.
For additional reference, you may want buy the The Hermes Baby and Rocket Typewriter Repair Bible:
https://twdb.sellfy.store/p/vlog/
It’s available in pdf format for immediate download.
In addition, you may want to join the Antique Typewriter Maintenance Group on Facebook:
https://www.facebook.com/groups/typewritermaintenance/
You’ll find a lot of very helpful people there.
Regarding platen refreshing, I’ve used layers of polyolefin heat shrink to recover platens that are severely damaged (eg holes and chunks missing). The polyolefin creates a very firm surface for good imprint. It isn’t soft and it’s not very quiet.
LikeLiked by 1 person
Hi Mary,
It is with great interest and pleasure that I am reading your blog. I was directed here by Suzanne, with whom I had some typewriter repair interactions a while back. My interest lies mostly in the Hermes Baby—specifically the HD-1 model (1946–53)—and I would like to share some of my experiences with you.
So far, I have had nine “babies” of that vintage—some in good condition, others not so good. All required some work. I now have four left: two working great, and two in pieces, waiting for reassembly. I sacrificed a donor machine to reconfigure one with a European AZERTY keyboard into a QWERTY layout. It was surprisingly easy.
I have to say that I consider myself a novice when it comes to typewriter repairs, doing what I can without specialized tools and using all the great online resources I can find. I have worked on various machines (Olivettis, Olympias, Hermes 2K and 3K, and more) with varying degrees of success, but working on a Hermes Baby was—and still is—challenging, to put it mildly. The online manual I purchased is a great resource, but it covers the 1954 (HD-2) model onward. I managed to find a factory repair manual for the HD-1 online, but only in French. Fortunately, that’s not an issue for me, as French is my mother tongue.
The manual advises you not to remove the carriage rails, as reassembling the bearings is quite challenging. (No kidding!) It also warns that when reinstalling the paper pan (deflector) assembly, you will be greatly helped by using tool OH 229 to compress the two springs. It even states that the tool will be provided on request. Great service back then! Proper type alignment deserves special mention—not only for the micro-adjustments required, but also for the placement of those four screws next to the frame and carriage shift assembly. There’s good reason they were relocated to a more accessible area in the HD-2 machines.
I have a love-hate relationship with the early Hermes Baby (I briefly had a later model with the plastic top but didn’t like it and subsequently sold it), but when everything is working well, it’s a great machine to type on—snappy, precise, and responsive. I love the look (gull wings!), the size, and the feel of it. I hope you agree.
LikeLike
Hello Alain,
I agree with you:a Baby/Rocket in good working condition is the perfect traveling typewriter: nimble and lightweight. My only reservation is that carriage return arm. It is (to me) awkwardly small and so easily damaged. However, that is outweighed by the high quality typing experience and classy styling. They really do look fantastic. I am partial to the seafoam green ones.
There were a couple intriguing things in your comment. First off: nine “babies”!! It sounds like your experience with these machines is considerable. I have experience with only this 1943 Baby and a 1957 Rocket
https://myoldtypewriter.com/2025/05/09/mother-and-daughter-hermes-2000-and-hermes-rocket/
Per the HD-2 repair manual I have, working on the carriage and paper pan assembly sounds very challenging. I am glad I dodged those bullets.
You wrote about the HD-1 (1946-1953) and HD-2 (1954-) and now I am curious about the differences between the models. You mentioned a French language repair manual for the HD-1 that you found online. Could you send a link? I have family members who could help me translate and it would be a very valuable resource.
LikeLike
Nine “babies”!! It sounds like your experience with these machines is considerable.
Ten if you count an Empire Aristocrat I had. Very good Baby clone machine.
Working on the carriage and paper pan assembly sounds very challenging. I am glad I dodged those bullets.
You can add to the list removing the bearings from the carriage. If you can avoid it definitely avoid these two procedures. Not for the faint of heart.
I am curious about the differences between the models.
I’m not certain about all the differences between the two but positioning the type adjustment screws (No more nuts) facing up was a huge improvement. Easier to get at.
You mentioned a French language repair manual for the HD-1 that you found online
I got the french repair manual from Jacques Perrier’s web site https://machineaecrire.ch/atelier/#atelier .Jacques runs the Hermes typewriter museum in Lausanne Switzerland. He’s the go to guy for everything Hermes. His site is loaded with very useful info.
here’s the link for the repair manual:
Click to access baby_35_1940.pdf
note: The manual starts at page 4. that’s not an error.
LikeLike
Thank you so much for pointing me to Jacques Perrier’s site. I was able to download the Baby repair manual,
but unable to open it. I’ll try a couple more computers/browsers here and if unsuccessful in opening the pdf, I may reach out to Jacques Perrier. I spoke too soon. I was able download the file and open it on my phone.LikeLike
sounds like a software issue.
LikeLike
I have a Hermes Baby but not in that attractive finish. Mine has a Swiss keyboard and the dull grey. I also have a post WW2 Empire Aristocrat which is the British version made under licence. Made with cheaper materials as well. The case is steel whereas the Baby is a non magnetic alloy.
Useful article here from the ever informative Robert Messenger: https://oztypewriter.blogspot.com/2014/07/the-story-of-typewriter-company.html
LikeLike
Thank you for the link to the fascinating Robert Messenger article about Empire Typewriters – really enjoyed that.
LikeLike
Your blog is one of my favourites on any subject.
My Empire Aristocrat was my Dad’s. A graduation present to himself in the late 1940s I suspect. The case does have some rust and the felt needs replacing following a sustained attack by moths. His grandchildren also left their mark.
LikeLiked by 1 person
I have one of the Empire Aristocrat clones in the hammered steel finish. I think it looks good, and definitely is unique in my collection (I haven’t seen another typewriter anywhere finished like that, actually). But I think my favorite thing about it is the old school British dealer label from Savitt’s Office Equipment Ltd, with two London locations listed.
LikeLike