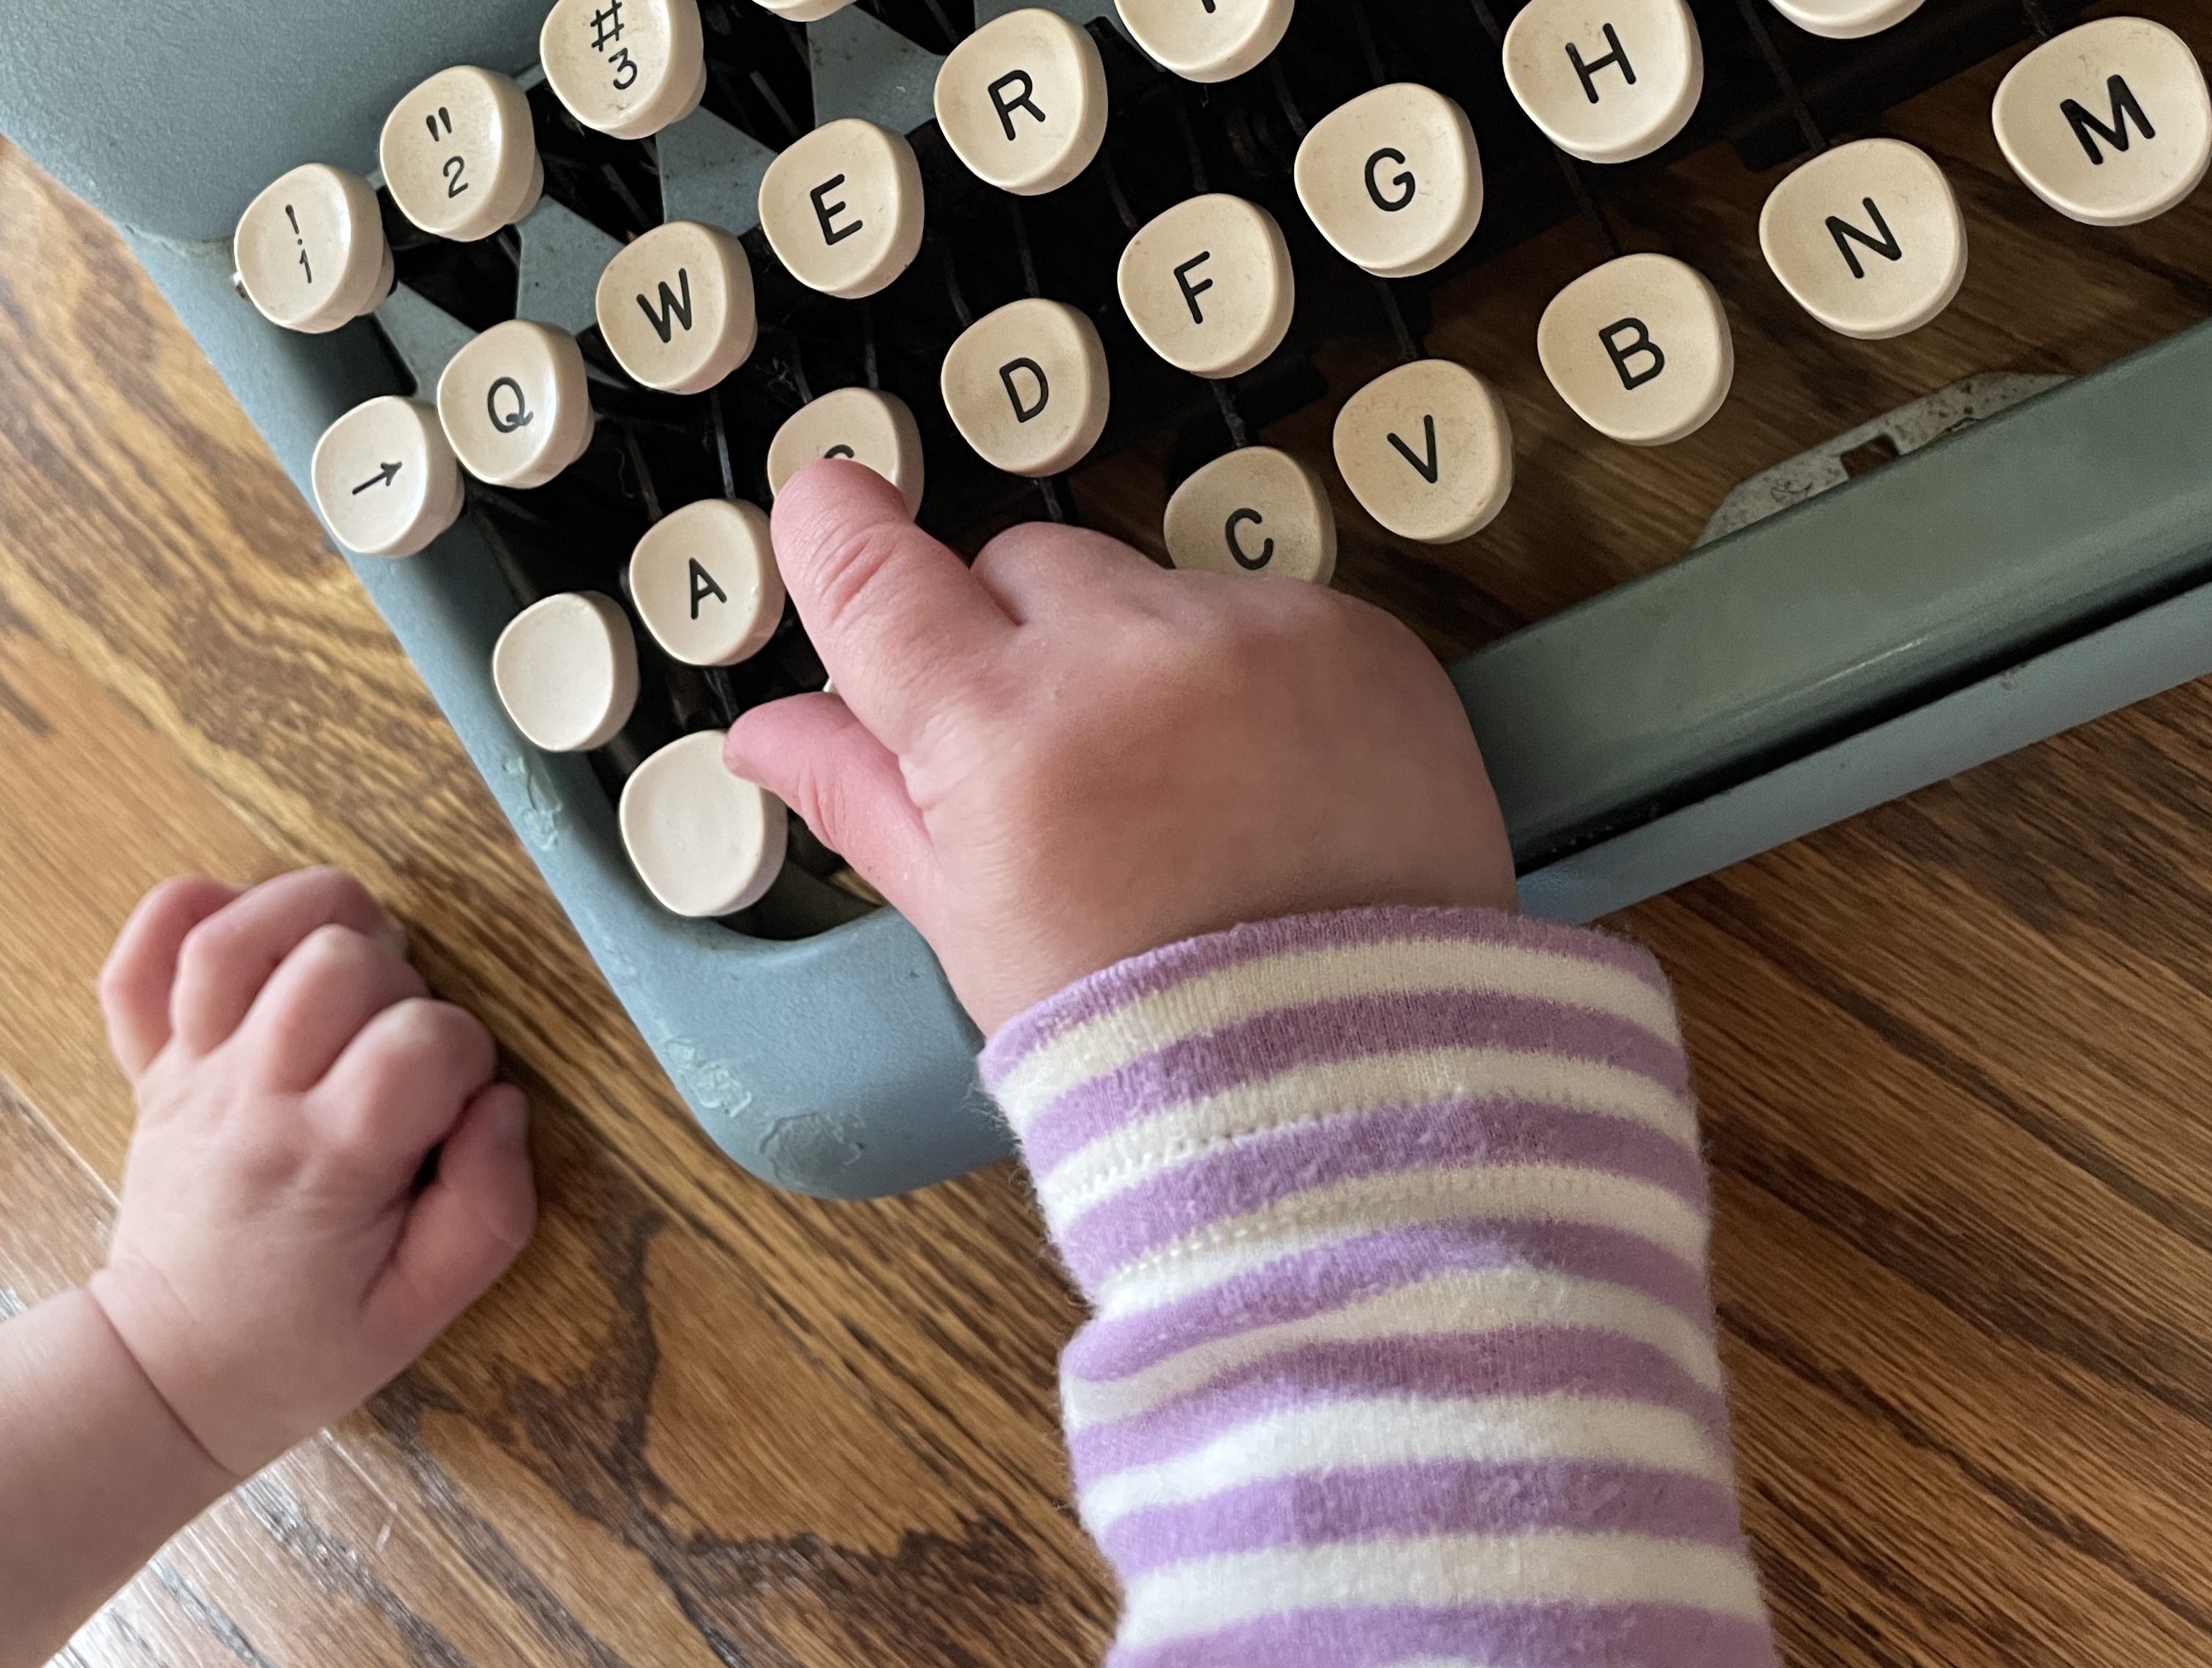
Since my son and daughter-in-law have moved closer to me, I have been busy in Grandma Land chasing a newly-walking terror intent on finding the most fragile, most dangerous items to crush or mouth.
Two of the first concepts to which I introduced my kids and now my grandson are hot-hot and soft-soft. Hot-hot means don’t touch the stove (or barbecue or iron or candle, etc). Soft-soft means be careful, this thing is old/delicate/precious. You can look and maybe touch with ONE finger. This year, the Christmas tree with all its glass ornaments was soft-soft intensive.
Hot-hot and soft-soft are guidance for children as well as pro tips for adult life: lots of things out there can burn you and you can burn lots of things.
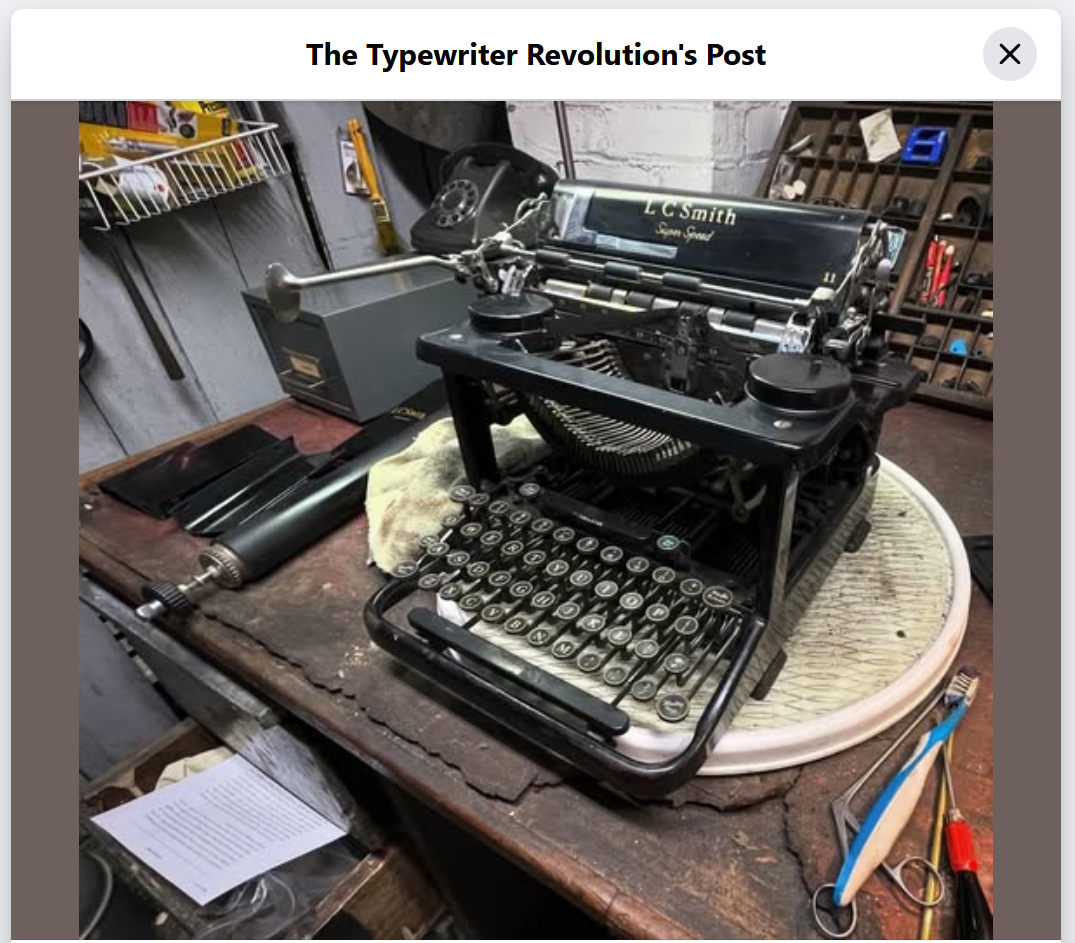
Many typewriters require a soft-soft, one-finger approach, especially ones that have great personal meaning to the owner. I generally work on anonymous orphans and low-stakes junkers, but every once in a while, I cross paths with a typewriter of great sentimental value.
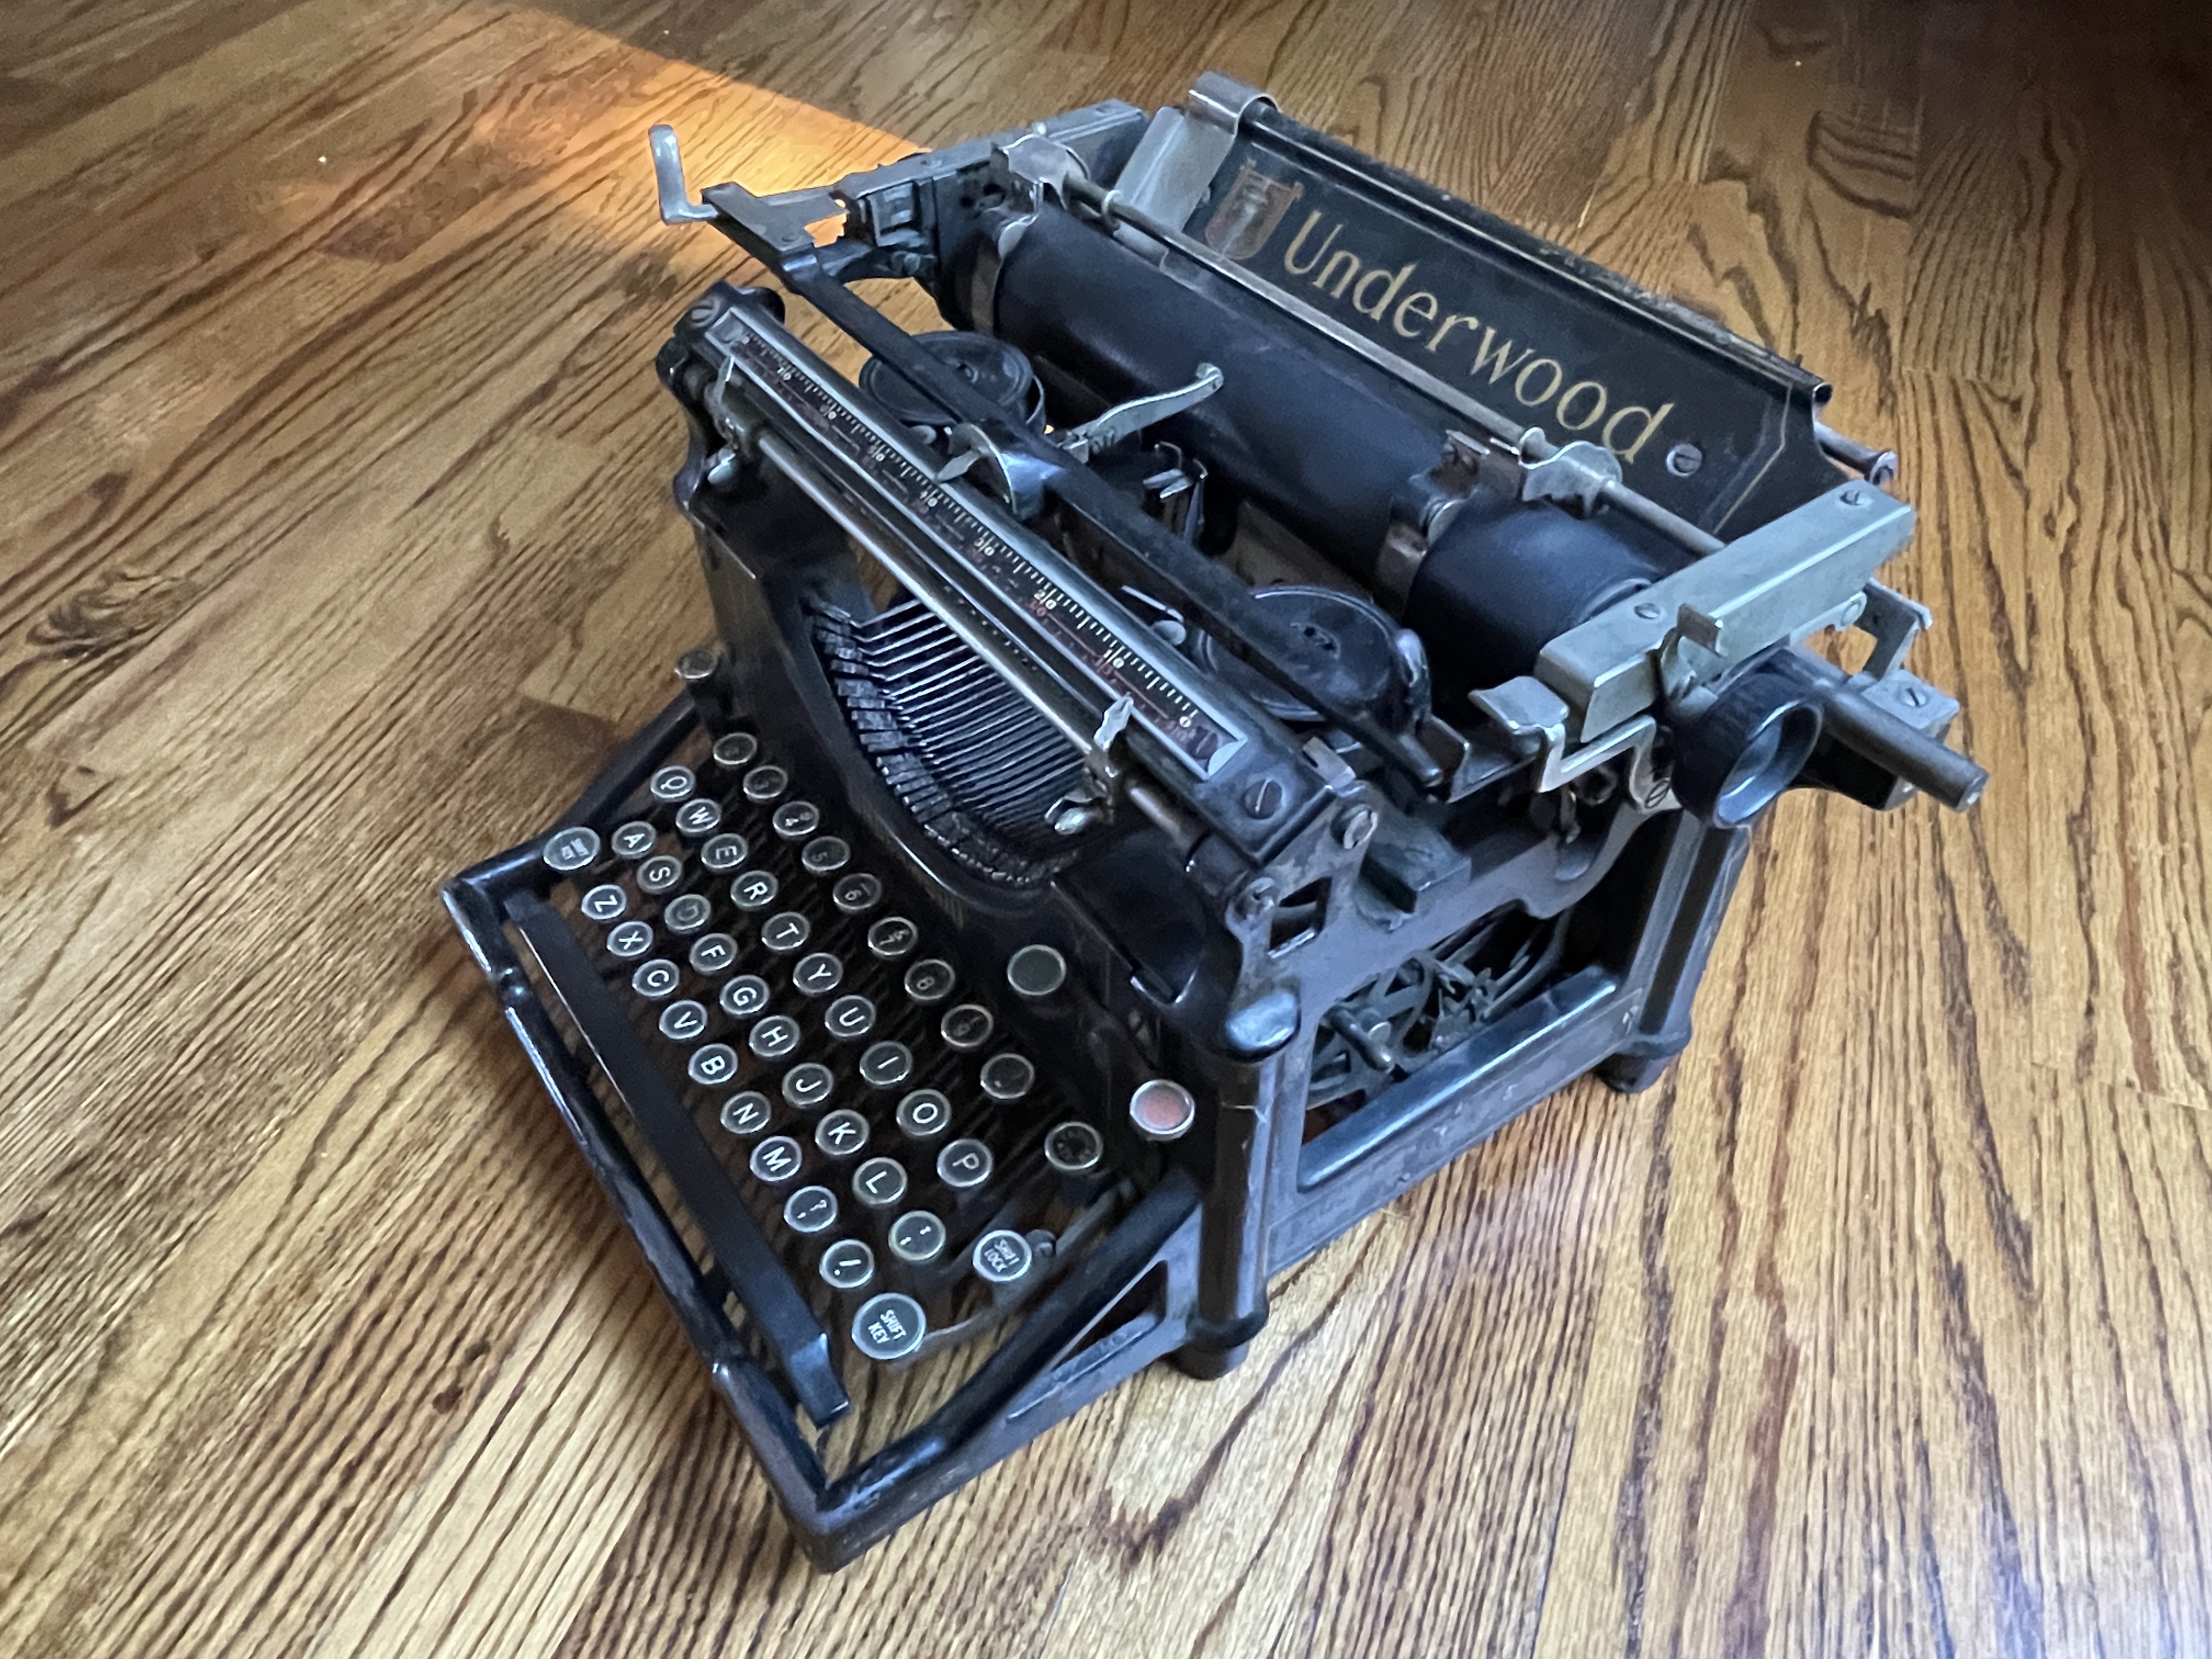
At a recent DC-area type-in, I met an enthusiast named Rick Z. and got into a conversation with him about his grandfather’s Underwood 4.
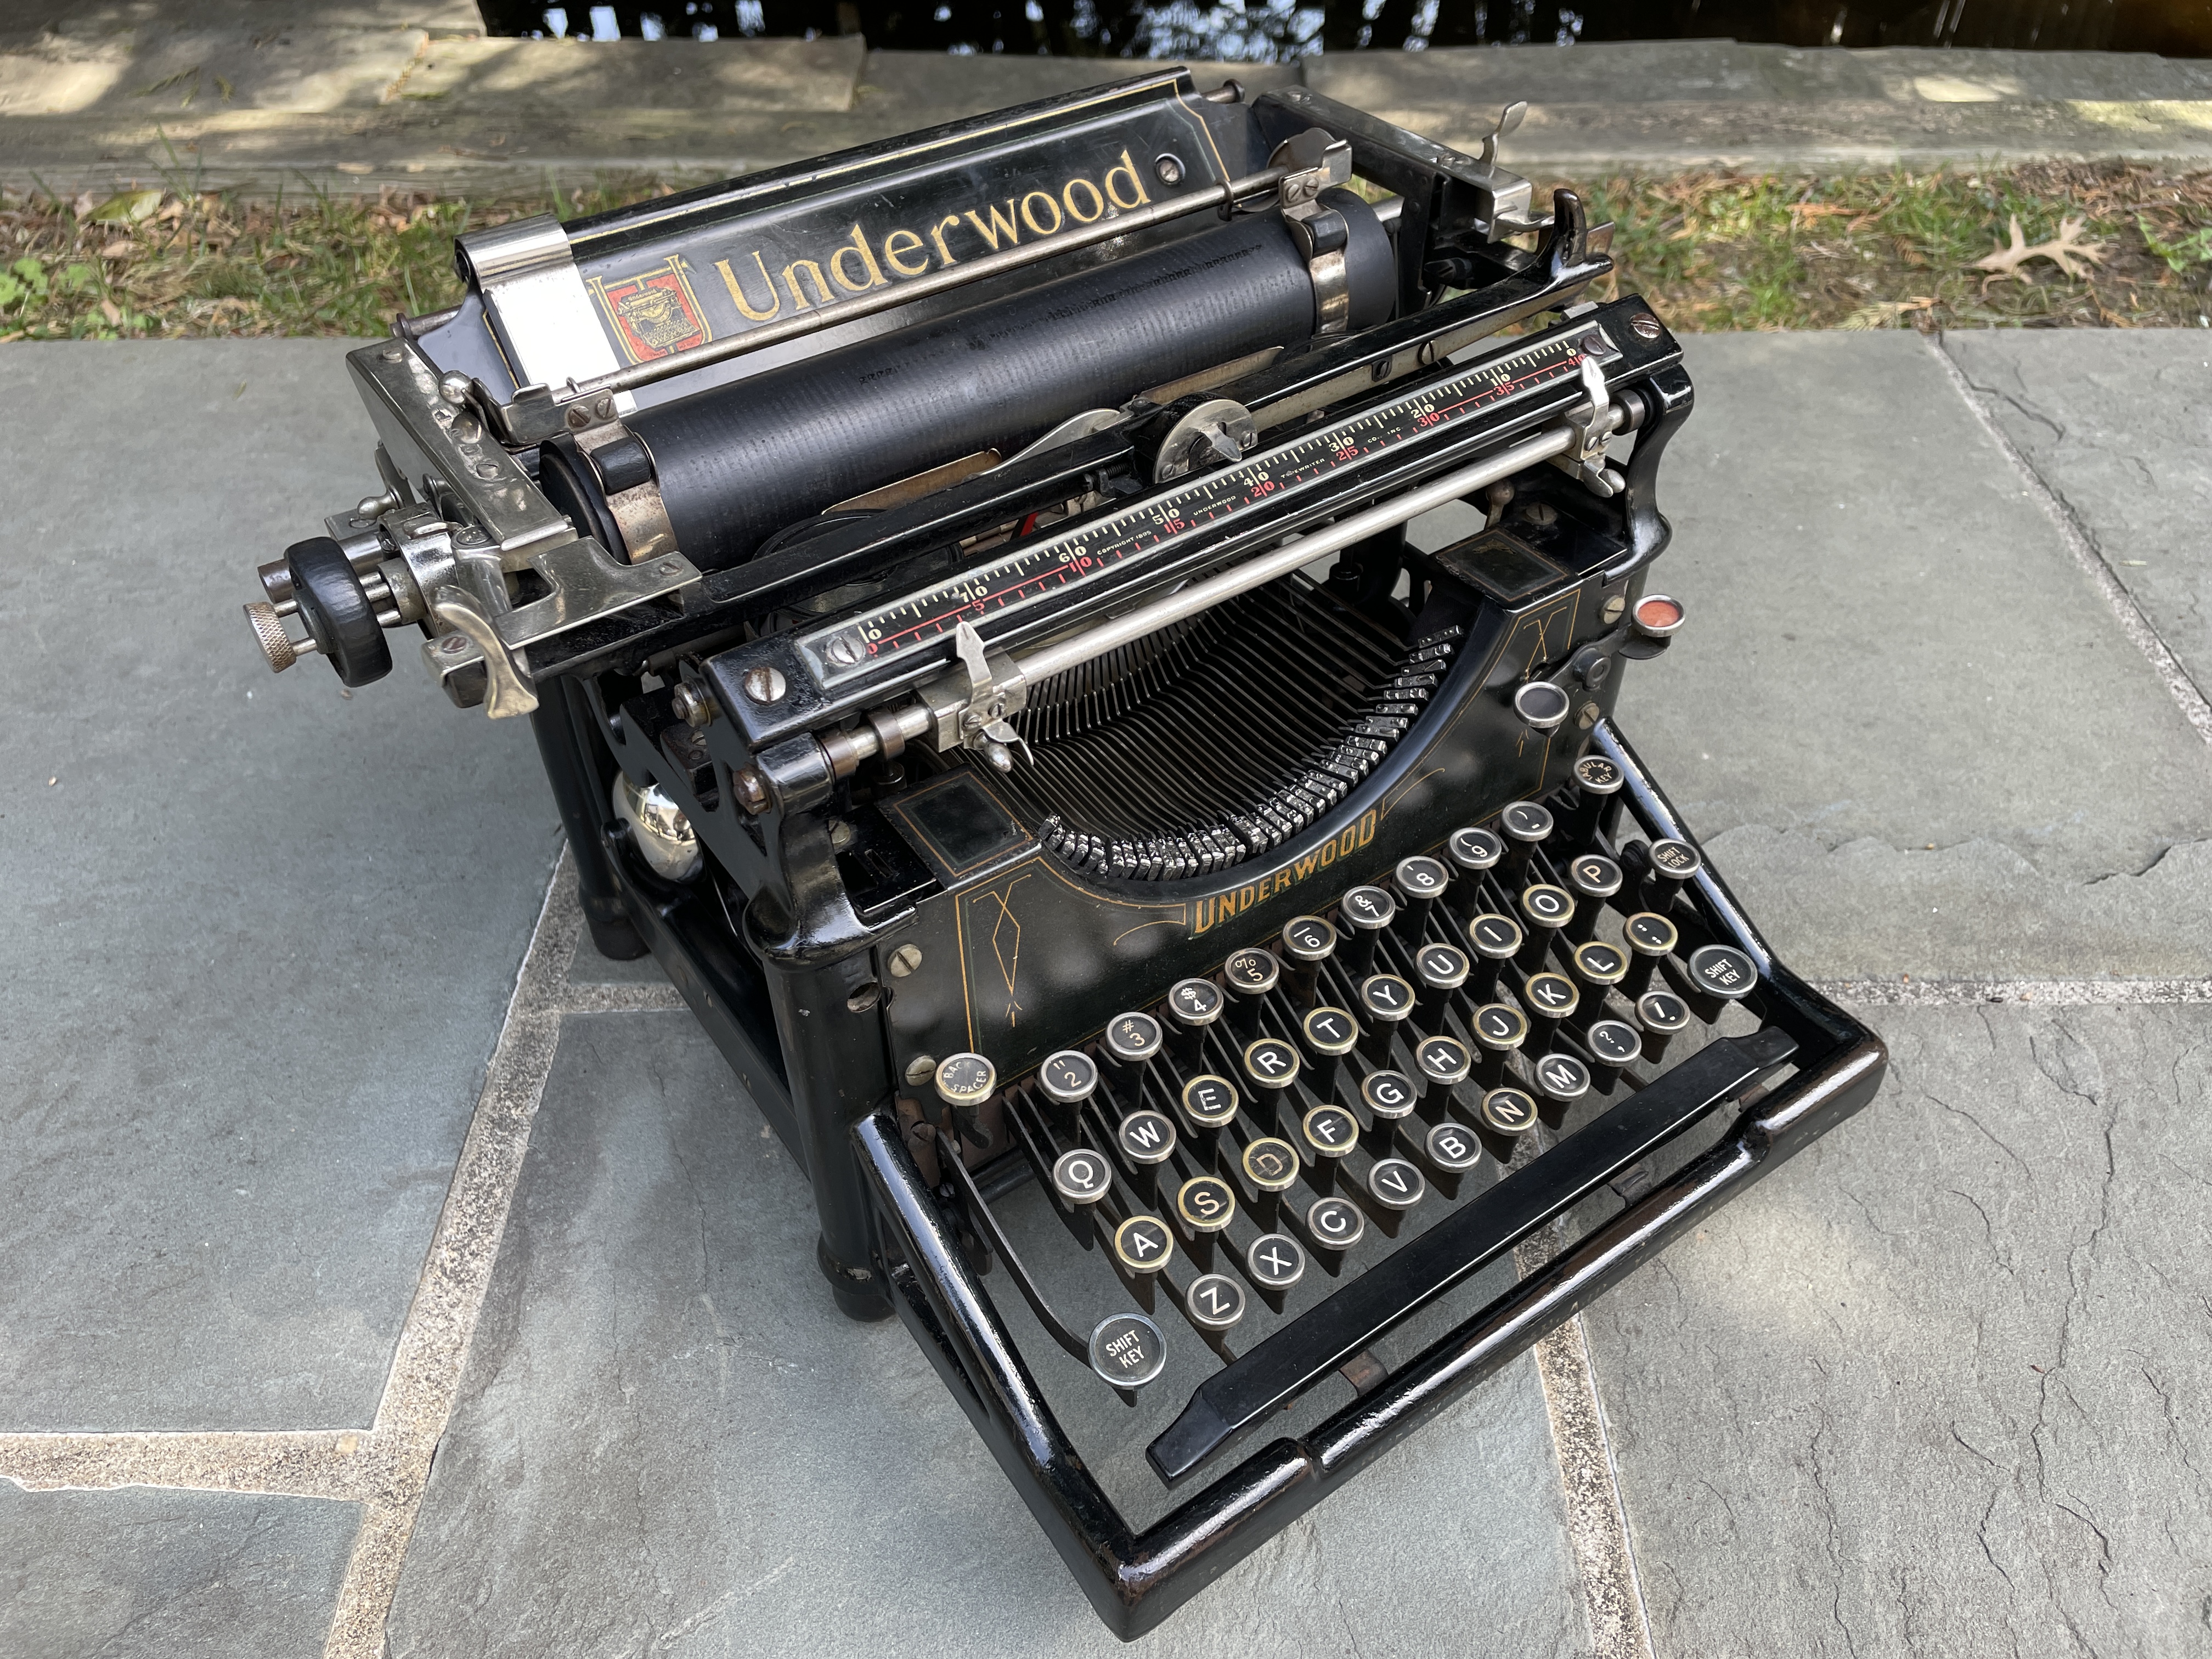
It’s rare that you get the backstory on a typewriter, but this Underwood 4 has been in the same family for over a hundred years. Rick asked me if I could clean it up and try to get it running again. Of course I said yes, and he brought it over.
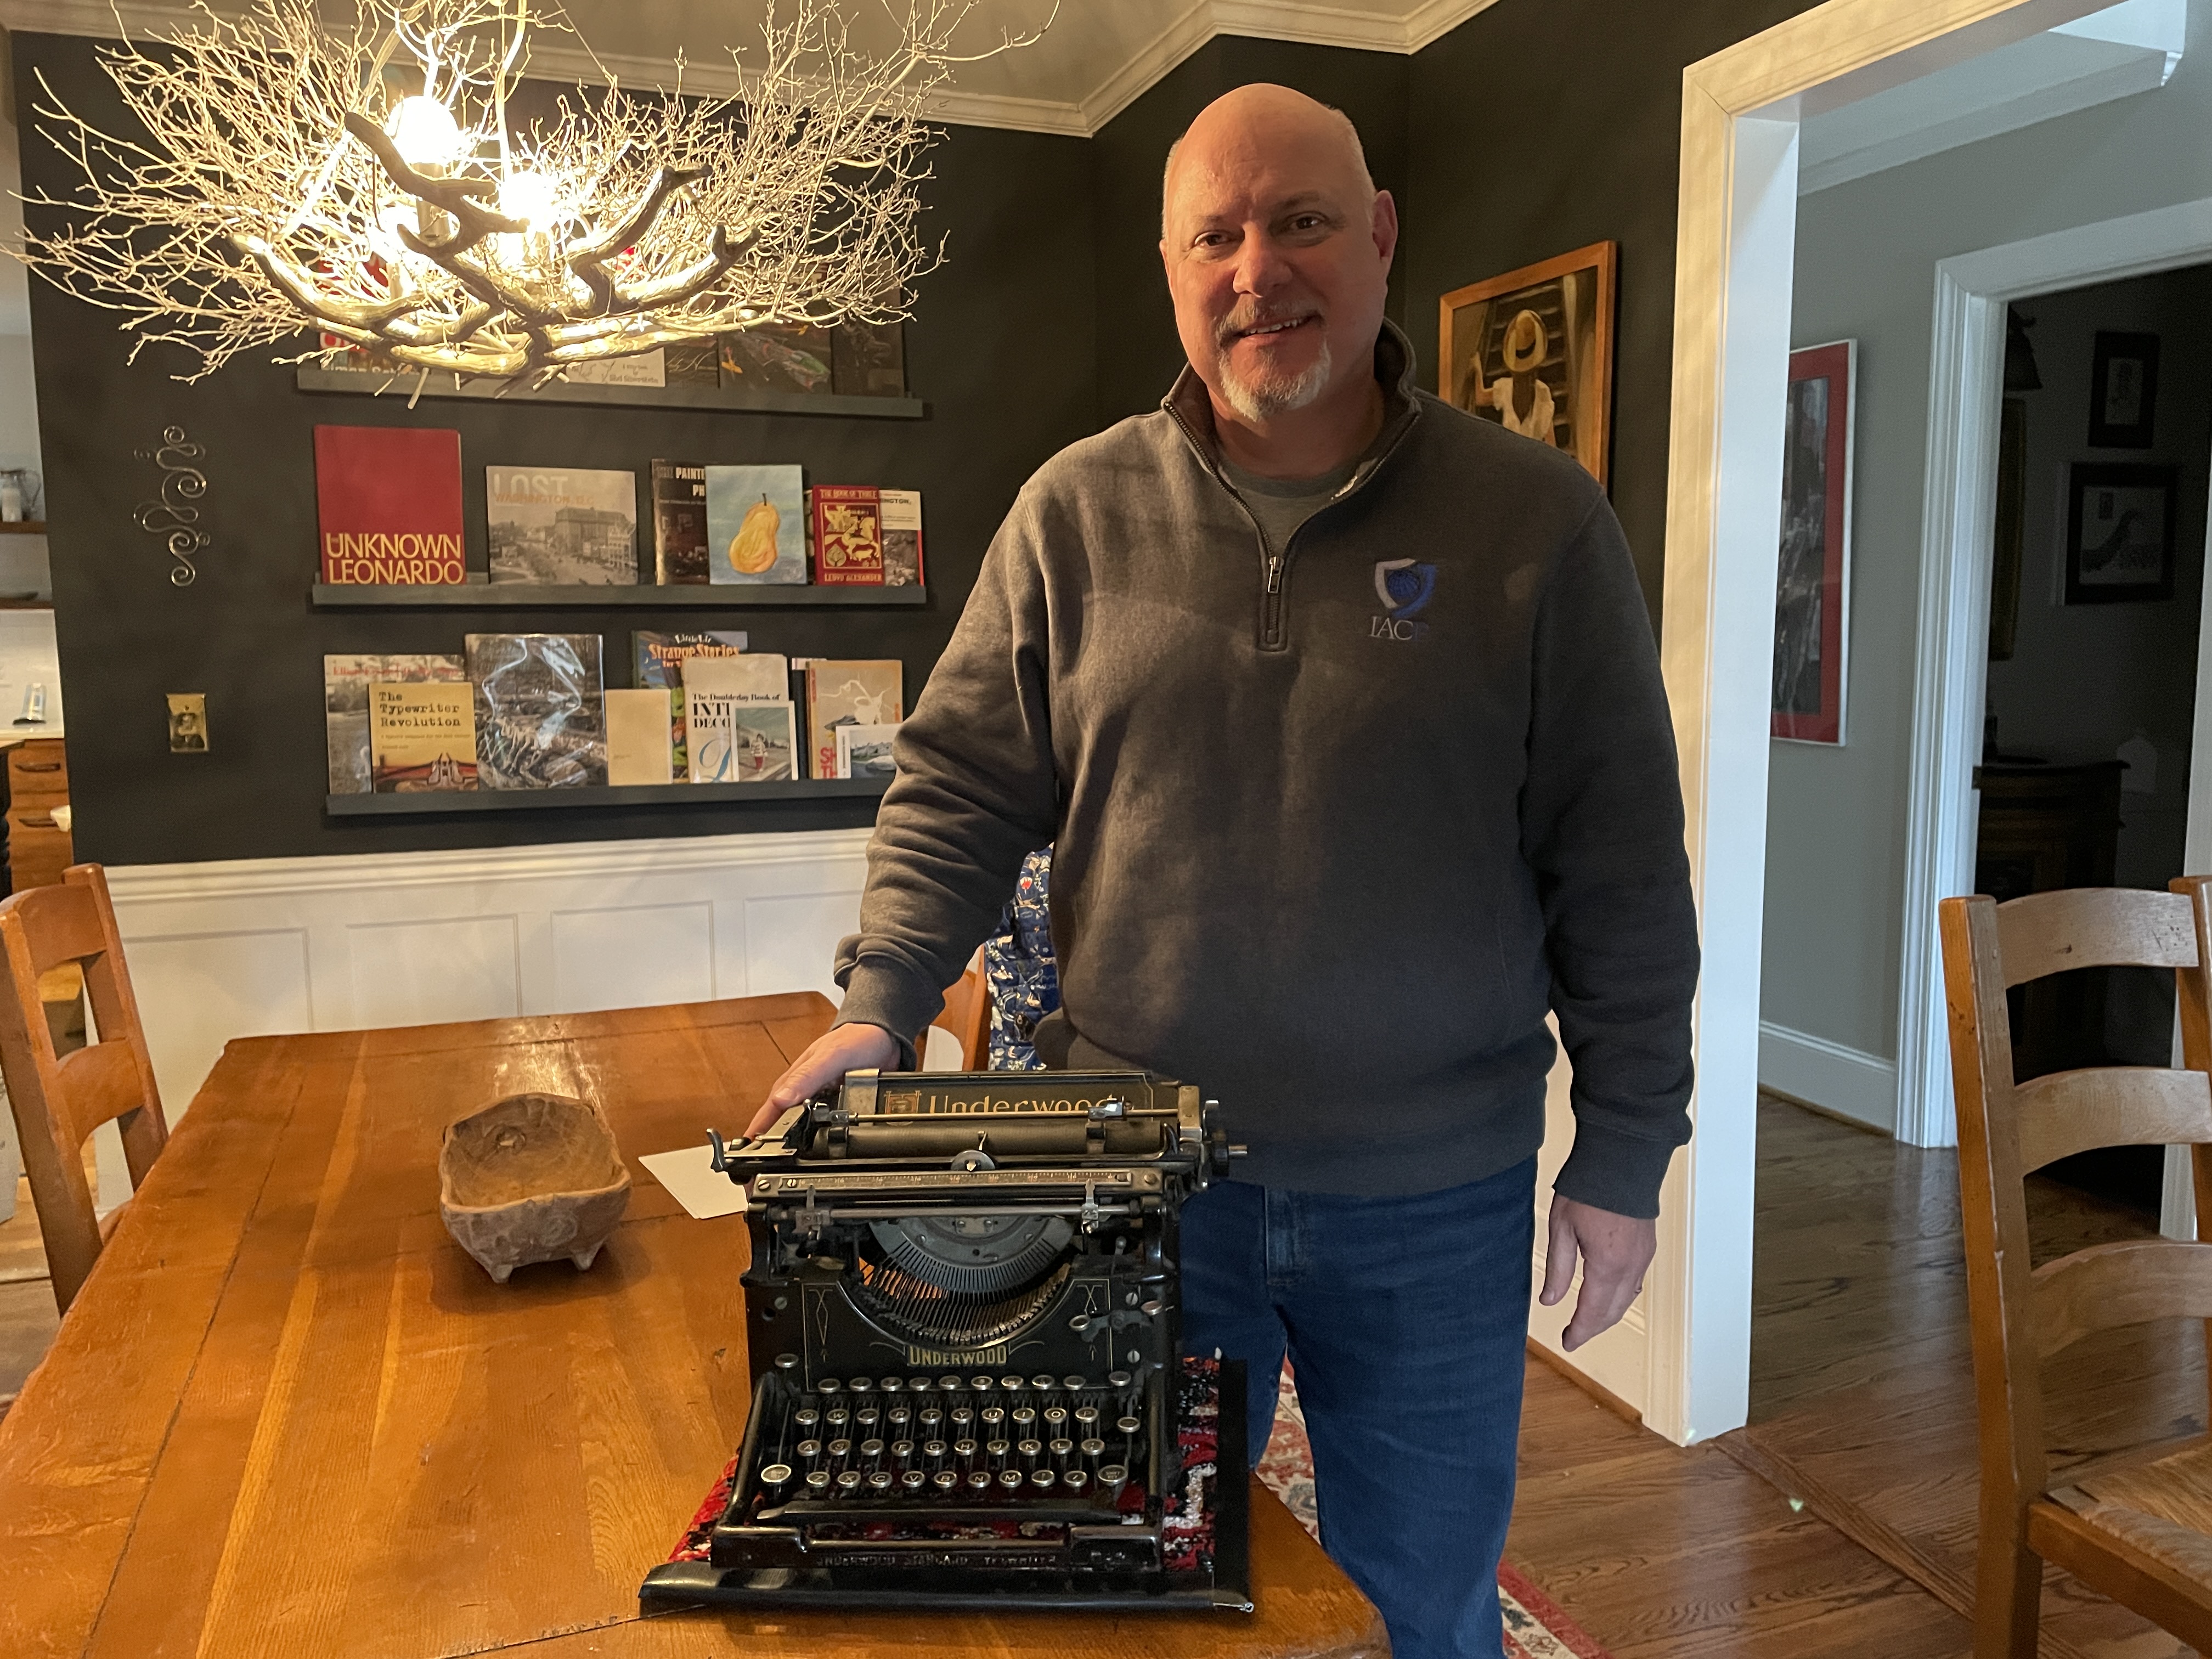
Rick’s grandfather George Z. was a combat engineer during WWI. He bought the typewriter secondhand and used it for business correspondence. Rick has childhood memories of playing on the old Underwood.
The photo below shows George Z. in 1917 before his unit, the 108th Engineer Regiment of the 33rd Infantry Division, left for France to fight in World War I. He’s 23 years old.
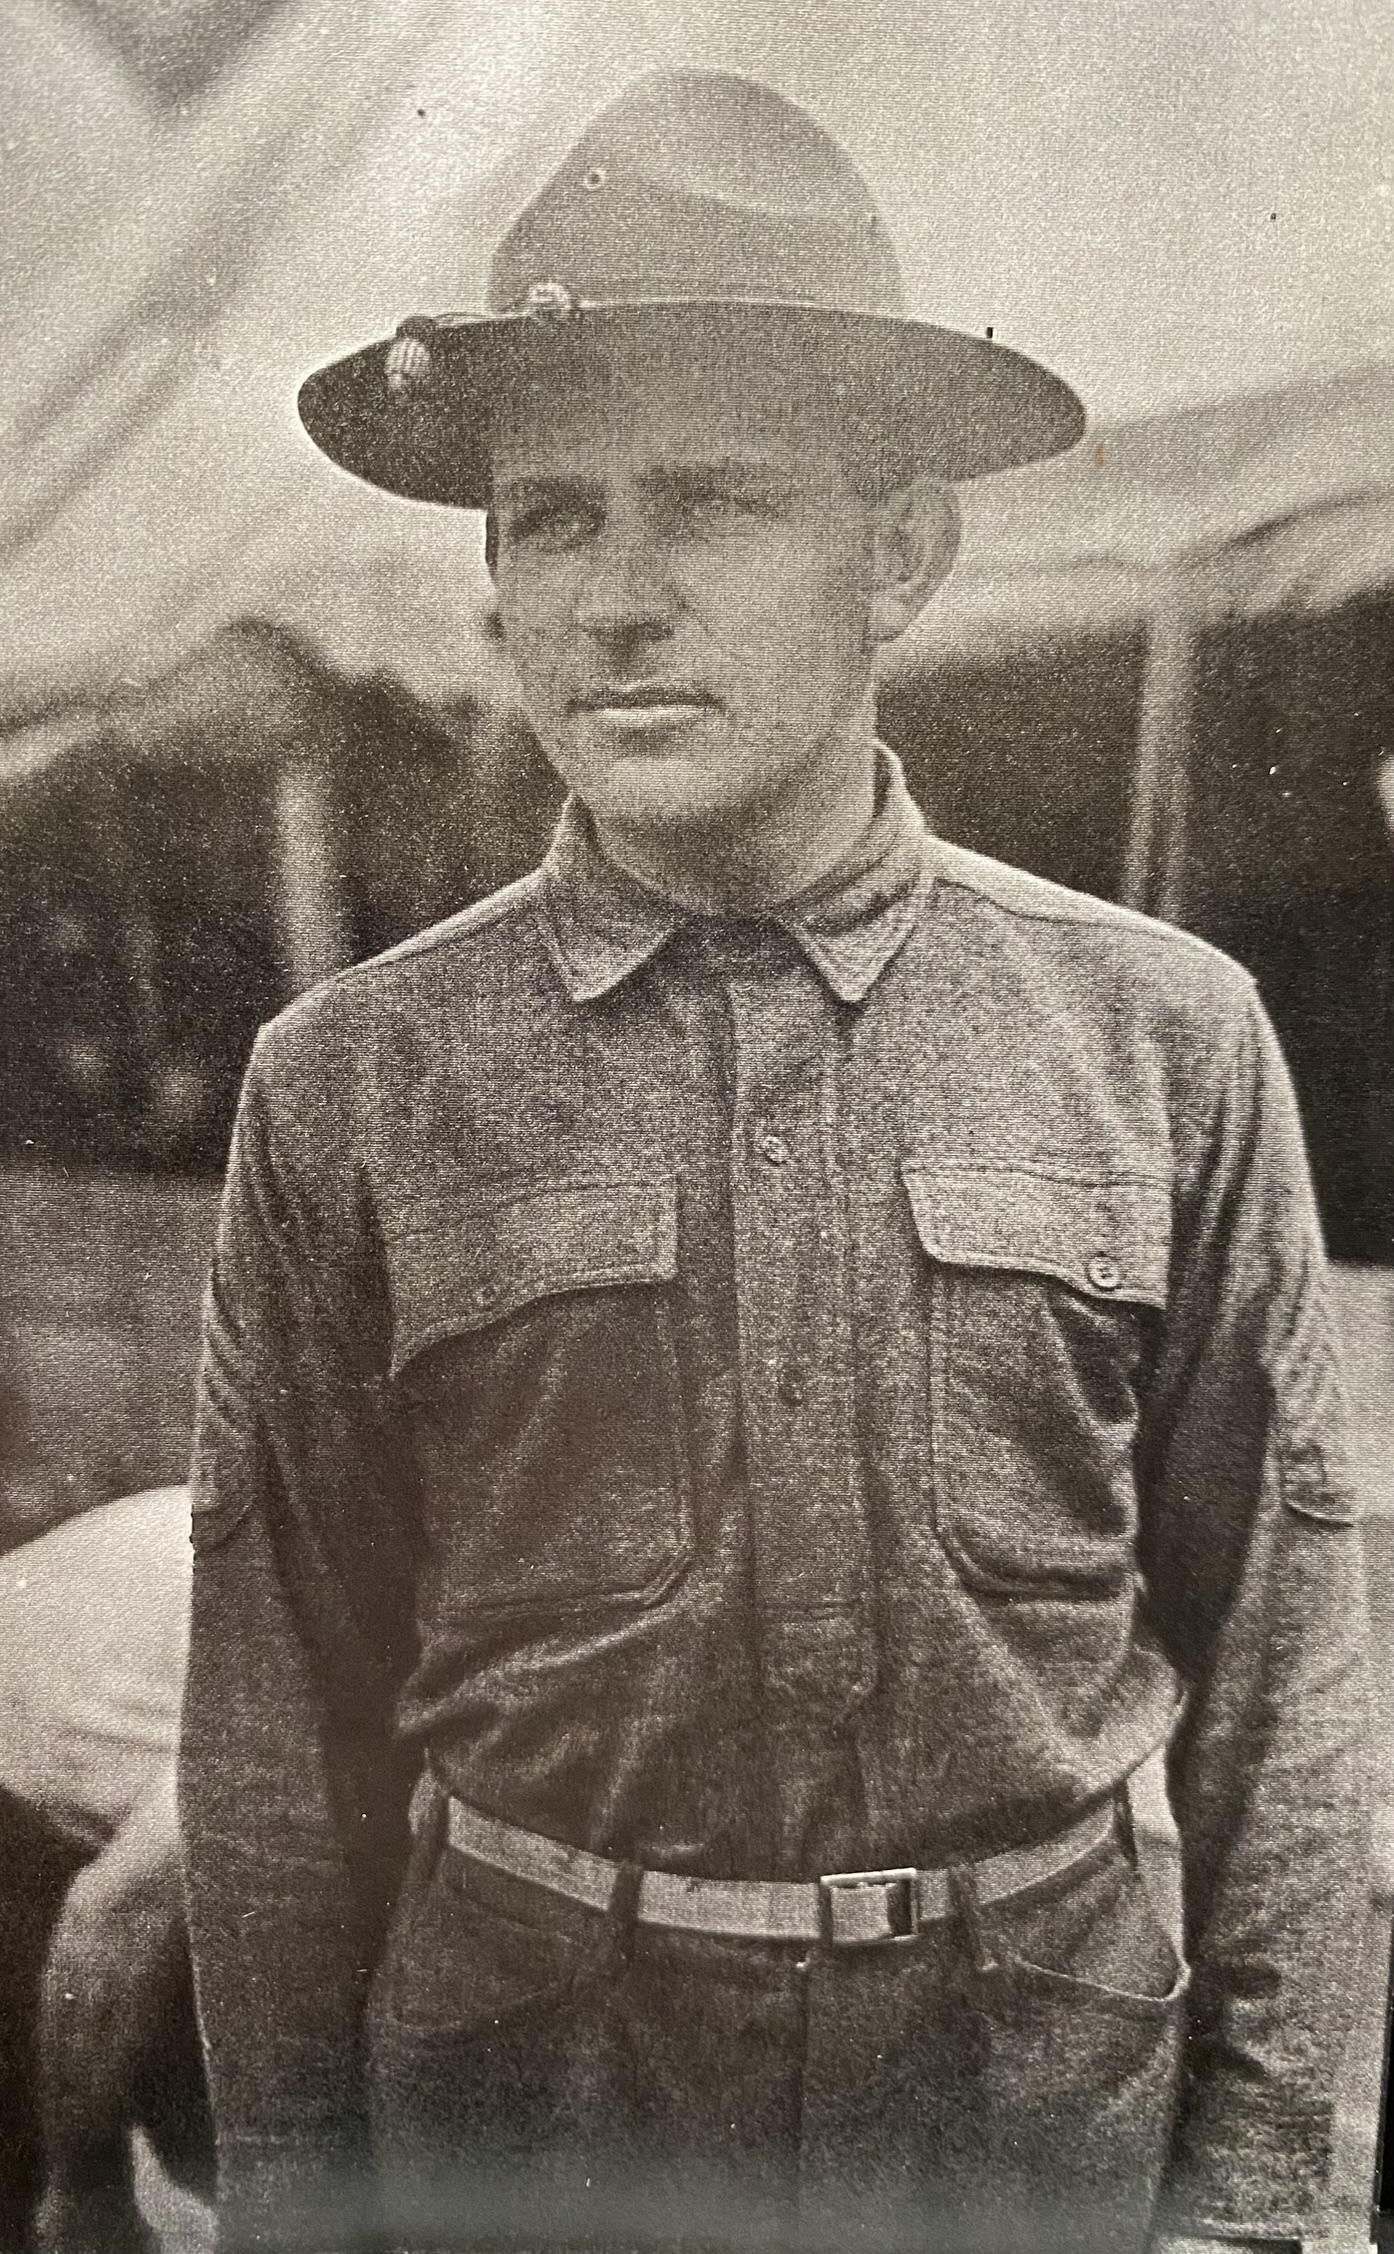
George Z., 1917
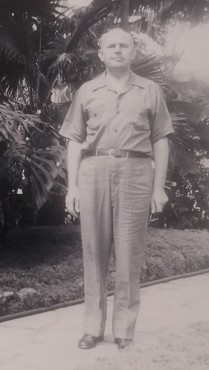
After his return from the war he worked for a number of construction companies as a civil engineer, purchasing this used 1917 Underwood 4 sometime in the 1920’s. He later started his own one-person civil engineering firm and the photo below shows him in 1941 when he would have used this typewriter regularly.
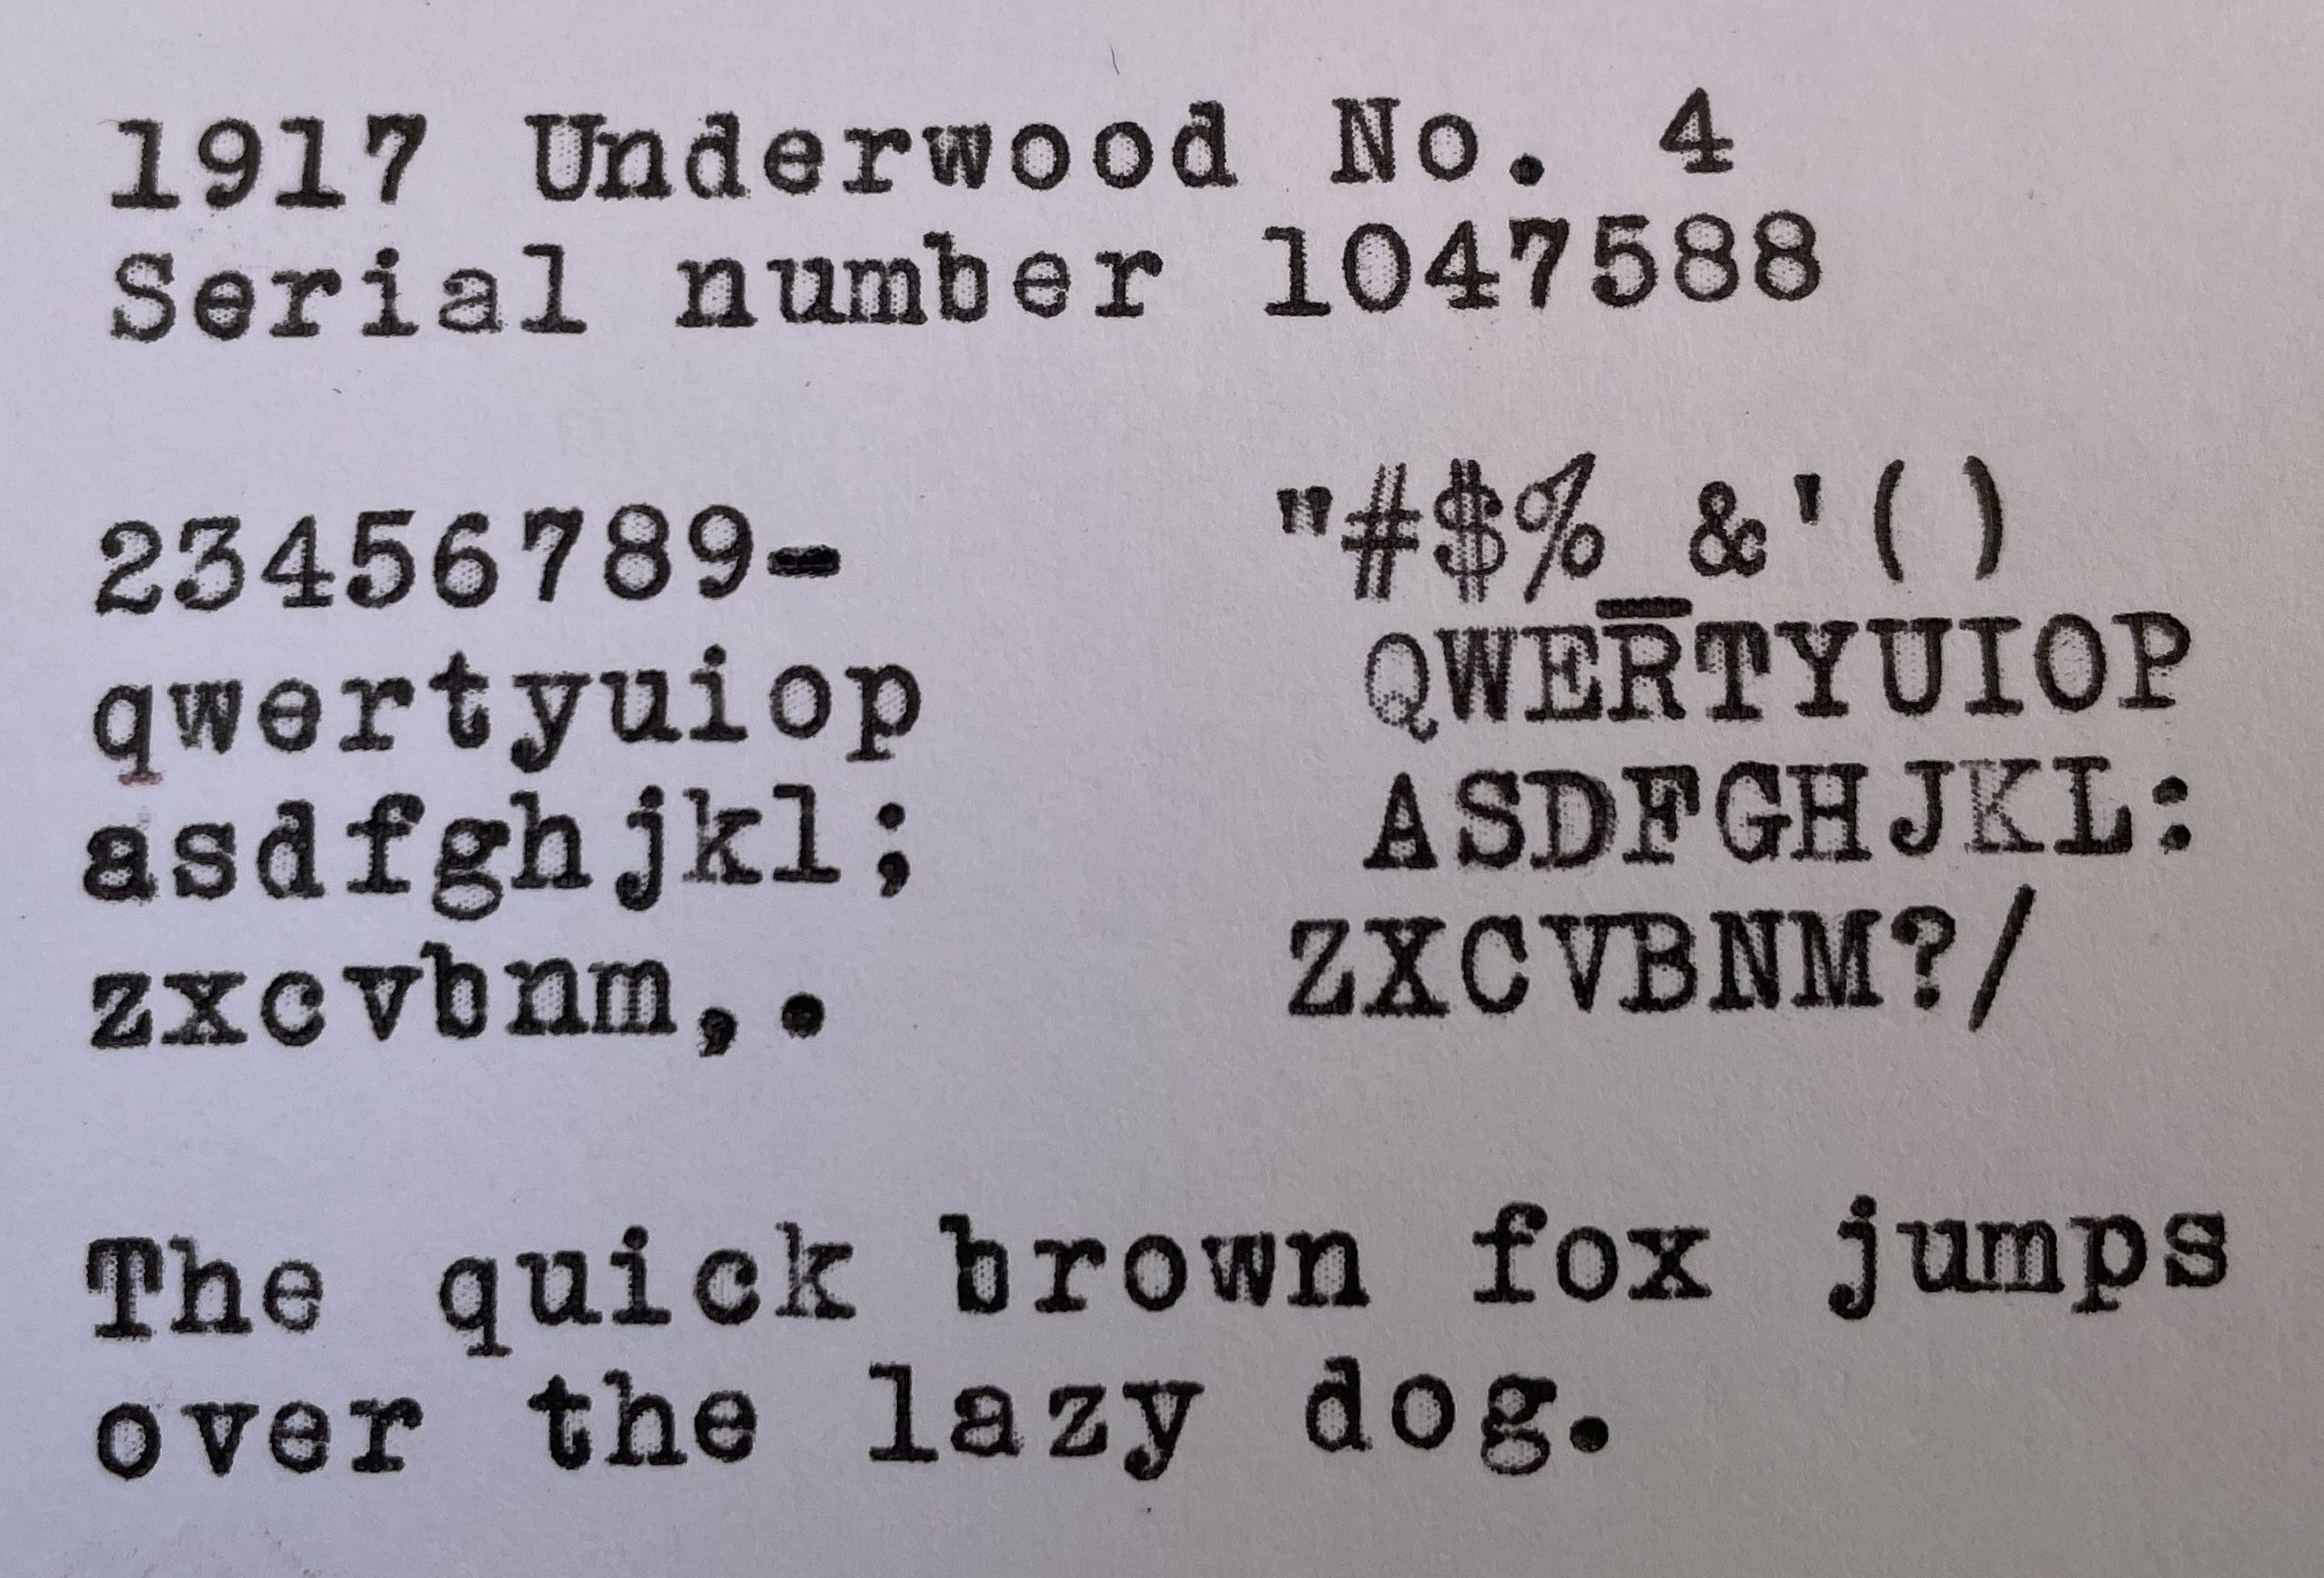
George Z.’s Underwood 4 is from November of 1917 per Typewriter Database.
Serial Number 1047588

While researching Underwood 4s for this project, I came upon this typewriter at Typewriter Database:
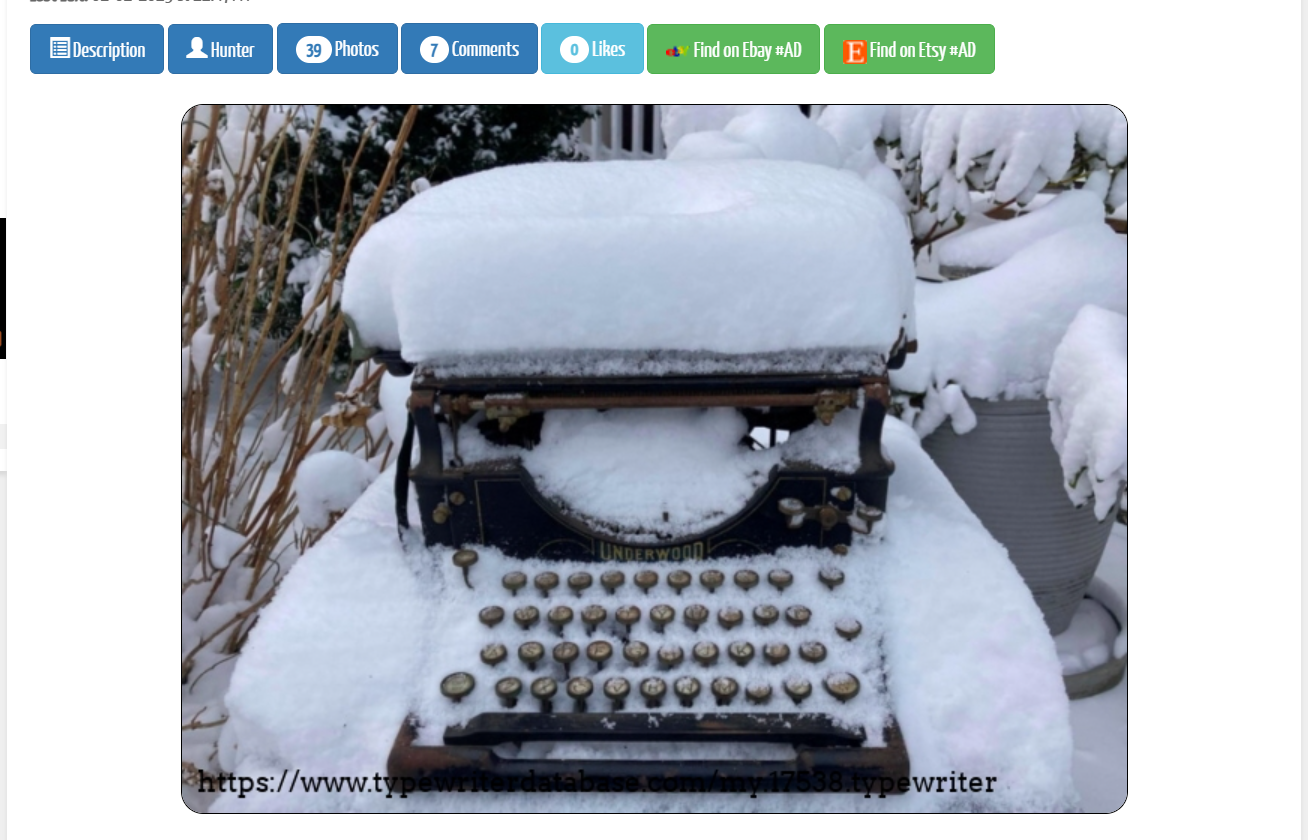
The story of this snowbound typewriter is good: the collector had reluctantly brought it home as a parts machine and it became a snow gauge. It weathered some very snowy winter weather; and two years later, its owner decided to clean it up. Guess what? It typed. This story is a testament to the mechanical durability of these old Underwood standards.
Though mechanically hardy, these old typewriters often come to me in a cosmetically battered condition with stripped decals and layers of rust and corrosion. Many look like DePiglio, the Underwood 5.
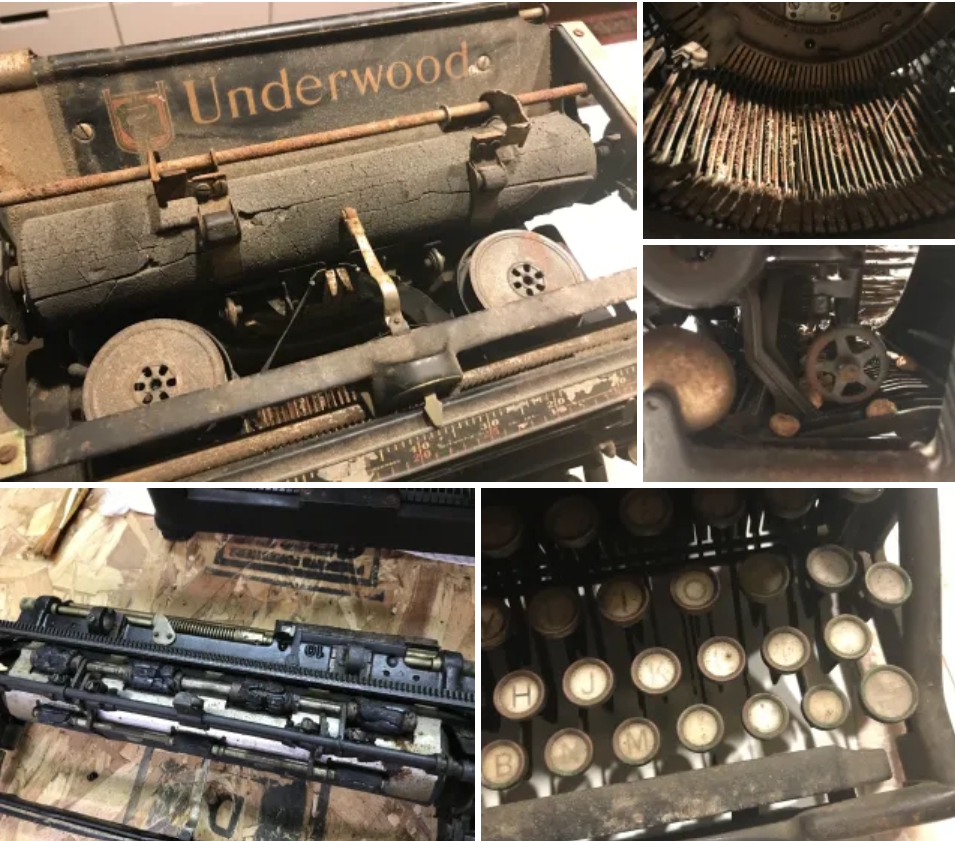
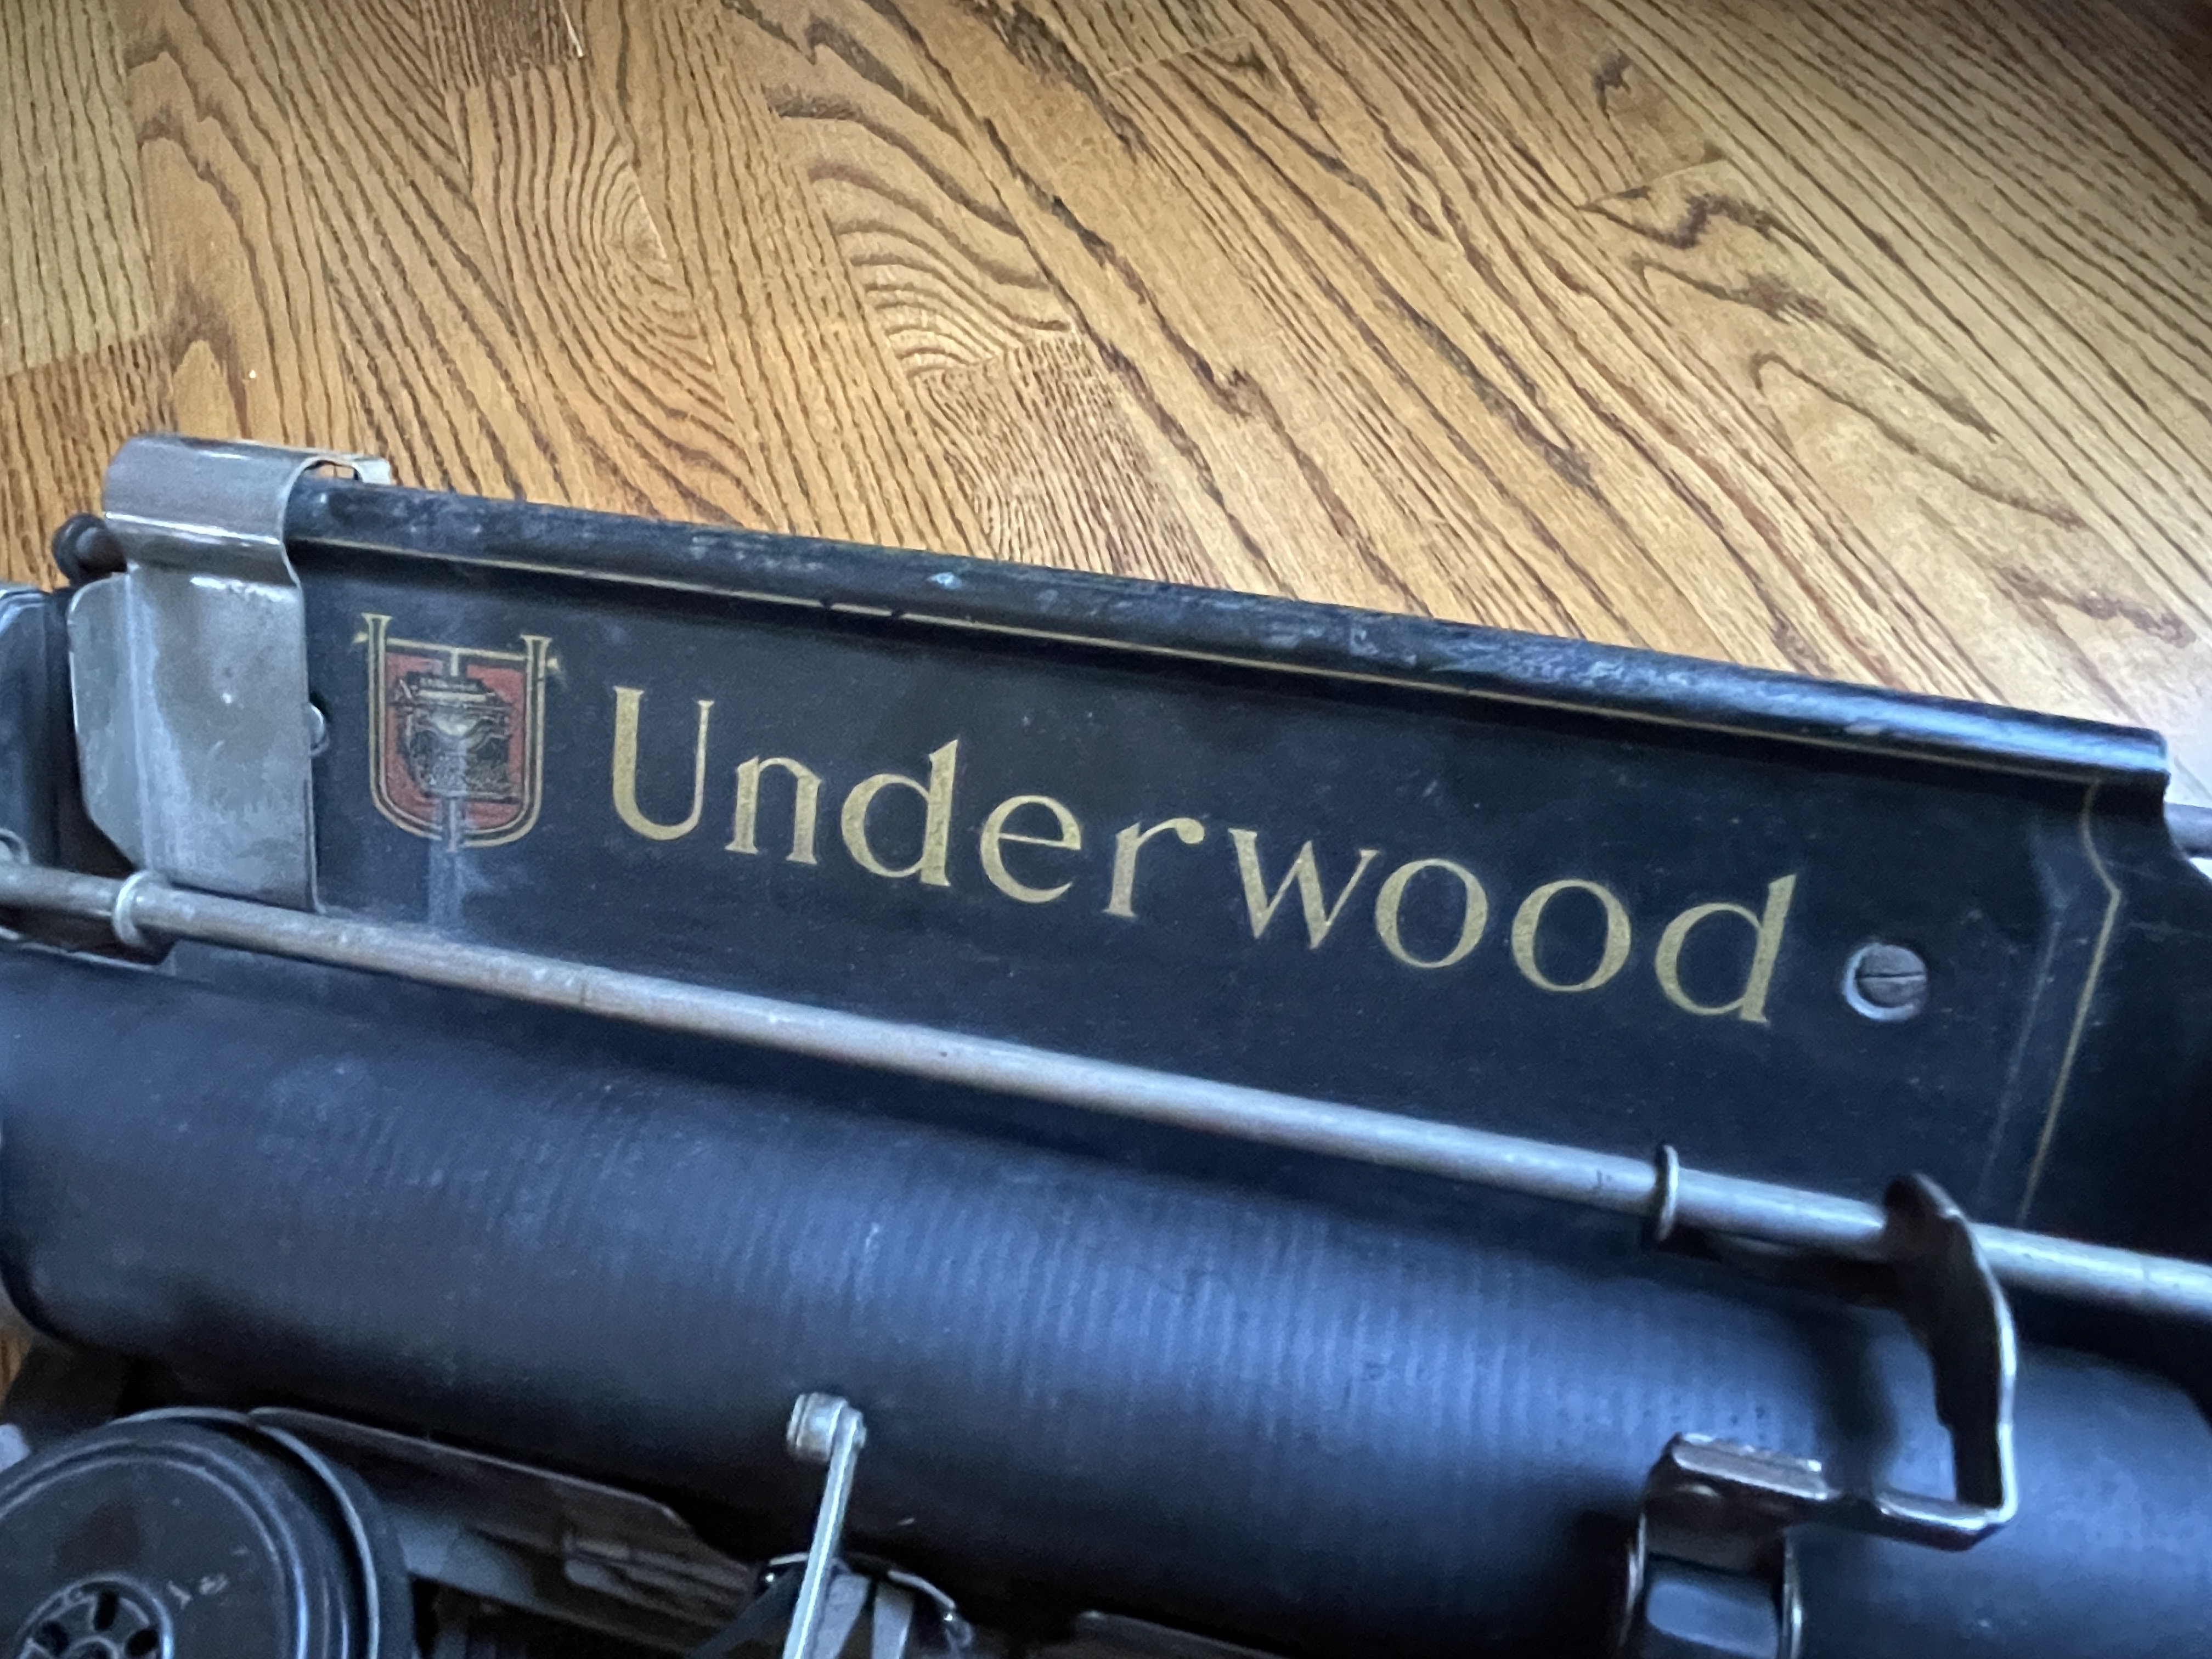
On inspection, Rick’s Underwood 4 was very gummy with scattered patches of rust in the underbelly, but otherwise in excellent mechanical shape. I felt that with a good cleaning, it would all shake out fine. And there was a cherry on top: the decals on the paper table and behind the keyboard were in excellent condition. George Z. and his family had obviously taken good care of this typewriter.
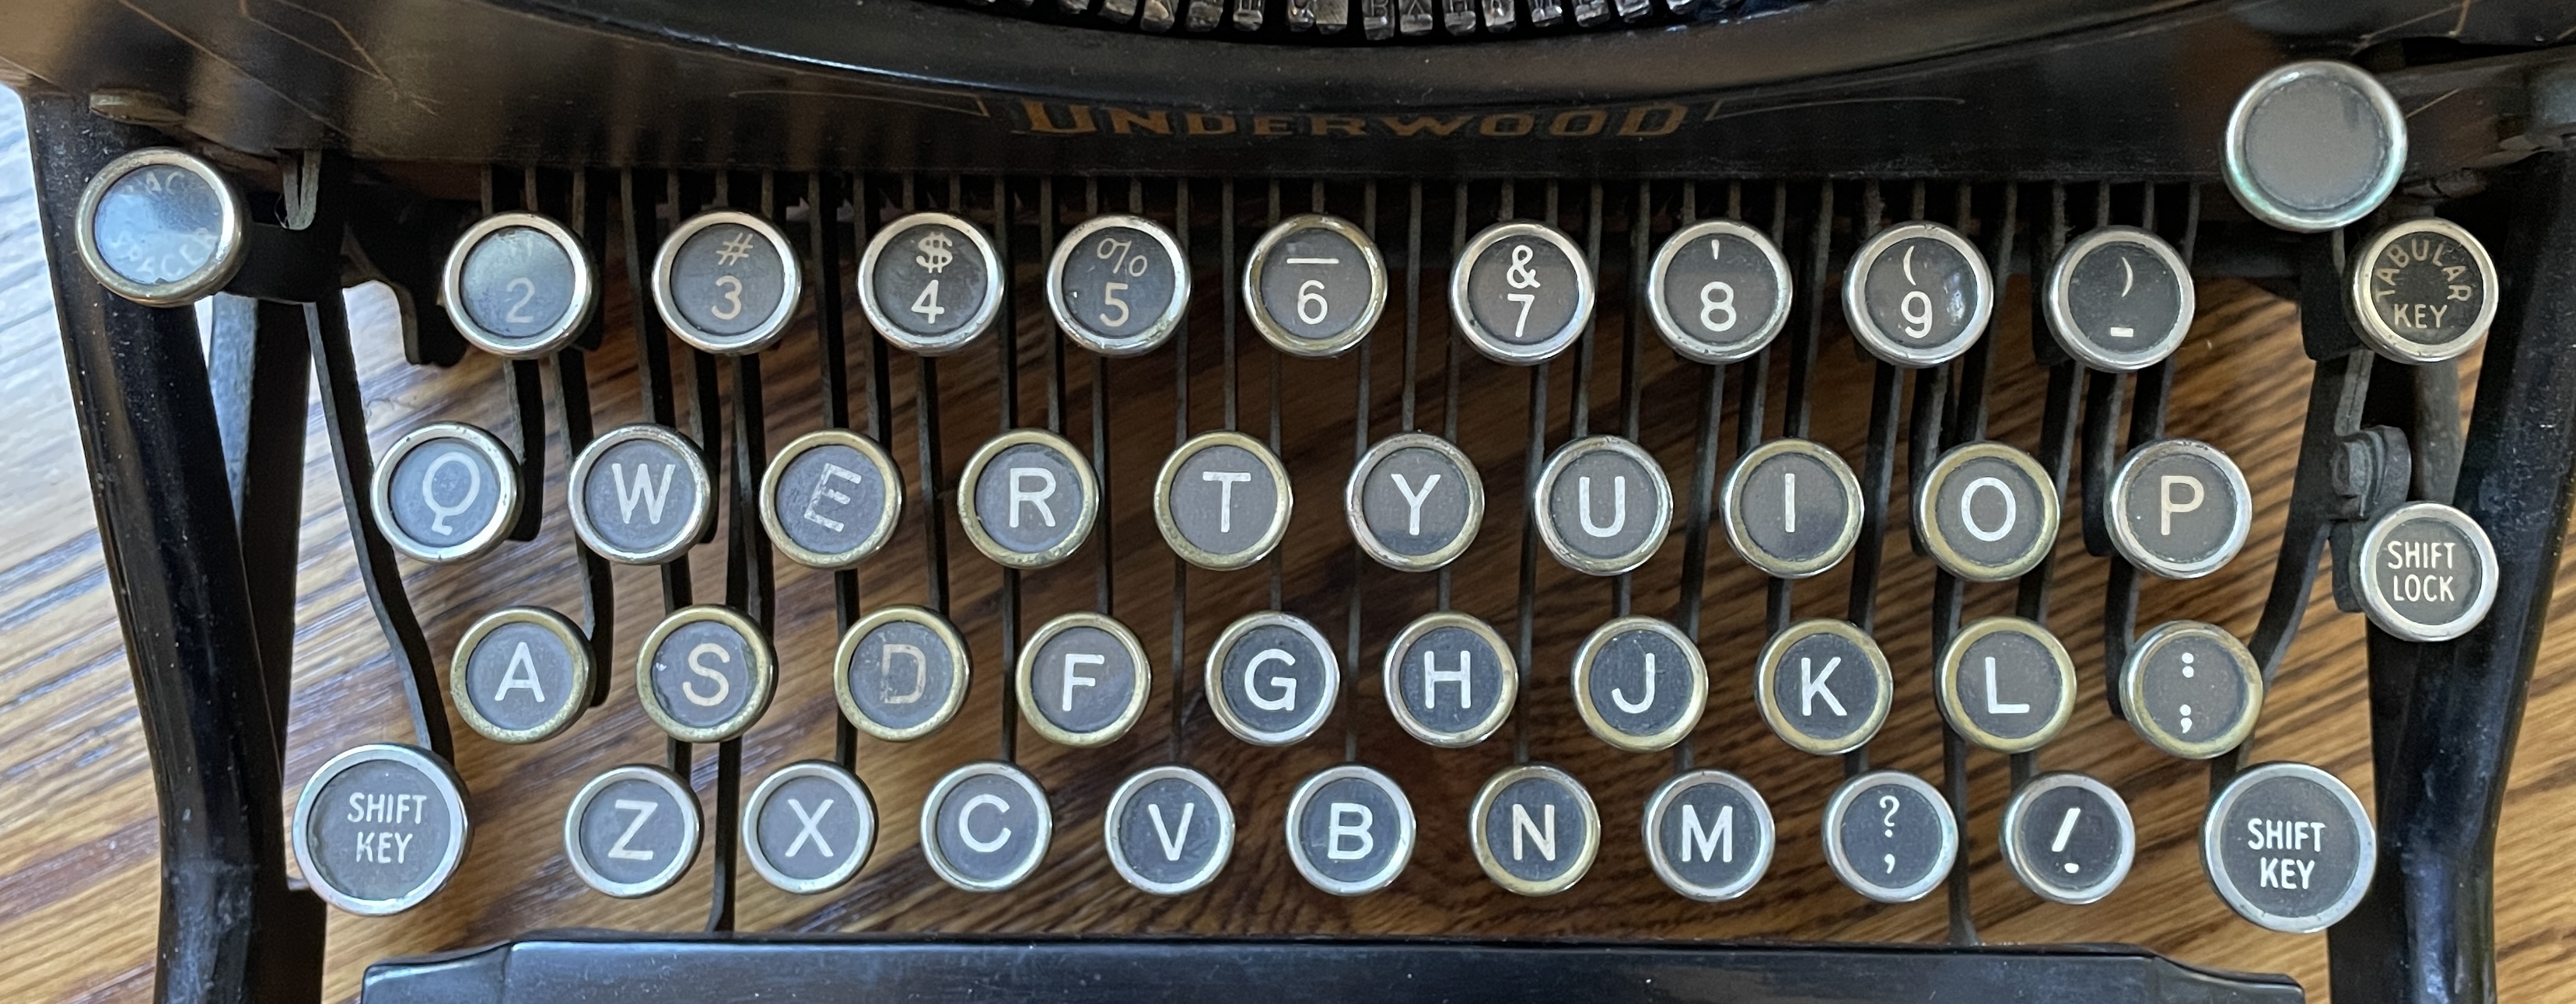
The decal in front of the space bar is pretty much worn off, but I see the ghost of a “No. 4”
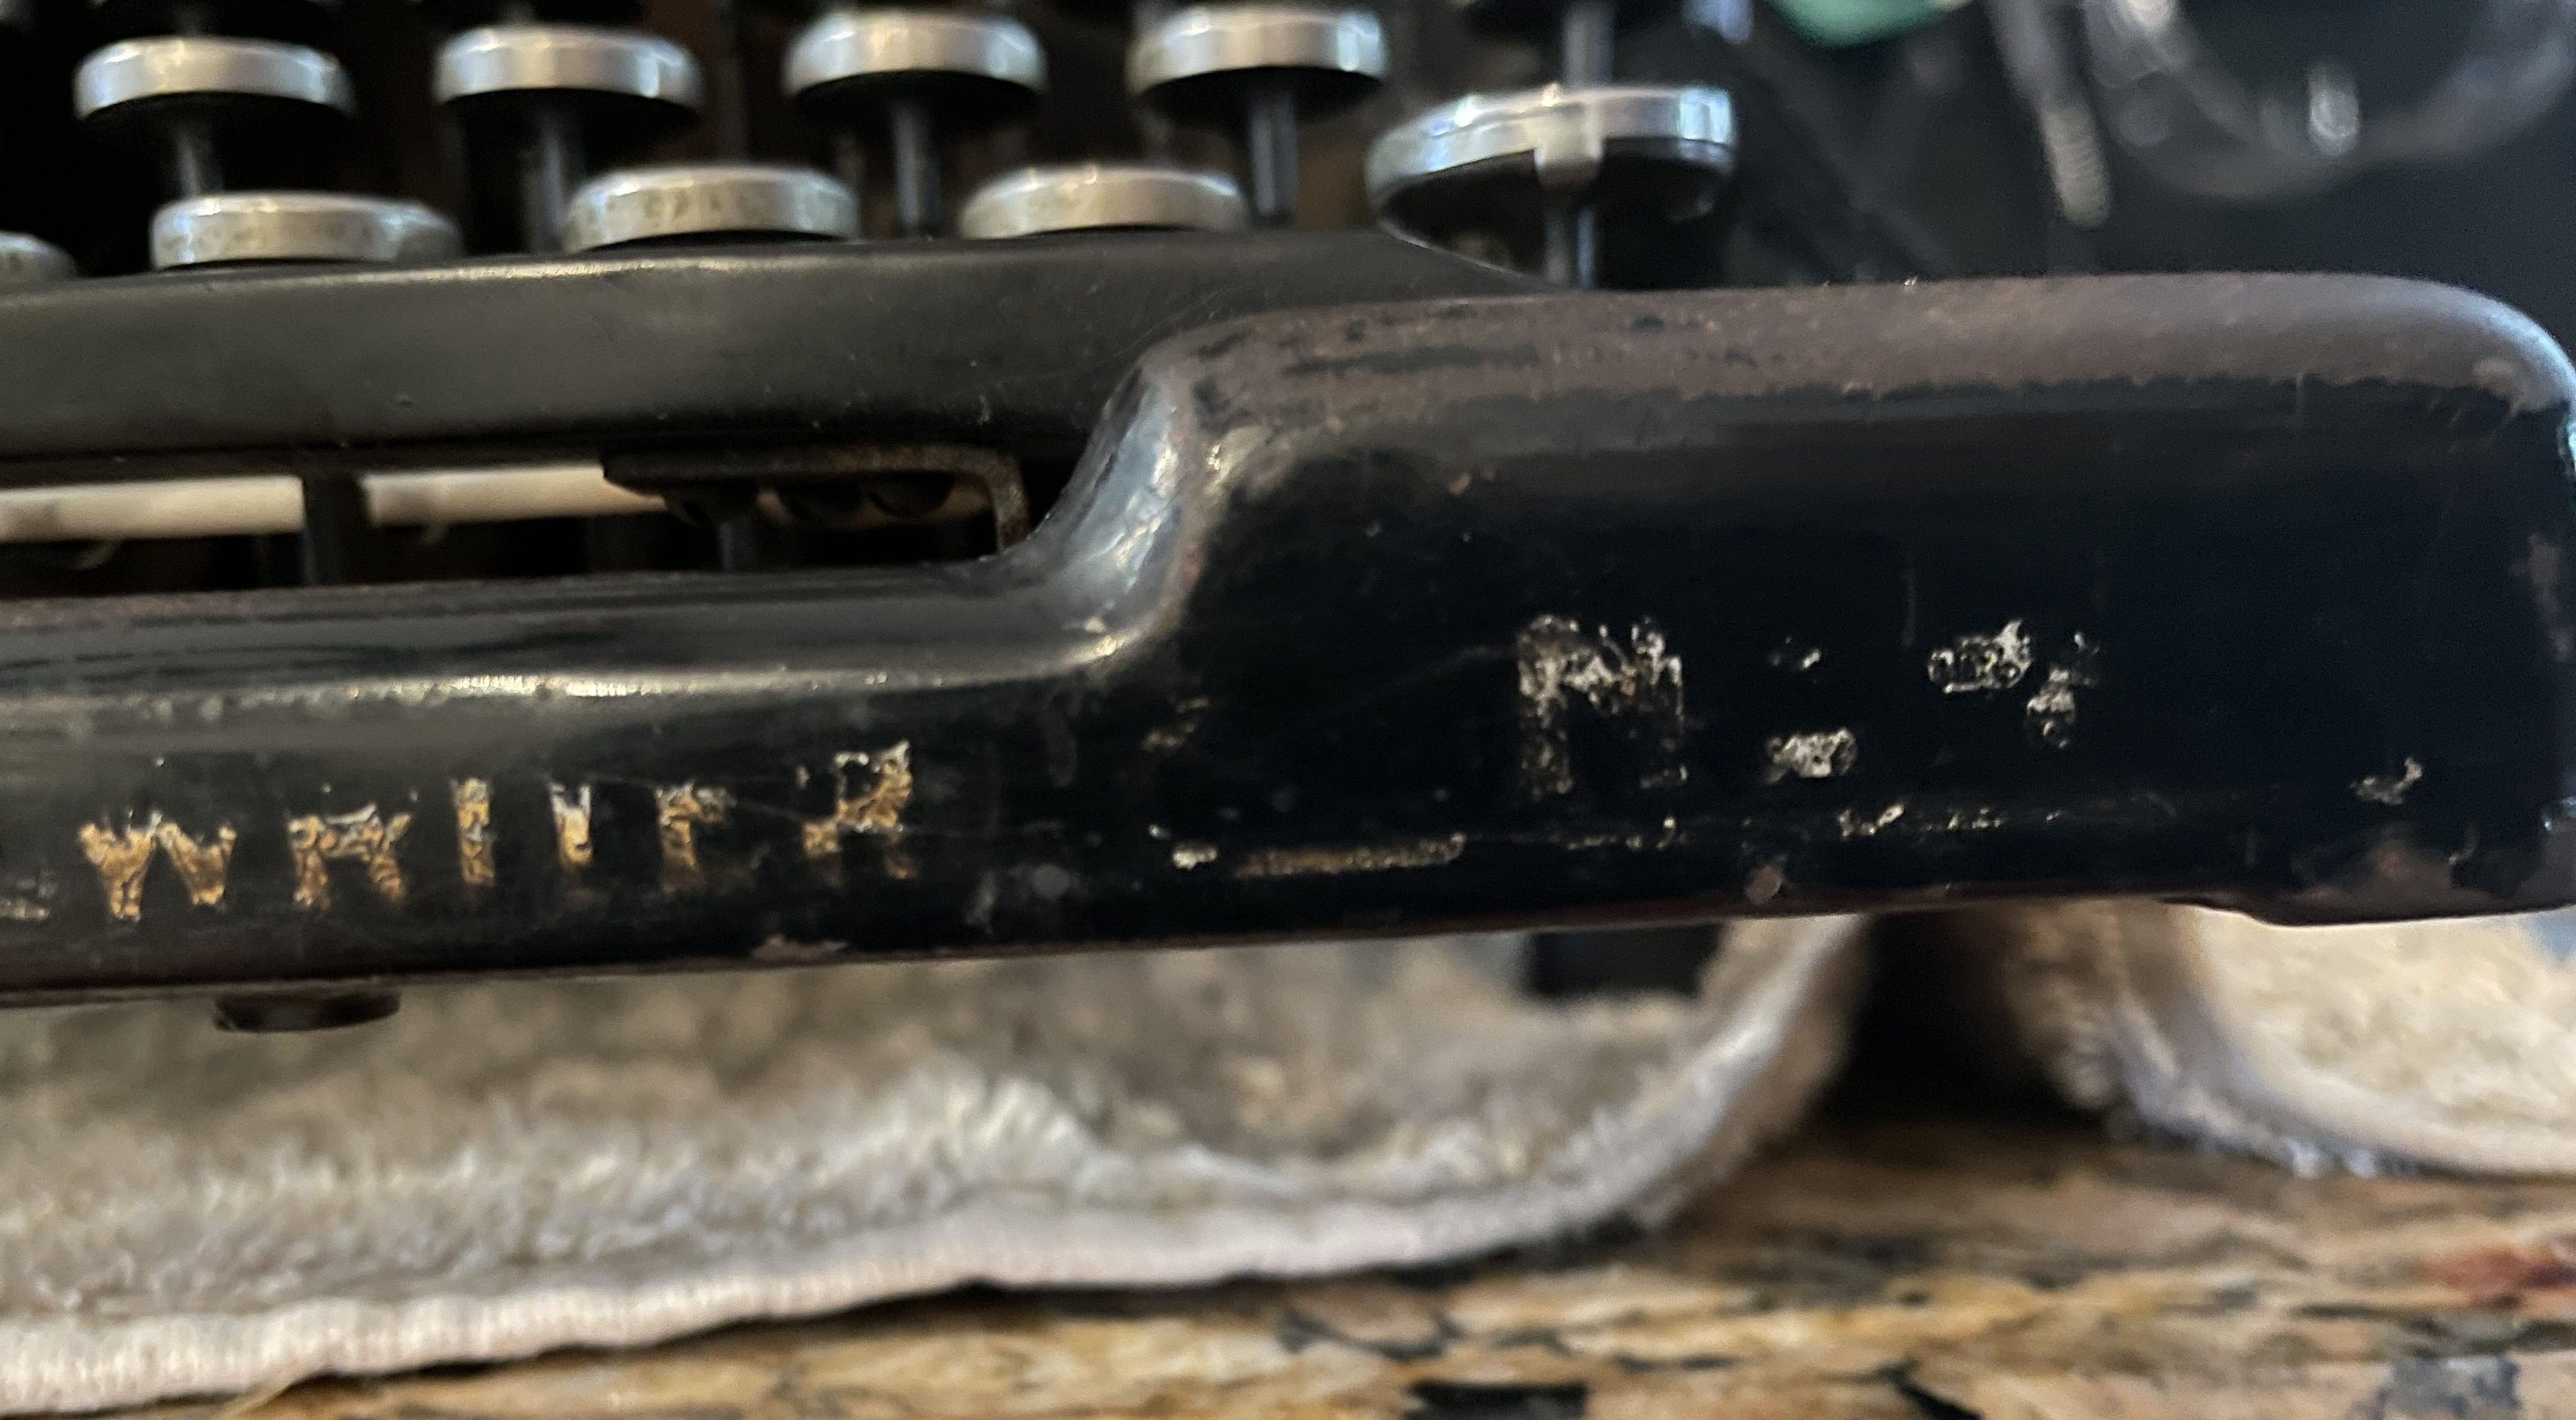
The keyboard has 76 characters, so it’s definitely a No. 4.
You may ask, what’s the difference between an Underwood 4 and 5? They were manufactured at the same time though it appears Underwood ceased production of the No. 4 in the early 20s. Will Davis has a nice explainer:
Because of this typewriter’s lateral paper guide, I would say it’s an Underwood 4D sub-model.
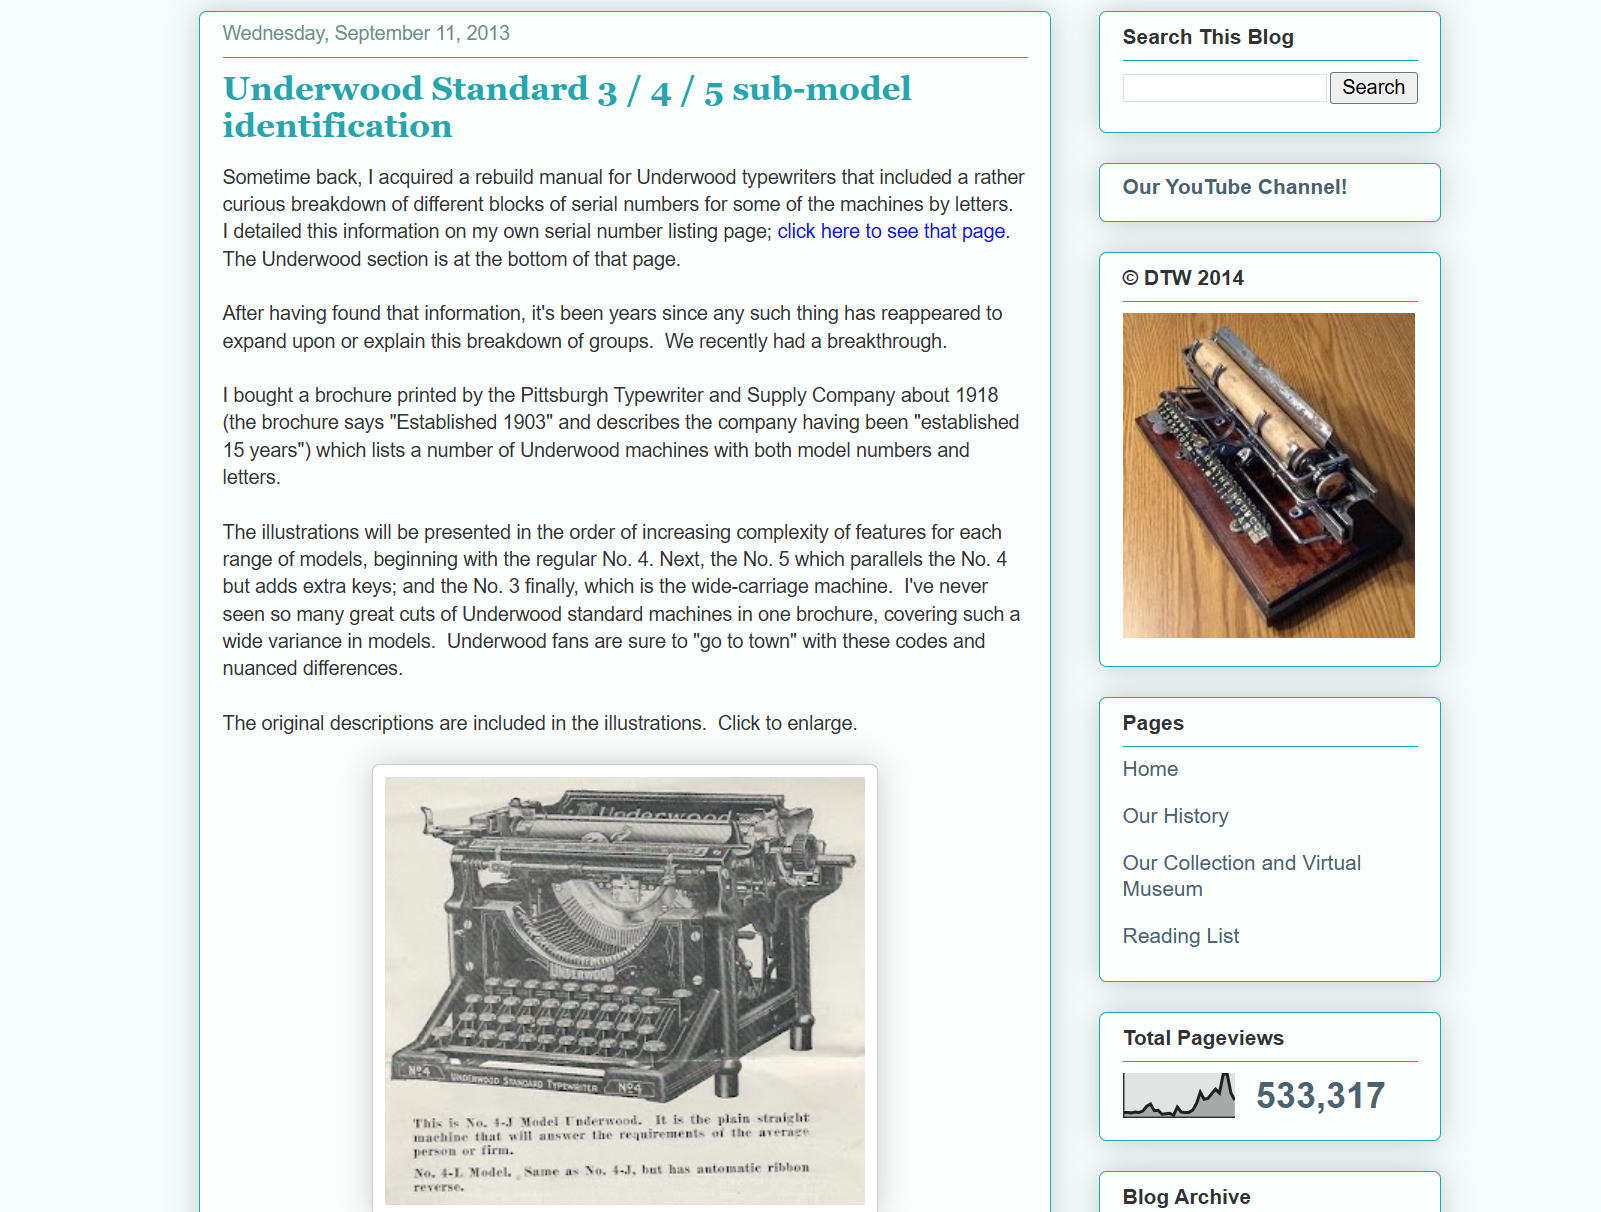
Richard Polt also has a good post from 2013 describing all the permutations of Underwood standards. Underwood made subtle changes over the years, but it was essentially the same solid machine for 40 years or more.
Rick Z. left the Underwood in my hands, and I knew that I would have to go Super Soft-Soft on this one. I would need to do some careful, targeted dismantling in order to clean it up, and while I got to work, I composed a list of best practices in my head that I have collected from pros in the field.
Tips for typewriter dismantling
Tip #1: Stay humble
Don’t go all Dunning-Kruger on a poor old typewriter.

Boom! What a title.
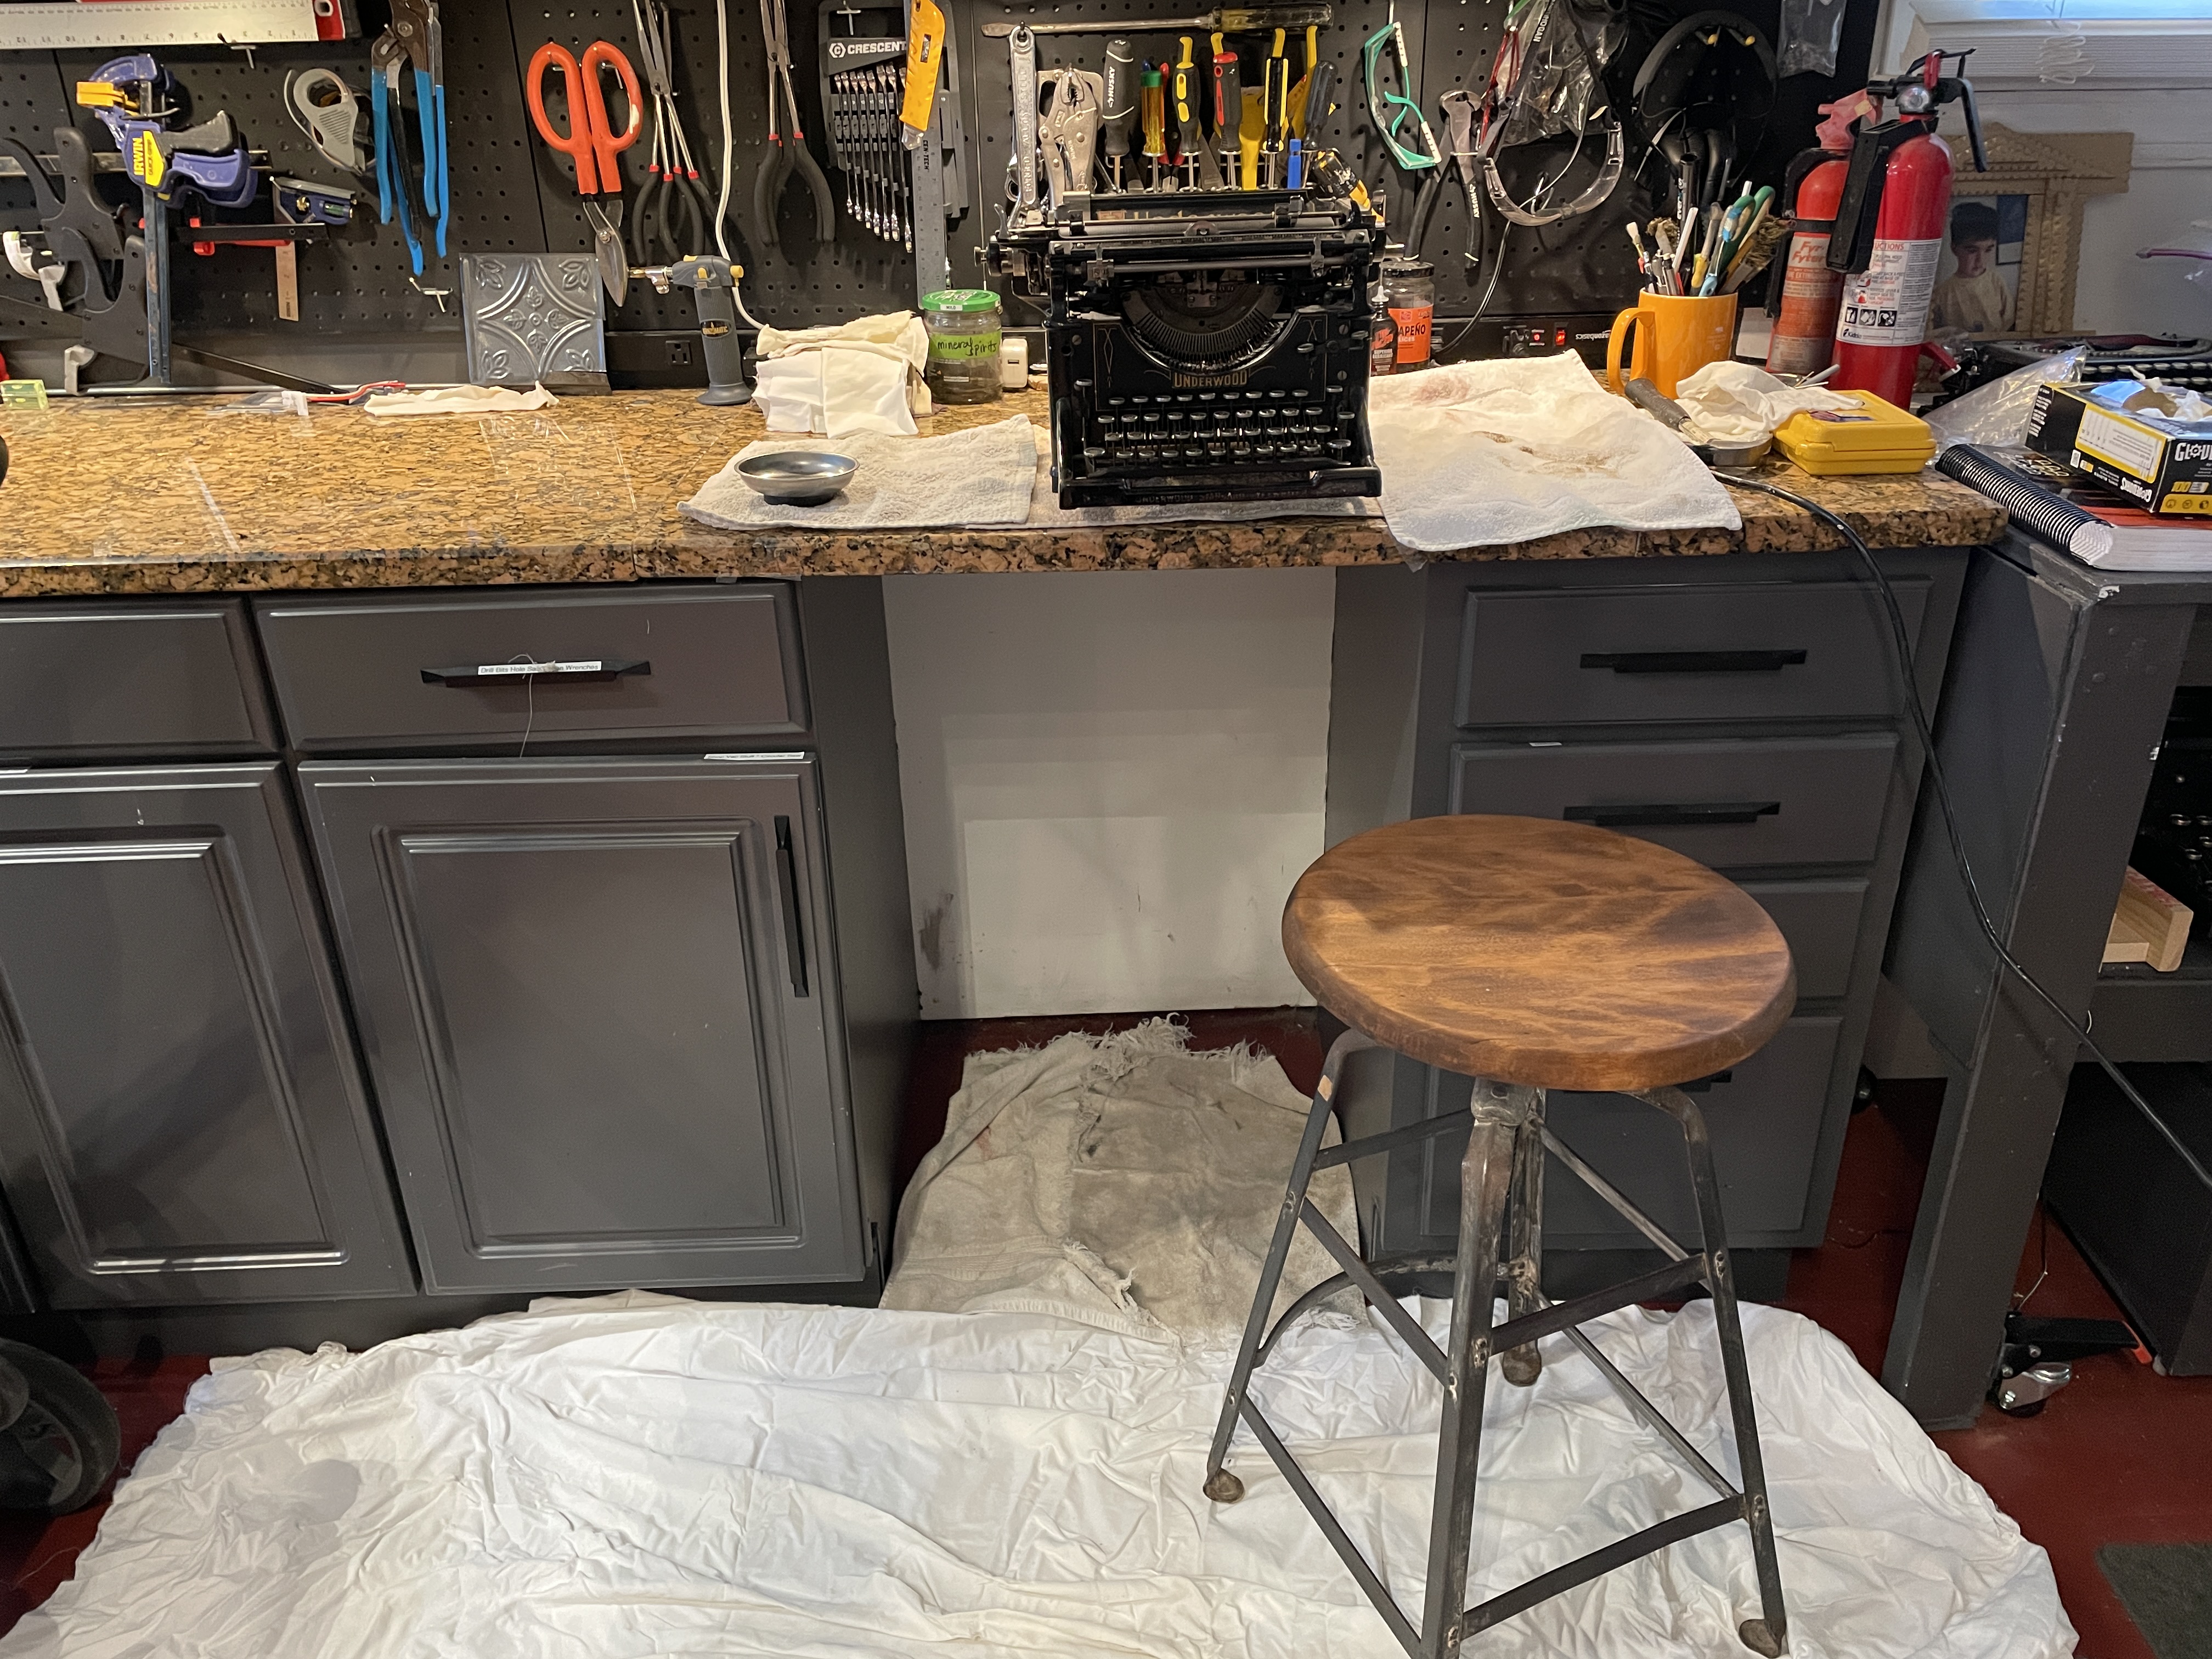
Tip #2: Work on a white drop cloth or old sheet
If you drop a tiny piece, you can easily spot it on white—and it won’t roll away.
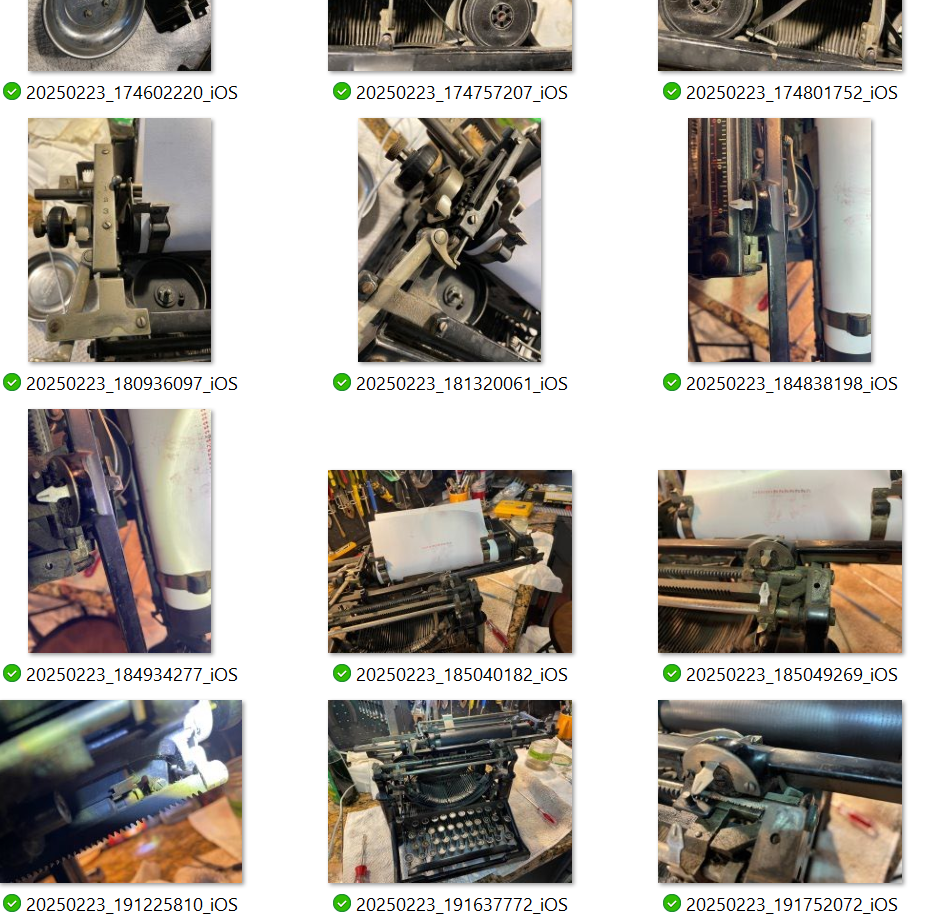
Tip #3: Take lots of photos
Your future self will thank your past self for having the presence of mind to capture the pieces as they went together before they came apart.
Tip #4: Re-insert the screws after you remove a part
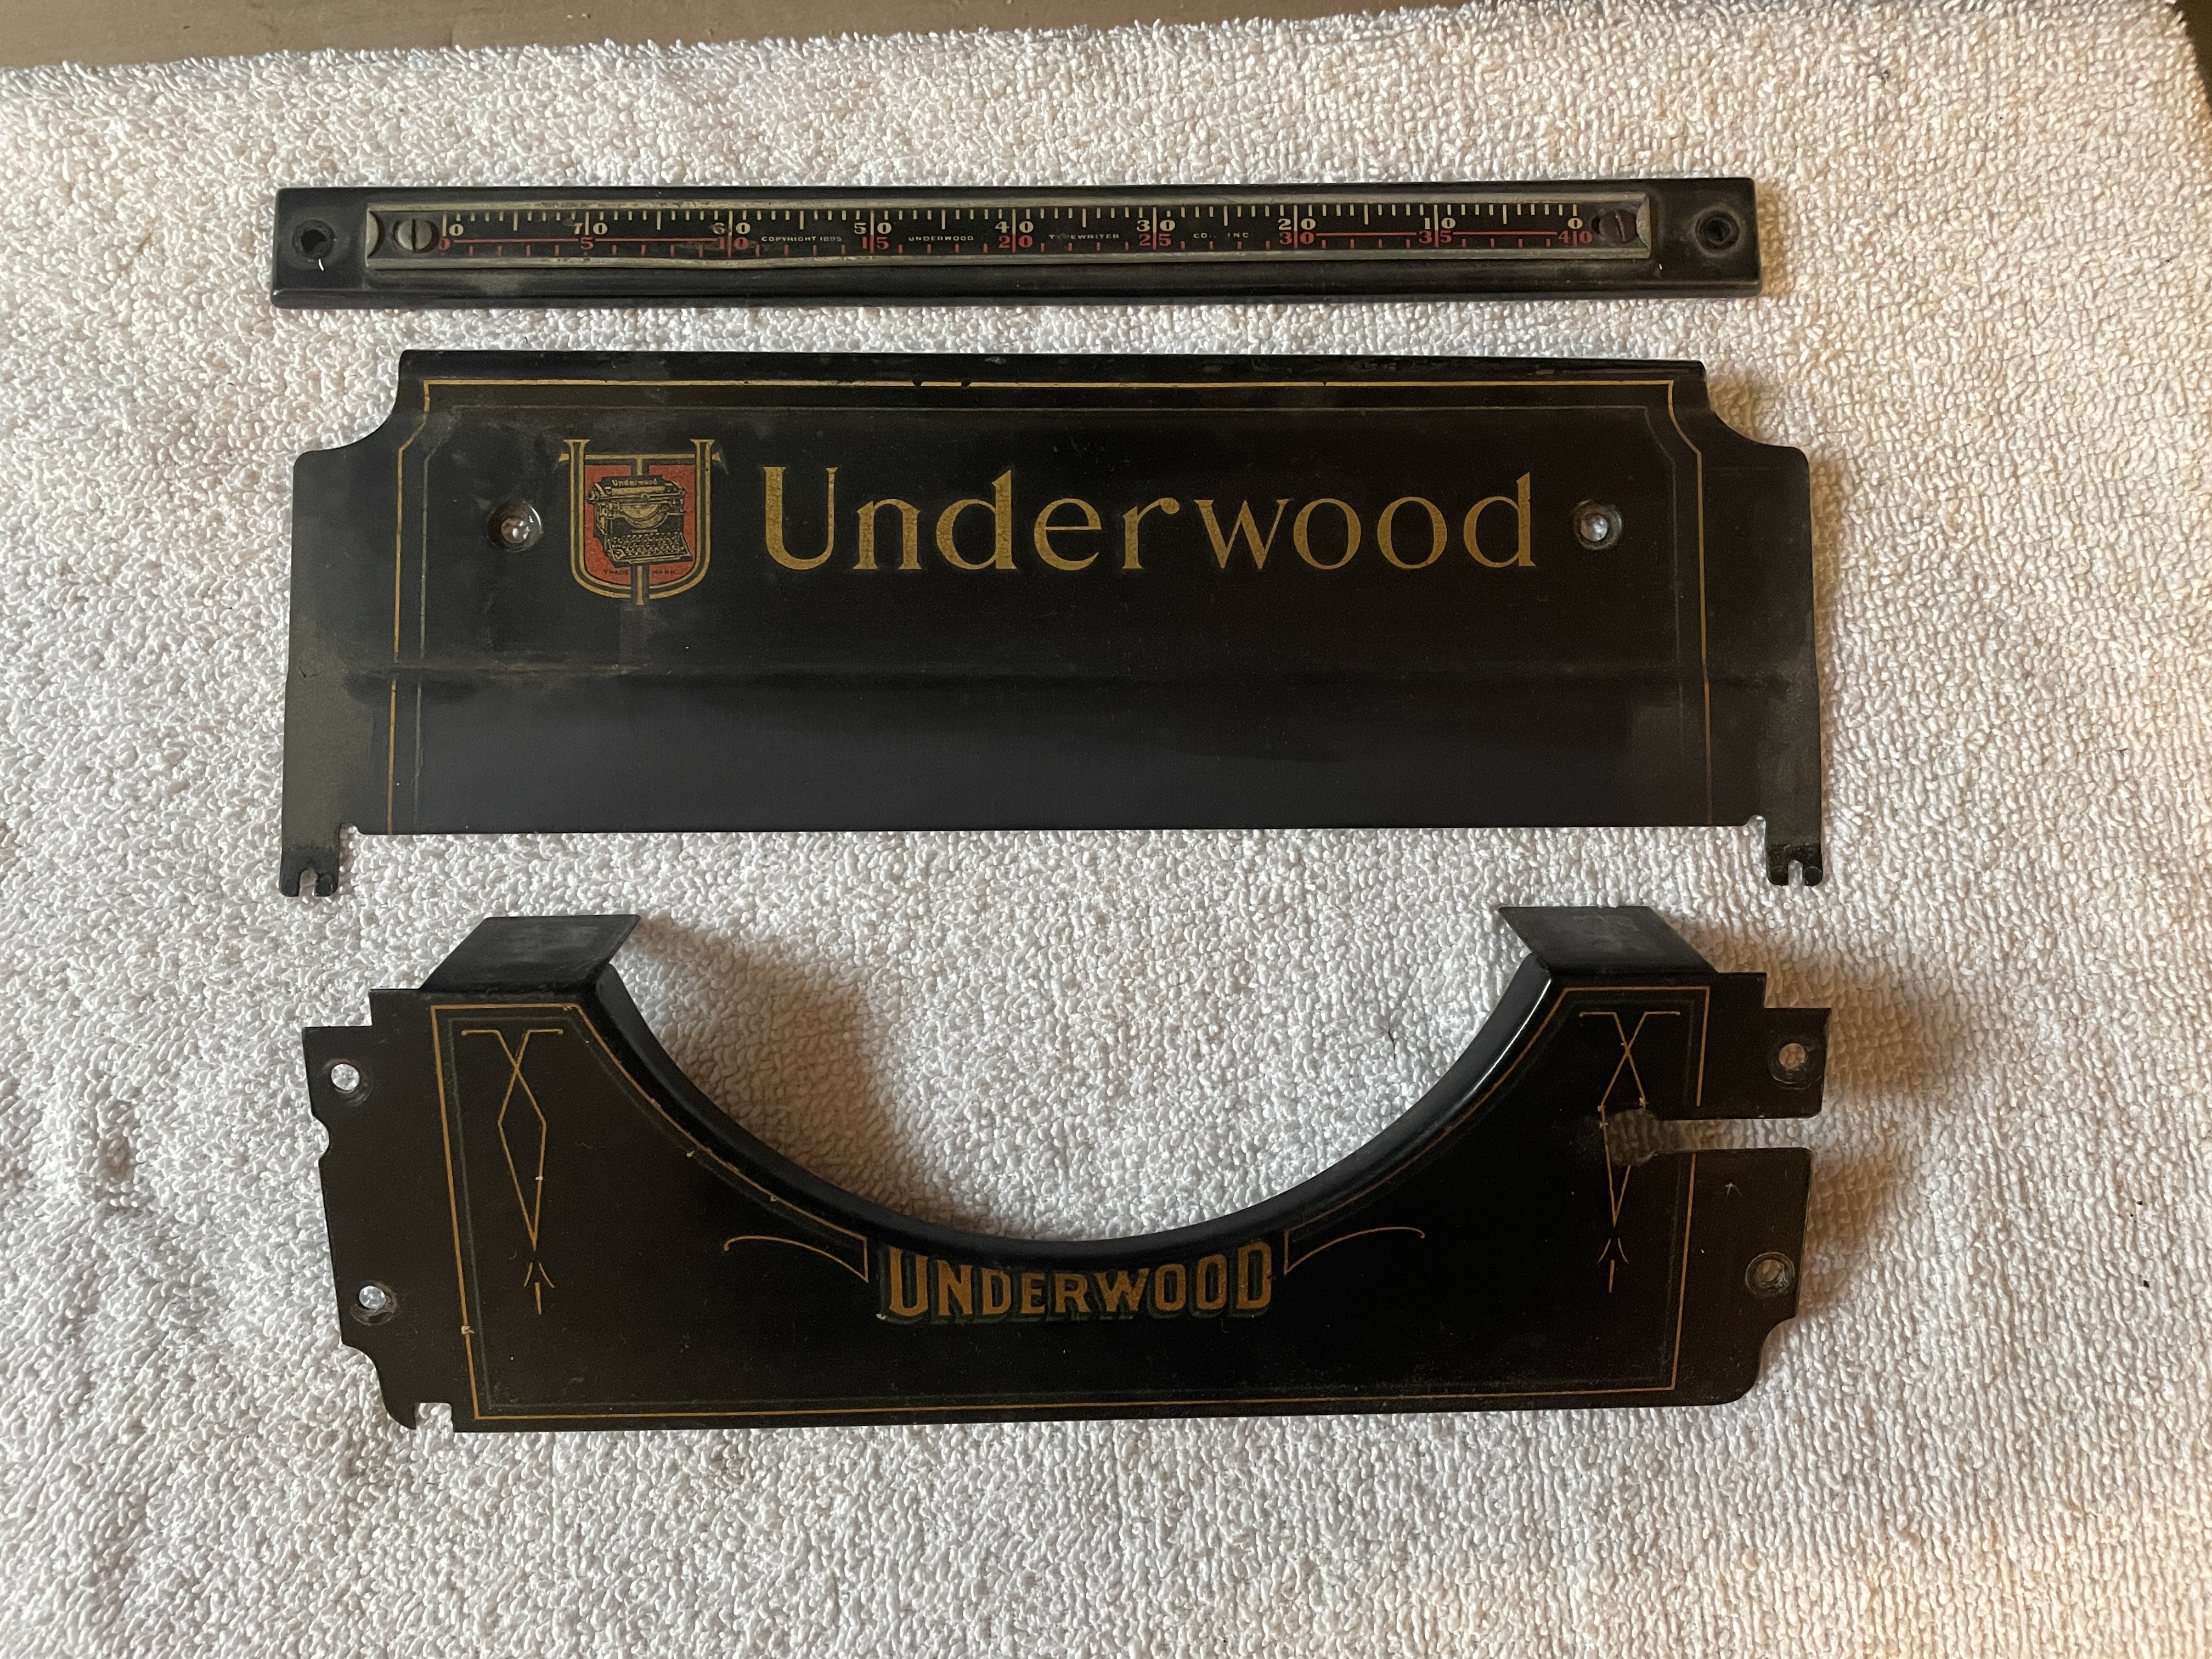
Tip #5: Remove the decorative cover plates before cleaning
The solvents you use for the mechanical parts may eat through paint and decals in a split second, so remove and stash them away from the work area.
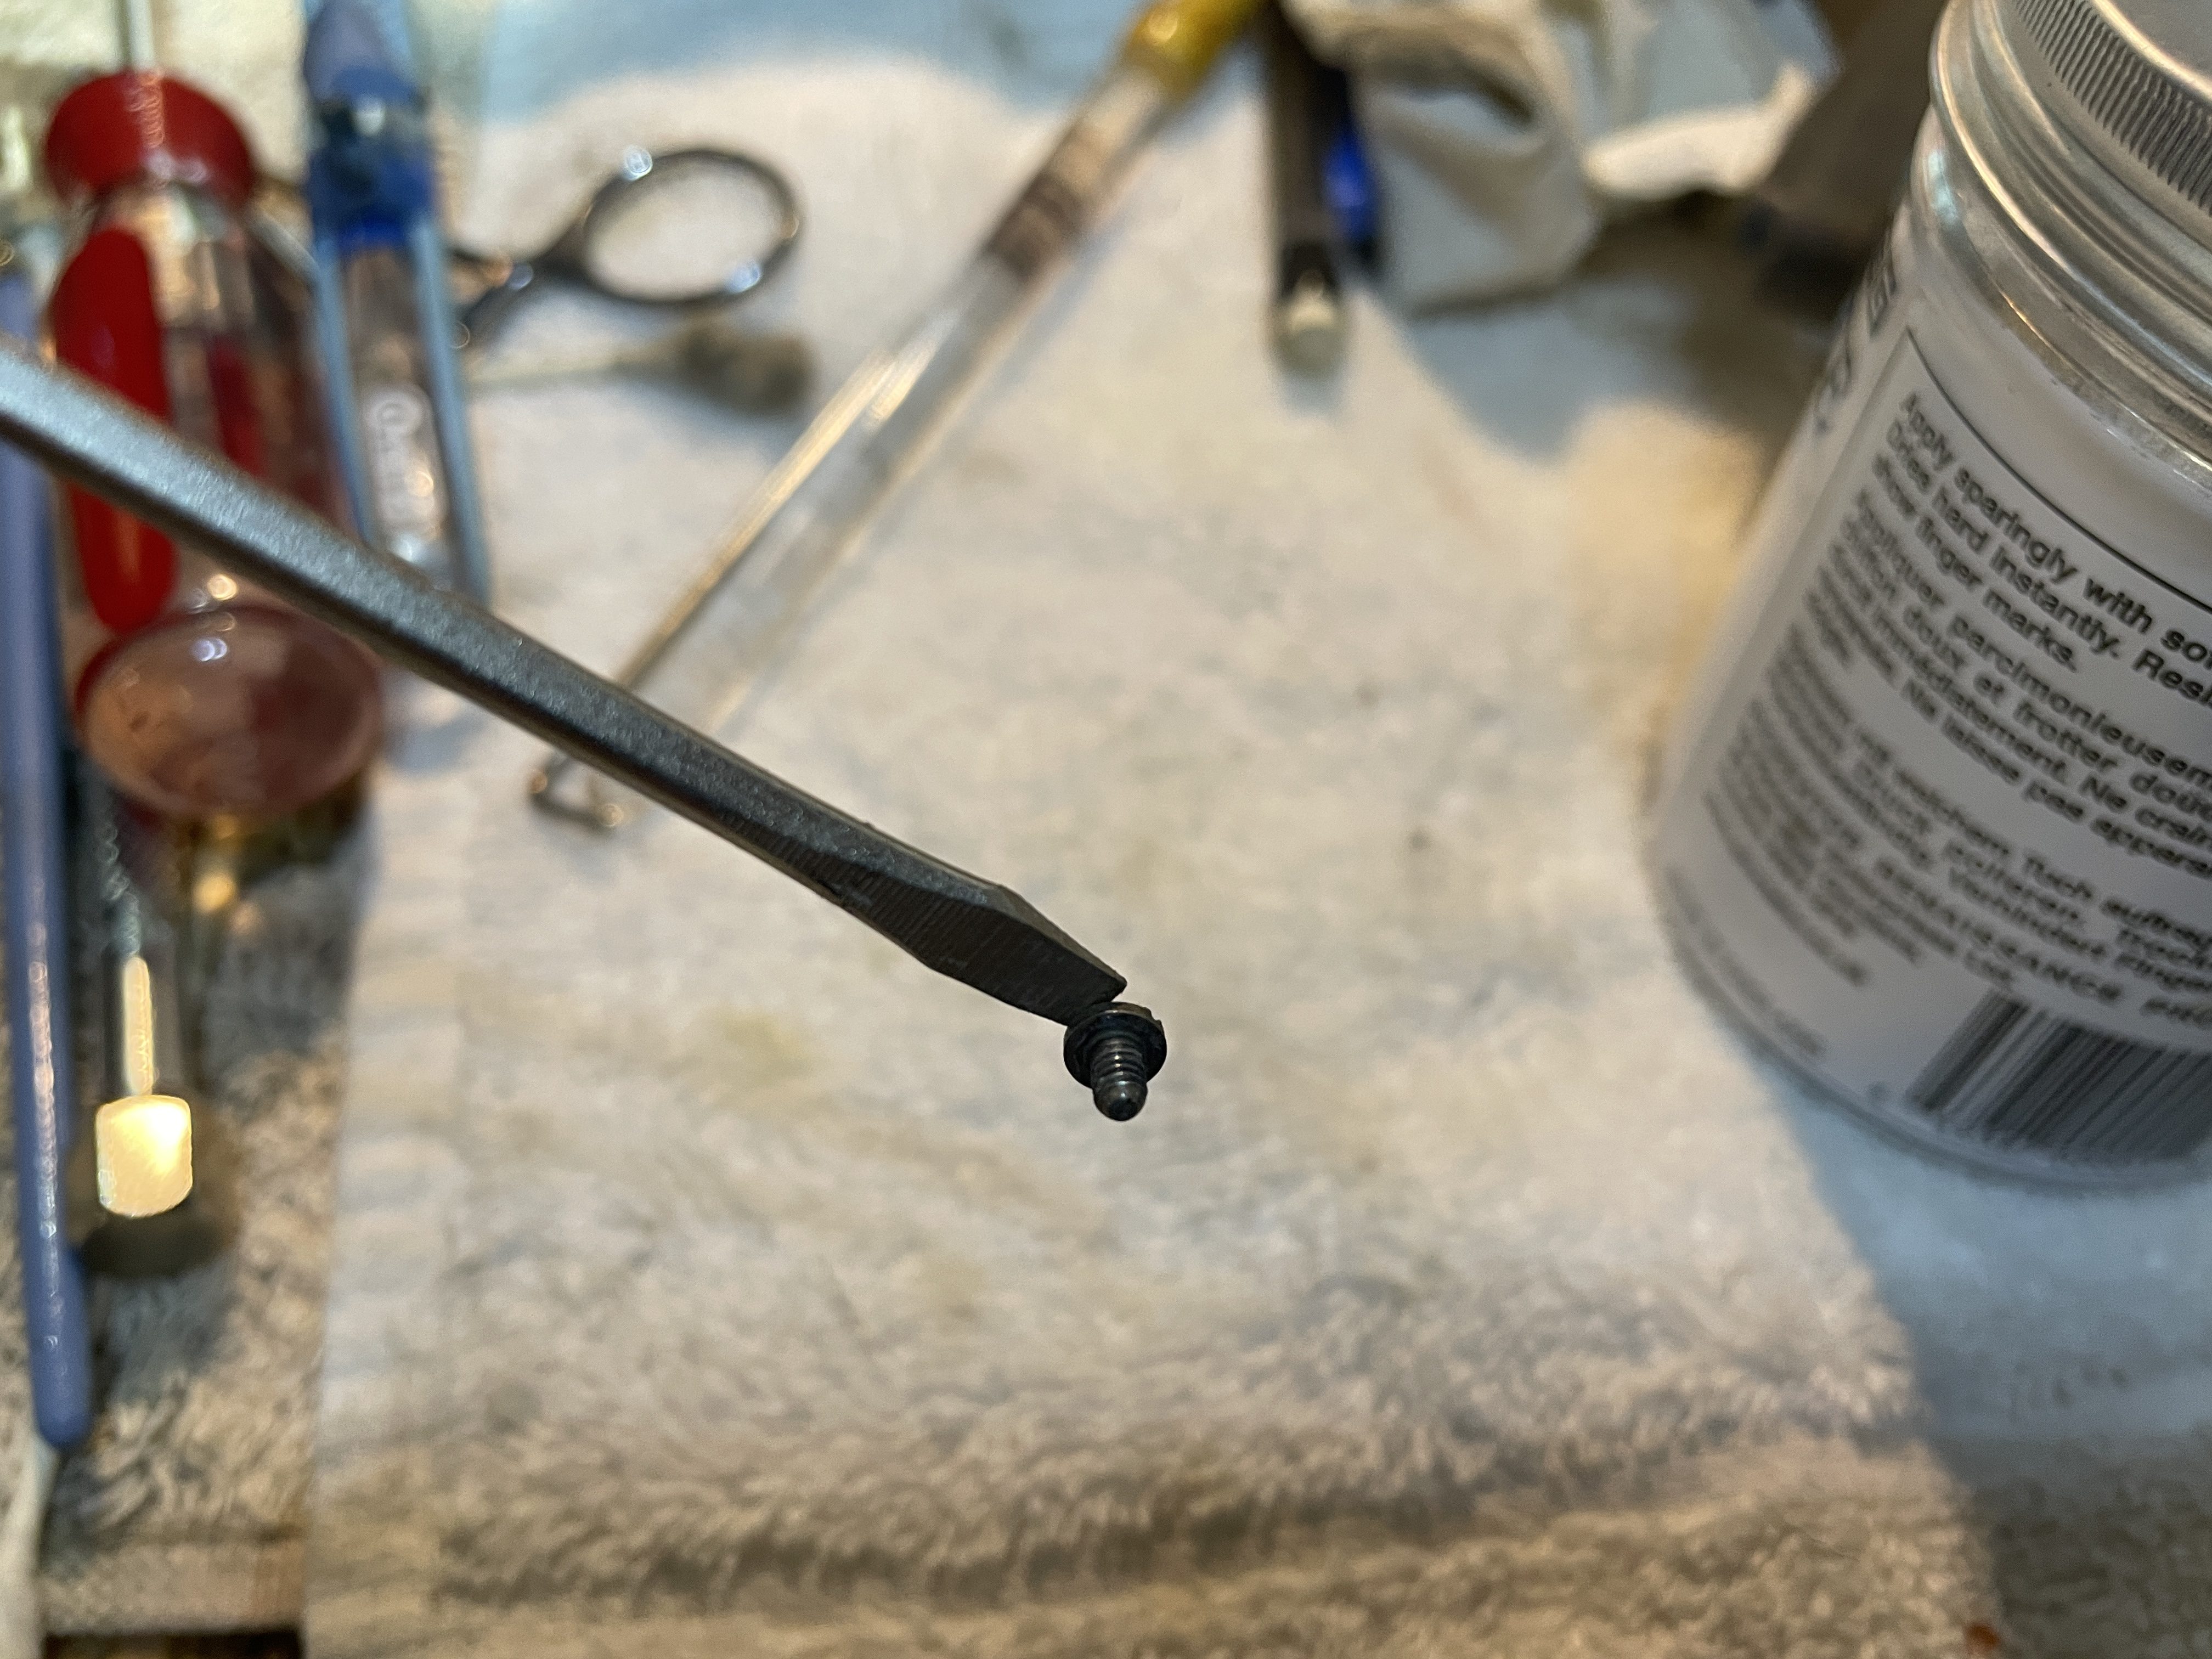
Tip #6: Magnetize your screwdrivers
They will hold onto those teeny, futzy screws better and make them easier to retrieve if they drop into the dark bowels of a typewriter.
Speaking of pro tips, I have got to get a Lazy Susan turntable like Richard Polt’s. It would make working on heavy machines so much easier.
Back to the Underwood: there was a lot of thick gummy gunk inside that I wanted clear out, so I took the carriage off. I recommend keeping carriages on typewriters as much as possible. However. Taking the carriage off an Underwood of this ilk is not too difficult.
When attempting my usual method (Two Screws and Slide Off), I kept hitting a rear tab brake as I tried to slide the carriage off the way rod, so I went to Plan B: the Four Screw Method. Just make sure that you secure the drawband before removing the carriage.
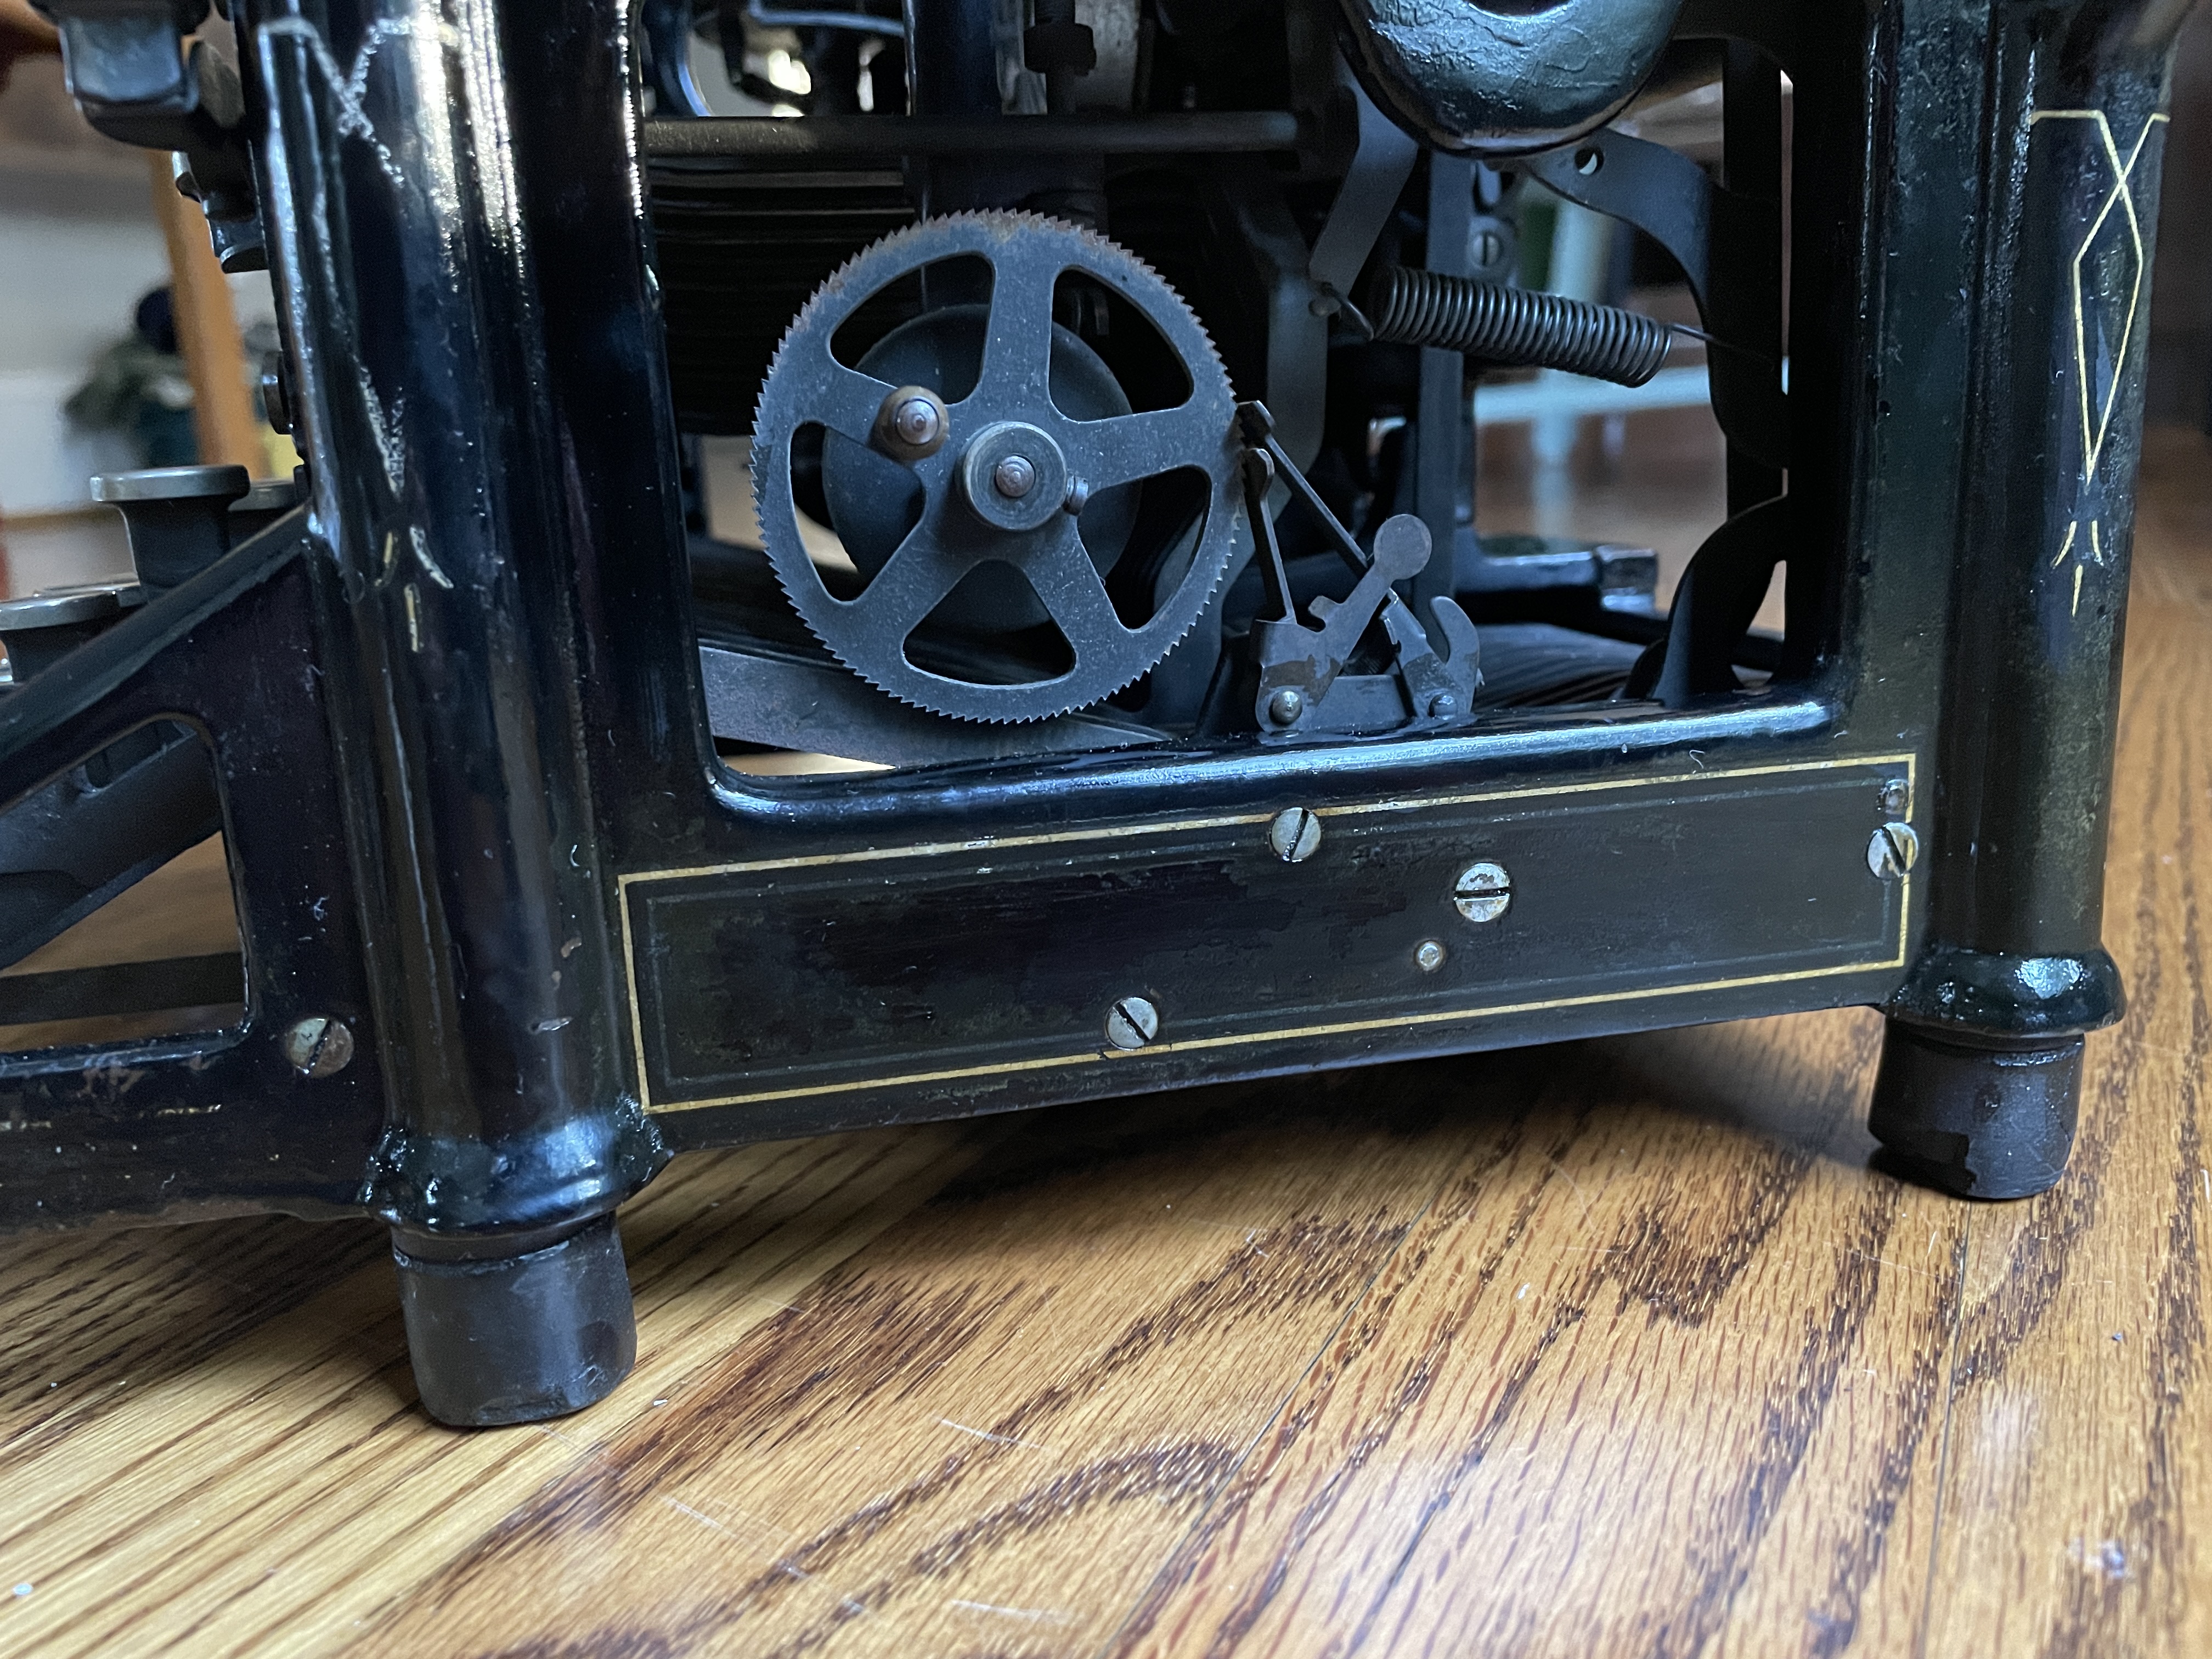
And off it came. I’m glad I did because there was a lot of greasy fur and crunchy bits in the mechanical depths.
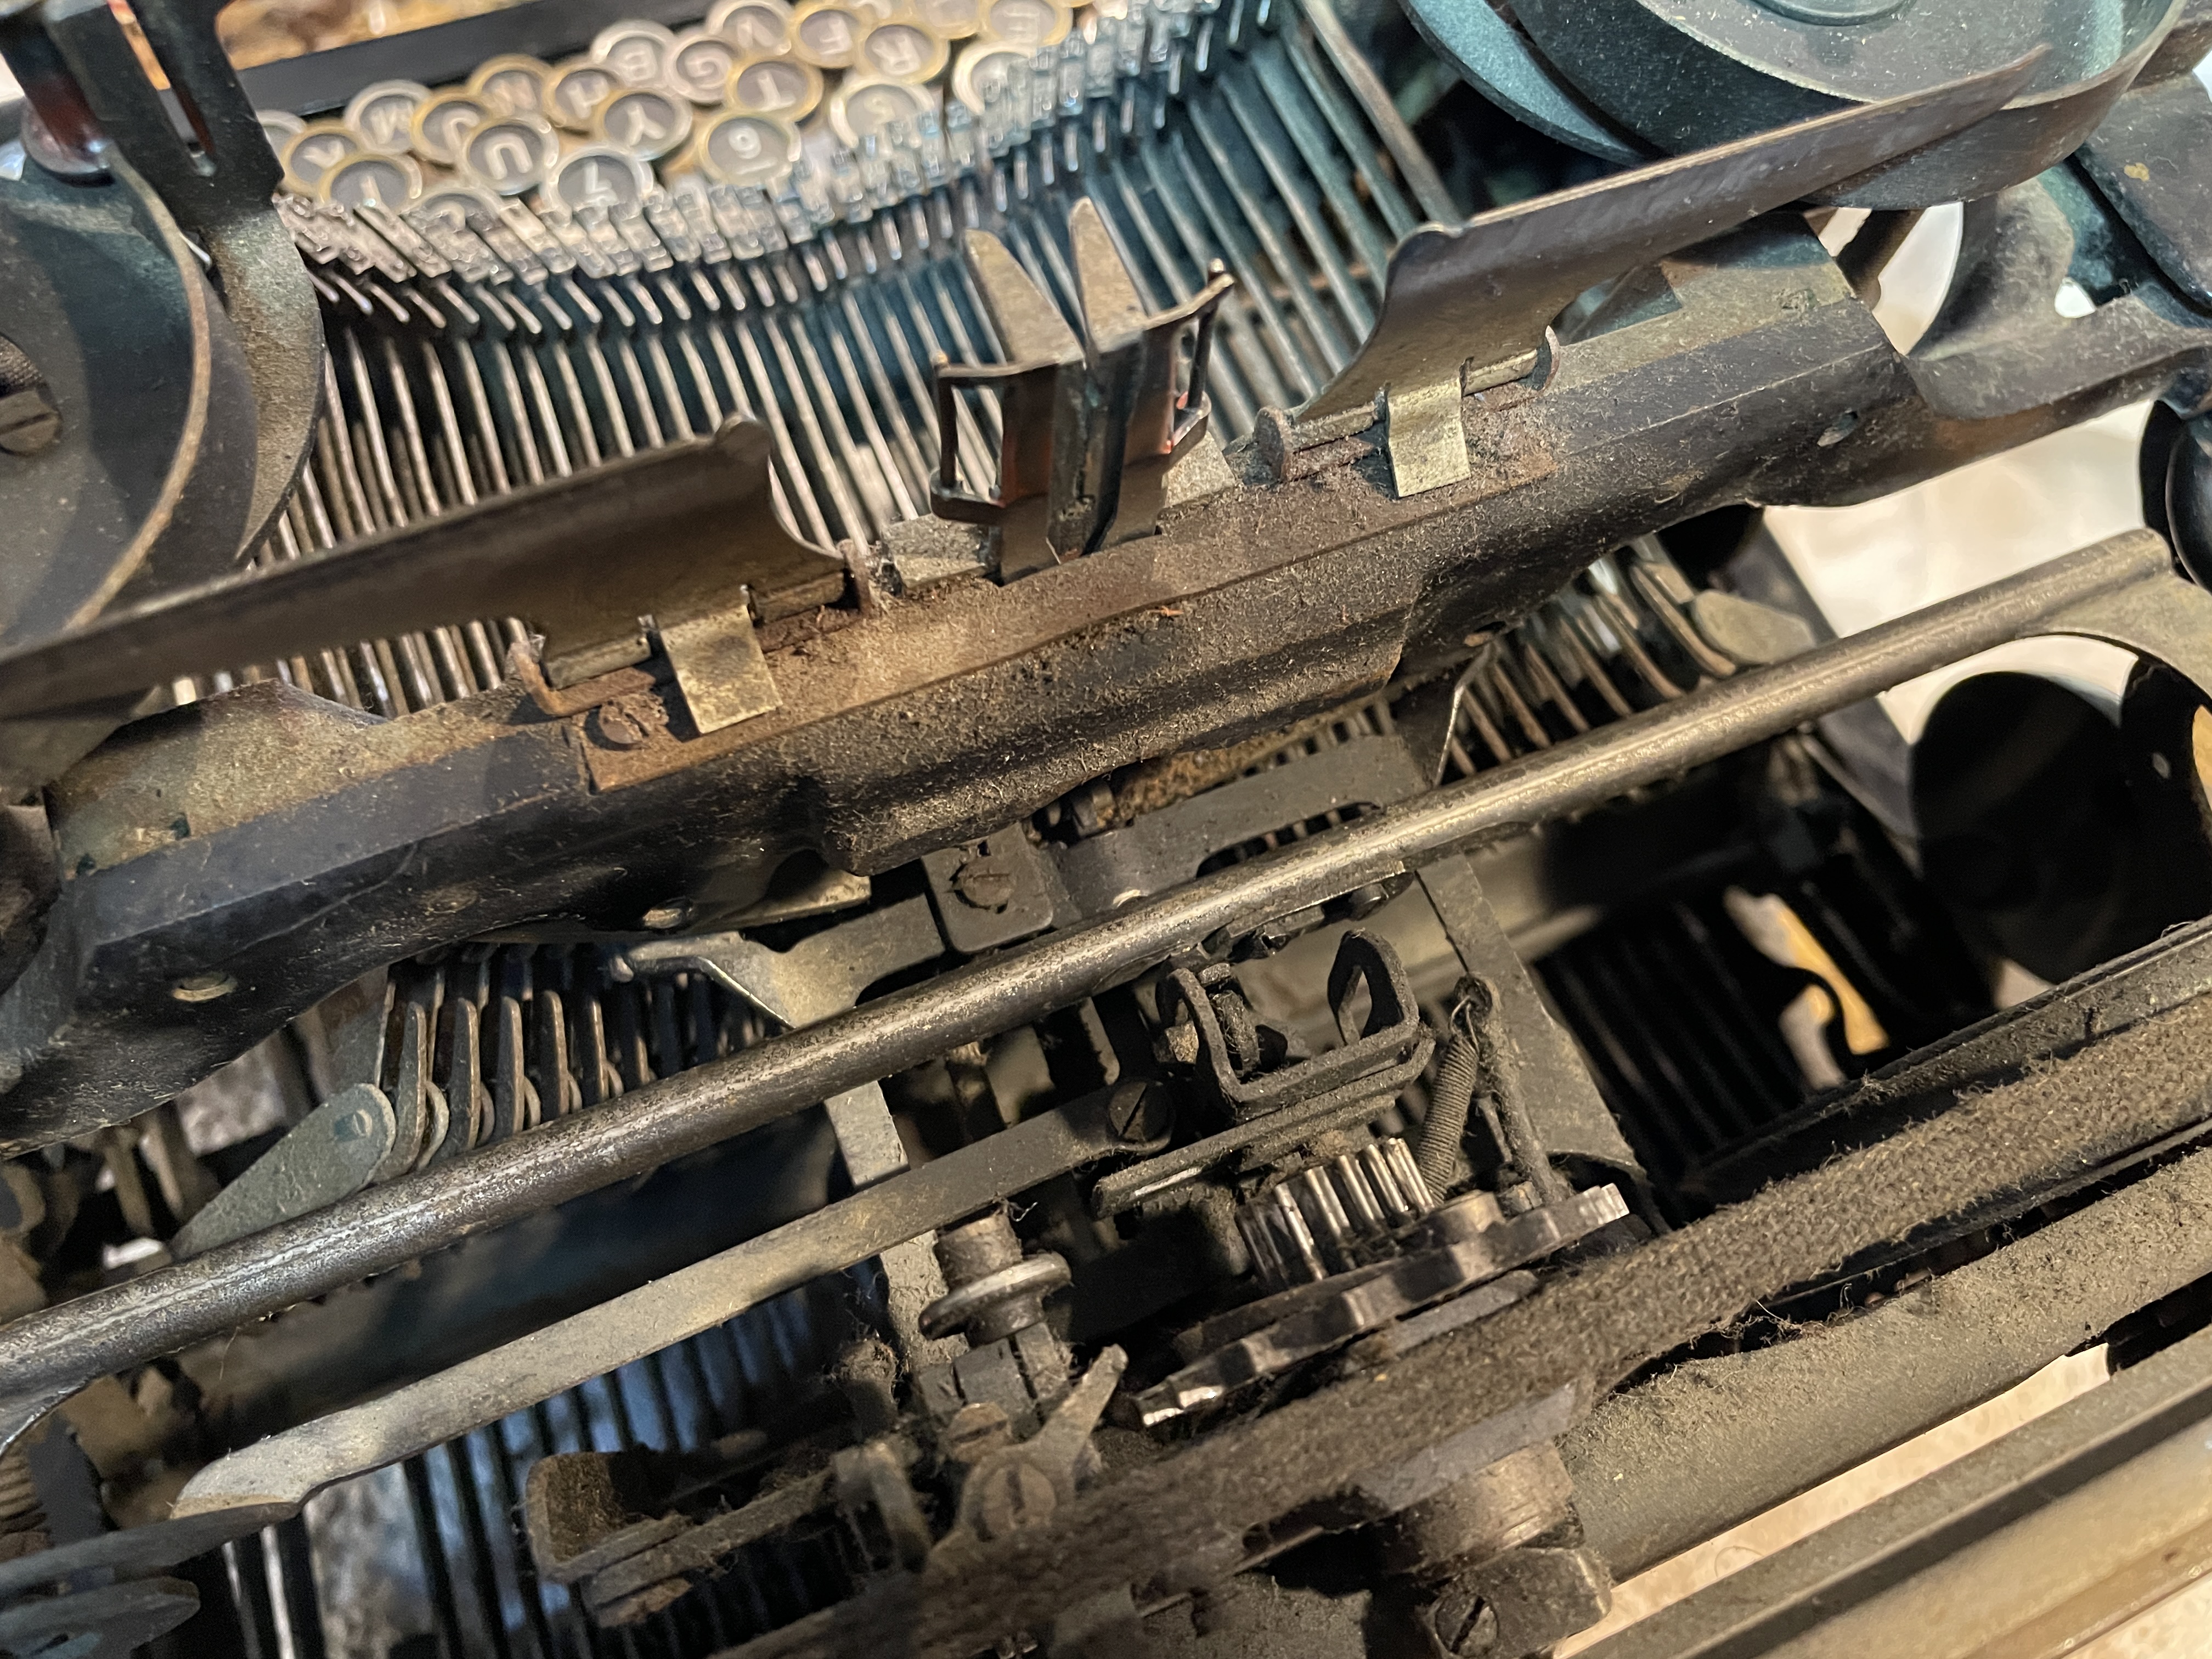
I carefully blew out the dust and crusty stuff, doctored everything with mineral spirits, polished the way rod so the carriage could glide, and cleaned the segment and type face.
I had problems with recurrent gumminess in the segment and the escapement. I would clean it until it was loose and snappy and then come back the next day to find it all gummed up again. I started with mineral spirits, stepped it up to denatured alcohol, and finally found relief with lacquer thinner. I blew out brown sludge with the air compressor. Hundred year old lubricant? WD-40? Don’t rightly know.
Mechanical issues
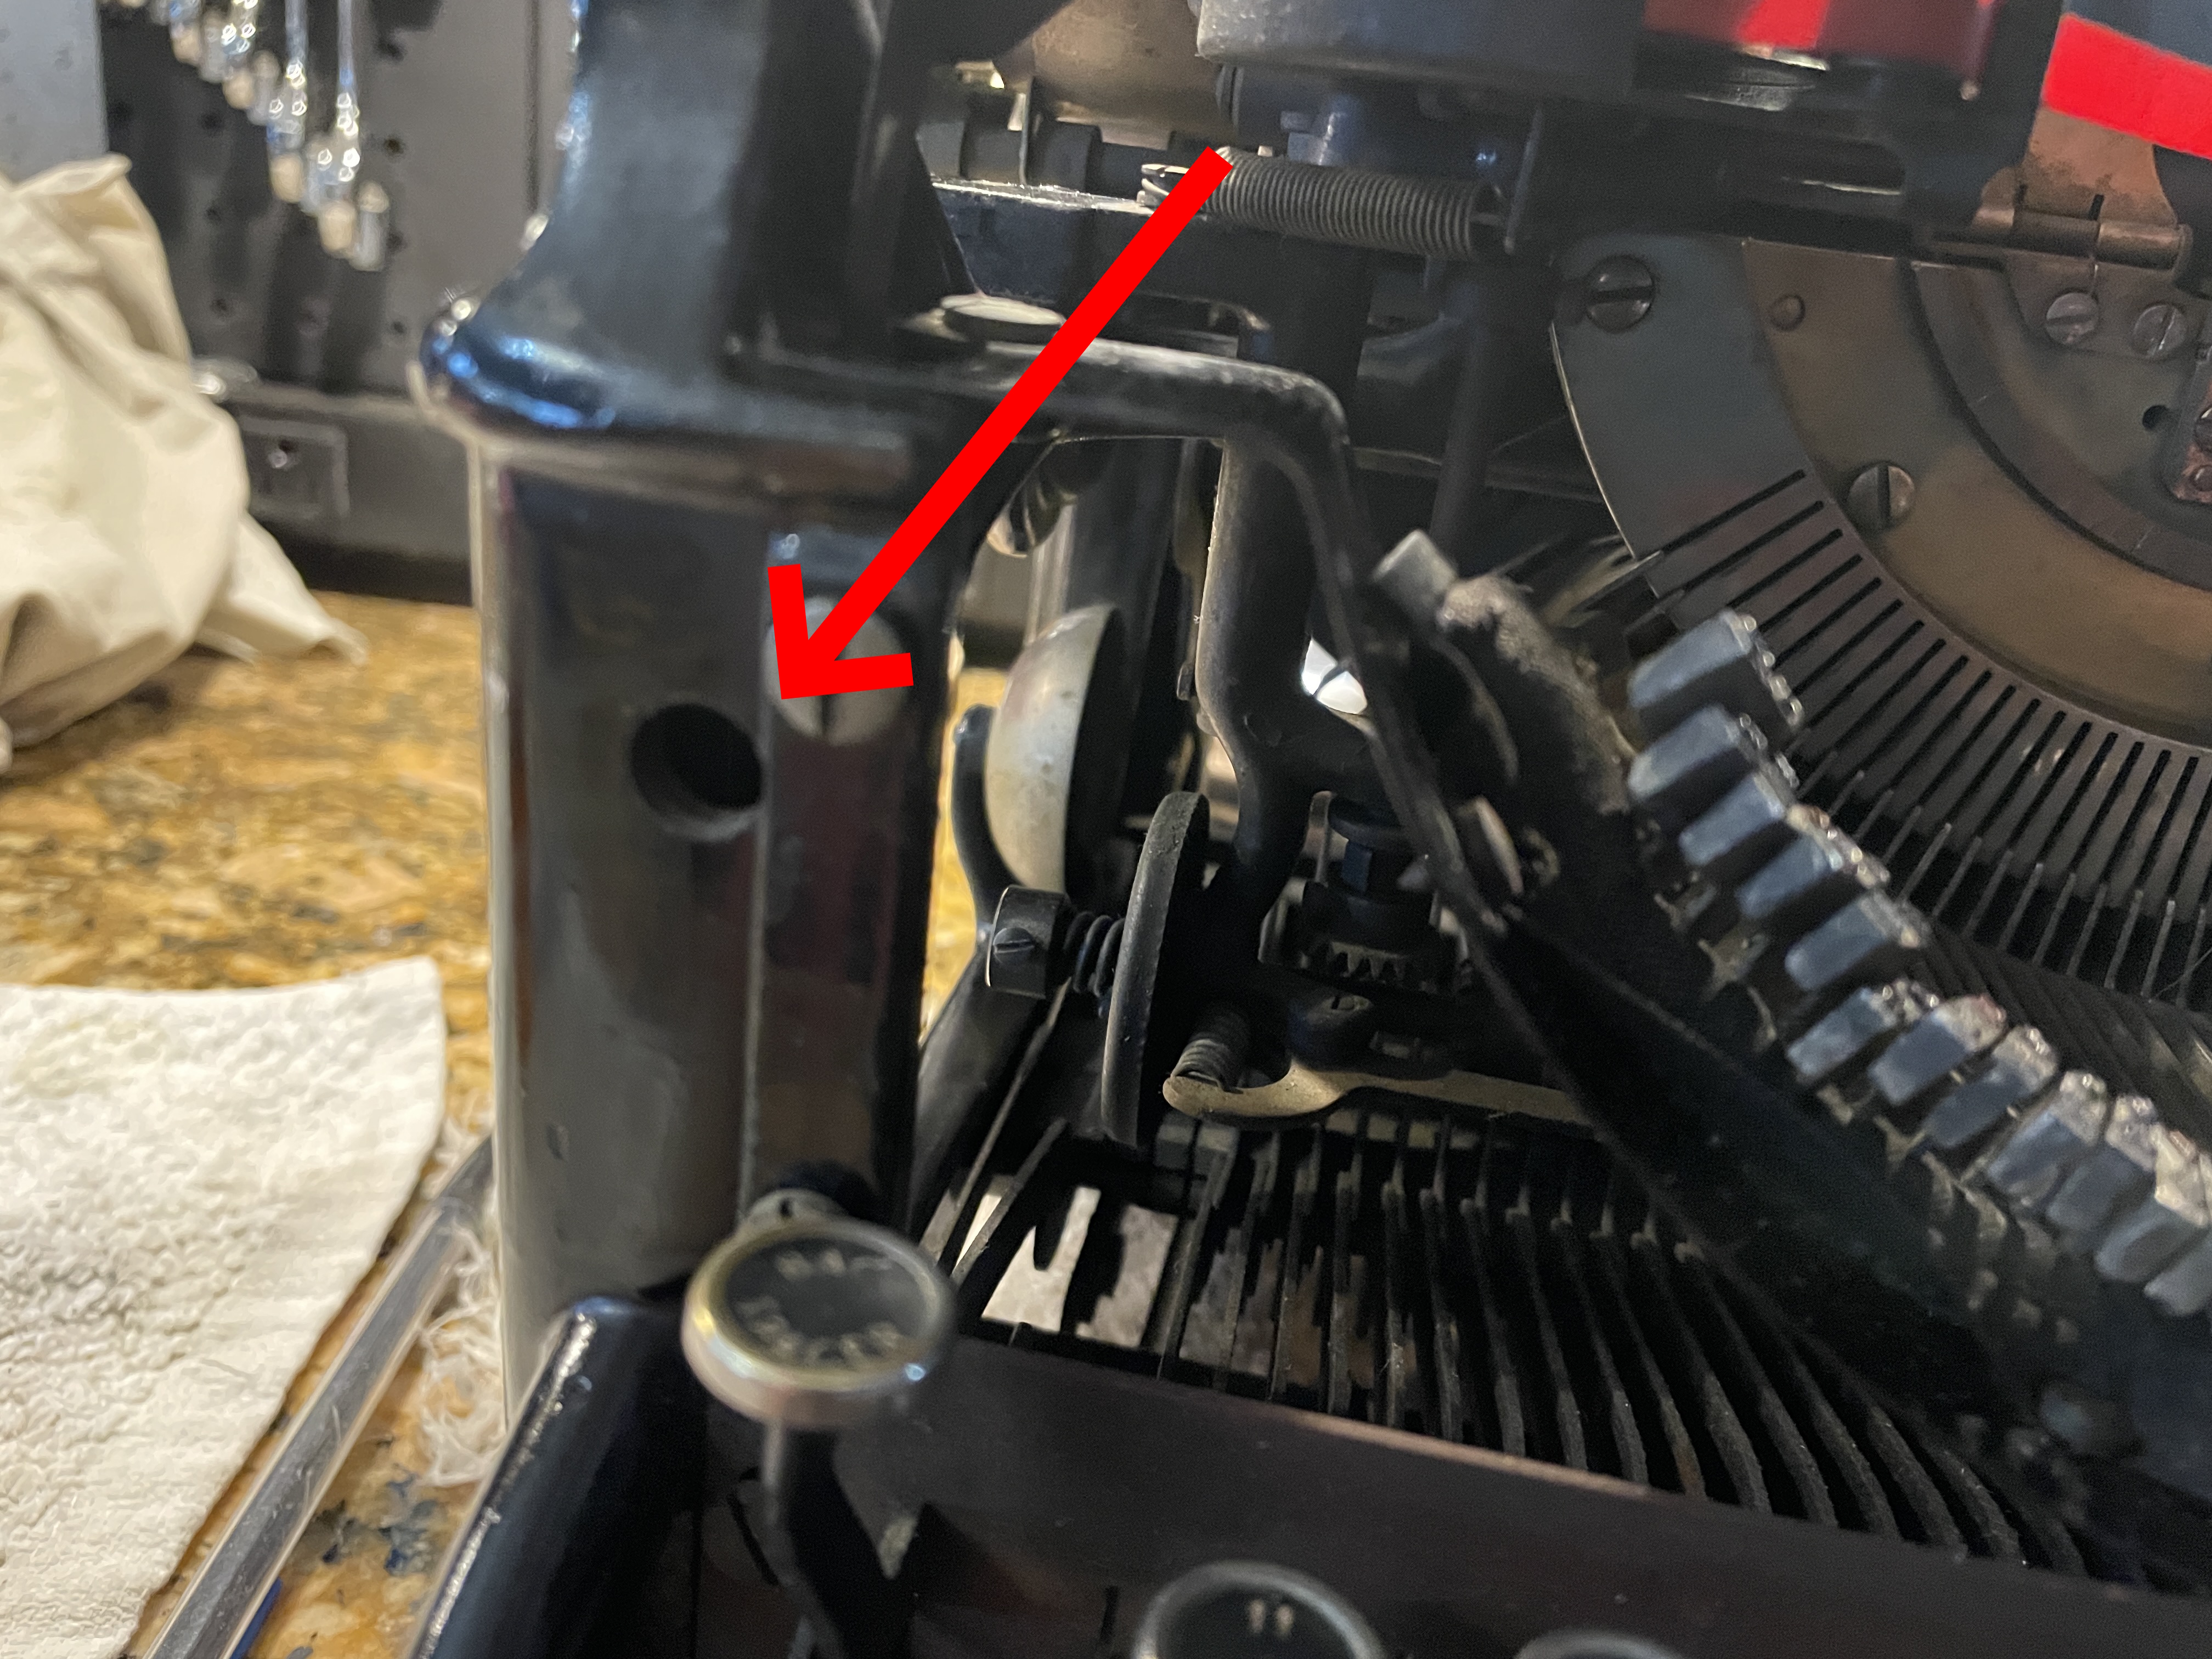
Missing margin release button
The margin release button was missing. I’ve seen this before on an old Underwood. As commenter Tyler A. mentions in that post, a pencil can be inserted in the hole and the bell trip arm pushed back for margin release. In later models, Underwood replaced this little springed button with a better key top margin release system.
Nonfunctional line space selector
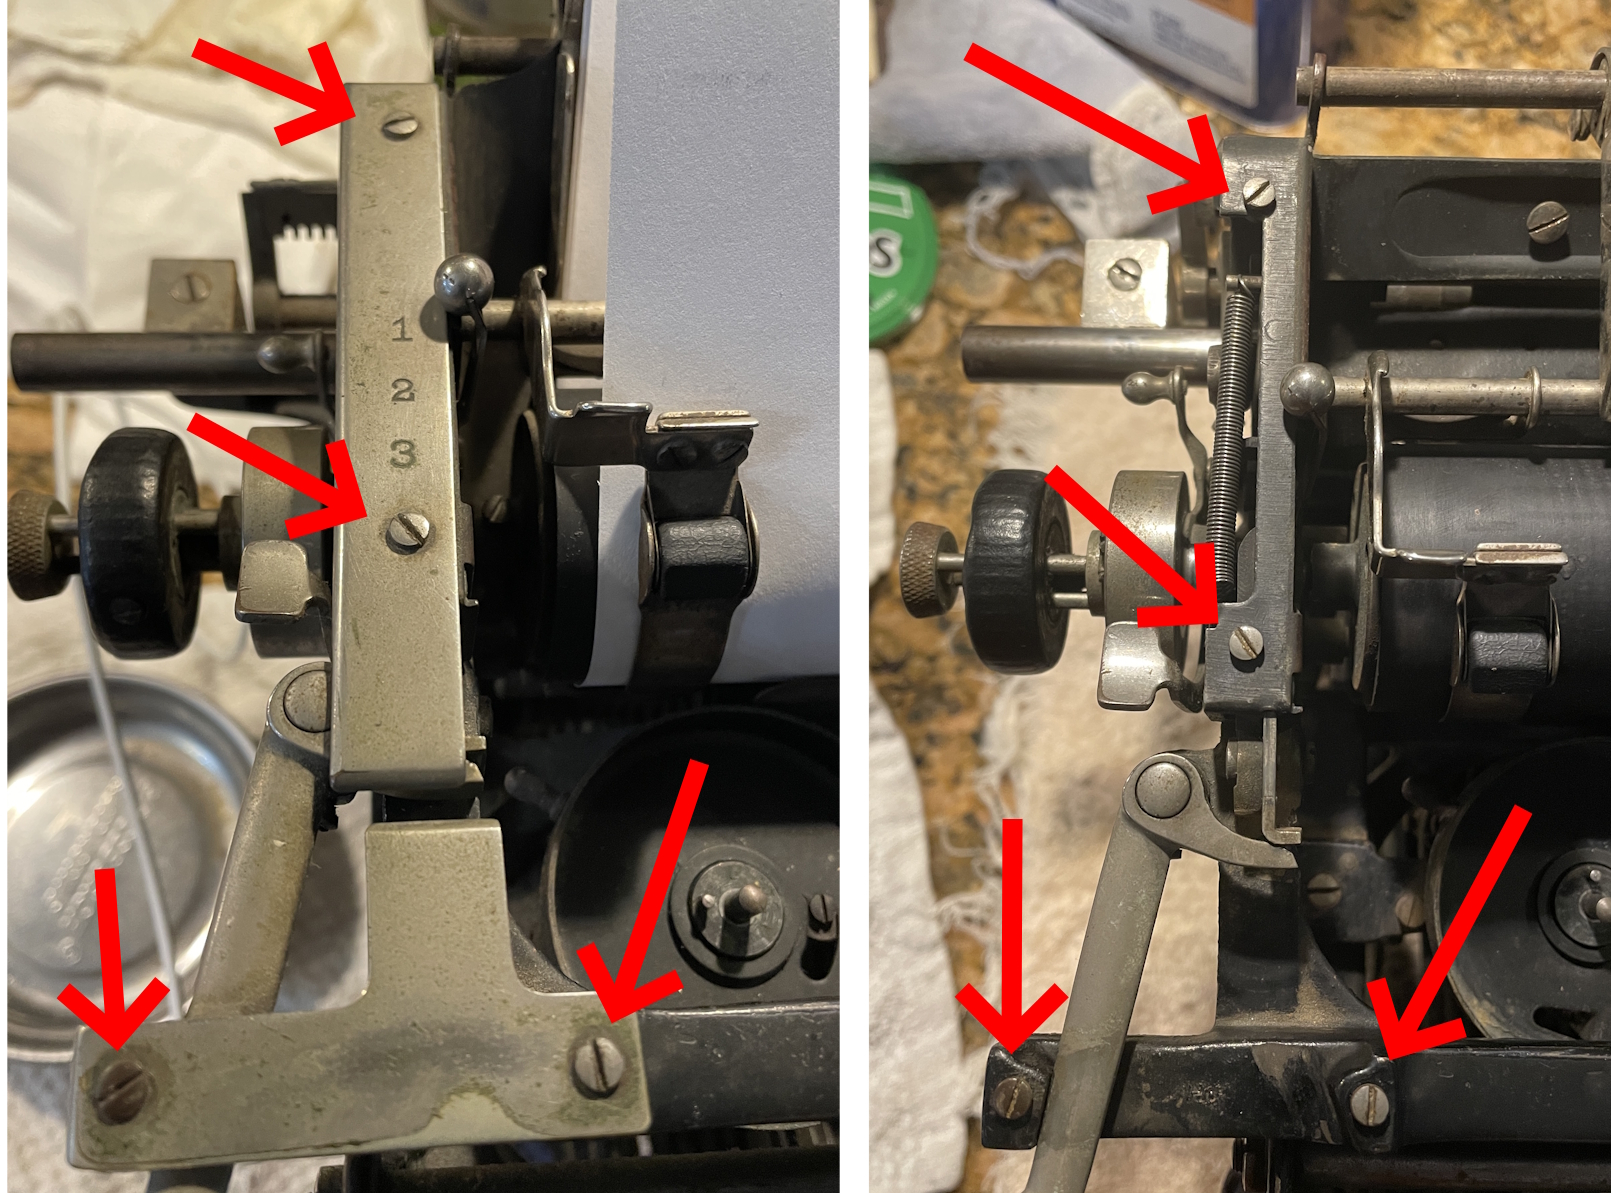
I also noticed that the line space selector was wibbly-wobbly and not functional, obviously missing a piece. Fortunately, I have a comparison machine, a 1938 Underwood 6 which is very similar mechanically. Thank you, Underwood Company, for sticking with a reliable design for so many years.

I took the line space selector cover plate off the Underwood 6 and saw what my problem was on the Underwood 4. Here’s the functional Underwood 6:
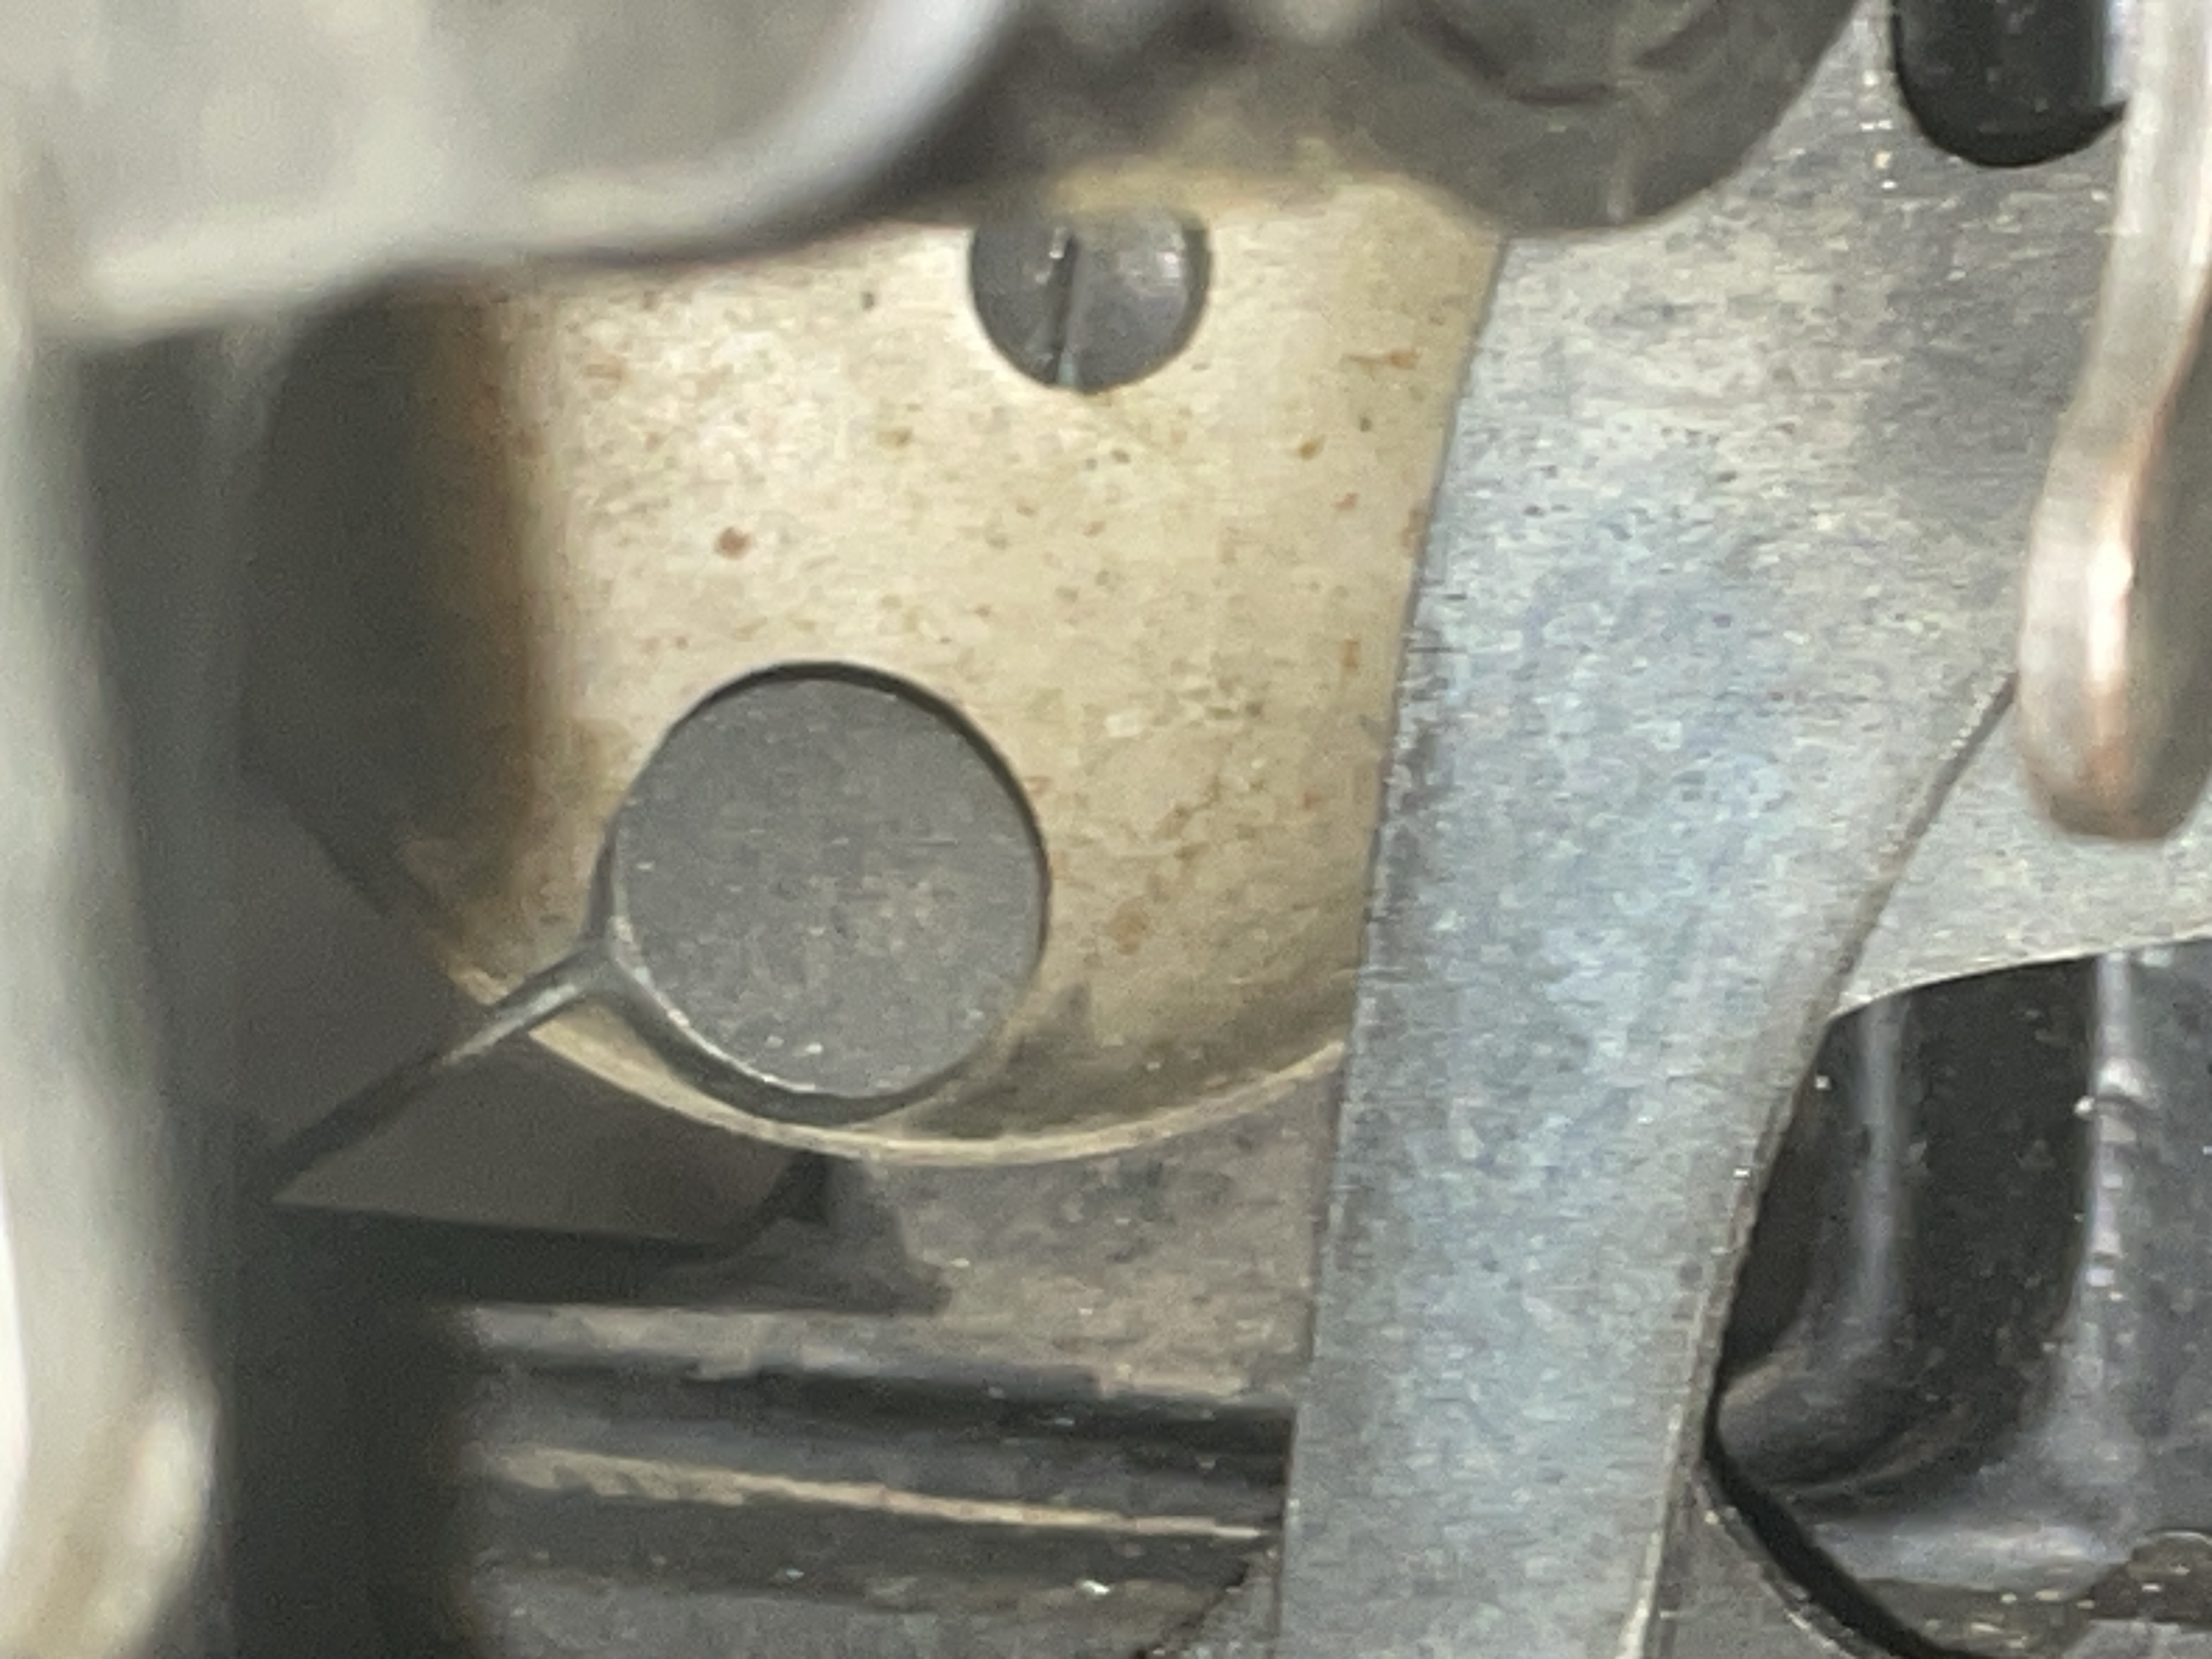
Here’s the dysfunctional Underwood 4—and I see that I’m missing a screw:

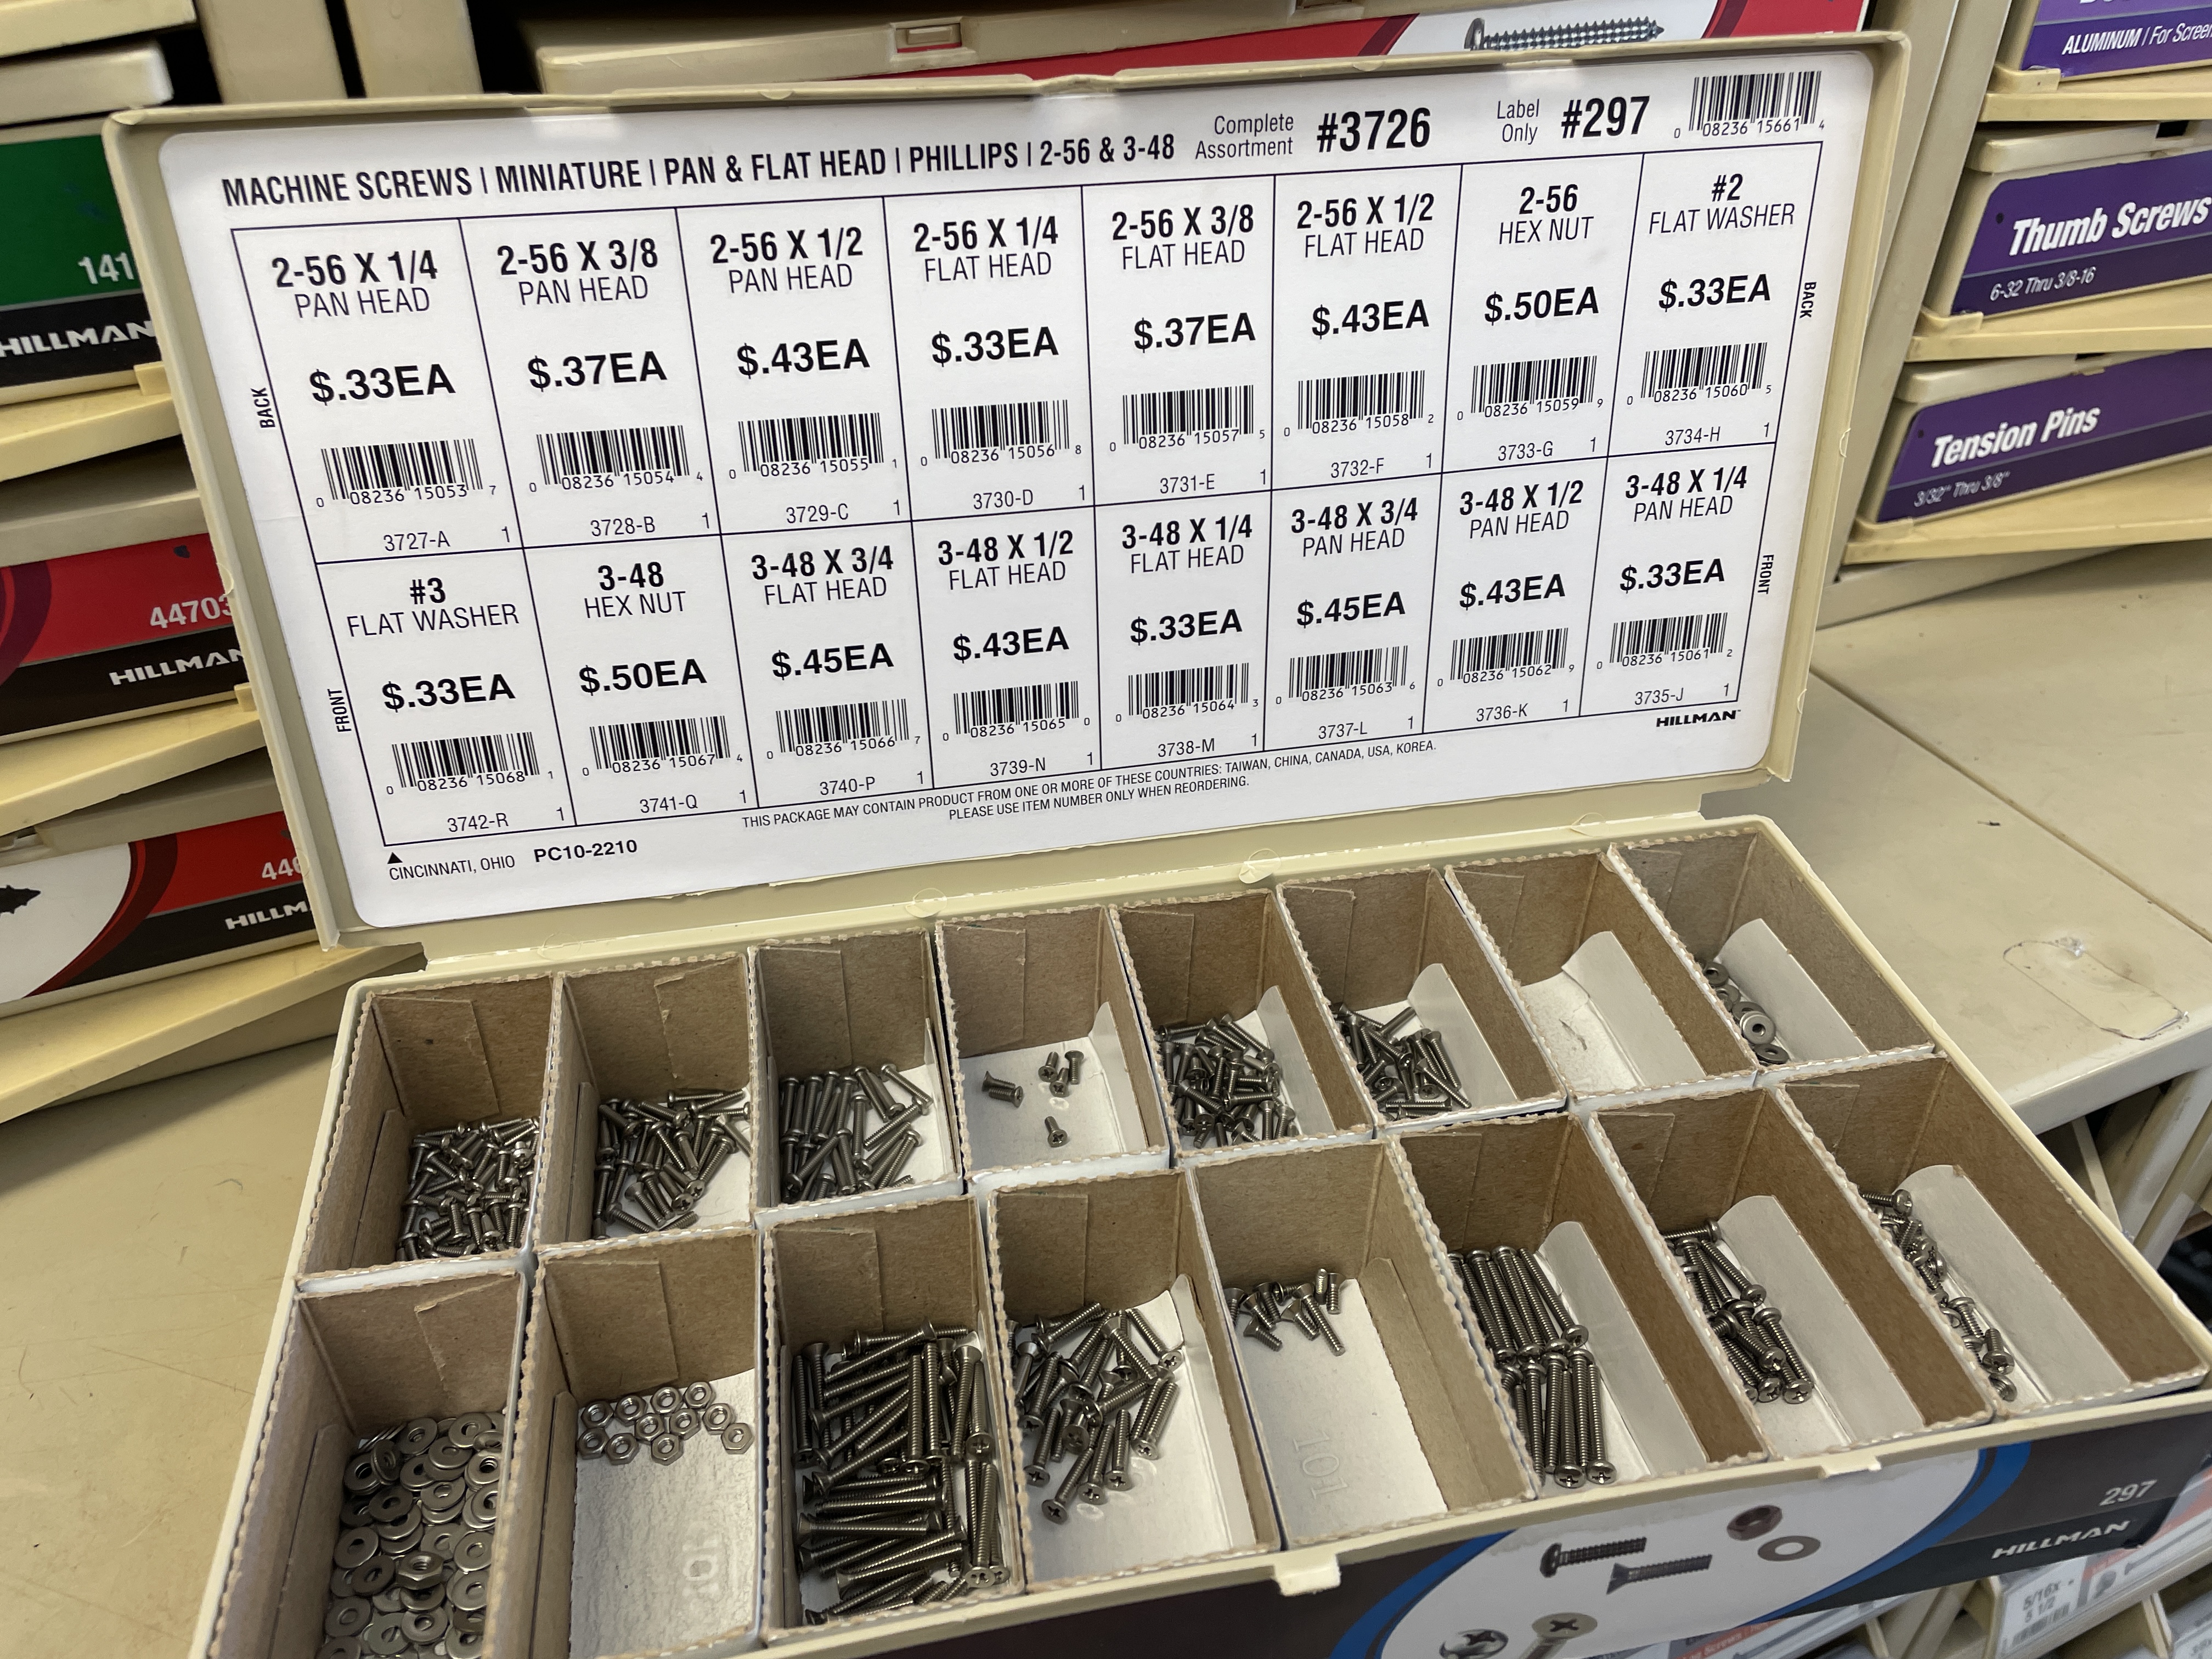
Per the 1955 Ames General Catalog, it’s a very tiny #2-56 screw.
![]()
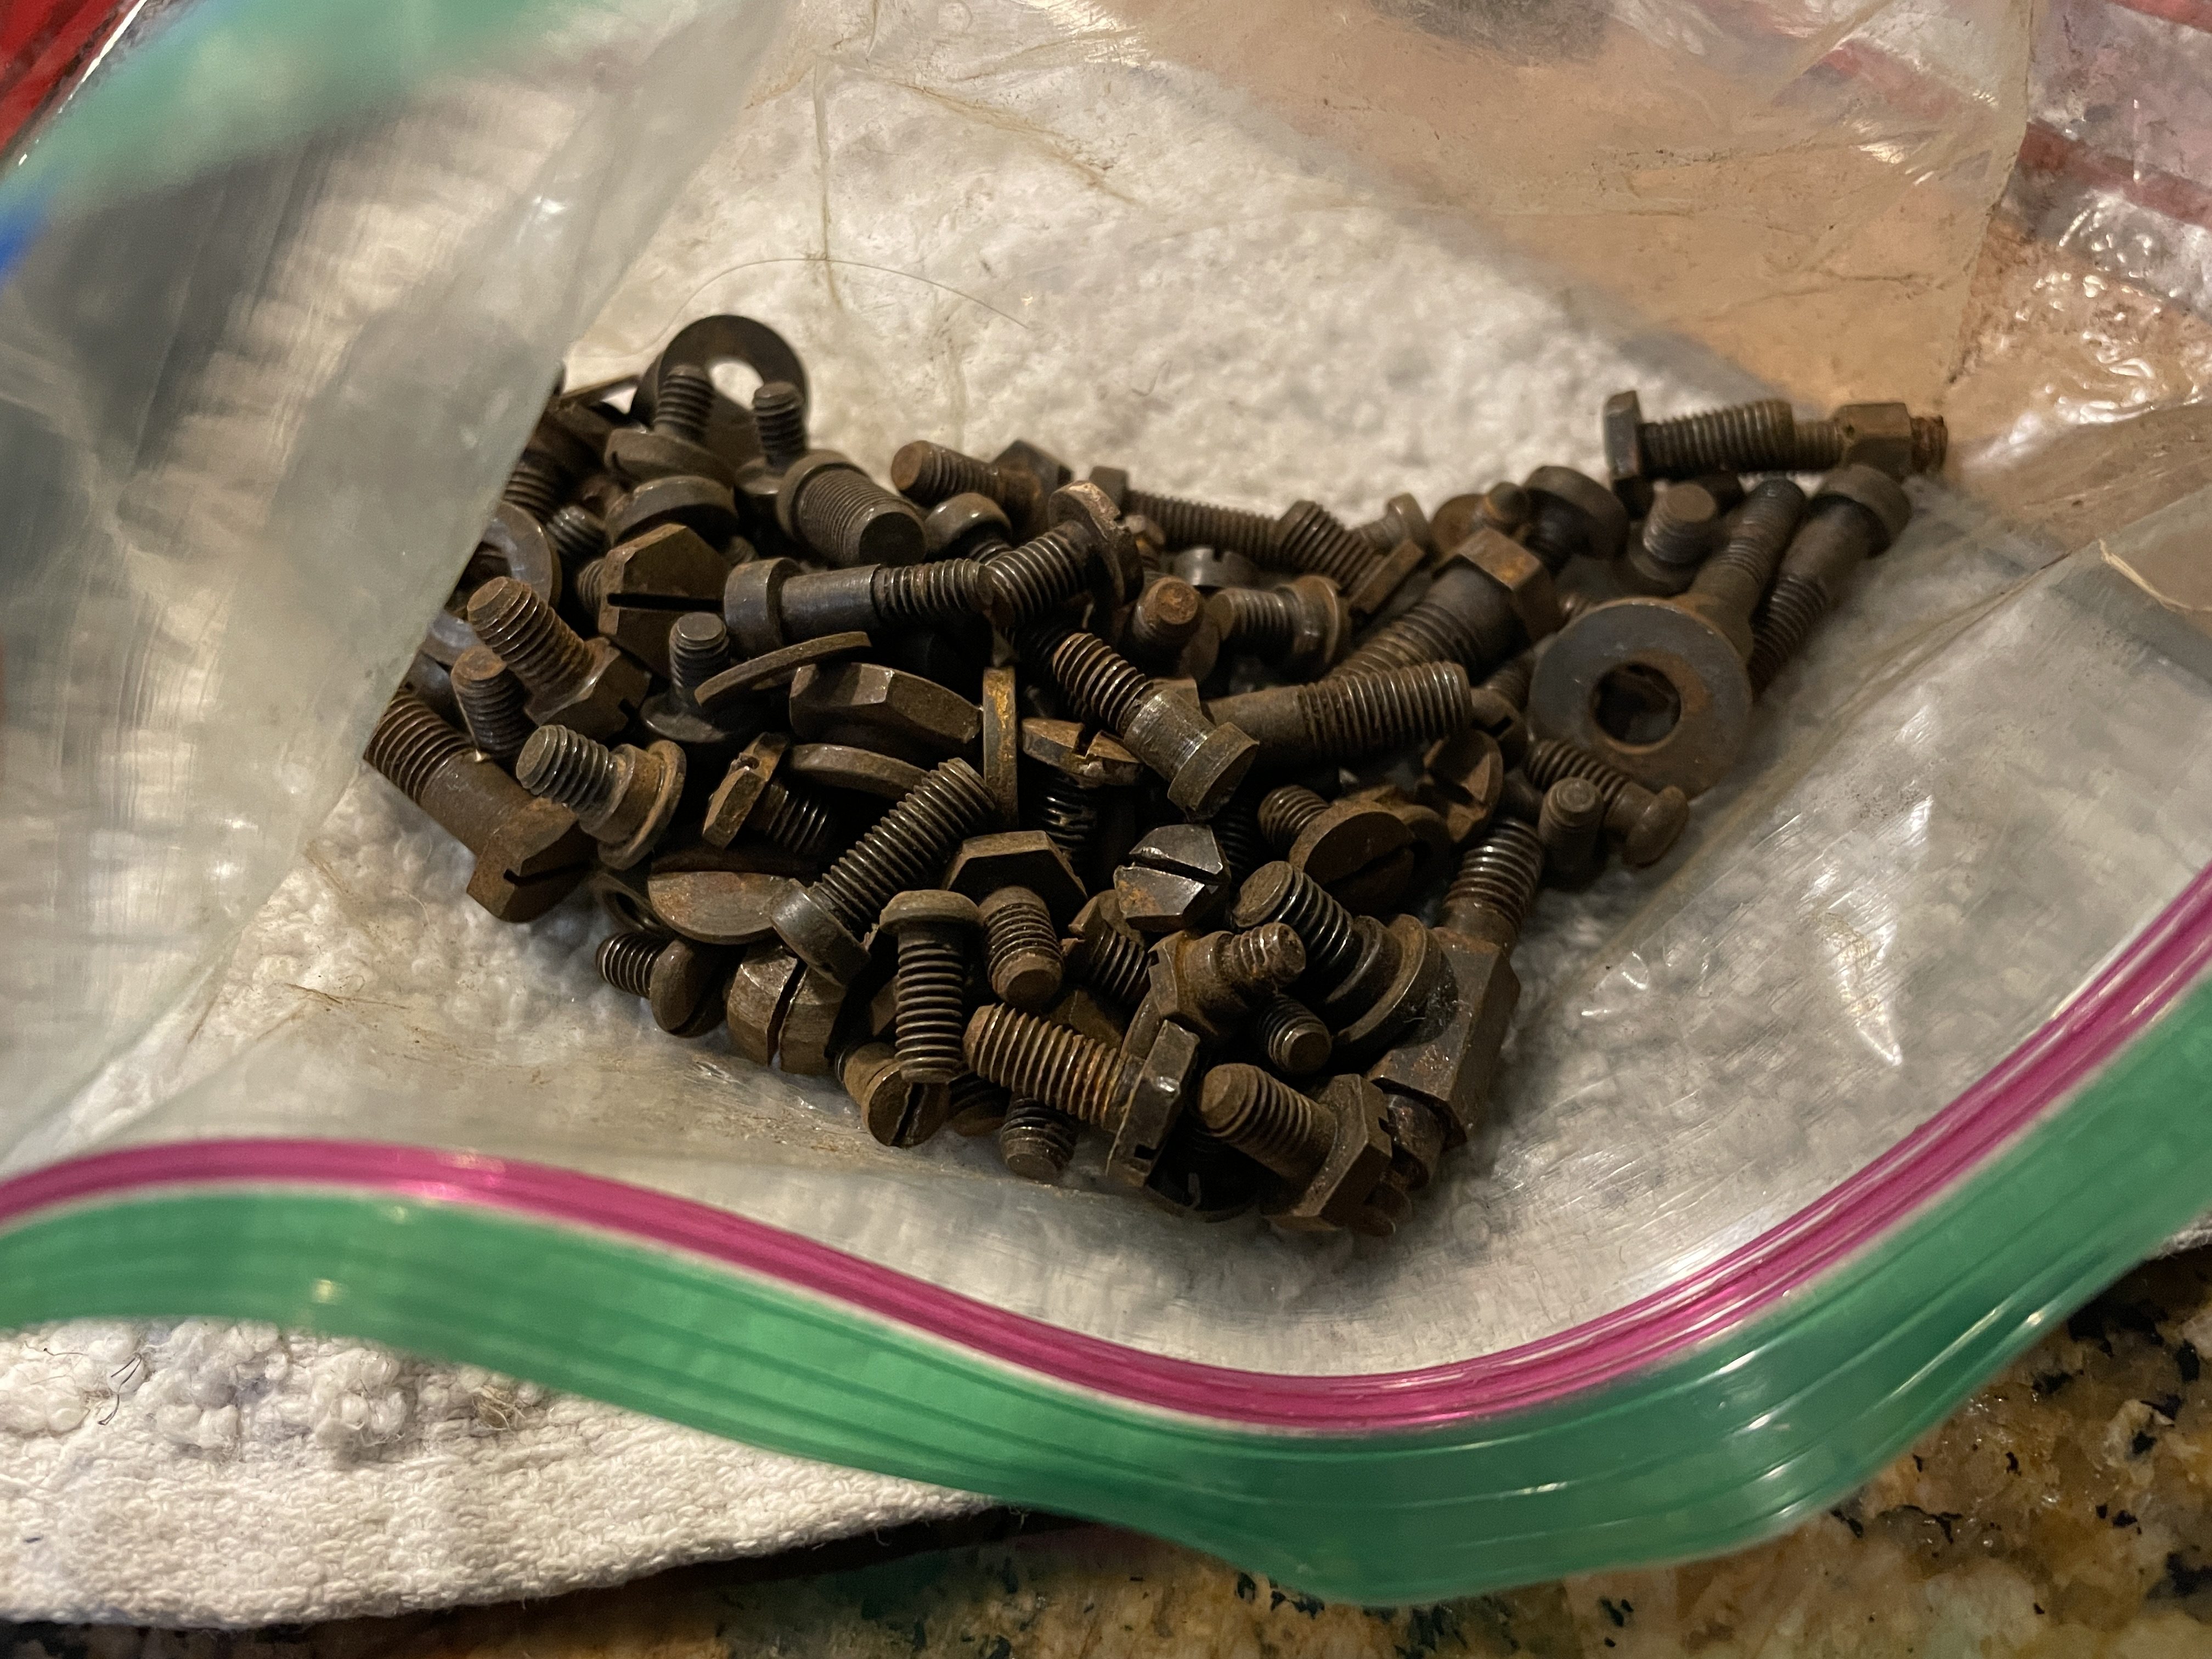
I dug through my many bags of typewriter screws, but I didn’t have anything small enough.
I went to the hardware store and found a 1/4″ long #2-56 pan head machine screw:
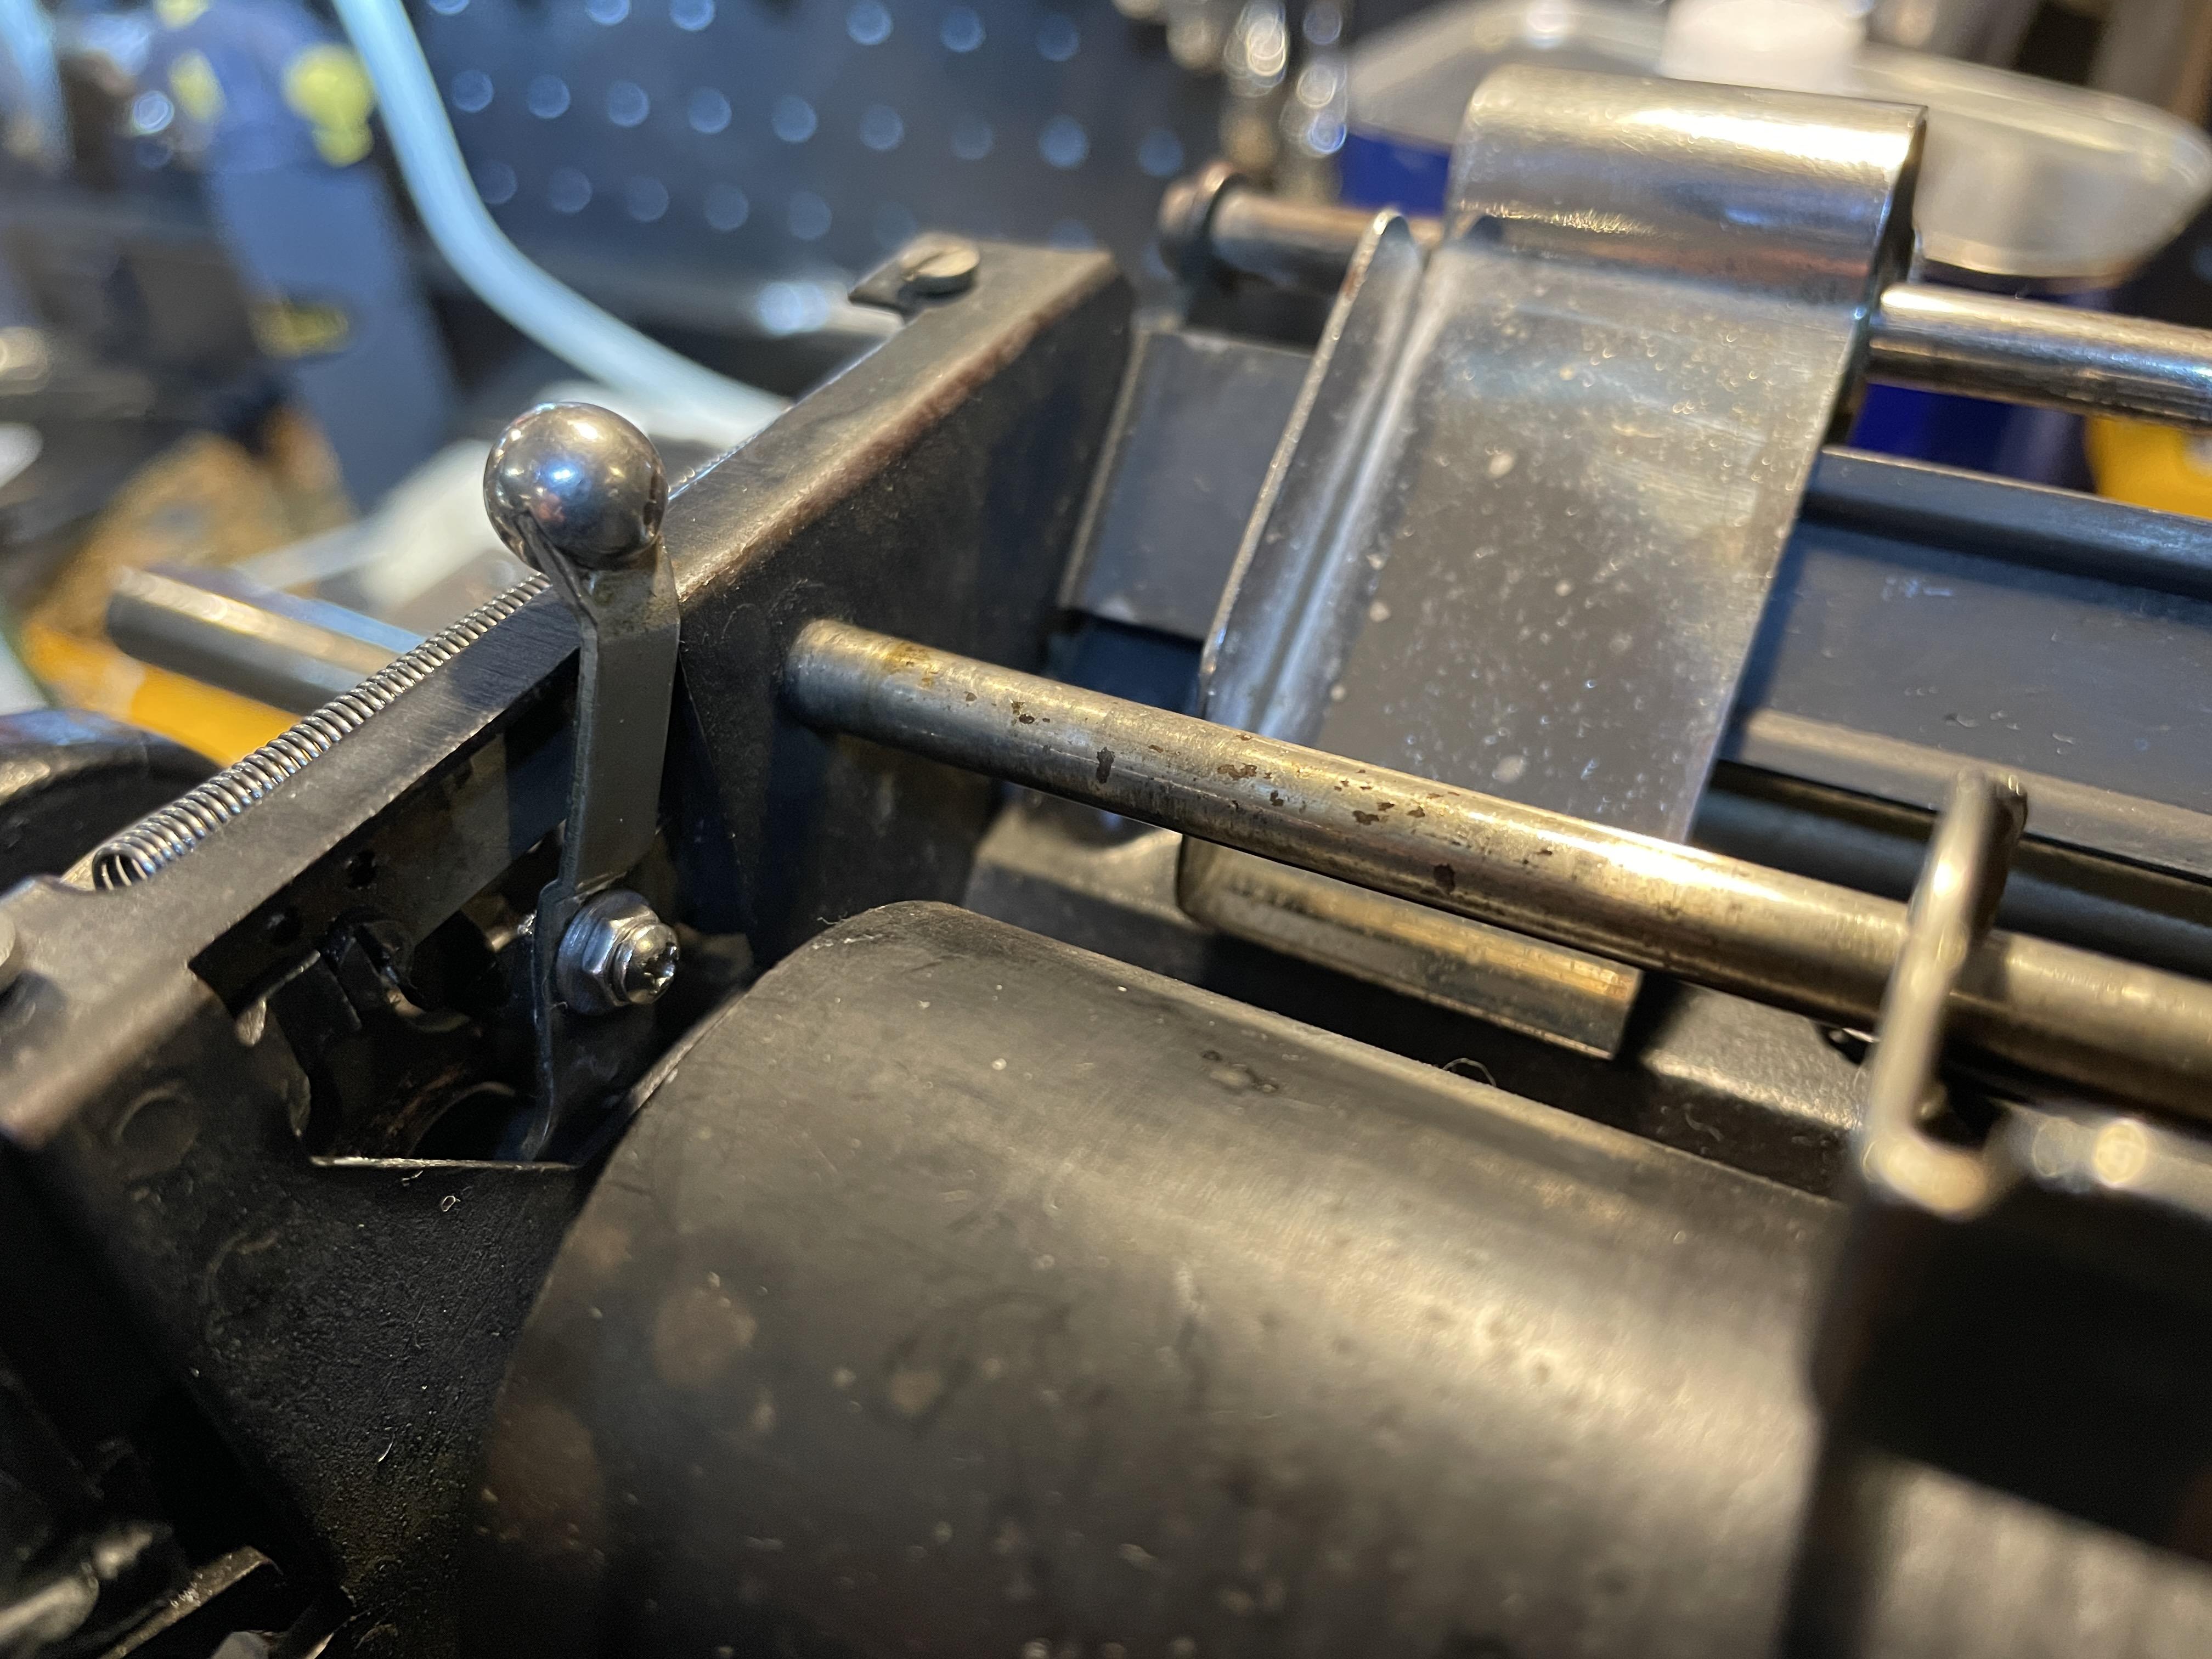
The screw was a little long, but I added a washer and a nut and it seemed to do the trick. All good:
The damn Underwood bell
No bell. Ugh. There was a vague clunk at the end of the line, and the Underwood was often running over the right margin.
Underwood bells have a reputation for being problematic. All I heard was a sad, barely-audible clunk. When I peered inside, I saw the clapper resting inside the bell—it needed a little “forming” upward to get a clear ding.
I recently made a bender tool out of a cheap screwdriver, and that was very helpful in “forming” the bell clapper.
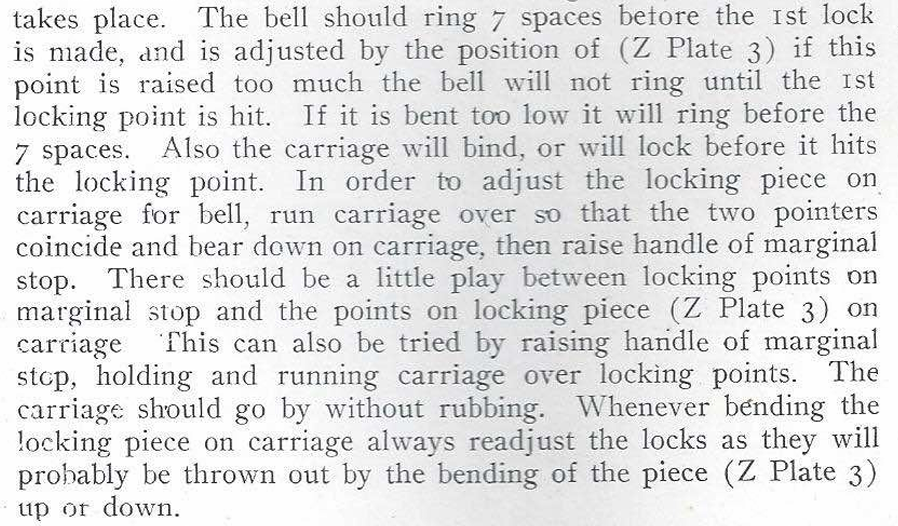
I formed it upward a tiny bit, and I got a slightly more distinct bell sound. However, I was still having problems: I was overrunning the margin and it was ringing right at the end of the line, not seven spaces before.
With these old Underwoods, “right is left and left is right” which is very confusing. If you are reading a service manual, know that the Right Marginal Stop controls the left margin and the Left Marginal Stop controls the right margin, bell, and line lock. Here are the service manuals that I referenced when trying to solve this problem.
- H. G. Pearce Underwood Service Manual (1920), pages 25-27
- Ames Typewriter Mechanical Training Manual (1945), pages 58-59
- Underwood Typewriter Maintenance and Repair, Dept of the Army (1955), pages 30-34
Note that part terminology differs from manual to manual.
I experimented with Richard Polt’s One Weird Trick for Underwood bells, but I wasn’t able to improve the right margin’s bell quality, timing, or overrunning.
I then vaguely recalled a 10 year old blog post at Tyler A.’s blog Words Are Winged called “Tuning an Underwood 5”.
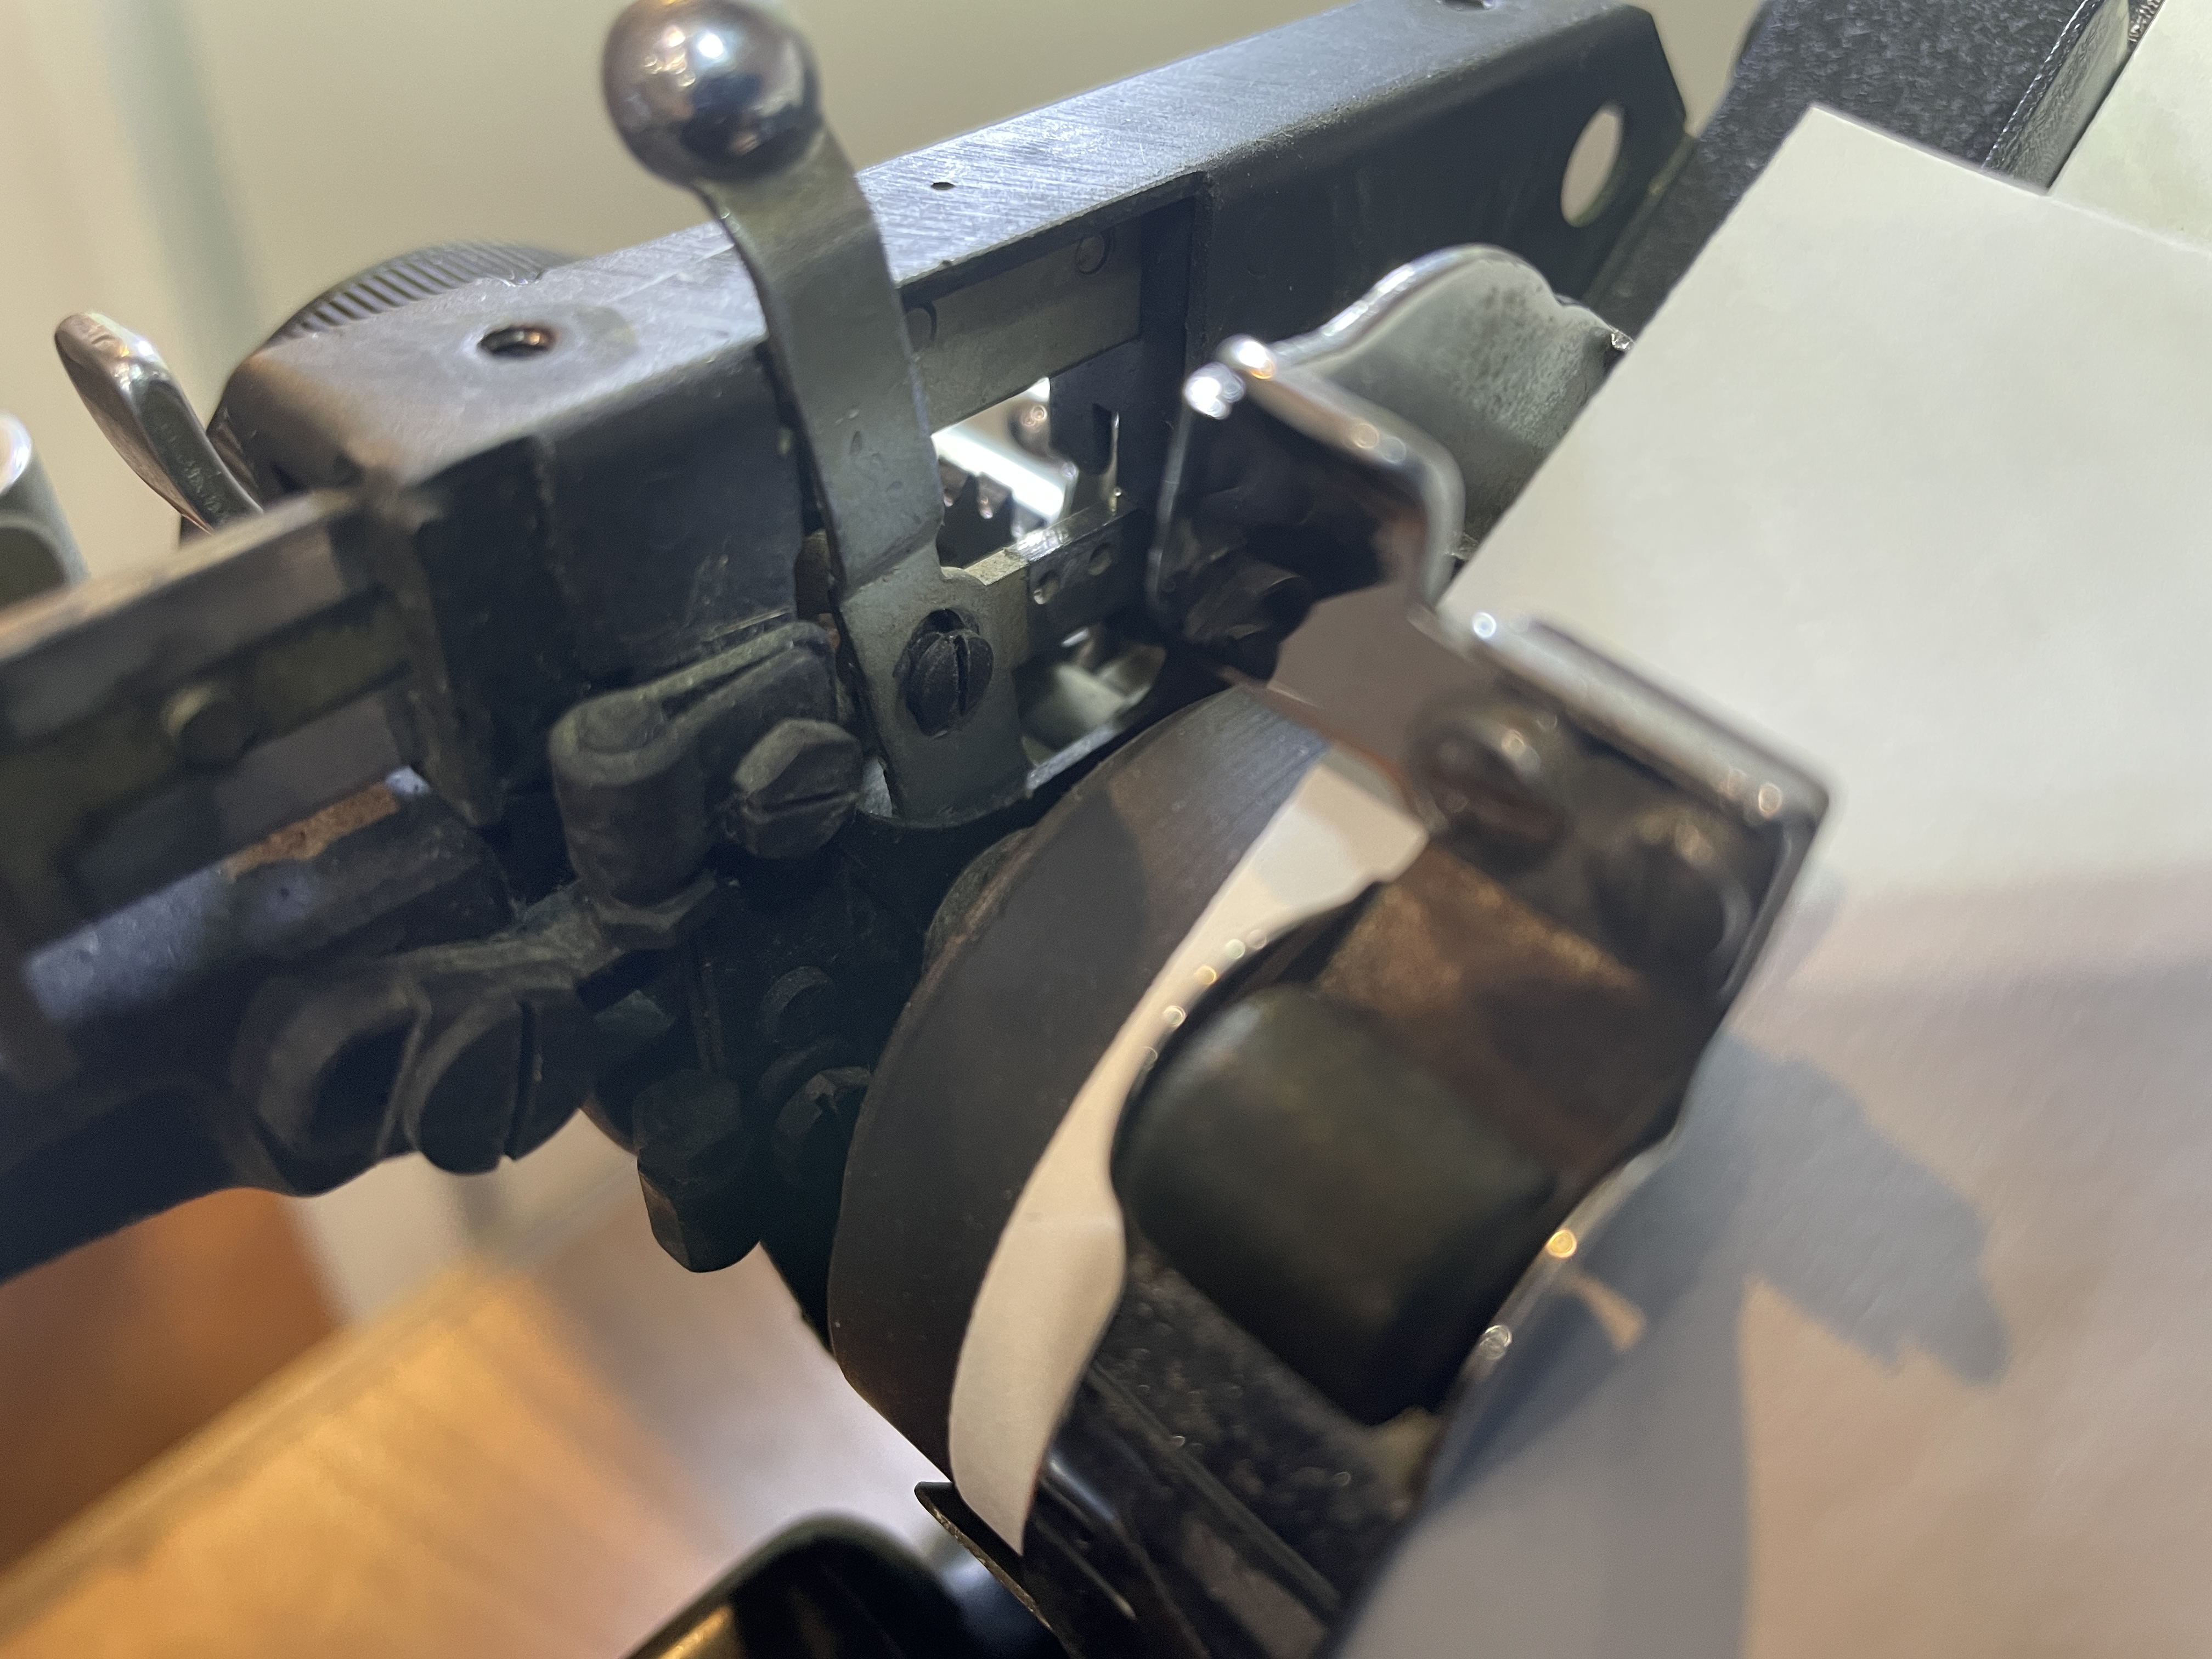
Deformed Locking Piece / Bell Trip Adjuster
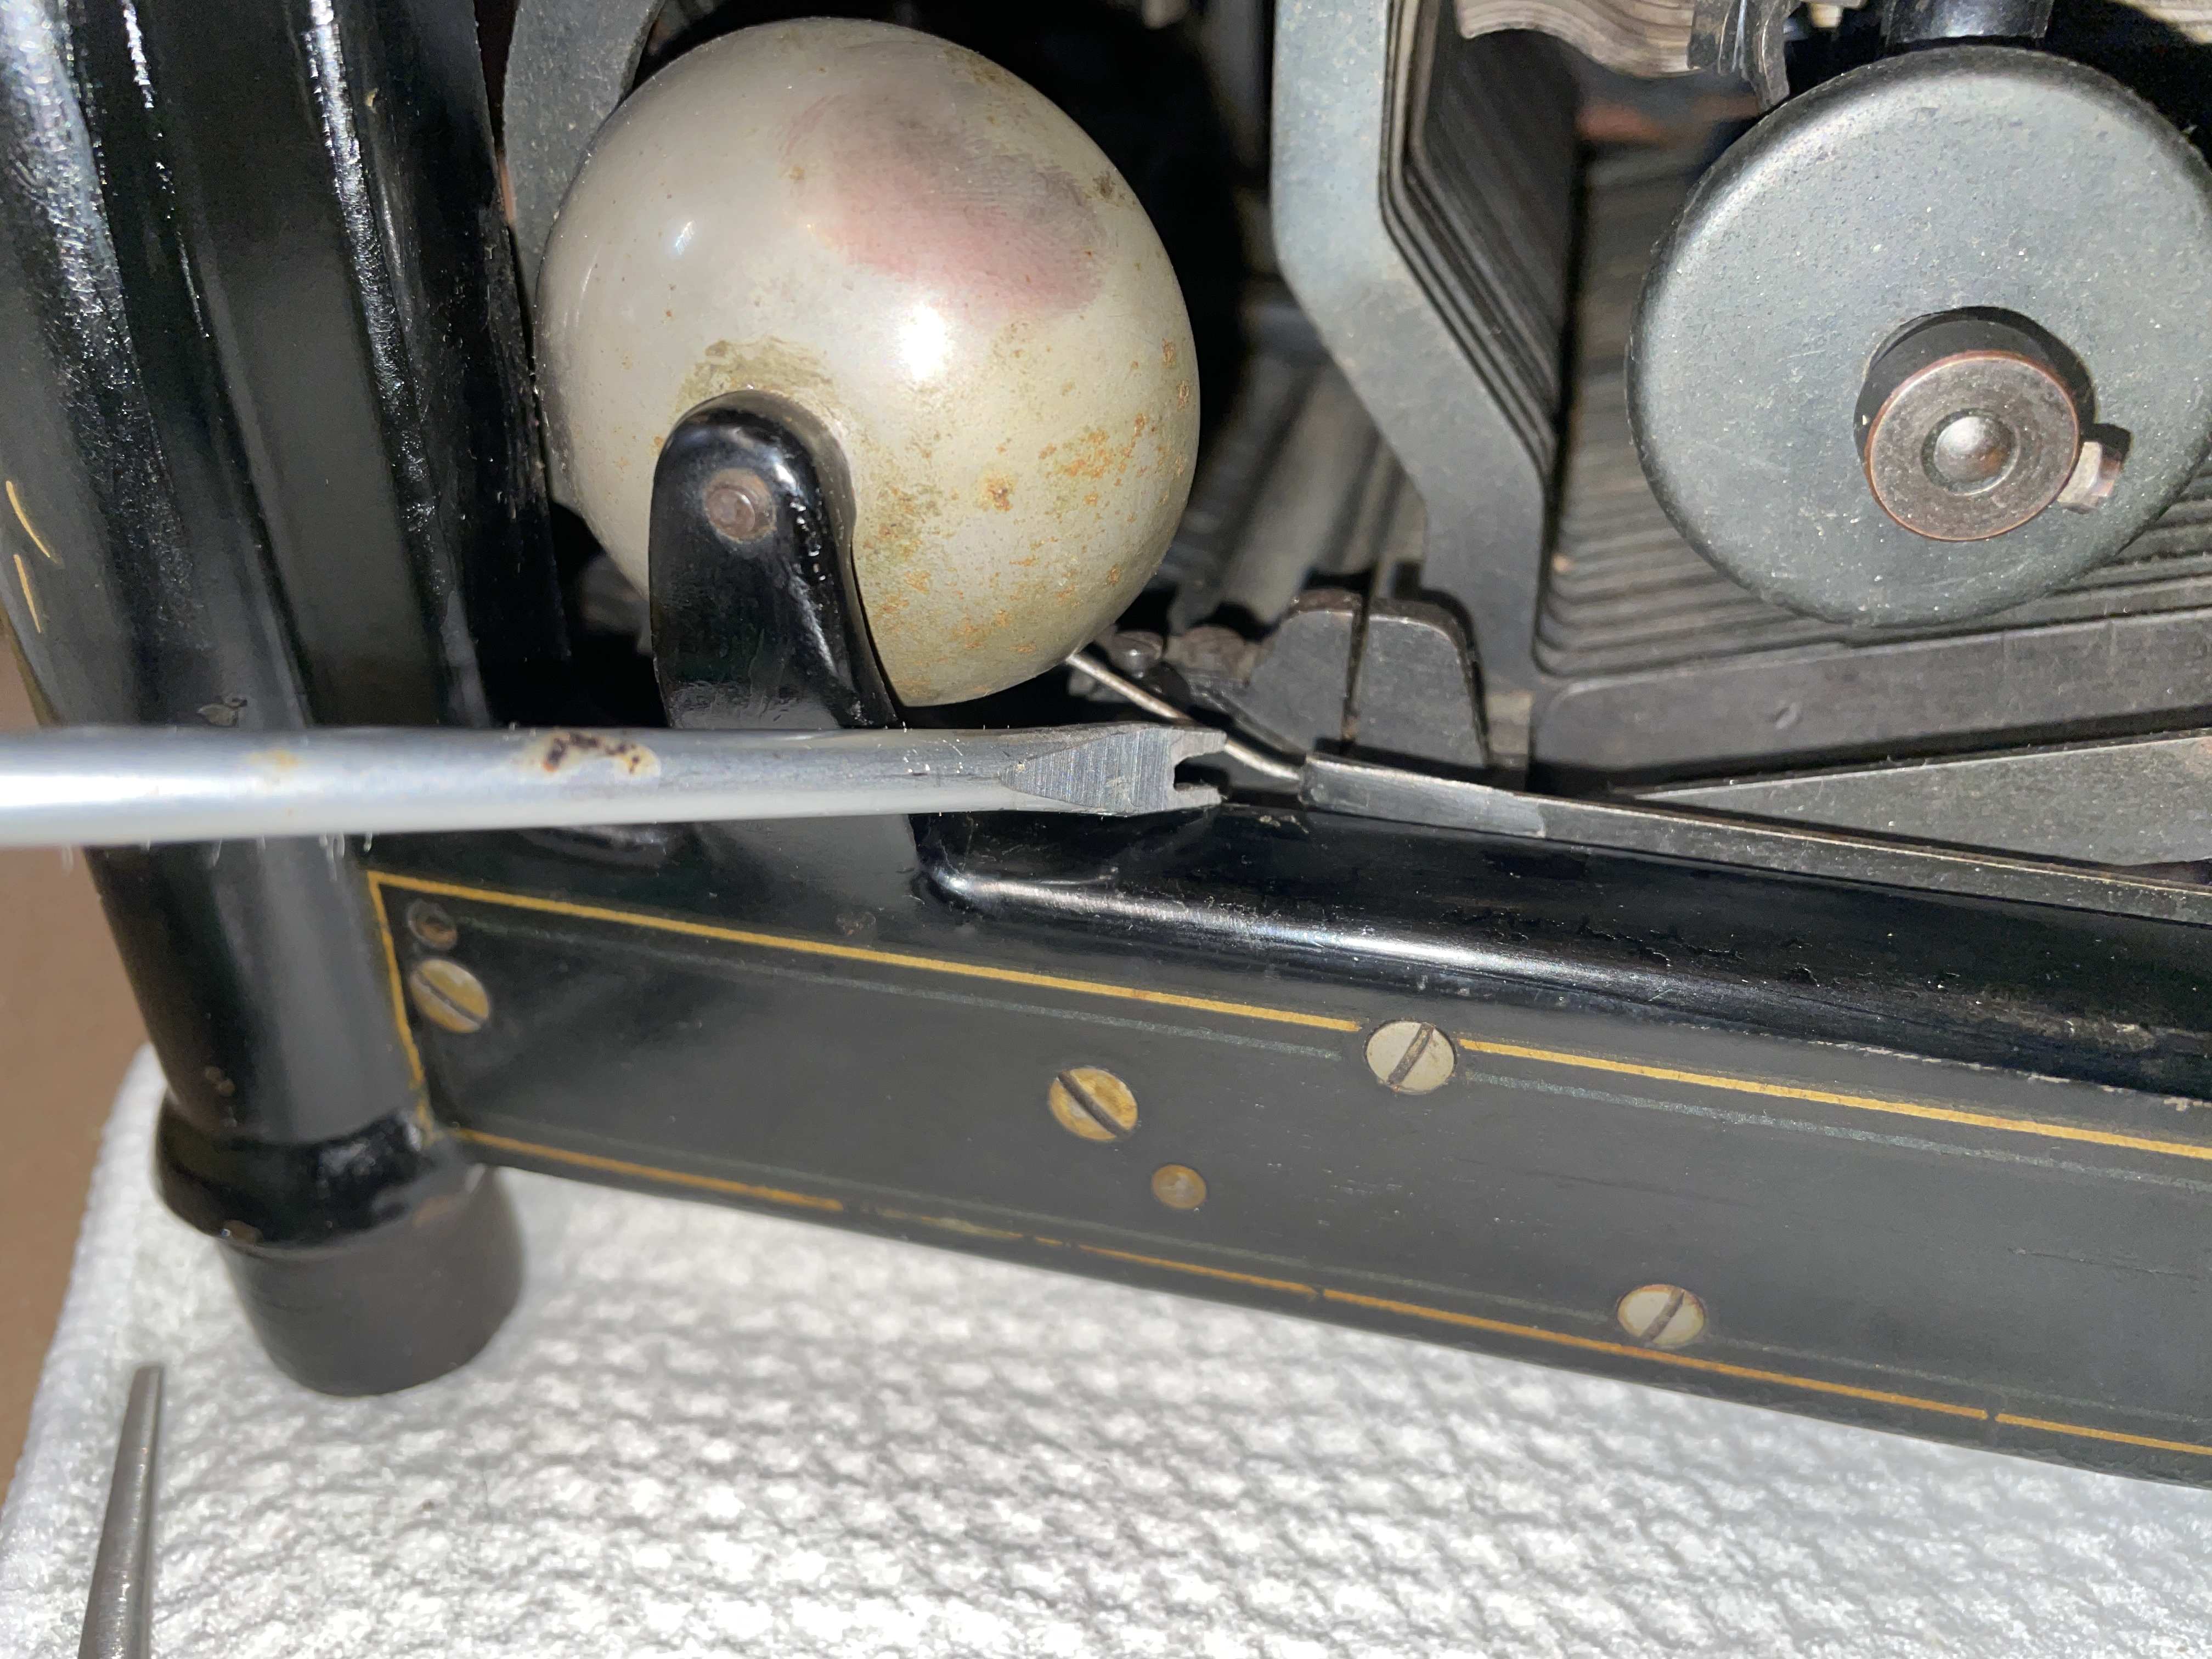
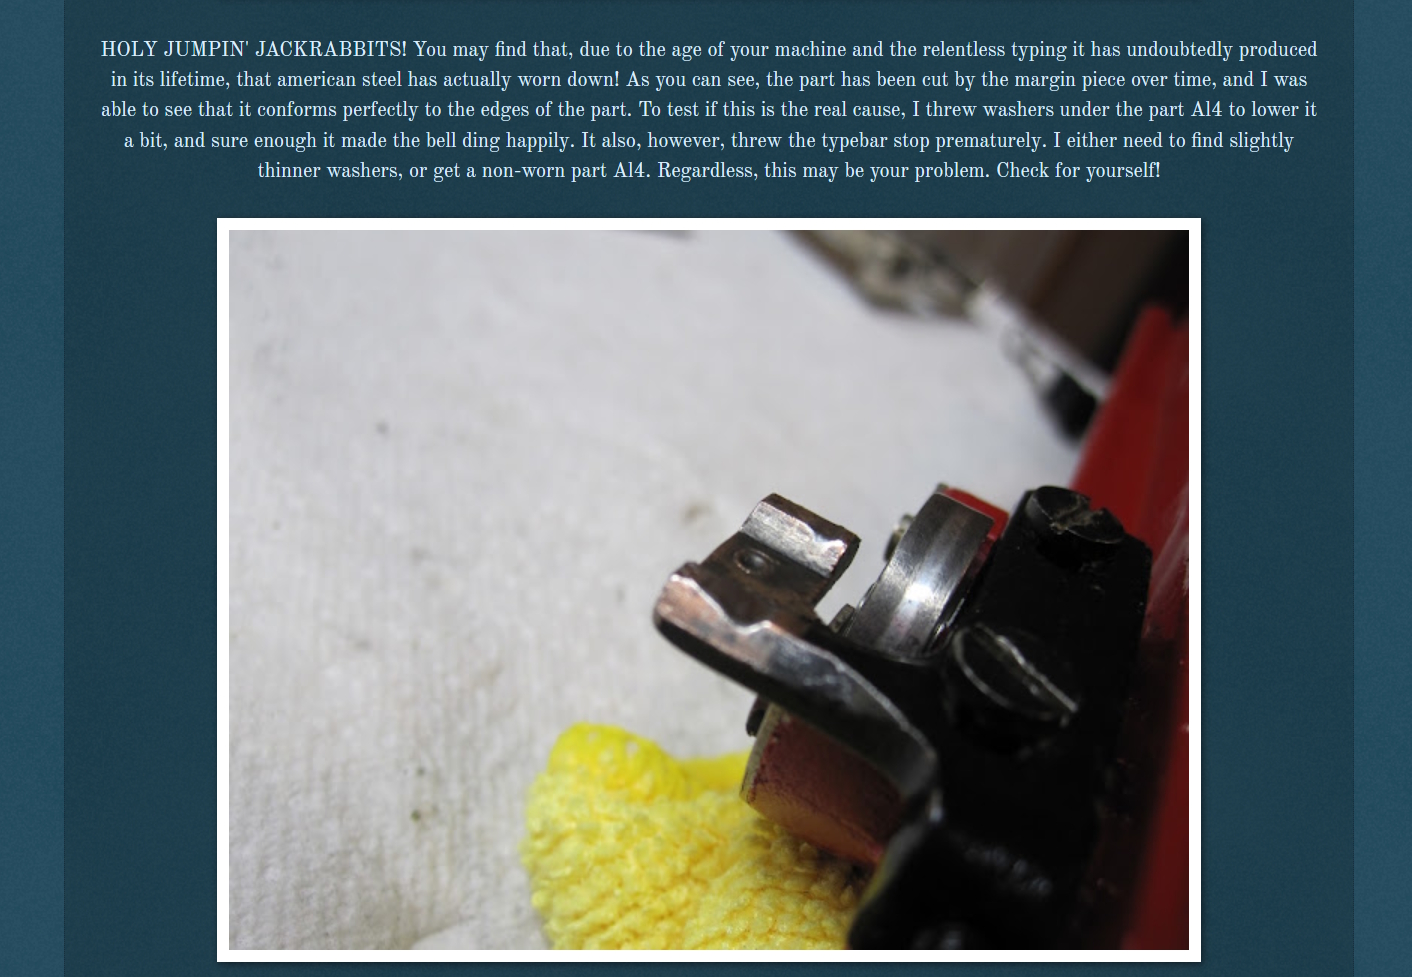
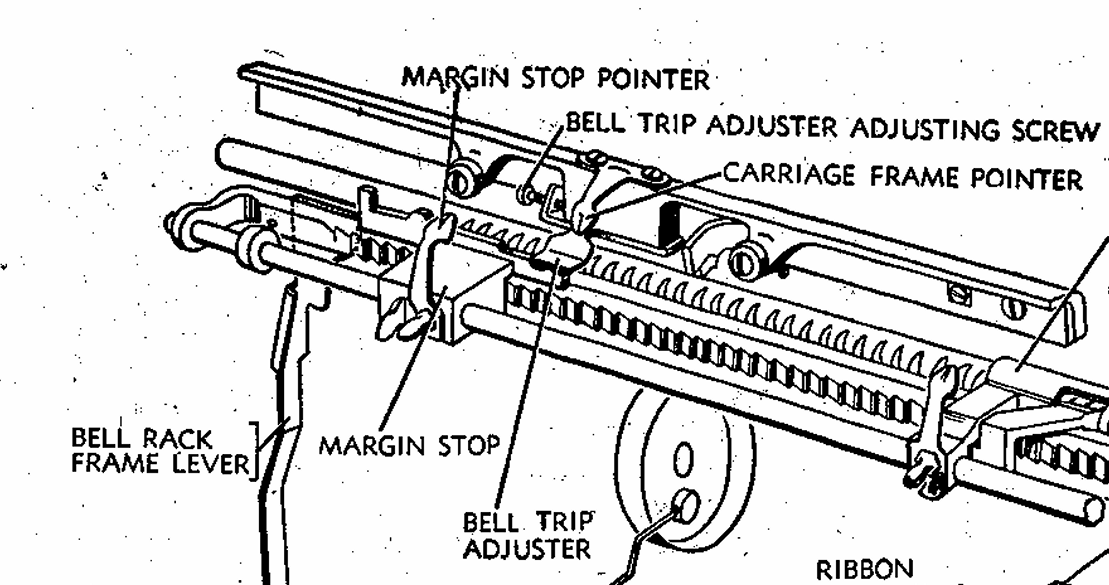
I probably had a similar problem. I saw that the first and second camshapes of the Bell Trip Adjuster A.K.A. Locking Piece had worn down over the past 100+ years and weren’t fully depressing the right margin stop (Left Marginal Stop)—thus the barely audible and badly timed bell as well as the margin overrunning.
Tyler had inserted washers under his Bell Trip Adjuster with some success.
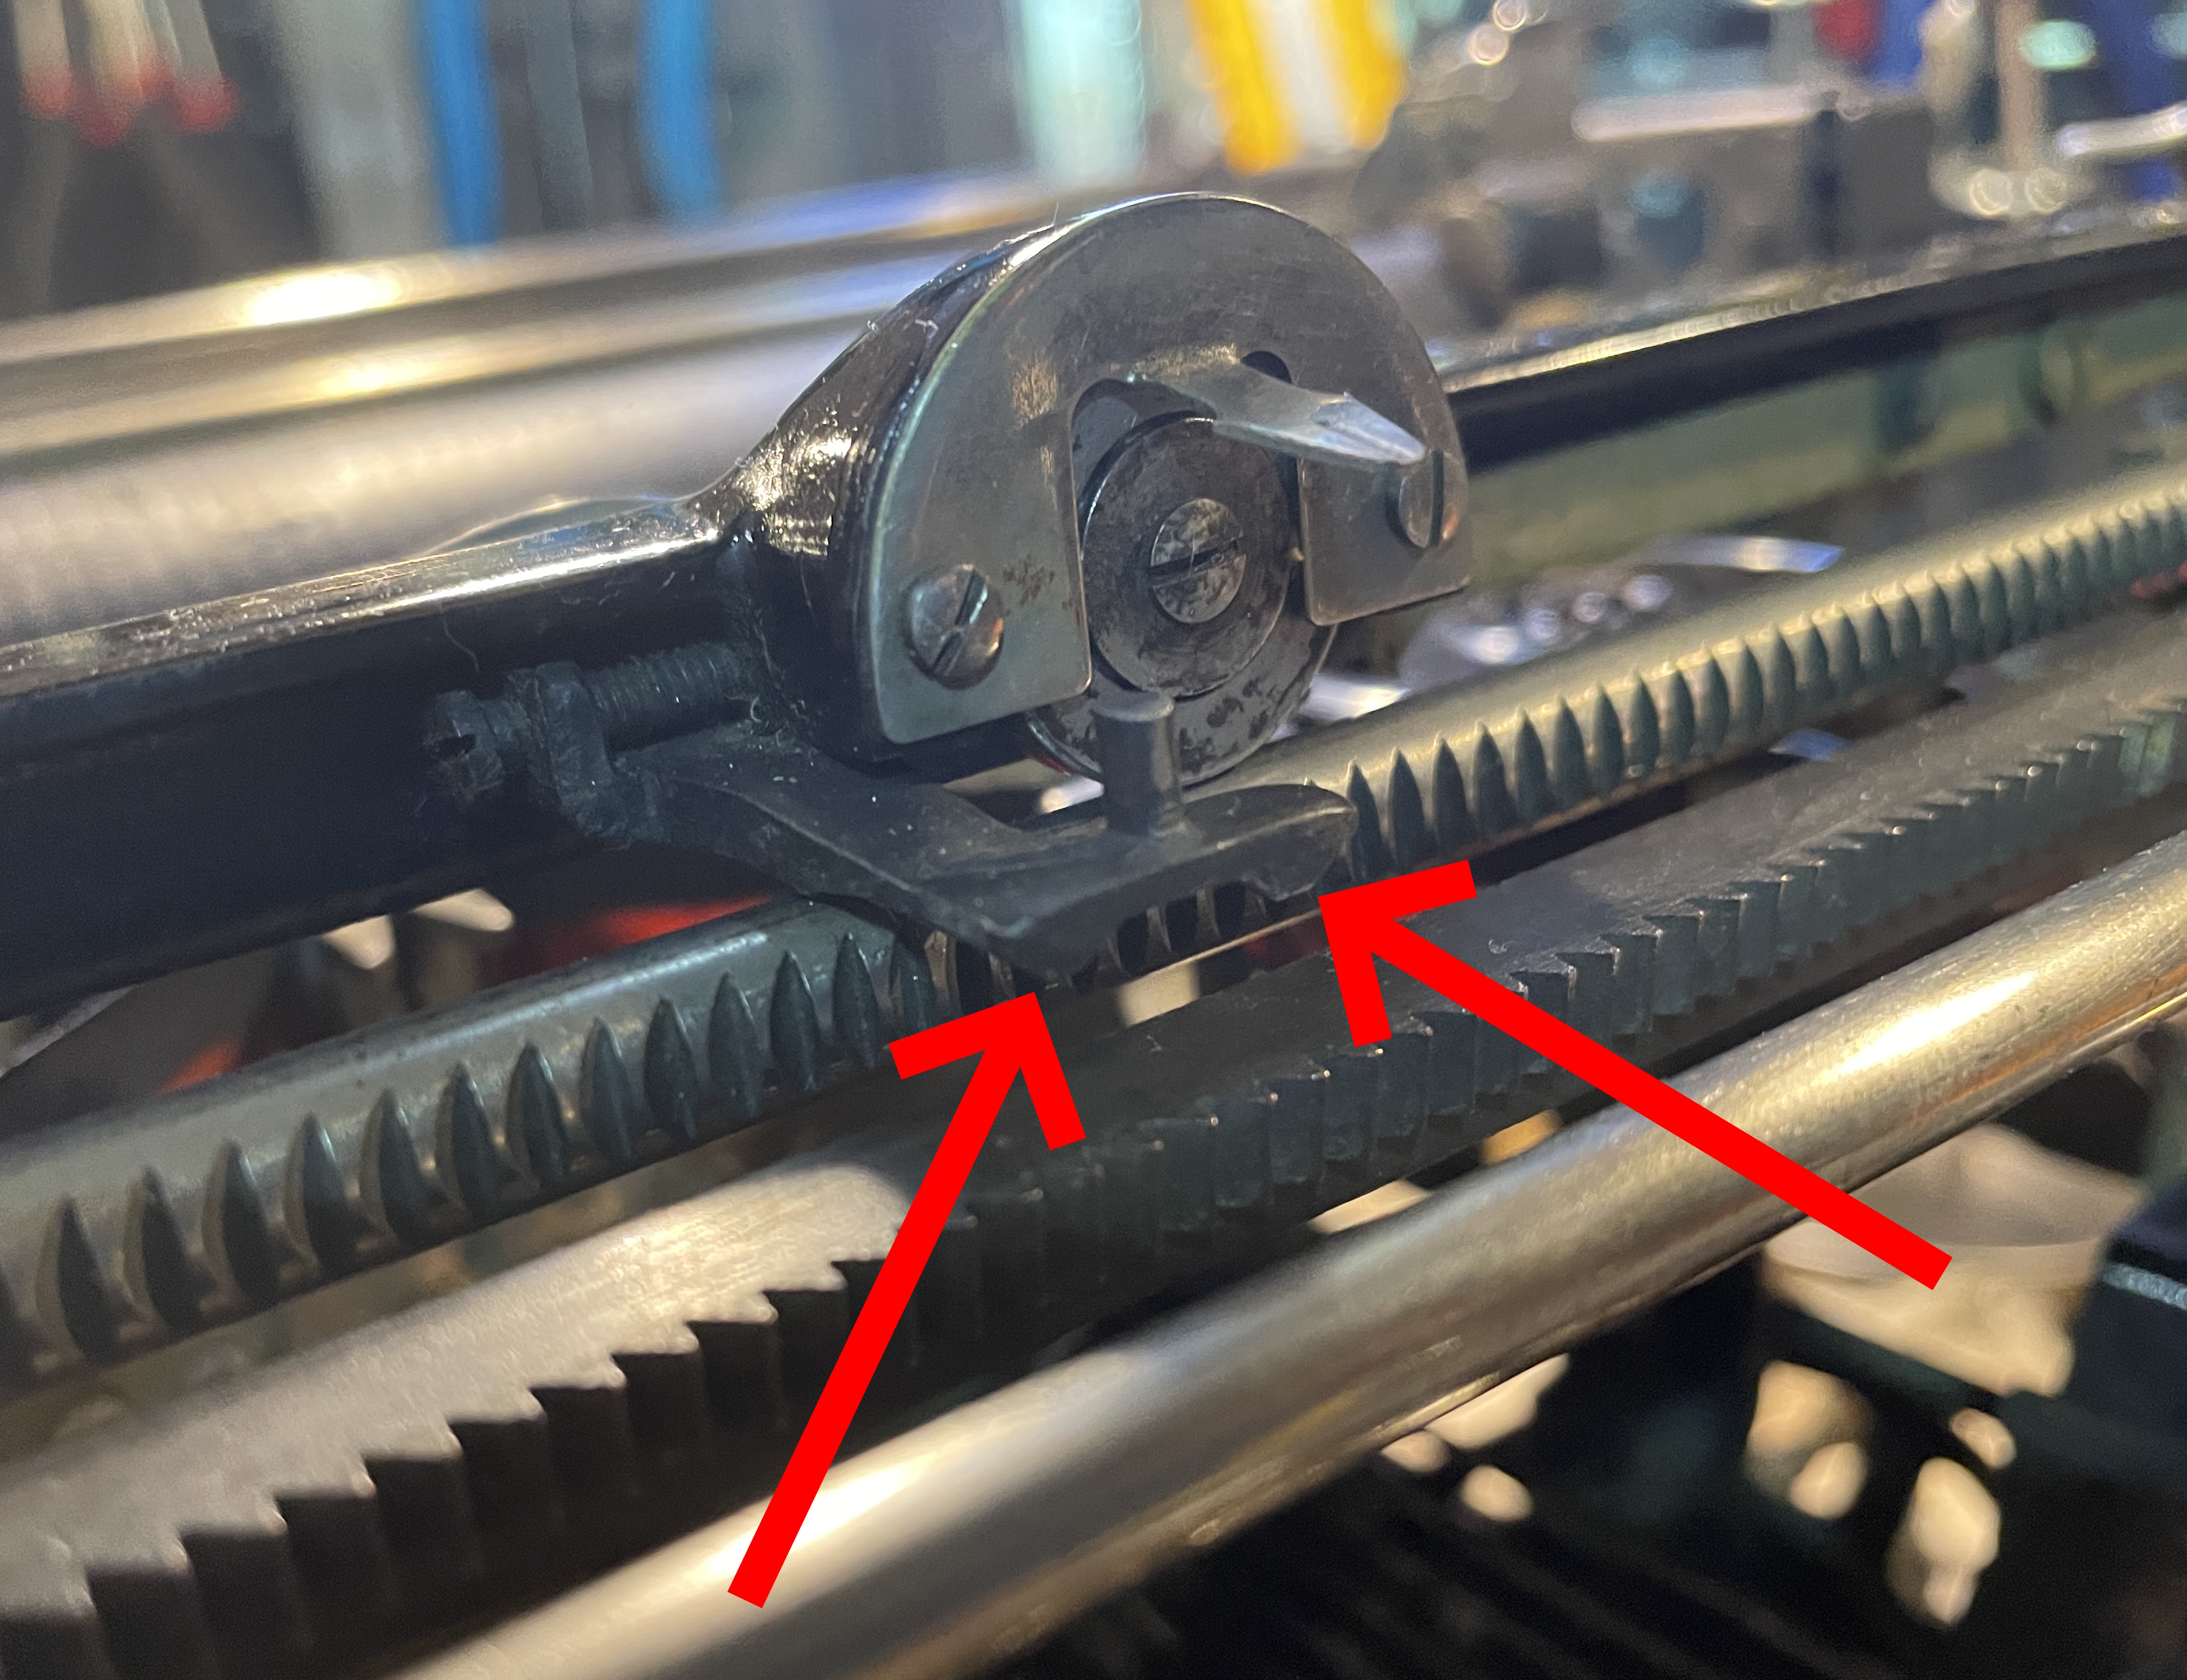
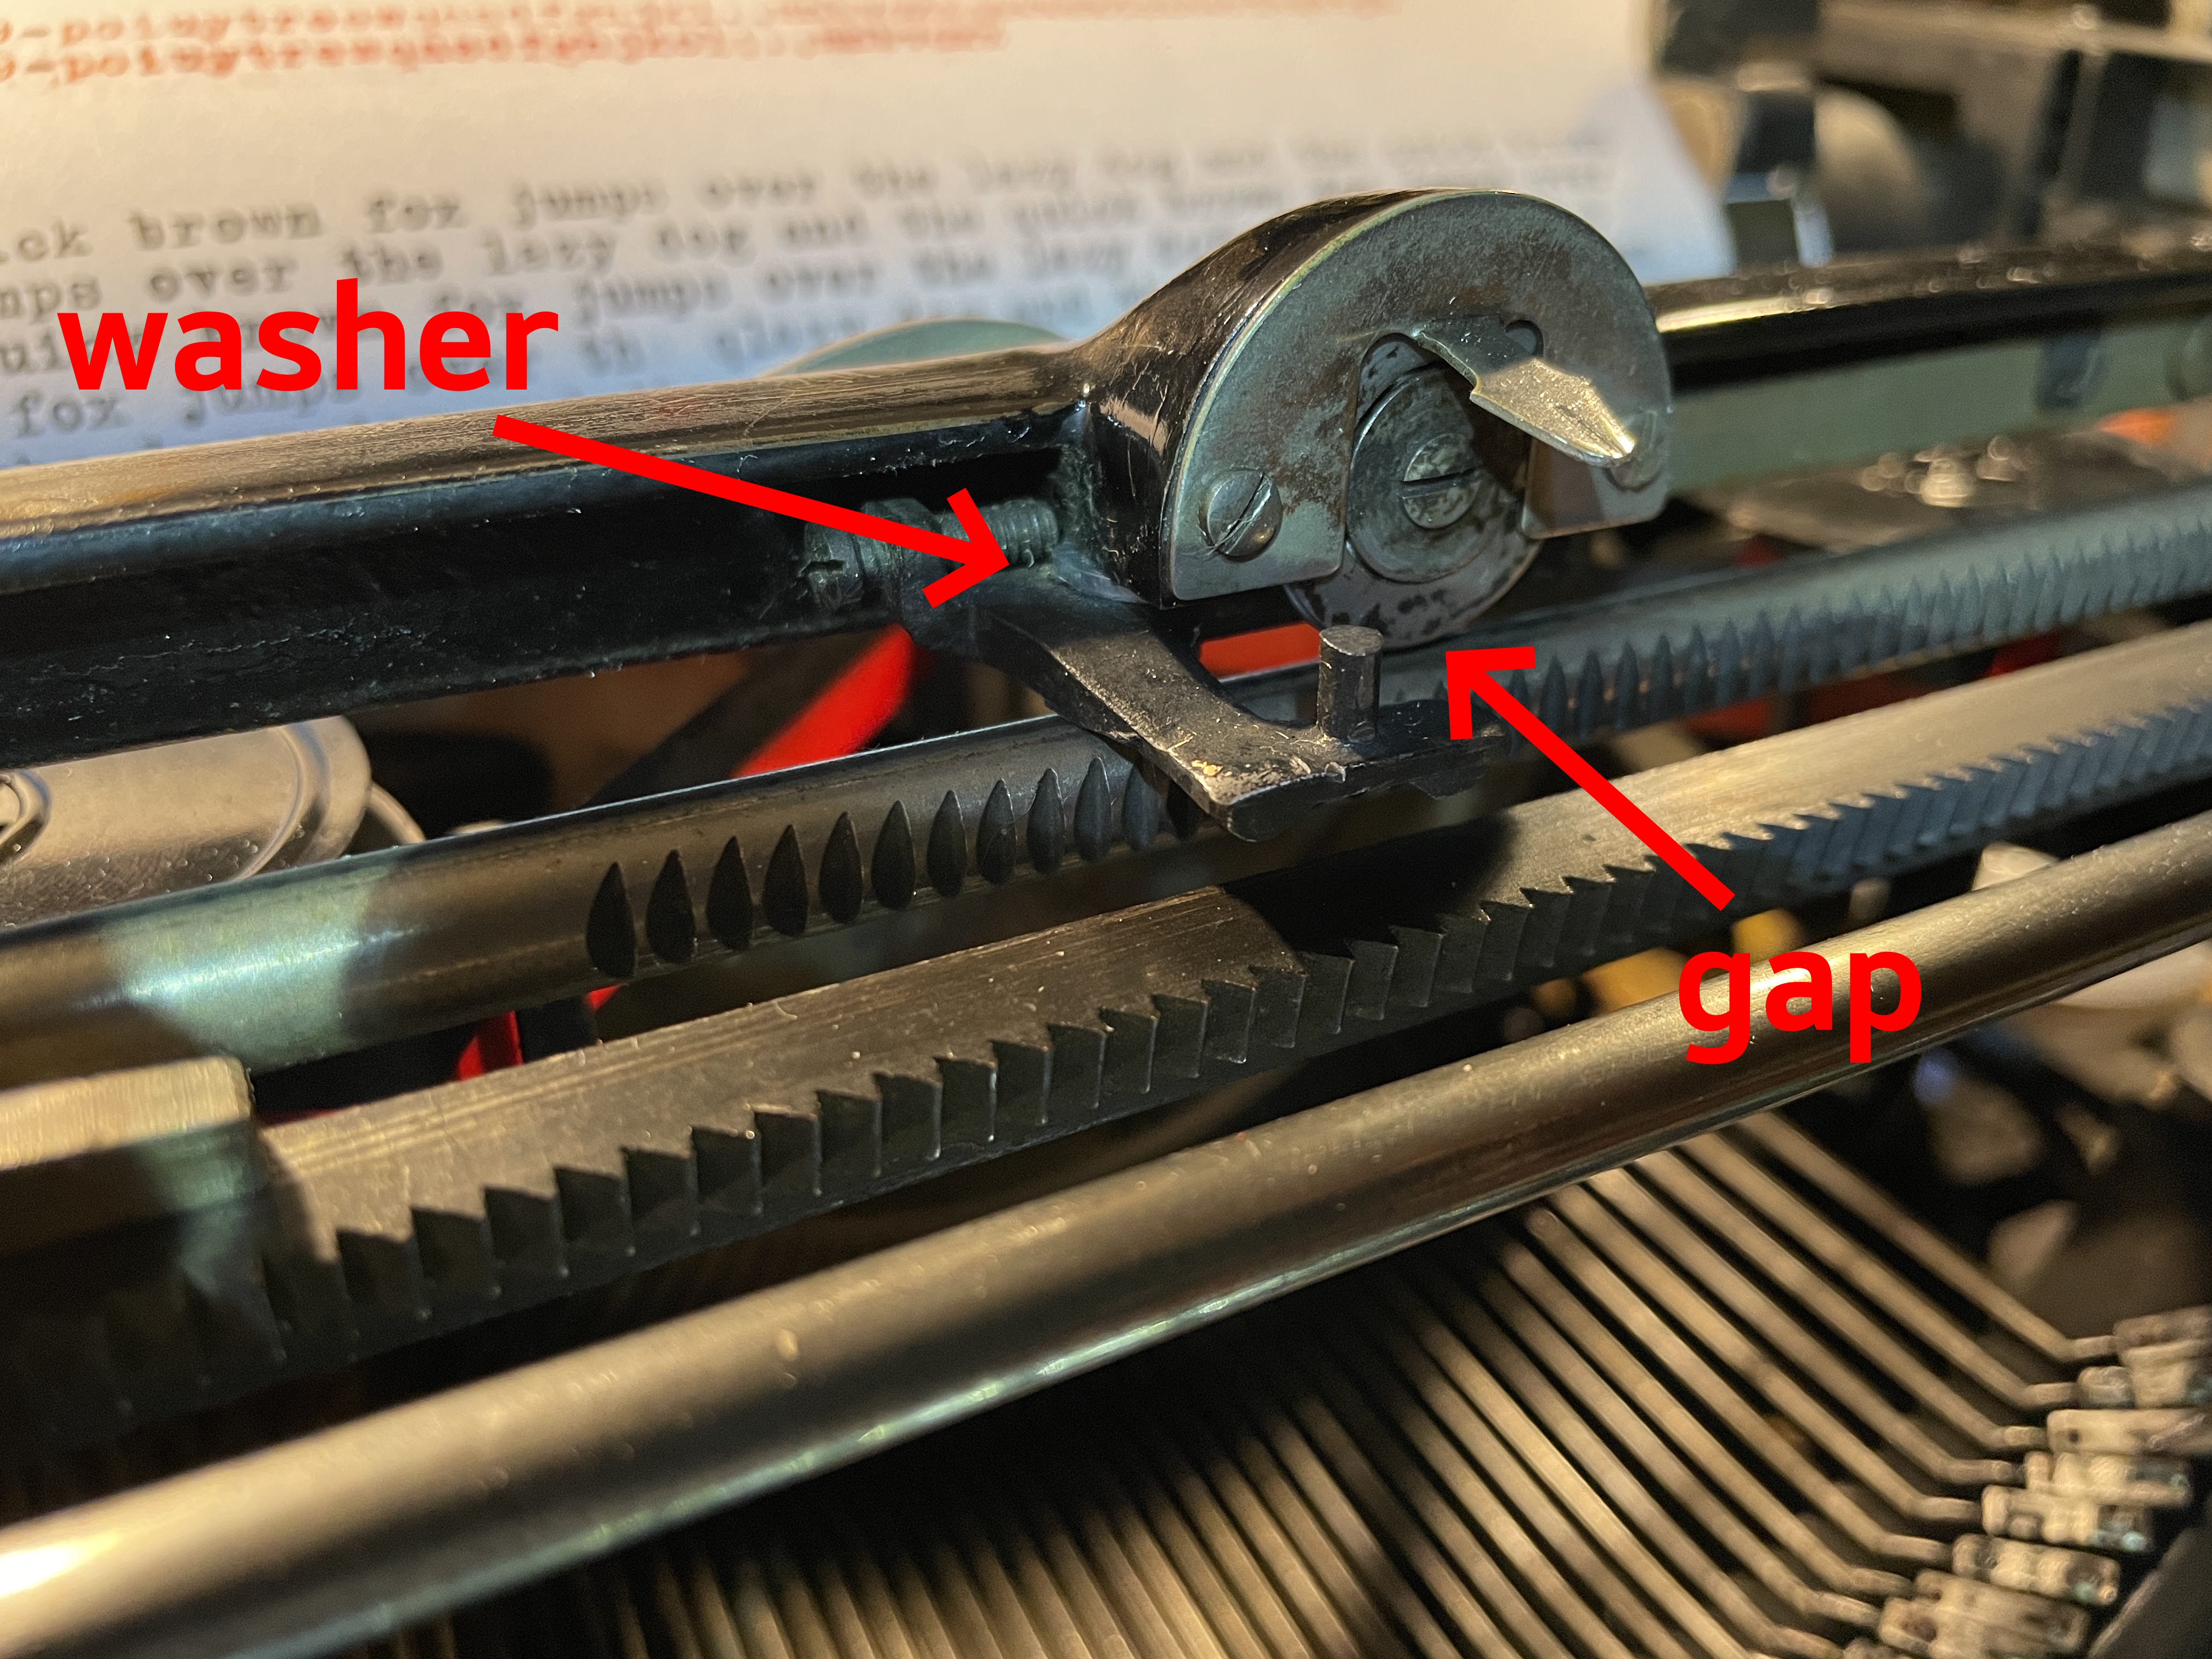
I put a couple washers under my Locking Piece A.K.A. Bell Trip Adjuster. It made the bell ring correctly and fixed my margin overrunning; however, the carriage frame pointer’s wheel then did not make contact with the rod it’s supposed to ride along.
So what are you supposed to do? The 1920 H. G. Pearce manual suggests bending the Locking Piece A.K.A. the Bell Trip Adjuster for better contact.

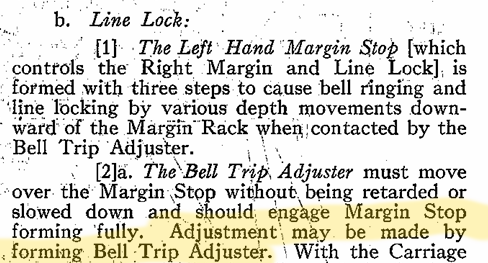
The Ames manual from 1945 suggests bending this piece as well.
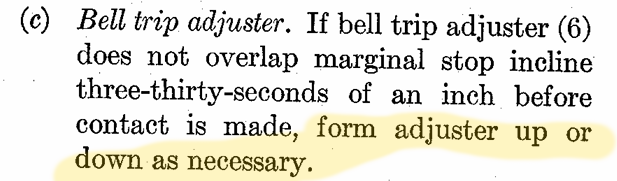
It is also suggested in the 1955 Underwood repair manual:
I am hesitant to bend/form the Bell Trip Adjuster/Lock Piece. I don’t have an Underwood parts machine right now, and if I break that part while trying to form it downward, I will have to explain myself to Rick Z.
Instead, I experimented to determine how much that Locking Piece/Bell Trip Adjuster needed to come down. I jammed some brass stock under the right margin stop piece and that seemed to do the trick by subtly raising the margin stop piece. That Locking Piece just needs to come down a tiny, tiny bit.

I trimmed the brass stock and reassembled. It’s a poor, temporary fix because now you can’t slide adjust the right margin. However, the bell now rings at the correct time and the right margin stop stops the carriage properly.
Cosmetics
The decals on the paper table and behind the keyboard are in beautiful condition. I did not touch those except for a light dust, a wipe with water, and some gentle polishing with Renaissance wax.
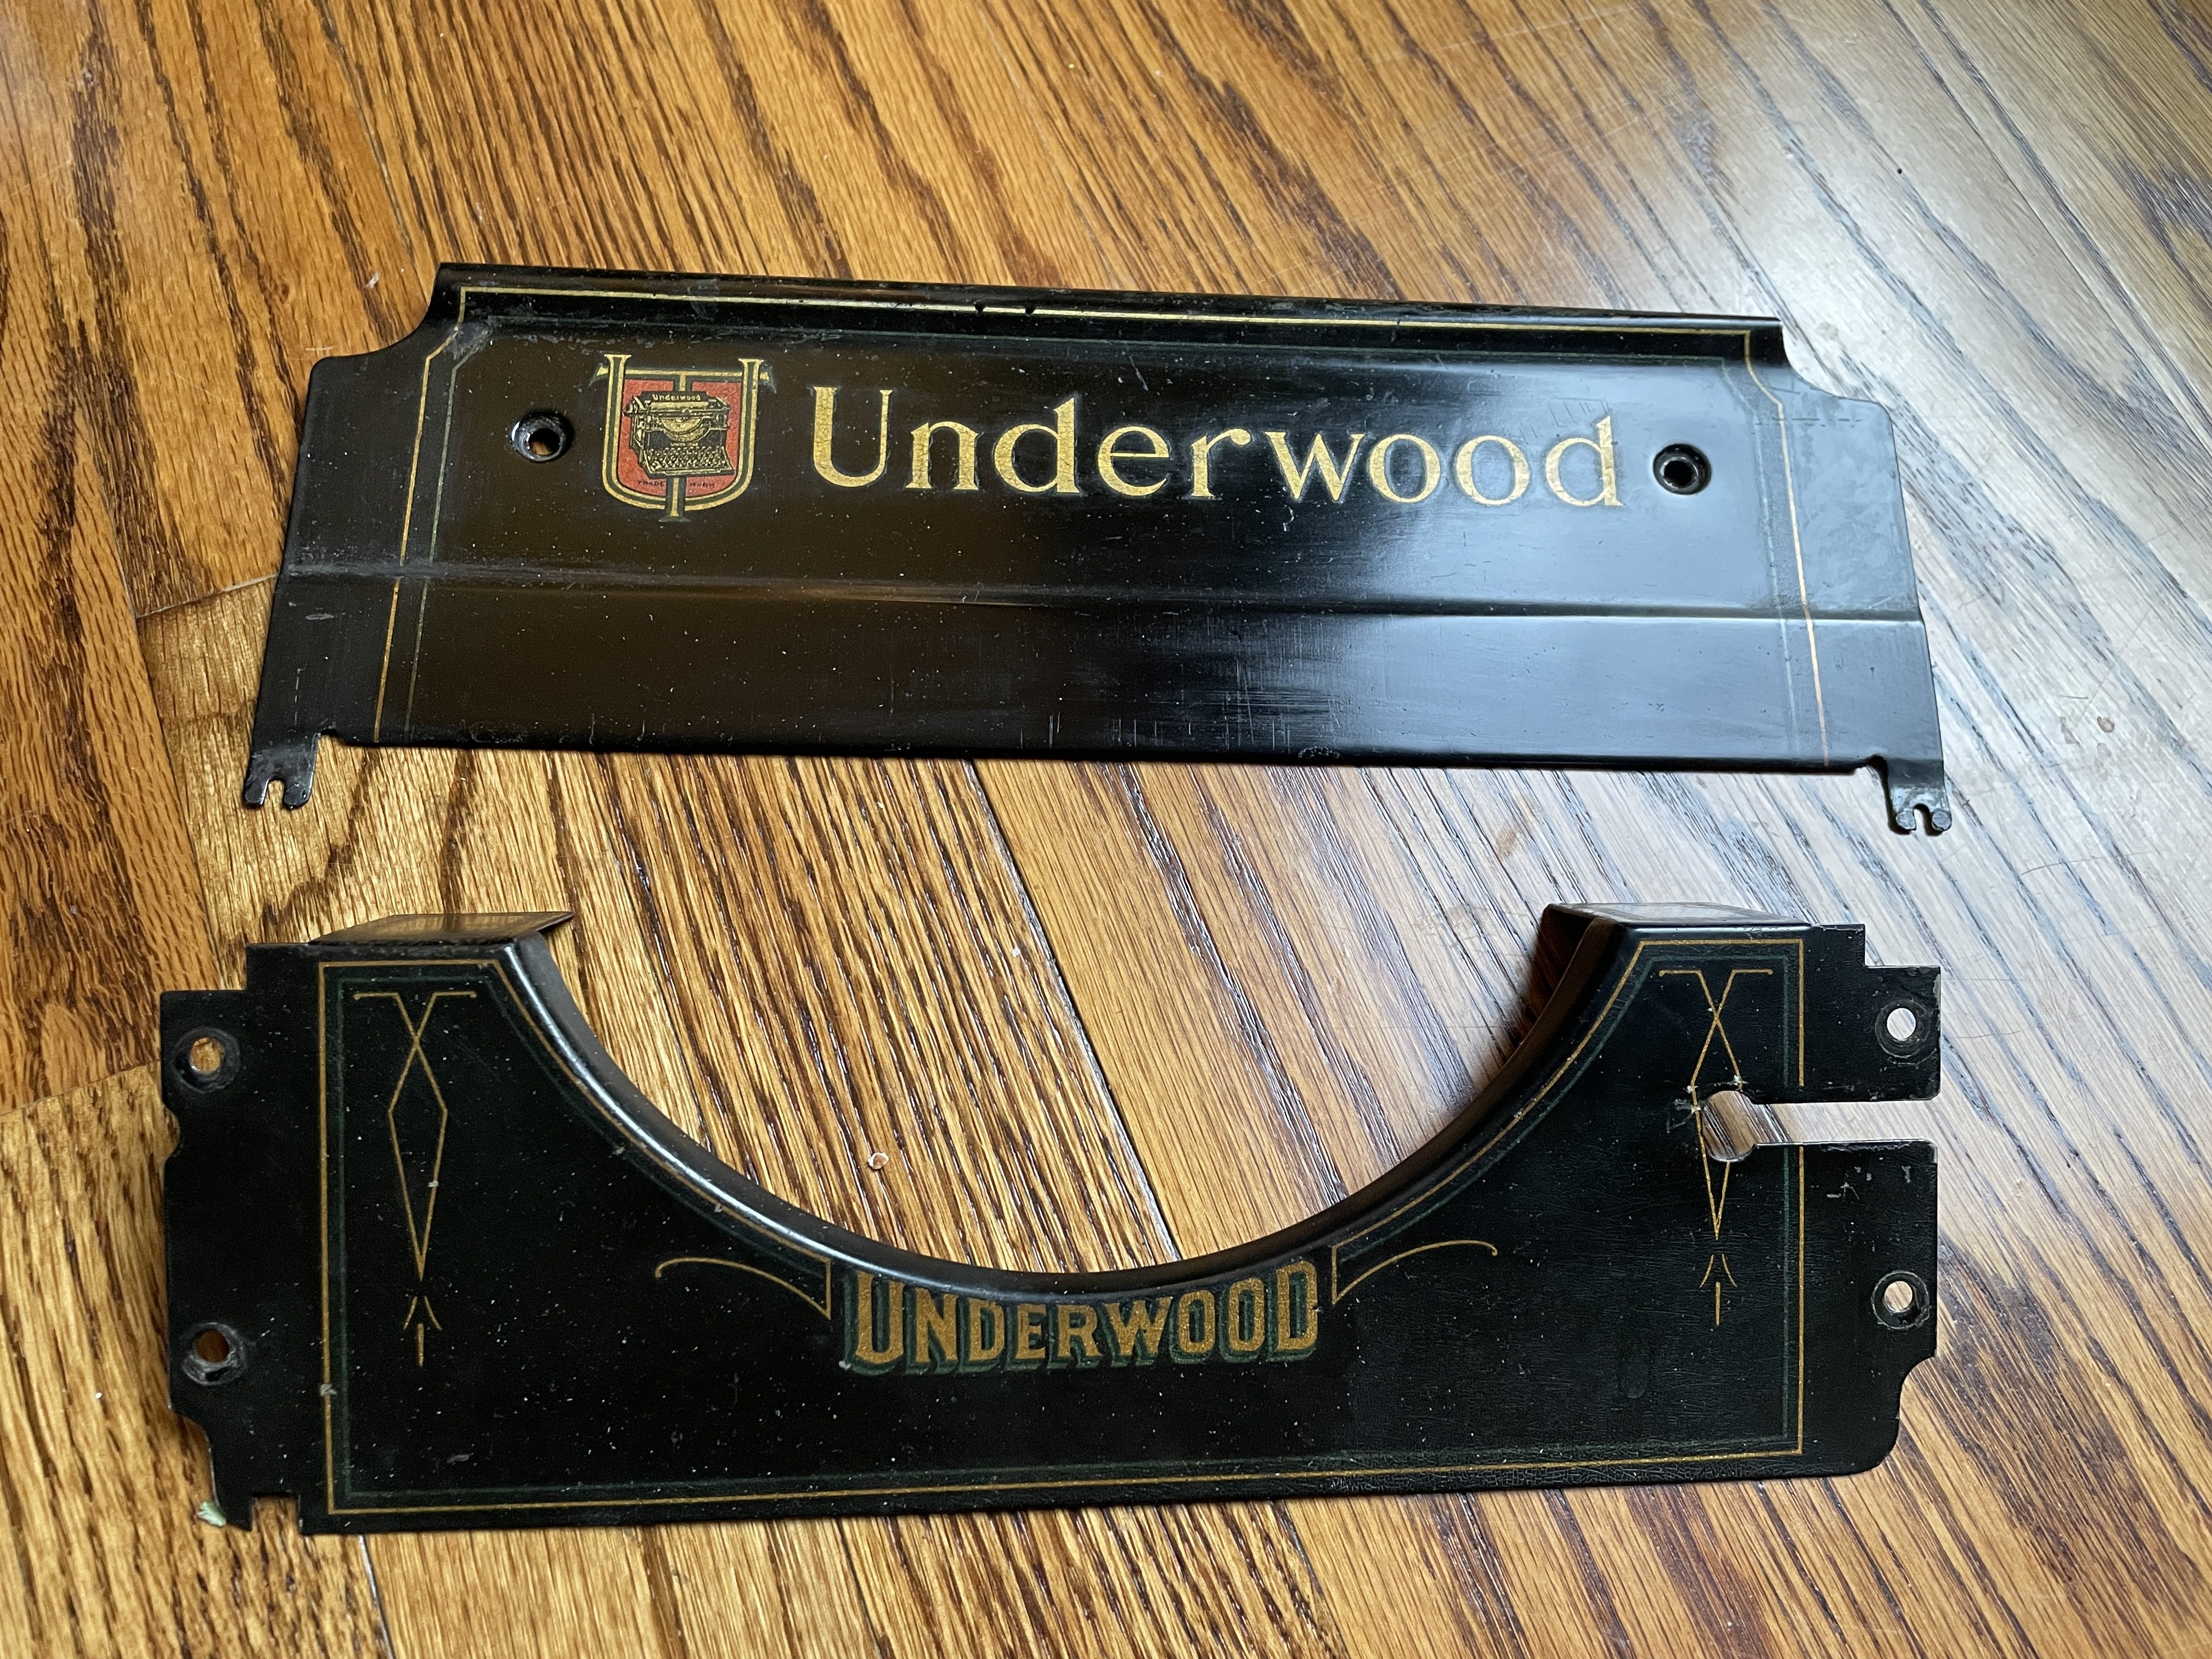
The shellac on the main body was another story. It was flaking away like dandruff with the touch of a finger. The pin striping in this area of the right side is close to perfect, so I wanted to preserve that.
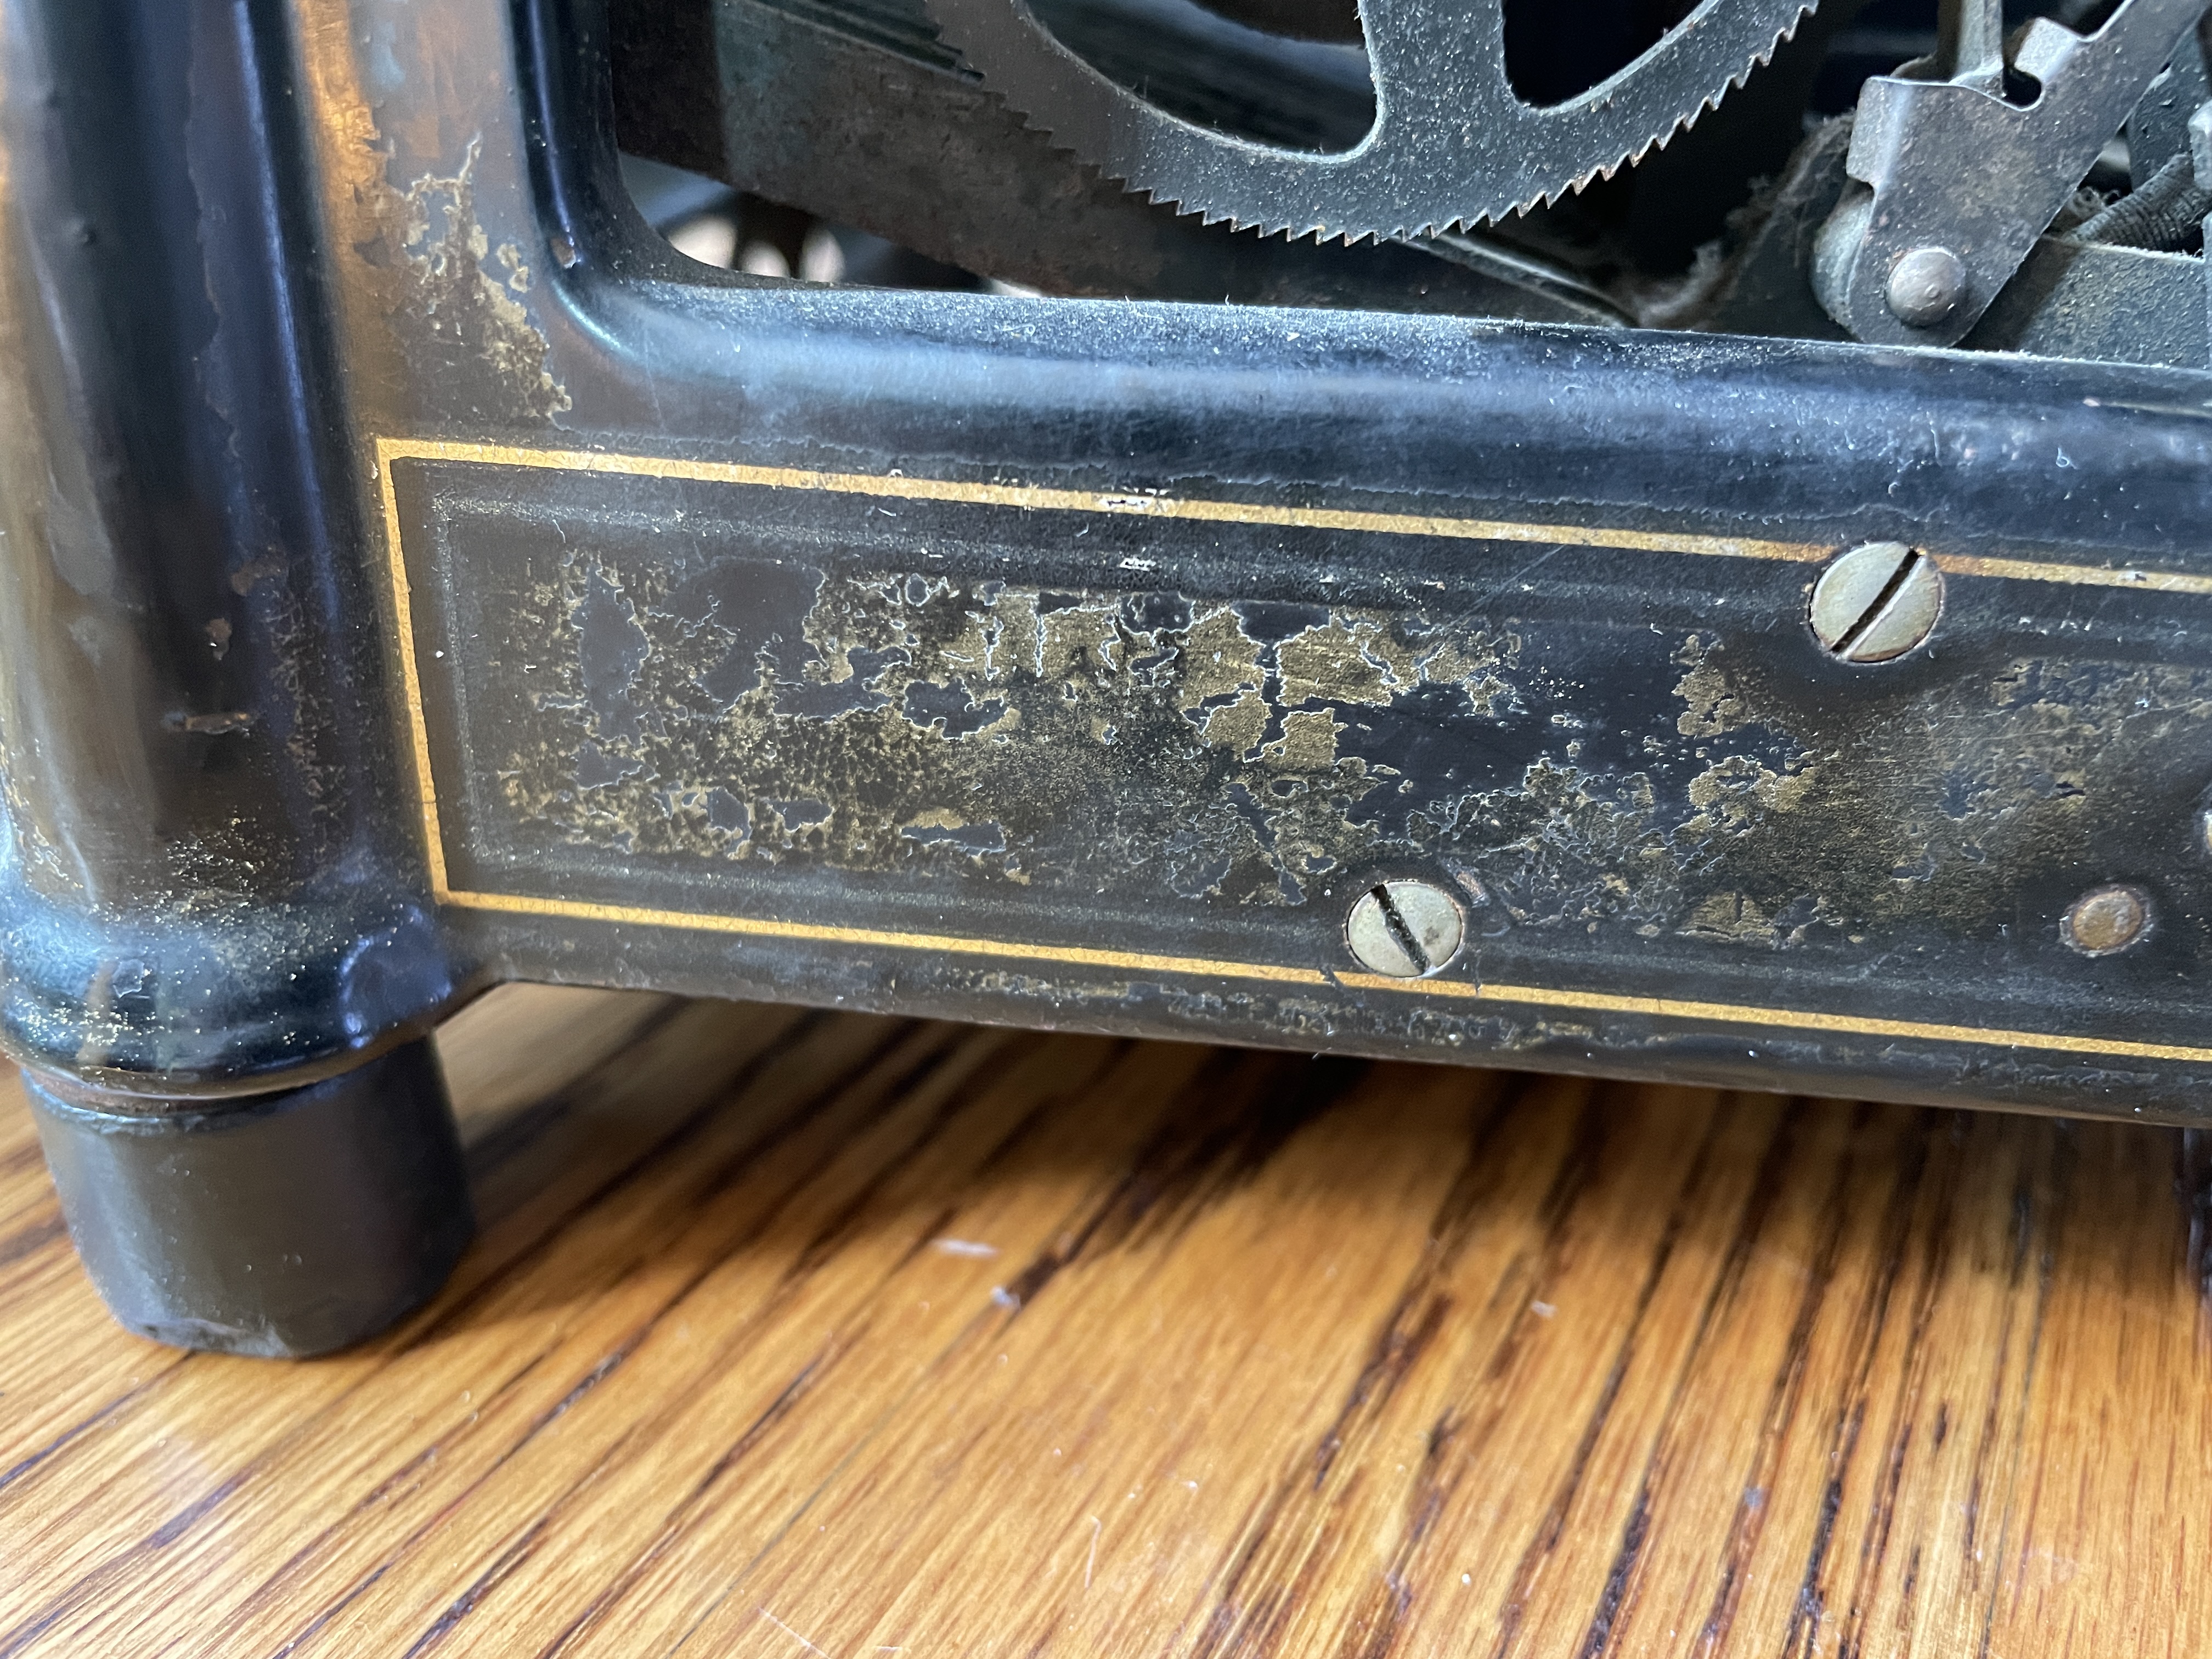
With careful Q-tips and avoiding the pin striping, I wiped the scaly shellac with denatured alcohol. The denatured alcohol softens and liquefies the old shellac and helps it lay down.
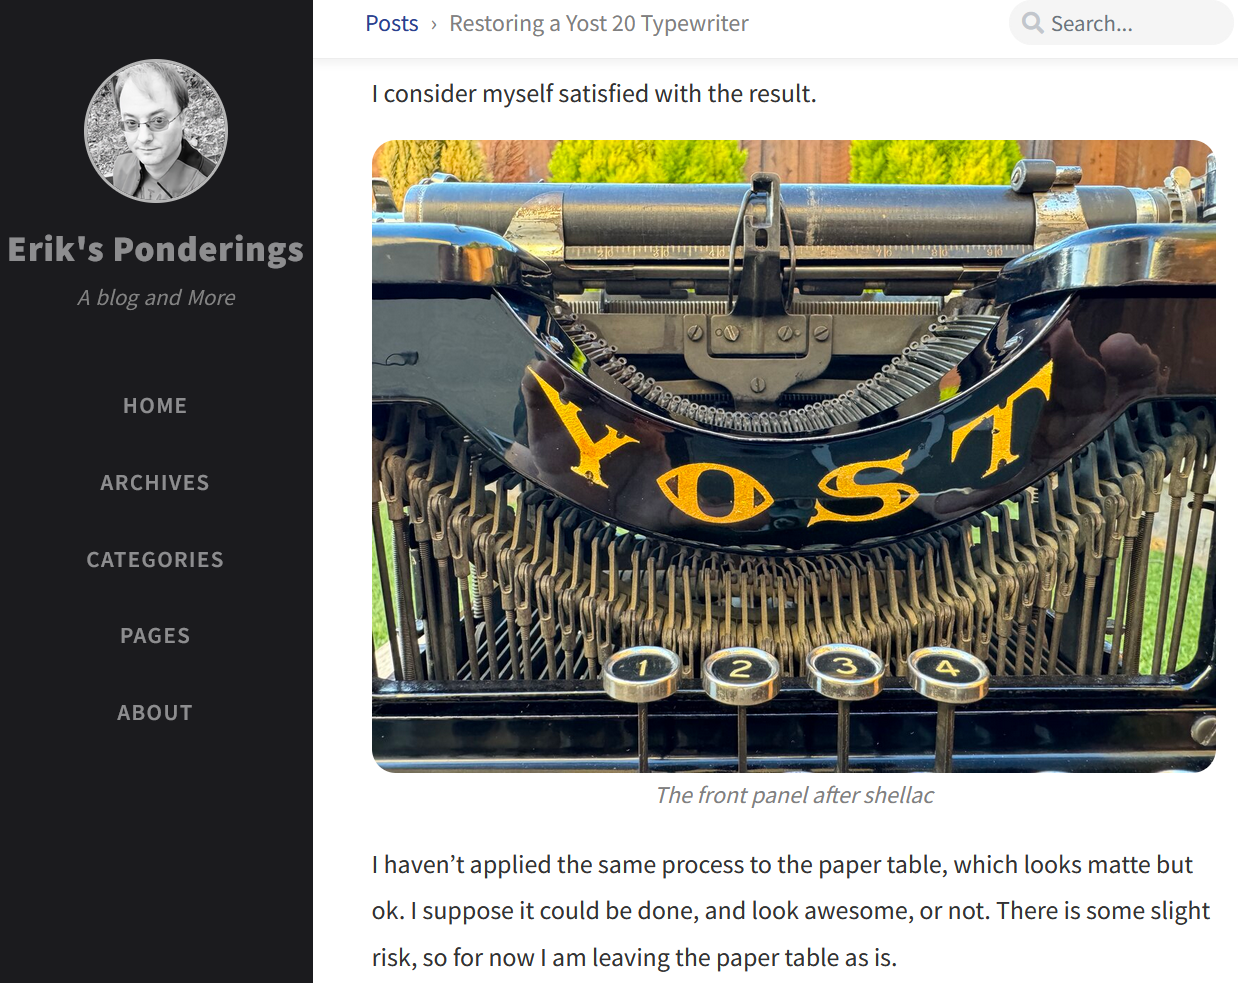
While I worked, I thought about an Erik B.’s inspirational work on a Yost 20 with crusty shellac issues.
I started to get a little shellac-curious. I’ve seen French polishing on old sewing machines with intricate decals. The technique produces a lustrous finish, and you’ll find tons of YouTube videos by woodworkers and luthiers describing French polishing.
Here’s good old Stumpy Nubs explaining shellac.
I bought some blonde shellac flakes at a local woodworking store, and mixed up a batch of 1:4 shellac using the Stumpy Nubs formula: one ounce ground shellac flakes in four fluid ounces of denatured alcohol.
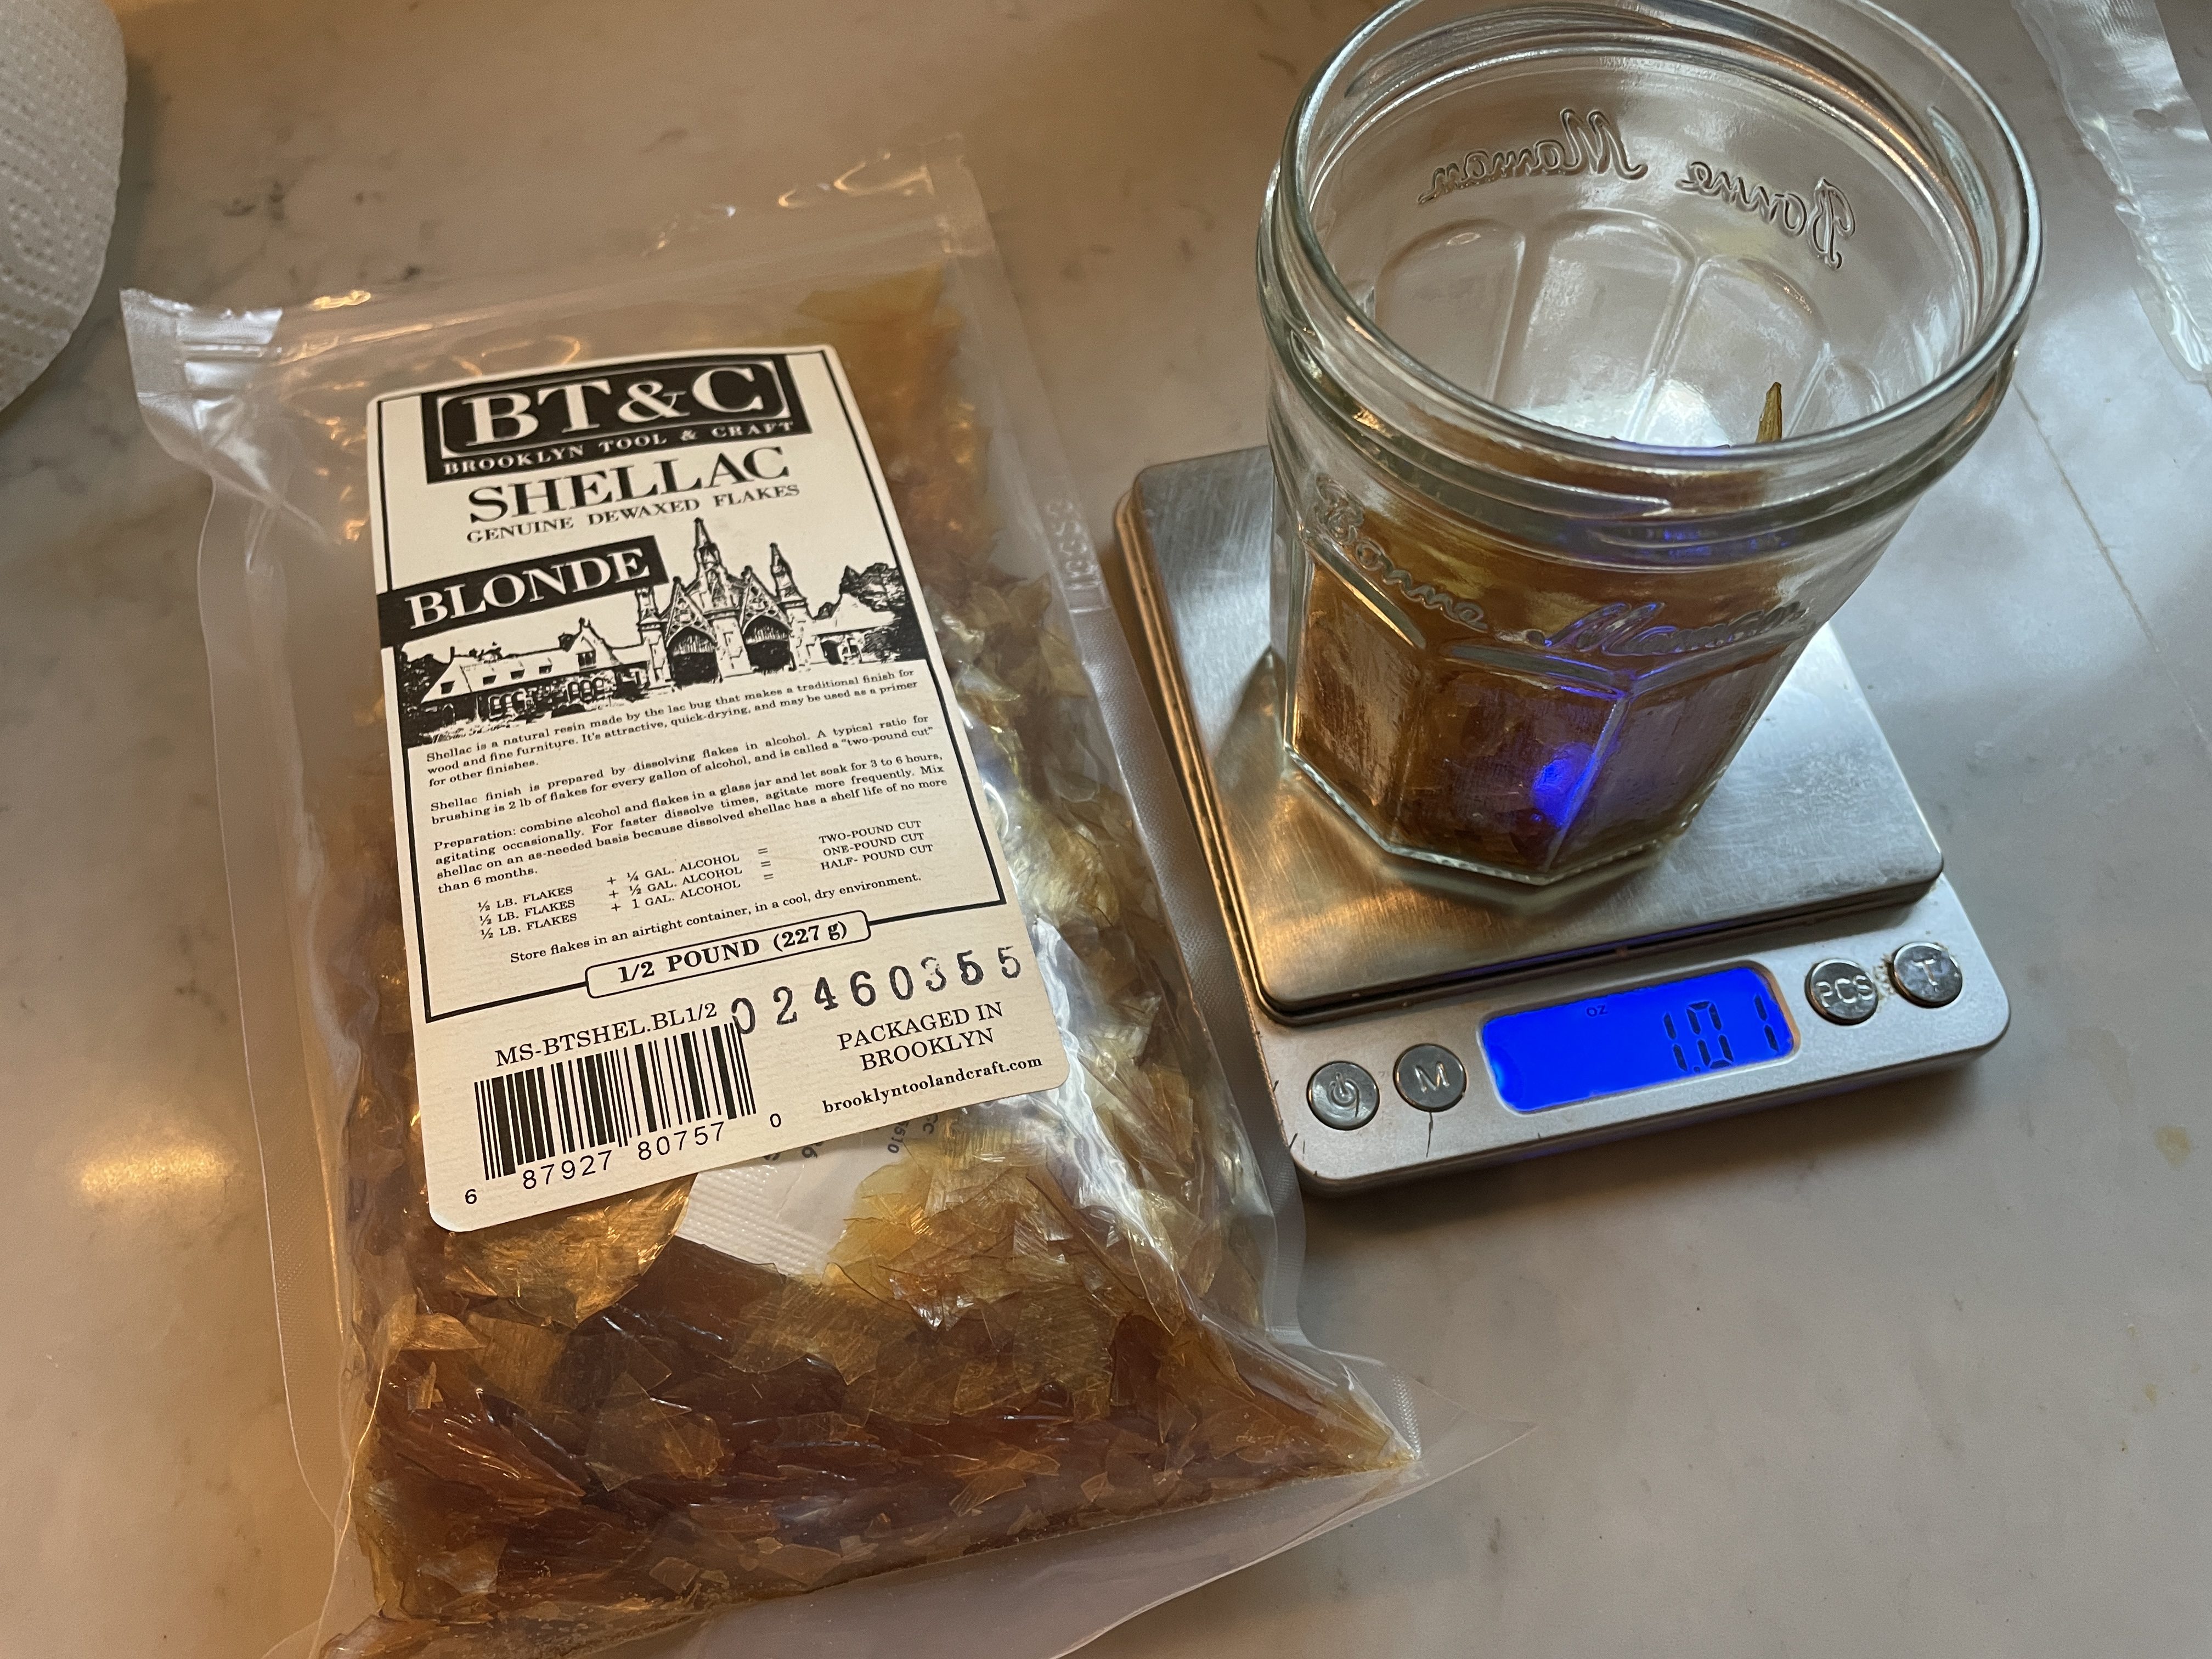
I mixed it up and let it sit for a couple days.
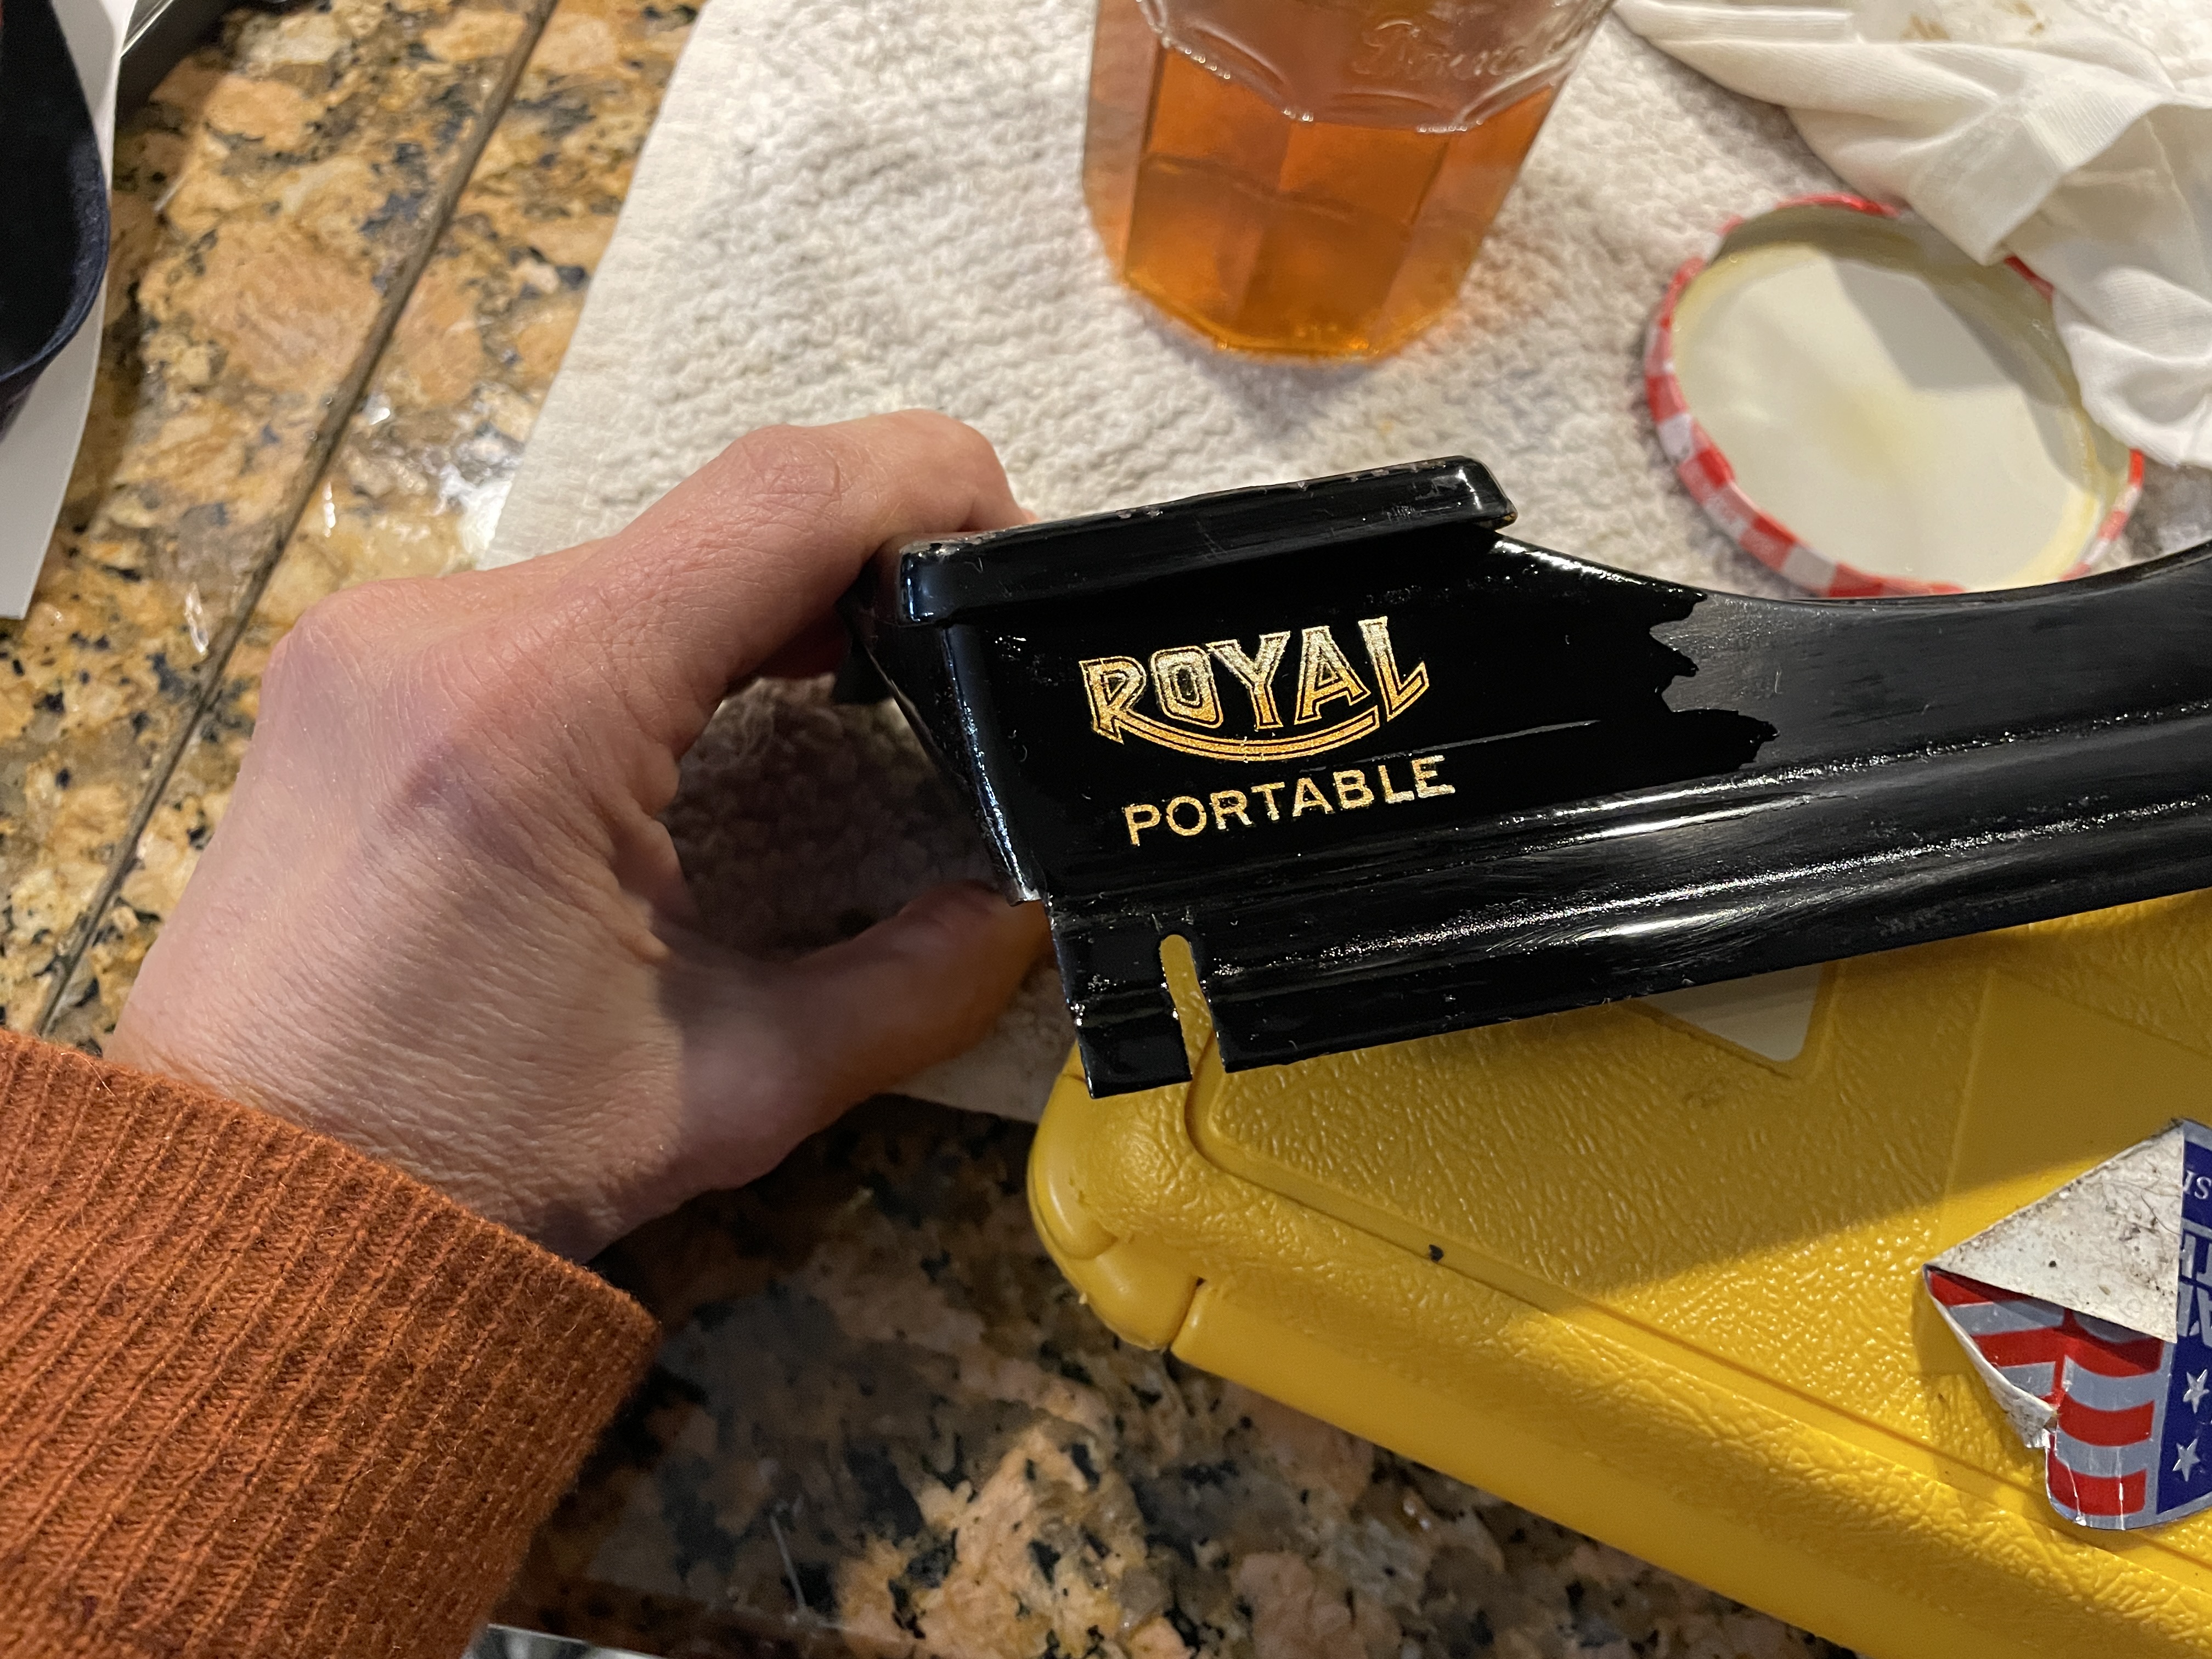
I did a test run with the shellac on a piece of a Royal portable parts machine with a damaged decal. I have heard that Royal decals are extremely fragile. Oh, Hell No. The shellac made the gold of the decal lighten significantly in sections. I assume that with repeated layers of shellac, the deep gold will return, but it was unnerving.
However, I did like the finish the shellac produced on the black paint. The flaking shellac on the Underwood had laid down with the Q-tip application of denatured alcohol, and additional shellac smoothed the surface even more. I carefully applied shellac on the main body of the Underwood typewriter avoiding the places where the pin striping was intact. The shellac dries within seconds/minutes and I could build up coats, wet sand with 1200 grit sandpaper and continue adding coats. Over the course of a couple weeks, I would pop out to the garage intermittently, apply a few coats of shellac and ponder some of the mechanical problems.
I like the shellac treatment. The yellowed flaking bits have laid down. The shellac is not plasticky like polyurethane, and it’s easily reversed with denatured alcohol.
What an old beauty.

This old Underwood was an exercise in patience and care. I took a while with it, pondering its issues long and hard before jumping into anything.
We live in a time of rampant stove-touching and moving fast and breaking things, when many people ignore the principles of hot-hot and soft-soft. Here I get prescriptive: don’t be careless with precious and fragile things. If they’re important, try to preserve them with patience and care for the next generation.
Welp, gotta run. I’m chasing something not-so-old but precious and fragile.

I enjoyed this article. Thanks for the tips and links. I hope to teach my grand niece hot-hot and soft-soft. Regards.
LikeLiked by 1 person
So glad to hear this.
LikeLike
Love the storyI have introduced my LC Smith (th
LikeLike
I hope your LC Smith 8 is still happily typing along.
LikeLike
thanks for sharing your philosophy and practical fixing tips. My dad’s motto: “Don’t wreck other peoples’ stuff” matches yours. Way too many are wrecking other peoples’ stuff with disregard.
LikeLike
I’ve been thinking a lot about Fitzgerald’s famous quote about careless people.

Written a hundred years ago and very of the moment.
LikeLike
Very carefully and wisely done, and the result is so shiny! 😀
If we want to conserve things, are we “conservatives”? Difficult to remember the meanings of words these days. 😛
LikeLike
More like conservators. 🙂
This old Underwood needs a thorough airing and workout, so I will be catching up on long-deferred correspondence (mea culpa). Letter soon in mail.
LikeLike
Ooh, letter – can’t wait! 😀
LikeLike
Thanks for the fine post. The pictures of you little grandchild were nice to see, and all the information was impressive. RickFort Worth
LikeLike
Thanks, Rick!
LikeLike
Great article, and it’s nice to see that you tried, successfully, the shellac process!
LikeLike
Thank you for the inspiration.
LikeLike
I was gifted a No. 5 (from April 1917) a couple of days ago — I think the guy just wanted to get rid of it — and have been reacquainting myself with how these machines work. In truth I haven’t had time to do much other than fix some things that were clearly nonfunctioning (ribbon advance; line spacing lever), but overall it’s in good shape. Need to clean the left side sticky typebars and get the margin release button functional, along with the bell (always frustrating). Remarkable, brilliant machines, built maybe a mile from my house. Steampunk avant la lettre.
But I came here straightaway since I know you’ve spent some quality time with these, and of course your writeups are most helpful as well as pretty darn amusing and erudite. So thanks!
LikeLike
So nice to hear. I do love these old Underwood standards. I’m working on a 1950s Underwood Rhythm Touch right now which is basically just a slightly updated Underwood 5.
LikeLike
That’s the basket-shift model, preferably with the cool winged logo? Really nice machines!My 5 has some sort of “catch” such th
LikeLike
Yup, basket shift. I don’t know if it had the cool winged logo because the front cover plate is missing. 😦
LikeLike
Oops — looks like I got cut off mid-sentence. Careless. I was just saying that the new-to-me 5 has a sort of catch as the carriage moves to the left, so the carriage needs a push to continue. I wonder if there’s some sort of wear spot, or if maybe just increasing the spring tension a bit might help. So I have to see if there’s anything out there about this (including your writeups).
Well, there’s an aphorism in couplet form I like: “Problems worthy of attack prove their worth by hitting back.” –Piet Hein
LikeLike
Could be a rough spot on the carriage rails or the carriage (especially feed rollers) are dragging on the ribbon vibrator assembly or card guides (those parts get bent pretty easily).
LikeLike
Carriage rails were my first thought too. Believe it or not, last night all worked fine (?!). But I’m not convinced it’s gone. Good suggestions about vibrator and card guides. The various rails, like the way rod (great term) all can use light oiling.
Last night’s main event was getting the Q unstuck. Judicious forming of the typebar linkage segment attached to the key finally freed it up — it’s a crowded neighborhood under there.
Fun, discrete projects on this machine. Here’s hoping it types OK!
LikeLike