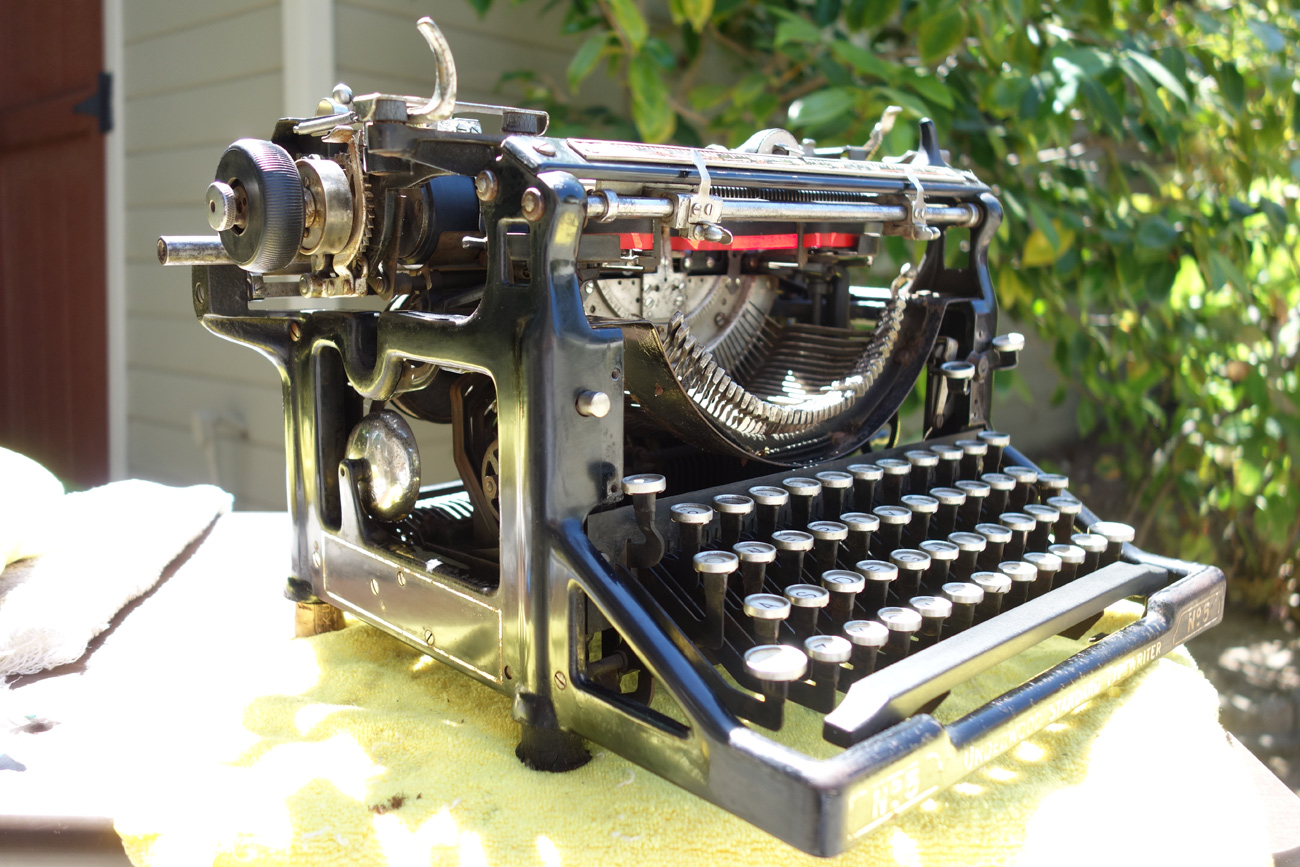
I have been spending many happy days outside by the garage working on the Underwood 5 for the young writer, Quin. When I first got it, I had doused the machine in Liquid Wrench penetrating oil to loosen the rust. That horrible burning smell persisted for days and days – working in the fresh air was necessary. Fortunately the weather was warm and pleasant, and I cleaned and tinkered and listened to the neighborhood children play and the neighborhood dogs bark.
In a recent blog post at Typerwriter Heaven, “Yost 10 – Dremelisation” Rob Bowker reflected on how rust and corrosion on typewriter surfaces affect his enjoyment of a machine. I completely agree. Typewriters, especially the levers, knobs and keys need to feel smooth and clean when operating the typewriter. There is nothing worse than getting oily rust and plating flakes on your hands from an old machine.
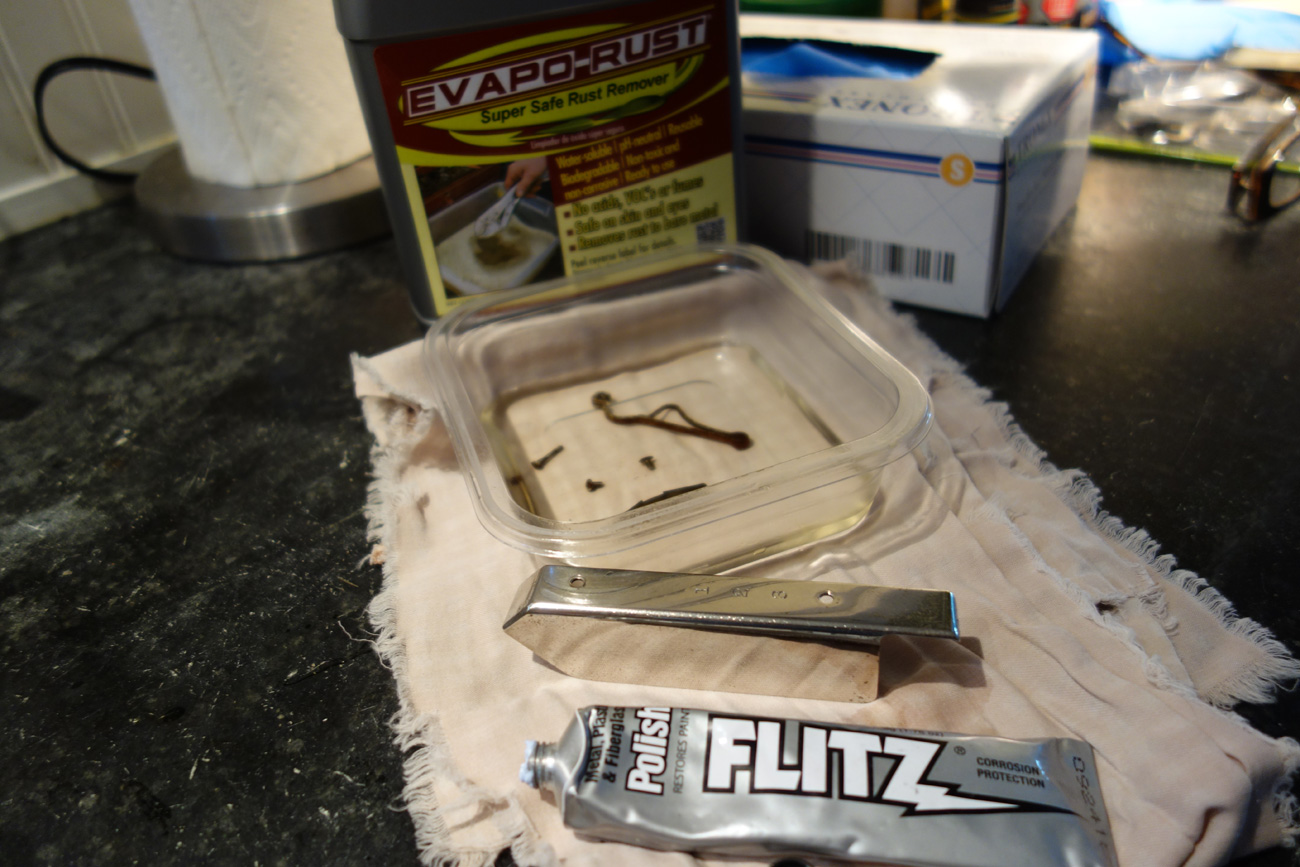
One of the first things I did was remove rusty parts a few at a time and throw them into an Evapo-Rust bath. Many of the plated parts were in bad shape with flaking plate (nickel? chrome?) and severe rust. I did the best I could to preserve as much of the plating as possible, following up rust removal with Flitz polish. Some pieces were down to bare metal, so I polished them with the dremel.
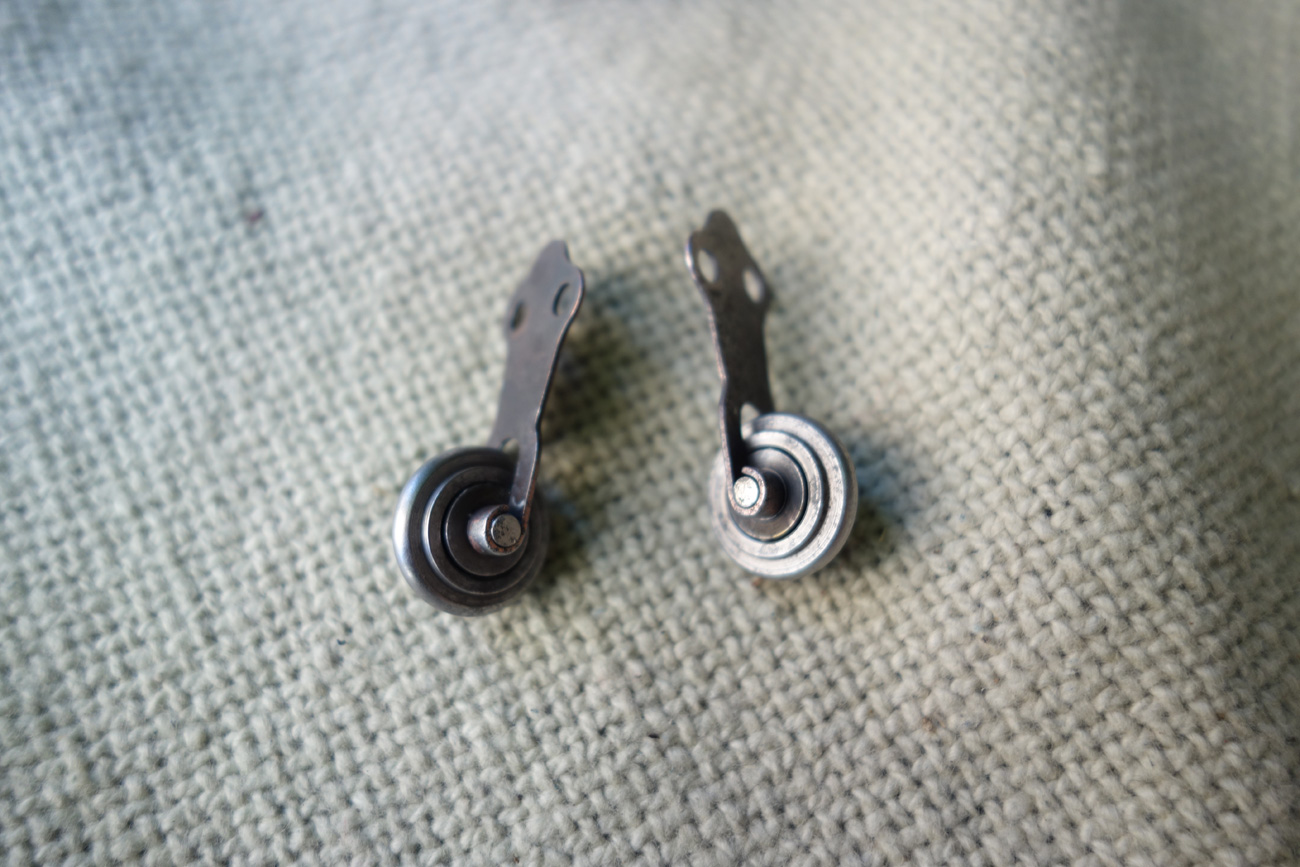
There is nothing like seeing a previously frozen chunk of rust become an elegant and freely moving mechanism. These little wheels that fit into the “rising cylinder scale” now spin lightly.
I removed the paper table and front panel from the typewriter and began to work on the scaly varnish with Soft Scrub. It was very slow going. It took several days of softly scrubbing to remove the old varnish and see smooth paint beneath. I used cotton swabs and tooth picks to work around the delicate decals. Soon the soft, buttery feel of clean paint began to emerge as the crusty scales of varnish were removed.

There was so much to be done on this machine, so I typed up a list and added as I thought of things:

The typewriter was missing one back foot when I got it, so one of the first things I did was make a temporary cork foot so that the typewriter didn’t lurch from side to side while I worked on it. The three remaining feet had disintegrated into varying heights so it was still a bit wobbly.

I ordered #4 black rubber test tube stoppers with holes and crafted four new feet. I cut the test tube stoppers to 5/8″ height. In hindsight, I would make the feet a bit taller (eg 3/4″+) so that there is plenty of clearance for the backspace mechanism under the machine which rides pretty low.
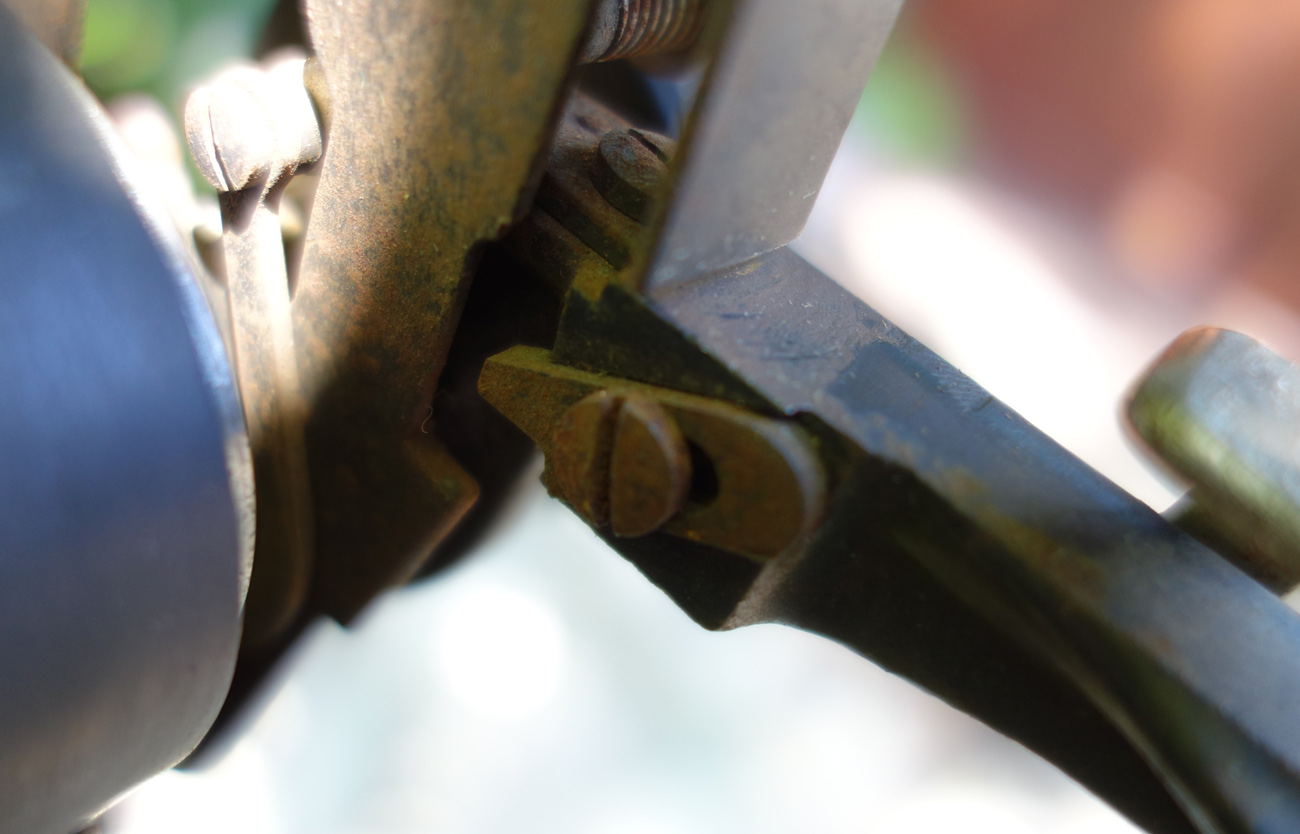
I had a diverse collection of bolts (where did I get all these bolts?) that fit the Underwood frame. I cut the heads off the bolts and screwed the bolts into the test tube stoppers and then onto the typewriter. In the picture below you can see one of the original crumbling feet and the foot I made from a test tube stopper.

I am keeping the original feet in a baggie for Quin, but I think the new feet are going to work great. They feel solid and supple and of uniform height – no more wobble.

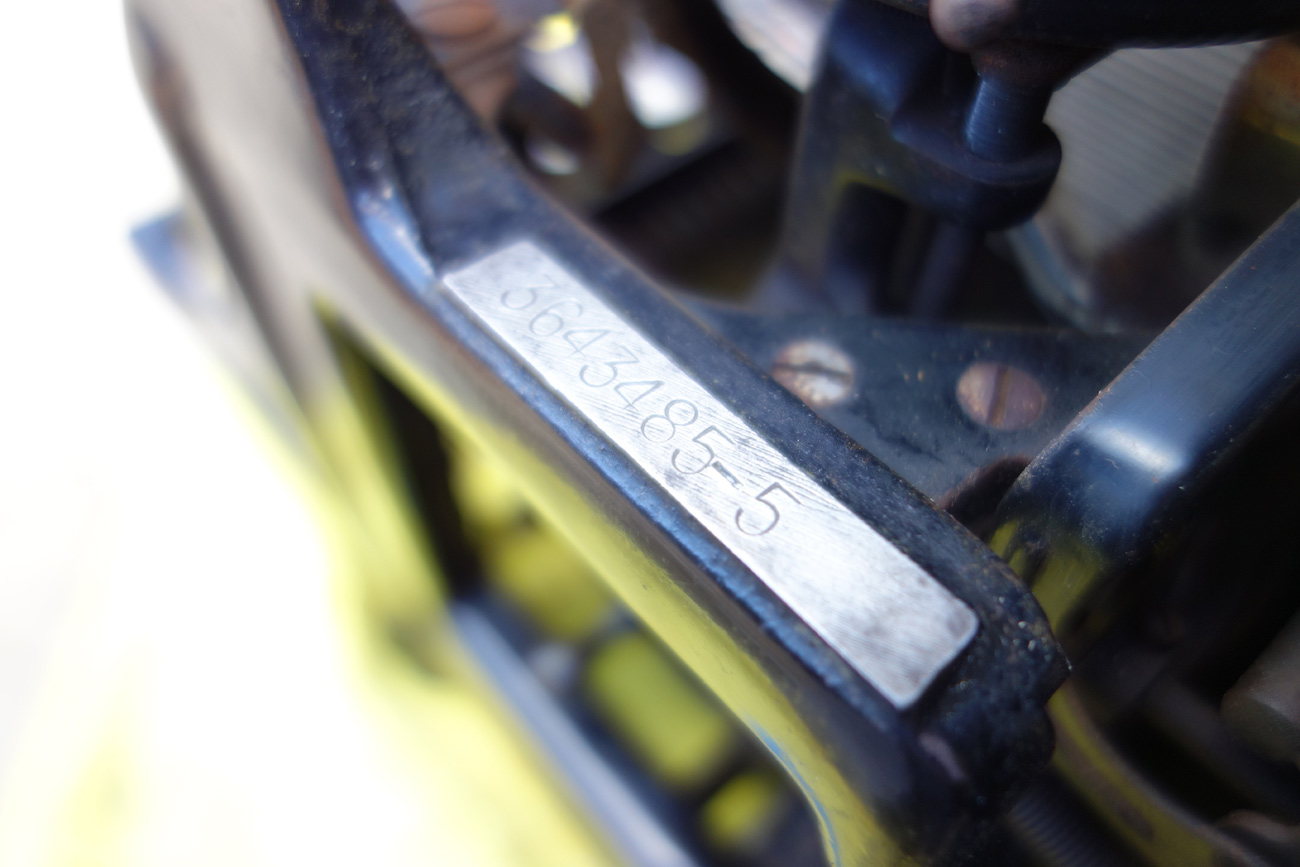
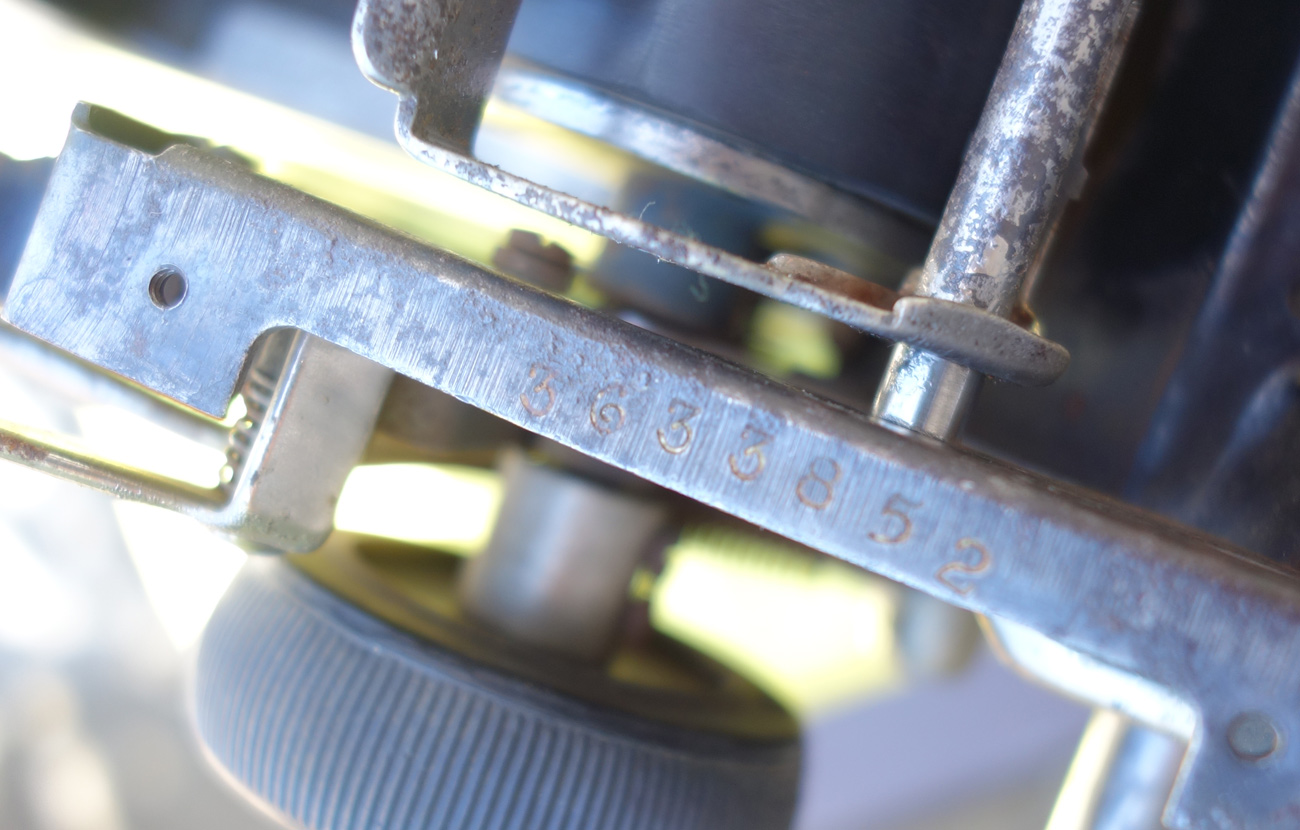
This Underwood had two serial numbers, both from 1930. One on main body: #3643485-5
and a serial number stamped on the carriage under a cover plate and handwritten behind the paper table: #3633852

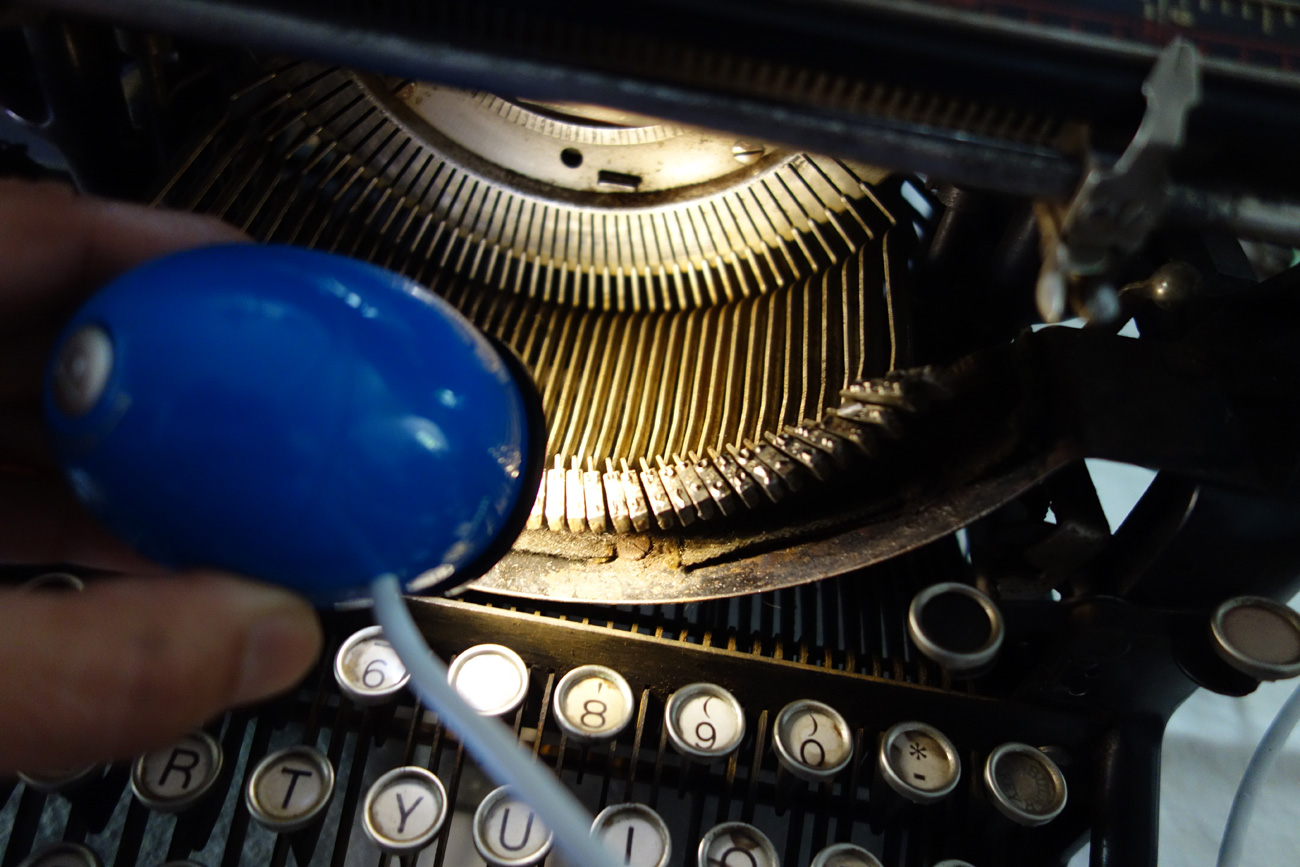
I scrubbed the type slugs. Most letters were printing very nicely despite the fact that the slugs had significant rust and peeling of chrome. I have a hand-held USB magnifier (very good for removing glass and splinters from feet) that I ran over the slugs. Despite looking very bad in magnification, the asterisk prints very well. Capital “M” and lowercase “w” are the only letters that look marginal when printing and even that isn’t too bad.

Type alignment
I really wanted Quin to have an optimal typing experience, and one of the things that drives me bananas is when the capital letters don’t line up with lowercase letters.

Fortunately, there is a 1920 service manual for the Underwood 3, 4 and 5 and on page 39, the manual describes adjusting the position of the “motion blocks” to align text. I found the blocks on either side of the carriage, set at an incline.
I removed the screws and blocks and threw them into an Evapo-Rust bath. After they were clean, I experimented with adjusting their position. I could get the capital letters to print much higher, but not lower to align with the lowercase letters.
I was stumped. What other adjustments could I make to bring those caps down? Fortunately I had recently re-read Words Are Winged’s posts on his amazing Underwood No. 5 overhaul. One post, “Tuning an Underwood 5” would provide me with an answer. The author observed that while putting his machine back together that his key lever comb was a bit too low and causing shifting to stay too high.
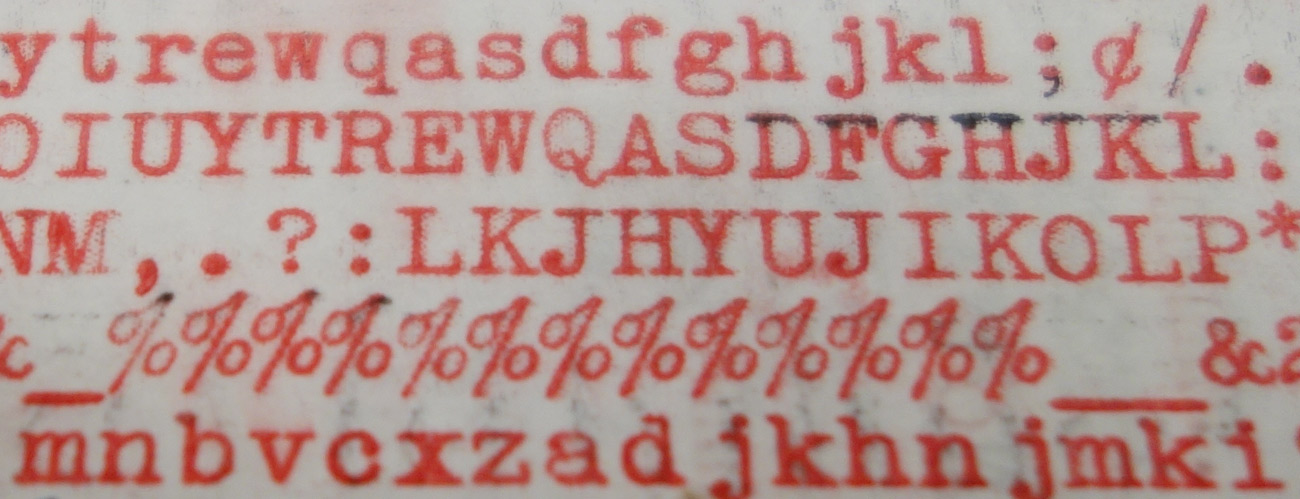
When I first got the machine, I had partially removed the key lever comb to sand rust off it, and now I wondered whether I had seated the comb too low when I replaced it. I loosened the screws, moved it up a bit and – voila! Perfect alignment:

Now the typewriter can answer this age-old question properly:

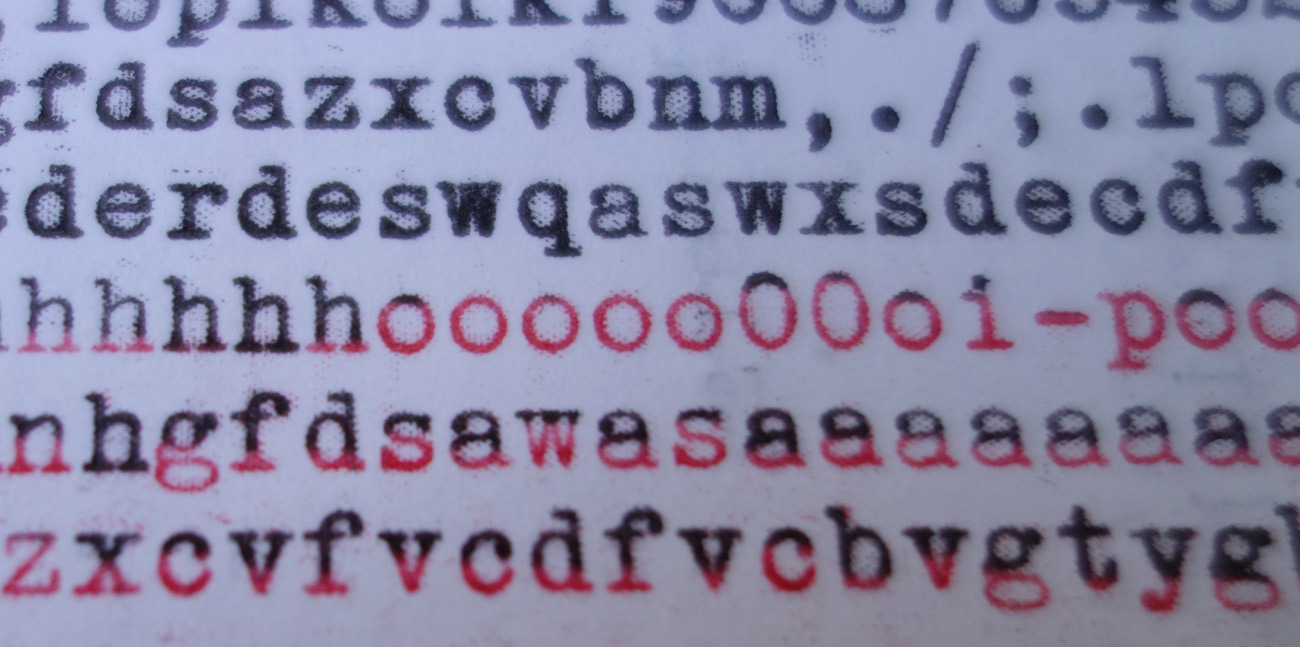
One of the last items on my to-do list was to adjust the ribbon throw. I found that while the typewriter printed just fine in black, several of the letters were printing half red and half black when I had it in red setting. I believe the official name of the problem is “bichrome mixing colors”.
I cleaned and cleaned the ribbon guide mechanism, but it didn’t seem to make a difference. I went to the Underwood service manual:
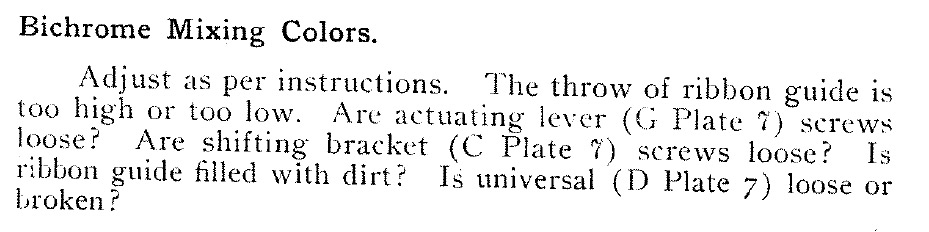
I think I need to take the carriage off and see if it’s very dirty back there or if I can adjust G Plate 7 and C Plate 7.
In retrospect, I should have taken the carriage off the typewriter as a very first measure when the typewriter arrived in its rusty and frozen state. I found out after the fact that it’s a fairly easy thing to do on an Underwood 5. Richard Polt removed the carriage on his and dismantled it in about seven minutes.
Anyhow, at this point, I am hesitant. This Underwood is typing so well right now, and I worry that I might not get it completely back together properly. There are subtle adjustments and parts positioning that I might overlook.
Should I take the carriage off and see if I can fix the ribbon throw?

Ames Typewriter Mechanical Training Manual, 1945, vol. 1; courtesy of The Classic Typewriter Page typewriter manuals archive
Ok then, let’s see. The first step is to disengage the draw band from the carriage stud and secure it to the draw band stud on the main frame. I used a hook to do this.
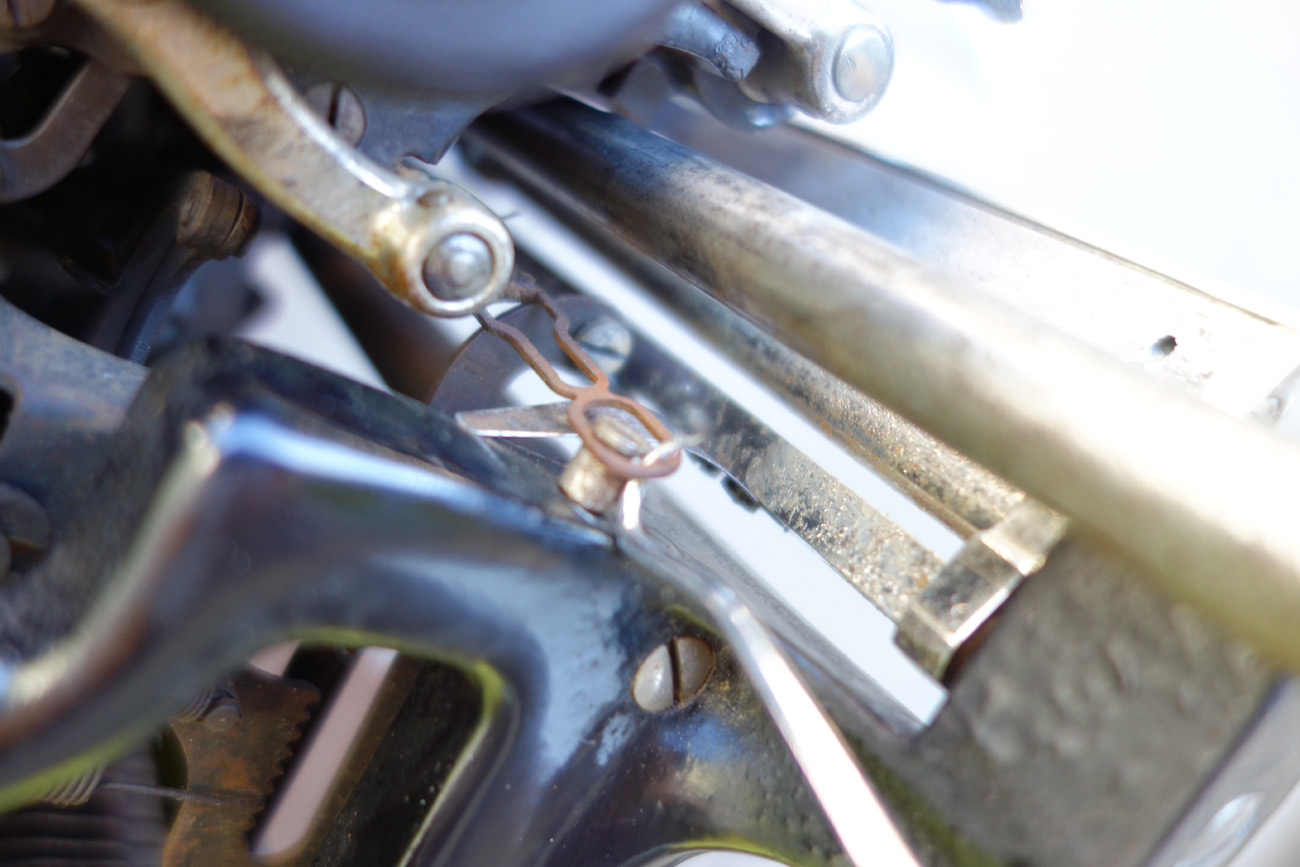
The next step is to remove the front scale plate and slide it off to the left. That’s the right carriage frame stop in my hand.
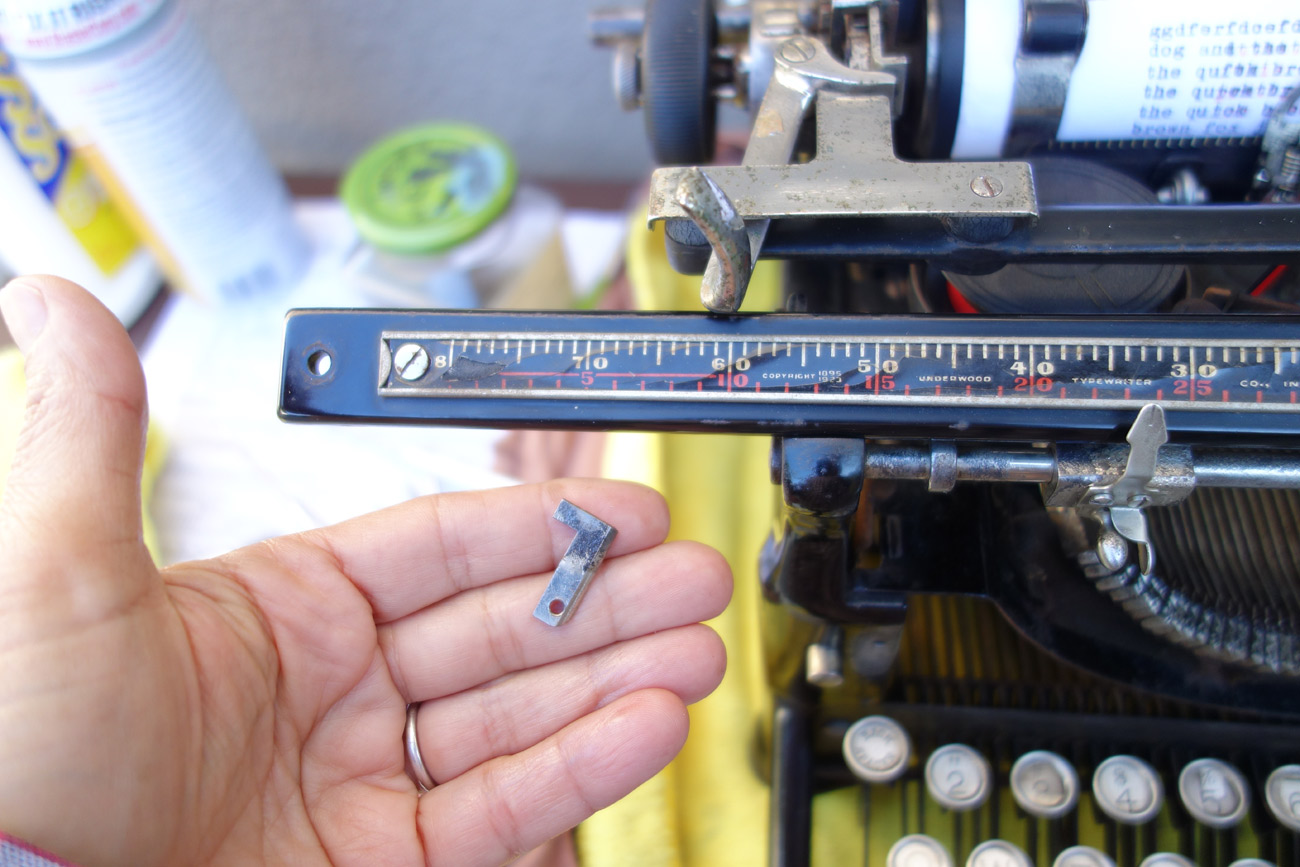
Then you lift the front of the carriage slightly…
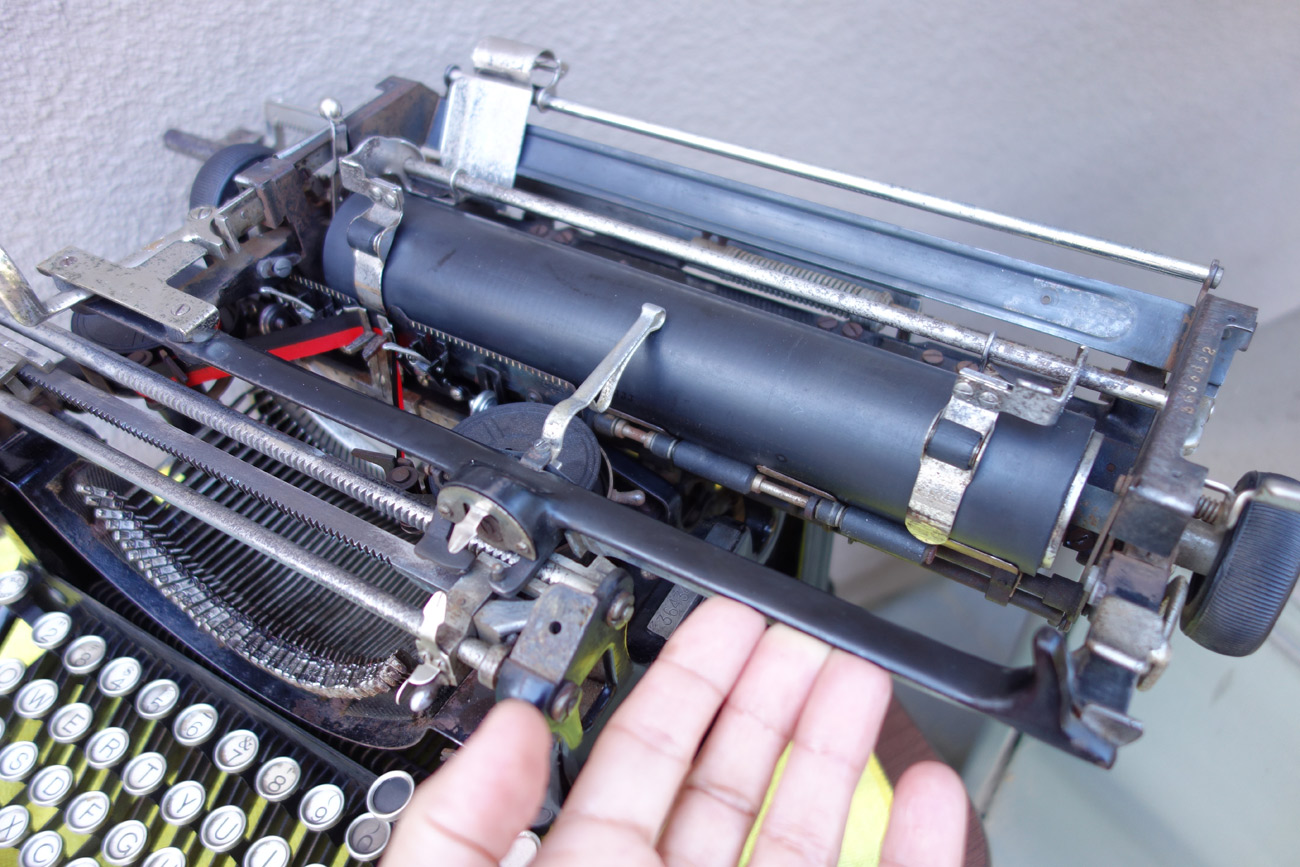
…and slide the carriage off to the right.

Ta-da! The carriage is off:
It was rusty and dirty behind the segment, so I flushed the ribbon guide mechanism with lots of mineral spirits and got a lot of grit out. I put the carriage back on for testing, but unfortunately the deep cleaning did nothing for my “bichrome mixing colors” problem.
I took the carriage off again and loosened the two “shift slide bracket screws”.
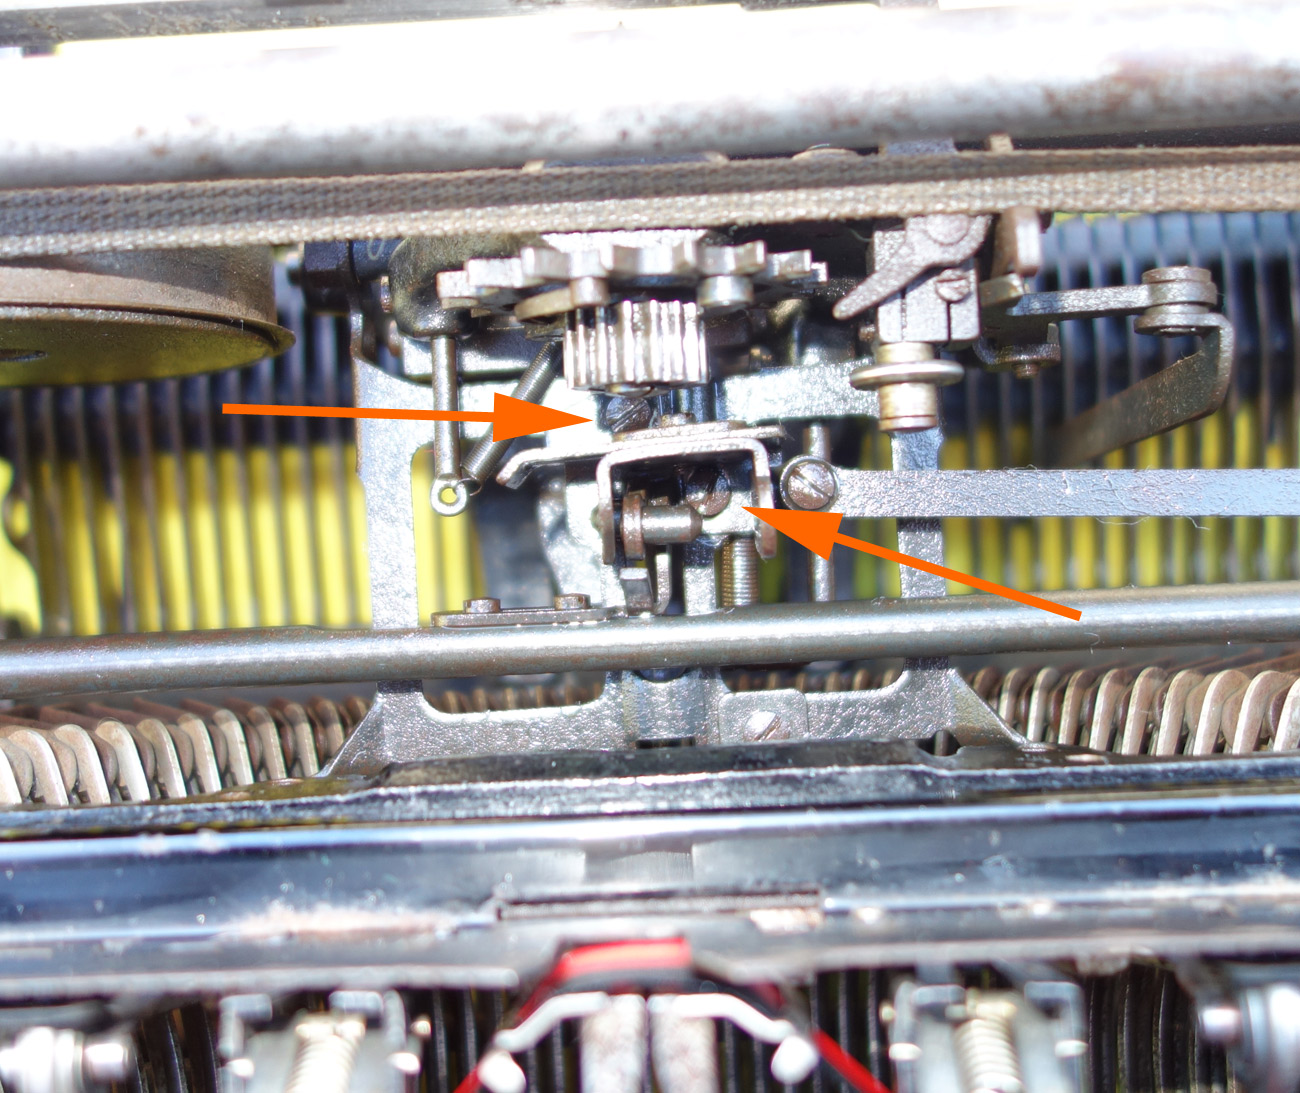
I moved the shift slide bracket backward, tightened the screws, put the carriage back on, tested, and saw that I had made some progress. I took the carriage back off again and adjusted the shift slide bracket a little more, and it was so much better:
It probably could be tweaked a bit more. How did this thing get out of adjustment? I’ll never know.
I put the carriage back on, replaced the front cover and the paper table and took a glamour shot:

This old girl is going back to Quin next Sunday. I am still doing detail work. I really think I need to get another terrible Underwood 5 of my very own to work on.
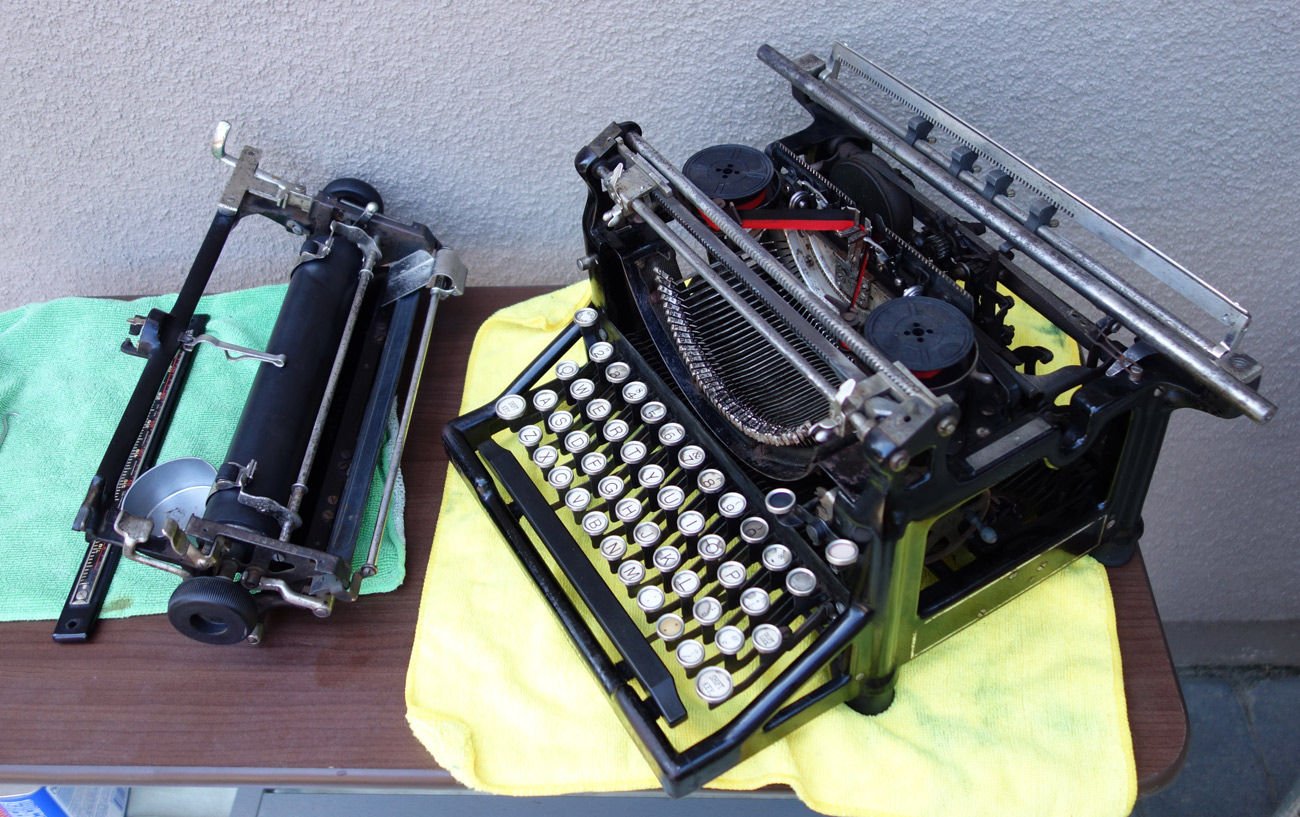
Here’s where we started:

One last thing: I am trying to replaced the faded red insert on the color switcher button. I don’t want to change the other key tops though several are in bad shape. I love the old timey font, and it’s important to me to keep this as real as possible. However, this faded red top really bugs me. I carefully loosened the tabs around the key ring, but that ring is clinging to the key like a nickel limpet. I cannot get it the ring off. Any tips or tricks?

I was lurking on Facebook the other day and saw someone using key top pliers with a popper and crimper attachment to remove and replace key rings. I was green with envy. If you have one to sell, I will buy it.

Oh my gosh. It’s easy to forget where the starting point was when it takes a good while to get a machine clean, but those last two pictures of the machine are like a sucker punch. From barn yard find, to well-preserved and ready to type. I applaud your efforts once more, and note that you excel at dealing with the paint. I’m always having issues with old varnish, and half the time just leave it on rather than deal with it.
In regards to the red colored key; I long ago decided that, despite cleaning literally every other part of a machine, I would leave the paper inserts of glass keys original. My own Underwood 5’s red key looks whitish pink, as yours does, but I think it helps reinforce the character of the machine.
I wish you luck in finding another barn yard Underwood 5 for your own collection!
LikeLiked by 1 person
It seems as if that color selector key wants to stay faded pink – I will abide by its wishes.
I am sure to stumble upon another terrible Underwood 5 for my very own. Once Quin’s Underwood was typing well, I was hesitant to upset the apple cart by dismantling it further. If it were my own, I would have removed the typebars for better cleaning. I was concerned about “breaking” someone else’s typewriter, so I cleaned them in place.
LikeLike
Yes, many lucks on the hunt for a Five of your own to nurse back to health. Clearly you have proven your mettle against the most discouraging of basket cases. 😀
Watch yourself, tho – before you know it you will have bid on one of those old suitcases full of typewriter repairman’s tools that pop up on ebay occasionally.
LikeLiked by 1 person
If you hear tell of any of those old suitcases full of typewriter tools for sale, let me know. I will put them to good use. I vaguely recall a document that described the use of various typewriter tools – was that at Typewriter Database?
LikeLike
I see you grabbed the SCM one. I shall have to send you the AMES catalogs too. (:
LikeLike
The transformation is truly fantastic! The machine deserved it though – I love my Fiver too.
When you are returning it to Quin do a proper unveiling and take a picture of her face please. I guess it might be a real life cartoonesque eye-popping-out-jaw-dropping moment 🙂
LikeLiked by 1 person
I have got to get another Underwood 5 – this one has been great fun.
I will take lots of pictures when I deliver the typewriter. Aside from the cosmetic improvements, I am happy that it types so well – solid and consistently wonderful. It will serve a young writer well.
LikeLike
This weekend my first vintage typewriter came to live with me. Totally smitten after only 3 days, I’m eager to clean, lubricate and adjust it to working condition. Wandering the typosphere, I’ve seen several of your posts and was encouraged by your successes. Your transformation of this Underwood 5 is nothing short of astounding! Congratulations on all your good work and thank you for inspiring me. 🙂
LikeLiked by 1 person
That’s so nice to hear. I find typewriter tinkering an incredibly relaxing and interesting hobby – there’s always something new to learn. In addition, a really supportive online typewriter community is there when you are looking for answers. I recommend getting Richard Polt’s book, The Typewriter Revolution. It’s full of great information on using your typewriter as well as care and feeding tips and tricks.
LikeLike
I have an underwood no 5 from 1923 that I recently acquired. I plan on restoring/cleaning it myself but the exterior has these varnish/ clear coat? Pealing along with the Underwood logo above the keyboard And I would love to be able to preserve the logo while getting rid of the gross yellow flakes. How exactly did you fix this problem on yours? I am very new to this so thank you so much for your help!
LikeLike
I love those old Underwood 5s! That flaky varnish is a pain though. I have had success in the past using Simple Green and/or Soft Scrub and/or automotive cleaner wax. I have read in repair forums of people using a mixture of Dawn and baking soda (as a mild abrasive) to remove varnish. What ever you use will take a lot of time and elbow grease and Q-tips and small rags. Working around the logo decal is tricky – you have to be VERY careful because you will damage the decal if you rub over it. Make sure to protect your keys from liquids with a towel. Liquid from cleaning can seep in and ruin the keytop legends. Also, make sure that you test in an non-obvious area first to make sure you are only taking flaky varnish and not paint. Every typewriter is different and some typewriter paint will withstand abrasives and cleaning agents and some will not. Good luck!
Here is a post from Richard Polt about cleaning his Sholes some time back:
http://writingball.blogspot.com/2012/08/sholes-visible-lacquer.html
LikeLike
Thank you so much for your help! It is very difficult to find resources about these underwoods even though I’ve heard they are very popular. Once I’ve removed the varnish should I apply anything to preserve the lettering? I also have some light rust in the chrome and metal bits, I’ve heard about using rubbing alcohol on those parts is that a good idea? There are a few broken but with the paper rollers that clip over they are rubber and melted so they are not round and the margin mechanism is missing the block bit that holds the two bits together. Where can I buy these replacement bits? Thank you so much for all of your help! You are the only truly helpful resource I’ve found so thank you and I hope all of my questions aren’t a bother😂 have a great day!
-Riley
LikeLike
I would recommend removing only the varnish around the decal lettering and leave varnish over the decal – it may damage the decal to clean over it. I polish up my typewriters with automotive wax or Renaissance wax. Alcohol (eg denatured alcohol) will remove grease but doesn’t do much for rust. Also, it’s very hard on paint and will strip off finishes. I like to use mineral spirits to clean metal parts. I drape painted areas with towels and scrub typebars and segment with mineral spirits using a brass bristle brush. I like to polish lightly rusted metal with a metal polish like Flitz. On very rusty parts, I use #0000 steel wool (carefully). If a very rusty part can be removed, a dip in Evapo-Rust can clean off surface rust. Regarding your flat paper finger roller, you may be able to sand them round with sandpaper. This is the link to the Facebook Typewriter Maintenance group:
https://www.facebook.com/groups/typewritermaintenance/
It’s a private group, but you can request membership. Members are quite helpful and share tips and infomation and may be able to point you in the direction of spare parts for your Underwood.
LikeLike
I’m desperate for parts for my No. 5. The roller is fossilized, the tabs do it their way, the margins also don’t obey normal commands like Return. Before I start to disassemble this I at least want to know I can find a few parts. The manual I downloaded is around 100 years old with no videos!
LikeLike
Congrats on your Underwood 5 – those things are built like tanks and will usually type even after 100+ years of abuse. You may not have to disassemble too much and replace parts. I’ve found that cleaning rust and gummy dirt in place can be very effective.
I recommend that you check out the Facebook Typewriter maintenance group:
https://www.facebook.com/groups/typewritermaintenance/
It is a large and active group, and they will be able to help you troubleshoot your Underwood 5 issues and source parts. It is a private group, so you’ll need to request admission to the group.
Good luck – you will love that Underwood once you get it running.
LikeLike
Hi! I just got an Underwood 5 on eBay. It’s my first old machine. It was listed as working great. And it seems like it probably was. But the packer didn’t pad the frickin TOP of the machine in the box. Nice foam boards everywhere else around it, though. …Except for the fragile TOP. …So it arrived with the left corner smashed downward a half-inch. The carriage return lever was disengaged and unaligned with the bar that rolls the platen. The lever that changes spacing from 1-2-3 lines worked and everything else seemed fine. I moved the lever and the bar so they’d clear each other then I lifted up on the corner and it popped back up and the bar now aligns with the lever. But the lever won’t activate the bar and the lines-adjuster is jammed. That’s my situation! Is there some part I should disassemble or plate I should remove that would let me see what’s going on? I could take off the top plate that says “1 2 3” and look under it. What should I look for? I’m a bit nervous. Should I just dive in? Is there some online info I should look at first? THANKS!!!!
LikeLike
Gosh, that’s a sad story. The old heavy machines sometimes suffer in shipping. The good news is that they can recover with some TLC. Go ahead and take the line spacing 1-2-3 plate off and take a look-see. If you like, you can email me pictures at

I have an Underwood 5 on the workbench that I can use as a comparison machine.
Also: there is a 1920 Underwood 5 repair manual online that you may find helpful:
Underwood 5 Repair Manual
Good luck!
LikeLike
Great stuff! Thank you for all the images and documenting the steps – am ‘reading up’ on the Underwood 5 (have the summer-project machine waiting in the wings). The old service manual is fine (though occasionally “written in code”), these images-walkthrough make it so much clearer!
I’m now much looking fwd to tackling my centenarian 5 later this summer.
LikeLike
That is so good to hear. Know that the feeling is mutual. Backspace Does Not Erase is my go-to website when I am working on a Remington portable. Your posts have been invaluable to me.
I wish you many happy hours working on your Underwood 5. I have found them very fun machines.
LikeLike
😀
LikeLike
Nice! I recently bought an Underwood No. 5 (1920s) and it’s missing a part that supposed to connect with the type bar release mechanism when you hit the margin and rings the bell. Unfortunately, there’s not much typewriters in the same era here in the Philippines, especially these models.
LikeLike
I apologize for the slow response – been “disconnected” for the last day or two.
Underwood Fives are very common here in the United States, and you may be able to find a collector here in the states with a parts Underwood Five that may be able to send you the connector piece. The Facebook Typewriter Maintenance group is very active and helpful and may provide you with a lead, either in the states or the Philippines.
https://www.facebook.com/groups/typewritermaintenance/
LikeLike
Thanks! Much appreciated 🙏
LikeLiked by 1 person
Thanks for this site and all the information on the Underwod 5. I had one at one time, and it was in excellent working condition. In fact, I went through college with it, graduating in 1980. I don’t know what happened to my Underwood; I still had it as a back-up in grad school, but moved on to a Smith-Corona electric with a ribbon cartridge to give my papers a consistent black-type look. I wish I still had the old Underwood.
LikeLike
I am charmed by the idea that someone who graduated in 1980 was using an Underwood 5 in college. They are wonderful beasts.
I have fond memories of the little turquoise KMart Deluxe 100 I used in college. It disappeared at some point. I miss it.
LikeLike
A few things I forgot to say about my old Underwood. On lower back of the black frame, the Underwood had a series of patents listed. The last one was in 1926, as I recall, so mine wouldn’t have been produced before that time. Also, it could be a bit noisy. My roommate told me once, when I was typing on a paper late at night, “Usually, your typing doesn’t bother my; last night it kept me up!” Sorry about that. A Professor encouraged me to learn how to “compose at the typewriter.” Before that, I was handwriting, then typing, all my papers. I took that advice and began composing on the old Underwood–in time, I could write quickly on it.
LikeLike
Underwood 5 production started about 1900 and ending around 1931/32 – I think close to four million were produced. I’ve worked on real old ones and much newer ones and they really didn’t change much over 30 years. Fantastic machines – Underwood didn’t mess with the design too much. If it ain’t broke…
I will never be able to just sit and compose coherent pages on a typewriter. I’m a recursive writer. Even birthday cards get about five drafts. 🙂
LikeLike