Spring is sprung.
The mainspring on our new Oliver No. 9 was broken. This is (unfortunately) the least of her problems.
How did I know her mainspring was broken? Because when I tried to wind the mainspring, it just gave a sad little snapping sigh and lost tension.
Thanks to a great post by Tony Mindling documenting his repair of an Oliver No. 9 mainspring, I knew all was not lost.
One thing that makes a mainspring repair on my Oliver doable is accessibility. The little spring barrel is sitting right out there on the back of the machine. The mainspring on my Remington Rand KMC was tucked into its inner recesses. I am glad that I didn’t have to fix that one.
Tony had mentioned in his post that I need to remove the back carriage rail to remove the main spring. Fortunately I had a rusty little wrench that took care of the bolts that held the rear carriage rail. I had to treat the bolts with PB Blaster as they were frozen and rusty – like just about everything else on the machine.
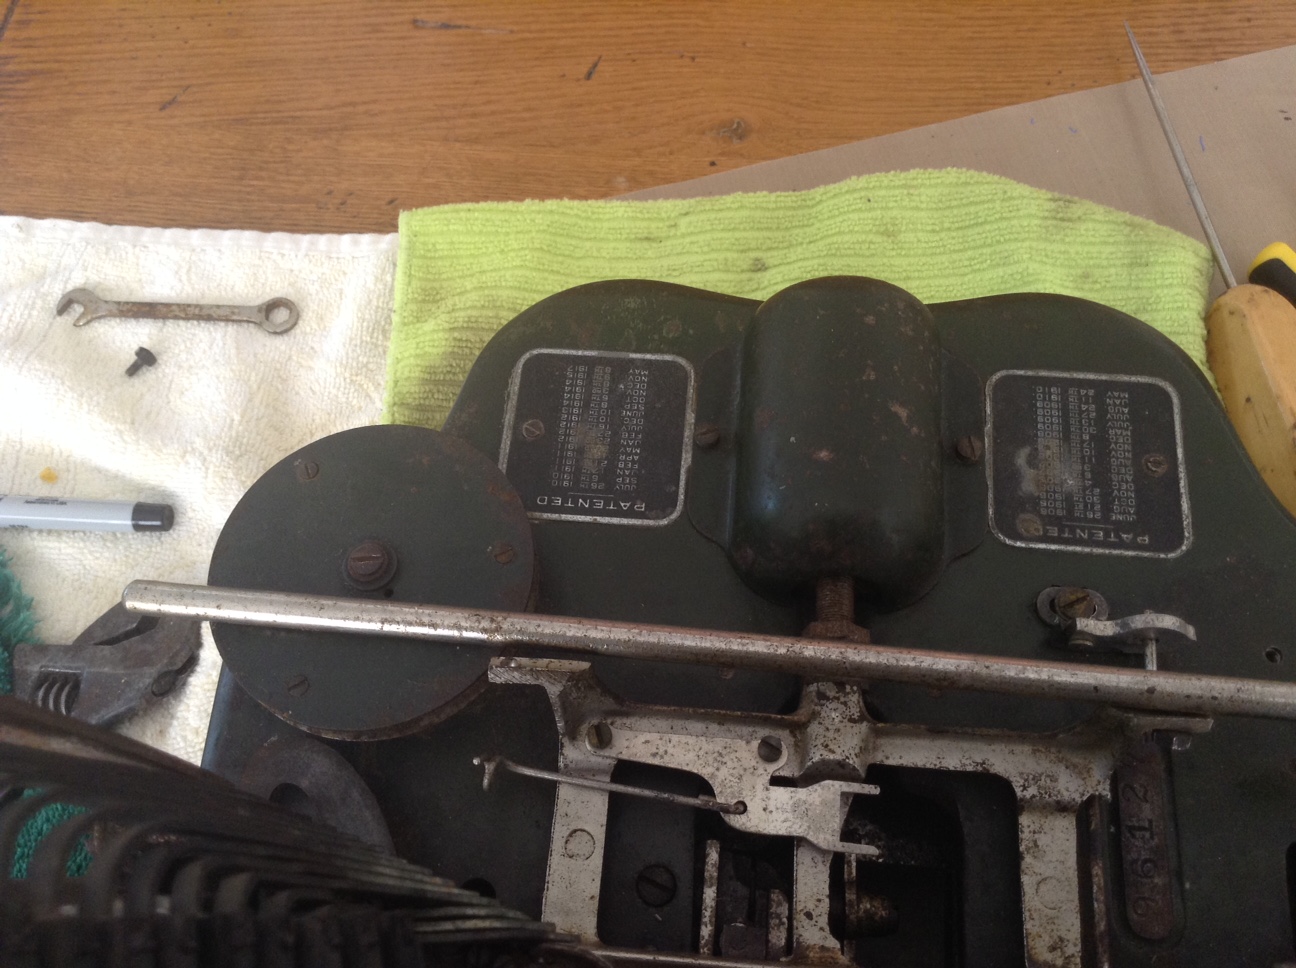
The rear carriage rail bolts were hard to access as they were under the rail – good thing I had that little wrench.

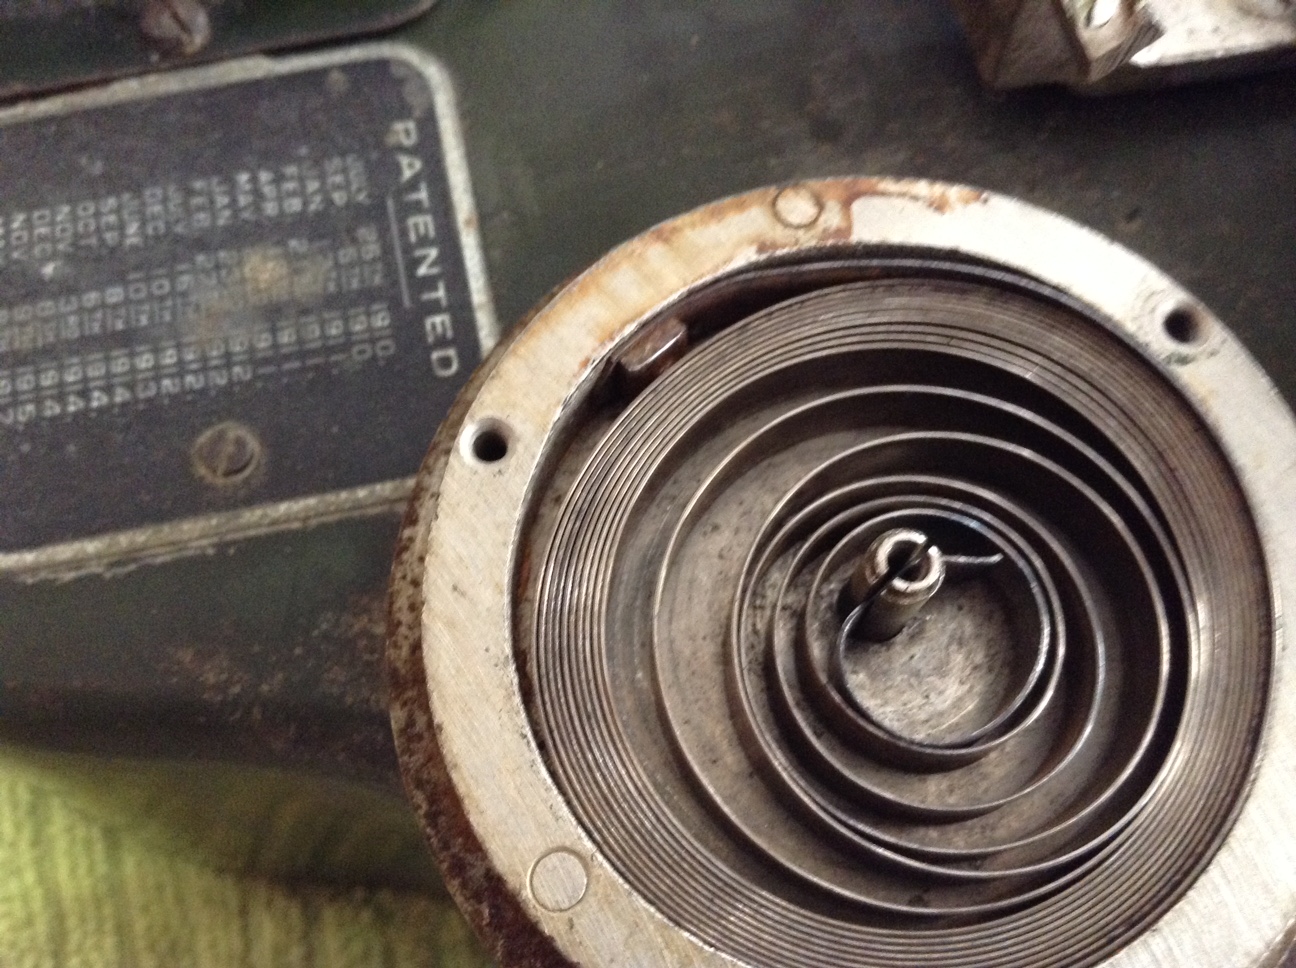
Back carriage rail is off – just need to remove the center screw on the spring barrel

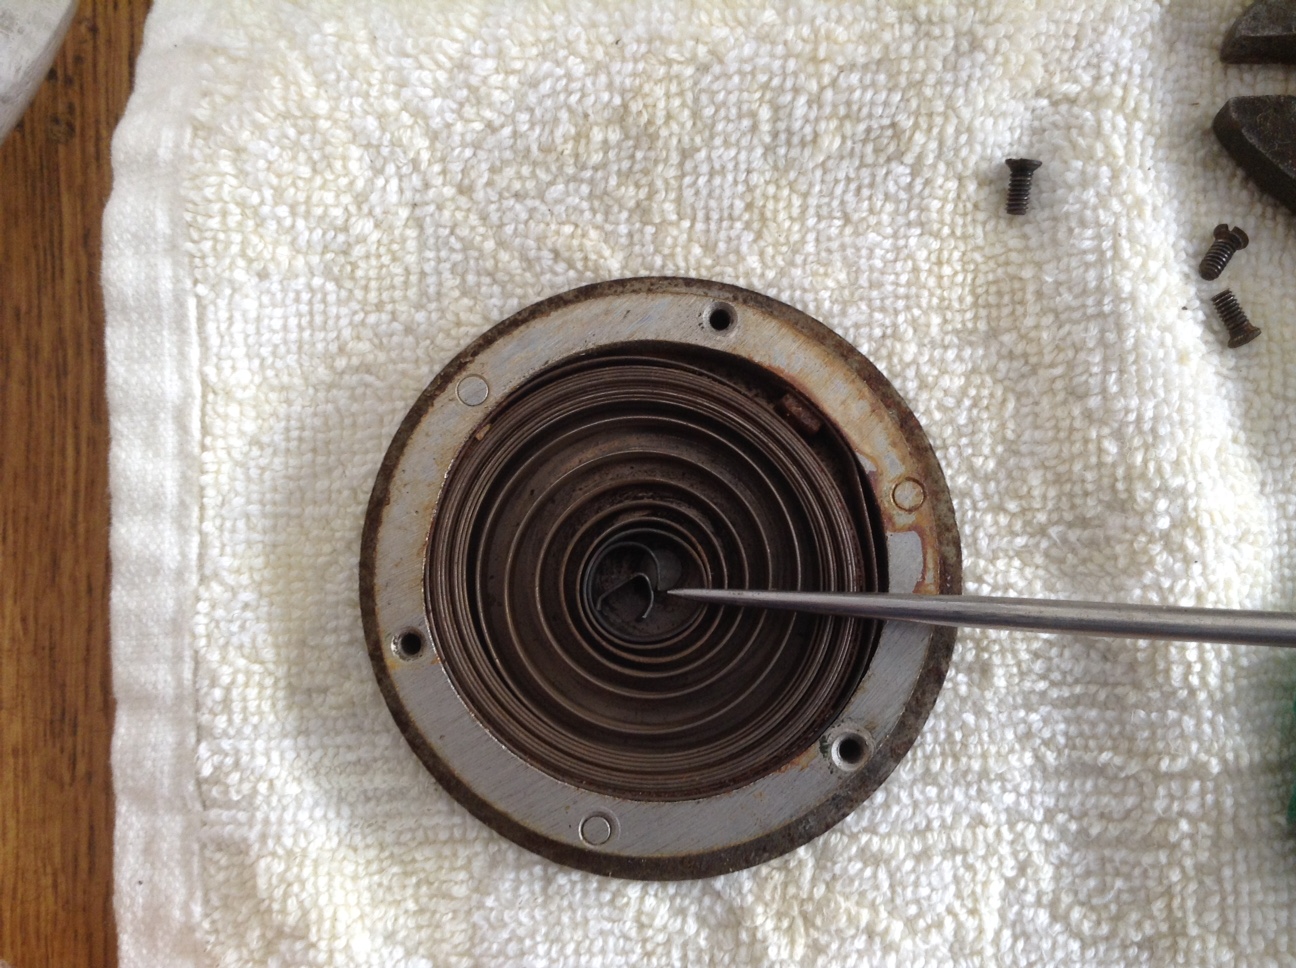
Hand model pops off the spring barrel
From what I’ve been reading, you have to be very careful operating on the mainspring as the very sharp spring may leap out and injure you. I opened up the spring barrel VERY slowly and found what I thought would be there: a broken mainspring.
Ok – I just need to re-attach the end of the spring to the slot in the center spindle. First, I wanted to replicate the broken end which was straight for the slot and with a little curve at the end. I started fiddling around with needle nose pliers and a screwdriver and then – ZIIIIING – all heck broke loose as the spring escaped from the case.
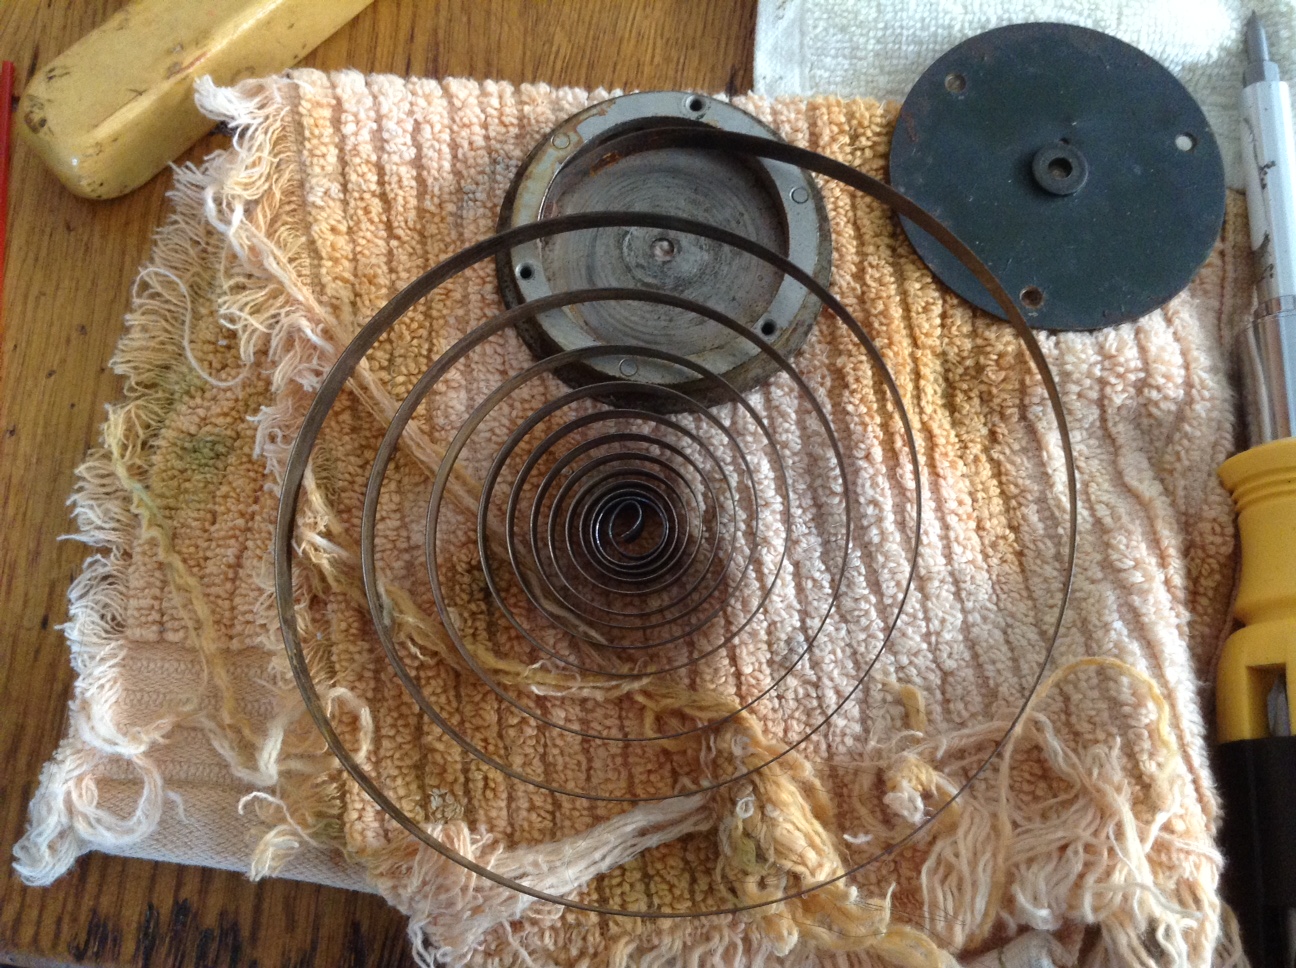
Fortunately, I wasn’t injured – that spring is very sharp. I carefully rewound it back into its case and it managed to get tangled and twistedin on itself like a crazy Slinky. I had to unwind it and rewind it a couple times. It did NOT want to go back to its case. I bent it to my will with a steady stream of curse words.
I am being a bit melodramatic – it really wasn’t that bad. It just would have been easier and safer if the spring had stayed in the spring barrel.
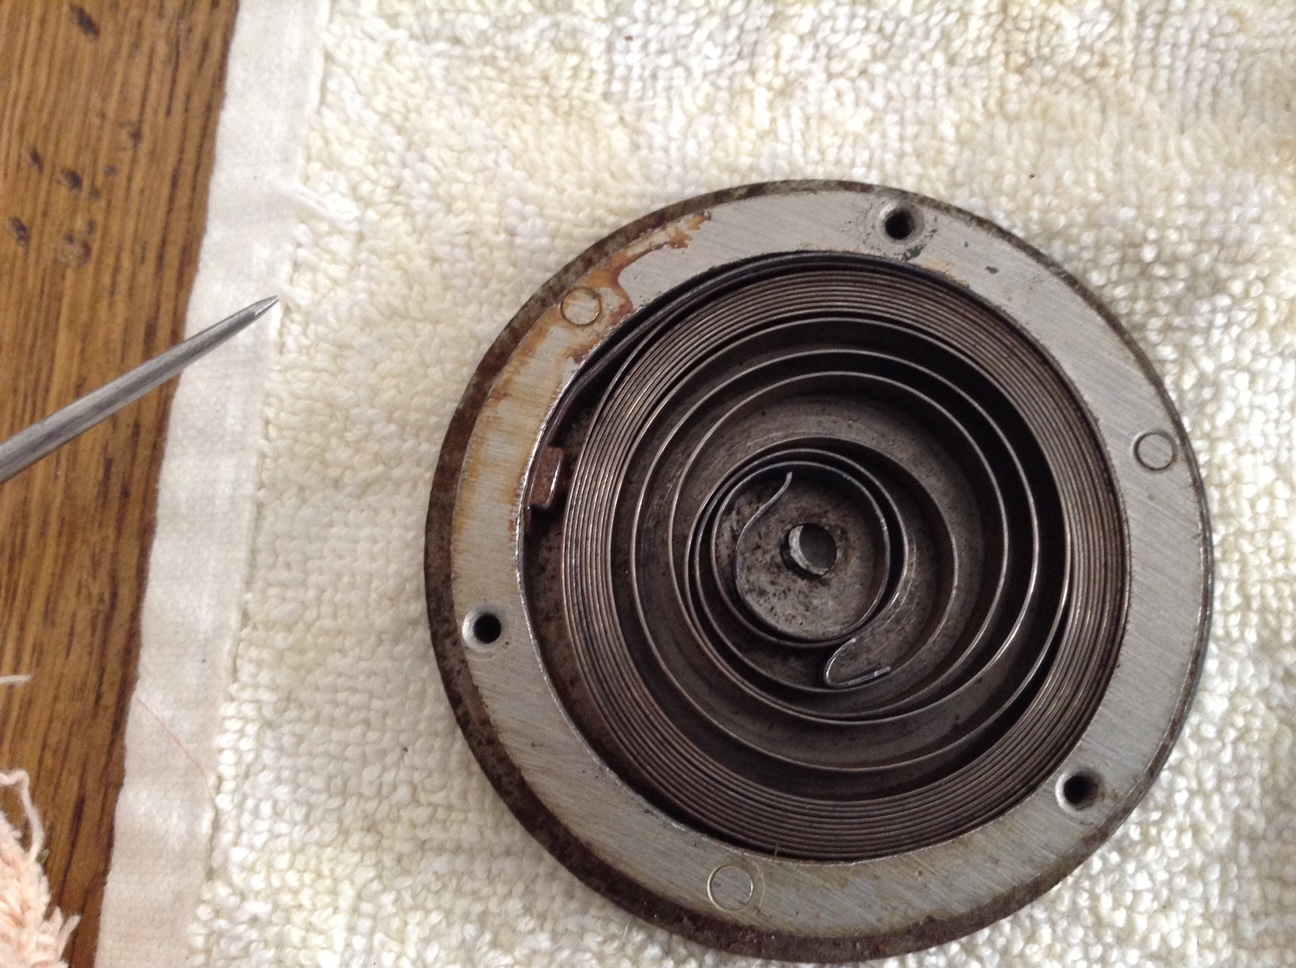
I placed the barrel back onto the machine, feeding the flattened end of the spring into the slot on the spindle. I screwed everything back together and tested the spring. It wound beautifully and then – SNAP – I had a broken mainspring again.
Sighing, I unscrewed everything and opened the spring barrel. Yup, snapped.
And then I thought about it. Which way am I supposed wind the mainspring? I had wound it clockwise. Could I have stressed the spring to the breaking point by winding the wrong way? Why, yes I could.
I went to YouTube to check out Martin Rice’s video on Oliver draw band repair. And he wound his mainspring counter-clockwise. OK then.
I carefully replaced the mainspring, inserting the flattened end into the center spindle slot.
I put the lid back on, wound it carefully COUNTER-CLOCKWISE. It worked beautifully. *ZZZZZIP* Lots of life in it and no breaking. It sounds beautiful, full of life and power. I live for these small victories.

Nicely done! Your writeups of this process are well detailed and useful! (:
LikeLike
I am really enjoying the process – slowly but surely this little green lady is coming back to life – thanks in large part to dedicated typospherians like yourself who provide online information and resources desperately needed by novices like myself.
LikeLike
Do you have any advice in restoring an Oliver #2
LikeLike
Gary Bothe’s restoration of an Oliver #2 is quite a good read:
http://catch55.home.xs4all.nl/projects/oliver2/
He details
LikeLike
Thanks. I have started to disassemble my # 2 Oliver . Hopefully I can follow directions. We shall see. Steven
LikeLike
Good luck! Fortunately the mechanics are exposed and easily accessible on Olivers.
LikeLike