Parts in a Box Syndrome is a well-known typewriter affliction caused by a typewriter owner’s fever of initial excitement, a flurry of dismantling, progressive confusion, and eventual forgetfulness.
The victim of the syndrome is the typewriter which usually becomes a Parts Machine™ or Project Machine™.
I know that I have about 24 hours after dismantling a typewriter before the details become distant and foggy and the machine becomes a potential victim of Parts in a Box Syndrome. I try to do minimal dismantling when cleaning and repairing unless I am very comfortable with a type of machine or the machine is particularly hopeless on arrival. If I have to get into the guts, I generally take lots of pictures and make notes.
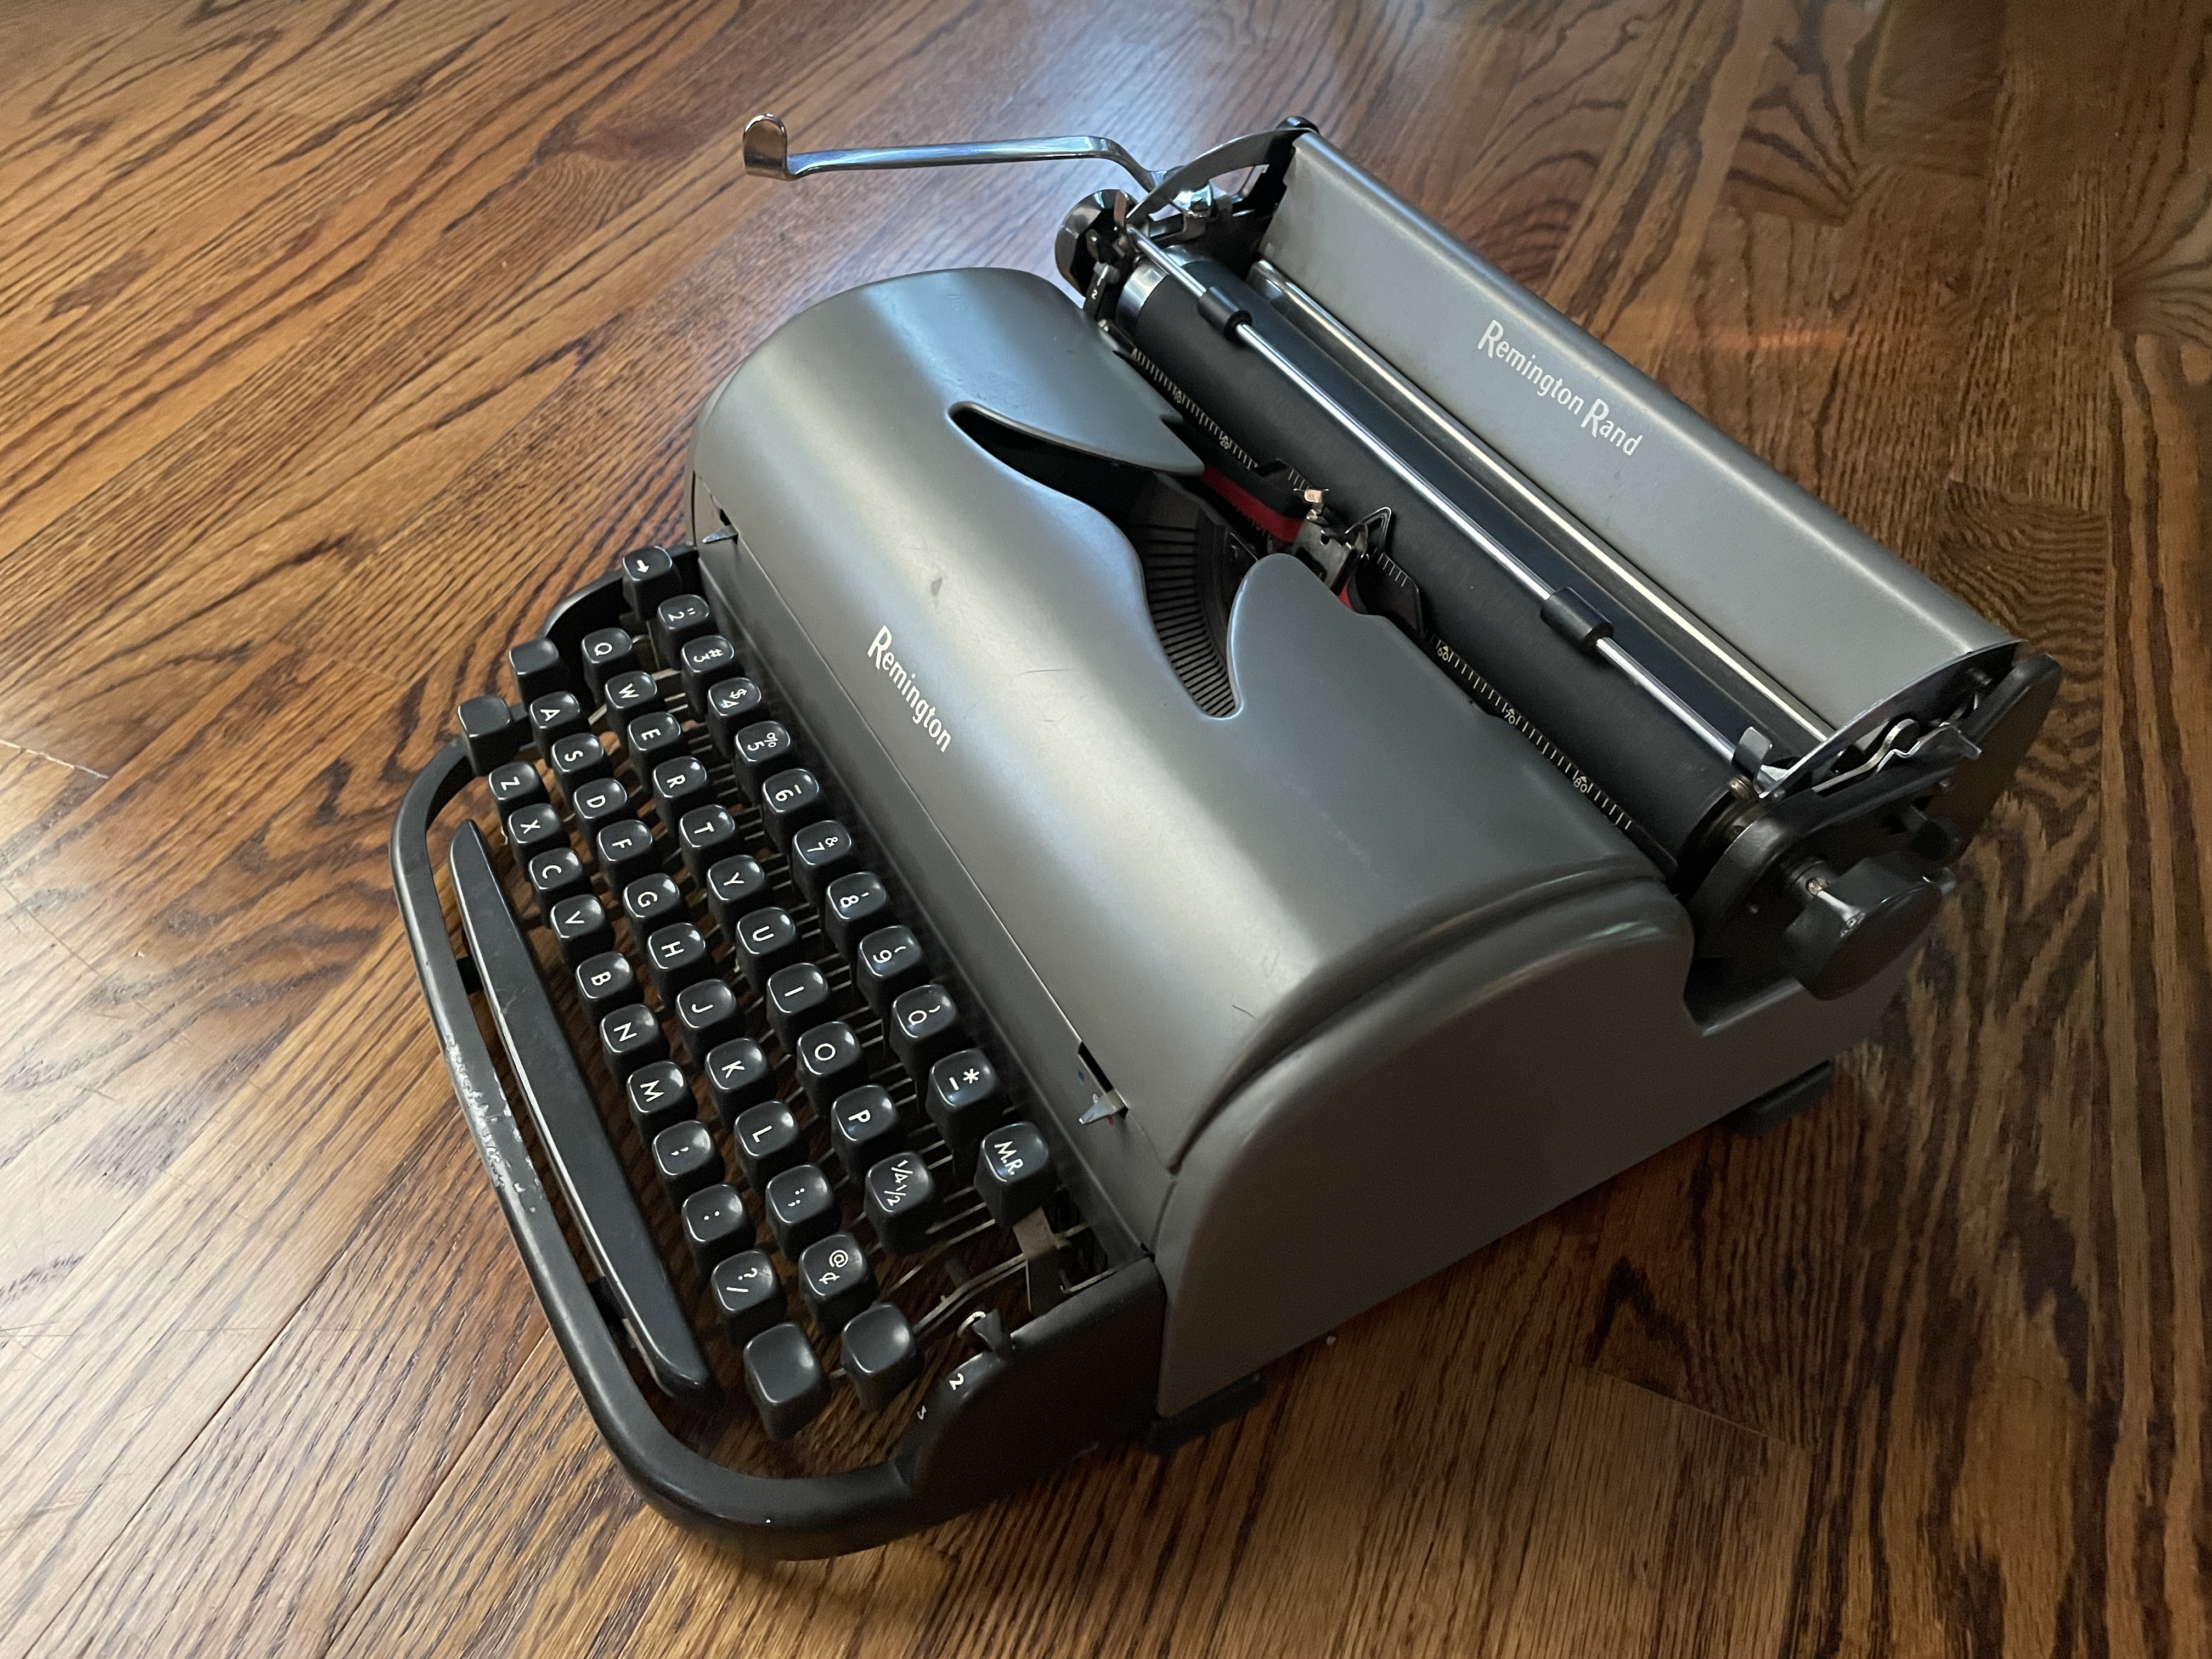
This 1949 Remington All-New Portable arrived in my garage as Parts in a Box. A local typewriter enthusiast, David, had found it for FREE on Facebook Marketplace and picked it up.
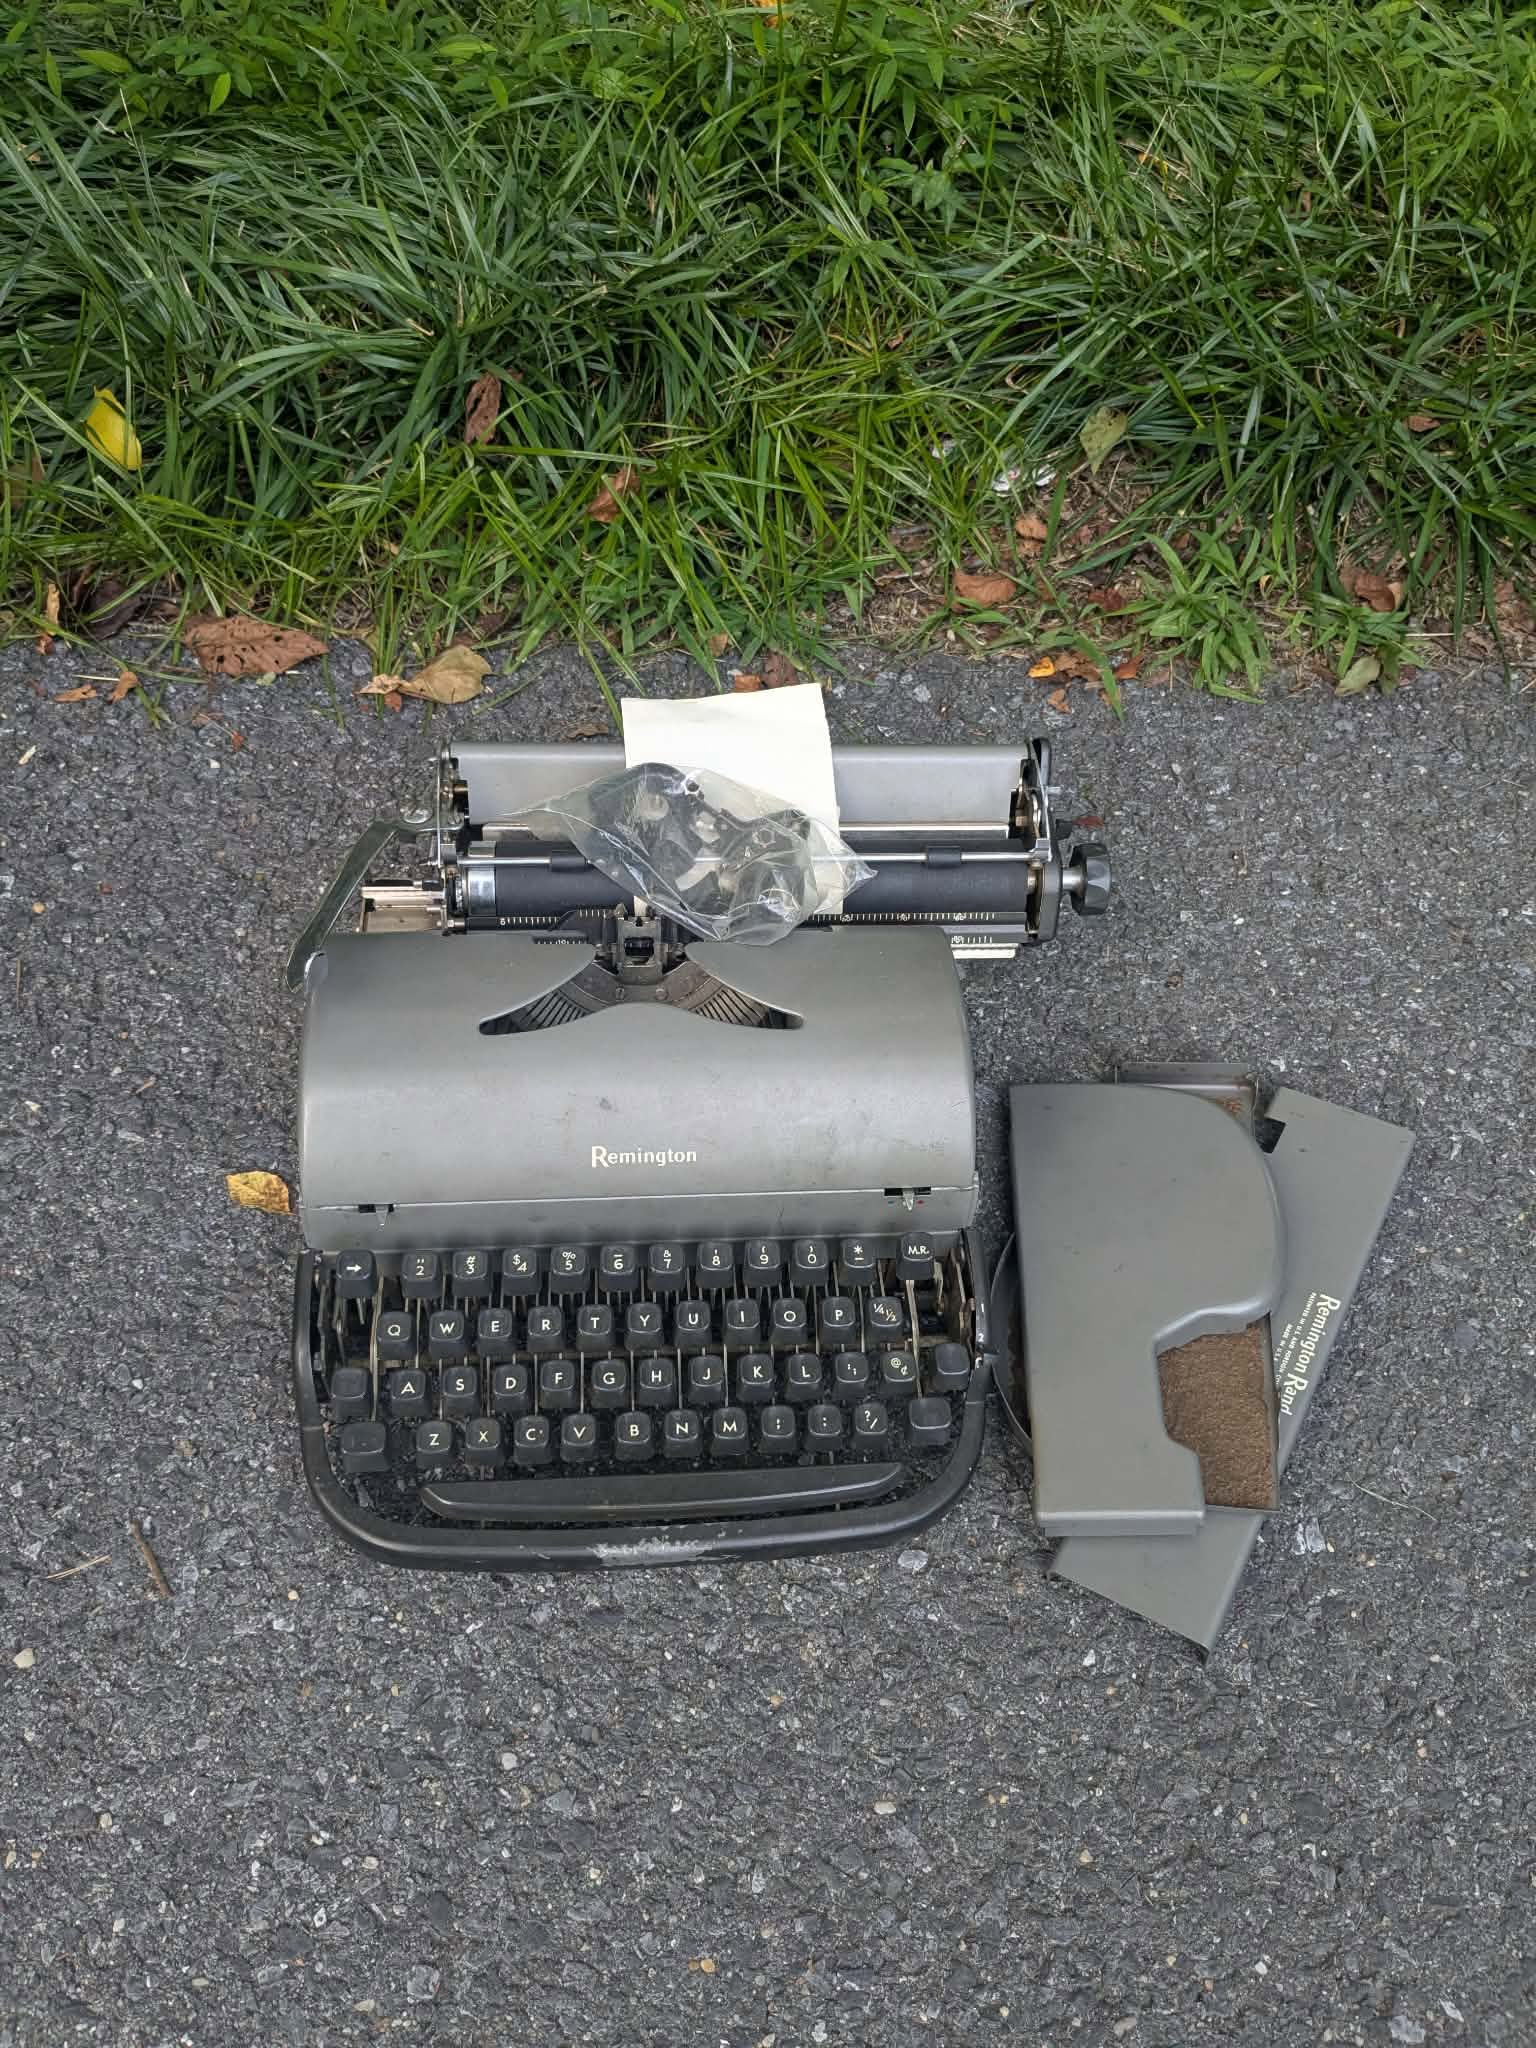
David asked me if I was interested in it as project, and I said, “Sure!” It didn’t look too bad from the picture, but David said something about the carriage being off and “bearings in a baggie”. Hmmm.
The typewriter arrived, and I saw the extent of the “project”.
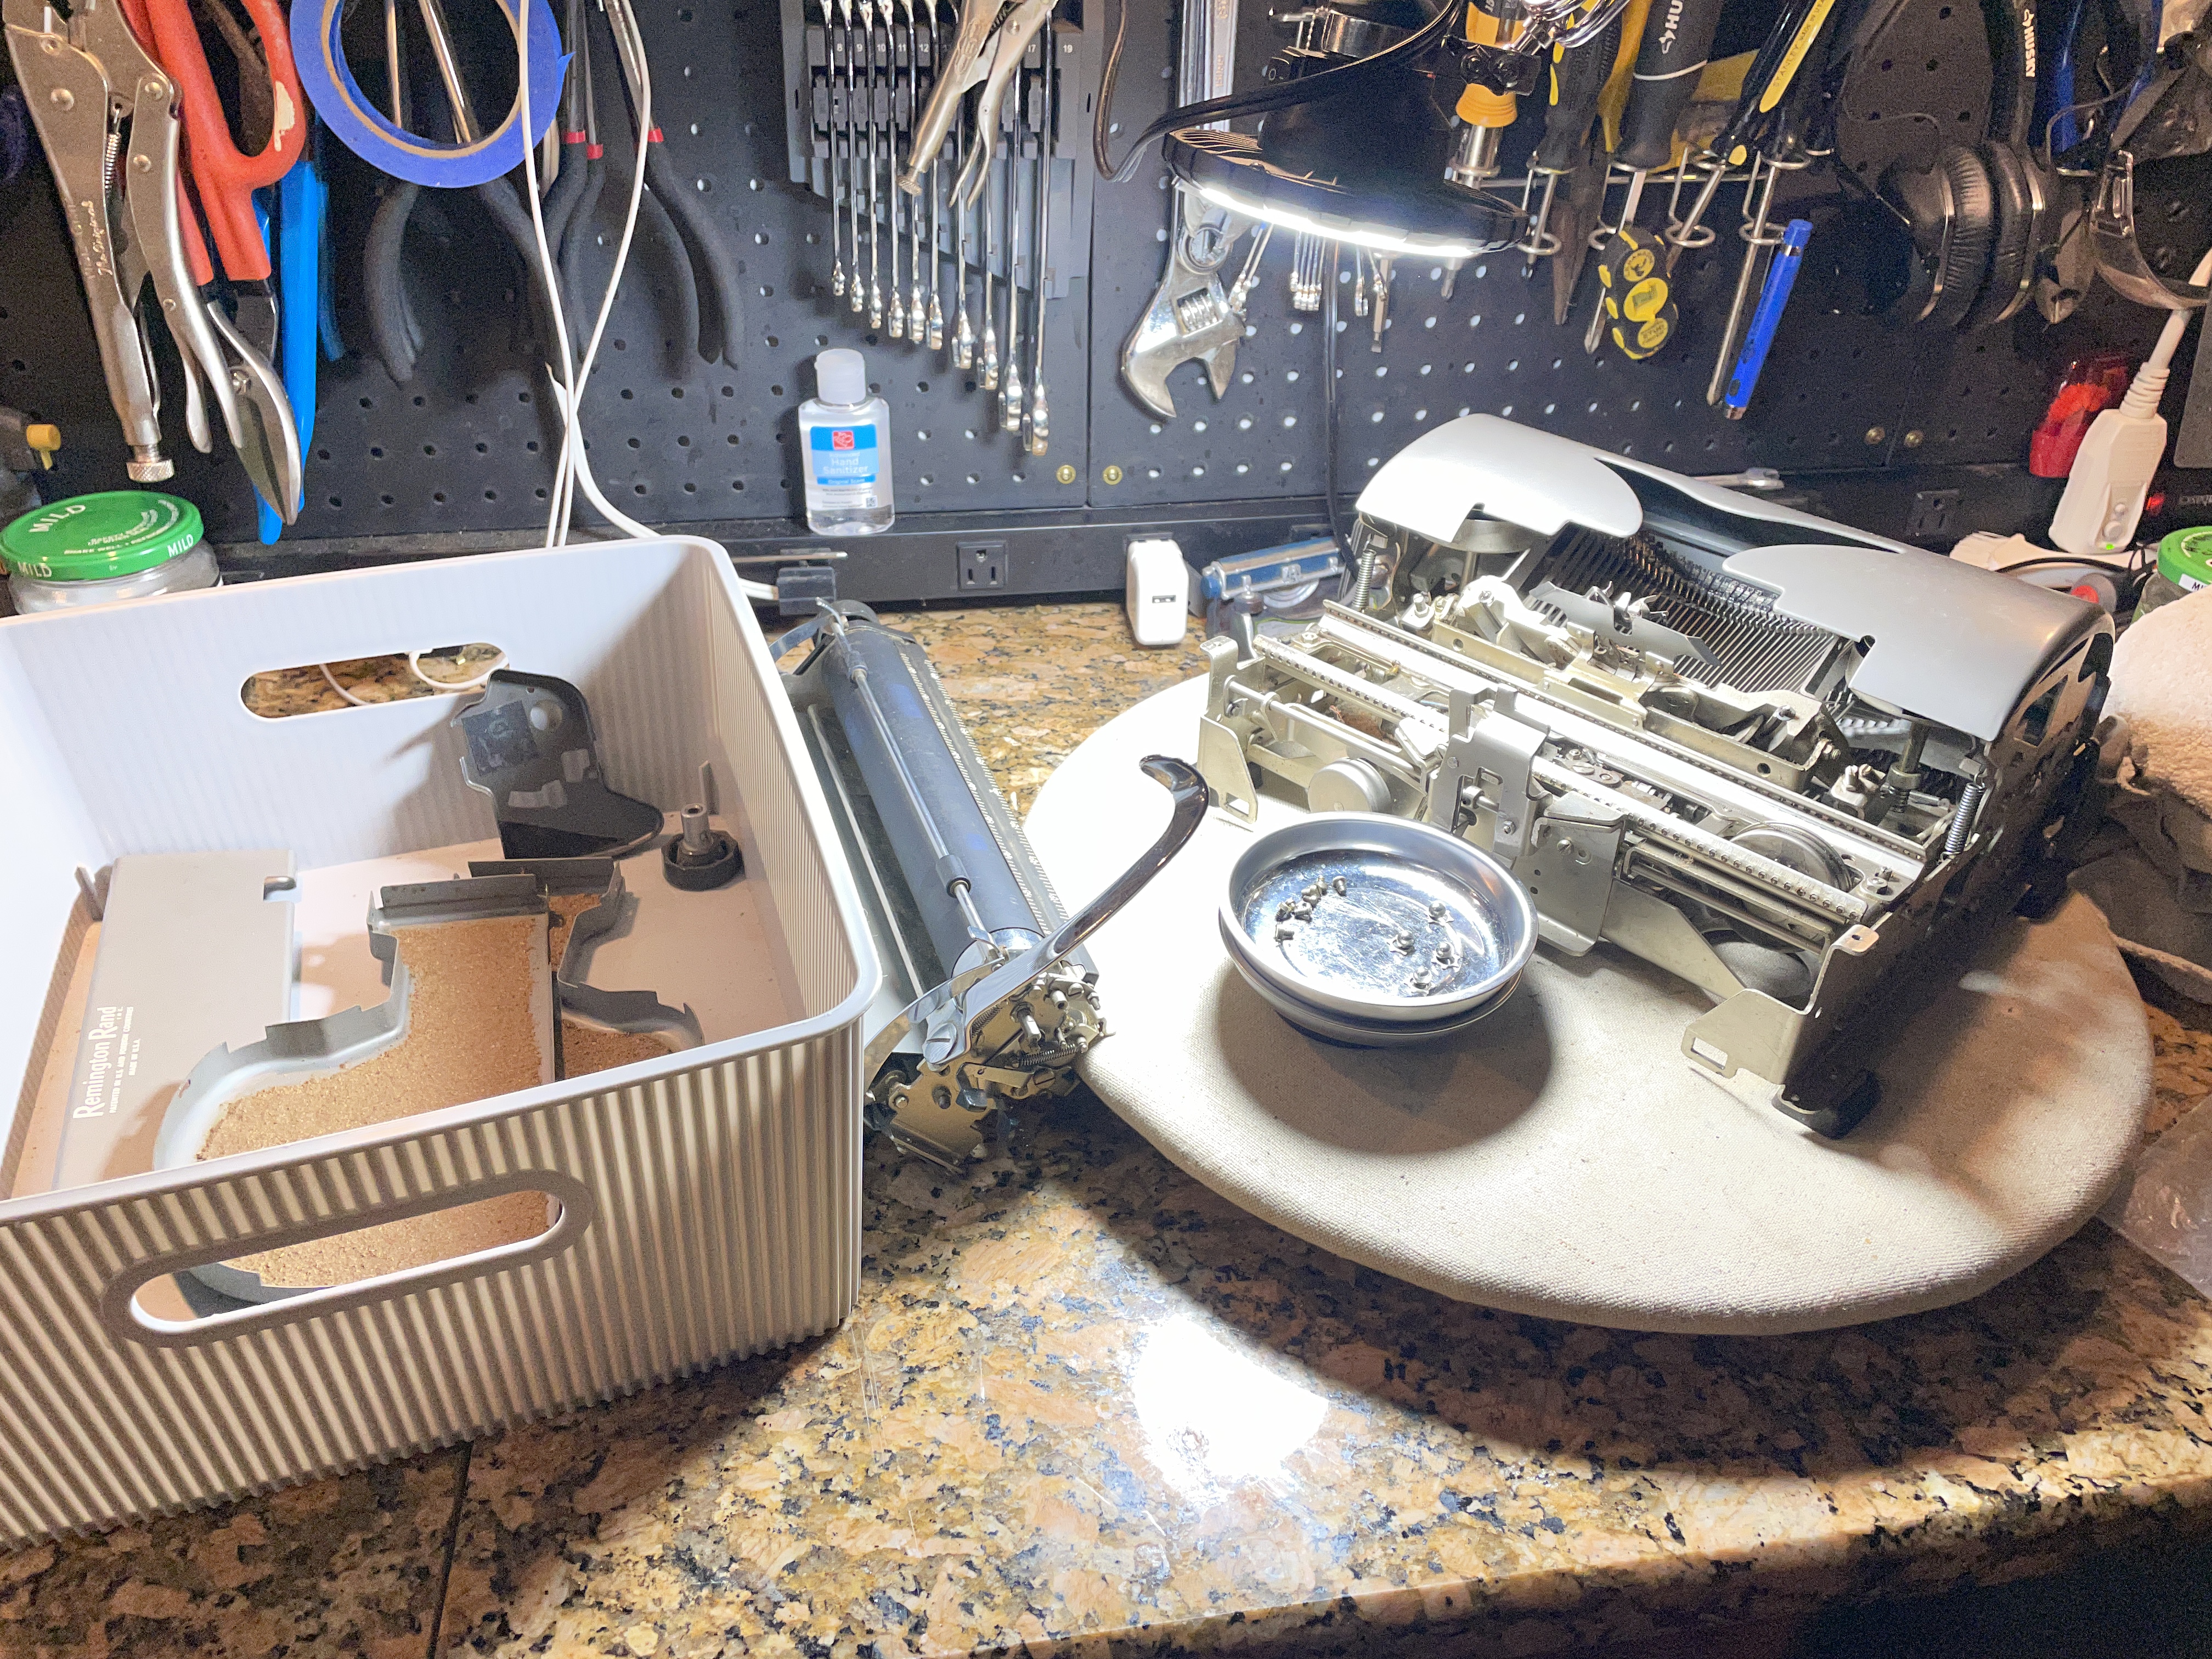
Some of the cover plates had been removed. The carriage was off, and I had a little baggie of small parts. The machine was very clean, and the escapement seemed to trip when I worked it with my fingers. I’m not sure why the carriage had been removed, but I wanted to replace it and see how well it typed (if at all).
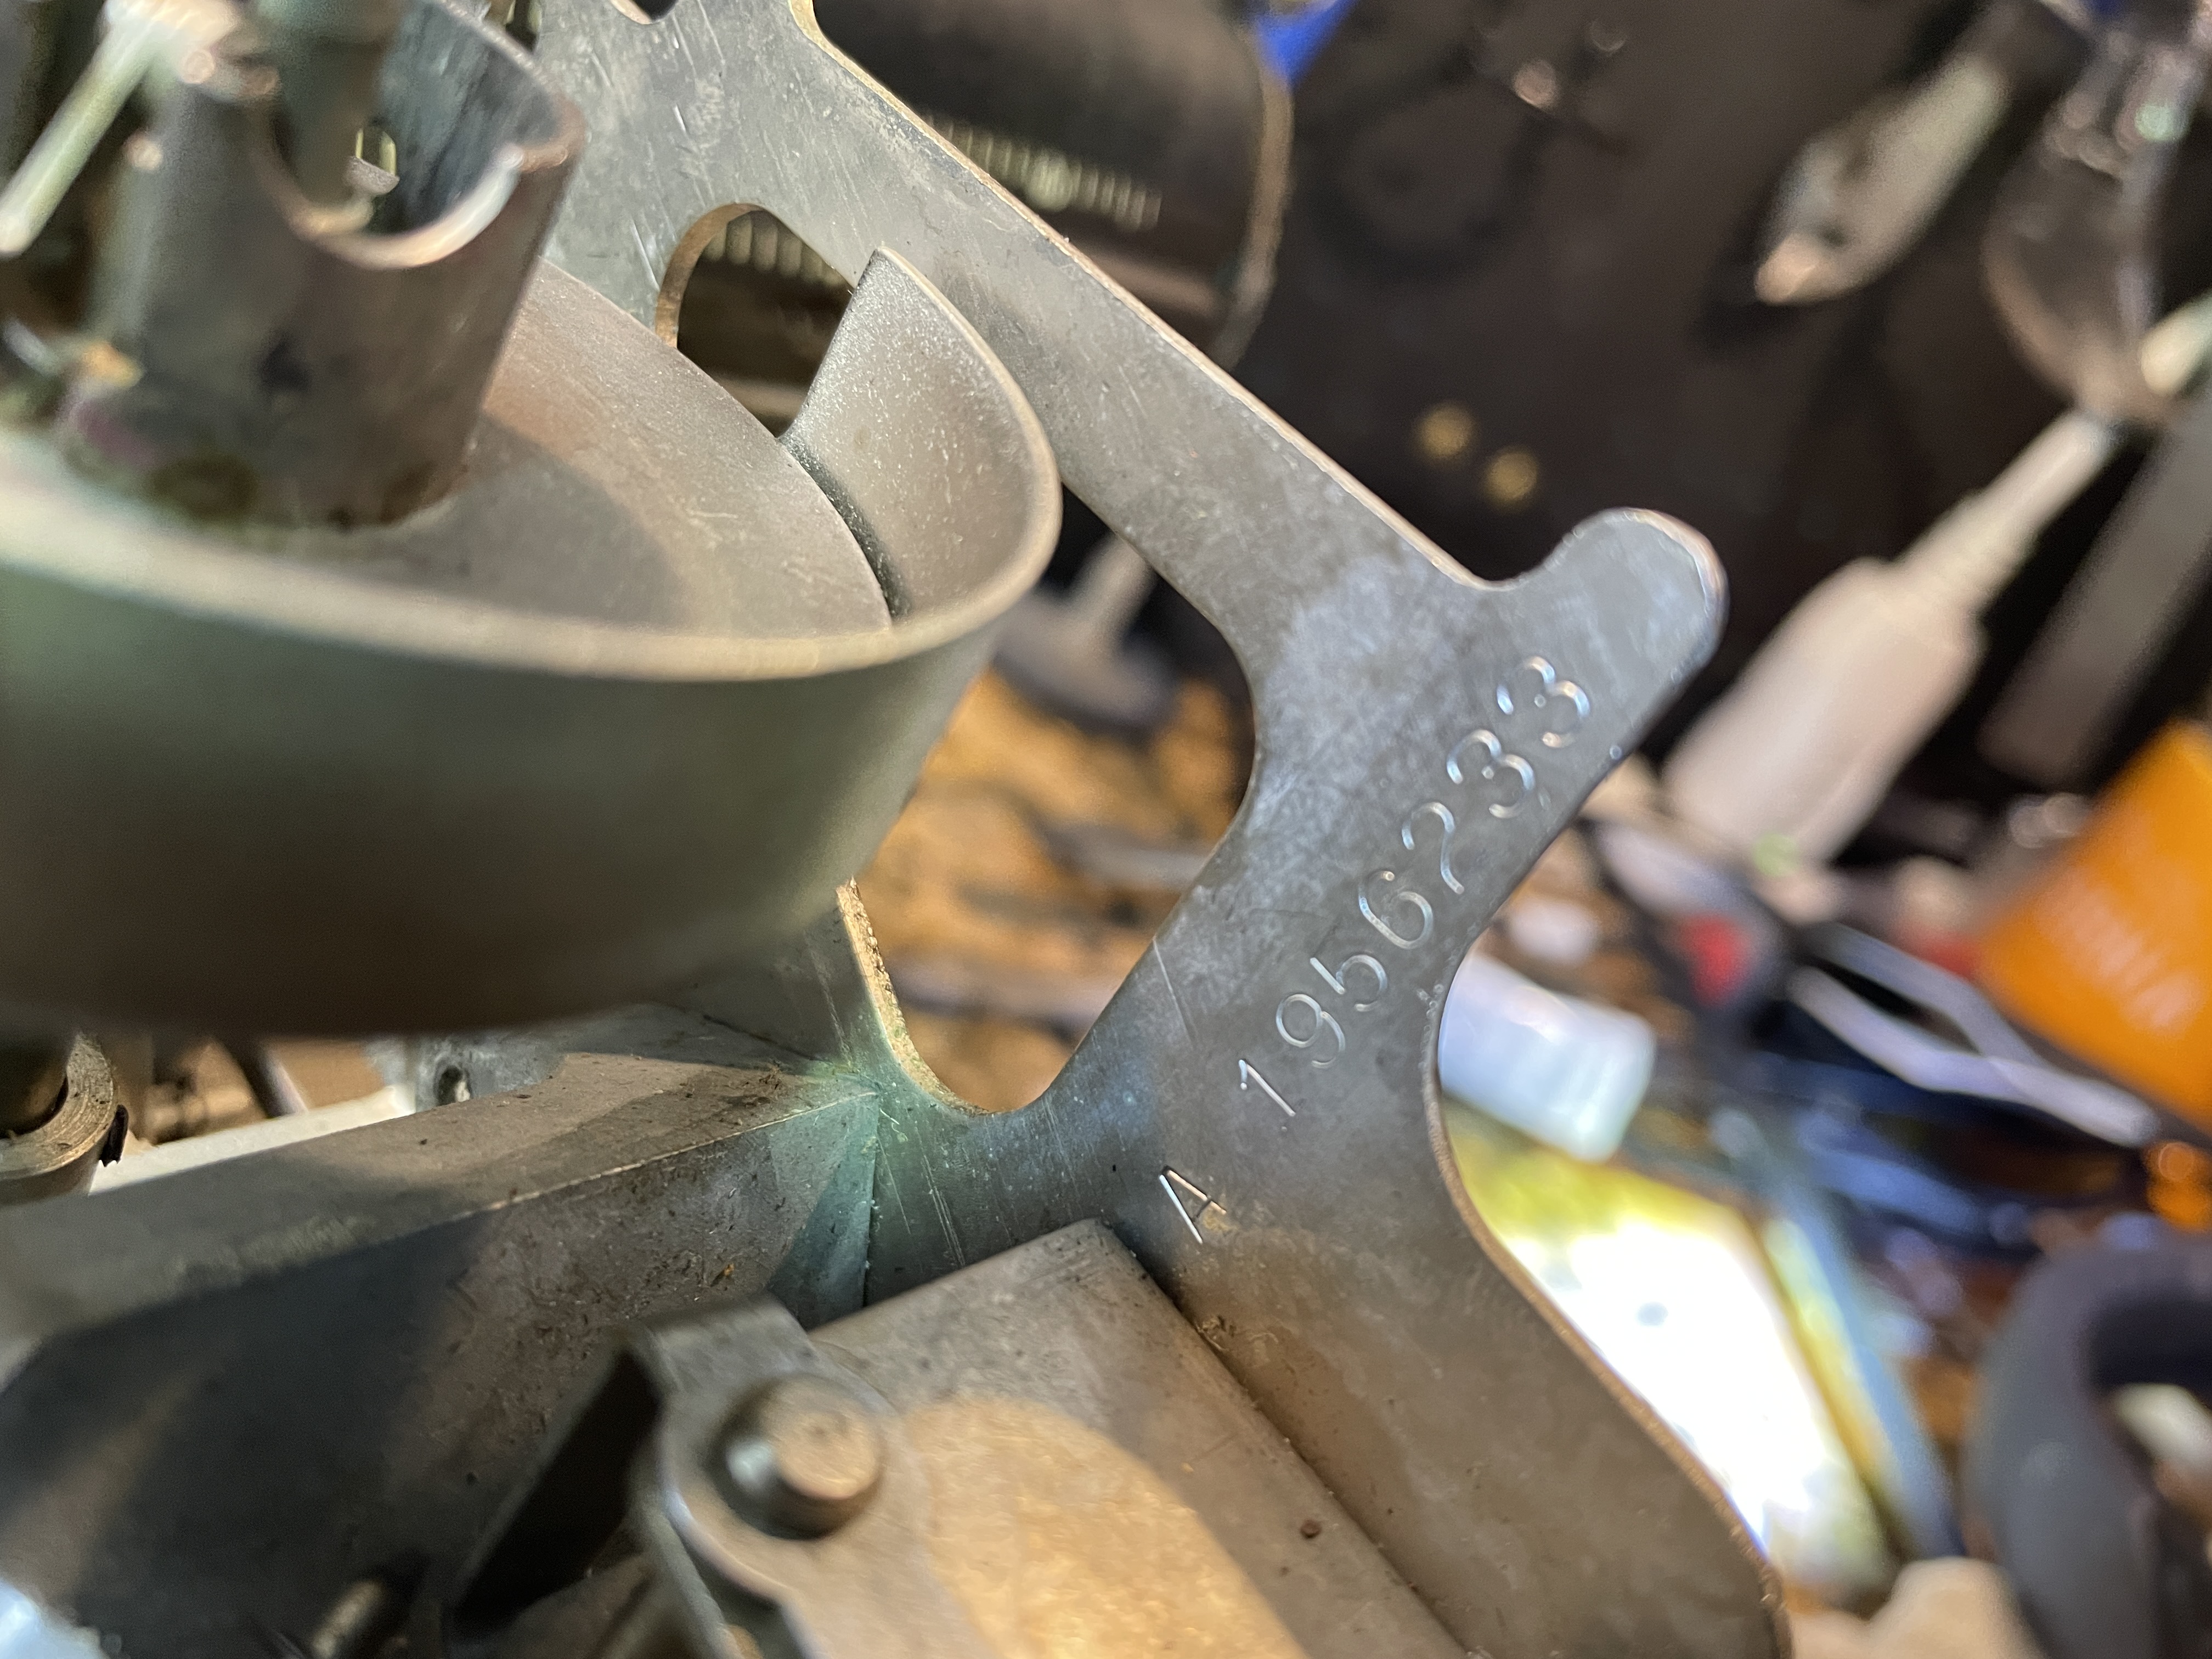
The All-New is from 1949 by serial number A1956233.
I took the rest of the cover plates off so that the machine would be easier to clean and work on. The springs that hold the ribbon cover on are like Mouse Traps of Death. They are insanely powerful and difficult to detach and re-attach.

This All-New has a carriage bearing style that is different from both earlier Remington portables and later Remington portables I’ve worked on. It uses four star-shaped sprockets and 1/4″ ball bearing pairs that roll independently on its carriage rails. This is similar to the bearing system Royal portables use.
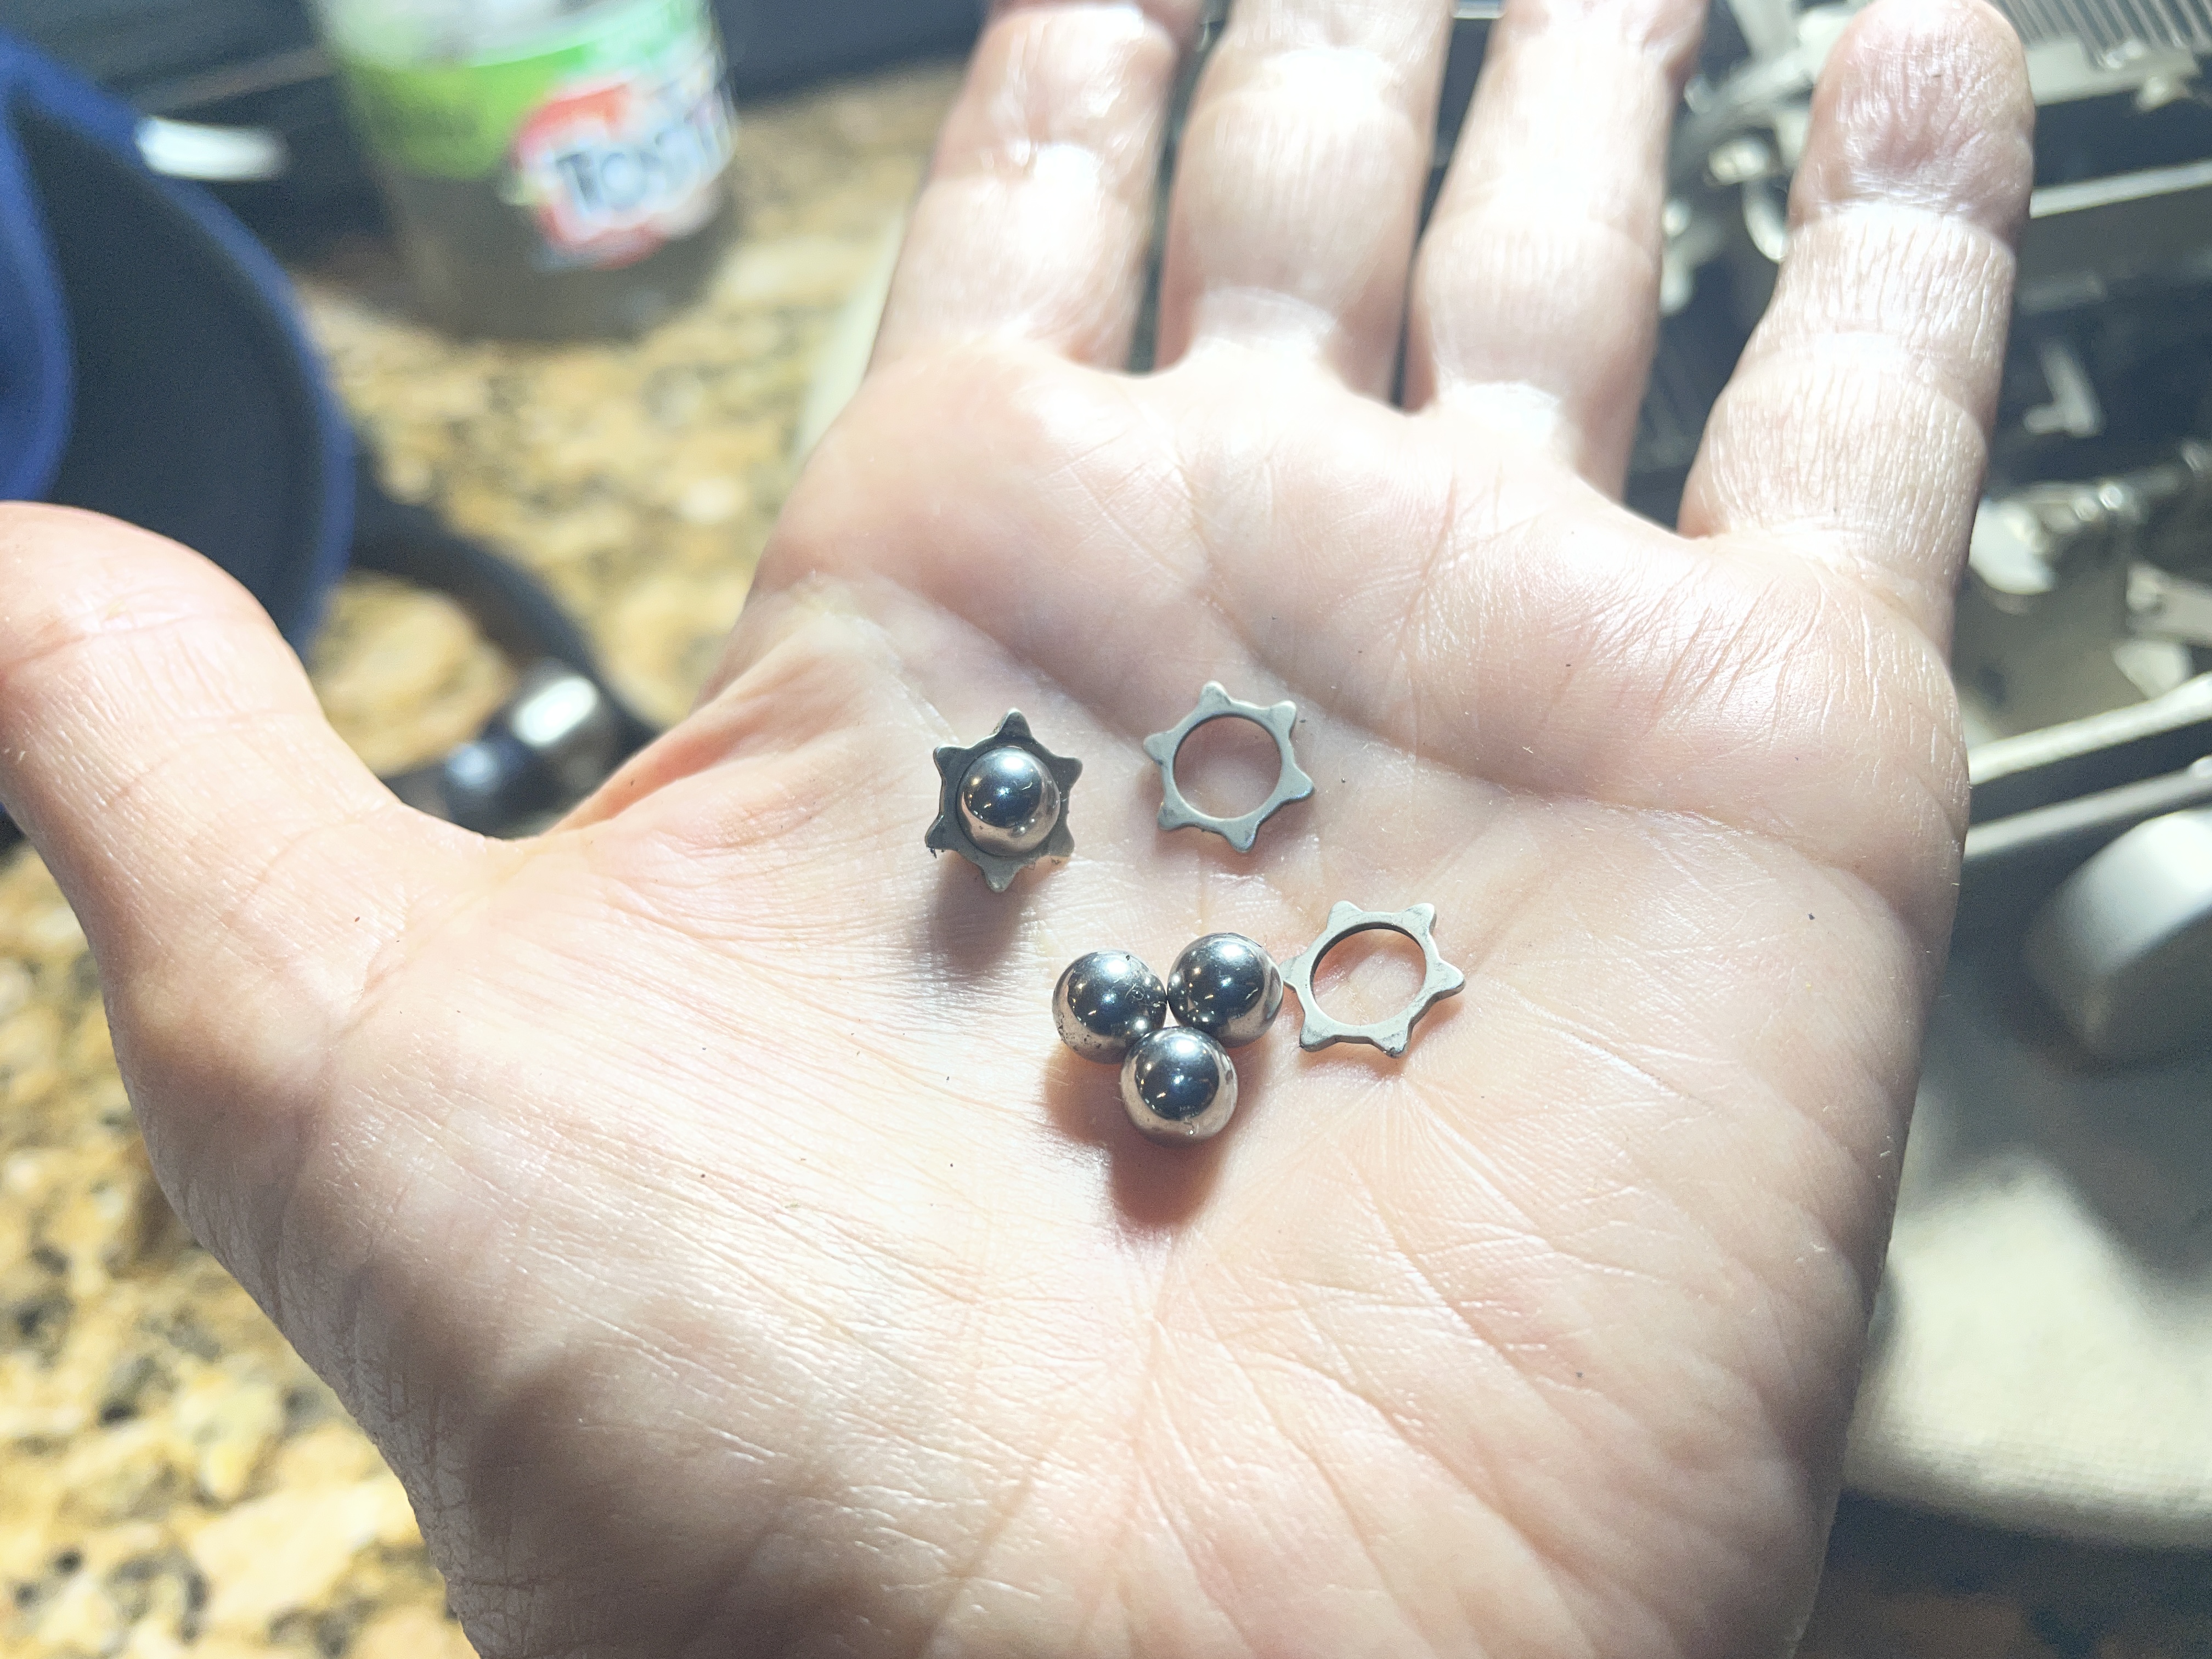
I wonder when Remington switched to this independent sprocket and bearing system on their portables and when they switched back. A 1920s Remington portable and a 1950s Quiet-Riter I worked on used “Carriage Roll Retainers” which are soooooo much easier to install.
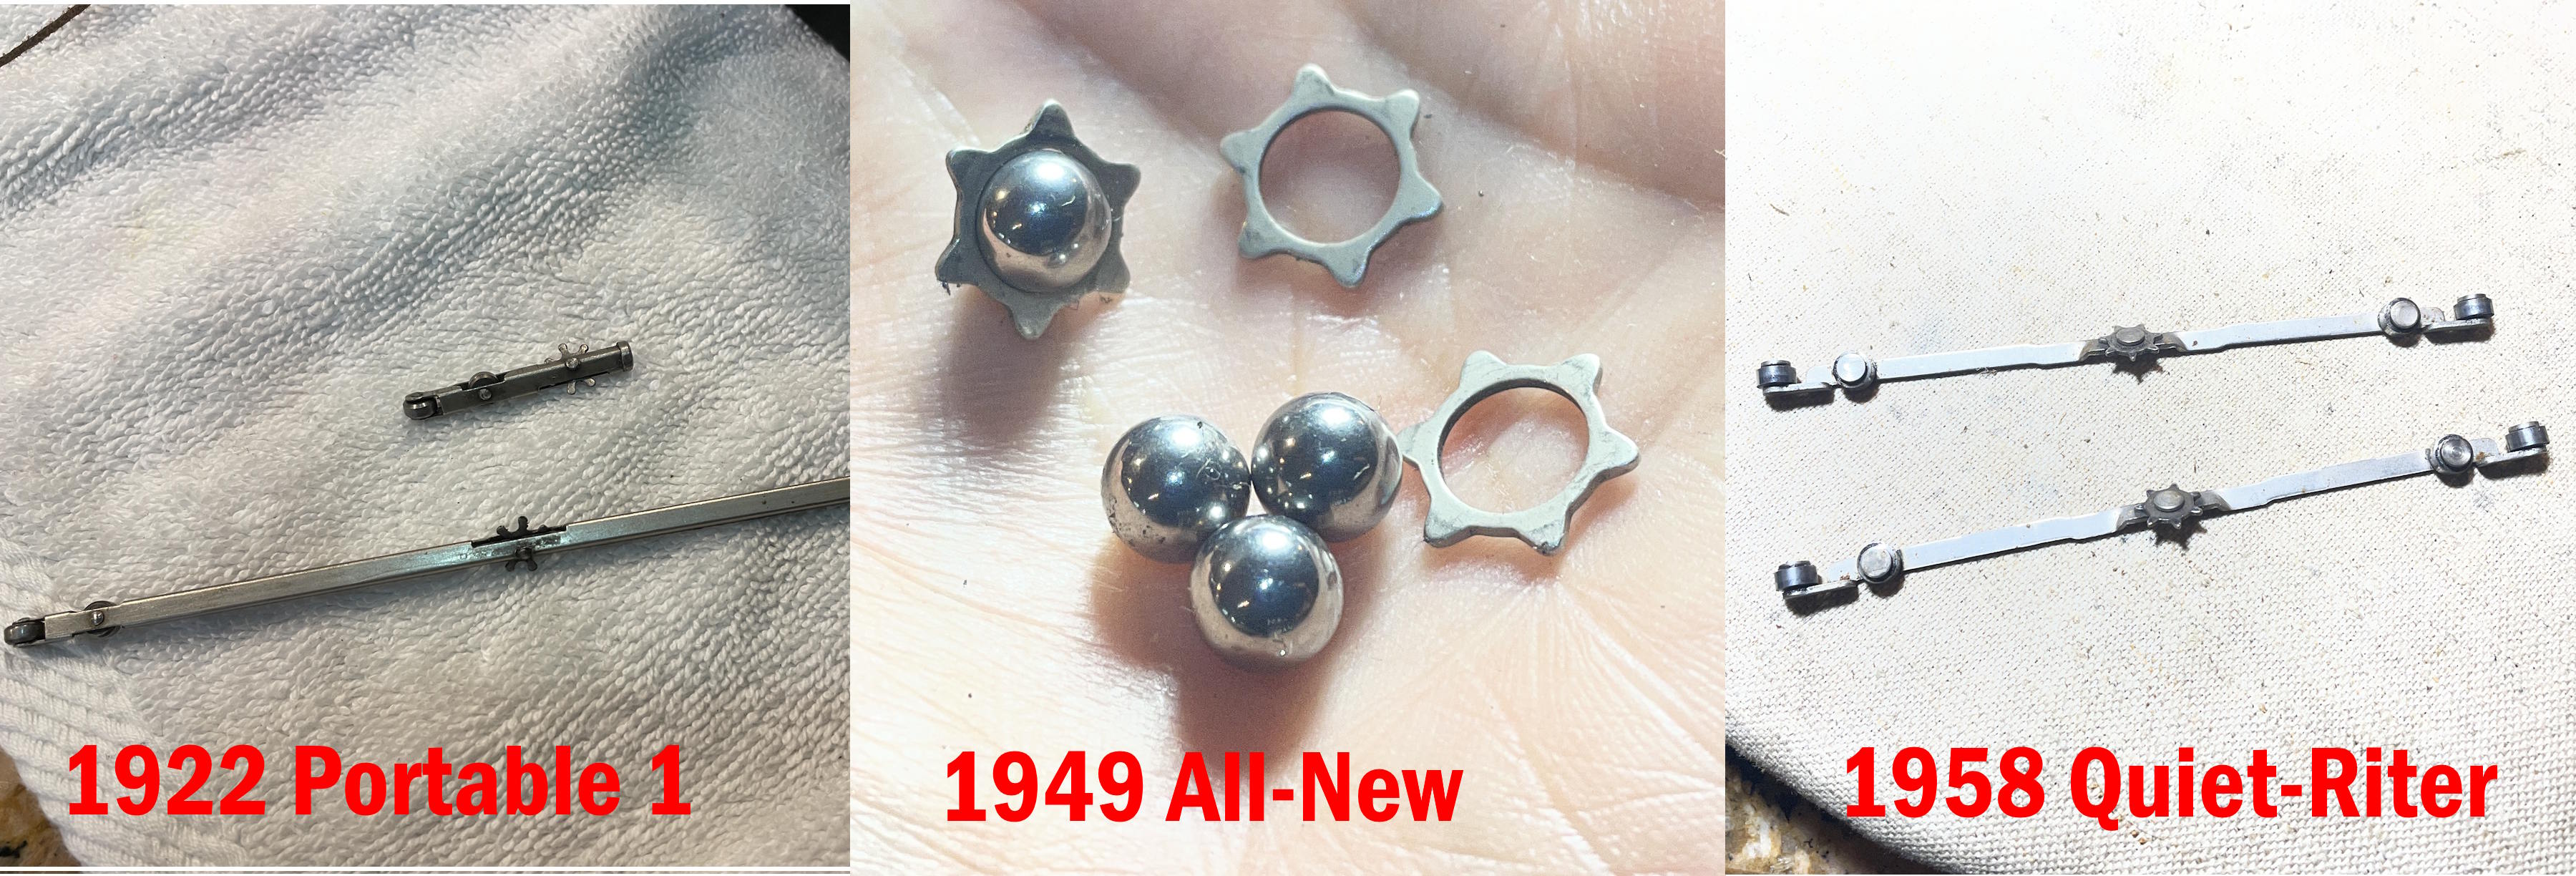
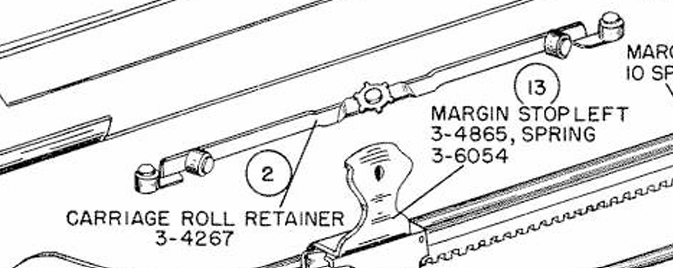
In the 1953 service manual, Remington was back to the “Carriage Roll Retainers”. Good decision, IMHO.
The 1955 Ames catalog offers the independent ball bearings and sprockets for Remington portables which were unfortunate enough to have them:


I hate installing these fiddly little sprockets and bearings. I think that I have conquered the Royal portable bearing problem ever since I bought M. Morren’s Royal portable bearing feeder tool. It makes quick work of an exasperating job.

However, that tool for Royals won’t work on this Remington since the carriage rail setup is different. I sat down to watch the famous “Straw Trick Video” again for the umpteenth time:
I’ve used the Straw Trick on a 1950s Underwood portable with independent bearings and pinions. It takes time and a large variety of curse words, but it works.
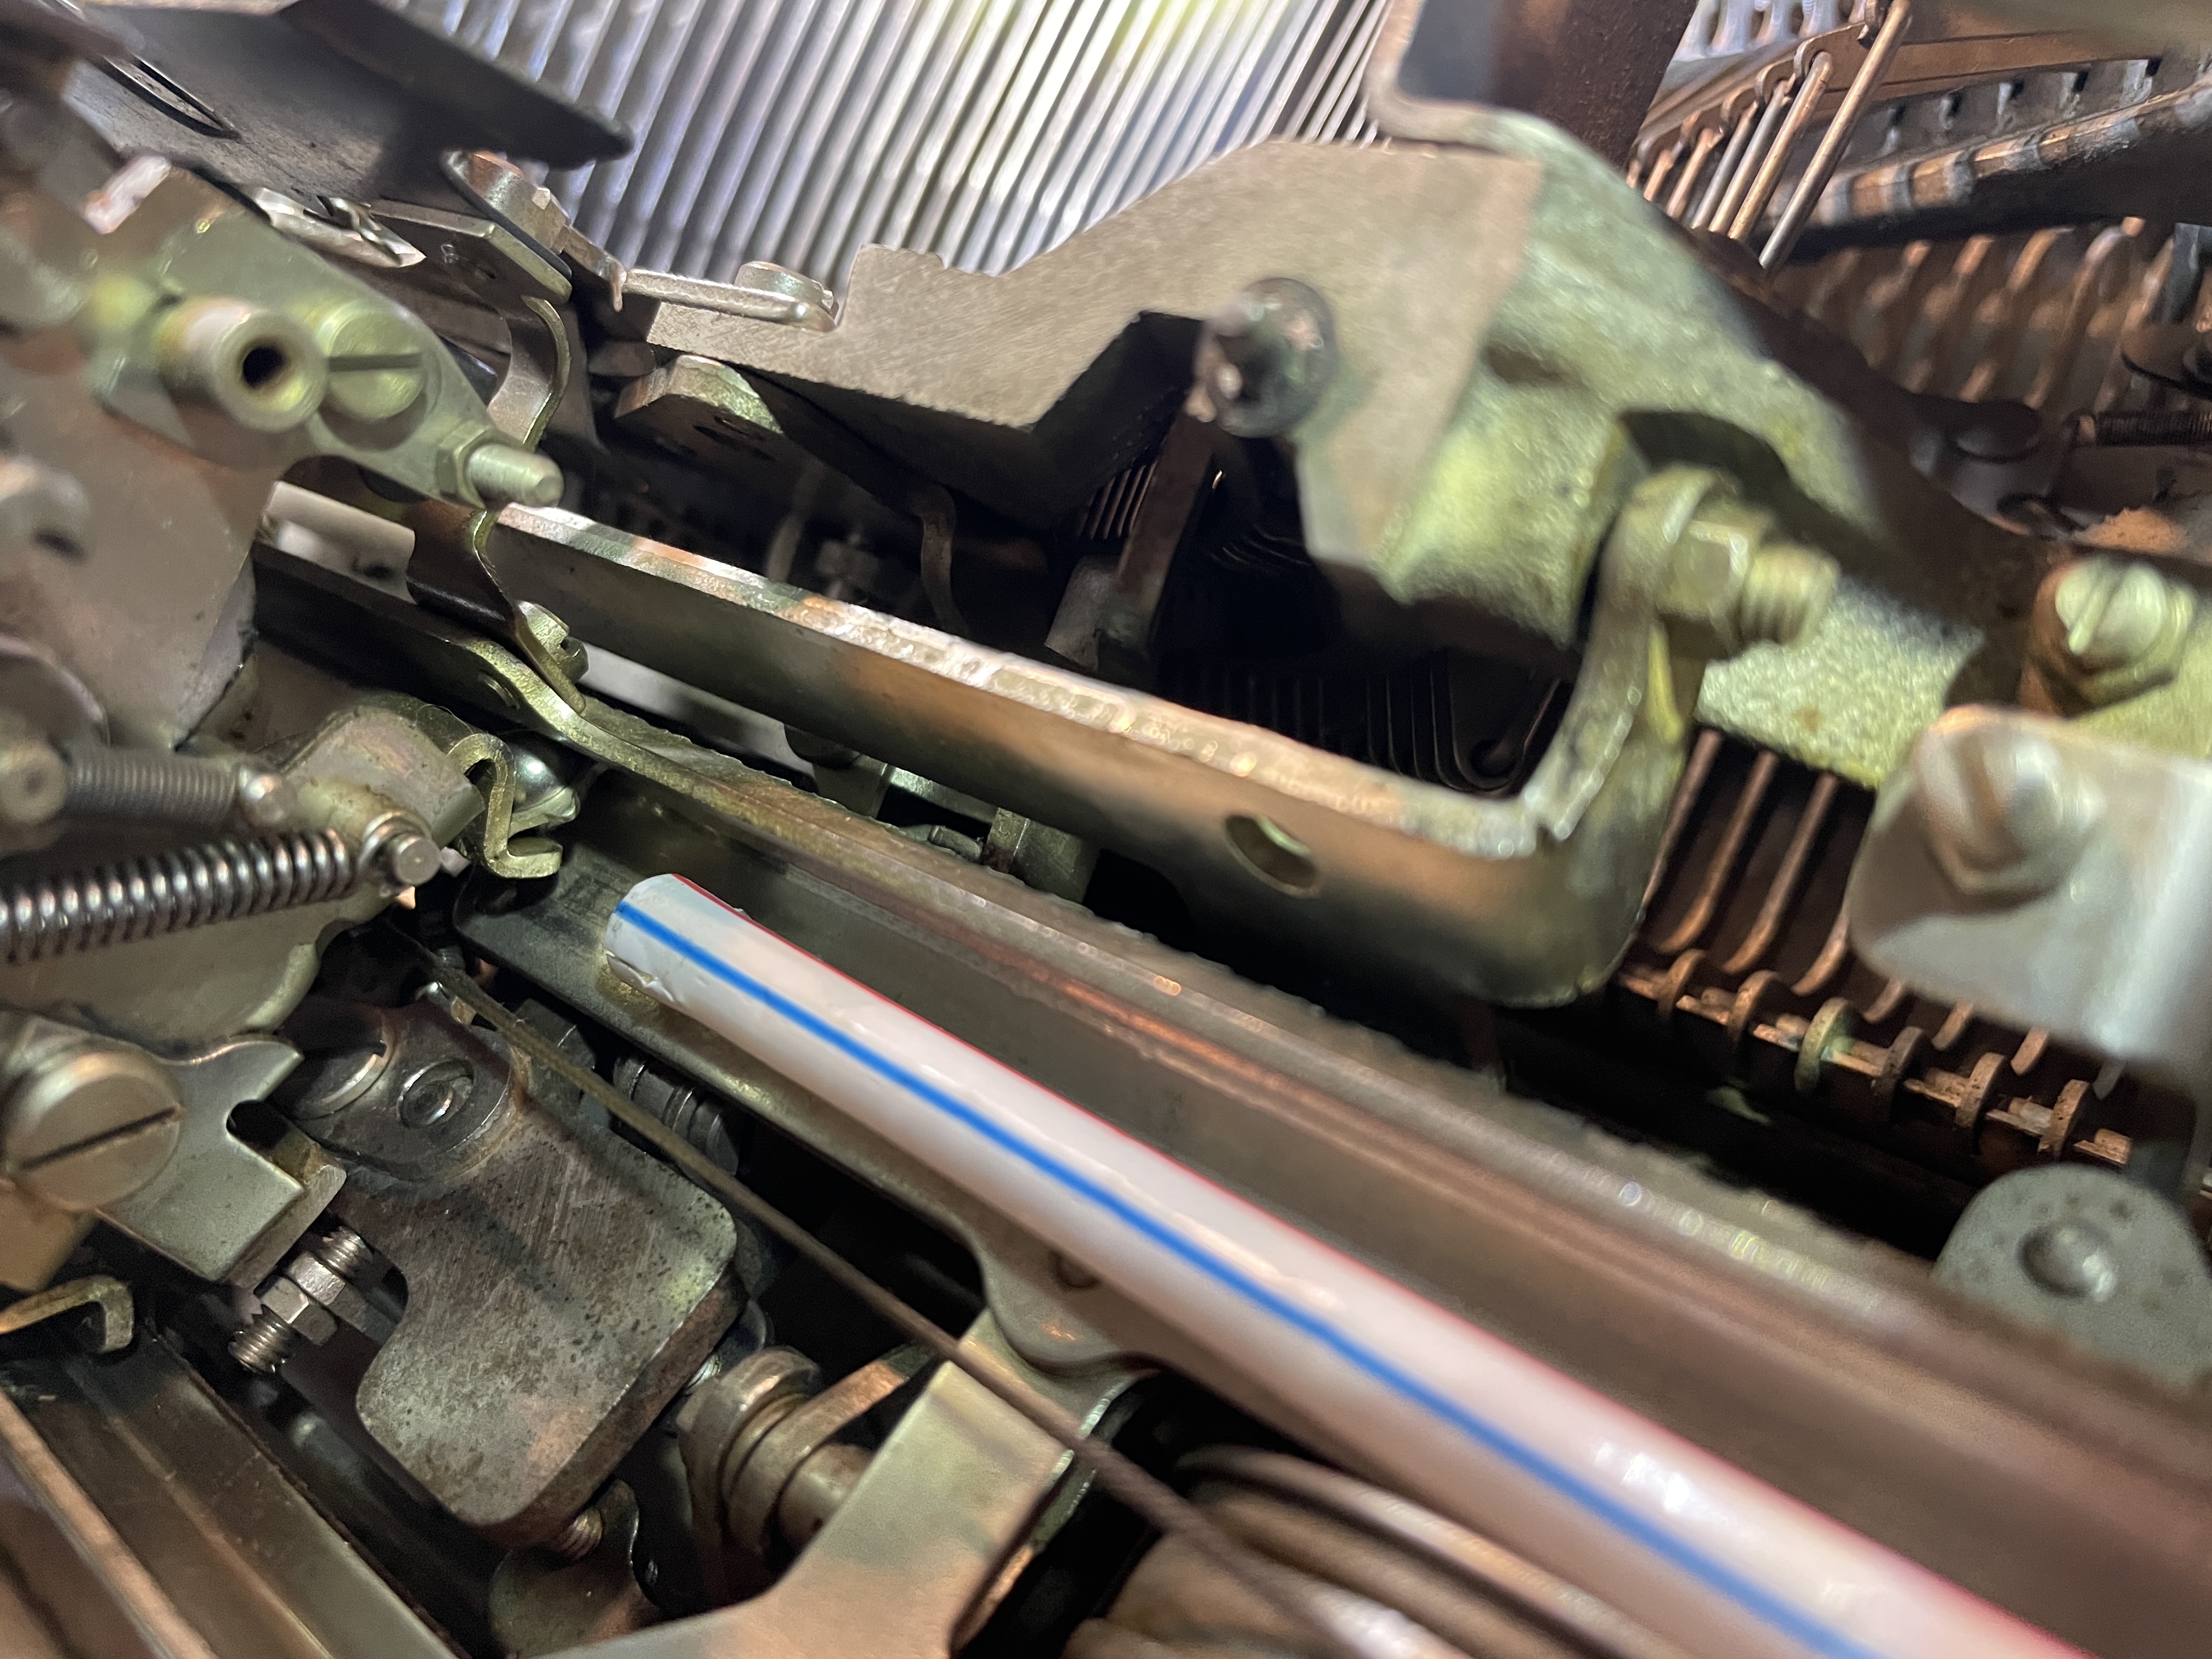
I pulled out my straw, fitted the pinion and bearing into the straw and was able to place a couple sets. However, the rails were too tight to place the other two. I needed to loosen the rails to get a little more wiggle room between them. I could see no way to loosen the carriage rails from the top.
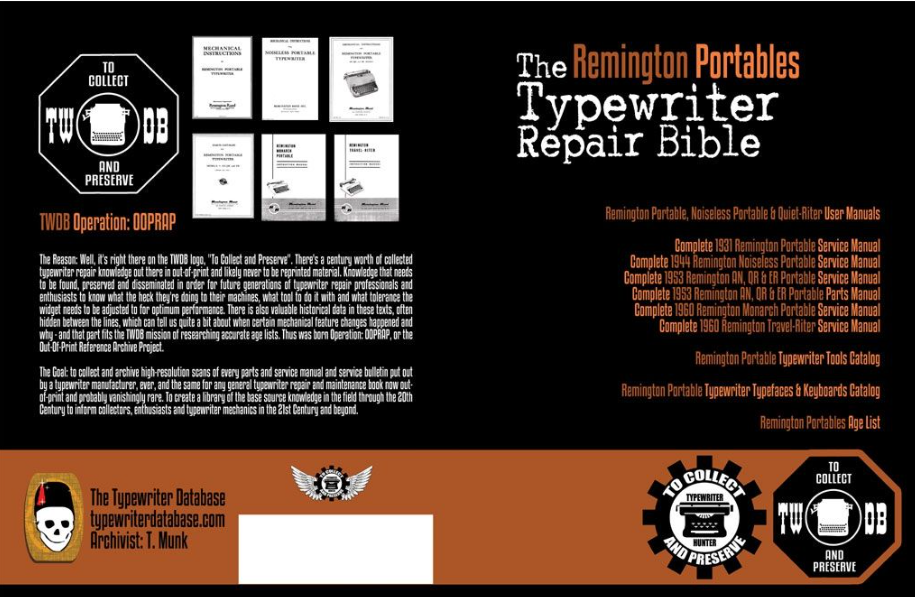
I pulled out my Remington Portables Typewriter Repair Bible
I was surprised to find instructions for removing the carriage bed rails from the body of the machine. I figured that if I could get the carriage bed rails out, I could loosen the rails and get those sprocket/bearing sets in. Here’s how it’s done:
- remove cover plates
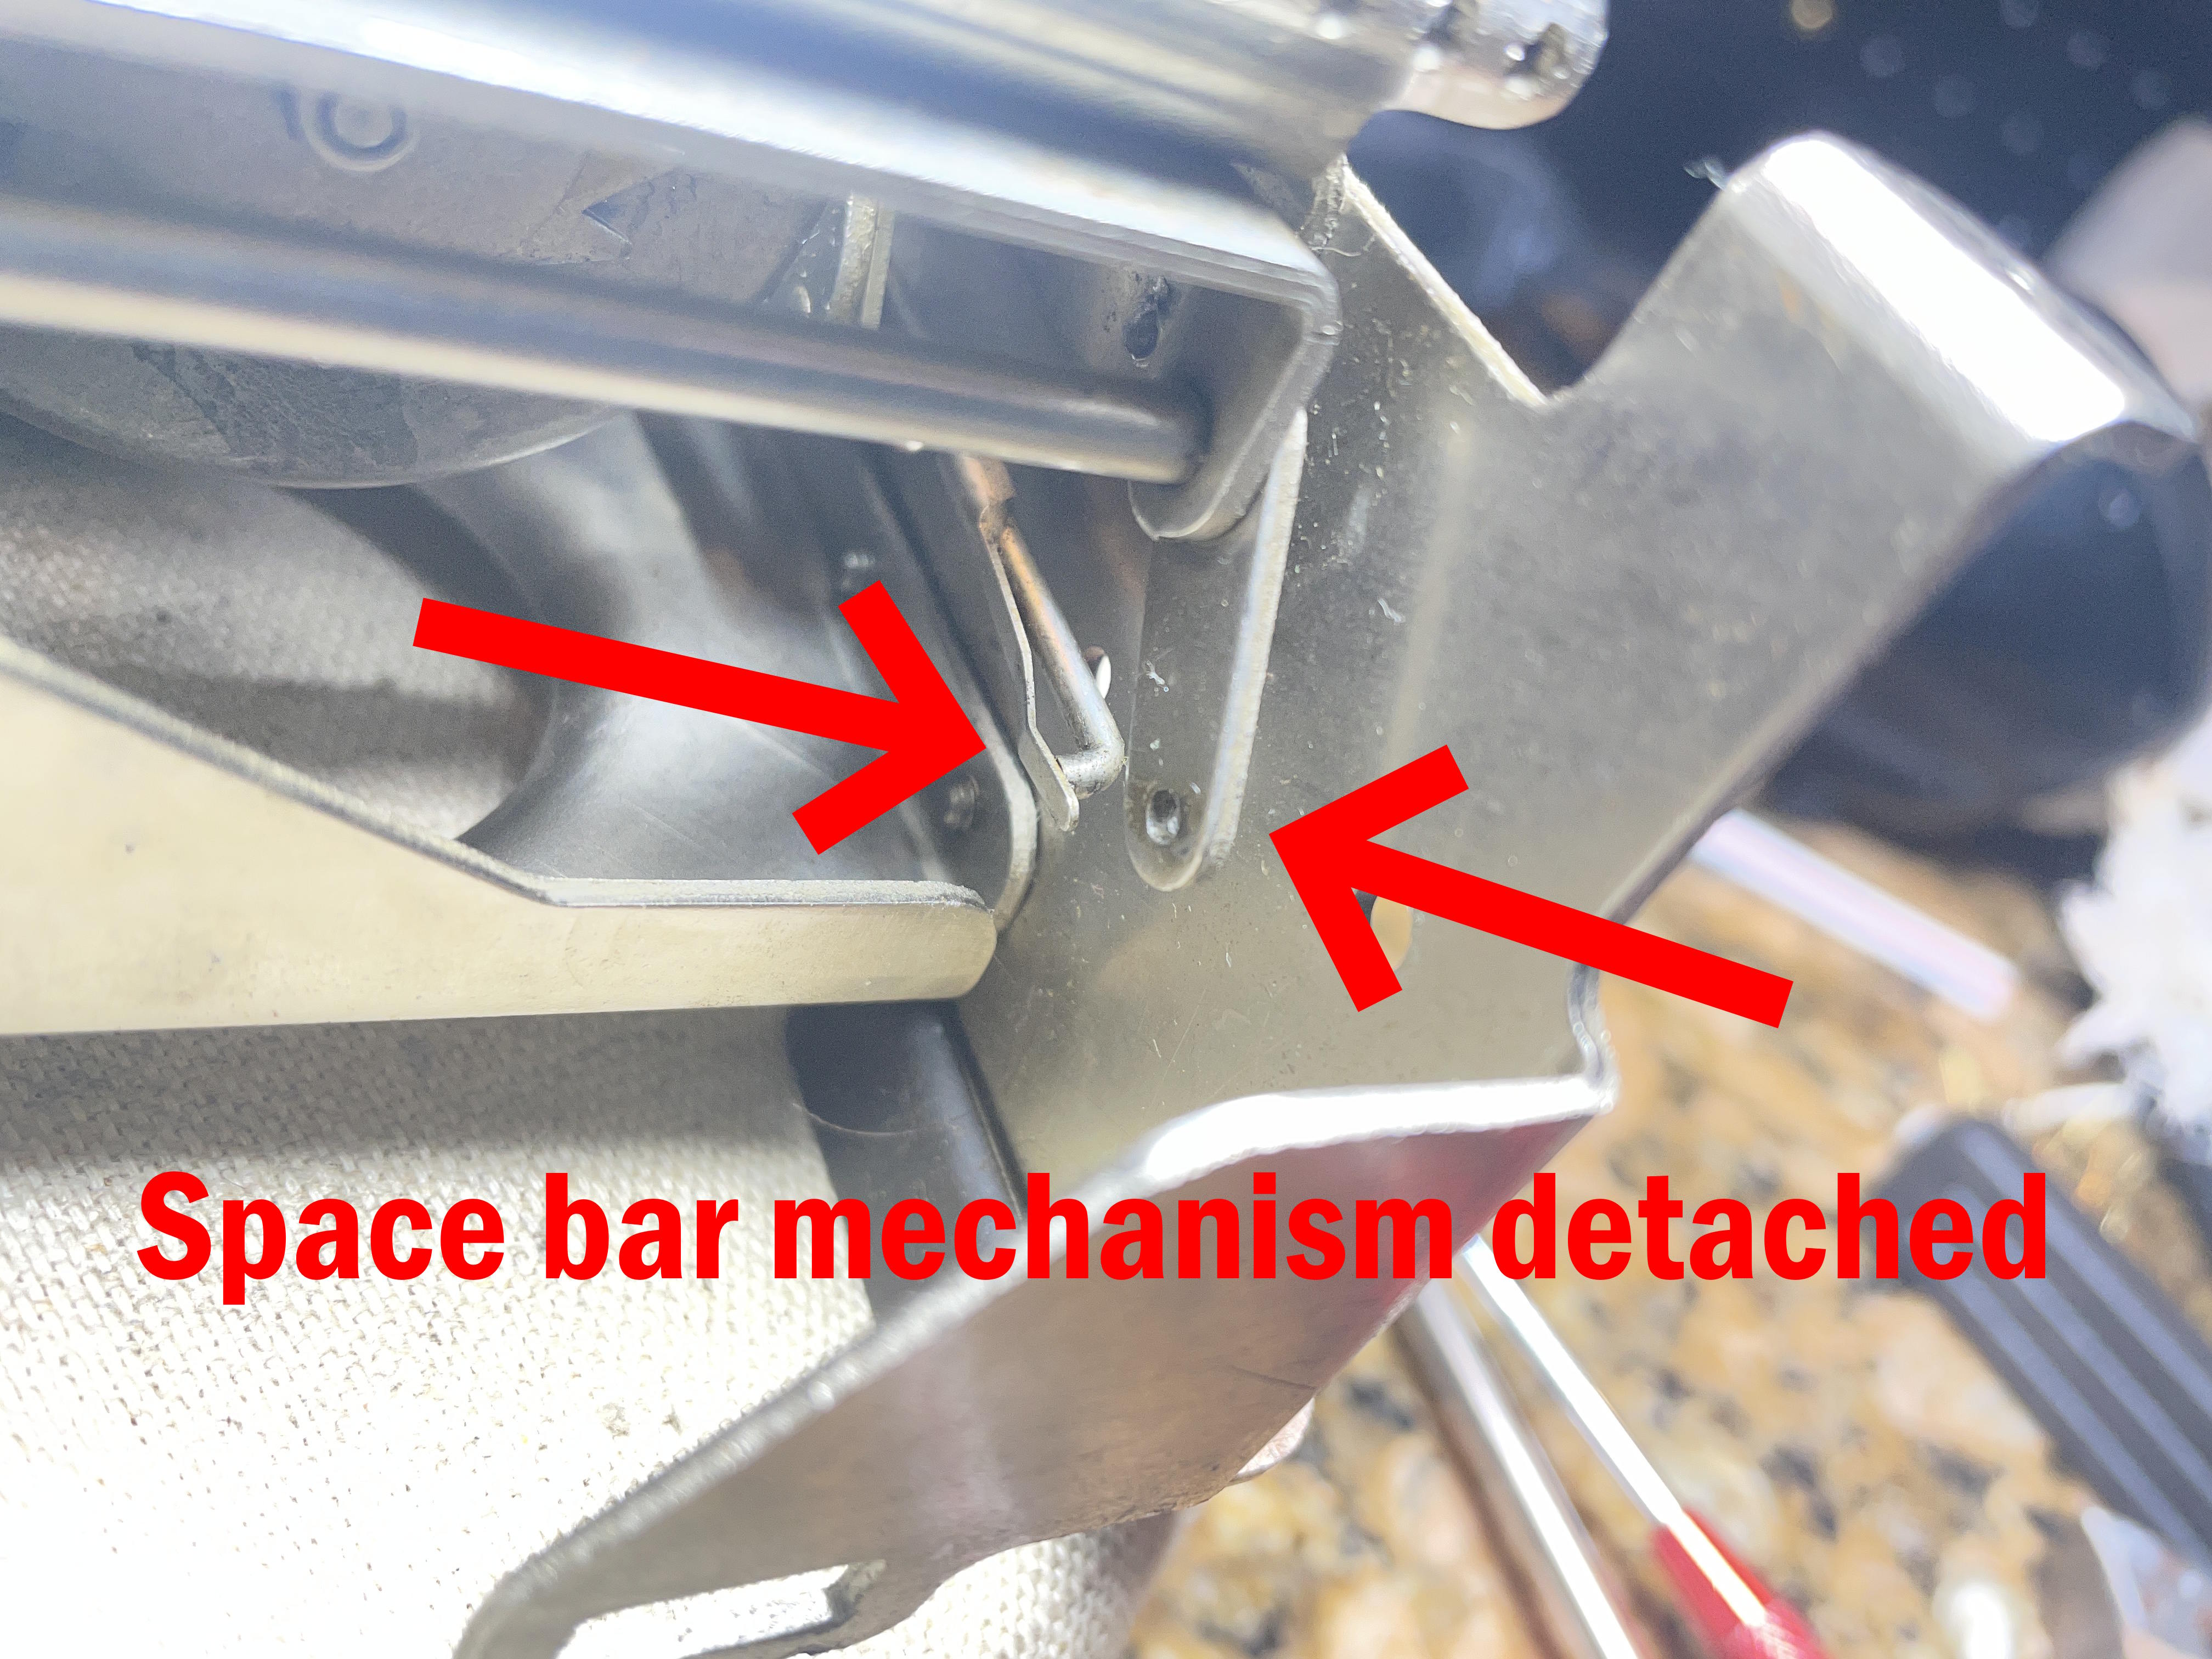
- unhook the space bar pull wire
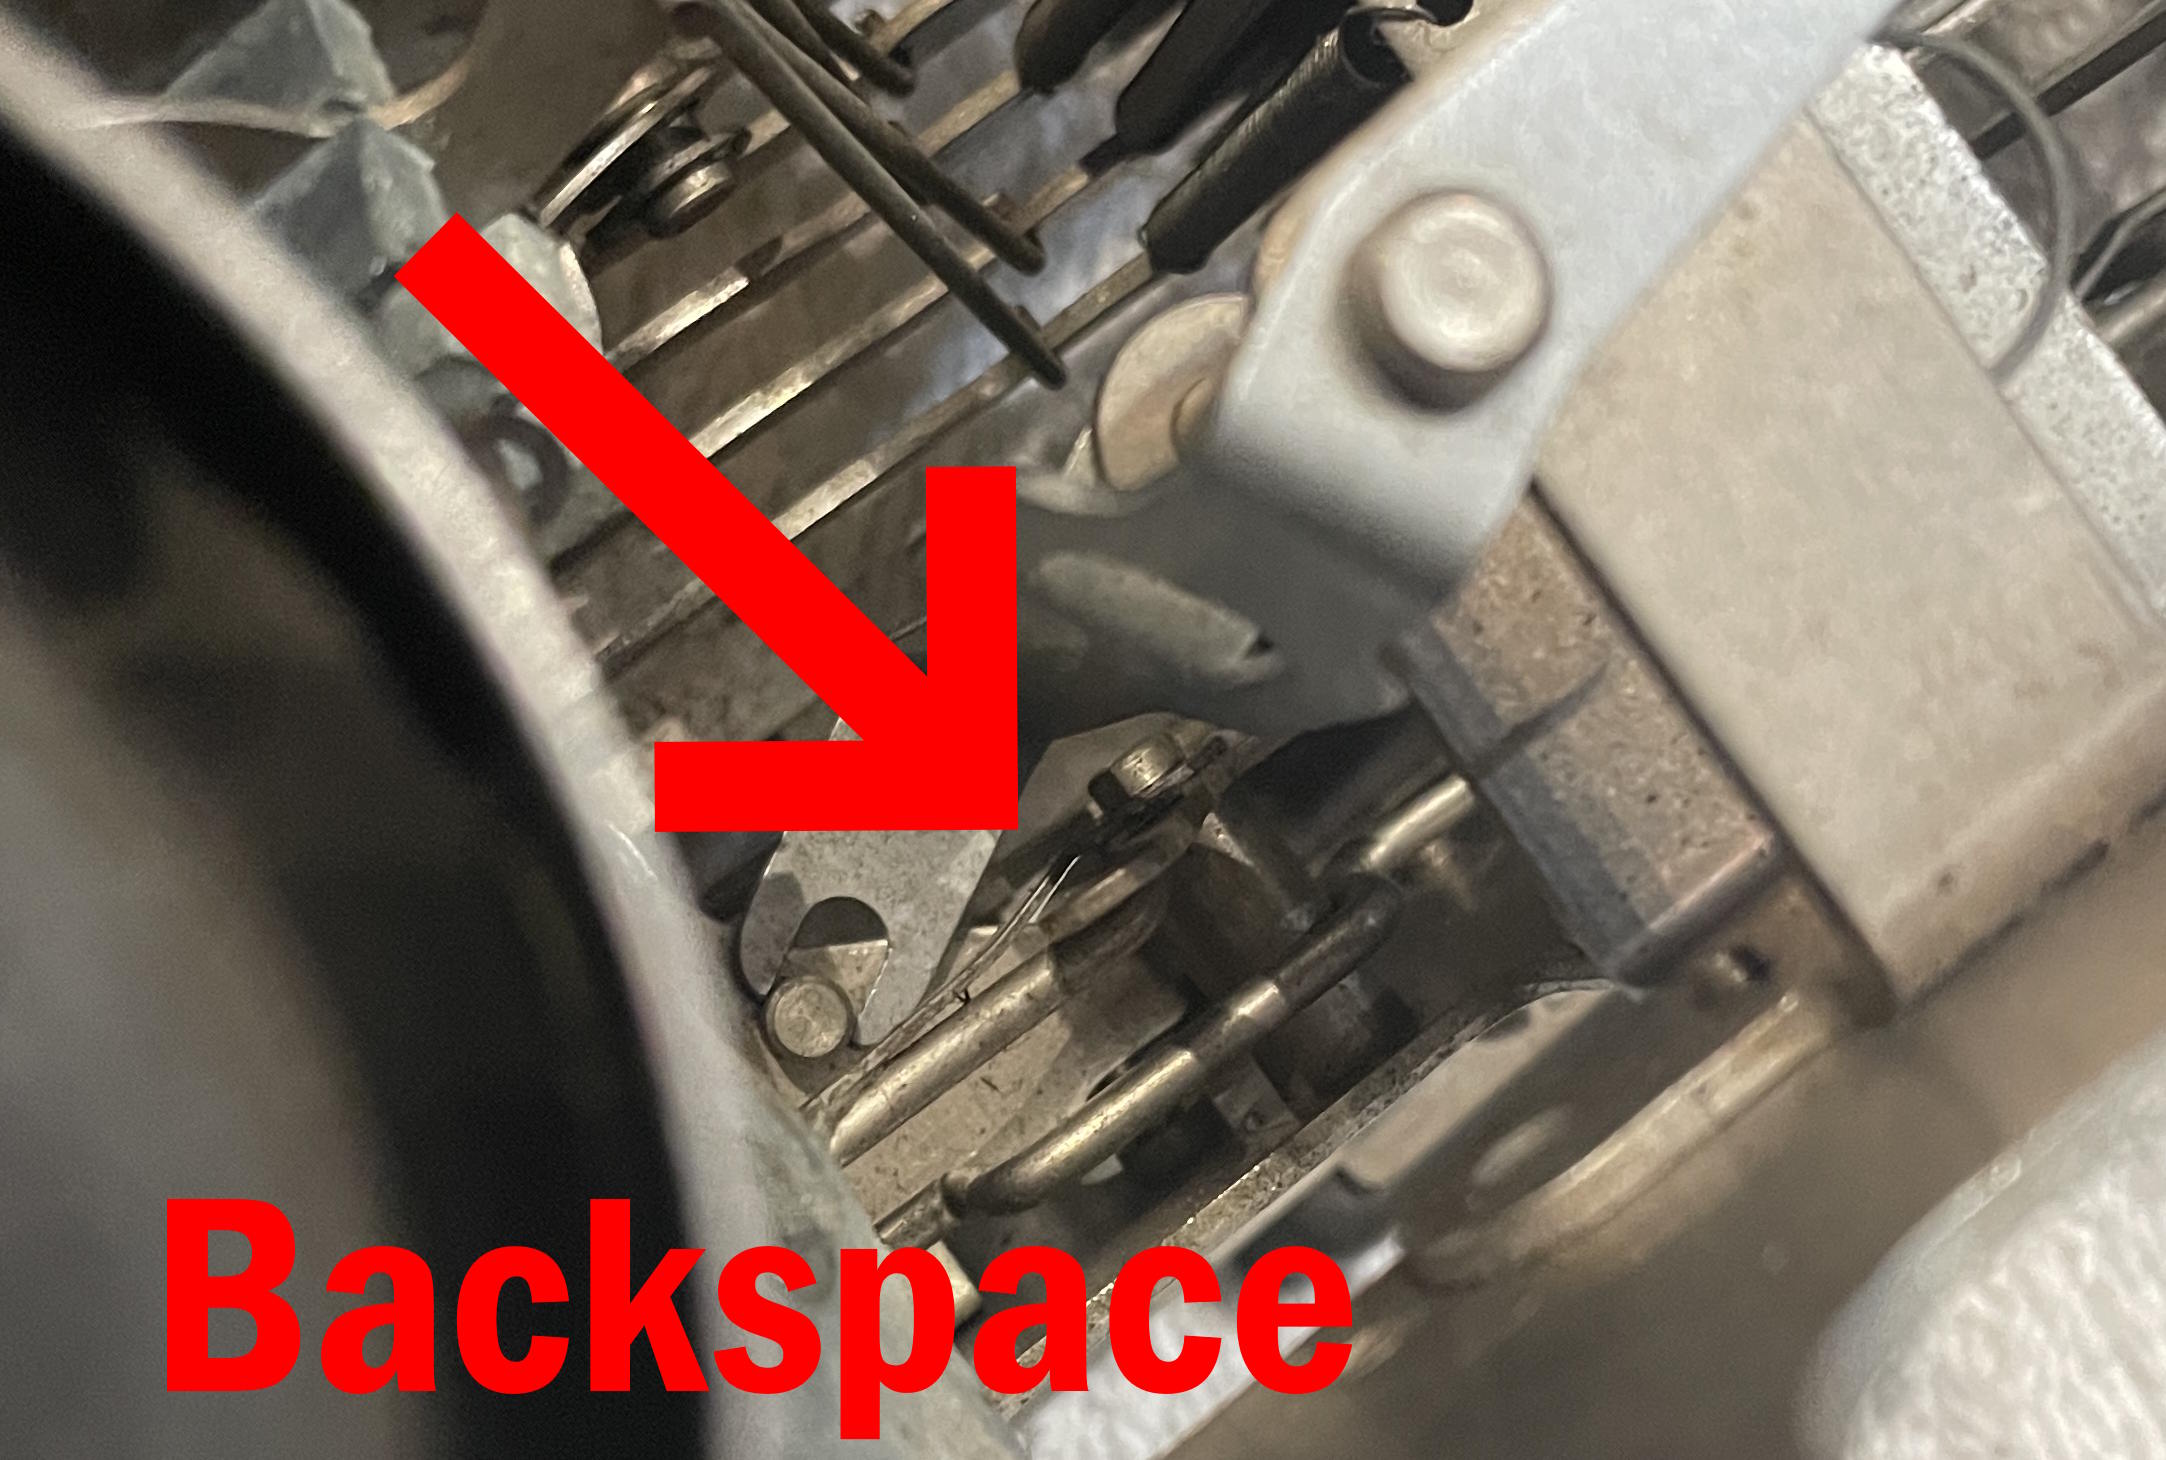
- unhook the backspace pull wire
- tap out two dowel pins on each side of the carriage bed rails
- unscrew two screws at each end of the carriage bed rails
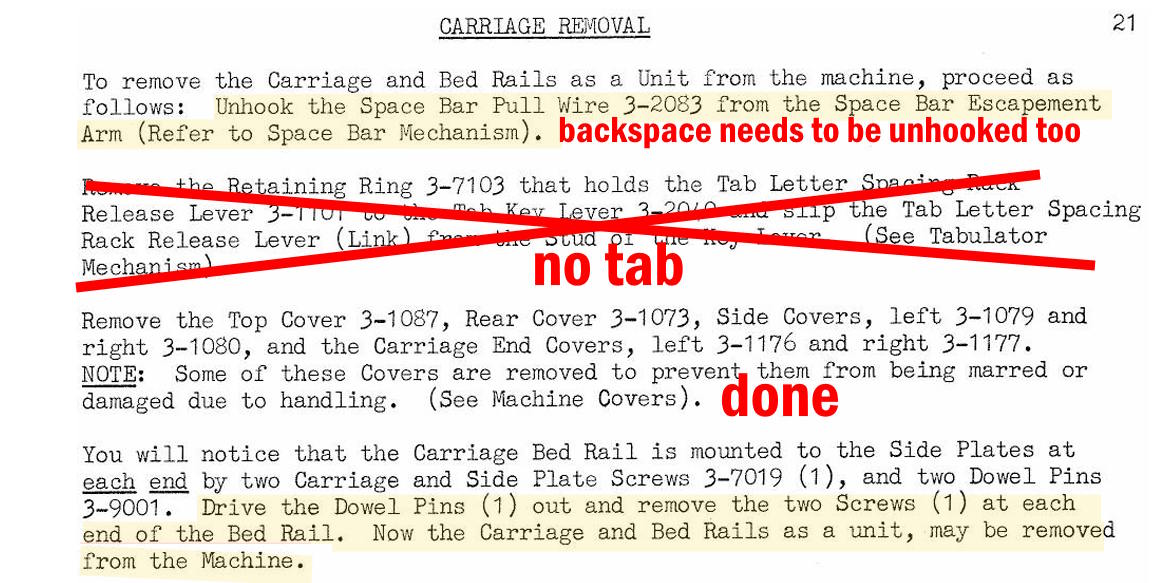
When you detach the space bar and backspace pull wires, take lots of picture so that you remember how the mechanisms are seated.
I had no tabulator on this All-New, so I didn’t have to unhook that.
The last thing is to tap out the dowel pins and remove the screws at the end of the carriage bed rails.
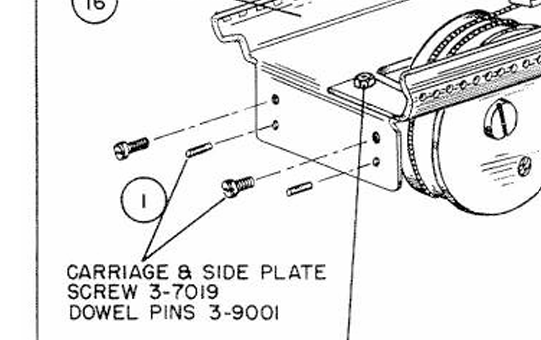
The dowel pins are really stuck in there. I used a very thin punch to drive them out.
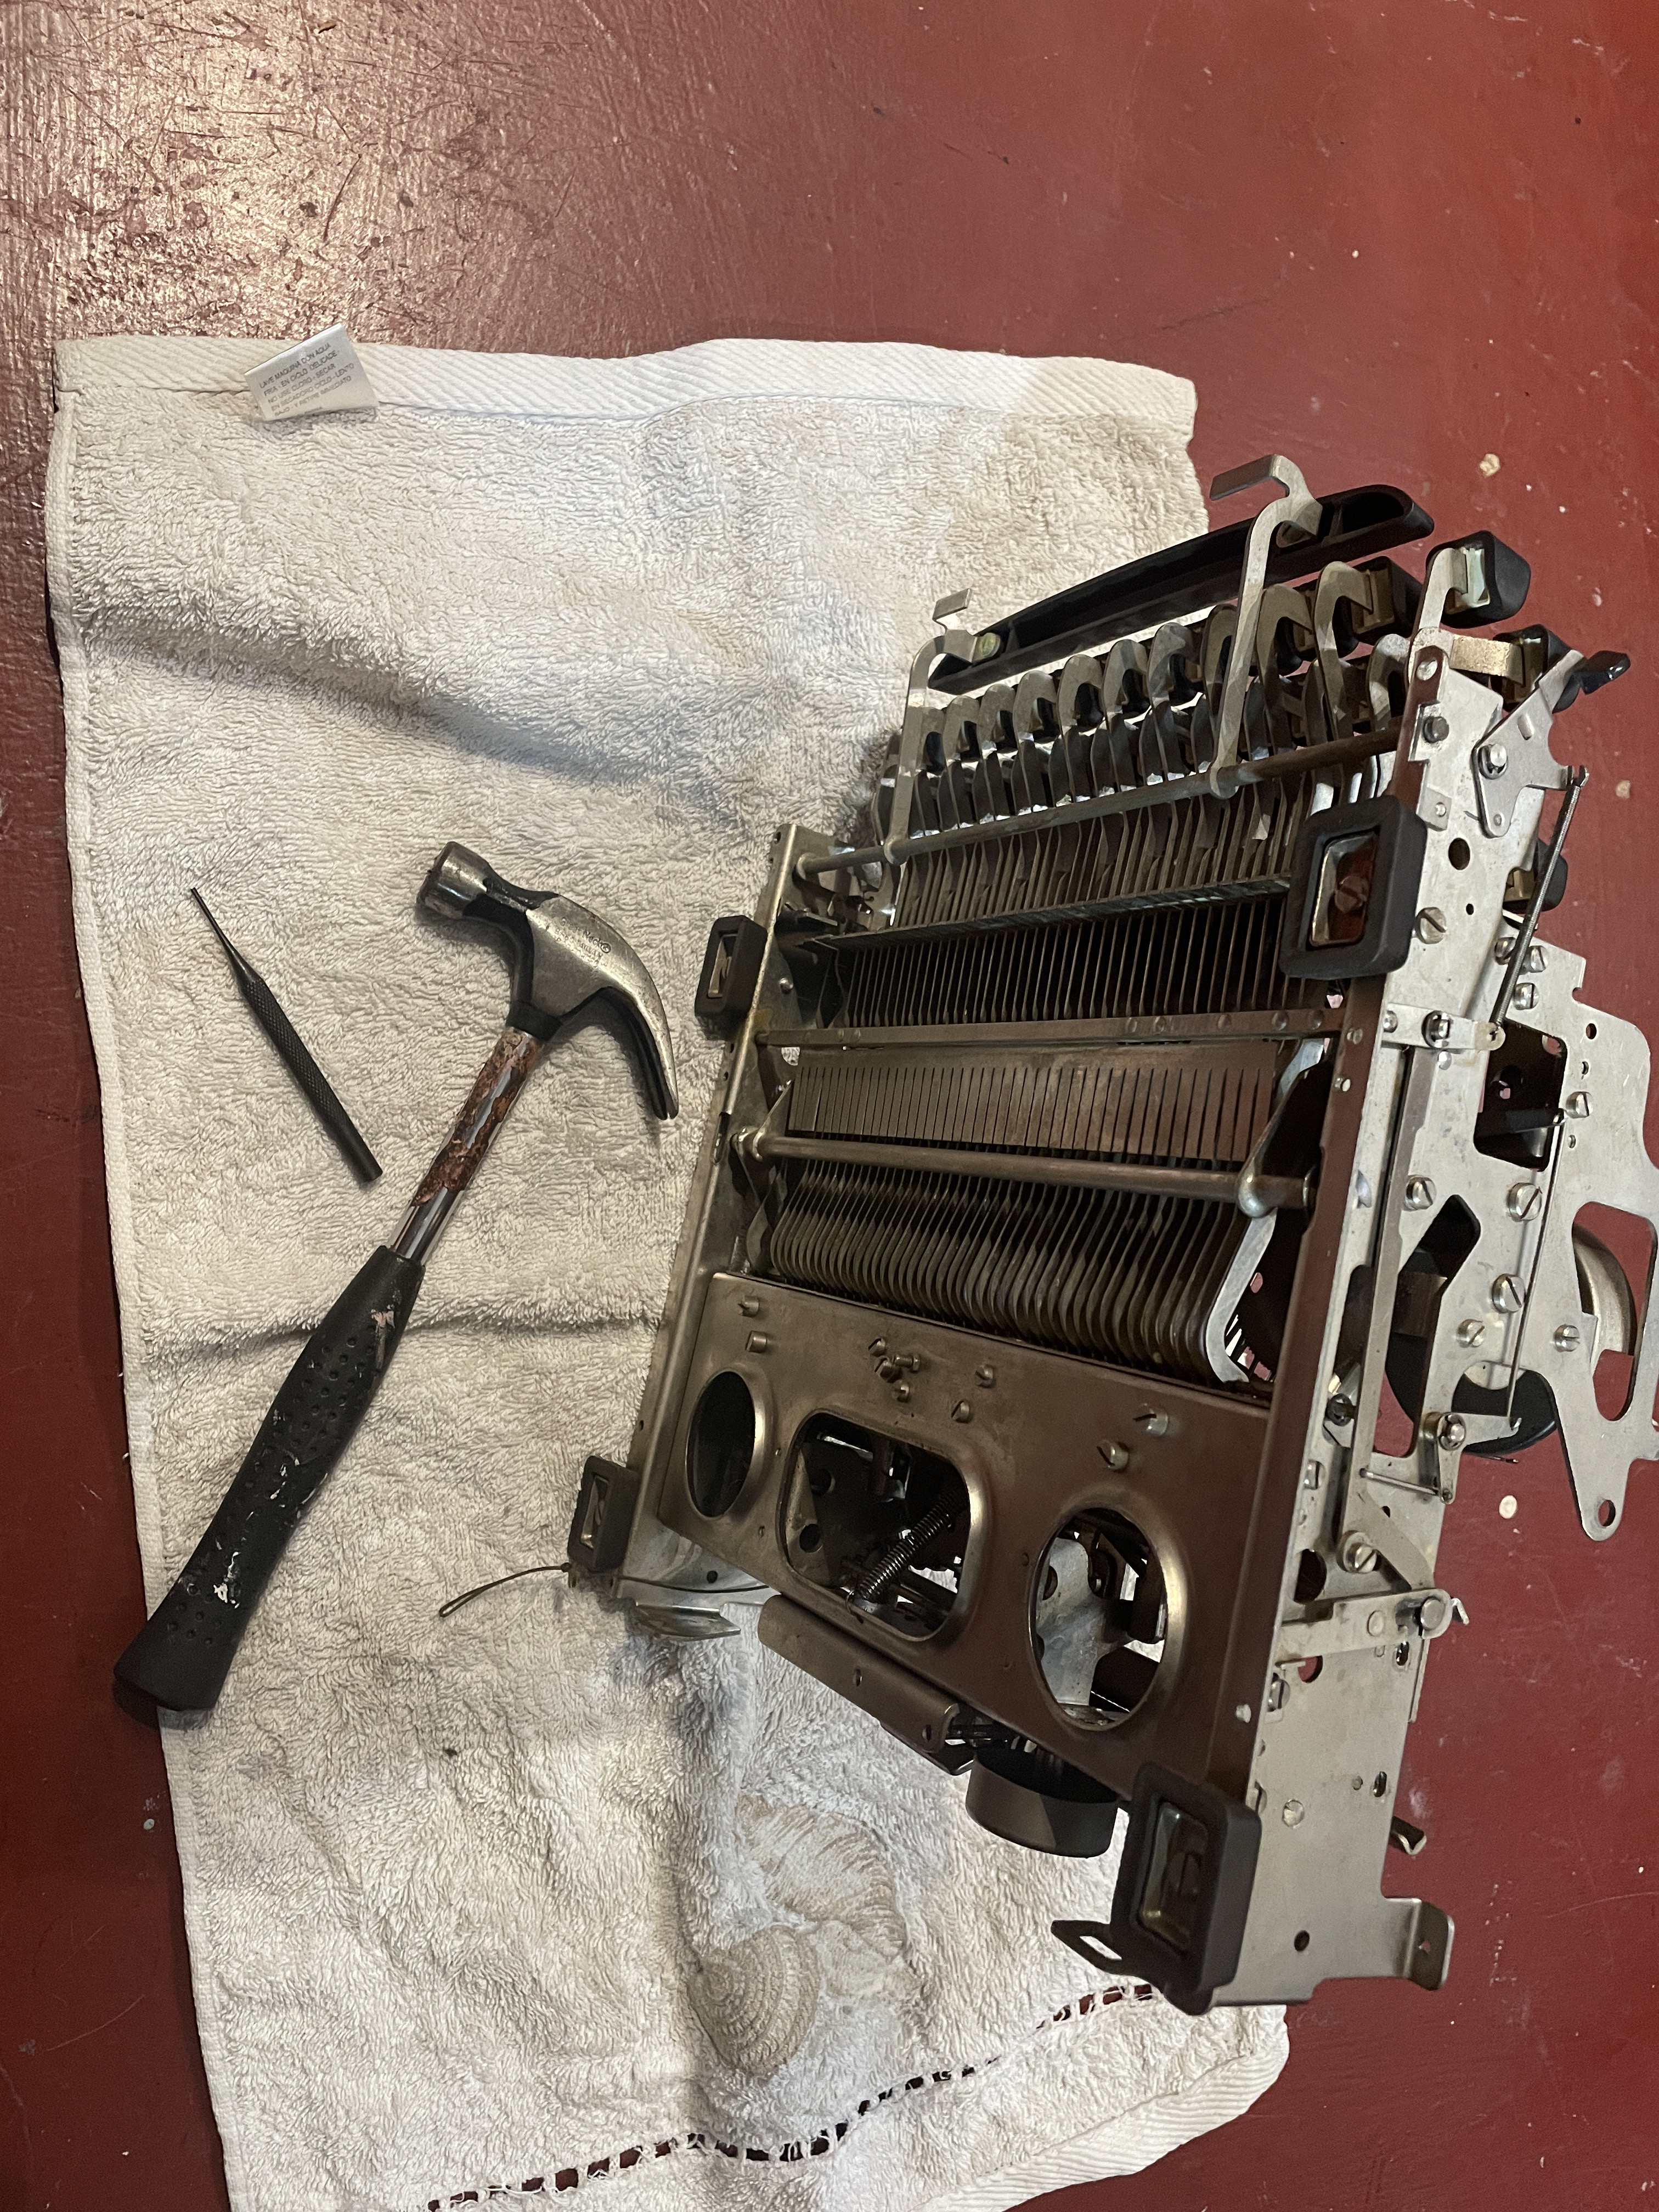
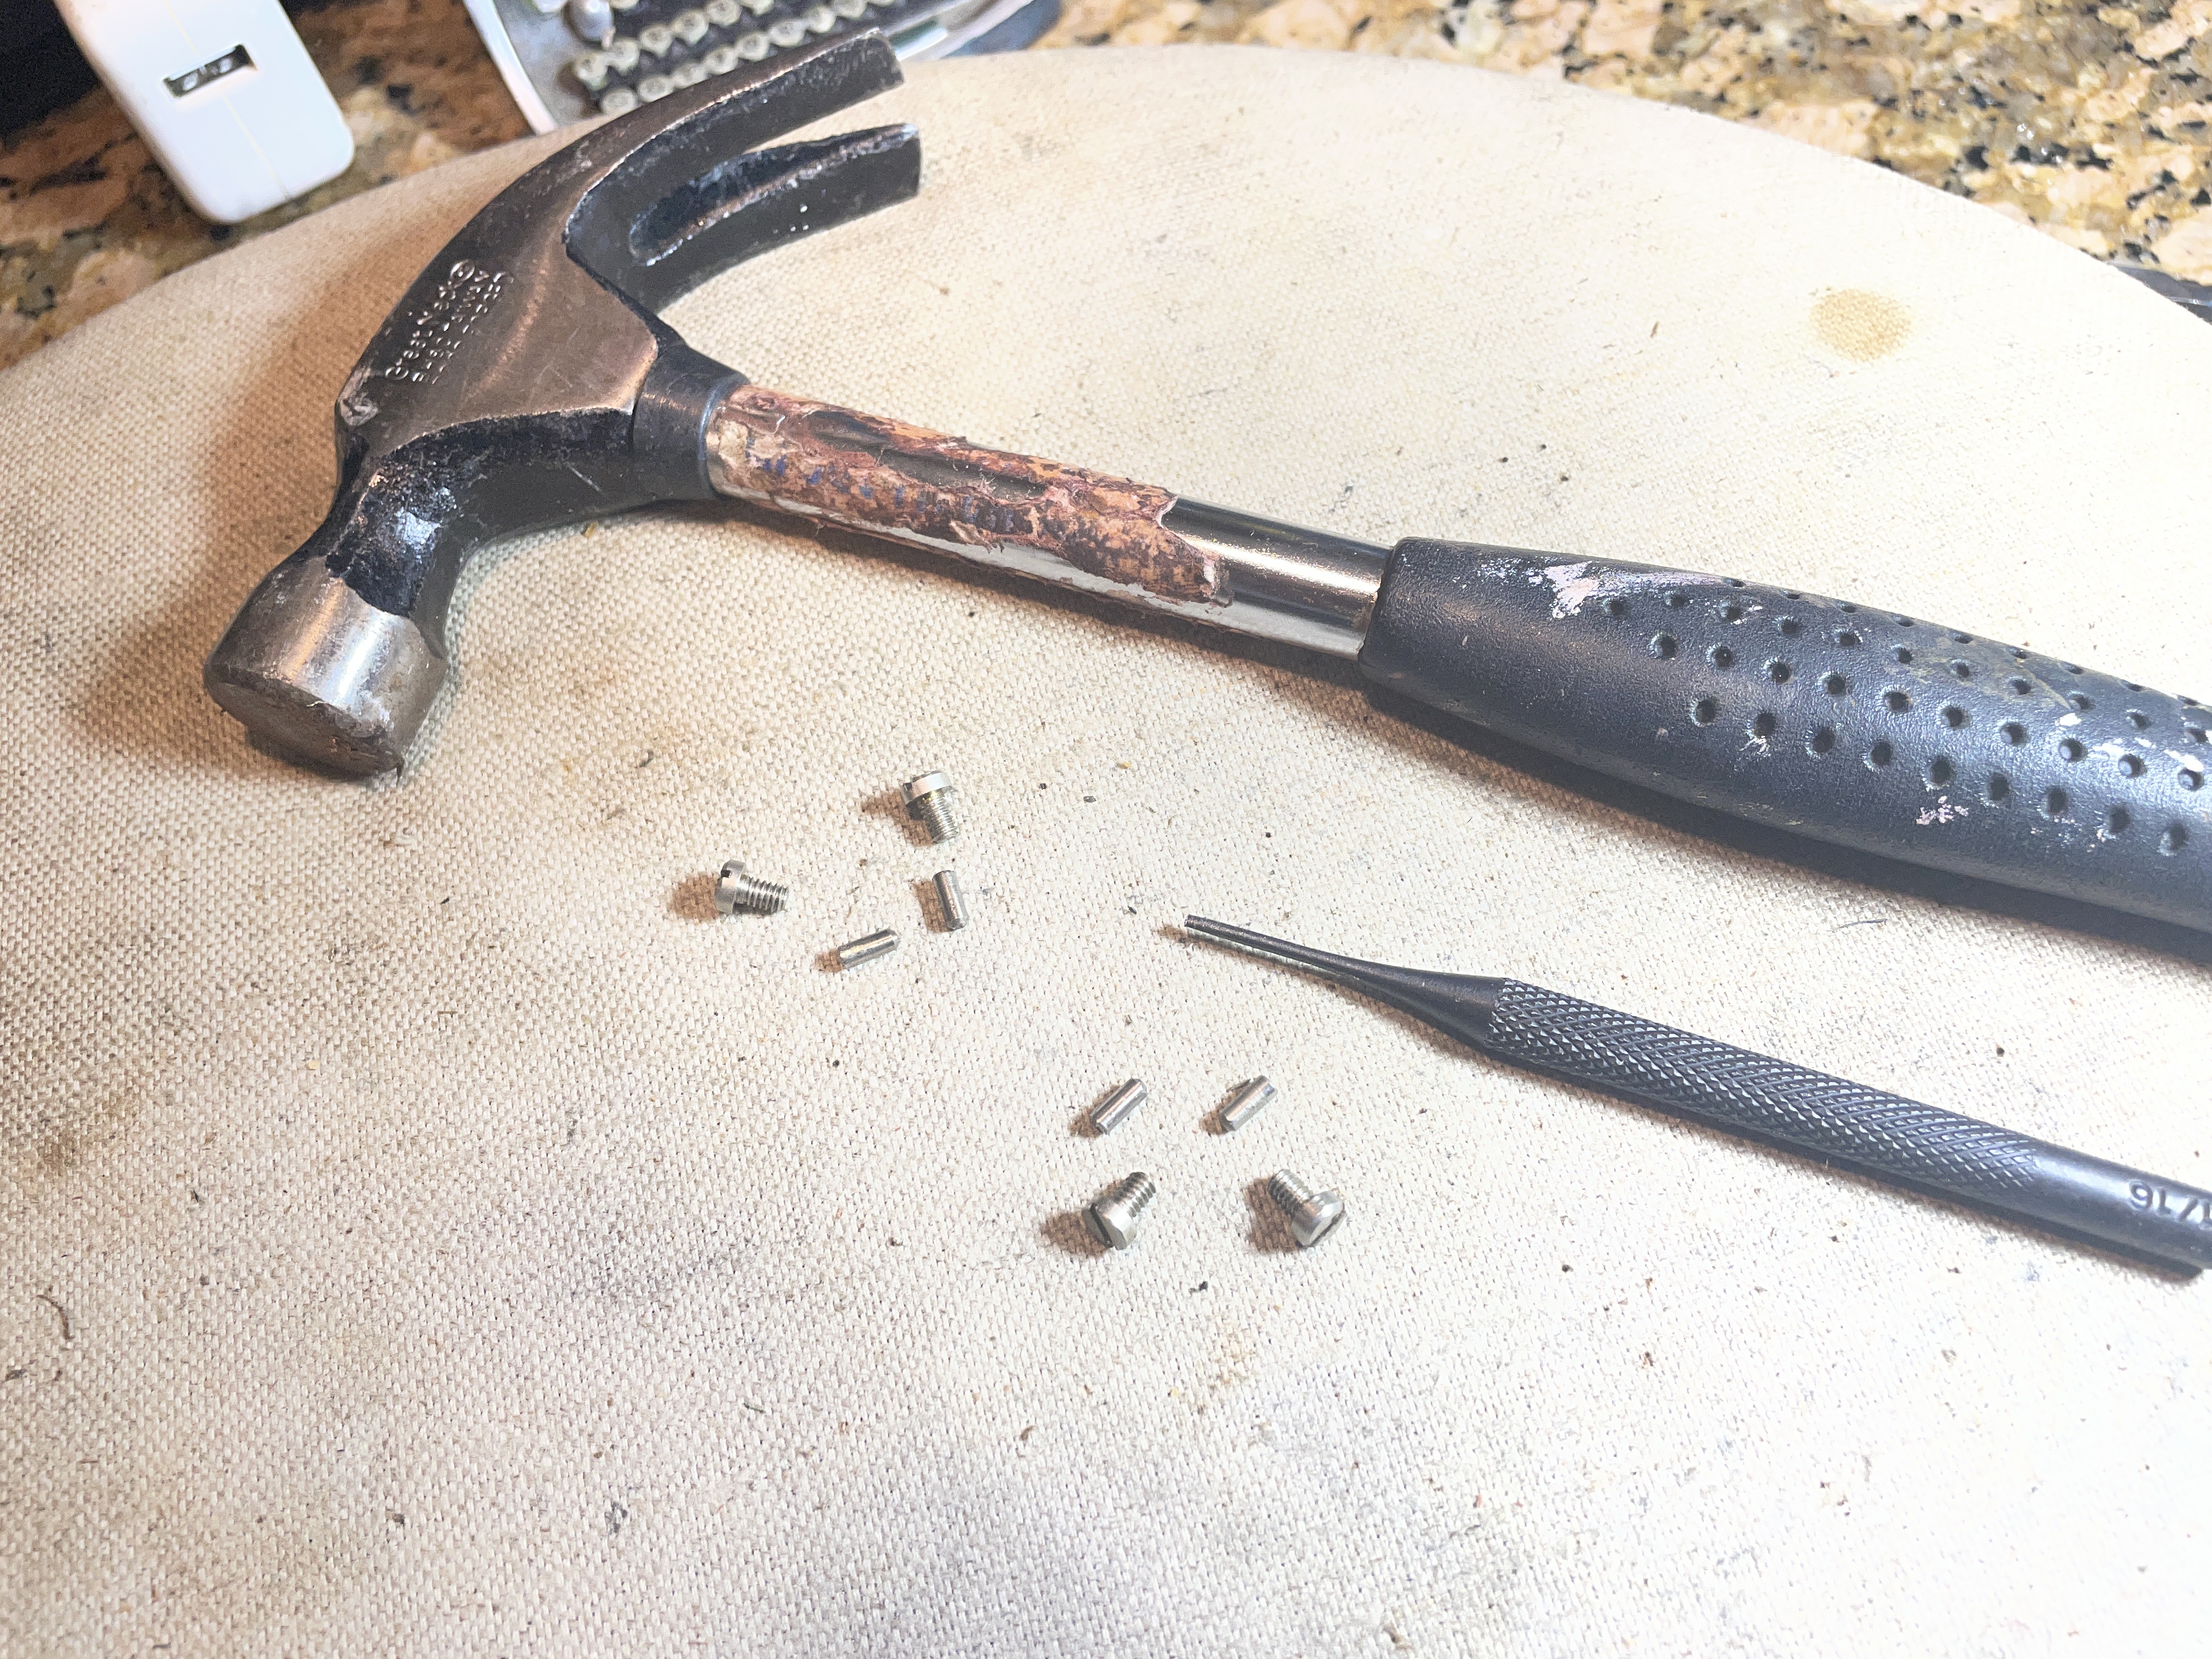
Once the pins and screws are out, the carriage bed rails lift out.
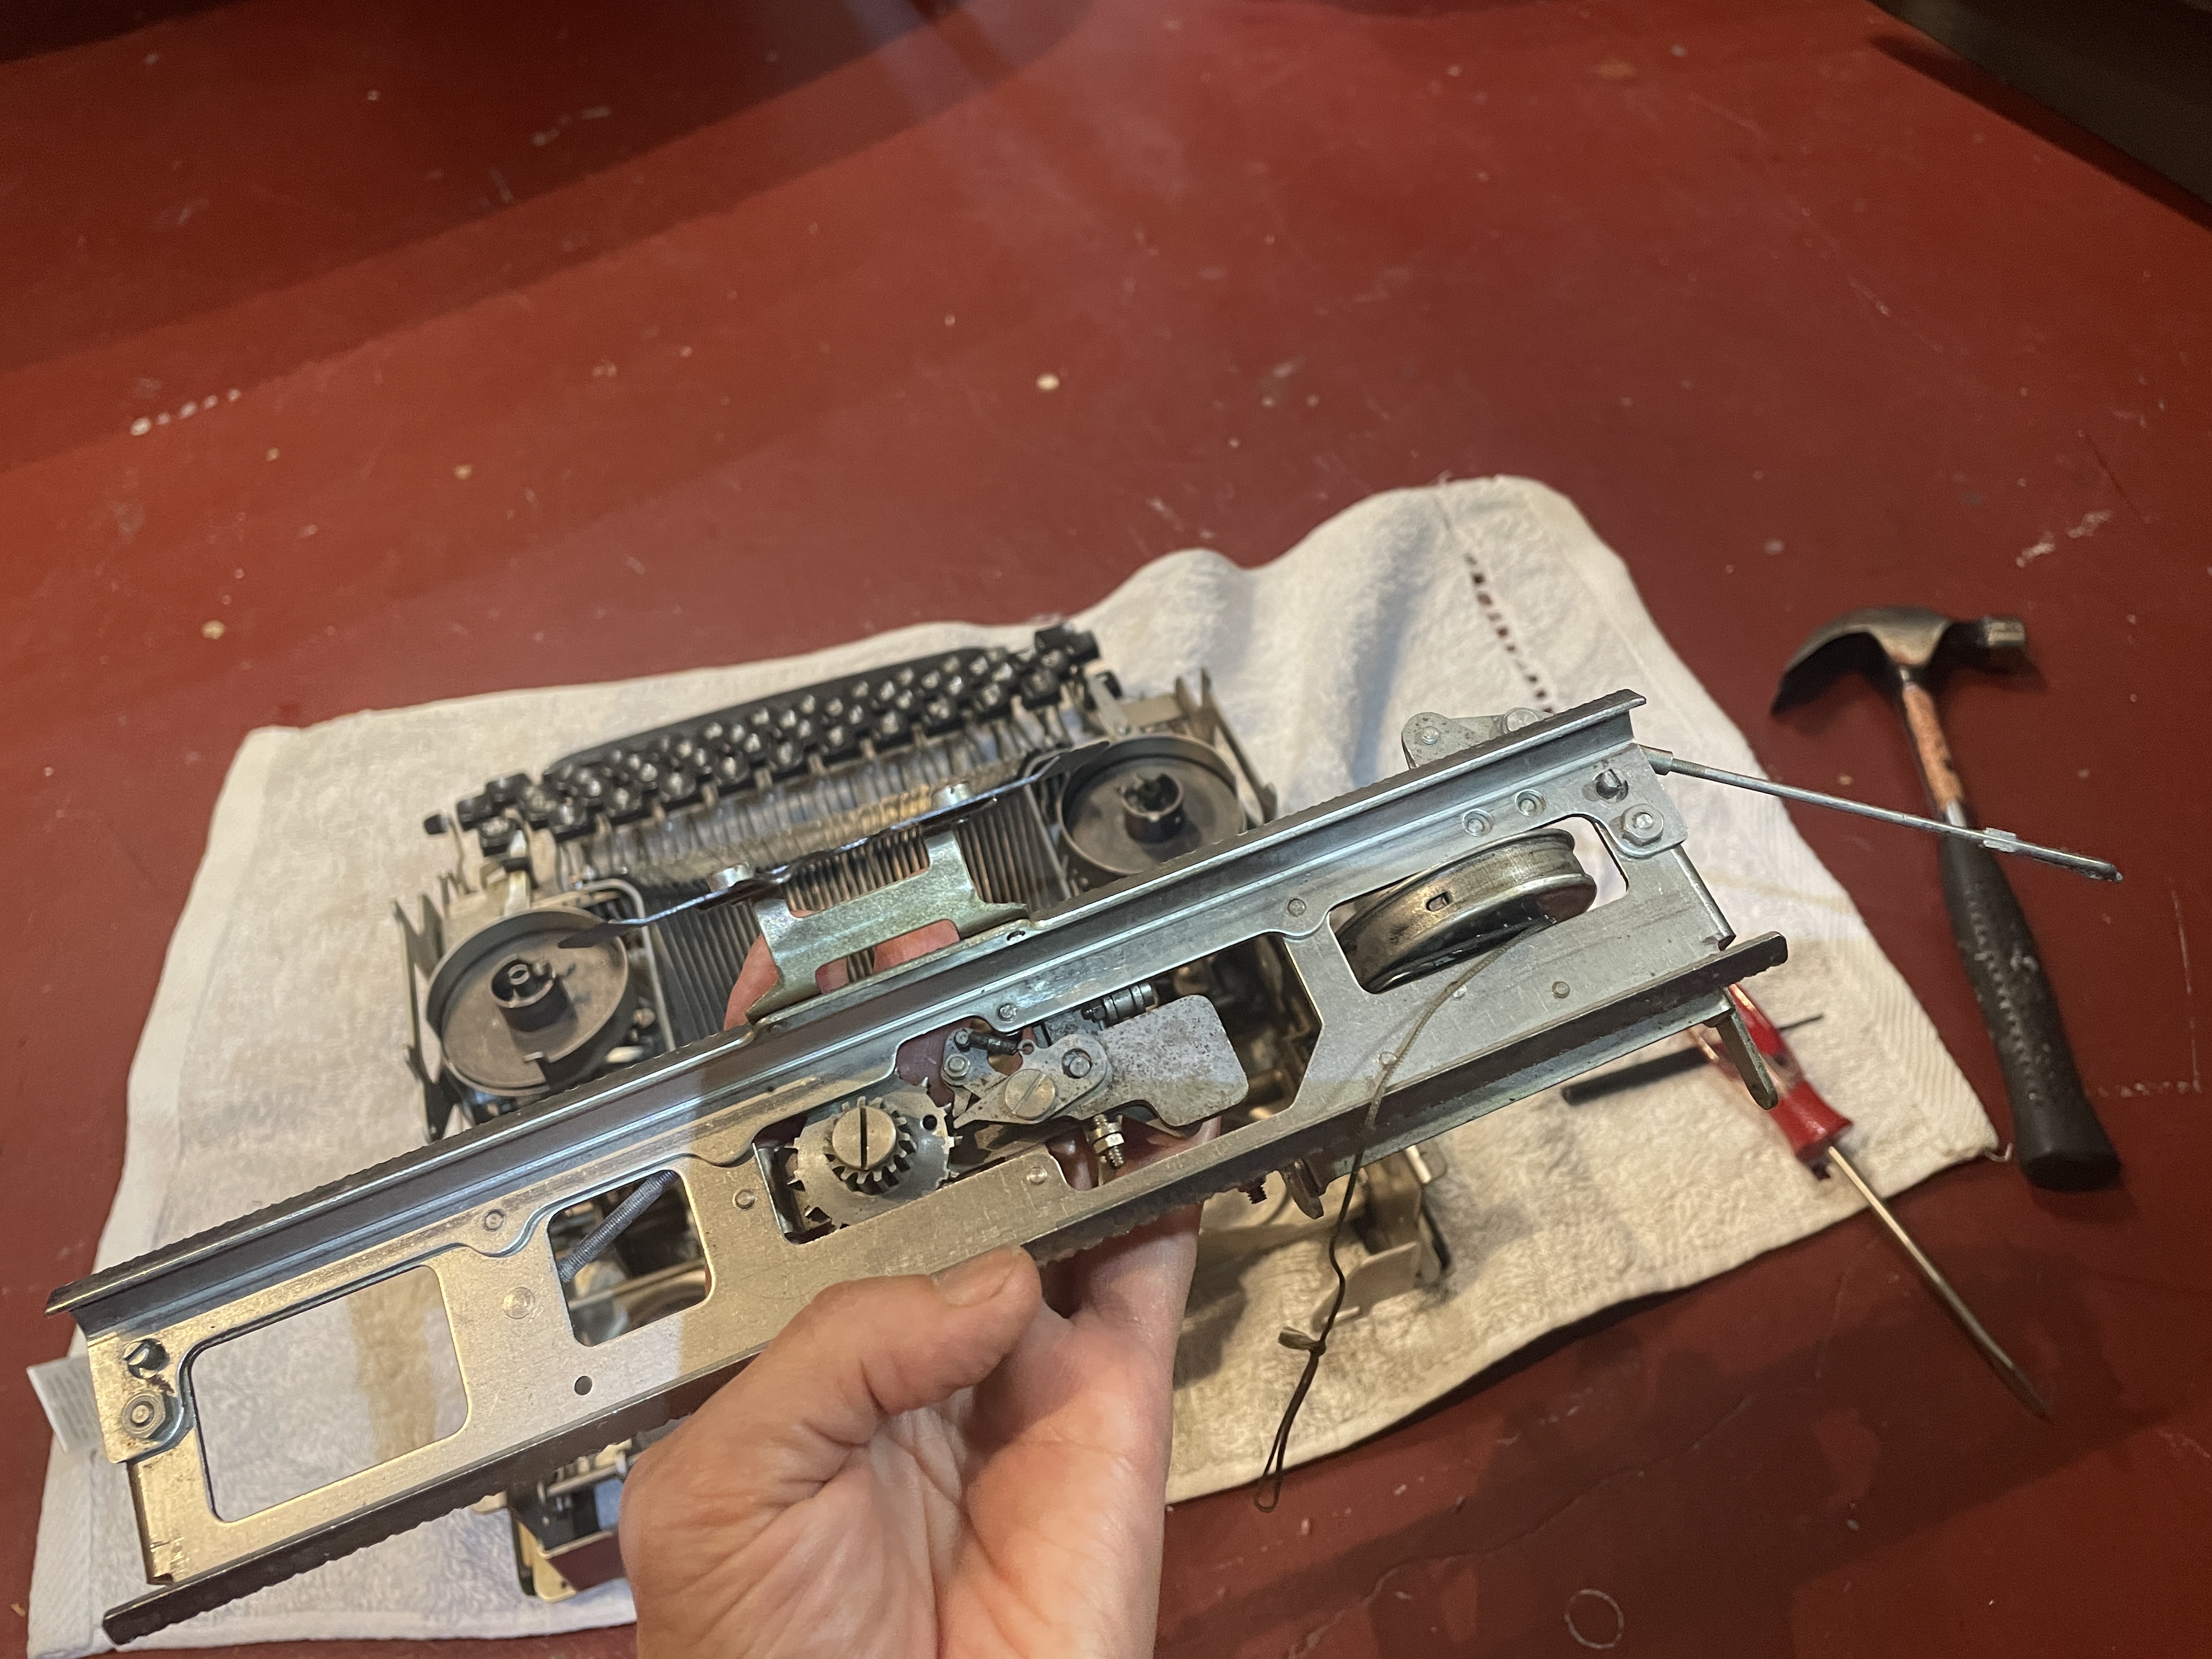
I loosened four screws on the bottom of the carriage bed so that I could get a little wiggle room between the rails while I inserted the pinions and bearings. Please note: I left the greasy shadows of the rails’ original positions so that I could re-tighten them where they once were after I was done.
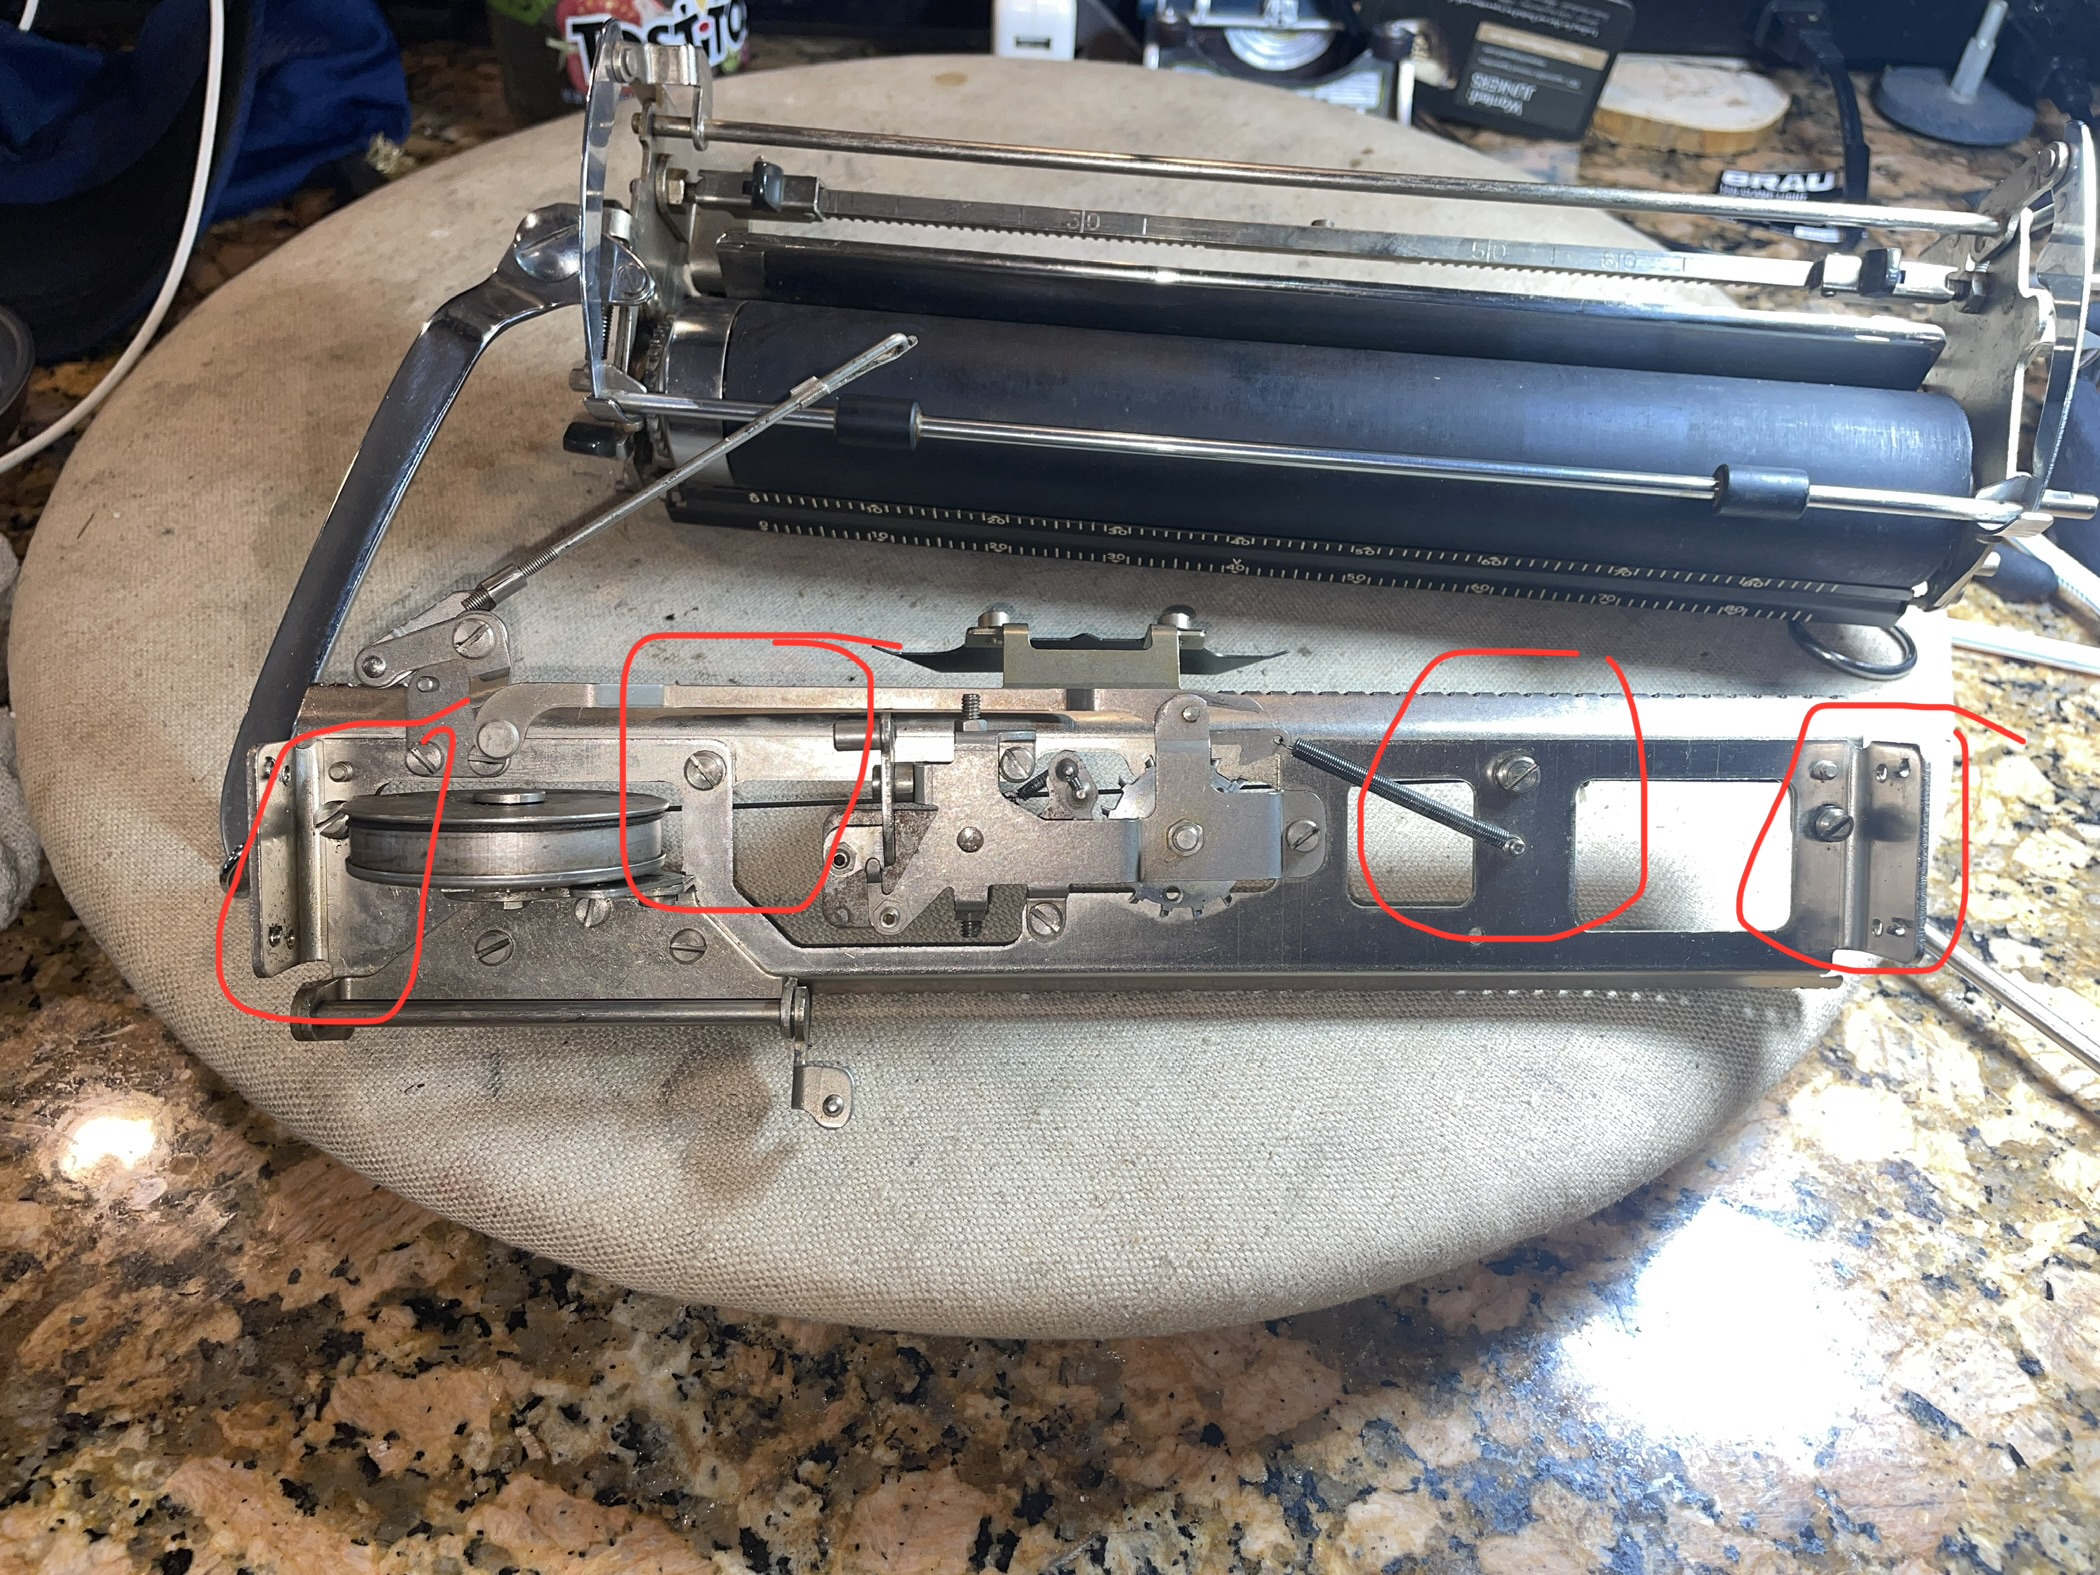
Getting the pinions and bearings back into the rails is a lot easier off the machine. If you drop a ball bearing or pinion, it’s not going into the deep bowels of the machine. And with the carriage rails loosened, it’s a lot easier to set the sprockets and bearings. No picnic, but doable.
I placed the carriage on the rails at “0” and put the first two bearing pairs in with the carriage right-side-up. Then I flipped the carriage and rails upside-down.

In the upside-down position, I fitted the last two pinion / ball bearing sets and tightened my rails down into their original position.
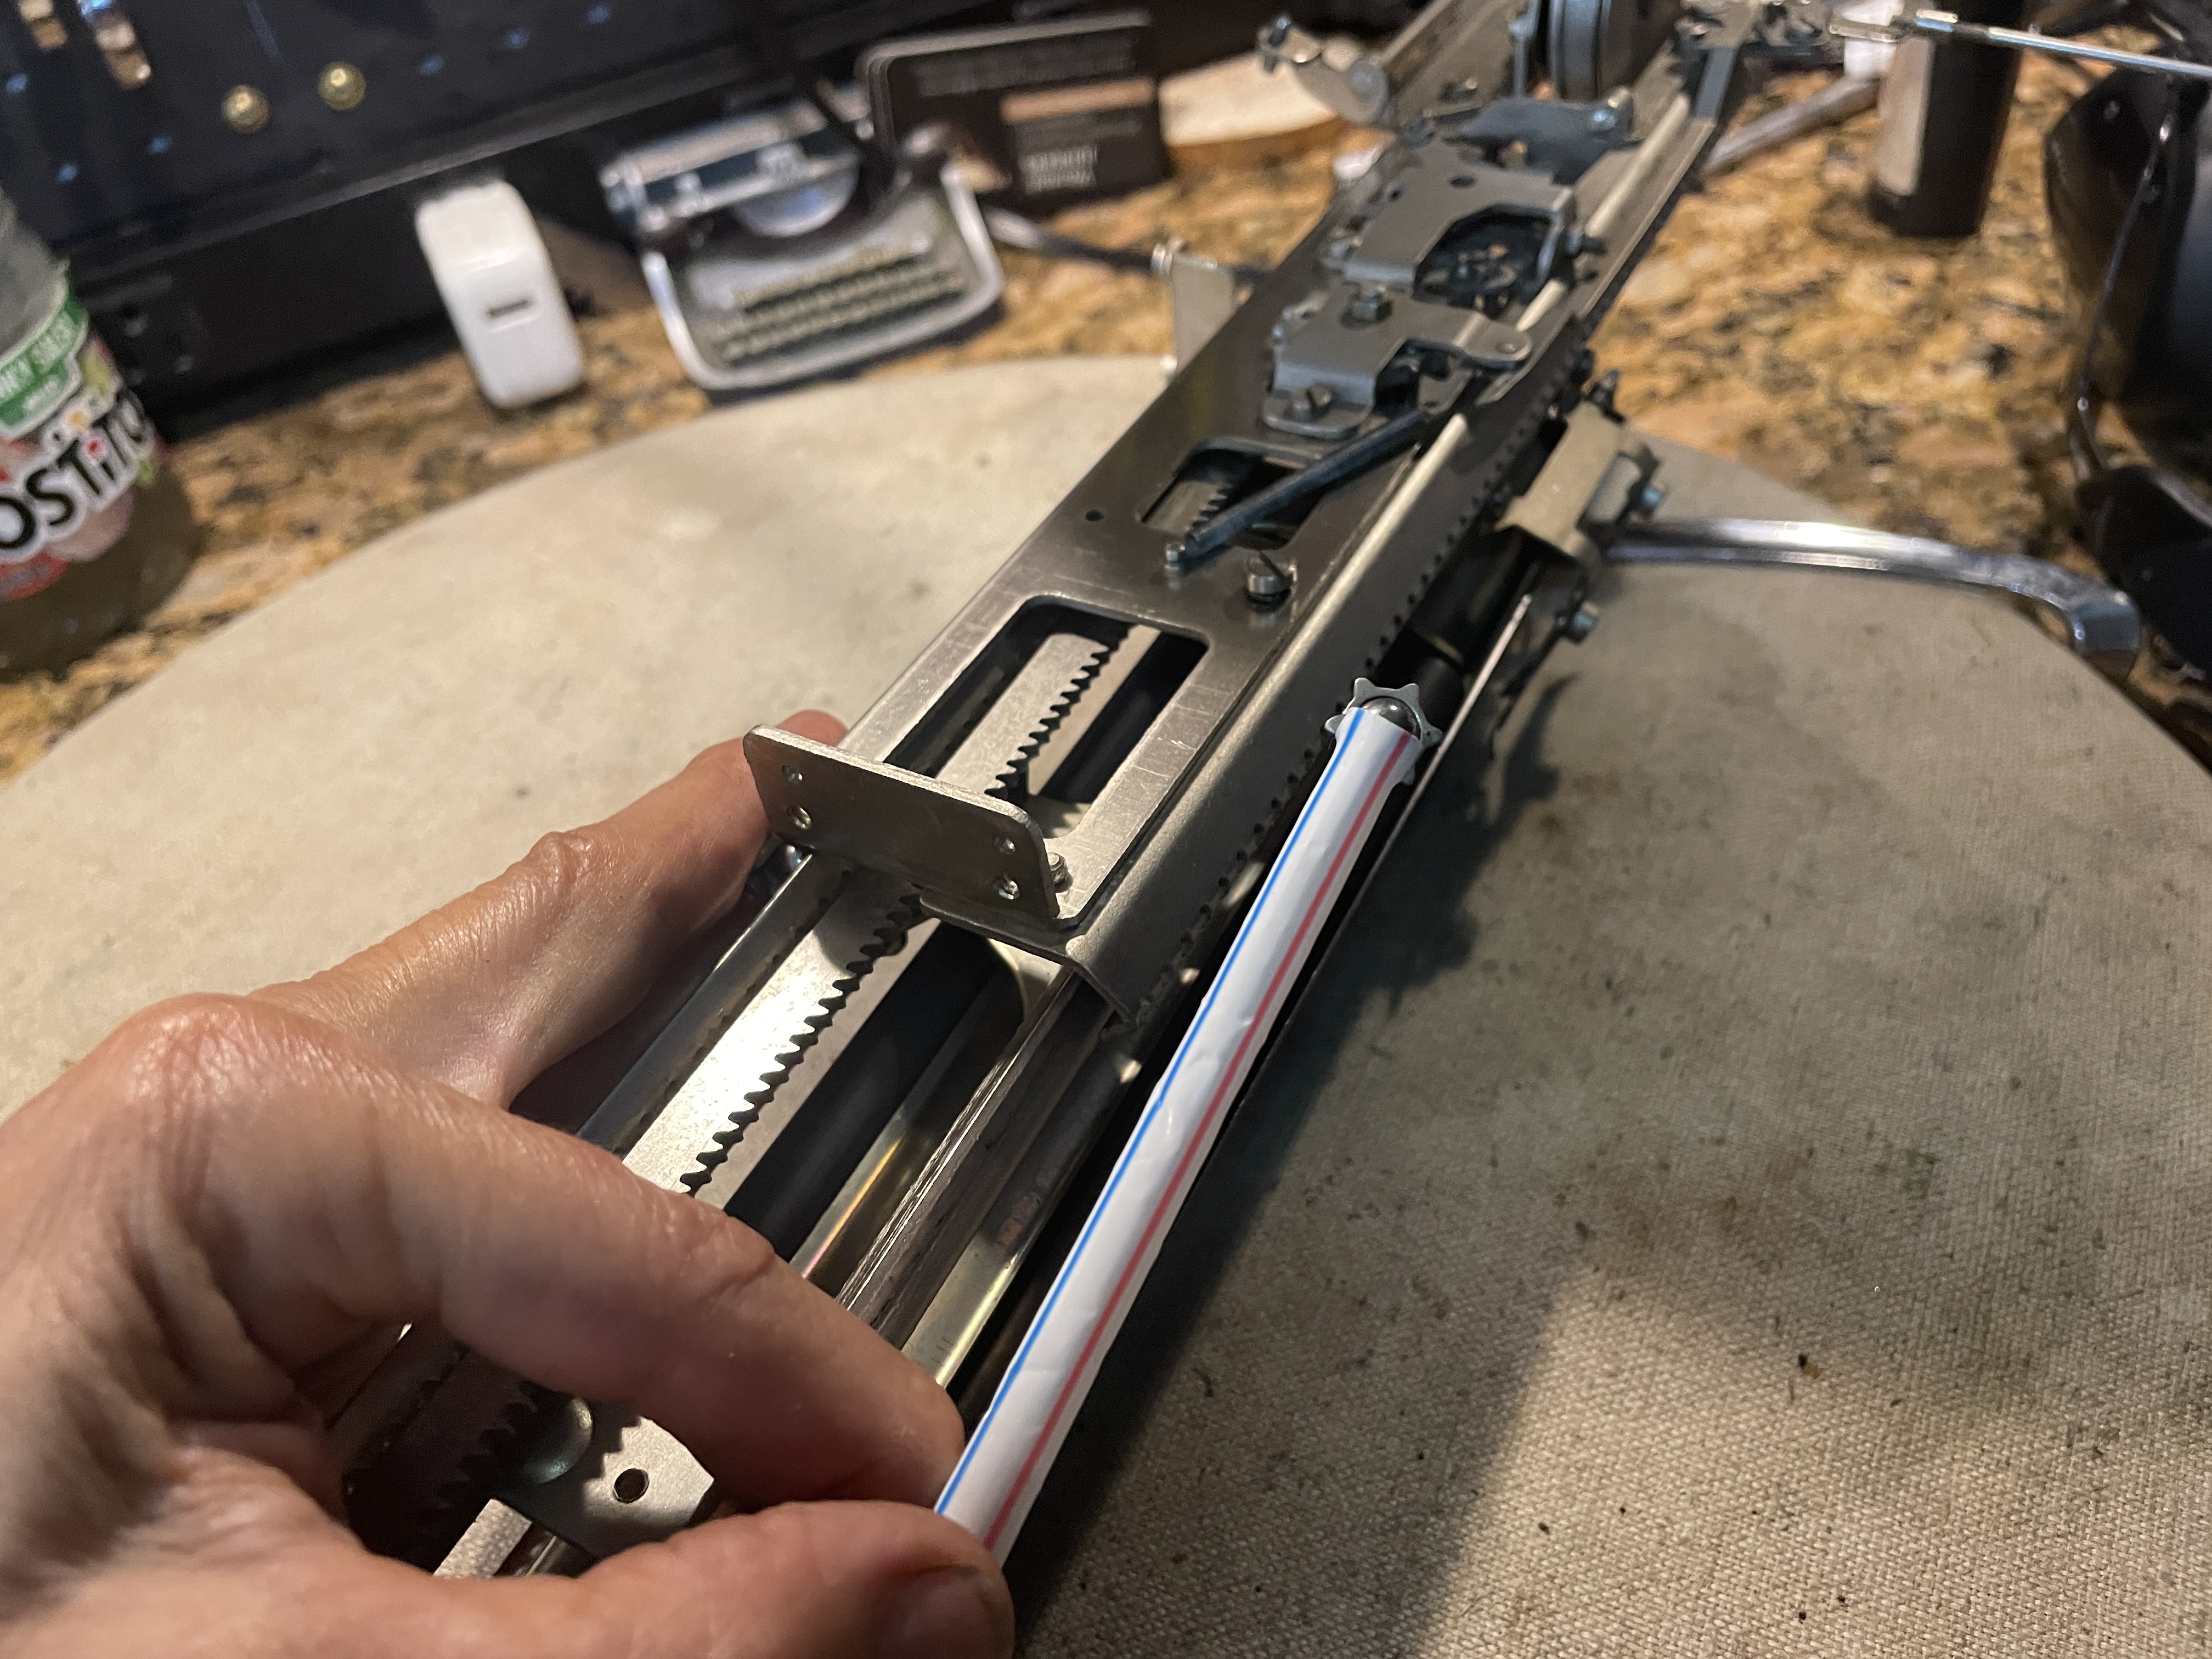
I tested and the carriage ran smoothly on the carriage rails. I re-installed the carriage and carriage bed rails, re-attached the space bar and backspace and tried typing.
Huh. There’s really nothing wrong with this machine. I don’t even have to make any adjustments to it. It’s a real head-scratcher as to why someone took the carriage off in the first place. Maybe it came off for cleaning?
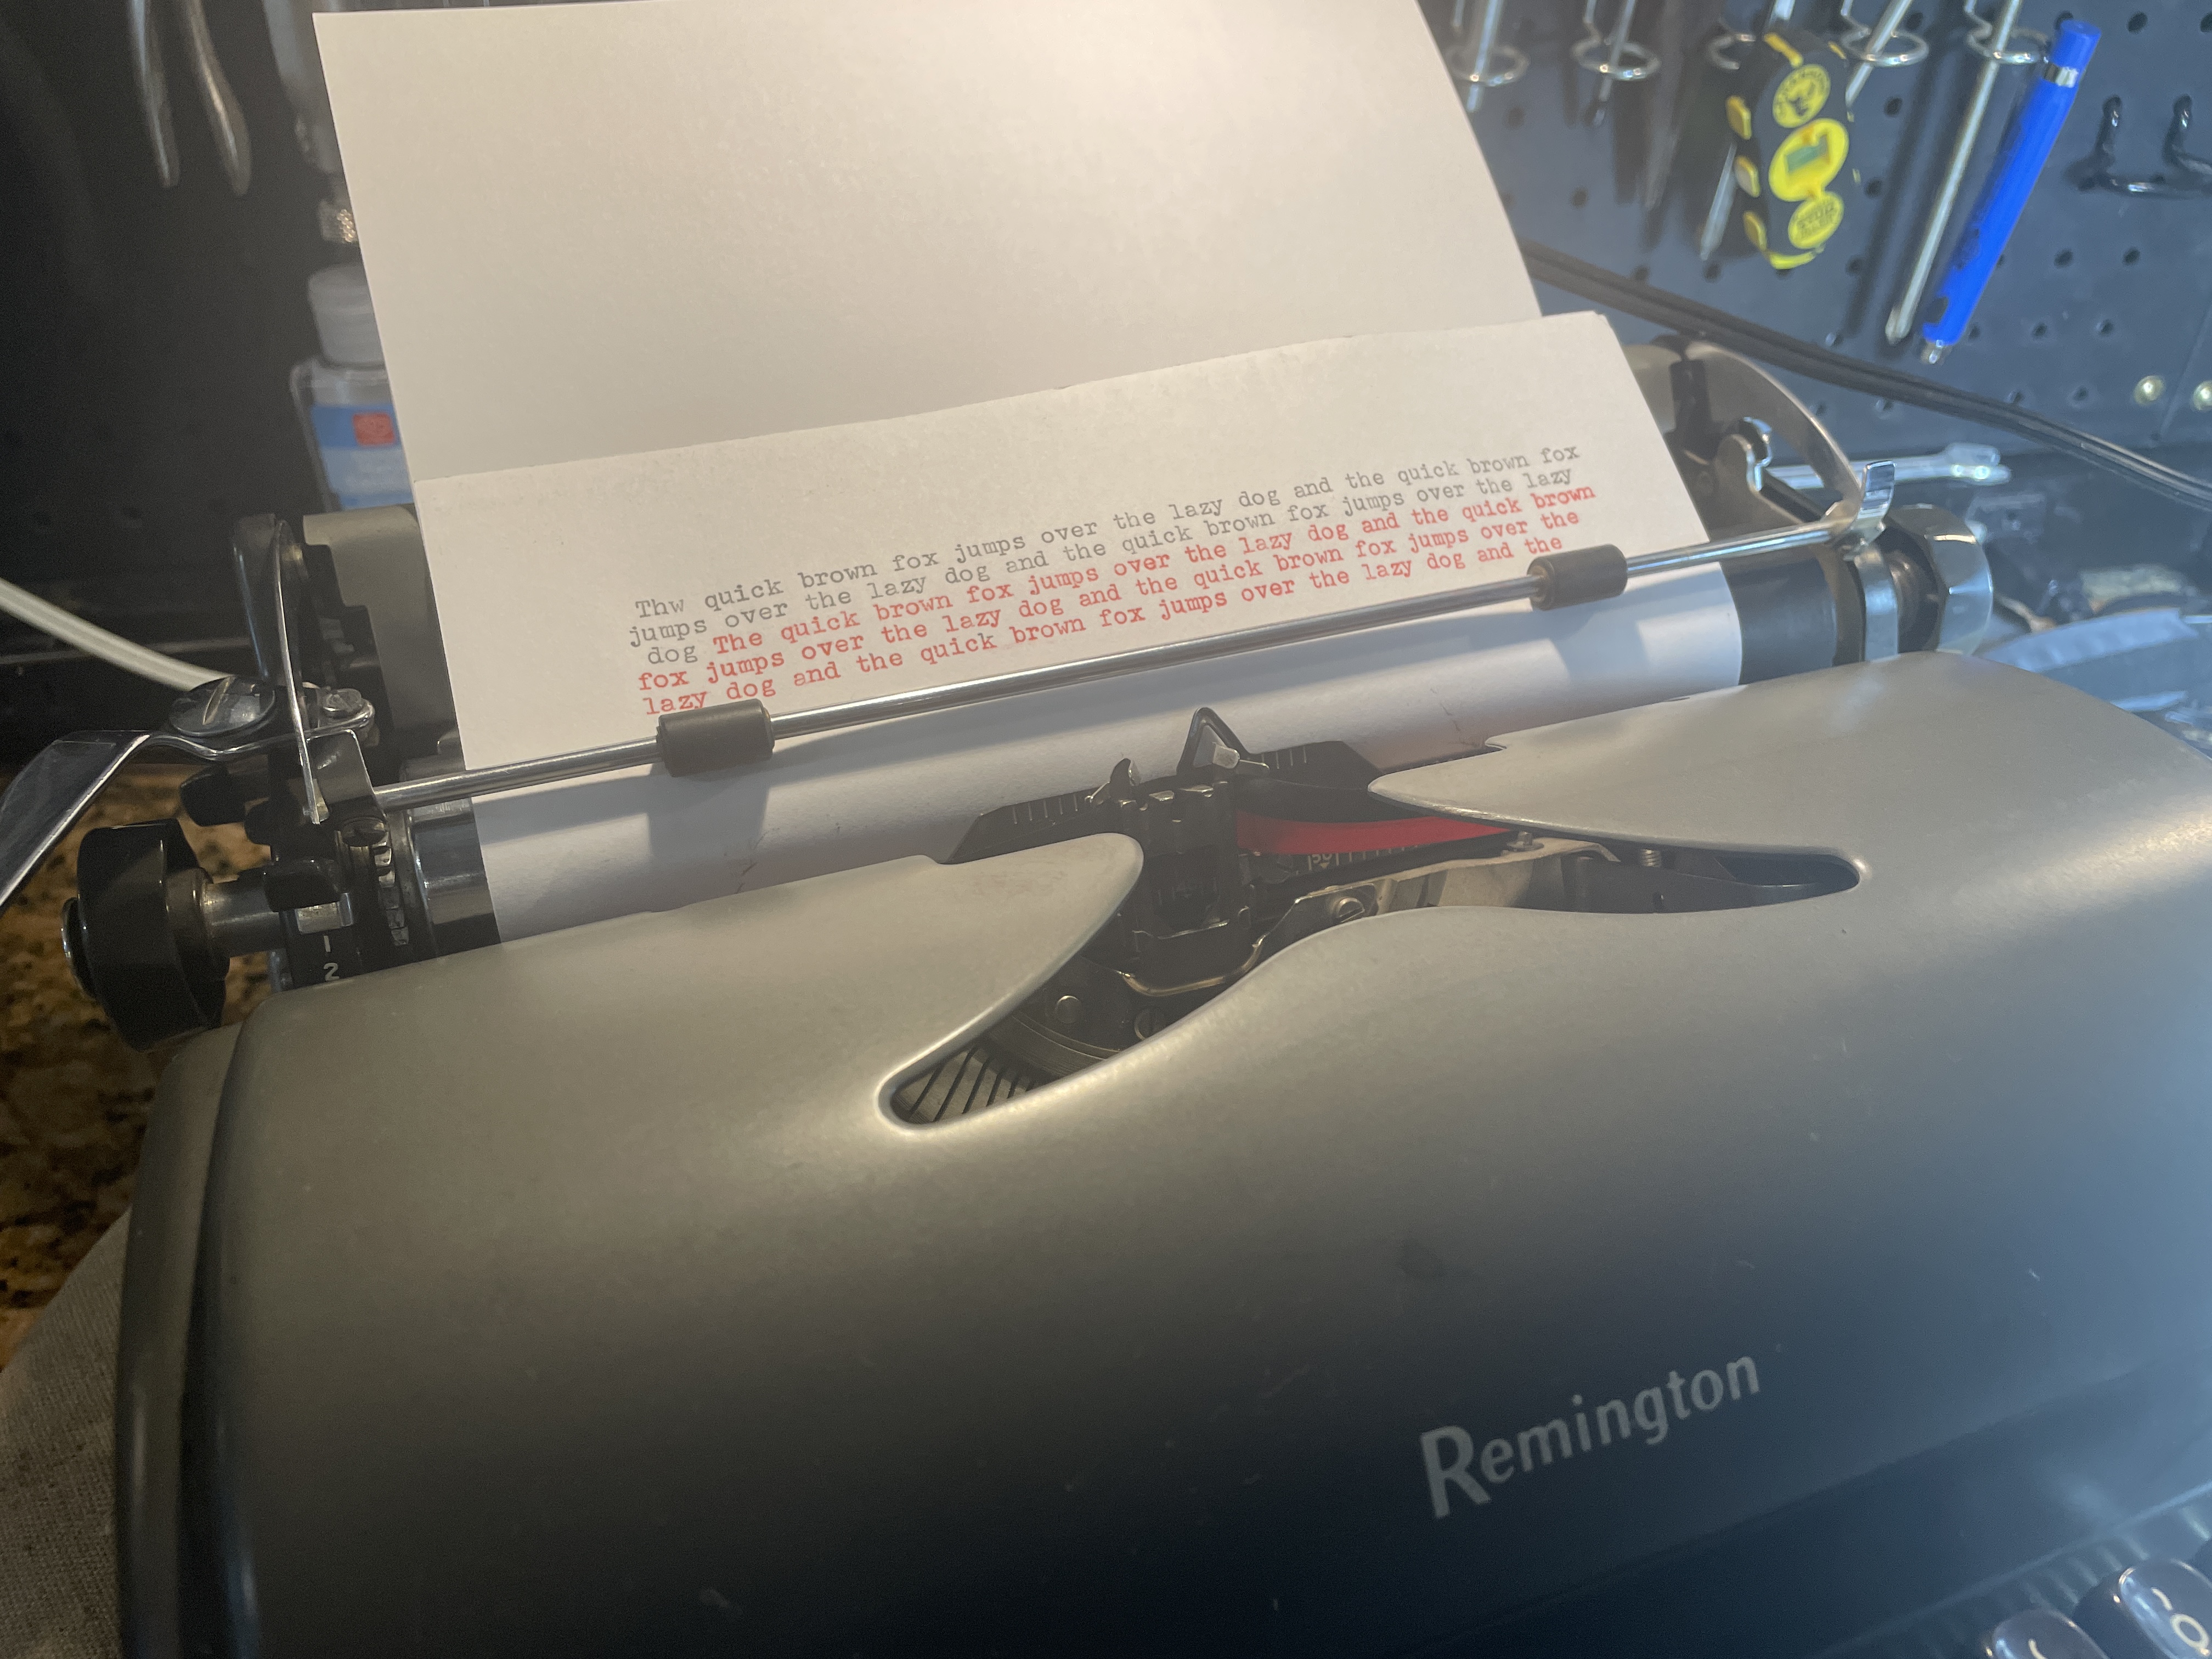
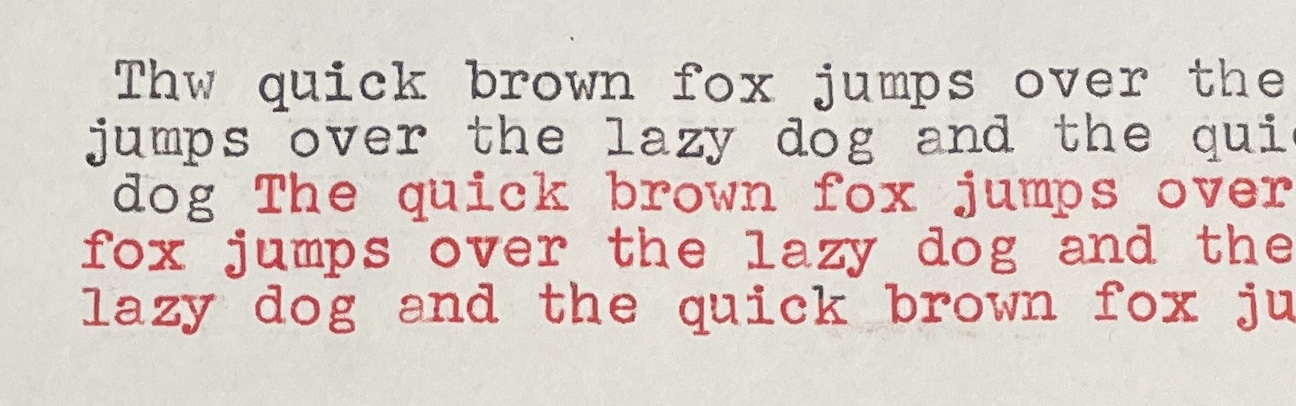
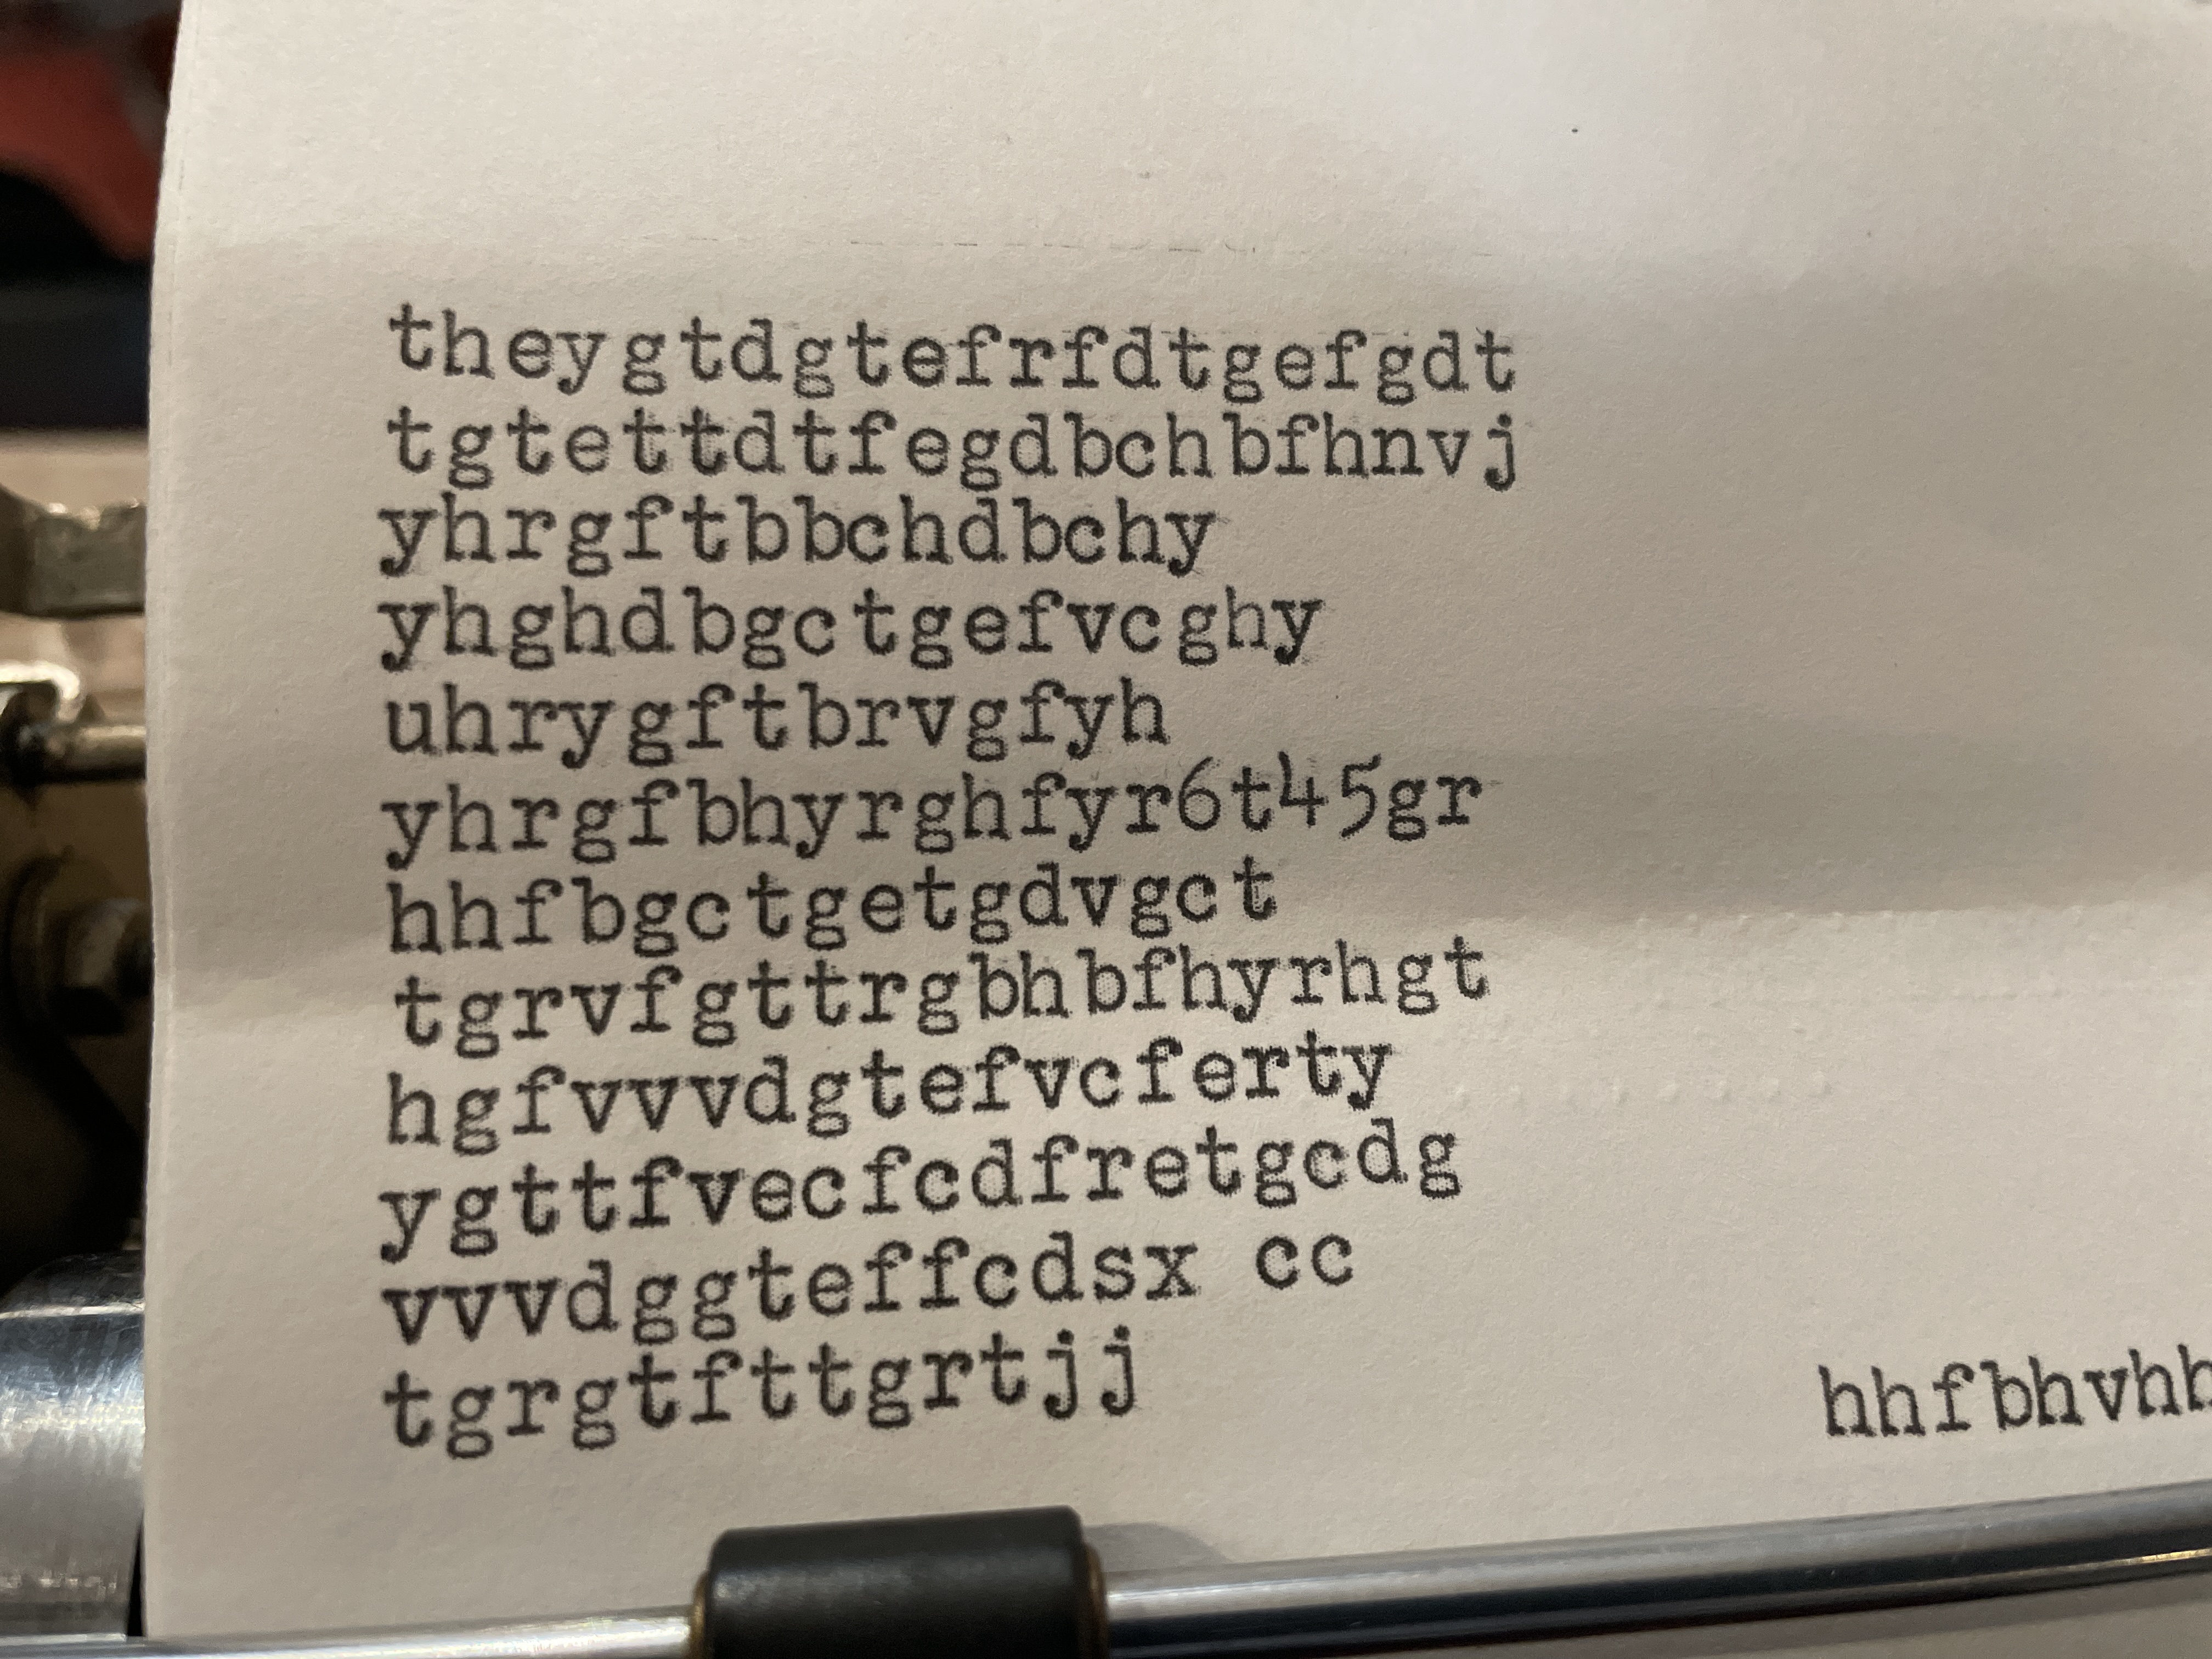
Well, I had to make one adjustment. I tested the typewriter with a long, drawn-out letter to a correspondent and found that I had an irregular left margin on carriage return.
I looked through my Remington Portable service manual to see how to fix this:
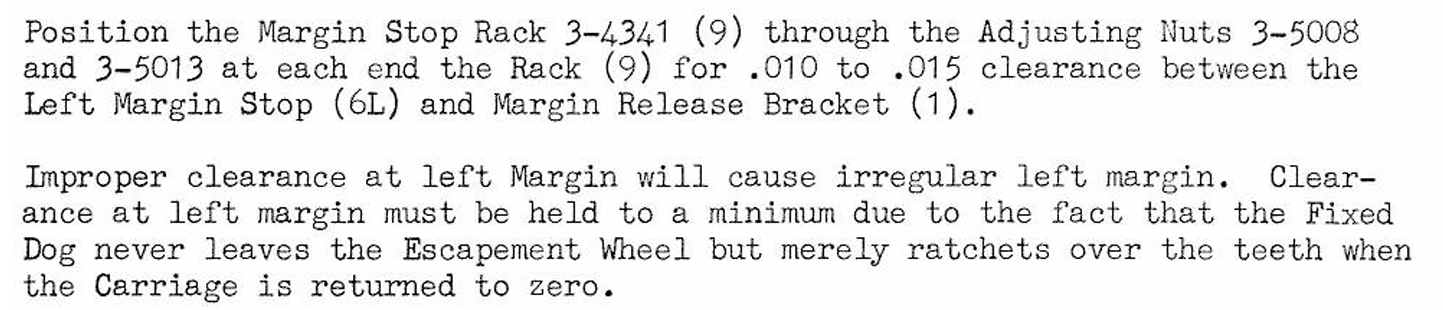
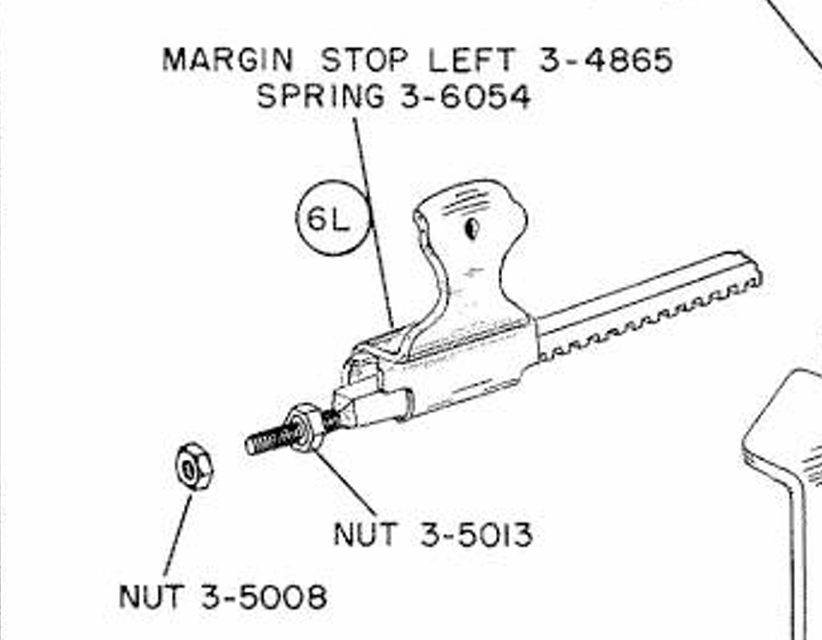
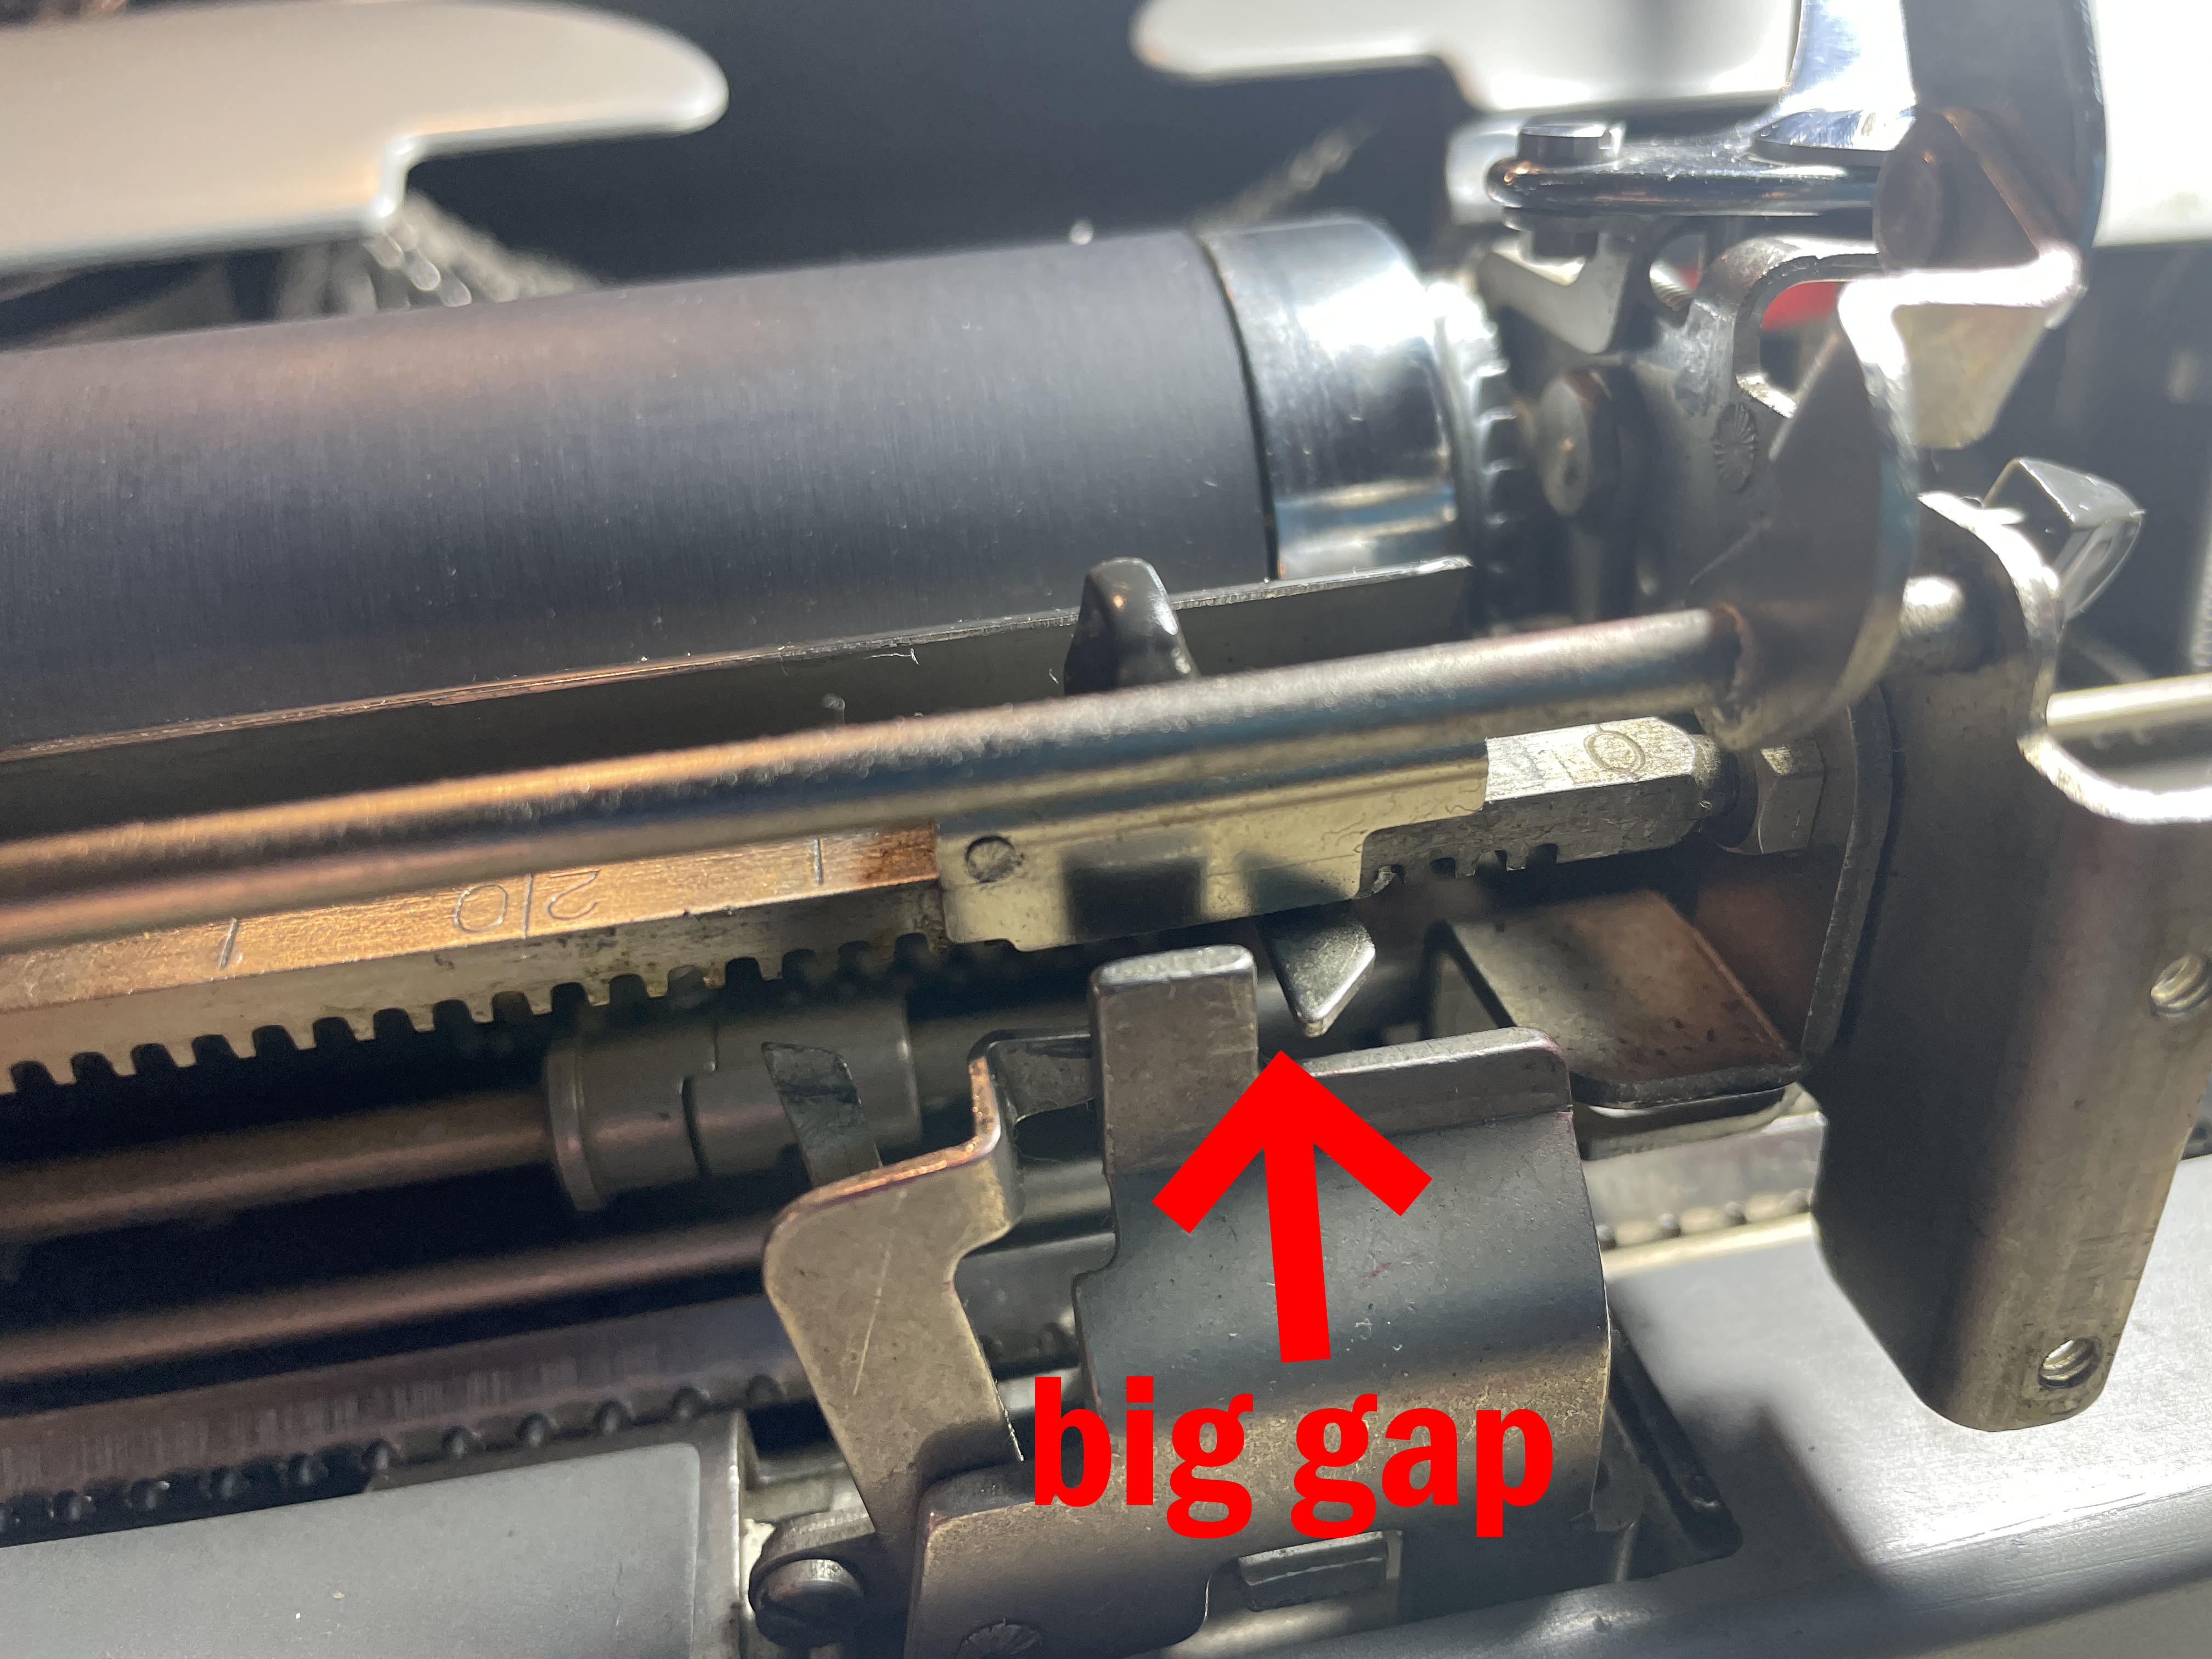
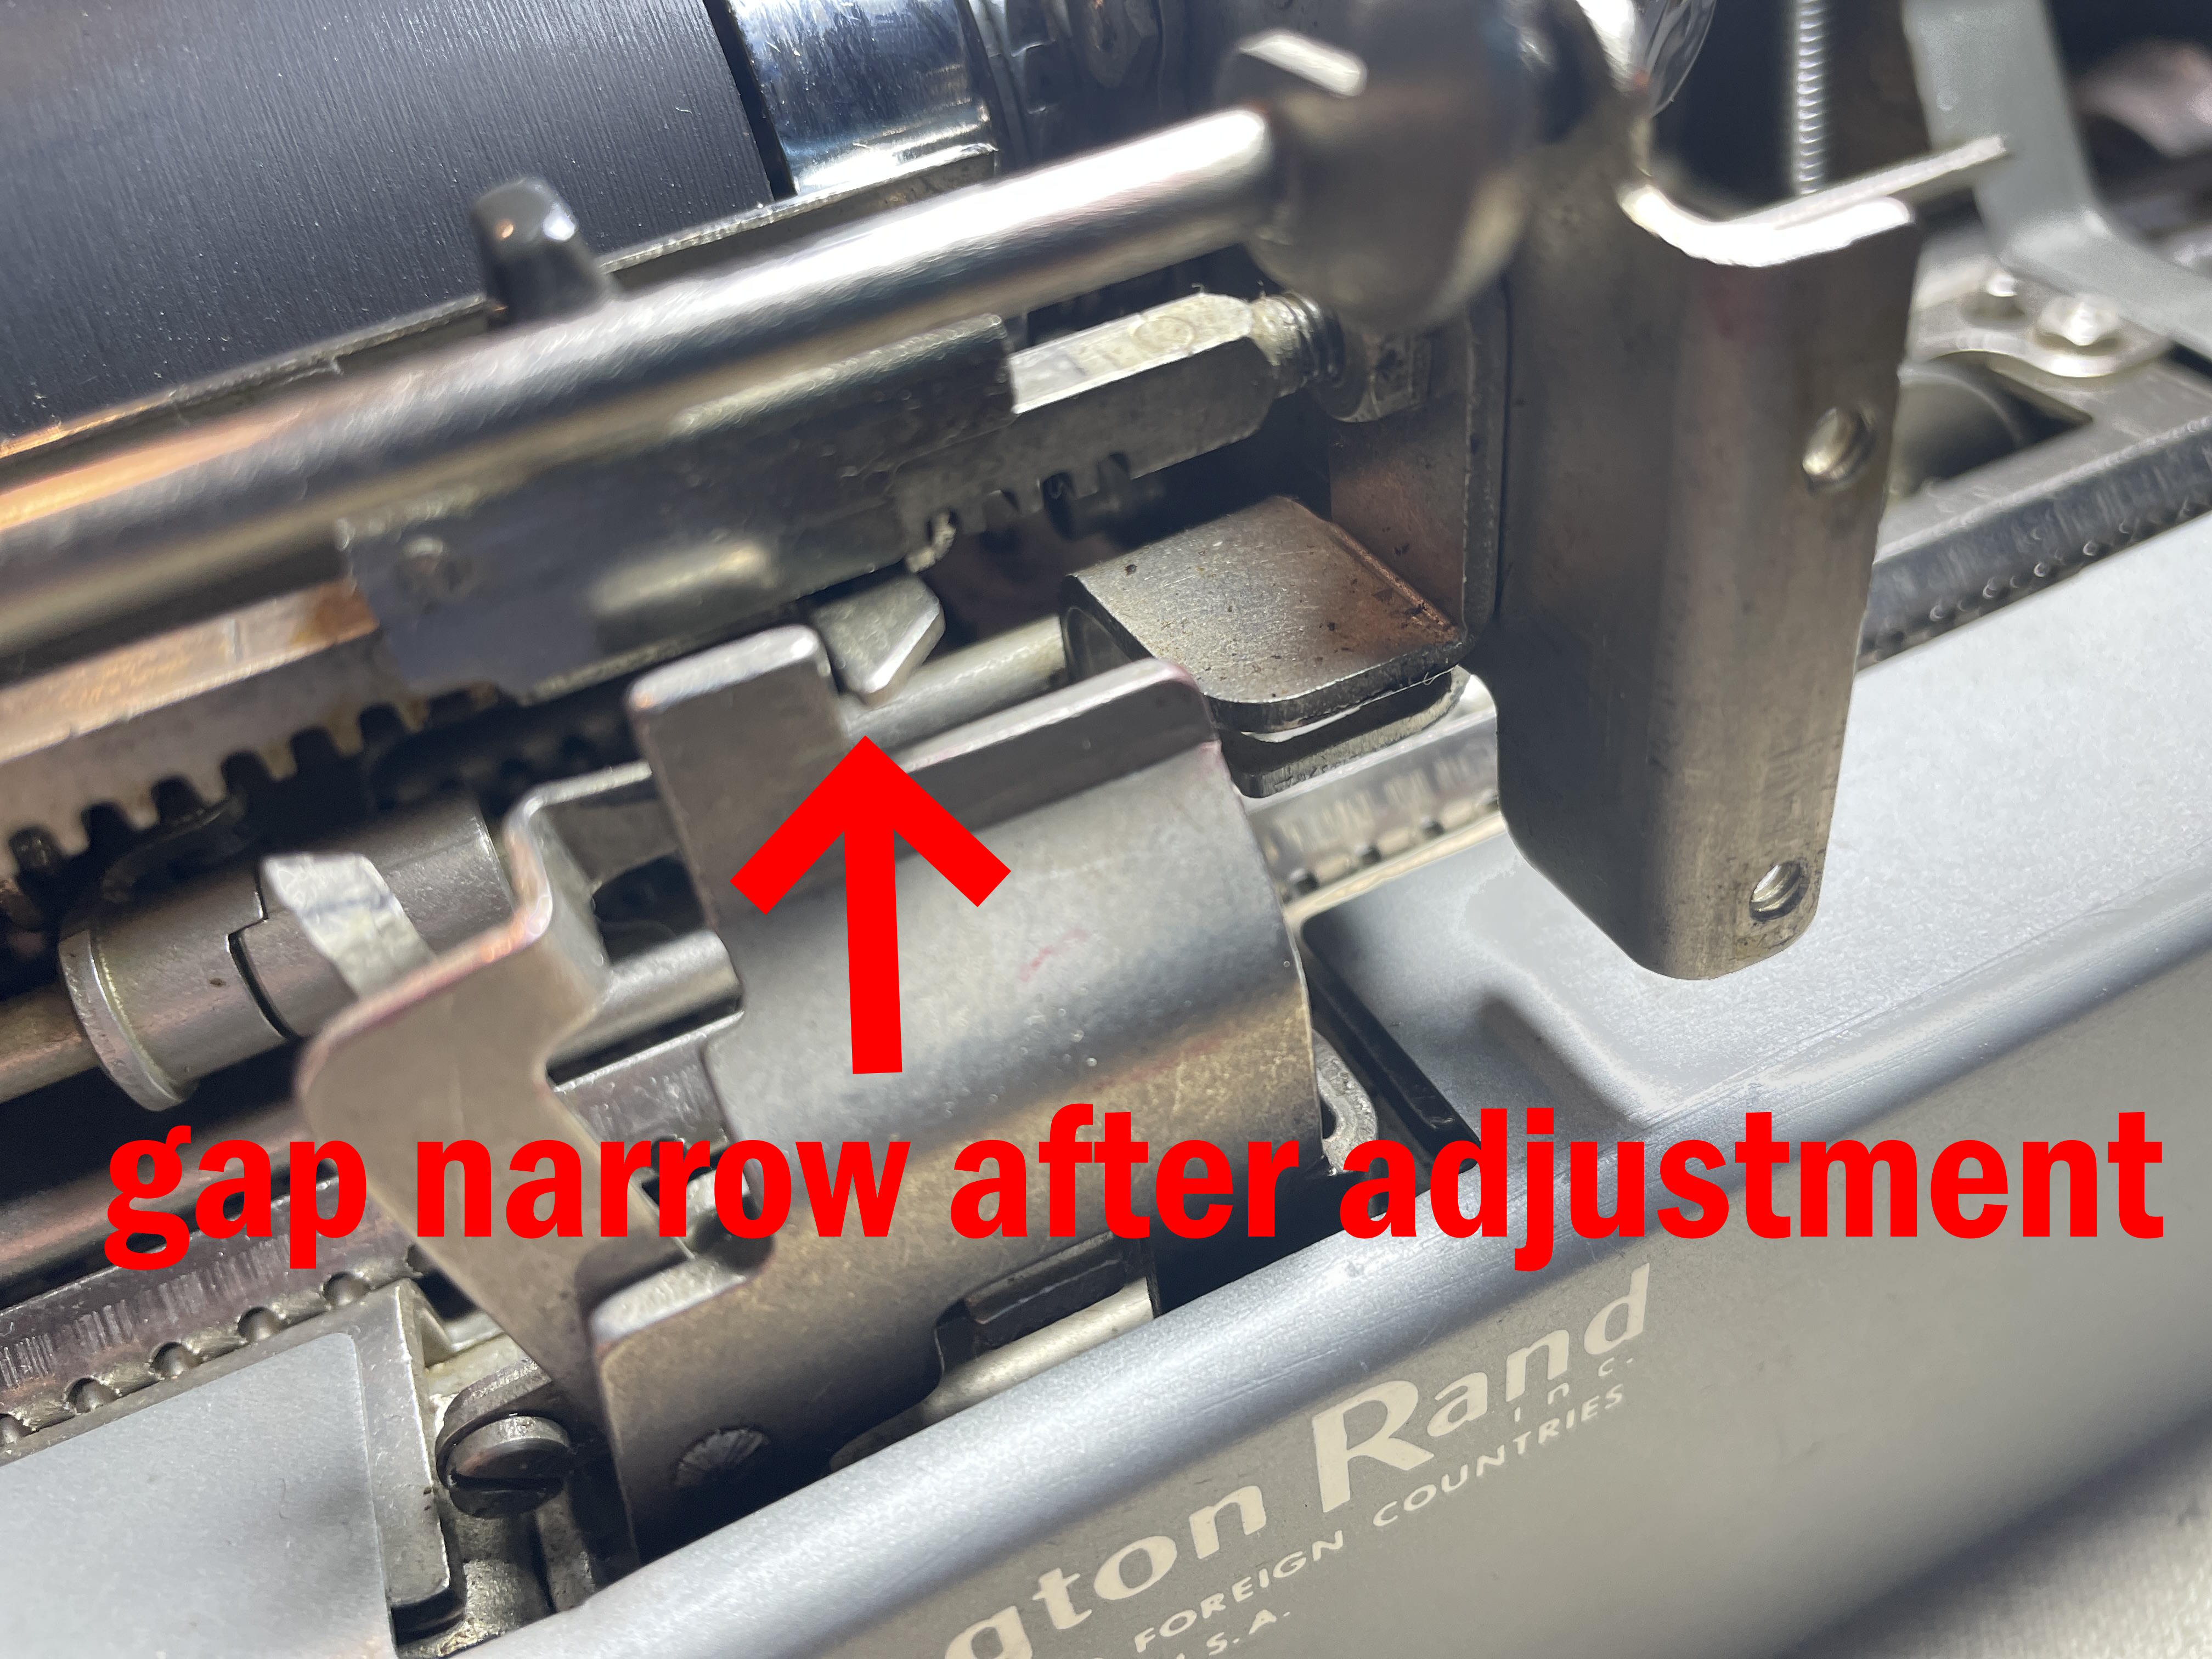
I took off the back and side cover plates and saw that I had a BIG gap between the left margin stop and the margin release bracket. I needed to reposition the margin stop rack to narrow that gap.
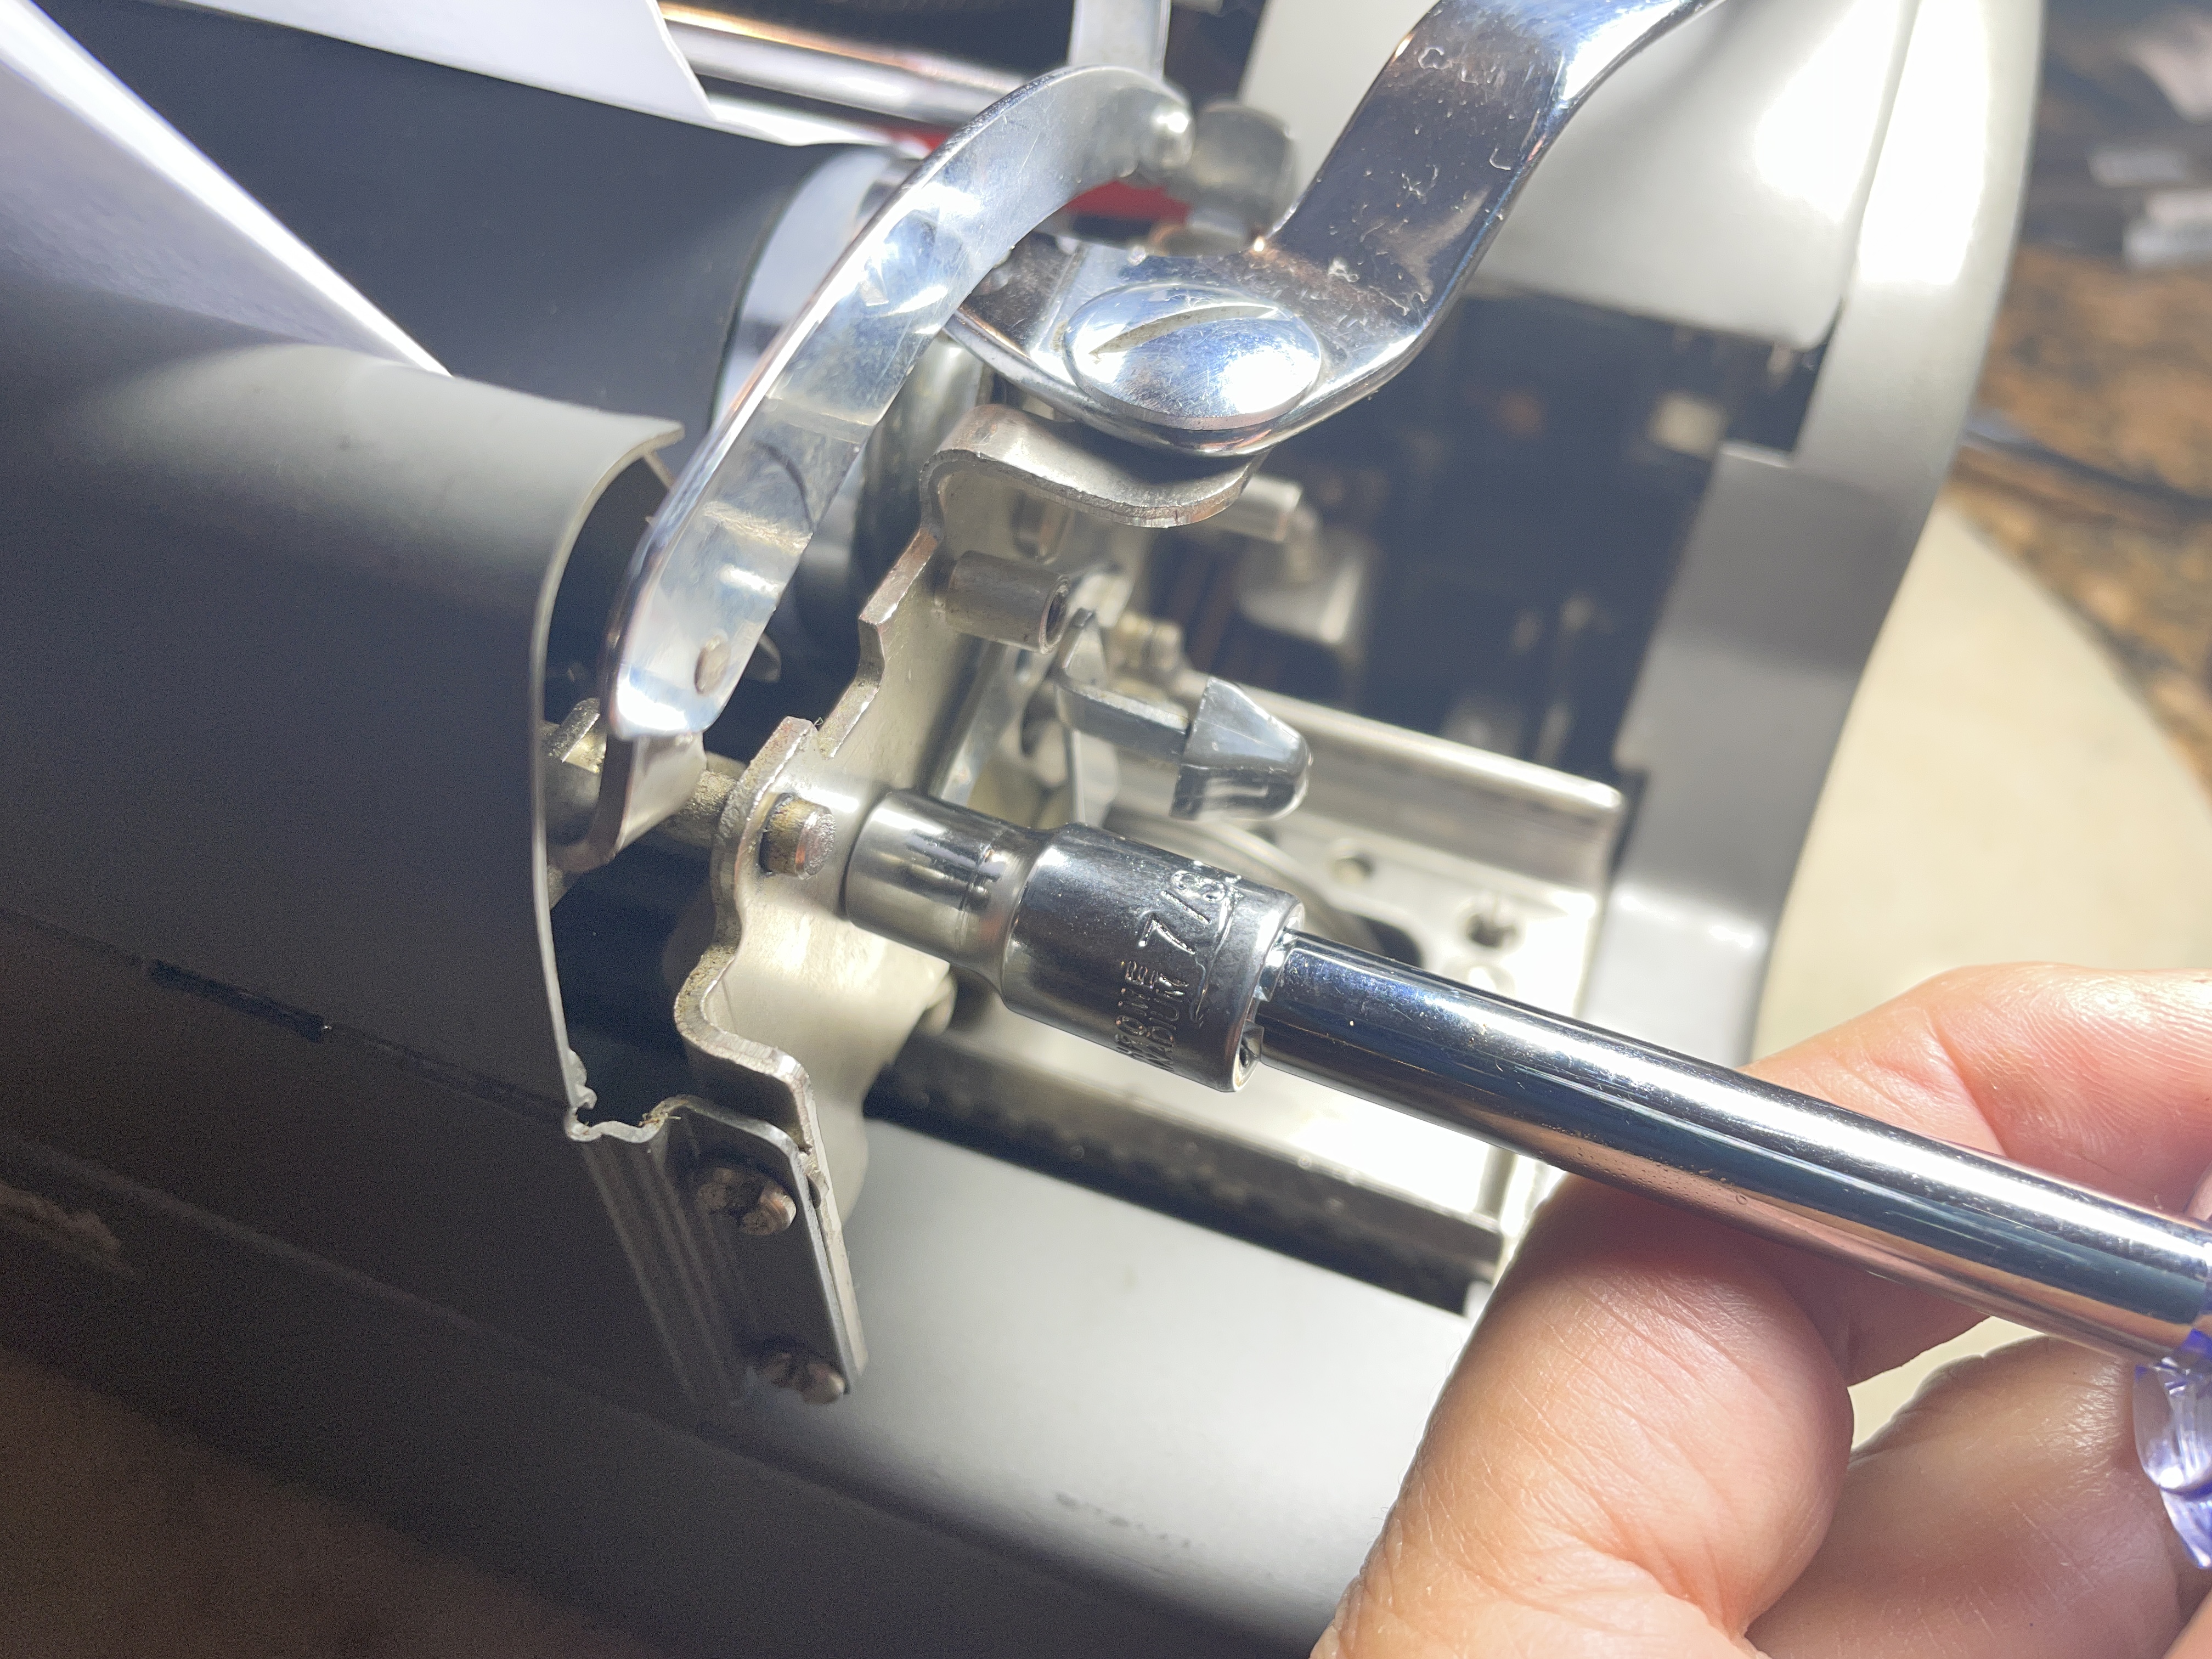
I first loosened the outer lock nuts on both sides of the machine with a 7/32″ nut driver.
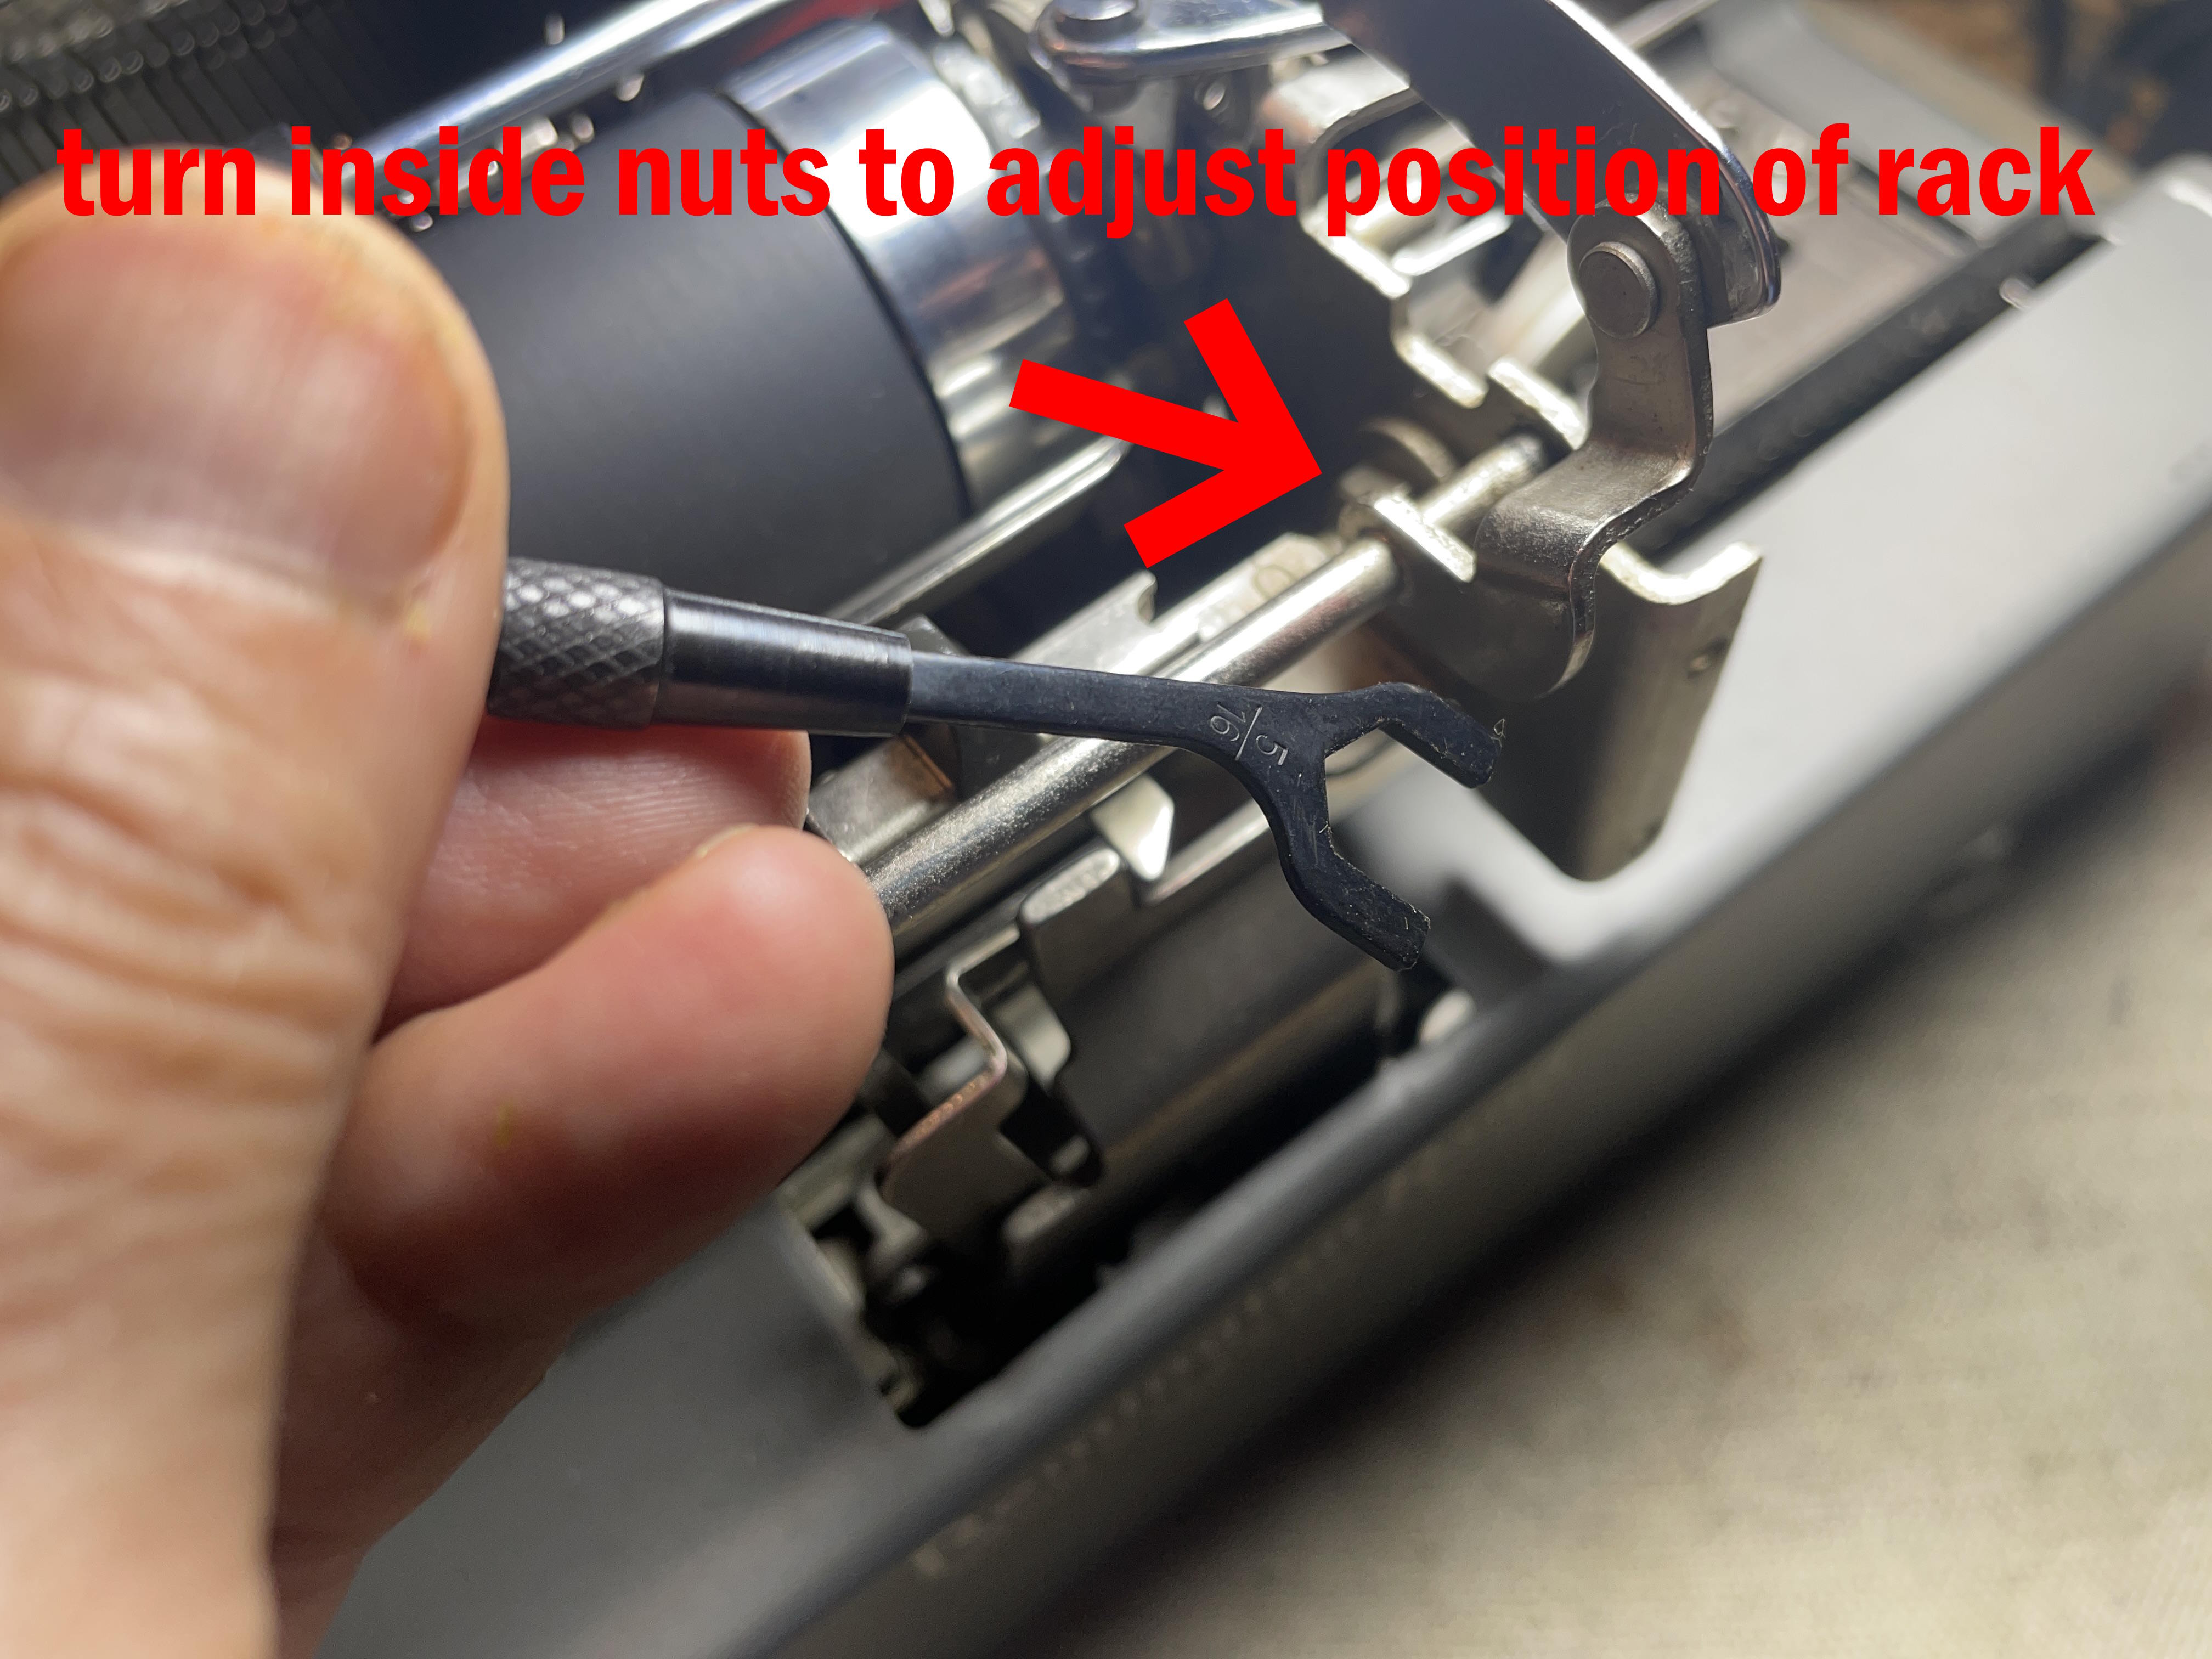
I then adjusted the inner nuts with a 5/16″ wrench and carefully moved the position of the margin stop rack so that the gap between the left margin stop and the margin release bracket was very narrow.
I narrowed the gap between the left margin stop and the margin release bracket.
And my irregular left margin issues were gone:
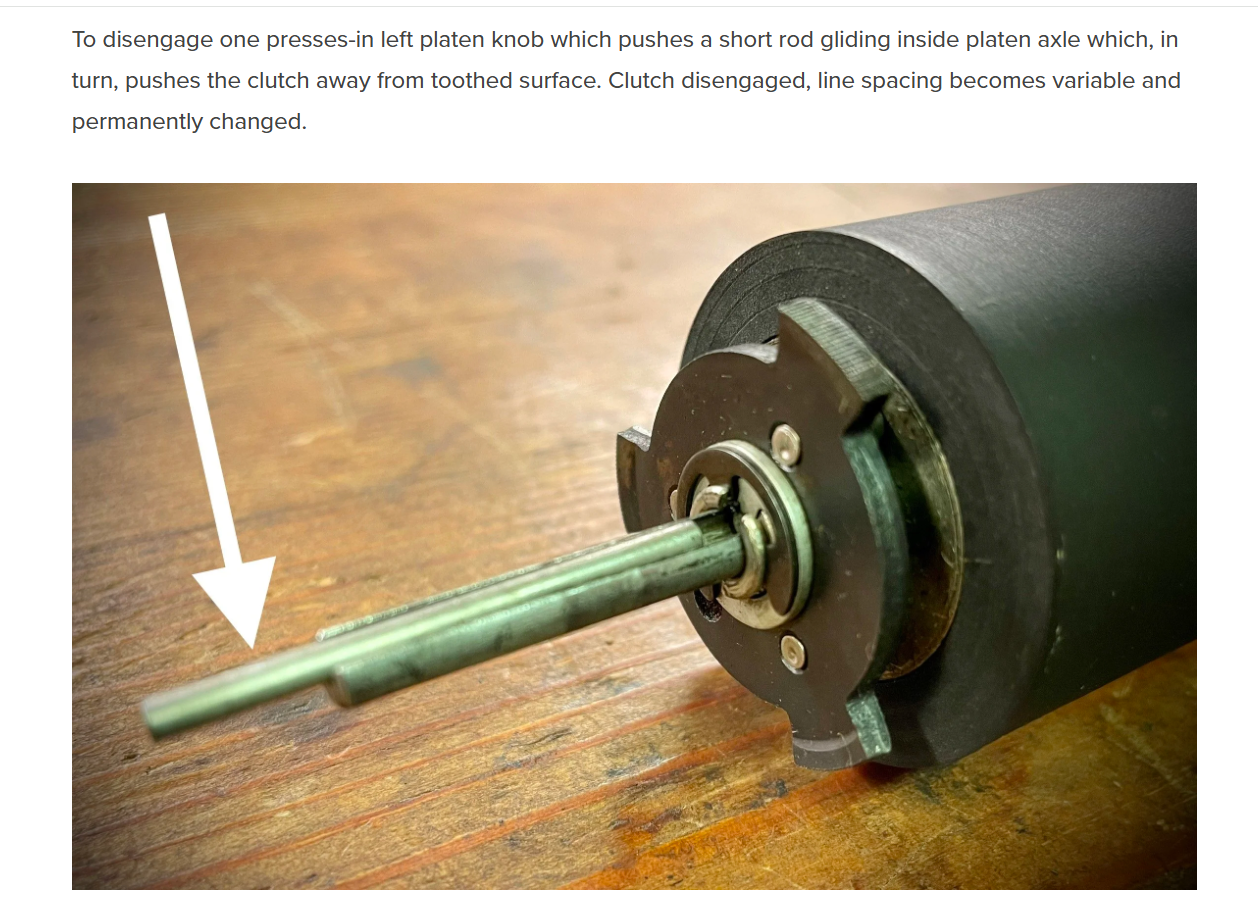
Another nagging problem I noticed once I had the machine all back together was that the variable button was dead. I could use the rachet release lever but the button on the left knob didn’t work. It felt like I was missing a spring or some other part. There was nothing left in my baggie of parts. What was I missing?

I dug around on the internet and found a post about a Quiet-Riter and there it was: I was missing a rod that sits inside the platen rod on the left:
I decided to fabricate a replacement for the missing rod and found a broken tool that fit perfectly in the channel:
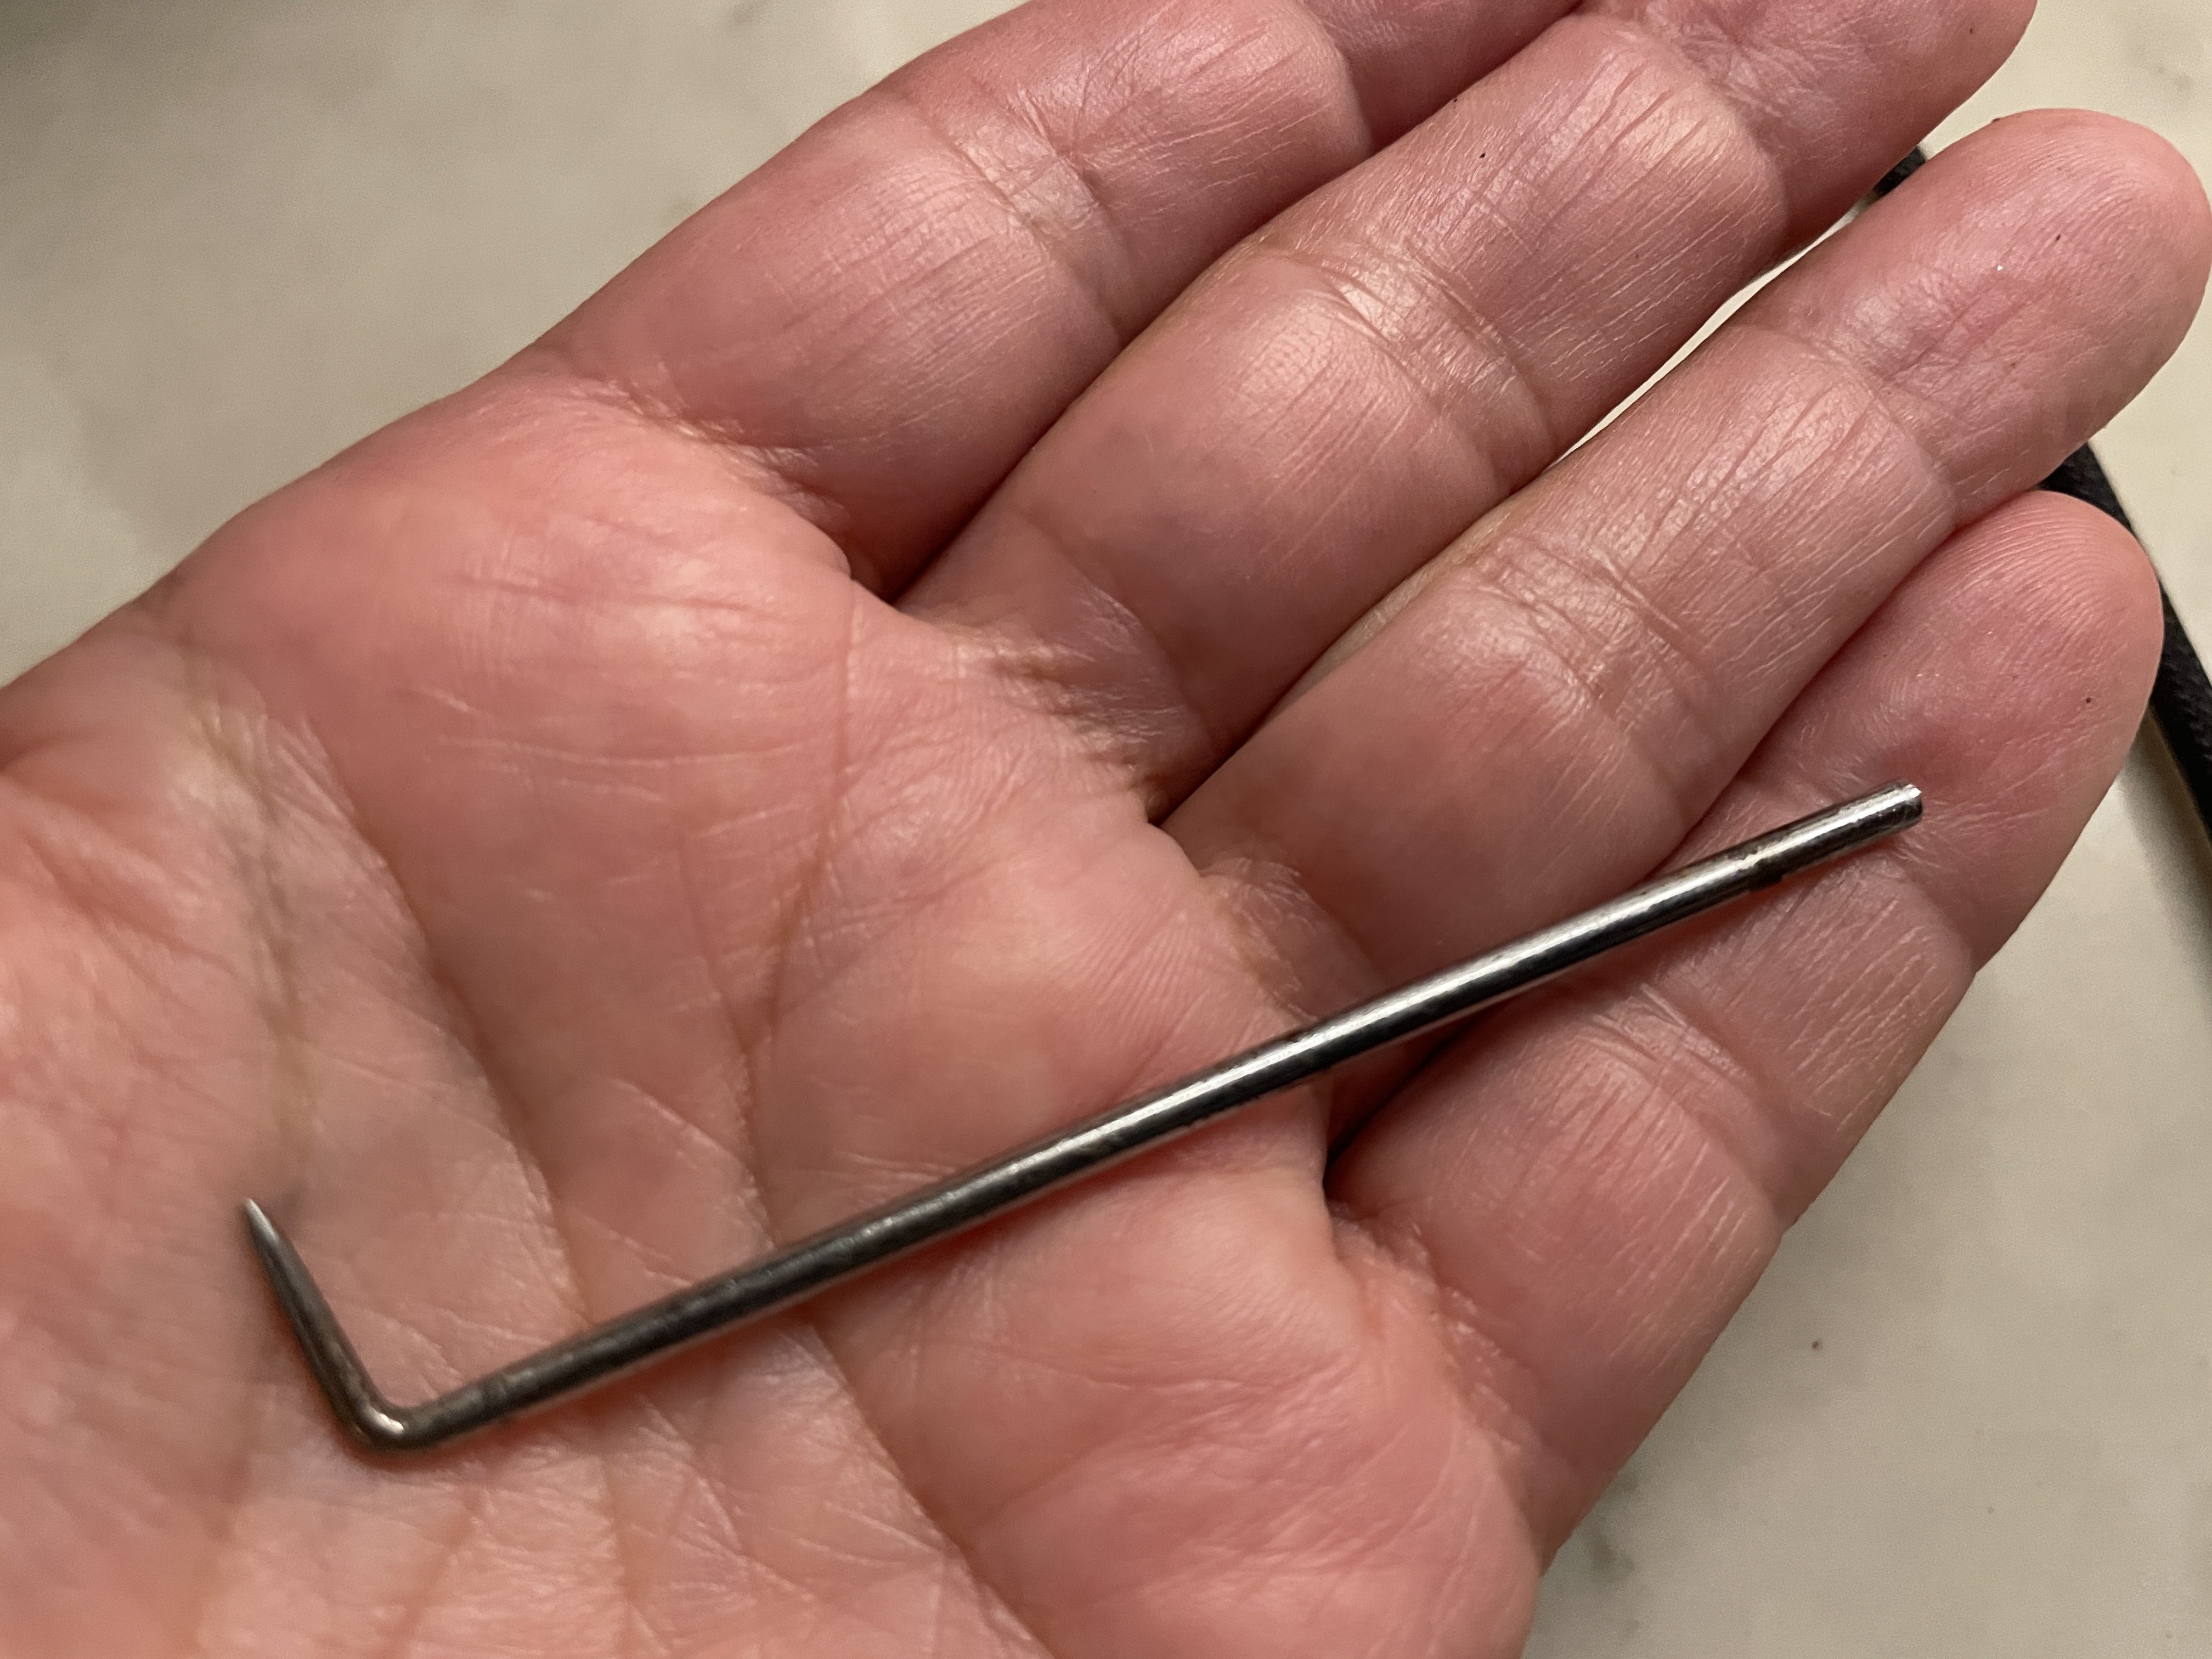
I cut it down with my Dremel.
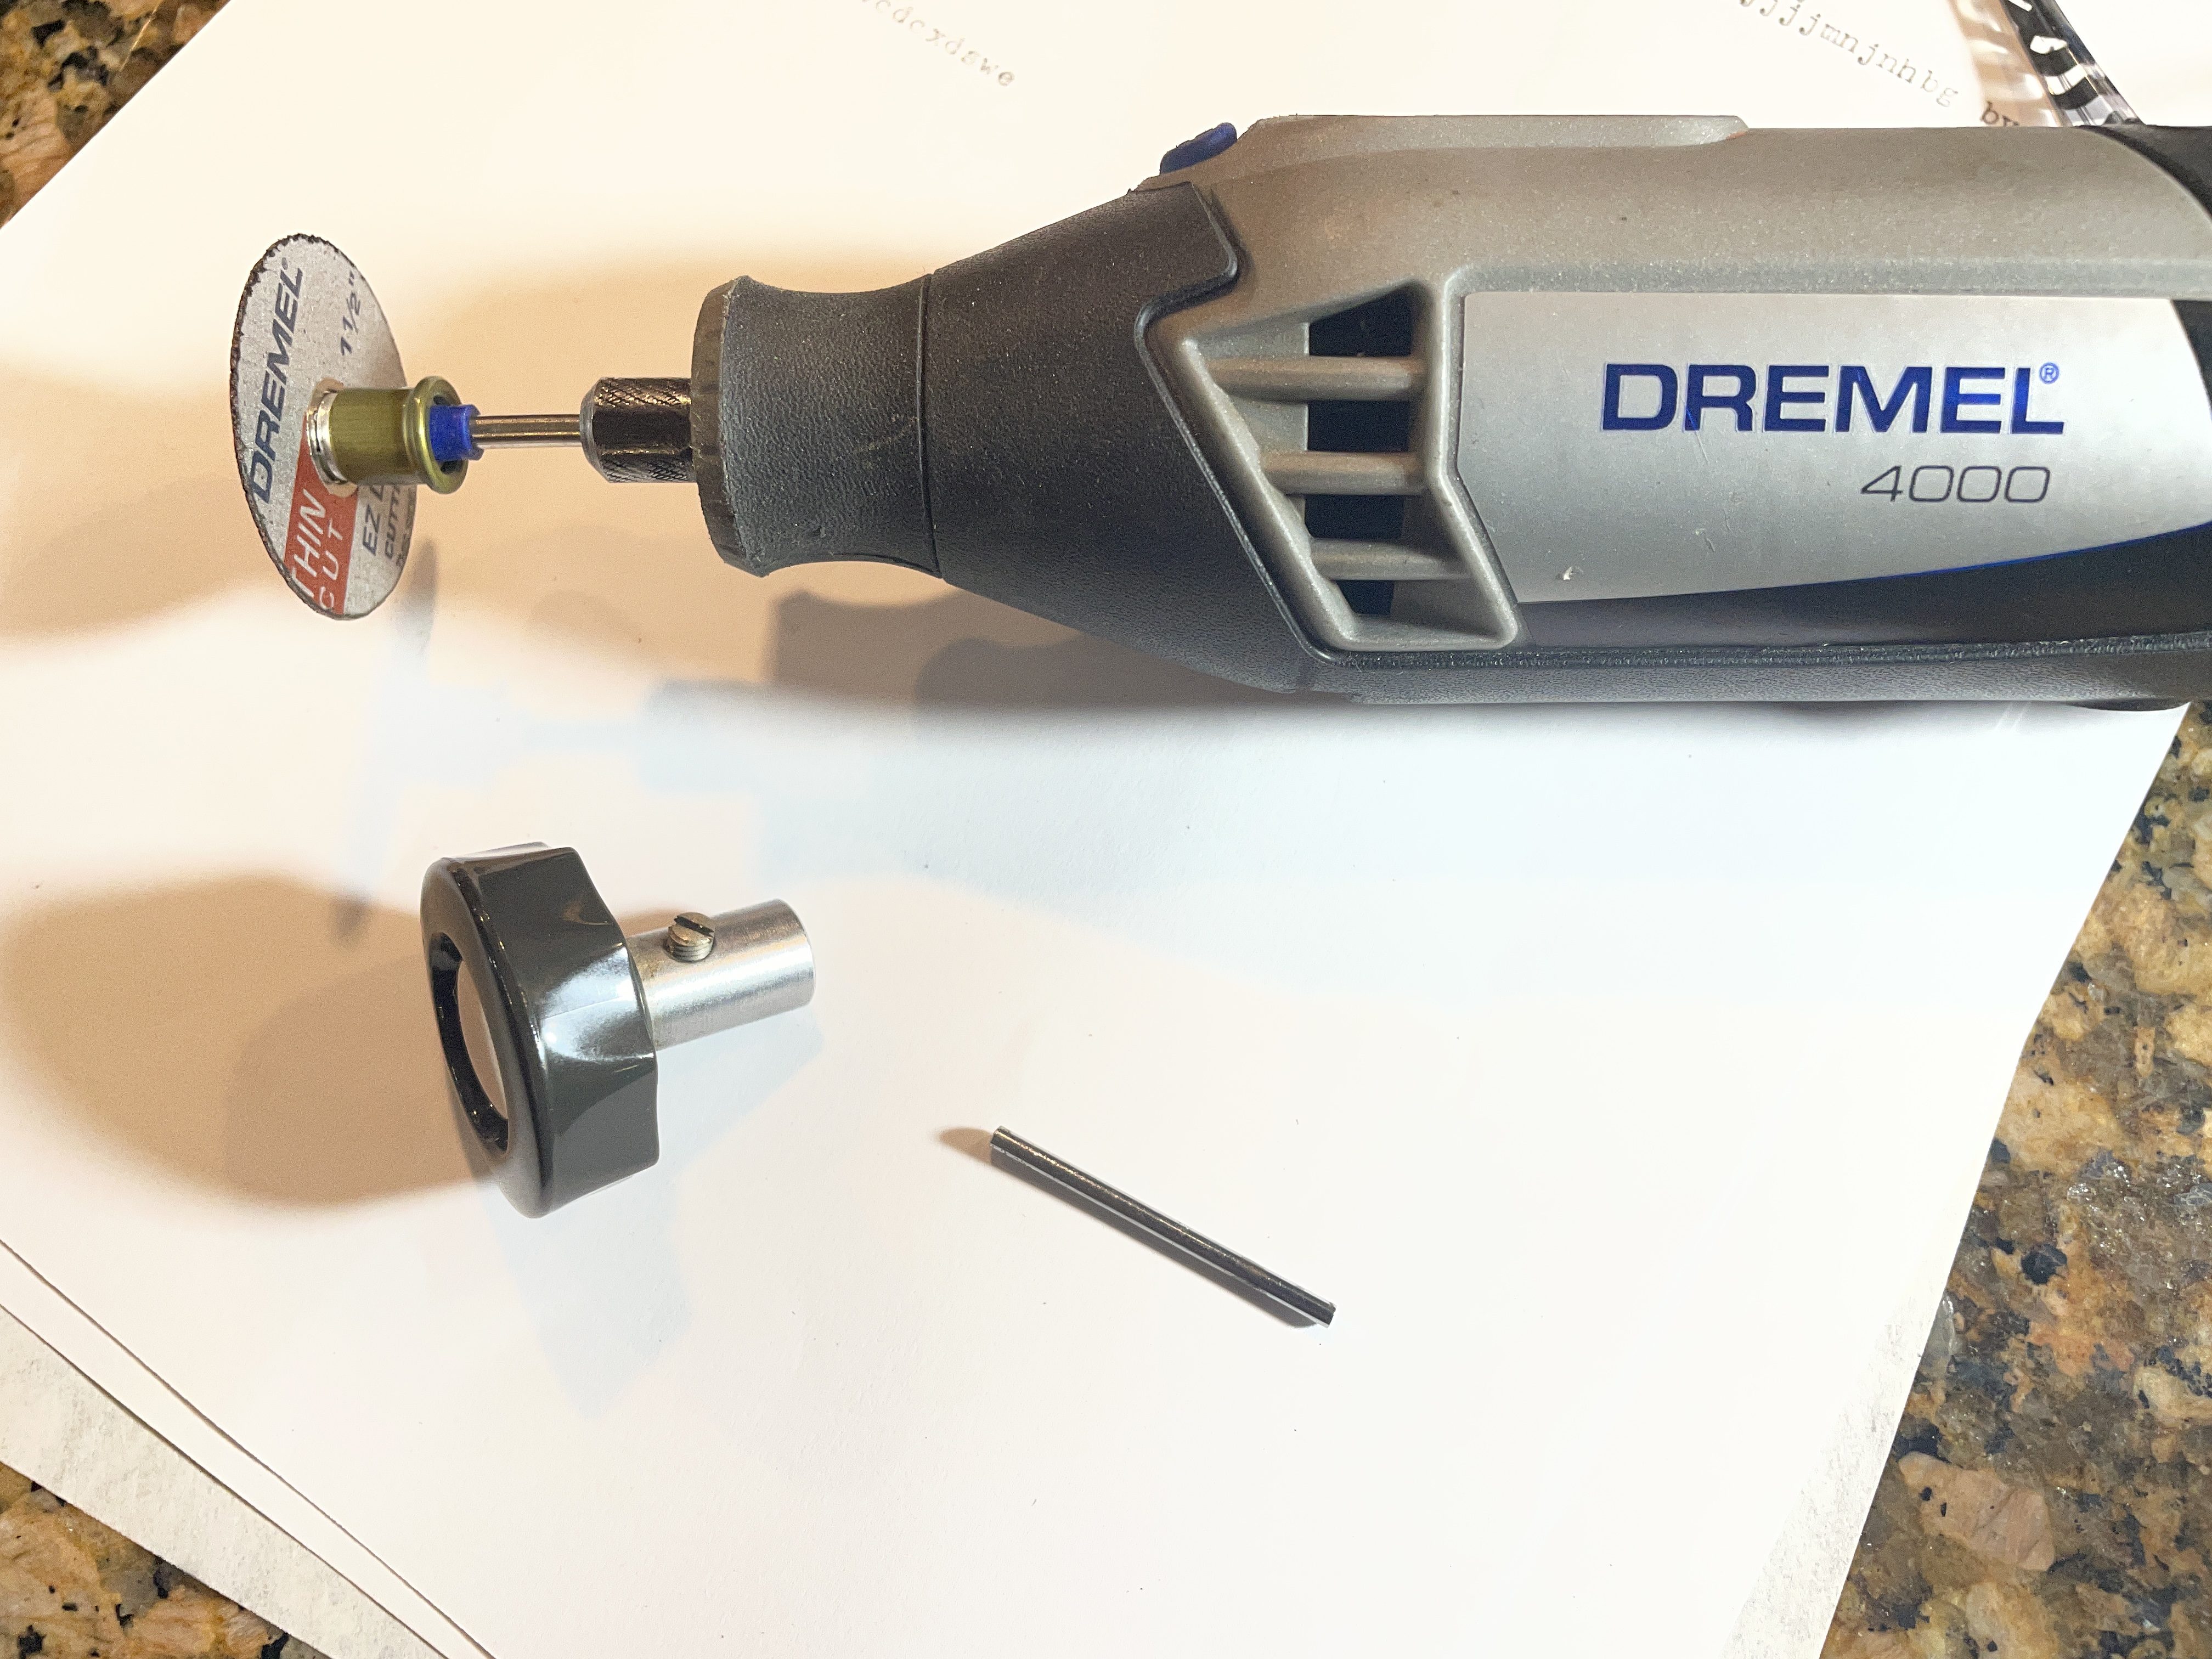
After some trial and error, I got the perfect fit and a functional variable button.
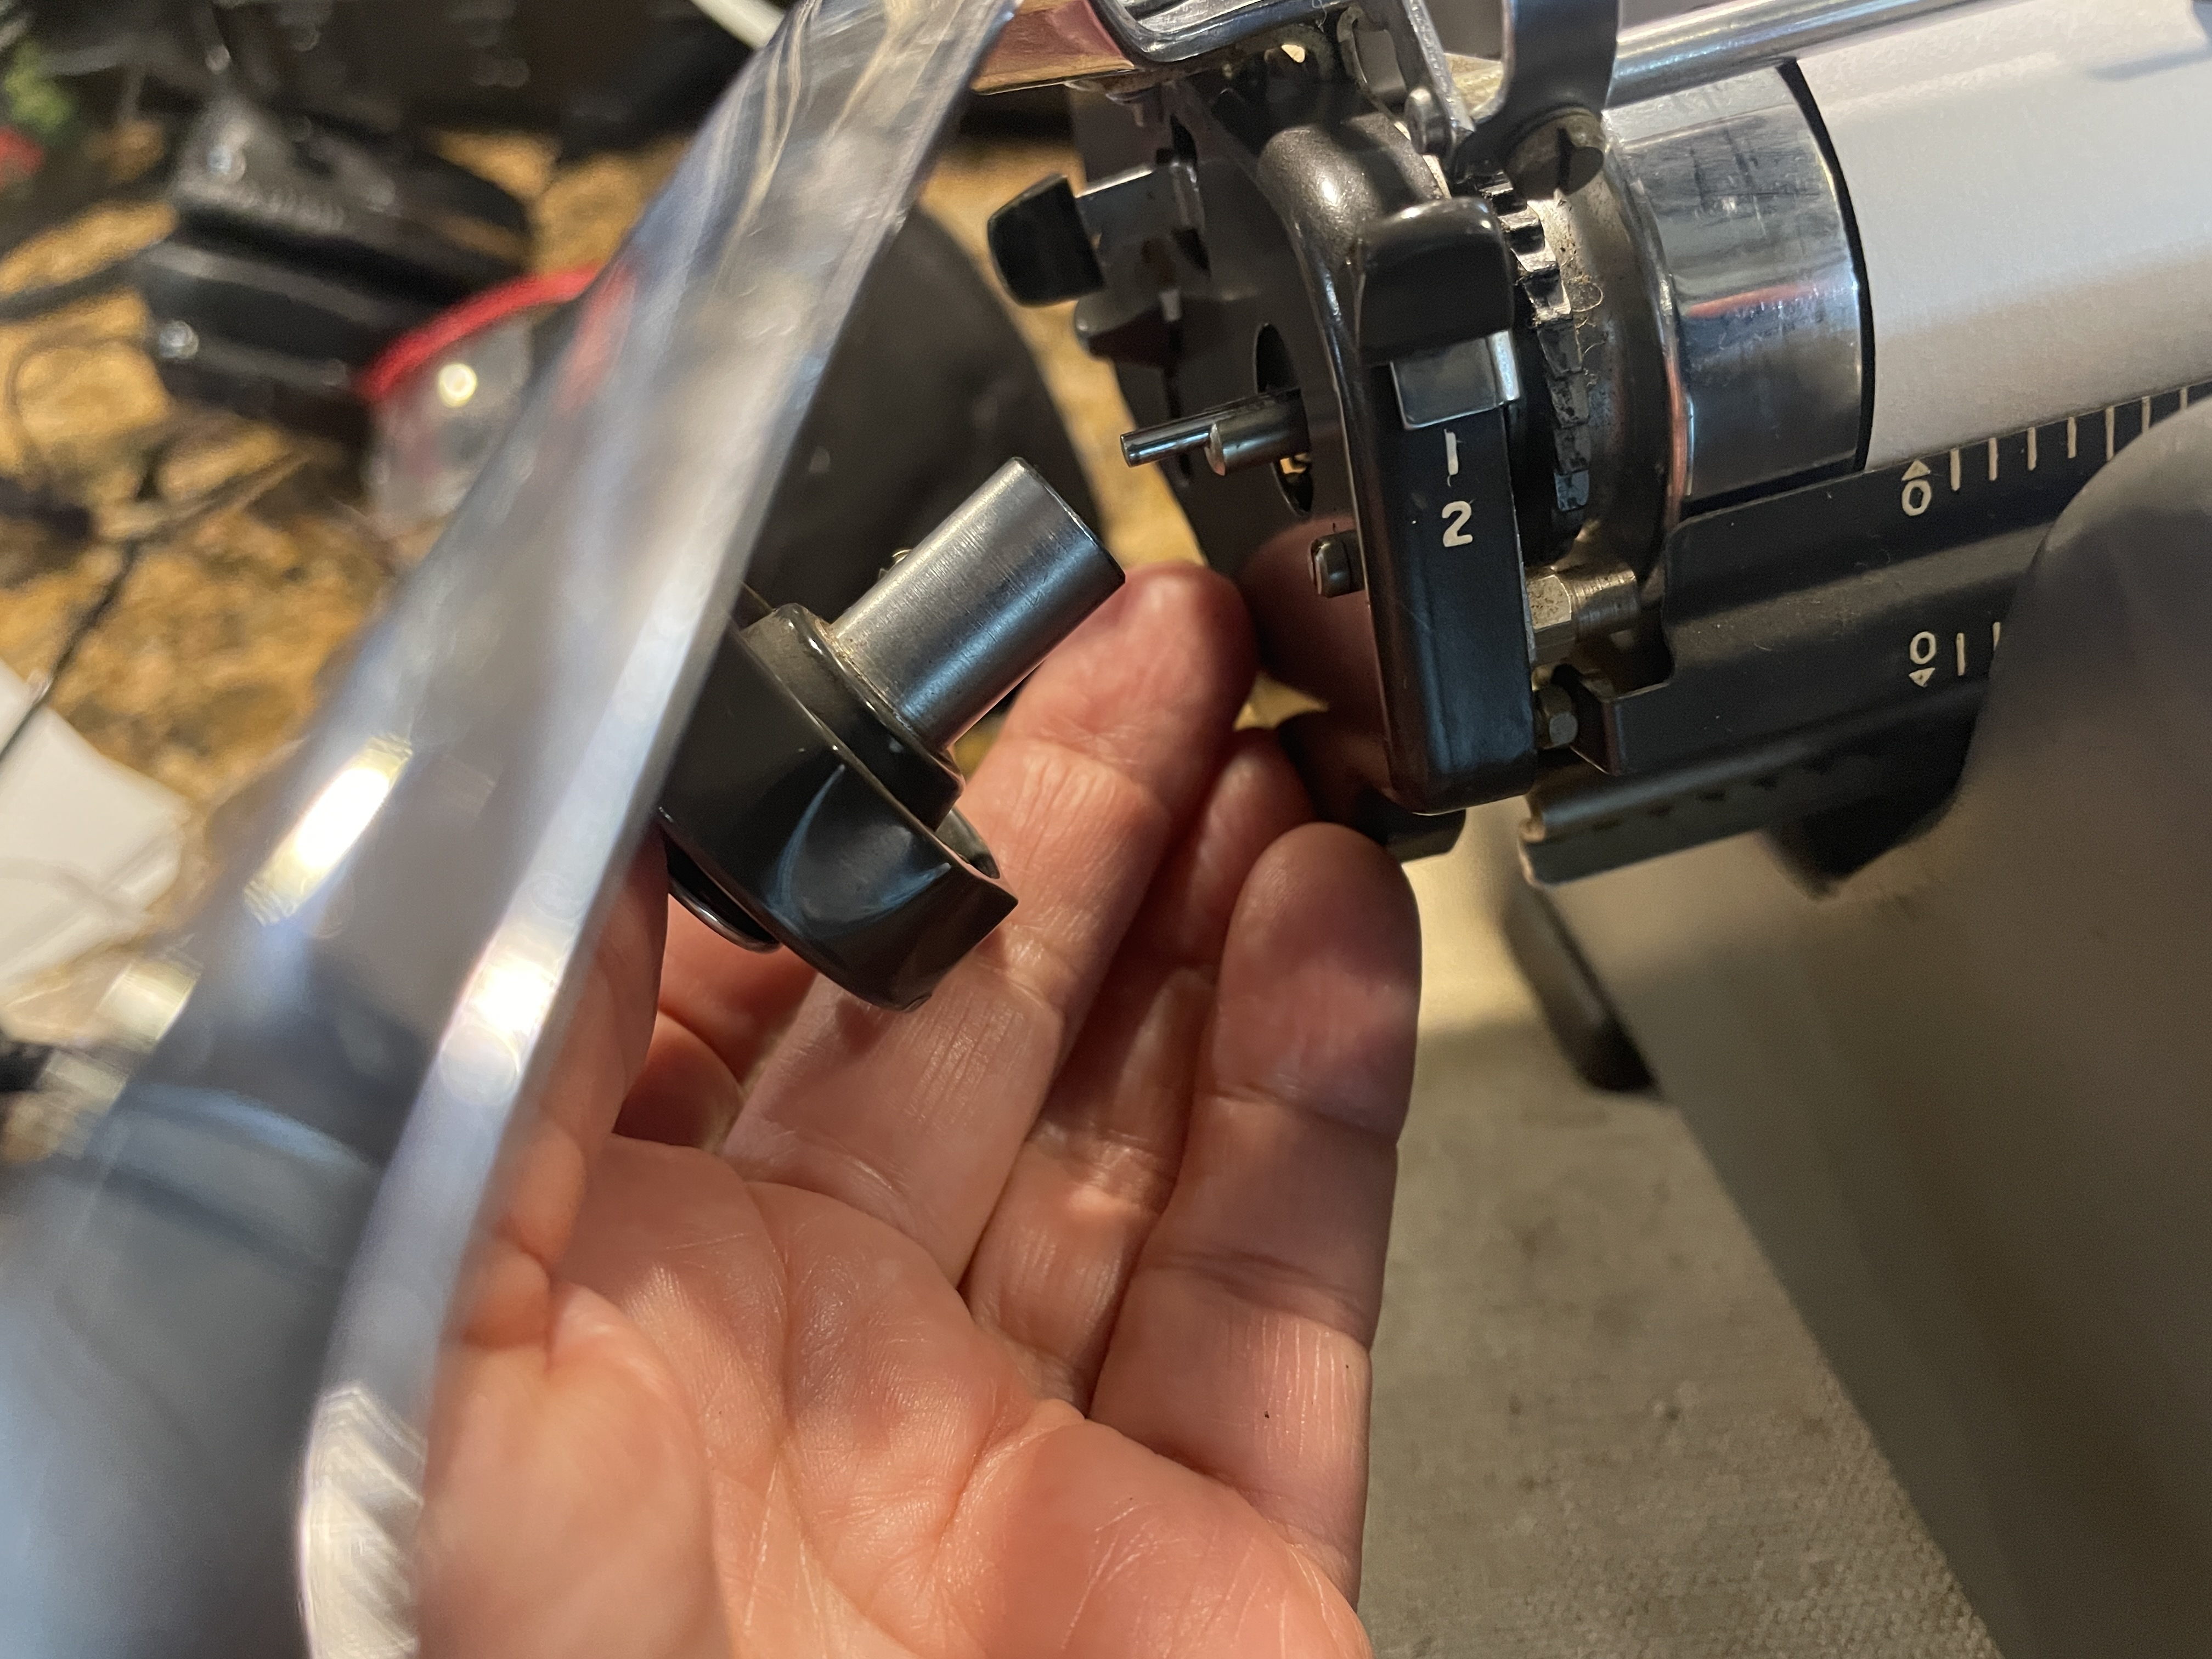
Yay! The typewriter is working very well though I still need to go through my point-by-point checklist.
This All-New does have some cosmetic issues. The paint on this one is a little battered in spots.
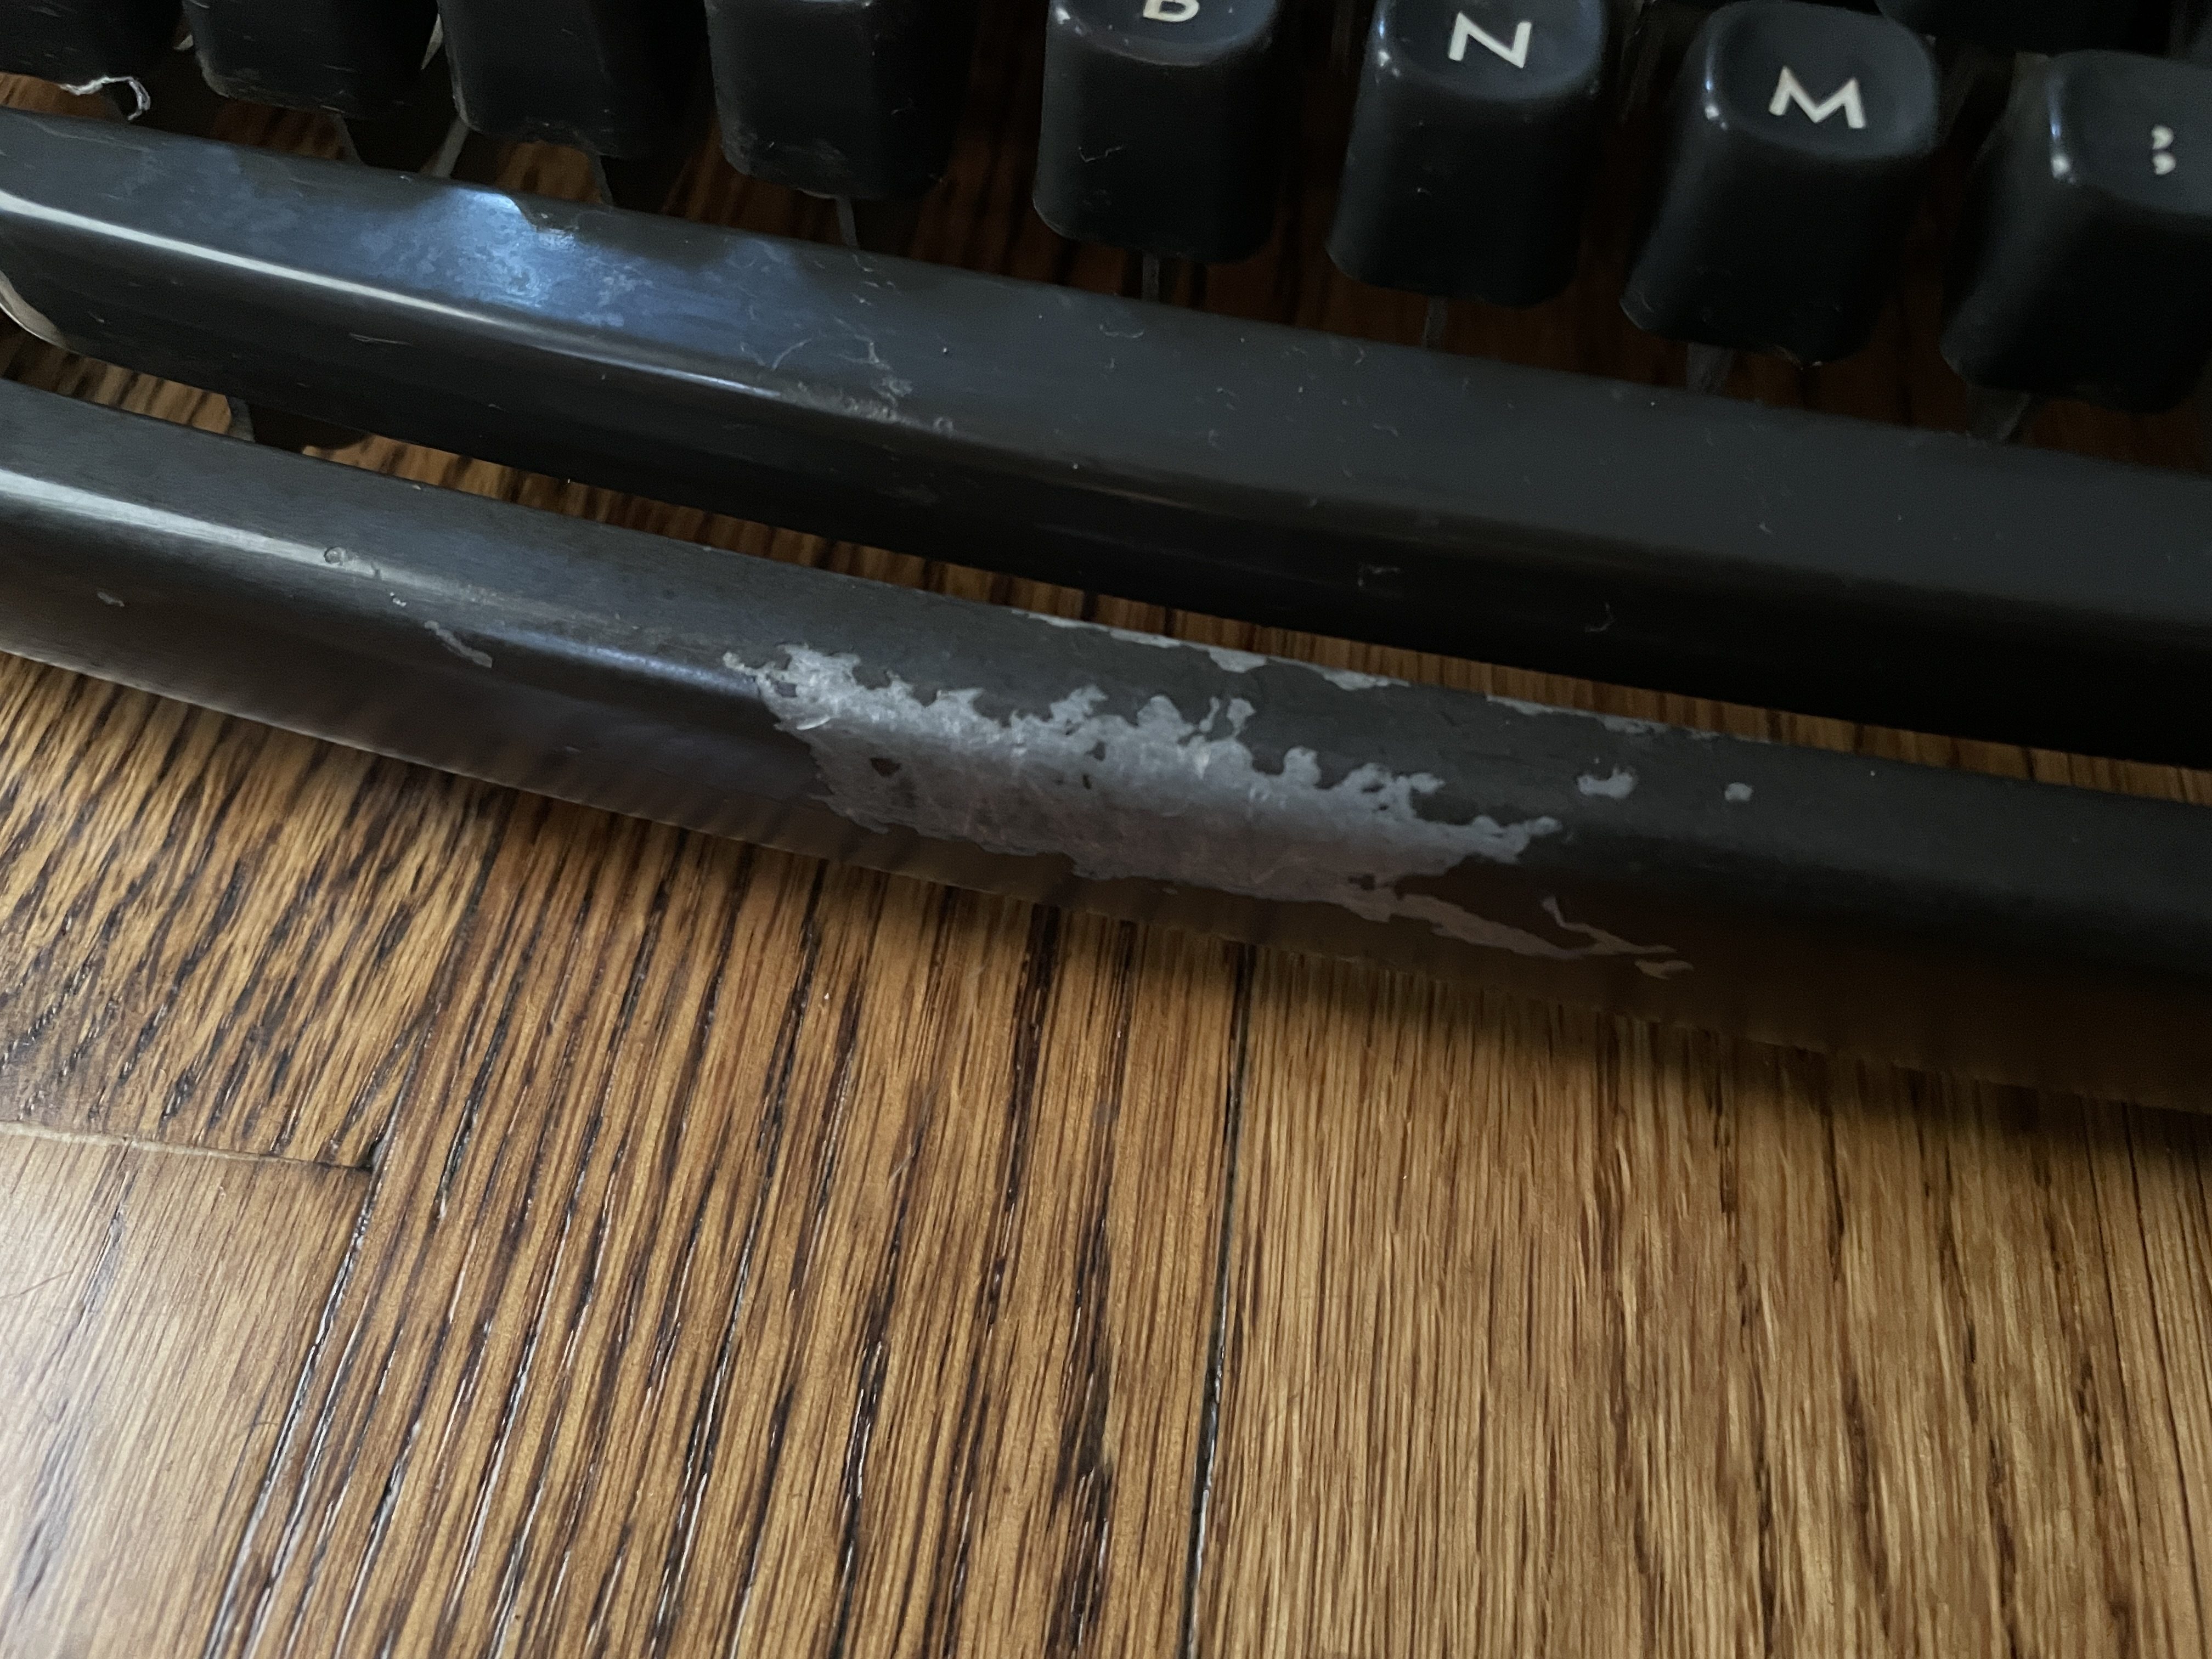
Fortunately it’s lead-negative—at least it is on this chin piece:
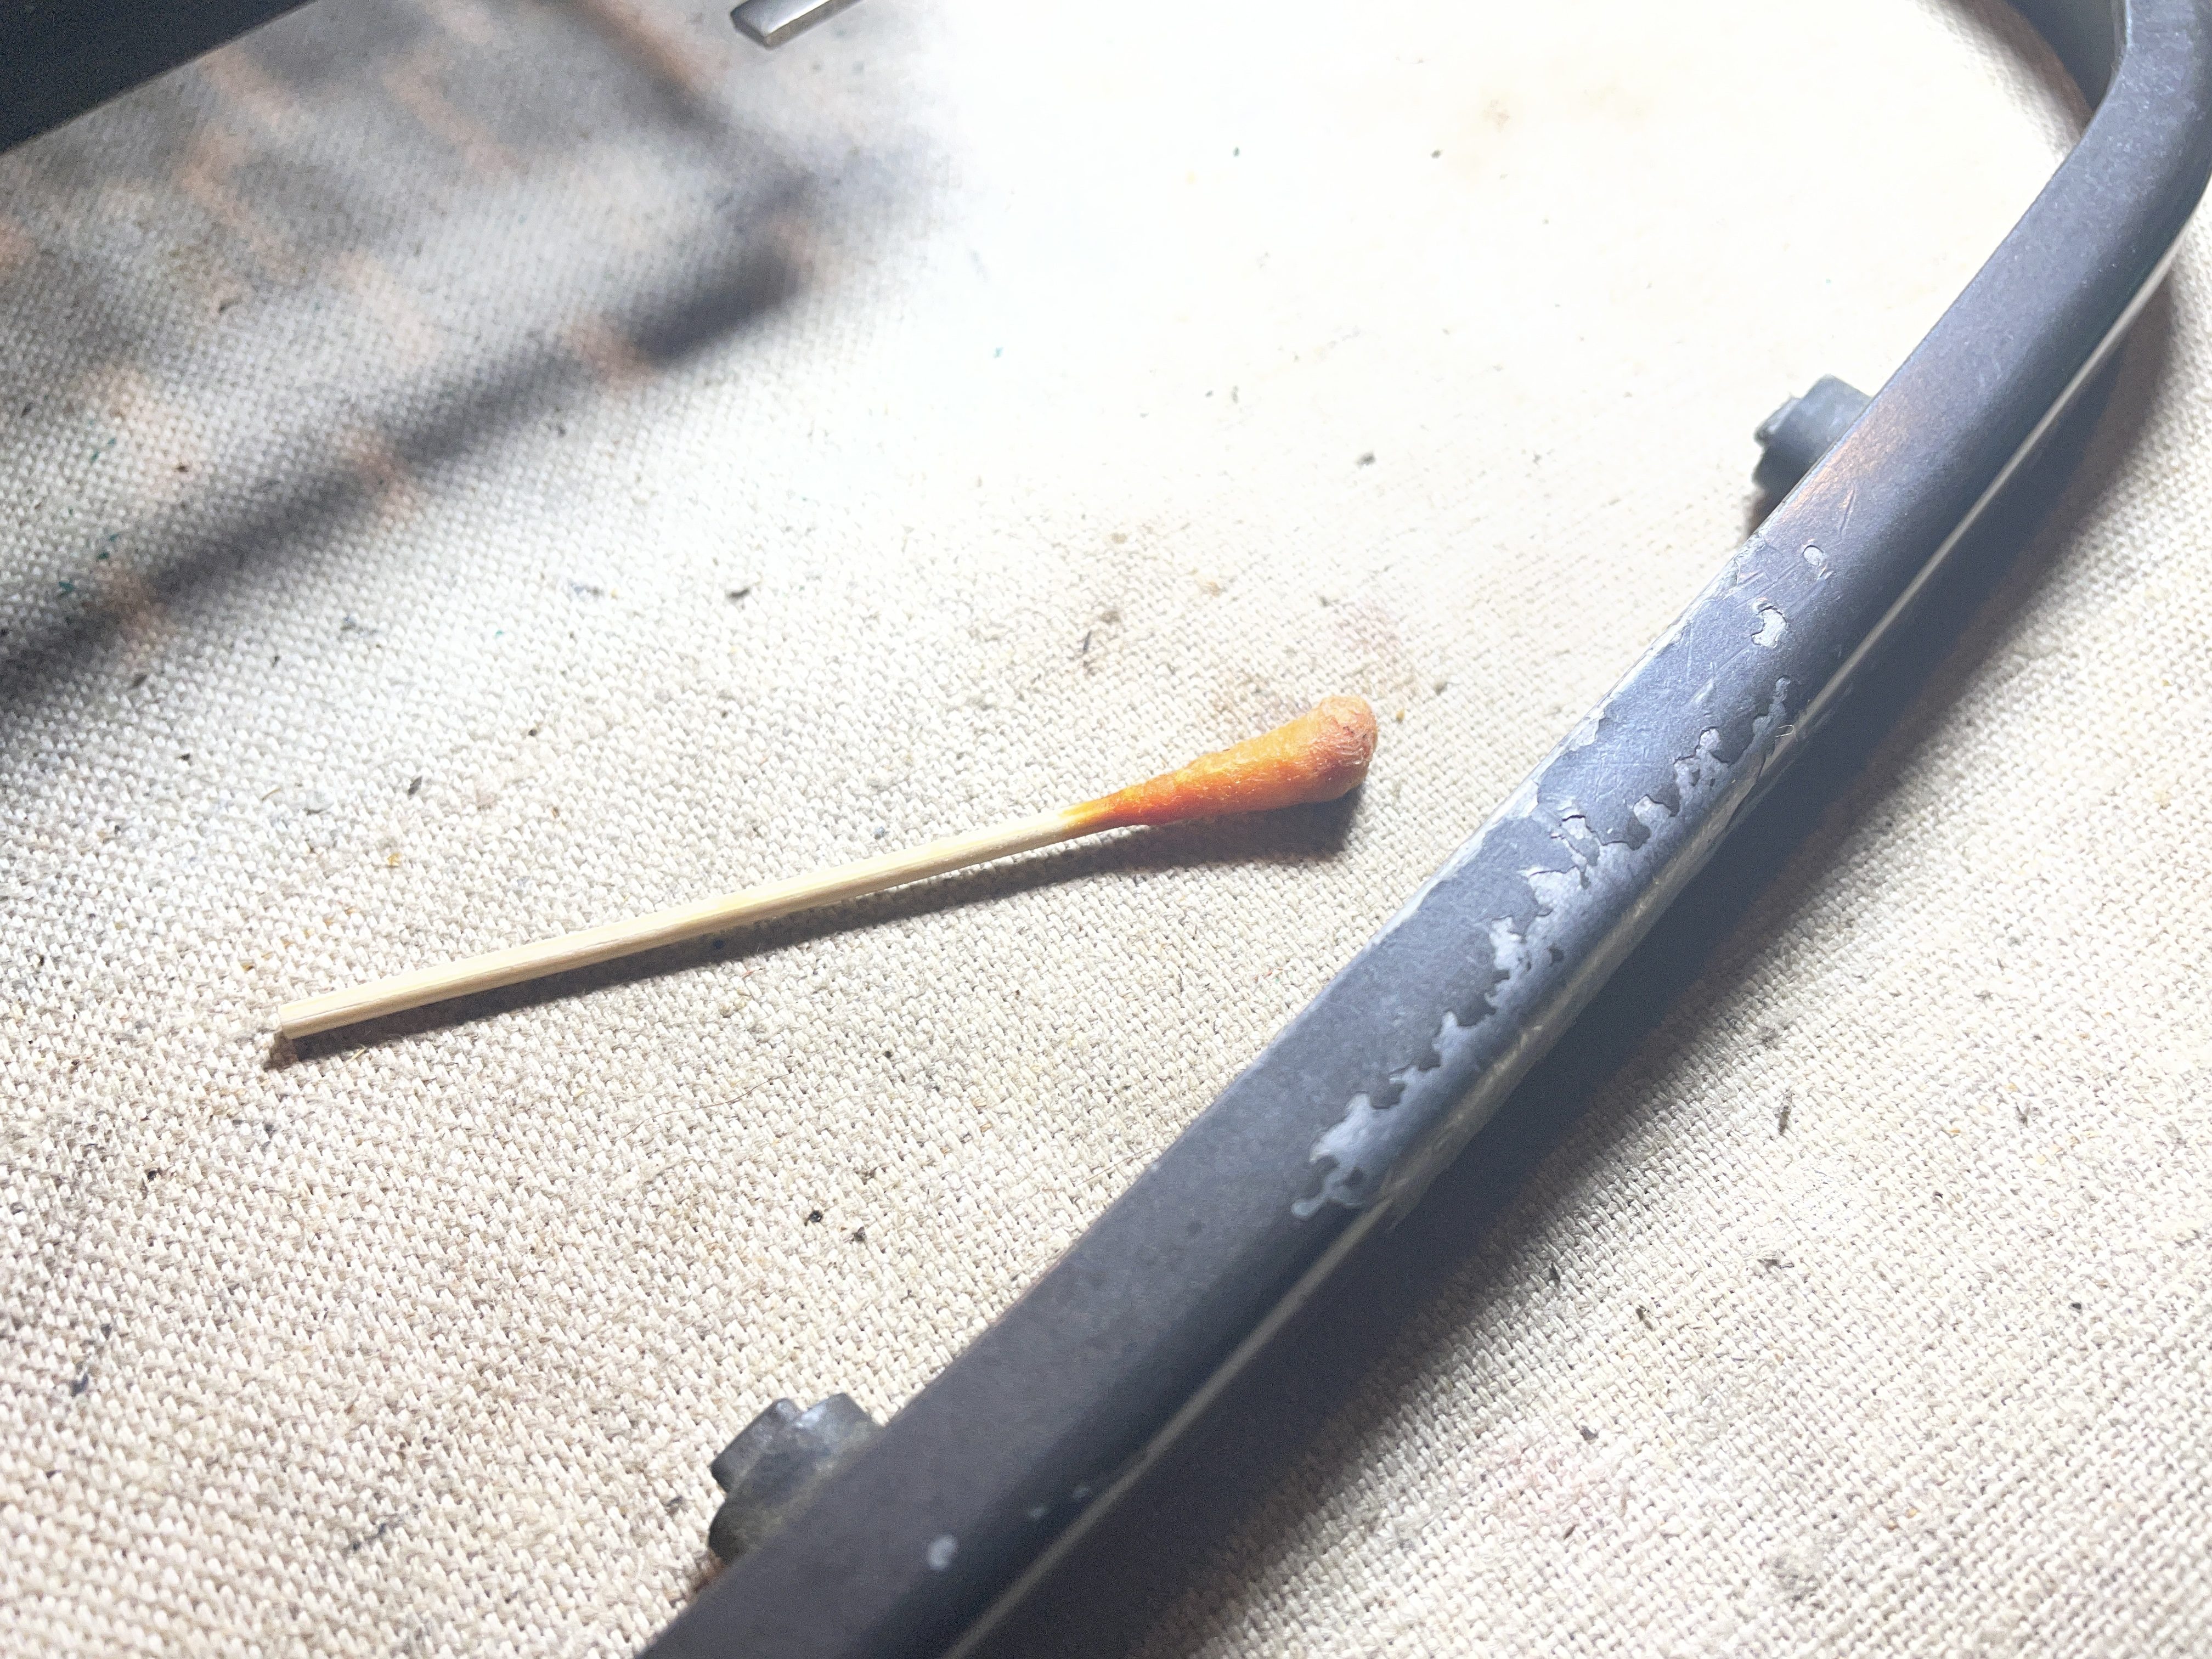
I think that I am going to powder coat the chin piece, probably the original rich charcoal color. Last week, my husband and I went to a powder coating class at a local makers space, Nova Labs, in Fairfax Virginia. Our practice pieces of bent metal that we did in class turned out beautifully despite our newbie technique:
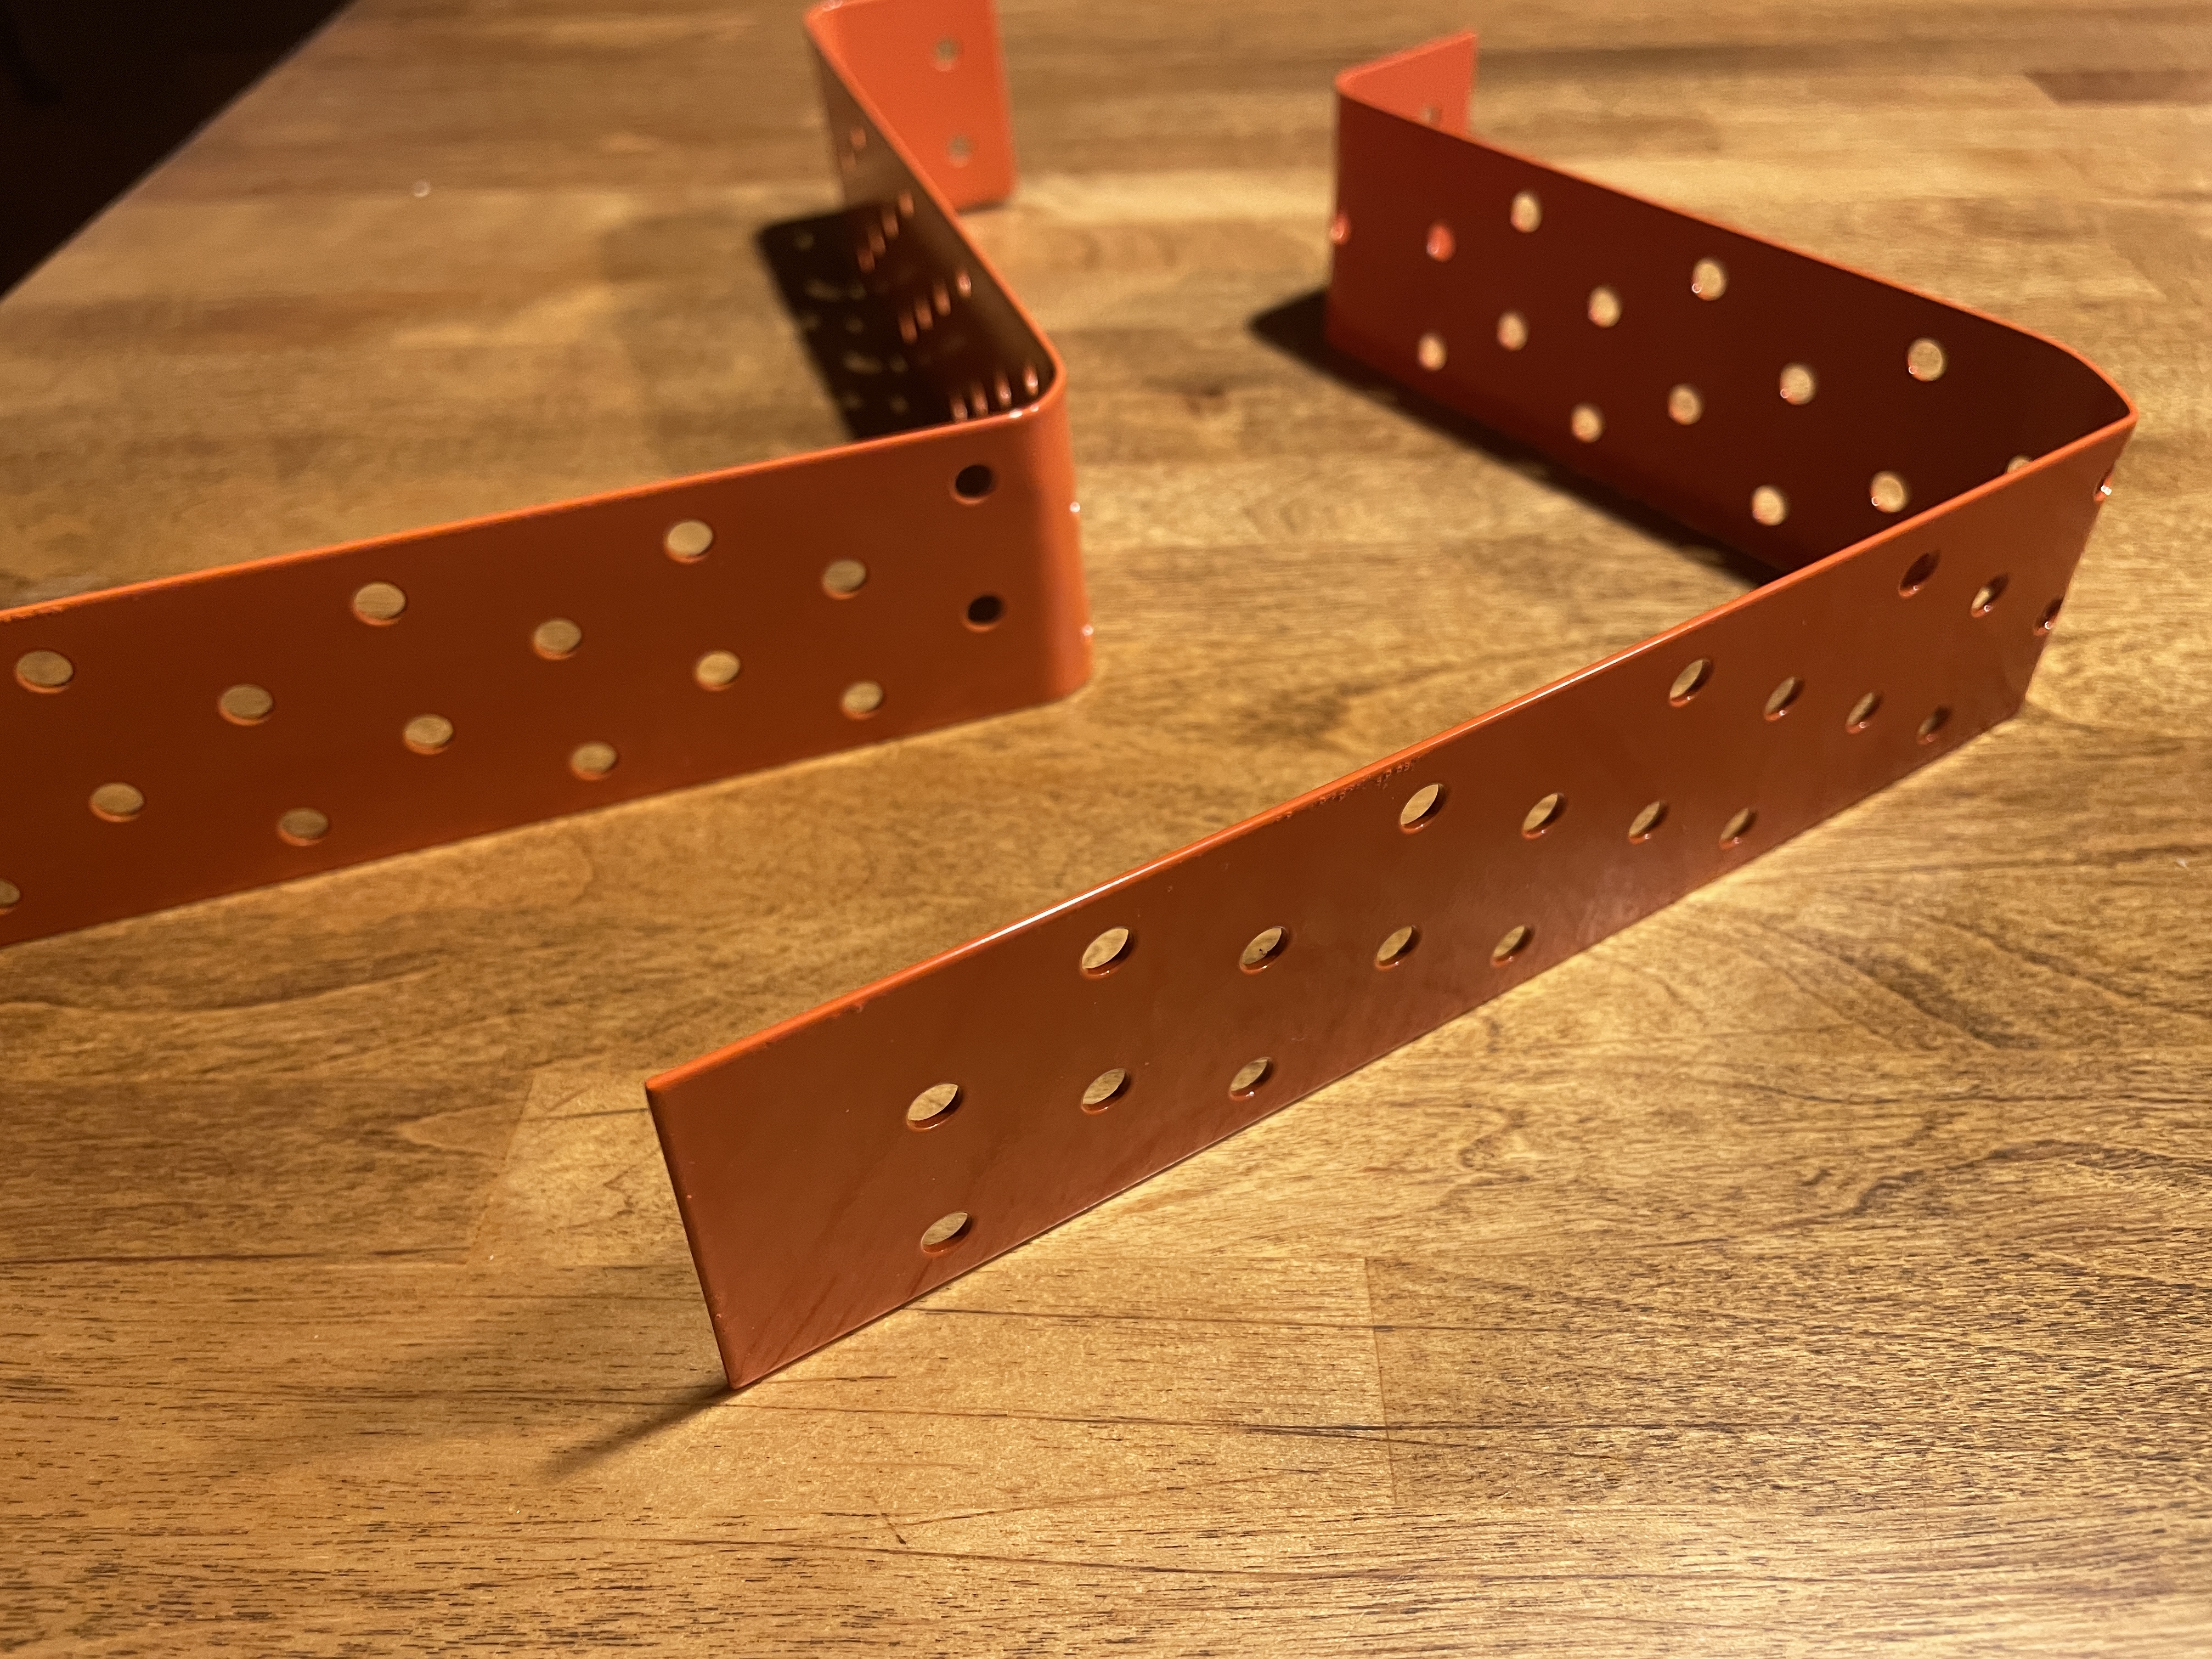
Powder coating produces a tough, beautiful finish. I did it once before about 11 years ago on a Voss with excellent results.
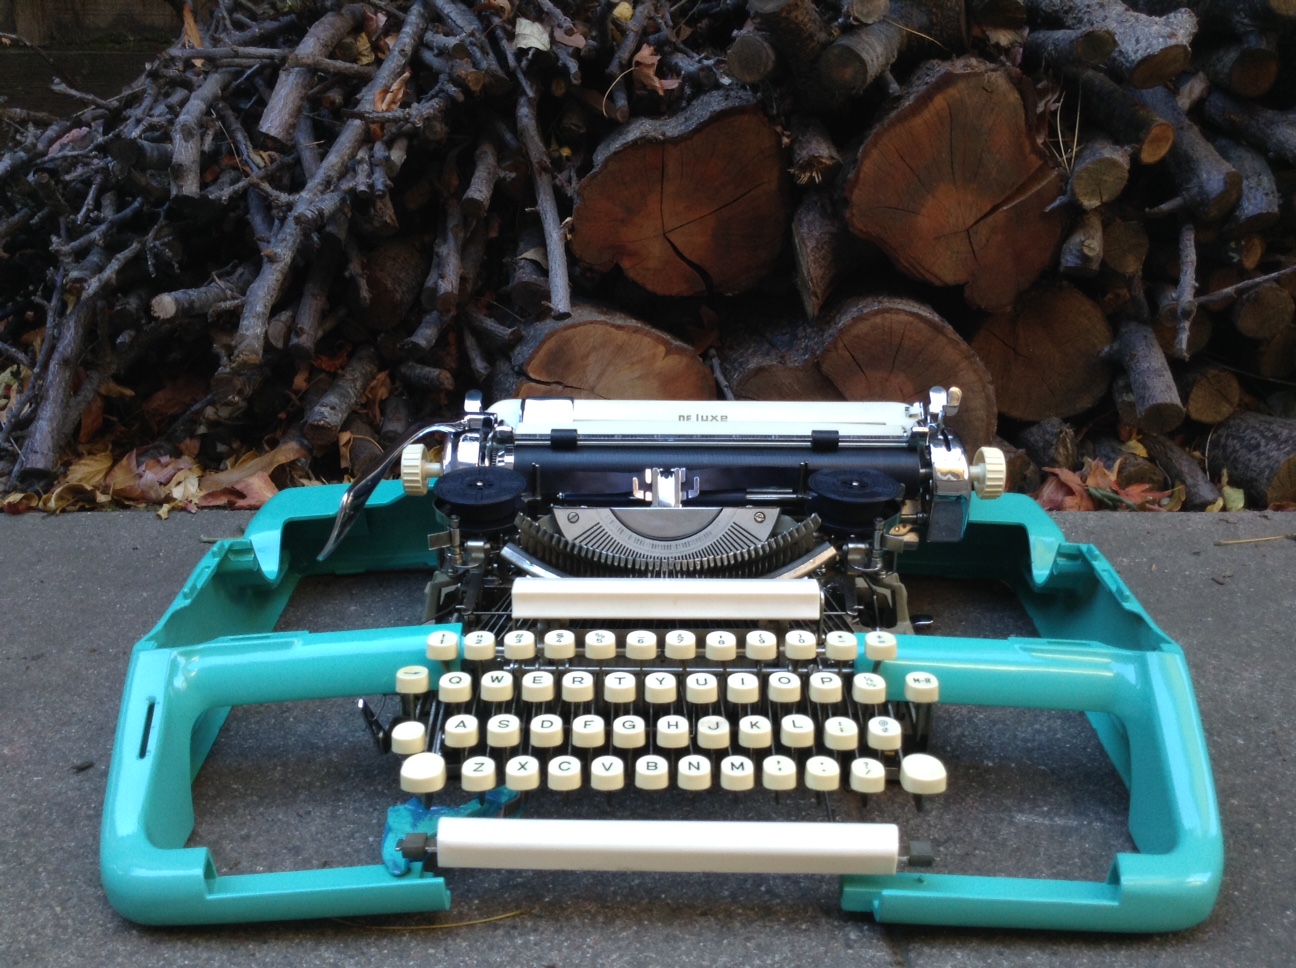
For a quick minute, I thought about doing a total powder coat re-paint, but no, I like the way this one looks.
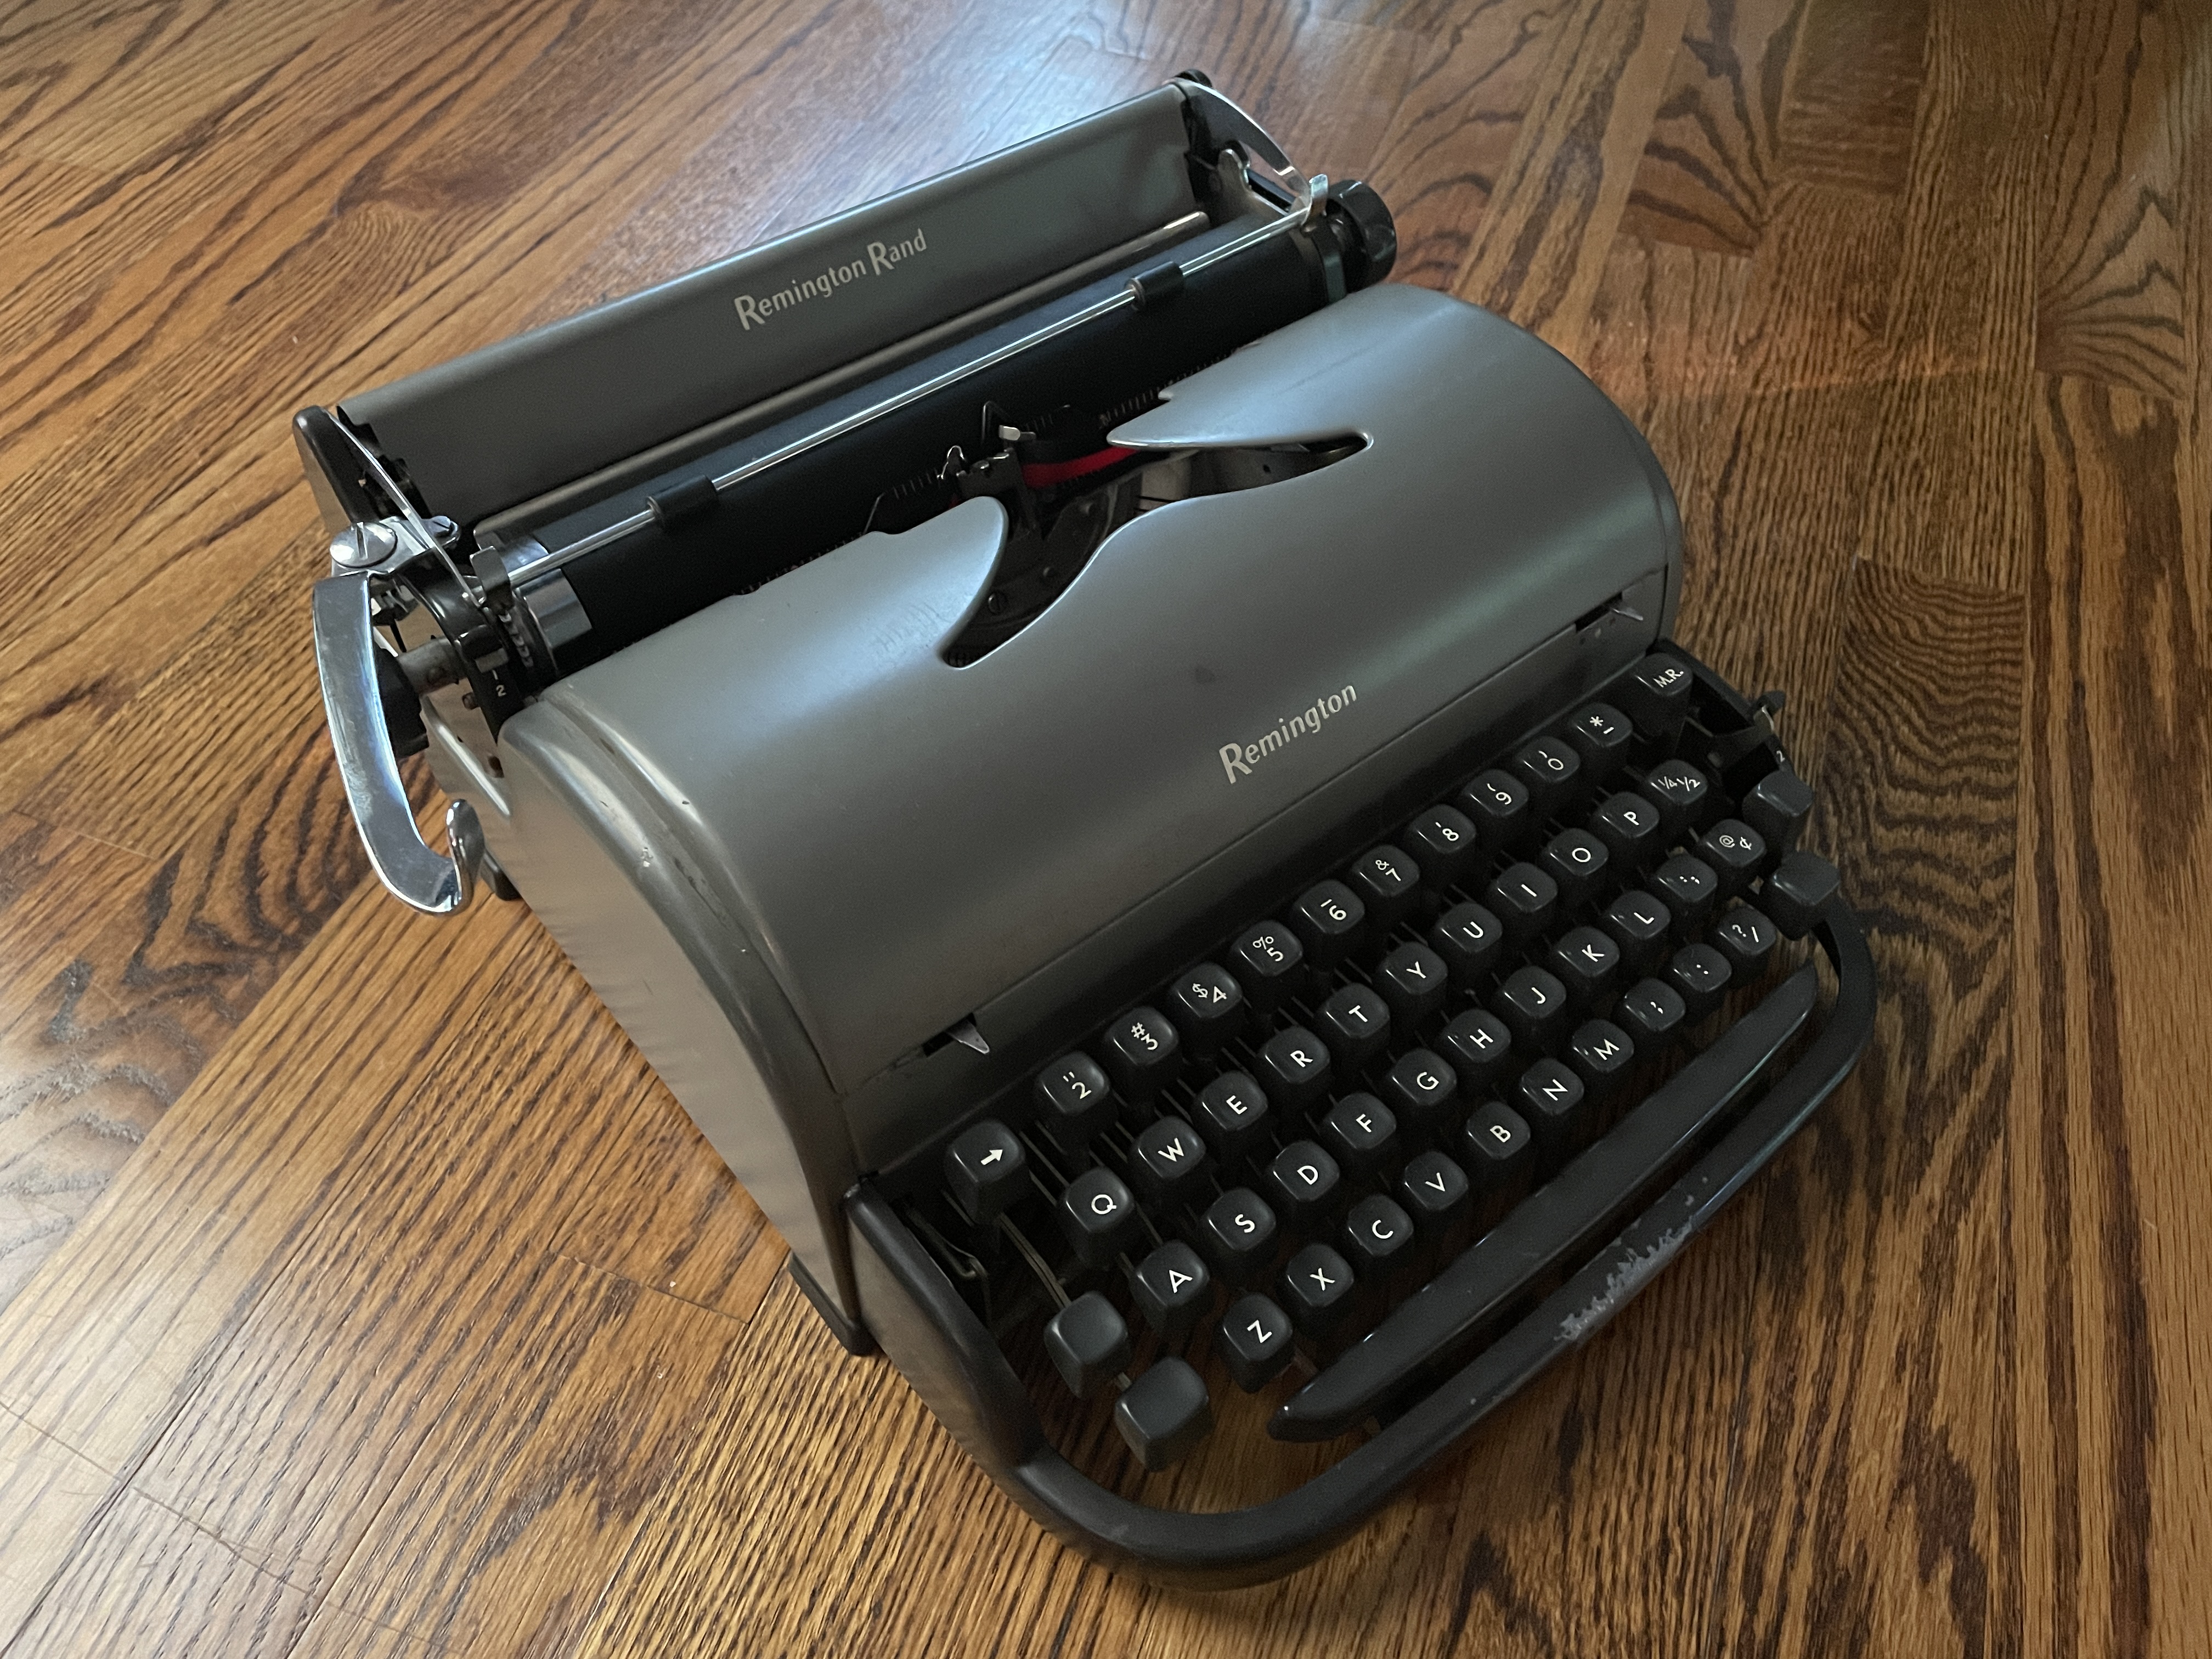
The other cosmetic/functional issue is that finger pads are missing for the some of the levers. These seem to fall off Remingtons all the time.

I see that TB Writers Plus is making Remington lever finger pads now and can do custom colors.
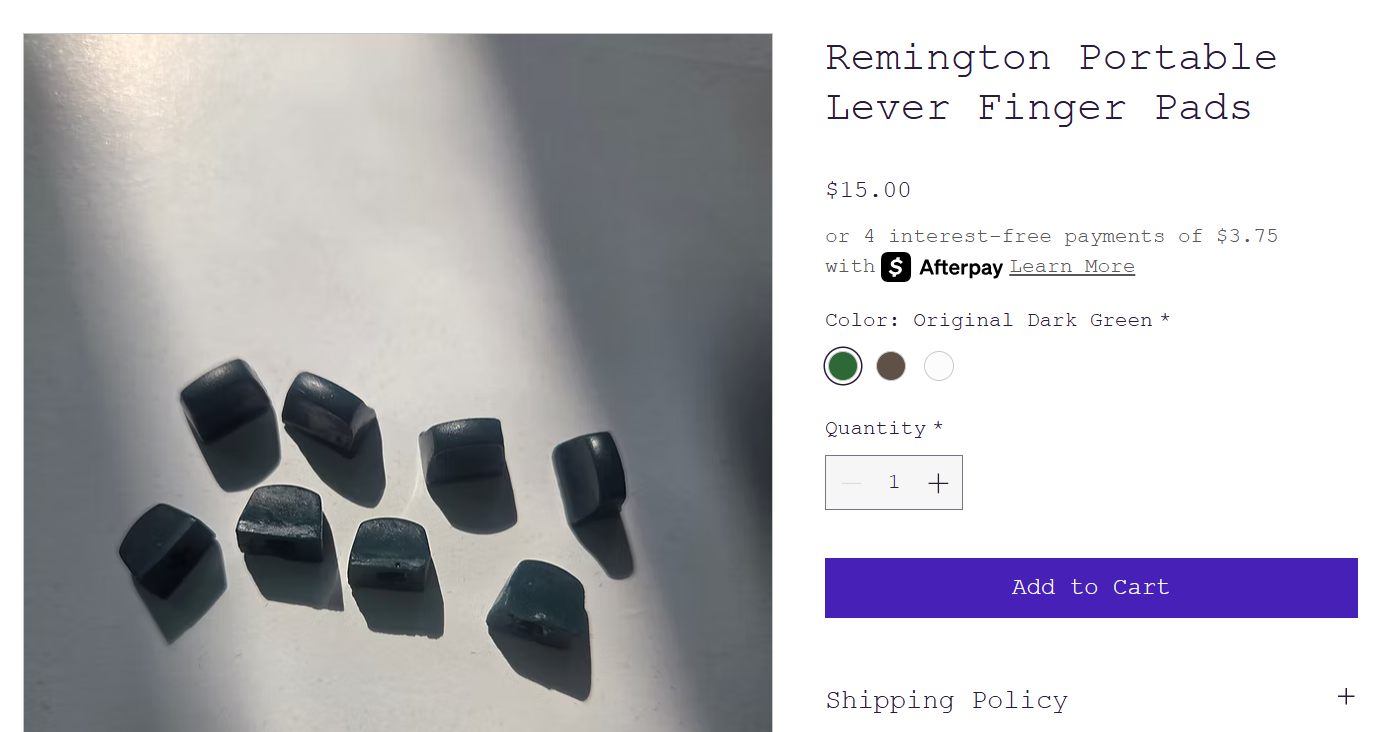
I ordered a set in “original brownish gray” which I think will be a good match for the dark charcoal colored ones I have.
I’m very happy with the way this one turned out. It’s a 77 year-old survivor that pulled through a bad bout of Parts in a Box Syndrome and is now typing like a champ.
Gorgeous.


Very Well Done!!!
LikeLiked by 1 person
Congratulations! Nice work.
Carriage bearings are only surpassed in difficulty by escapements which I think are somewhat easier.
LikeLike
My bearing feeder tool has been a big help on Royal portables. For other brands, as long as I can loosen the rails a little, I can get those independent bearings in.
LikeLike
Ha! A breadbox in a parts box! Excellent rescue – I wouldn’t worry about the chin scratch, the breadbox Remington always has that mark, the case latch does it.
LikeLike
I went to the Breadbox page at Typewriter Database – so, so many chin scratches! Well, I’m going to paint it anyhow so I can practice my powder coating skills.
LikeLike
Great work. You’re right, after about a day when you haven’t thought about a dismantled typewriter, your memory of where the little pieces go is shot!
LikeLiked by 1 person
I hope you’ll share how the powder coating of this Remington turns out. I’m thinking it’ll look “like new.” Great job bringing this machine back to life!
LikeLike
I’m planning to post about my powder coating experience. I’ve ordered a bunch of color samples from Prismatic Powders and will try to match the “chin” piece.
LikeLike