I hosted a typewriter open house in my garage a few weeks ago, and one attendee brought me a beautiful 1916 Royal 10 Box-O-Typewriter as a gift. It’s one of those super cool oldies with four glass windows. What joy this reassembly project has given me.

I couldn’t wait to get to work. Soon after the party disbanded, I took the pieces out of the box and laid them out on a sheet.

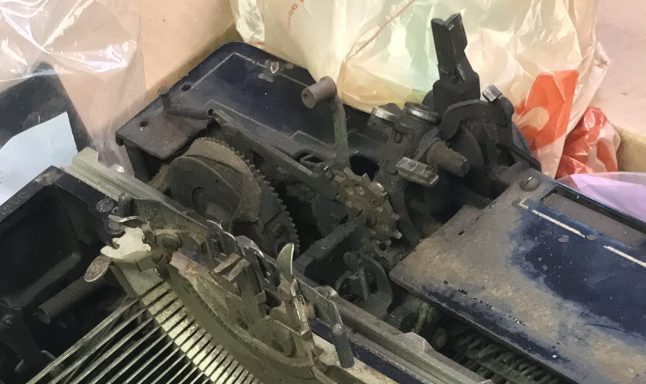

It’s best to keep carriages on typewriters unless absolutely necessary since it’s easy to lose pieces or damage parts on removal. However, since this one came to me with the carriage off, it did make cleaning the frozen parts easier.
I started working and thinking. Over the course of the last few weeks, real life would interfere with the work, but I kept the gears quietly turning in the back of my mind. Sometimes I would wake up in the morning after a night of Royal 10 dreams with new insights and solutions to its issues.
Typewriter repair is a meditative and creative activity for me, full of surprise and revelation. The thought processes are much like those a painter uses when engaged with a piece:

There were a lot of small pieces and screws and springs that I needed to re-attach, so I studied my three other Royal 10 reference machines. However, there are subtle differences between the 1916 Royal 10 and my newer Royal 10s. I am very grateful to a user who uploaded detailed photos of both a 1916 and a 1918 Royal 10 to Typewriter Database. They were invaluable in reassembly. The TWDB user included links to public galleries with high resolution images for the 1916 Royal 10 and the 1918 Royal 10.

(L to R) 1916 Royal 10, 192x Regal Rebuilt Royal 10, 1925 Royal Turkey, 1929 Royal 10 parts machine
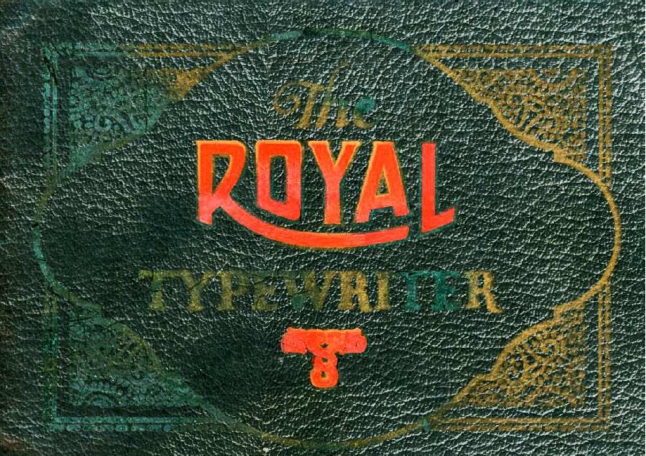
In Richard Polt’s manuals archive, I discovered this fascinating promotional leaflet from Royal ca. 1915 that describes all the fine technical features of the Royal 10.
I wonder if anyone has a typewriter with the “Pin Point” typeface:

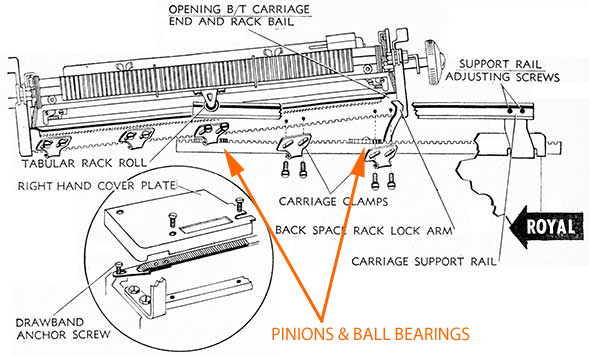
Royal was very proud of their carriage that glided on pinioned steel balls (my 1916 Royal was unfortunately missing its ball bearings and pinions).

The promotional leaflet describes a feature I struggled with: the “always locked” feature on this carriage shift machine.

Because the typewriter came to me missing one of its large shifting arm screws and several teeny shifting ball bearings, shifting was all cattywampus:
I found the following video from several years ago very enlightening:
I feel like the Dude when I say: it’s all connected, man. If the carriage shift is messed up, it will foul the ribbon vibrator and if that doesn’t go up and down, the universal bar can’t move and the escapement won’t trip and carriage won’t move forward and the ribbon spools won’t turn and…
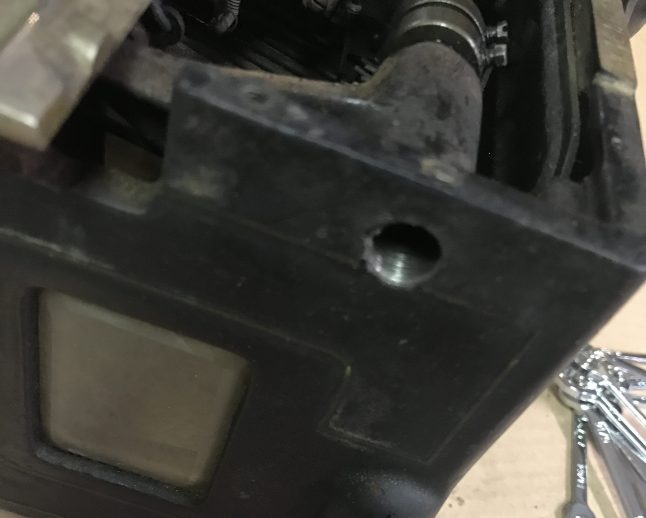
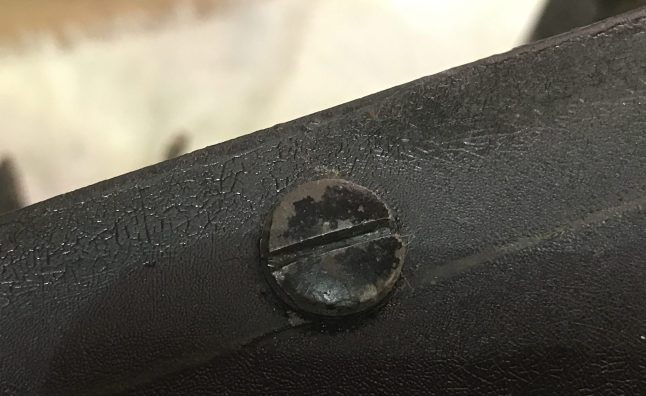
For the 1916 Royal 10’s missing shift screw, I scavenged the huge, cone-tipped shifting screw from my 1929 parts machine. You can see its ball bearings peaking out of the hole. These ball bearings are much larger than the ball bearings on the 1916 machine and didn’t fit the 1916 hole.
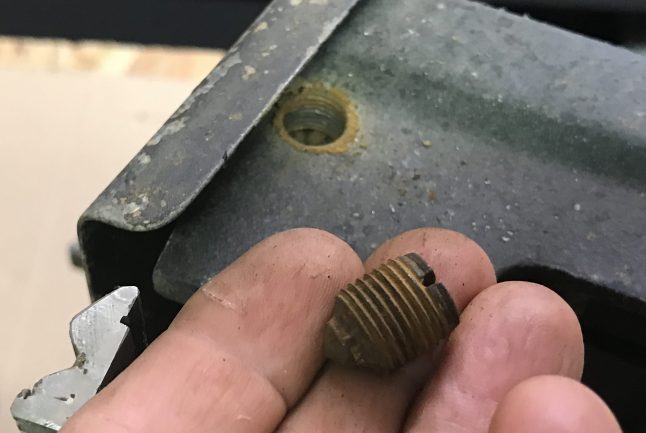
On the other side of the 1916 machine, the shift screw was suspiciously loose, and I couldn’t re-seat it. I removed it and found the nine teeny ball bearings were all out of place.

I replaced the ball bearings and held them in place in grease while I set the shift screw:

I can’t seem to find proper size ball bearings for the other shift screw. 3/32″ is too big and 1/16″ is too small. I put the shift back together, and it’s shifting with plenty of grease, but no ball bearings.
My 1916 Royal was also missing its carriage rail ball bearings and pinions, so I bought a parts lot from an eBay seller in Alaska. The parts arrived, and the lot included the elusive bearing pinions for the carriage rails. I needed two, and I got six! Yippee! Christmas came early!

I positioned them in the right spot, each held in place with a blob of sticky lithium grease (which I flushed out afterwards) so that the ball bearings didn’t roll all over the place while I set the carriage:

I got the carriage back on with the bearings and pinions in place and without folding, spindling, or mutilating anything important.
In the past, I have followed the Ames OAMI method of Royal standard carriage removal and replacement for the most part: removing two right carriage clamps, loosening the middle clamp, and feeding the tab roller and backspace arm through the rails.
However, there is more than one way to skin a cat or remove/re-seat a Royal standard carriage. Typewriter Chicago removes the backspace arm and works from right to left.
The process is much easier when you remove the backspace lever. Make sure you put the machine in shift lock position for access to the backspace arm screw.
With the carriage back on, I found the carriage dragged on one side where the front feed rollers rubbed against the card guide. A combination of sanding the feed rollers and straightening the card guide seemed to fix the problem.
The shift was a bit weak returning to lowercase position—even with the heavy carriage on. I added a strong spring that I got in my Alaskan parts lot. The spring was a little short, hence the “S” hook. Hey, it works. It pulls the carriage down strongly after shift and locks into lowercase.
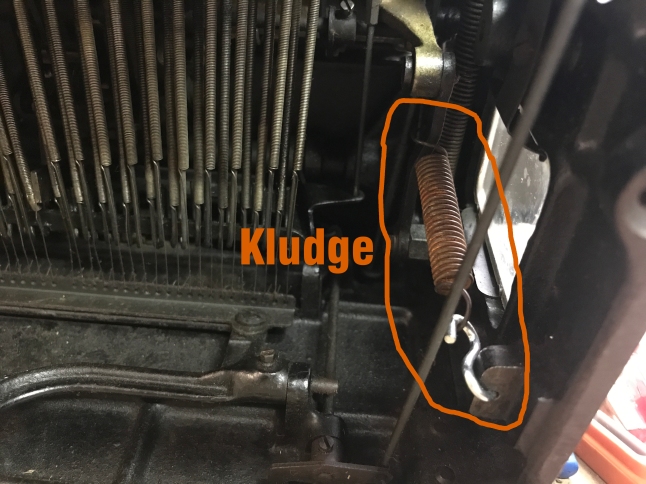
Aftermarket kludge similar to springs on newer Royal 10s
The old drawband ripped during testing:

I made a temporary replacement out of strong waxed twine. The mainspring bit me while I was trying to wind up the tension. There are safer ways of doing this (including wearing gloves).

Love hurts
Fortunately my tetanus shot is up to date—though tetanus seems a period-appropriate way to die by Royal 10.
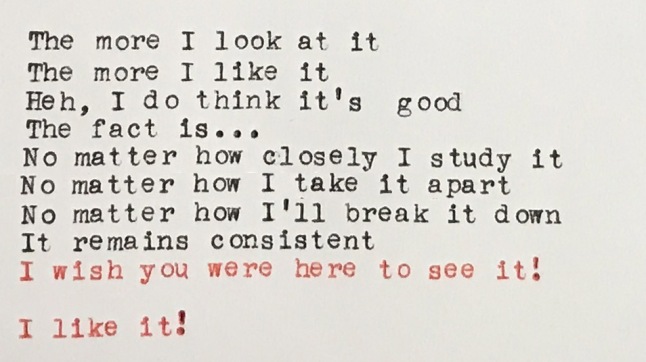
And you know what: this thing types pretty darn well for being 107 years young!

I still had to address the issue of missing and broken pieces. Could I replicate them using 3D printing? A staff member in the makerspace at the Arlington, VA public library showed me how to use Tinkercad and now I am kinda hooked. I have been modeling feet and platen knobs for various typewriters. The library has two or three 3D printers and I can get things printed in PLA filament on the cheap.

LulzBot TAZ printers at Arlington, VA Central Public Library

Polylactic Acid (PLA) filament is a plant-based, biodegradable plastic. It’s very, very hard, and sands great. It’s perfect for prototype modeling.
I had some bare screws for feet on this Royal 10, so I did some 3D modeling at Tinkercad, uploaded my design to Thingiverse, and requested a print from the Arlington public library:


PLA filament is a super hard and brittle plastic, and it’s not anywhere near as nice as a good rubber foot. Honestly, though, anything is better than a bare screw for a foot. I’m thinking of dipping my 3D-printed feet in Plasti Dip to improve gripping.

The left platen knob is broken, and I am now trying to decide whether to replace it with a 3D-printed copy or to “keep it real”:

I could not figure out why the typebars were all hanky-janky and then I realized that the typebar rest was missing.

After taking some measurements of my other Royal 10s (which have typebar rests that are integrated into the frame), I modeled a typebar rest:

Unfortunately, the ends of my typebar rest did not print properly, but I got it to work by gluing 5/32″ automotive tubing to the rest:

I then ran a wire through the tubing and anchored the rest assembly to the ribbon towers:

The typebars now rest neatly disciplined in their makeshift hammock:

I cleaned up the top cover plates with soapy water:

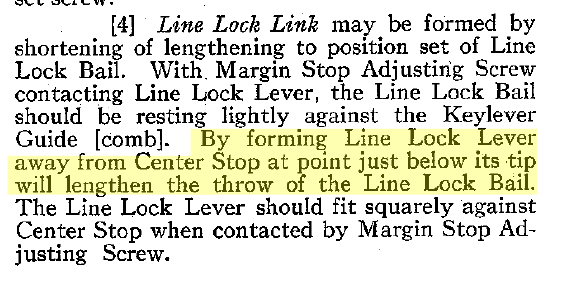
I continued to test, very happy with progress—though little things were bothering me. The line lock wasn’t engaging at the end of the line despite cleaning and working all the rusted components with my hands, so I turned to Ames:

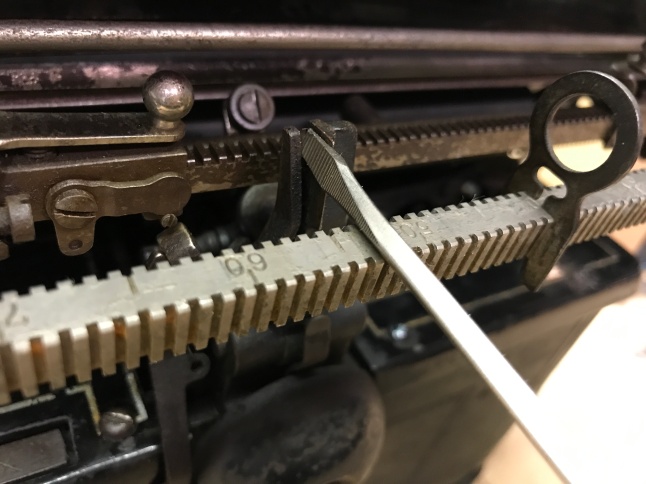
Yeah, I know this looks bad, but it worked.
It’s back together for the most part and typing pretty darn well. Three of the glass panel clips are missing, and I am debating whether I should try to fabricate something or buy parts on eBay.
Here’s a delicate little spring which *might* be related to the stencil lever. If anyone knows where this goes, let me know:

Off-topic: I refinished the Hi-Lo typewriter table that an attendee brought to my November typewriter get-together:

I gave the table a quick, light sanding and applied four coats of a wipe-on satin polyurethane. The walnut veneer is beautiful. They don’t make them like this anymore.

Here, have a seat, Royal 10:

Typewriters in this sort of condition force me to stay open, stay curious. As I work on them, the pieces and ideas slowly become coherent and hang together. Something broken and incomplete pushes me to think deeply and go off-script. Can I apply the lessons of this 1916 Royal 10 to my human life? When things go off the rails (sometimes literally), is this misfortune—or opportunity? Perhaps I should embrace the challenges of frustrating, sad, unsolvable situations and weave them into something good.


You beautiful galumphing monster. You have taught me a lot.

One of your best posts. Congratulations
LikeLiked by 1 person
That’s nice to hear. I was thinking the post was a bit long and technical and would appeal only to those with a fervent interest in old Royal 10s.
LikeLike
Very nice read, thanks! RickFort Worth
LikeLike
Awesome! Beautiful! Type on!
LikeLike
Bravo!
now, re: ” I’m thinking of dipping my 3D-printed feet in Plasti Dip to improve gripping.” i might suggest getting some stick-on feet and just stick them to the bottom of your PLA feet?
LikeLike
Oh! That could work.
LikeLike
Congratulations your fine restoration! I find using what is available to restore or repair typewriters is part of the enjoyment of doing the job.
Good idea on the plasti-grip. I need to give it a try.
I’m guessing you need some 7/64″ ball bearings. You have it working so best left alone until the next restoration comes your way.
LikeLike
By the way, I put the spring hook you sent me to very good use when I was re-assembling this typewriter. Handy little things!
LikeLike
Glad you could use it.
BTW, I’m sorry I forgot to mention the nice work on the typewriter table.
Soon after moving to MI, I found one for $20 on Craigslist that someone restored. Those are some wonderful and beautiful typing tables.
LikeLike
Agree! This one has a walnut veneer top with end matched grain – unparalleled craftsmanship. The table pairs nicely with the little vintage Shepherd Model 600 office chair (a freebie from a neighbor) which has become a favored chair in our household.
LikeLike
Great article. I have a few Royal standards, manuals and the HE/RE electrics, and they all use the same rail and bearing and sprocket setups, only the electrics have four – your idea to use lithium grease to hold them in place is a great idea I’ll be trying next time I work on them. And, I just got a 1918 Royal 10, and now your article has given me a bit better idea of the nuances of its mechanics should I need to do any work on it. But you’ve also inspired me to take on a bit of a junker of my own – a special LC Smith 8 with government serial # and an Elliot Stencils carriage. It’s.. daunting – do you ever look at one of these and wonder, ‘What did I get myself into?’ 😀 Well this is one of those times for me… if I was down in the DC area I’d be tempted to pass it to you in a moment of panic, but I guess I’ll just have to do it myself. 😀
LikeLike
I took a look at your LC Smith 8 with the Elliot stencil carriage at Typewriter Database. What an interesting machine! It looks like a challenge, but I’d love to see you get it working. Since I tend to attract distressed typewriters, I am constantly questioning my life choices. “What did I get myself into?” is about right.
LikeLike
Great post – great machine!
Like Ted already commented; adding soles to the feet can work well. I’ve printed feet with a 1mm rim to prevent the stick-on sliding off. I’ve used latex-infused furniture-felt, but there’s also adhesive rubber-sheet to sole the feet with.
For spring-replacements a guitar-string can be useful; springy but not so hard it’d directly break when forming (and low-cost too).
The pin-striping on this old 10 is so cool, great you could get it together again- (grand job on that table-top!)
LikeLike
Good tip to add the 1mm rim to printed feet. You have posts at your blog about 3D printing that I should re-read. Next up in my queue is a Remington Portable 1 with a dragging carriage problem. I will pore over your photos at Backspace does not erase as I dismantle the RP1, trying to solve its riddles.
LikeLike
Looking at your typing sample, the spacing and alignment of the letters looks off, but you first have to verify that your typing technique is correct since that can have a significant impact such things. Getting everything to sit nice and evenly is key to getting great looking manuscripts and worth spending time on, although a very touchy sort of adjustment best left to pros.
LikeLike