Typewriter repair keeps this Old Dog sharp and on her toes. Two recent repairs on two different SCM Electra 120s broadened my skill set and gave me a lot of old-dog-new-trick satisfaction.
The first repair was on one of my “catch and release” typewriters that came back to me recently. It’s a beautiful Smith-Corona Electra 120 that I found at a local thrift store for $10. It was gummed up from disuse. After a careful cleaning, it went back into action when Jean, a lovely local typewriter enthusiast, adopted it.
Here is a photo of the Electra 120 at the thrift store, looking like a puppy in a pet shop window.
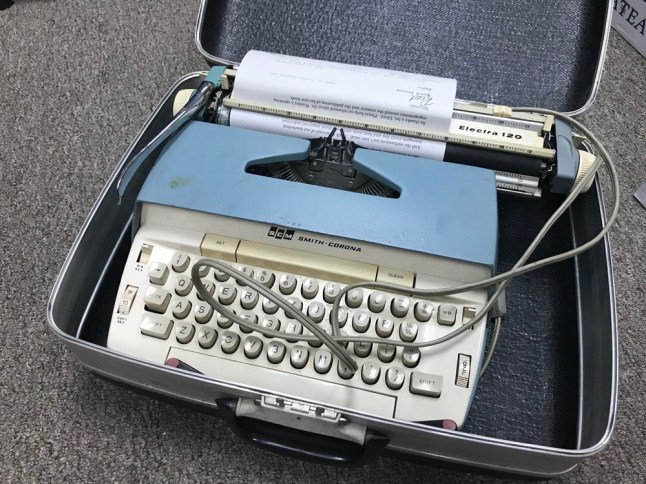
My favorite SCM electrics are the ones with the manual carriage return arm.
Jean LOVES typewriters and has a small collection. She journals daily and moves around her collection, following her mood. I am so happy to see this thrift store rescue getting regular use.
One day recently, she was hammering away happily on her Electra 120 when it suddenly stopped typing. Although the little electric motor was humming along, she could not get any of the keys to move.
Jean brought it over to my garage workbench, and I found the culprit: a broken rear v-belt.


I did a little research and found that you could use automotive O rings for belt replacement, but since Jean put her typewriters through heavy use, I wanted a real, live electric motor belt replacement.
I wasn’t quite sure of sizing, but I found a very helpful post by Daniel B. at the Antique Typewriter Maintenance Group on Facebook:

A vendor in West Virginia, Biedler’s Electric Motor Repair, sells belts of all sizes. Since I was replacing the rear belt, I ordered a 3M315 Gates Polyflex v-belt from Biedler’s eBay store (https://www.ebay.com/str/bemrinc)

The belt arrived very quickly and the package came with a little inspirational booklet. Though I am usually resistant to proselytizing, it touched my black heart:

To get at the motor for the v-belt replacement, I needed to remove the shell. Duane from Phoenix Typewriter has an excellent case removal video:
He also has a good video on lid removal – which can be a little fiddly:
The lid is held on by screws and tabs on either side:

The lid has a studs on either side that ride on rails inside the machine:

I removed the casing, inserted the new rear v-belt, and replaced the case. I was careful to make sure that the electrical cord didn’t get pinched in the casing when I replaced the shell:

The new belt worked perfectly:
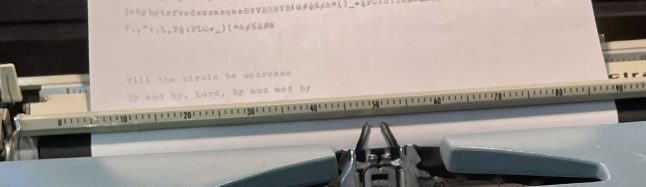
Will the circle be unbroken?
The Electra 120 was typing great when I got a new text from Jean:

Uh-oh! I saw the Bat Signal and got ready for the new intake.
Jean brought over the new troublemaker, yet another beautiful SCM Electra 120. The letter “t” was not striking properly on the typewriter and since Jean is a trouper, she was making do by substituting a “+” sign for “t” in her typing. However, the “+” sign wasn’t working too well either.

This one has a bunch of fun stickers on it including this stress reducing, textured rainbow sticker:

I had a house full of people for the Thanksgiving holidays so I traced each color and breathed deeply many, many times.
The typeface was very attractive. According to the 1968 SCM Typestyles Keyboards (found in the members-only typographical resource area at Typewriter Database), it looks like Smith-Corona’s Presidential Pica No. 78.

Anyhoo, I looked under the hood and immediately saw the problem with the letter “t”:
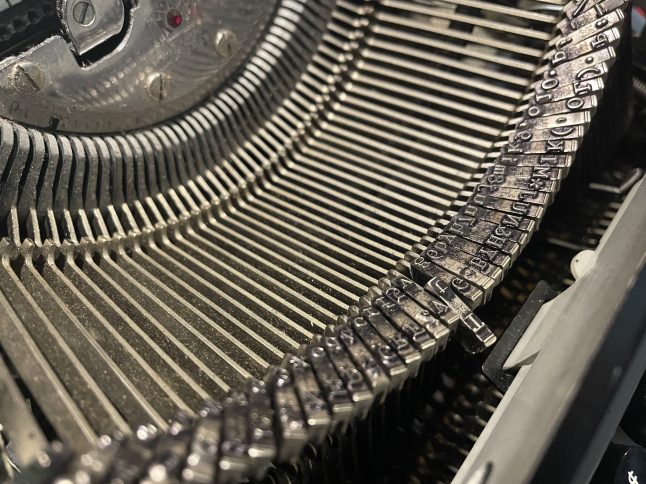
The “t” slug was loose on the typebar and flopping all over the place. The “+” sign slug was a Smith-Corona Changeable Type™ and that was loose because it was seated improperly. That was an easy fix since all I had to do was snap it into place. However, the loose “t” slug would prove to be more difficult.
Since it’s an electric typewriter, I couldn’t move the typebar freely into a position where I could work on it when the typewriter was powered off. What I ended up doing was turning on the typewriter briefly, striking the key and quickly grabbing the “t” typebar before it returned to the typebar rest. You have to be pretty quick because that thing moves fast. I used a screwdriver to prop it into a position where I could work on it.
I pulled out my enormous propane torch. I don’t have one of those cute little hand torches, but the big torch did the trick and I didn’t burn the house down. I heated the “t” slug and it slid off the typebar easily.

I wasn’t careful though and a blog of melted solder landed on the segment. I made a mental note to cover the mechanics next time I worked with solder.

I polished off the remaining solder from the naked typebar with a little sanding. I then did some YouTube research and found HotRod Typewriter’s very helpful video. He uses brass shims to position type slugs before re-soldering:
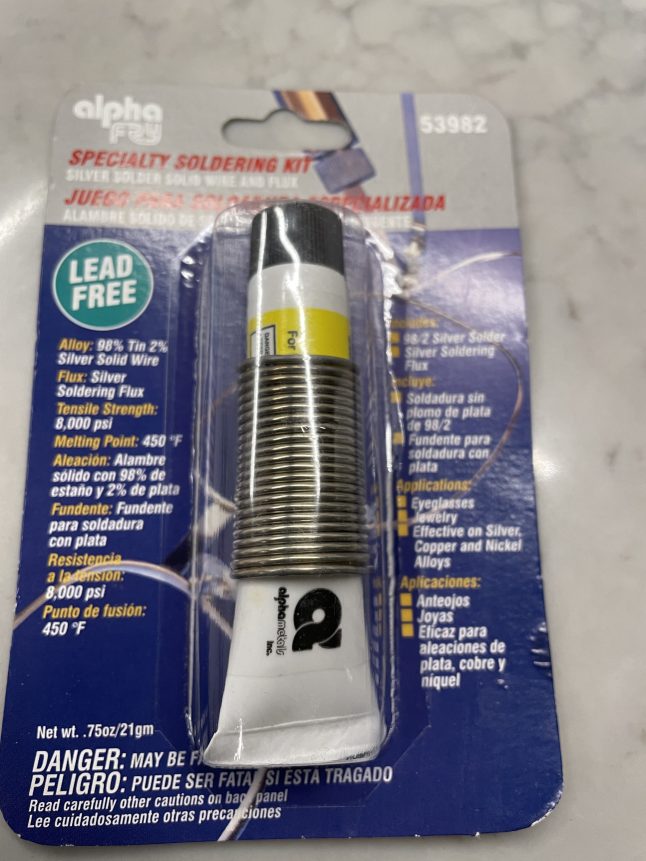
I found .005″ brass sheets for shimming and silver solder and flux at a nearby Ace Hardware. I had lead alloy solder at home, but I don’t think that would’ve been strong enough for a typewriter, especially an electric one.

I cleaned up the slug by heating it up and tapping out the old solder. I then cut a little v-shaped shim and inserted it into the slug.


When I slipped the slug onto the typebar, it held it nice and tight while I made incremental adjustments to its position. Positioning it properly before soldering took some time. I tested in both lowercase and uppercase position, and after I was satisfied that I was getting good impressions, I applied flux and soldered it in place using silver solder. This time, I was careful to protect the segment from flying solder with aluminum foil.

This is way too much solder, but it’s solid:

I cleaned the excess solder off the typebar and tested. The “t” is a hair low. Sigh. The typed output has a ransom note feel. It looks a little wibbly-wobbly.

Would the unevenness of the printed output bother you? Let me know in the comments.
I asked Jean, the typewriter’s owner:

I love Jean’s positive take—she’s an art teacher and takes kindly to the quirky in this world.
I needed to do thorough testing to make sure the solder job was solid, but I got distracted by the excitement and visitors over Thanksgiving. My young niece was in town for the holiday, and we headed into DC to the National Postal Museum, one of the nicest, most underrated museums in DC. The museum allows visitors to sift through a table of canceled stamps and choose six to bring home. I picked out some including these:

These stamps hit me with a keen shot of nostalgia. 8¢. US postage for first class mail was 8¢ when I was a Very Young Dog. I remember the sense of shock I felt in 1974 when the US Postal Service increased the rate to 10¢. The earth shifted beneath my feet when postage increased to 10¢—it blew my mind. If postage on a letter could change, was anything in this world certain and secure? I’m sure I could write a powerful coming of age novel using US postage rates as a plot device.
Once home from the museum, my little niece pulled out the two Postal Museum postcards she had bought and dutifully wrote to her parents and sister. I watched her, shamed. I am so behind in my correspondence. Chastened, I sat down and typed out a looooong letter on the Electra 120. The newly-soldered “T/t” slug held fast.
This repaired Electra 120 with mellow vibes will now return to Jean, having given me a little life-long learning. It’s a thrill that I will always chase.


Addendum
In the post comments, Ted Munk linked to Typewriter Repair Bible’s update full of type soldering & alignment tips. Here’s good information on type re-soldering:


Hello Mary
Nice to hear from you, looks like you are staying strong
LikeLike
I haven’t tried a brass shim, but I can say soldering a slug is _always_ trial and error in my experience. The lead vs. silver solder choice is one of those things typewriter repair enthusiasts like to debate. I’ve mostly used lead on well-cleaned metal. I like the lower melt temp, and there is a lot of surface contact area to mitigate my strength concern. I place the slug in the gap of electric soldering iron element (not the small electronics soldering iron). But I did use a Mapp gas torch and aluminum solder rod to braze broken aluminum frames on two Remington 17s, both in approx same place – apparently a weak spot.
LikeLike
This was my first time soldering a slug and definitely a learning experience. I would love to have a long conversation with someone who solders slugs regularly about best practices. Using that huge propane torch was a little crazy – I’m lucky I didn’t damage the platen or any plastic elements. The little brass shim was very helpful, holding the slug firmly while I futzed and futzed with positioning. I still didn’t get the position exactly right (a little low) and wasn’t sure if I had to start over from scratch or could re-heat and re-position. Fortunately the typewriter’s owner liked the quirkiness of the low “t”.
LikeLike
Here’s a TRB update full of type soldering & alignment tips (:
https://drive.google.com/file/d/0B9DocmExIHgXaGNreHpqSnpTSUU/view?usp=sharing&resourcekey=0-NEqZRXidacCC5C8SBojnIg
LikeLiked by 1 person
Ah! I wish I had seen this before I soldered, but everything worked out in the end. I hadn’t thought to use carbon paper for testing. Any idea what #17550 Soft Wire Solder or #Z5400 Soldering Shim were composed of? And TRB stands for…?
LikeLike
TRB= Typewriter Repair Bible, but I dunno about the solder.
LikeLike
Thank you for your post…I really enjoyed reading it, plus there are so many pictures that help your readers know exactly what you’re writing about. This is my favorite typewriter blog and most likely my favorite blog period.
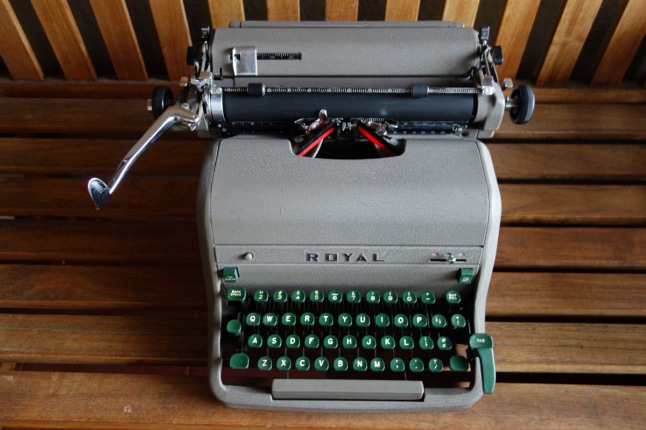
Well, anyway, your blog brought back a memory. When I was a student in Iowa City in the mid-1980s, I acquired a mid-century Royal manual desk typewriter–kind of a bulky beige machine with maybe green keys. The action of it was perfect (for me). But the typewriter had been used so extensively that all of the type slugs were blurry and not clear. I often thought it had typed many a thesis for the University. Anyway, I tried cleaning the slugs several times with alcohol. No improvement. Years later, in the mid-to-late 1990s, I finally set the typewriter at the curb. I can’t imagine what it would have cost to replace every single one of the slugs and have them all aligned properly. Probably a fortune that I didn’t have back then.
On the other hand, I’ve never encountered another manual with that kind of action. I actually found that it was difficult to make a mistake typing with that machine! I wish I had it back.
Again, I enjoyed your blog, and I’m glad you were able to fix the machine for a friend.
LikeLike
Just saw your kind comment. The holidaze were a bit of a blur and some things got lost in the shuffle. I can relate to your feelings about that Royal. Some typewriters are just a perfect fit for a typist’s style and personality. Perhaps your Royal was an HH. I had the good fortune to work on one some years ago – It was a superb typewriter:
LikeLike
Hotrod Typewriter is a regular contributor on the Discord typewriter server I’m on, and he’s helped me a few times with problems I’ve had trying to figure out how to fix things. His trademark is the custom paint designs he does on his machines – he is truly an artist, and the typewriter is his canvas. I’m lucky enough to own one of his machines, shown here. There are different approaches to some repairs, like the slug you fixed, and your article showed that it’s worth looking at multiple sources to find one that works for you. Good to see you posting again. I need to pay closer attention to the account where my notifications arrive! 😀
My custom Hotrod Typewriter is linked here. I admit it’s a bit of a display queen as it looks really good and is small enough to display in the entry of my house where people see it as they come in, but I do take it out every so often for a few pages of exercise. I didn’t have it customized for me, but he does do custom requests as well.
https://typewriterdatabase.com/1965-olivetti-lettera-22.19516.typewriter
LikeLike
Gorgeous paint job!
I found a HotRod Typewriter video on Olympia carriage removal invaluable last week when I had to really get into an Olympia SM9.
LikeLike
The stripes are painted, not pinstripe tape. Even under to where they really can’t be seen. And mine is a conservative design. Some he’s done are really wild. Definitely worth a look.
LikeLike