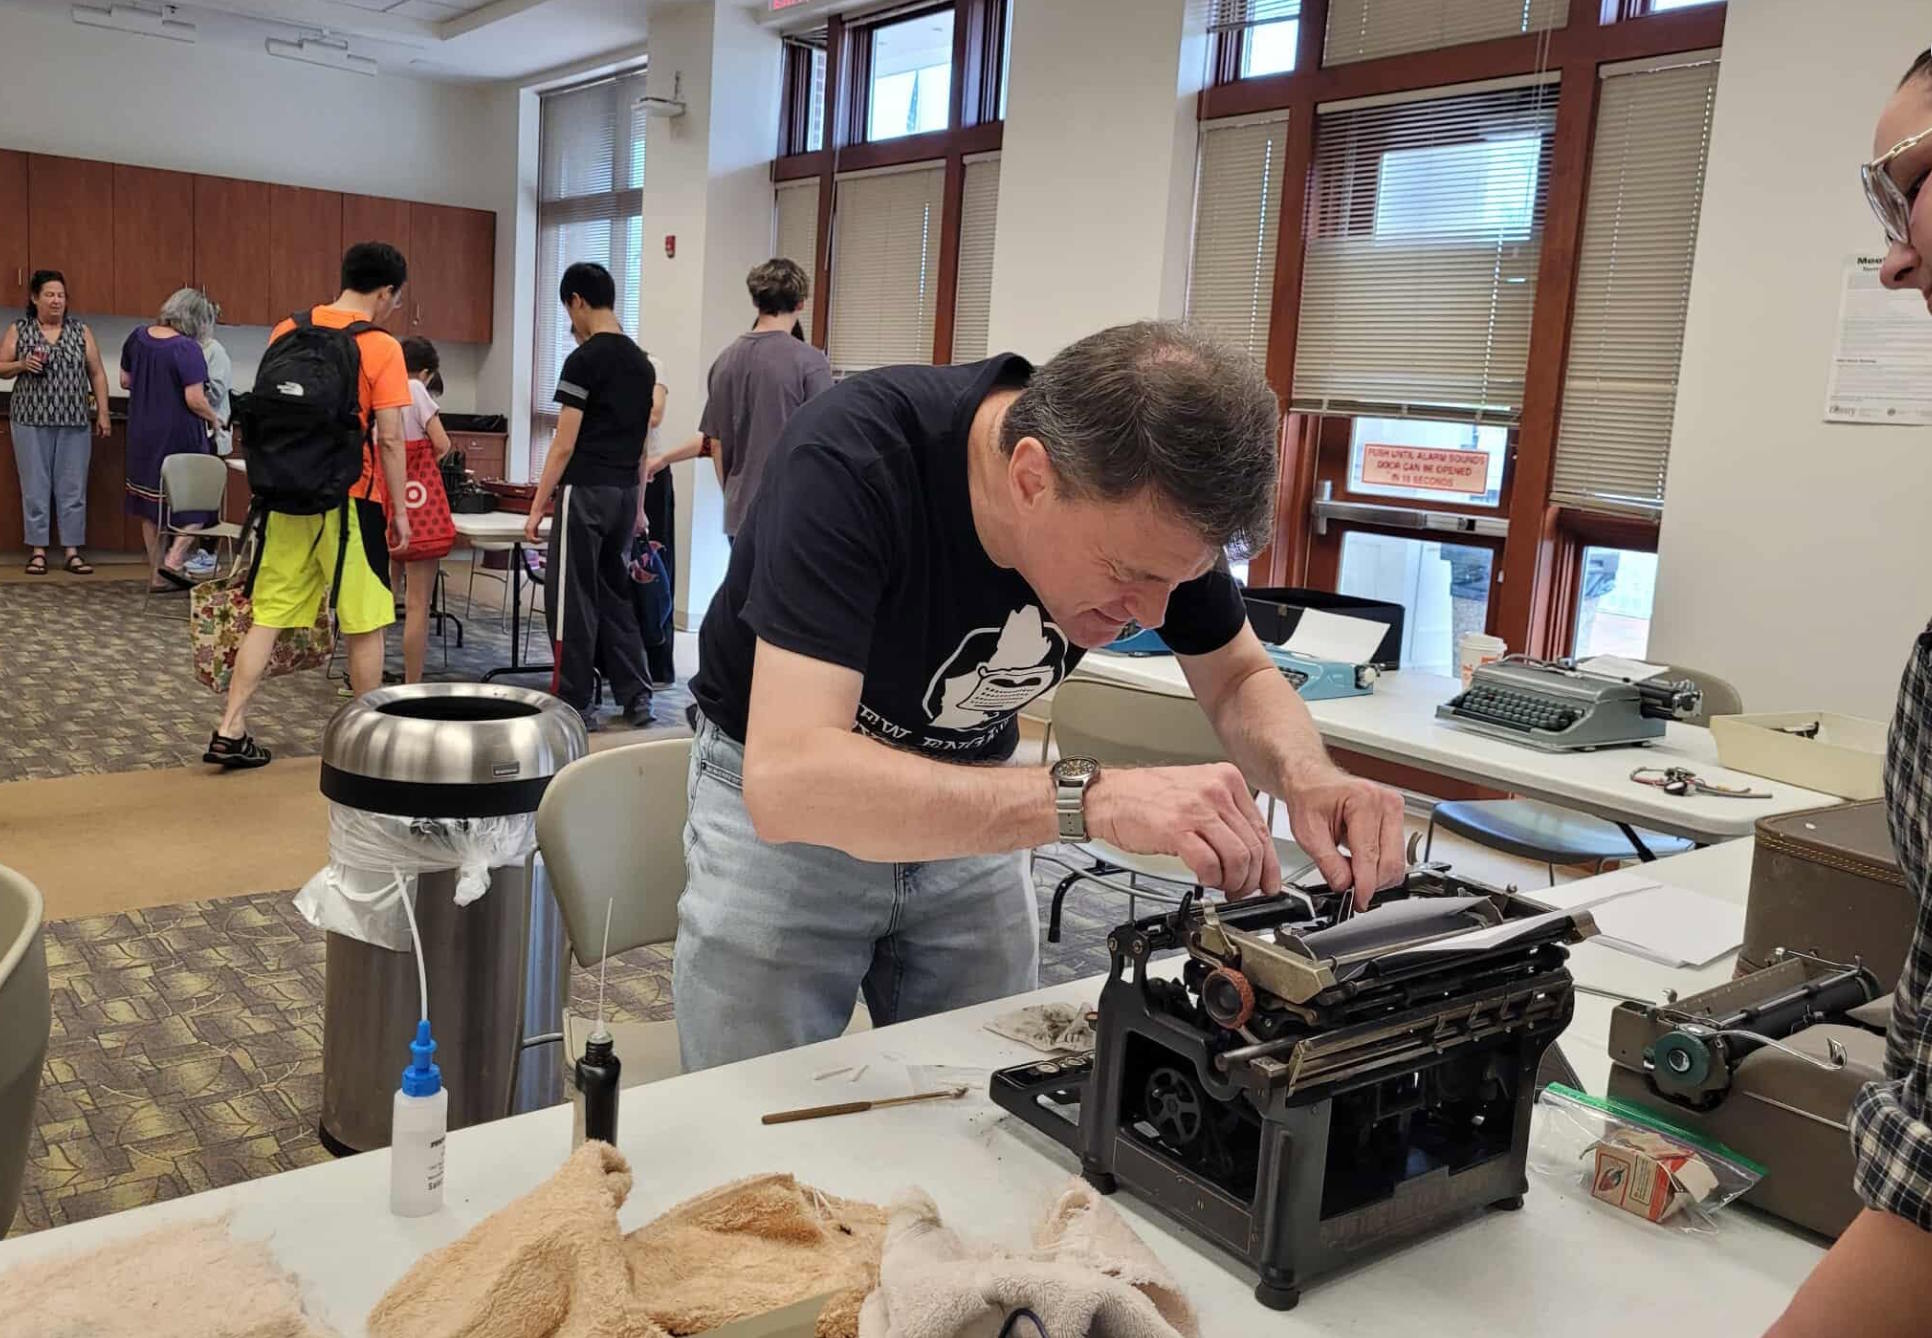
I belong to a small group of local enthusiasts who like to tinker with typewriters, and we get together occasionally to share know-how and tools. Last weekend, our group of typewriter mechanics met at a local library for a type-in and light repairing. The public event drew in the young, the old, and the curious.
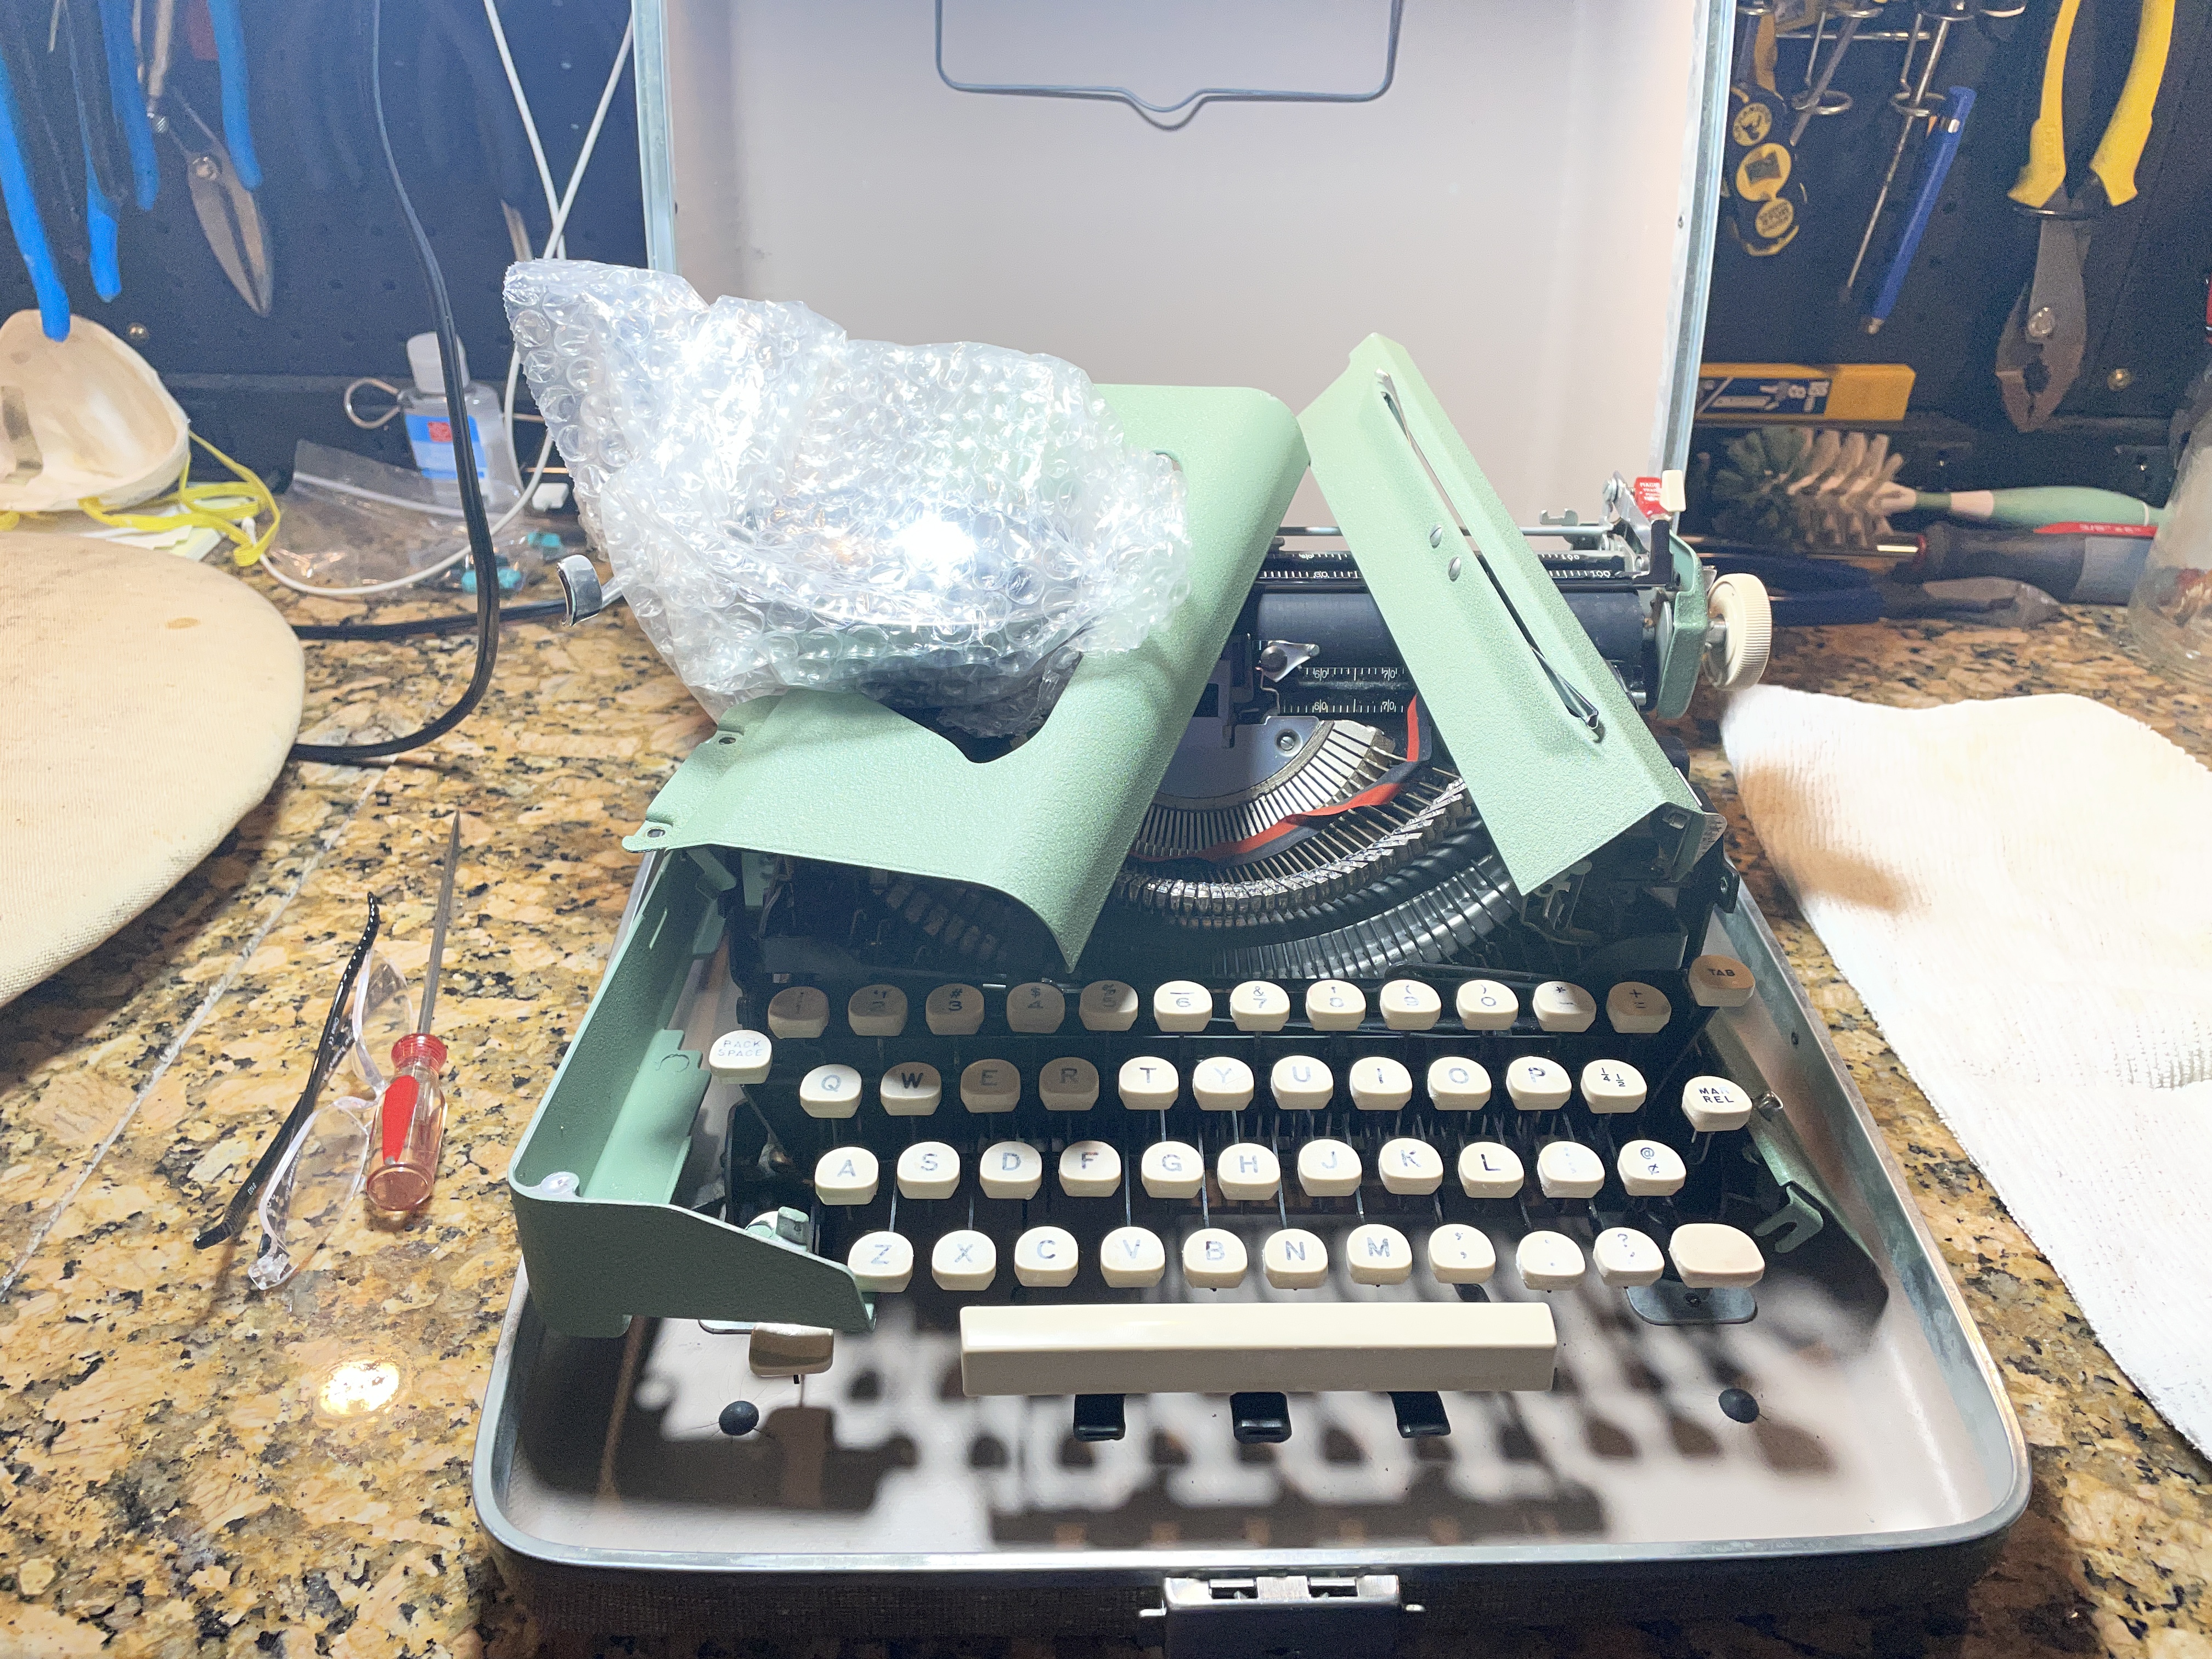
Before the event, we amateur mechanics brought out our problem typewriters for discussion. Here is a recent acquisition courtesy of Richard Polt’s downsizing effort, a green Royal QDL with dead shift/shift lock keys on the left. Besides being very attractive, this one has a nice typeface (Canterbury Elite, I think) so we hope to save it.


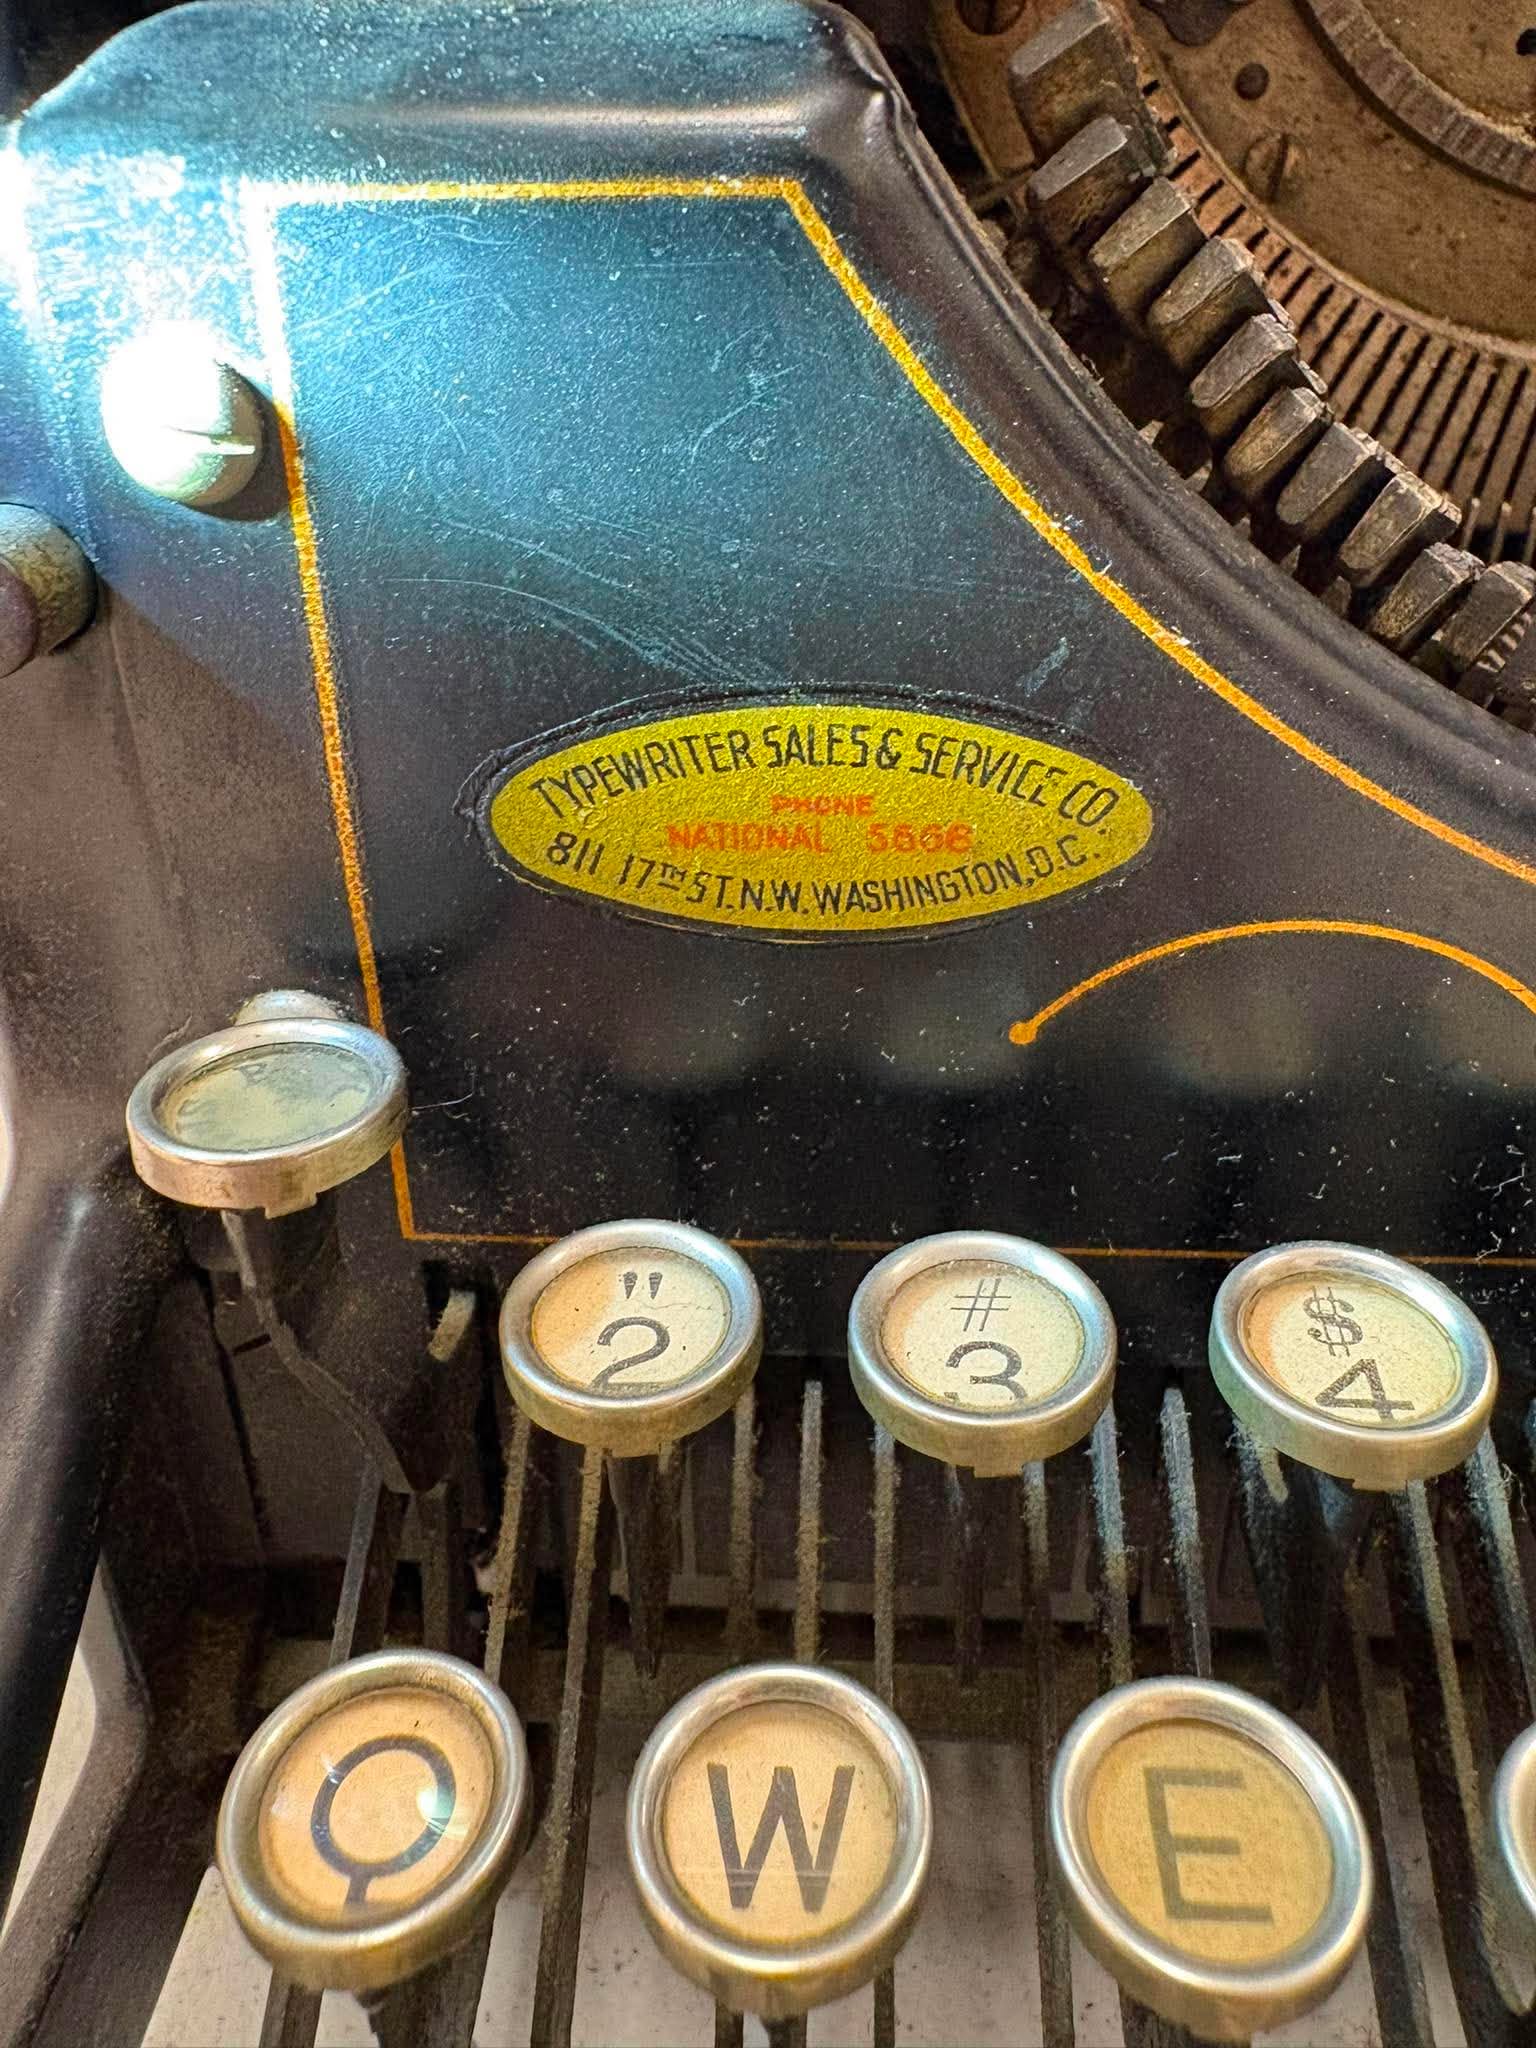
During the event, a very nice young woman brought her grandmother’s 1921 Underwood 5 in for a light cleaning and a new ribbon. It was in great shape, having been kept under a dust cover for years.
It had a great Washington, D.C. dealer label too. Look at that pin striping:
The young woman’s companion asked if we were a “league of typewriter mechanics” and later referred to us as a “guild”. Both terms strike my nerdy fancy. It sounds like each member of our group has a super power unleashed by the smell of mineral spirits.
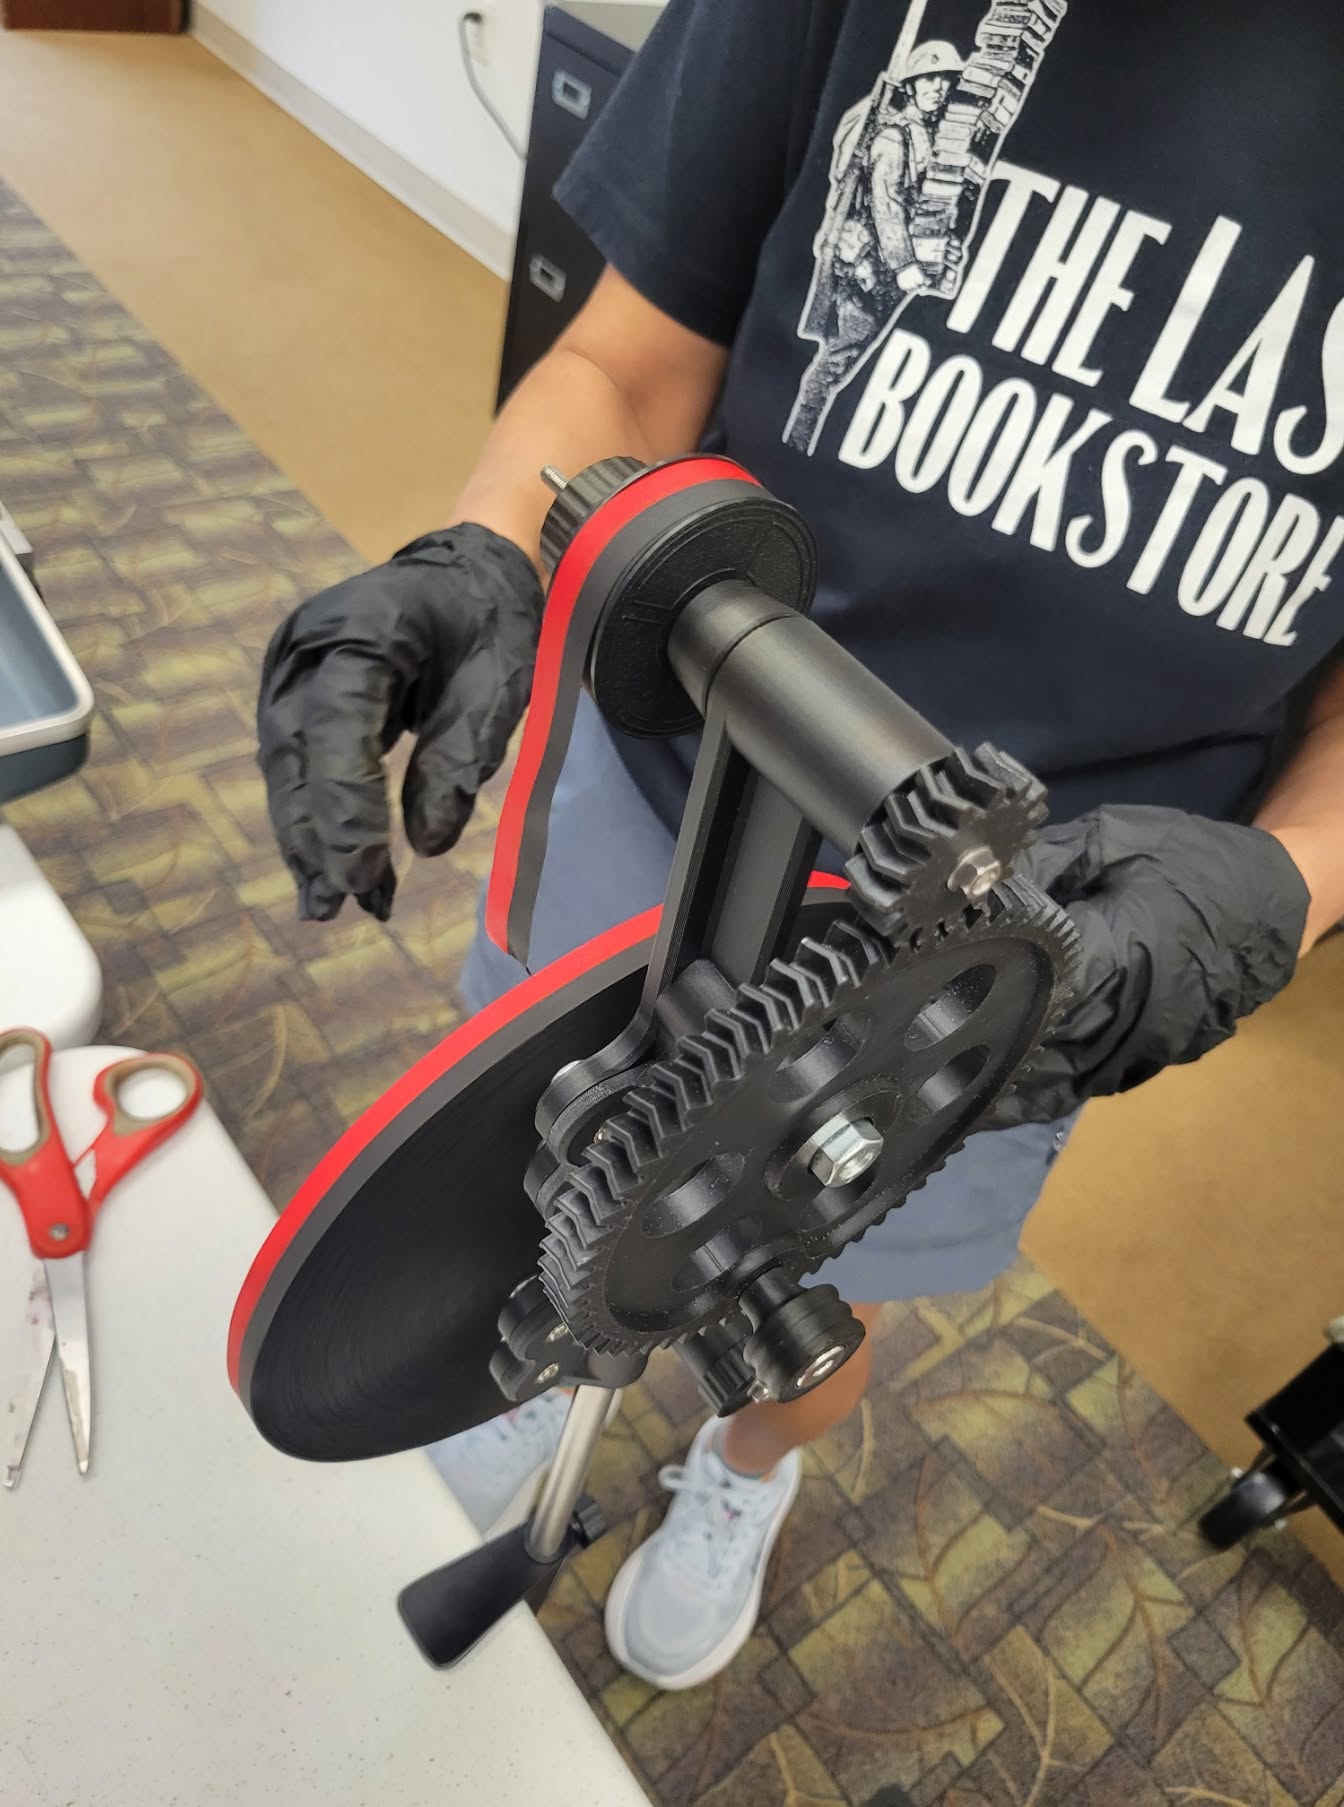
I brought my brand new 3D-printed bulk ribbon winder from M. Morren to the event and bulk ribbon spool from TB Writers Plus and spooled and spooled and spooled new ribbons for the machines with dead ribbons.
I sent one typewriter to a new home after the event (the little Consul 232), but somehow ended up bringing three more home with me for further study.
Here is the partially dismantled Royal QDL with the dead shift. I think it has a cracked shifting bar. I have a parts Royal Safari that may be able to donate parts.
And I brought home this SM7 with typebars frozen like claws from the grave. I understand that there’s something wrong about the ribbon feed too. This is going to clean up really nice.
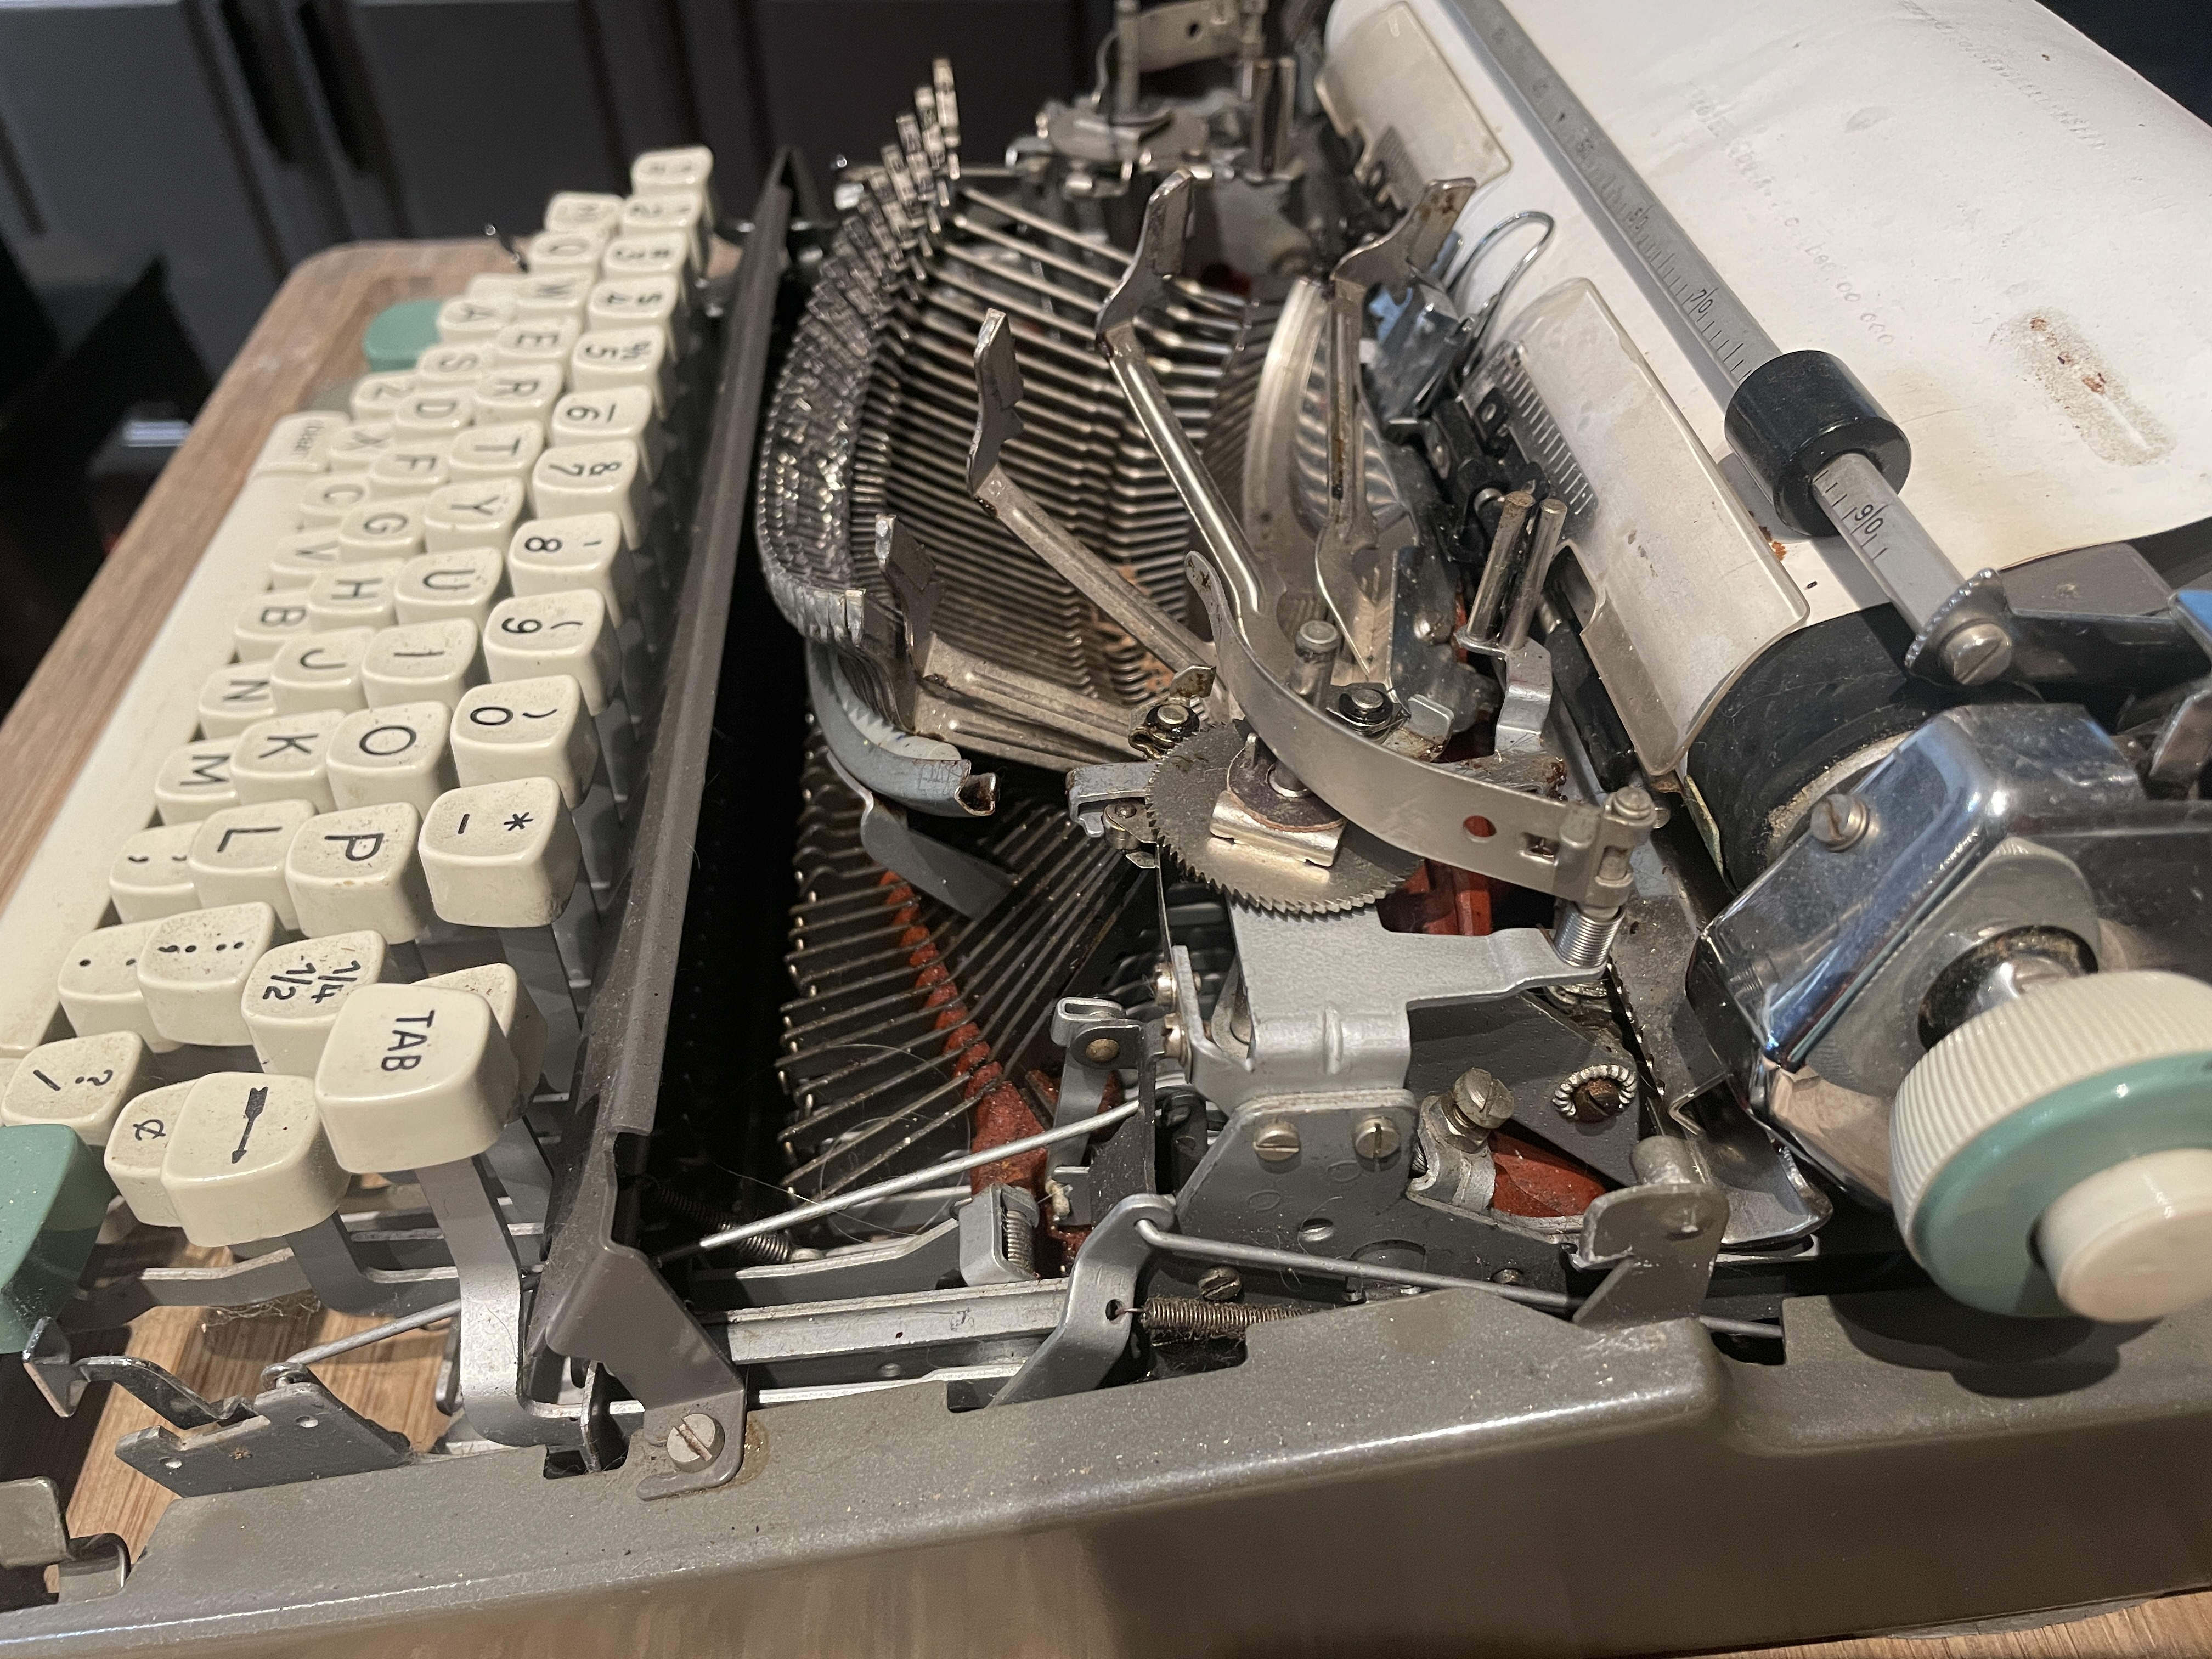
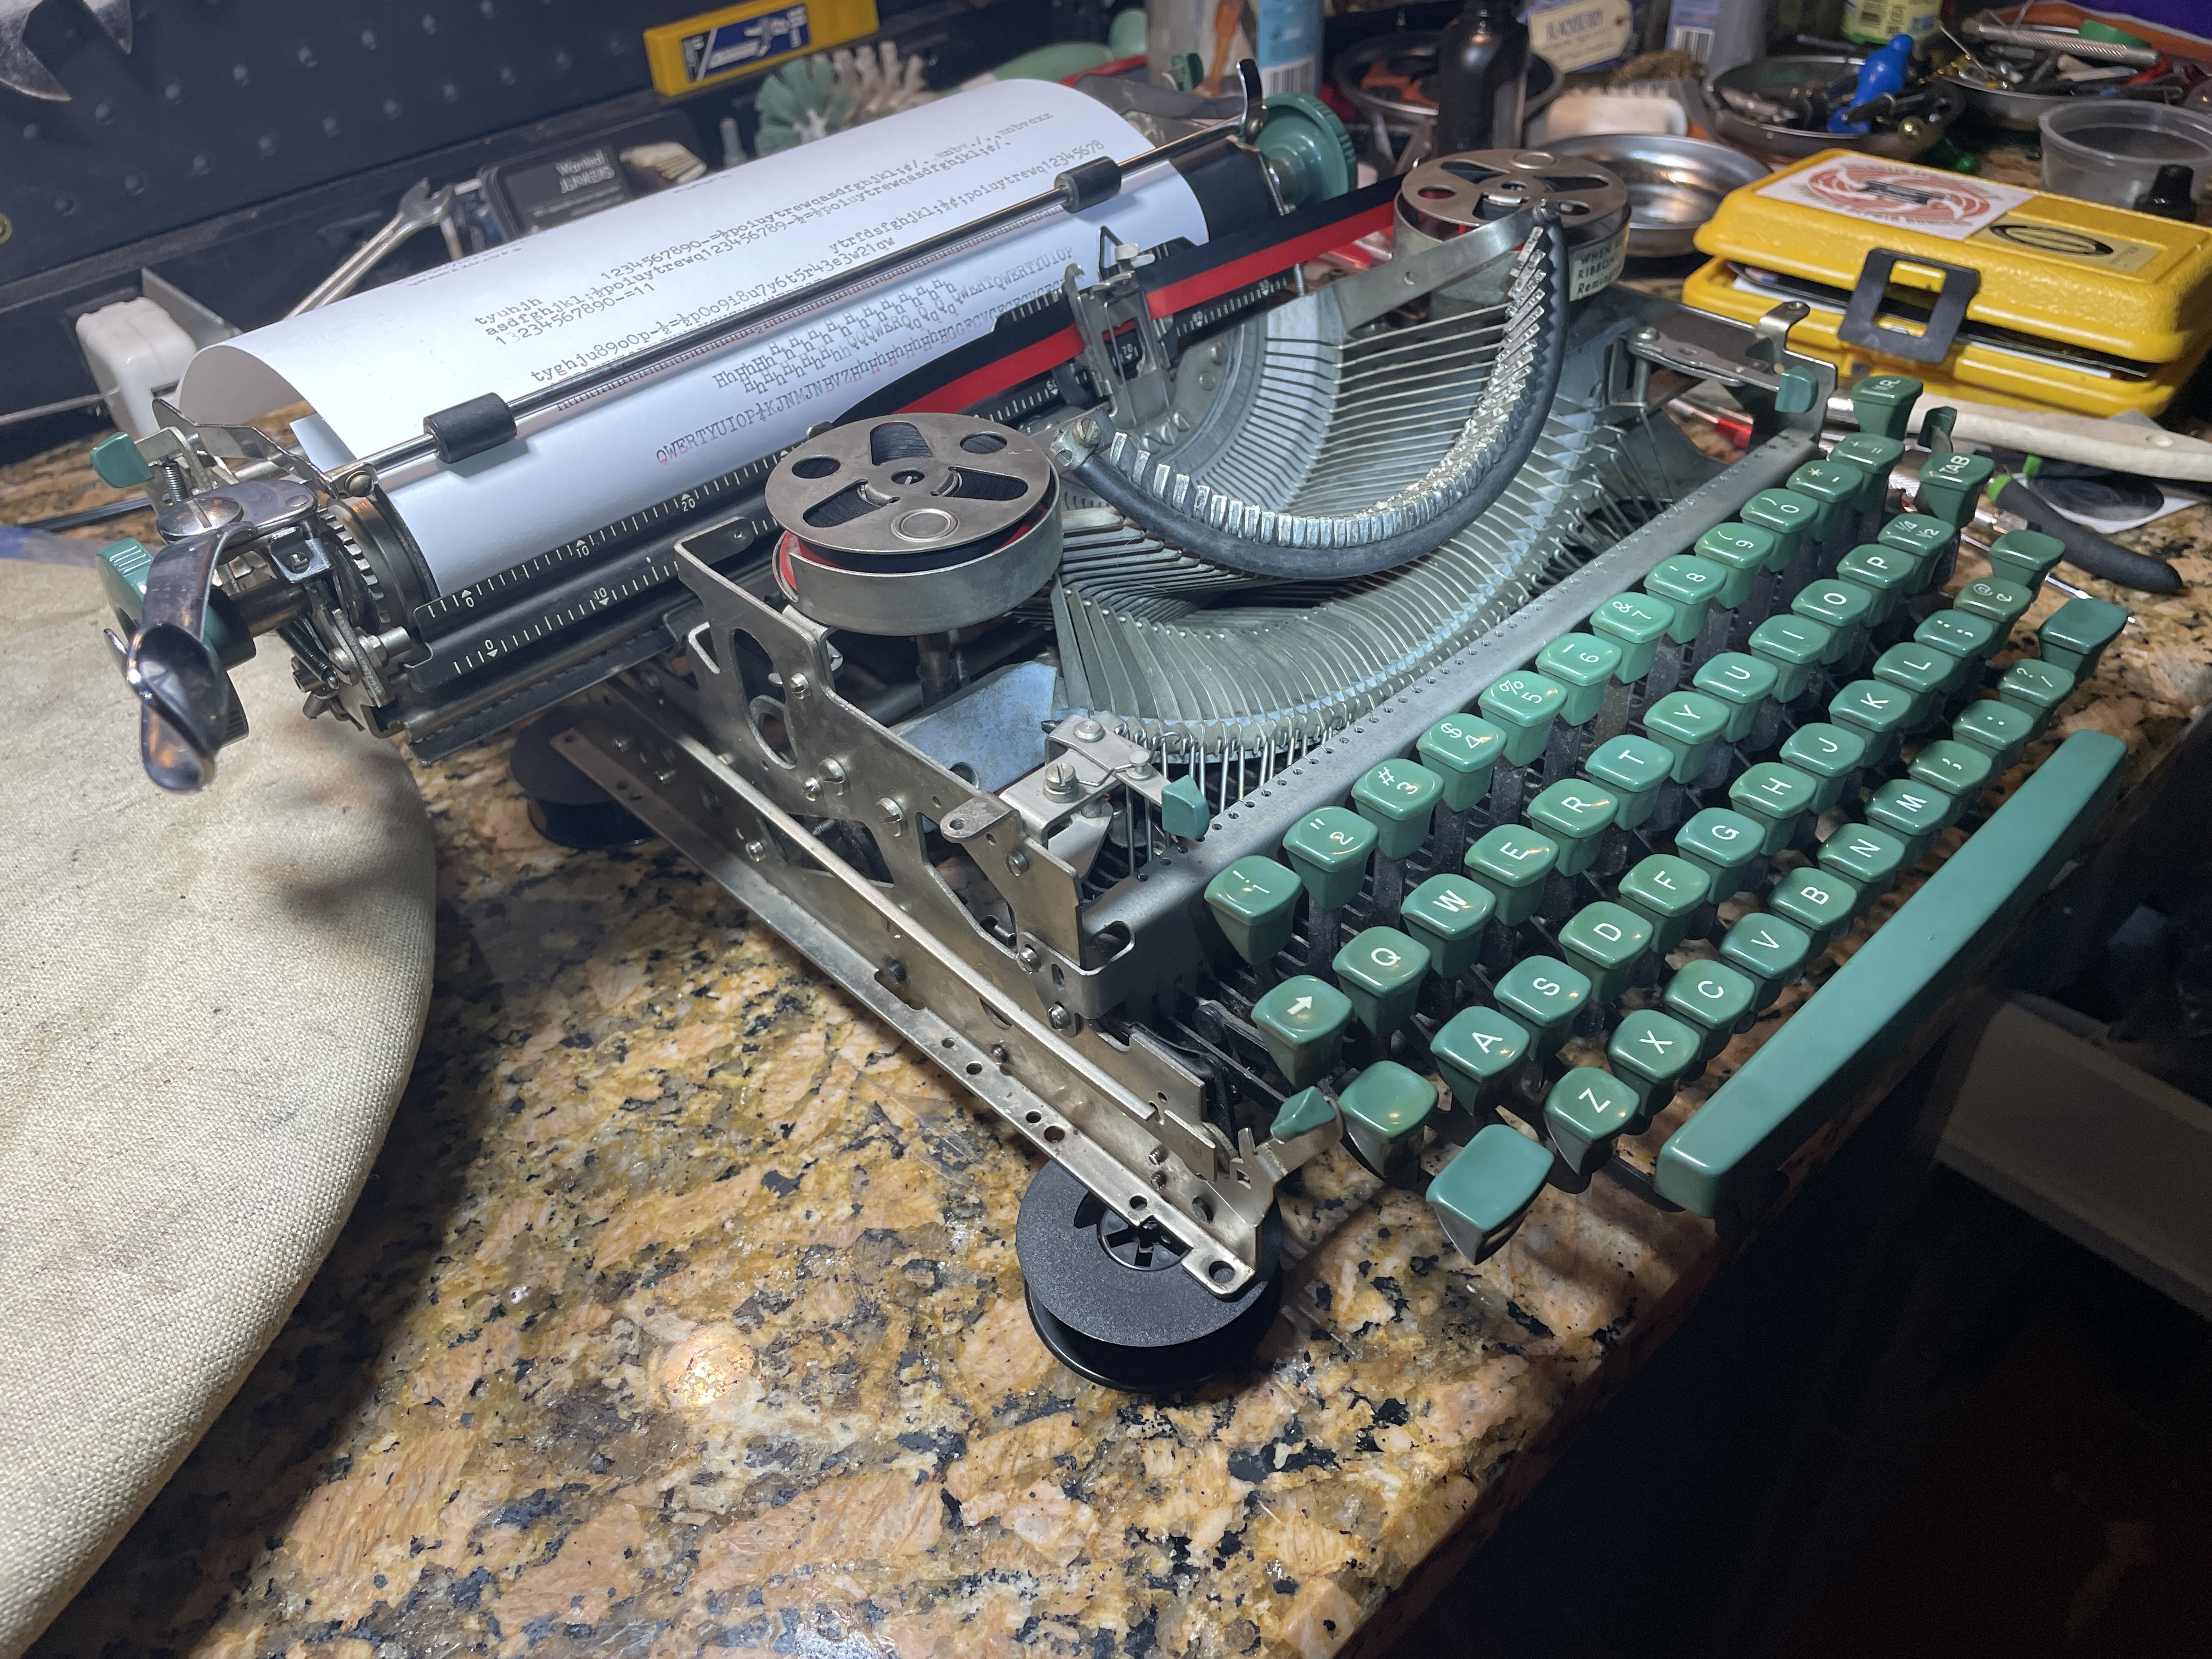
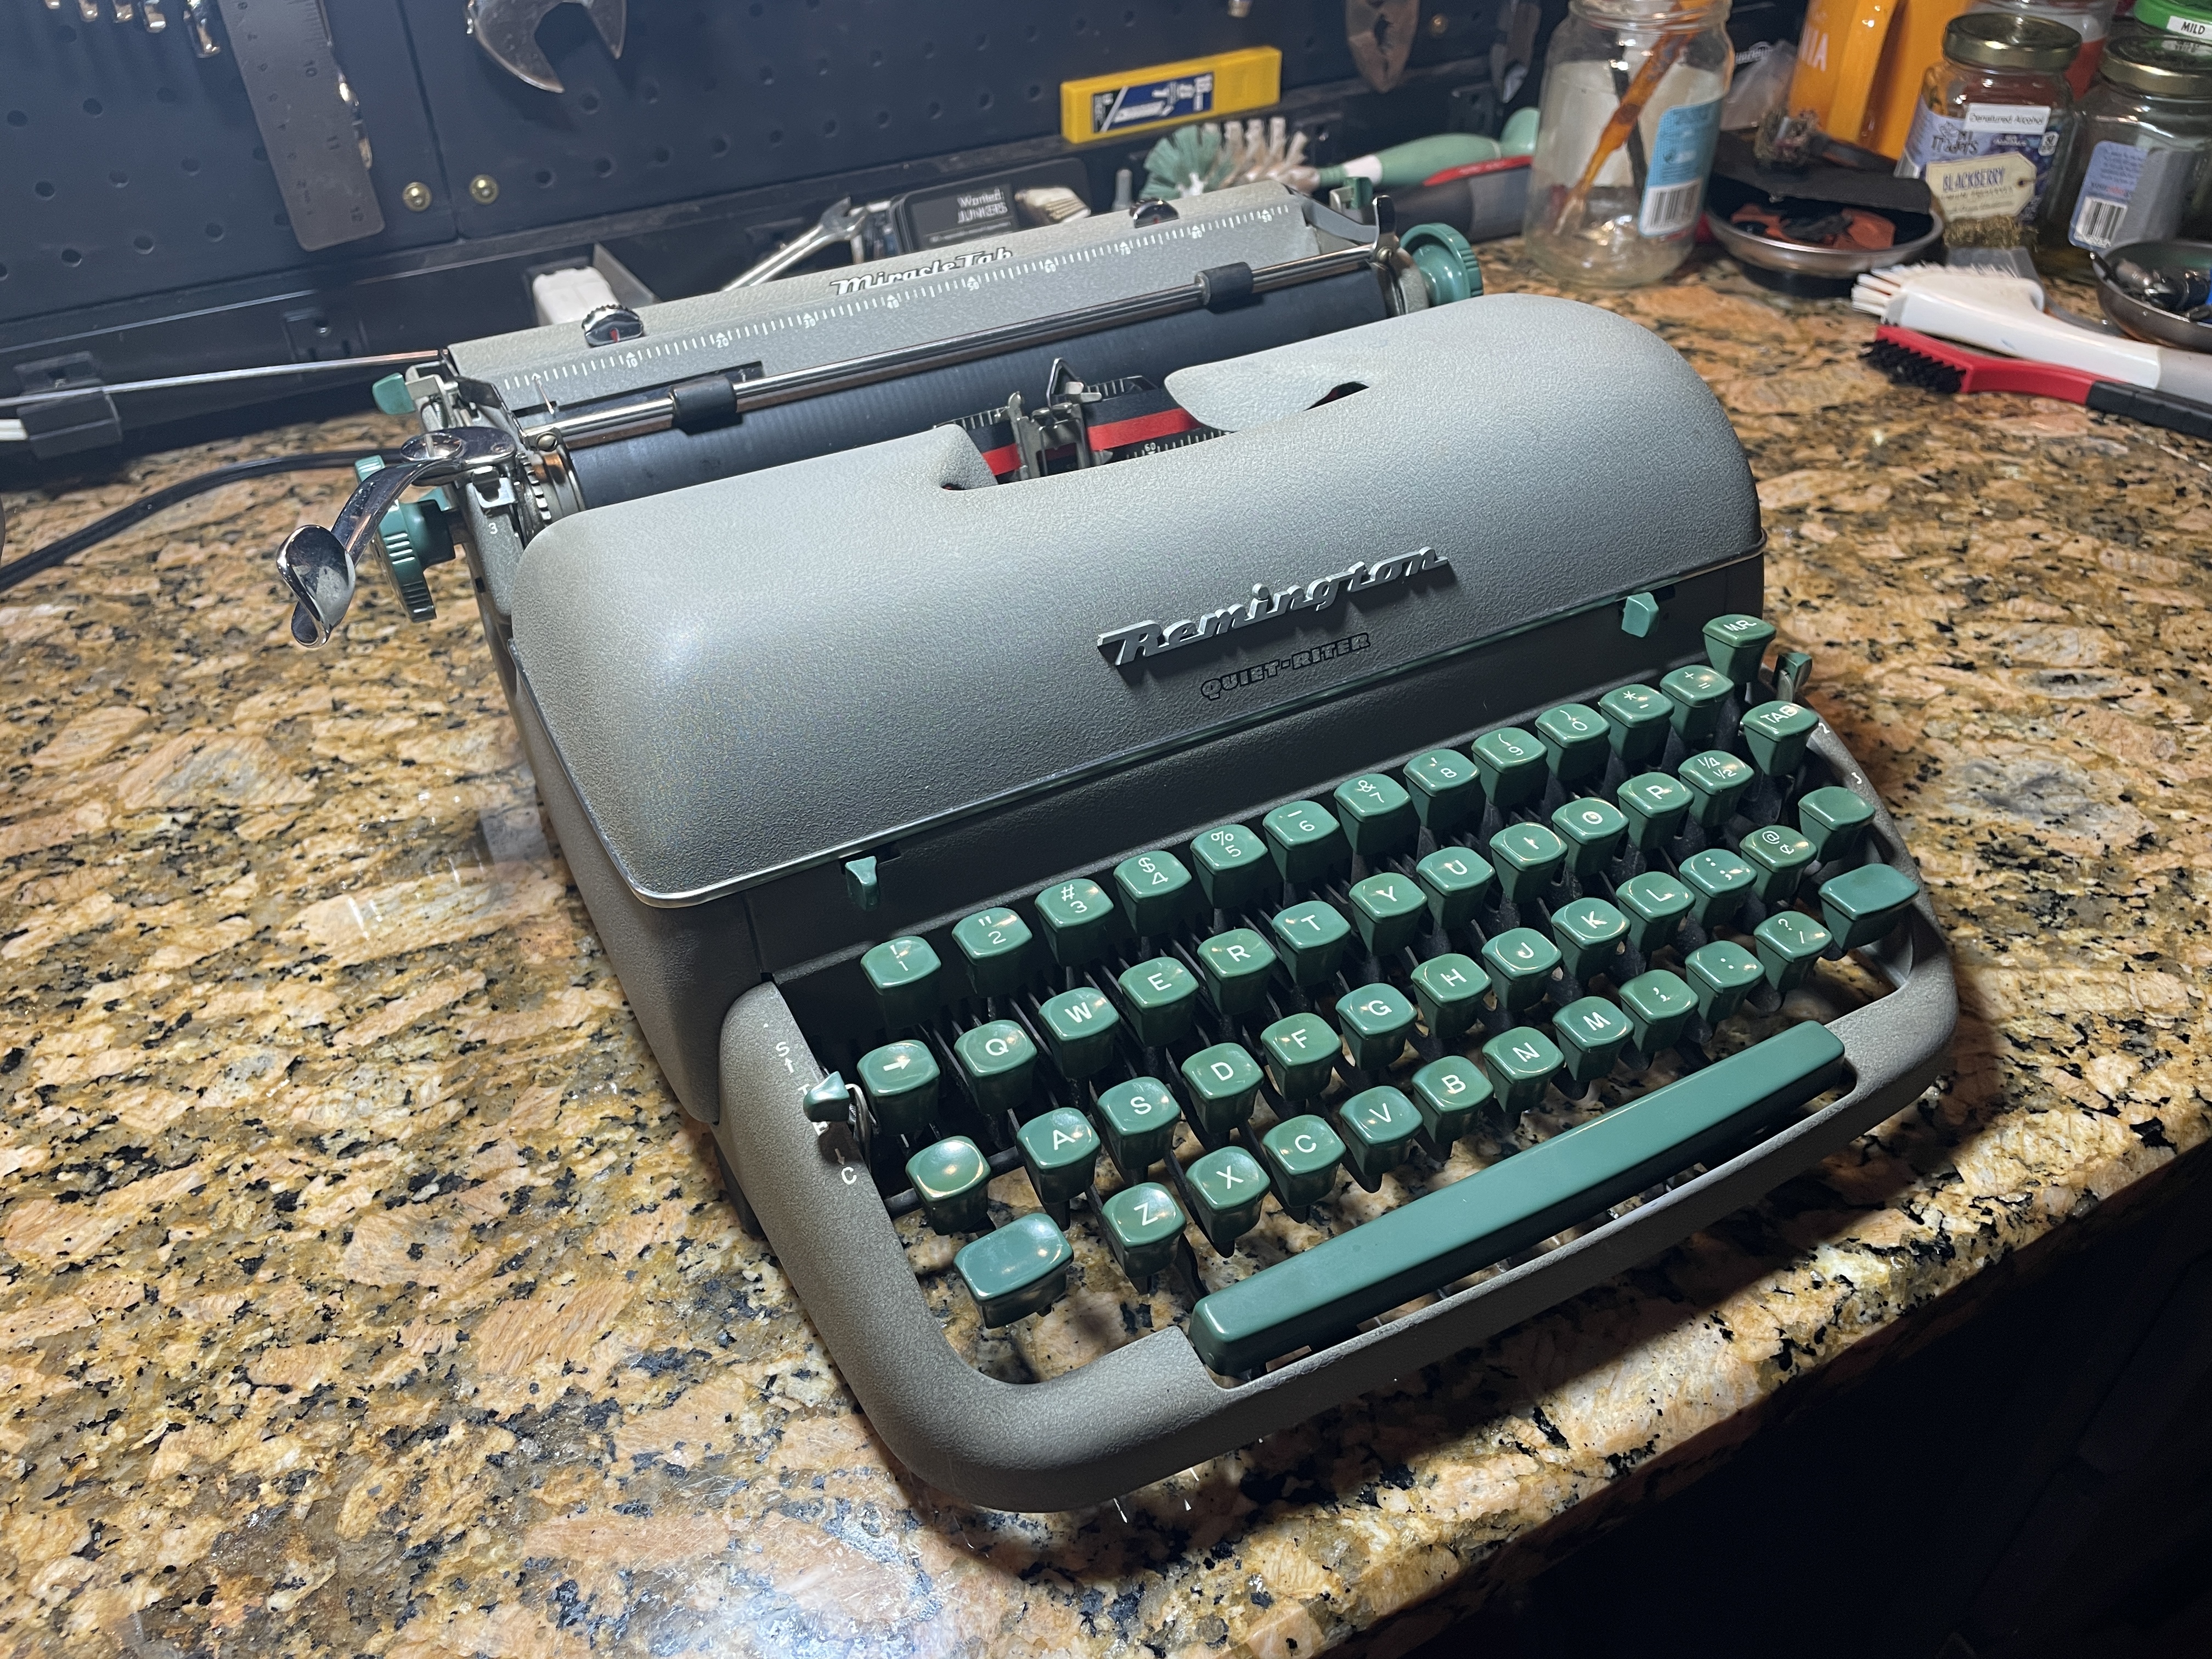
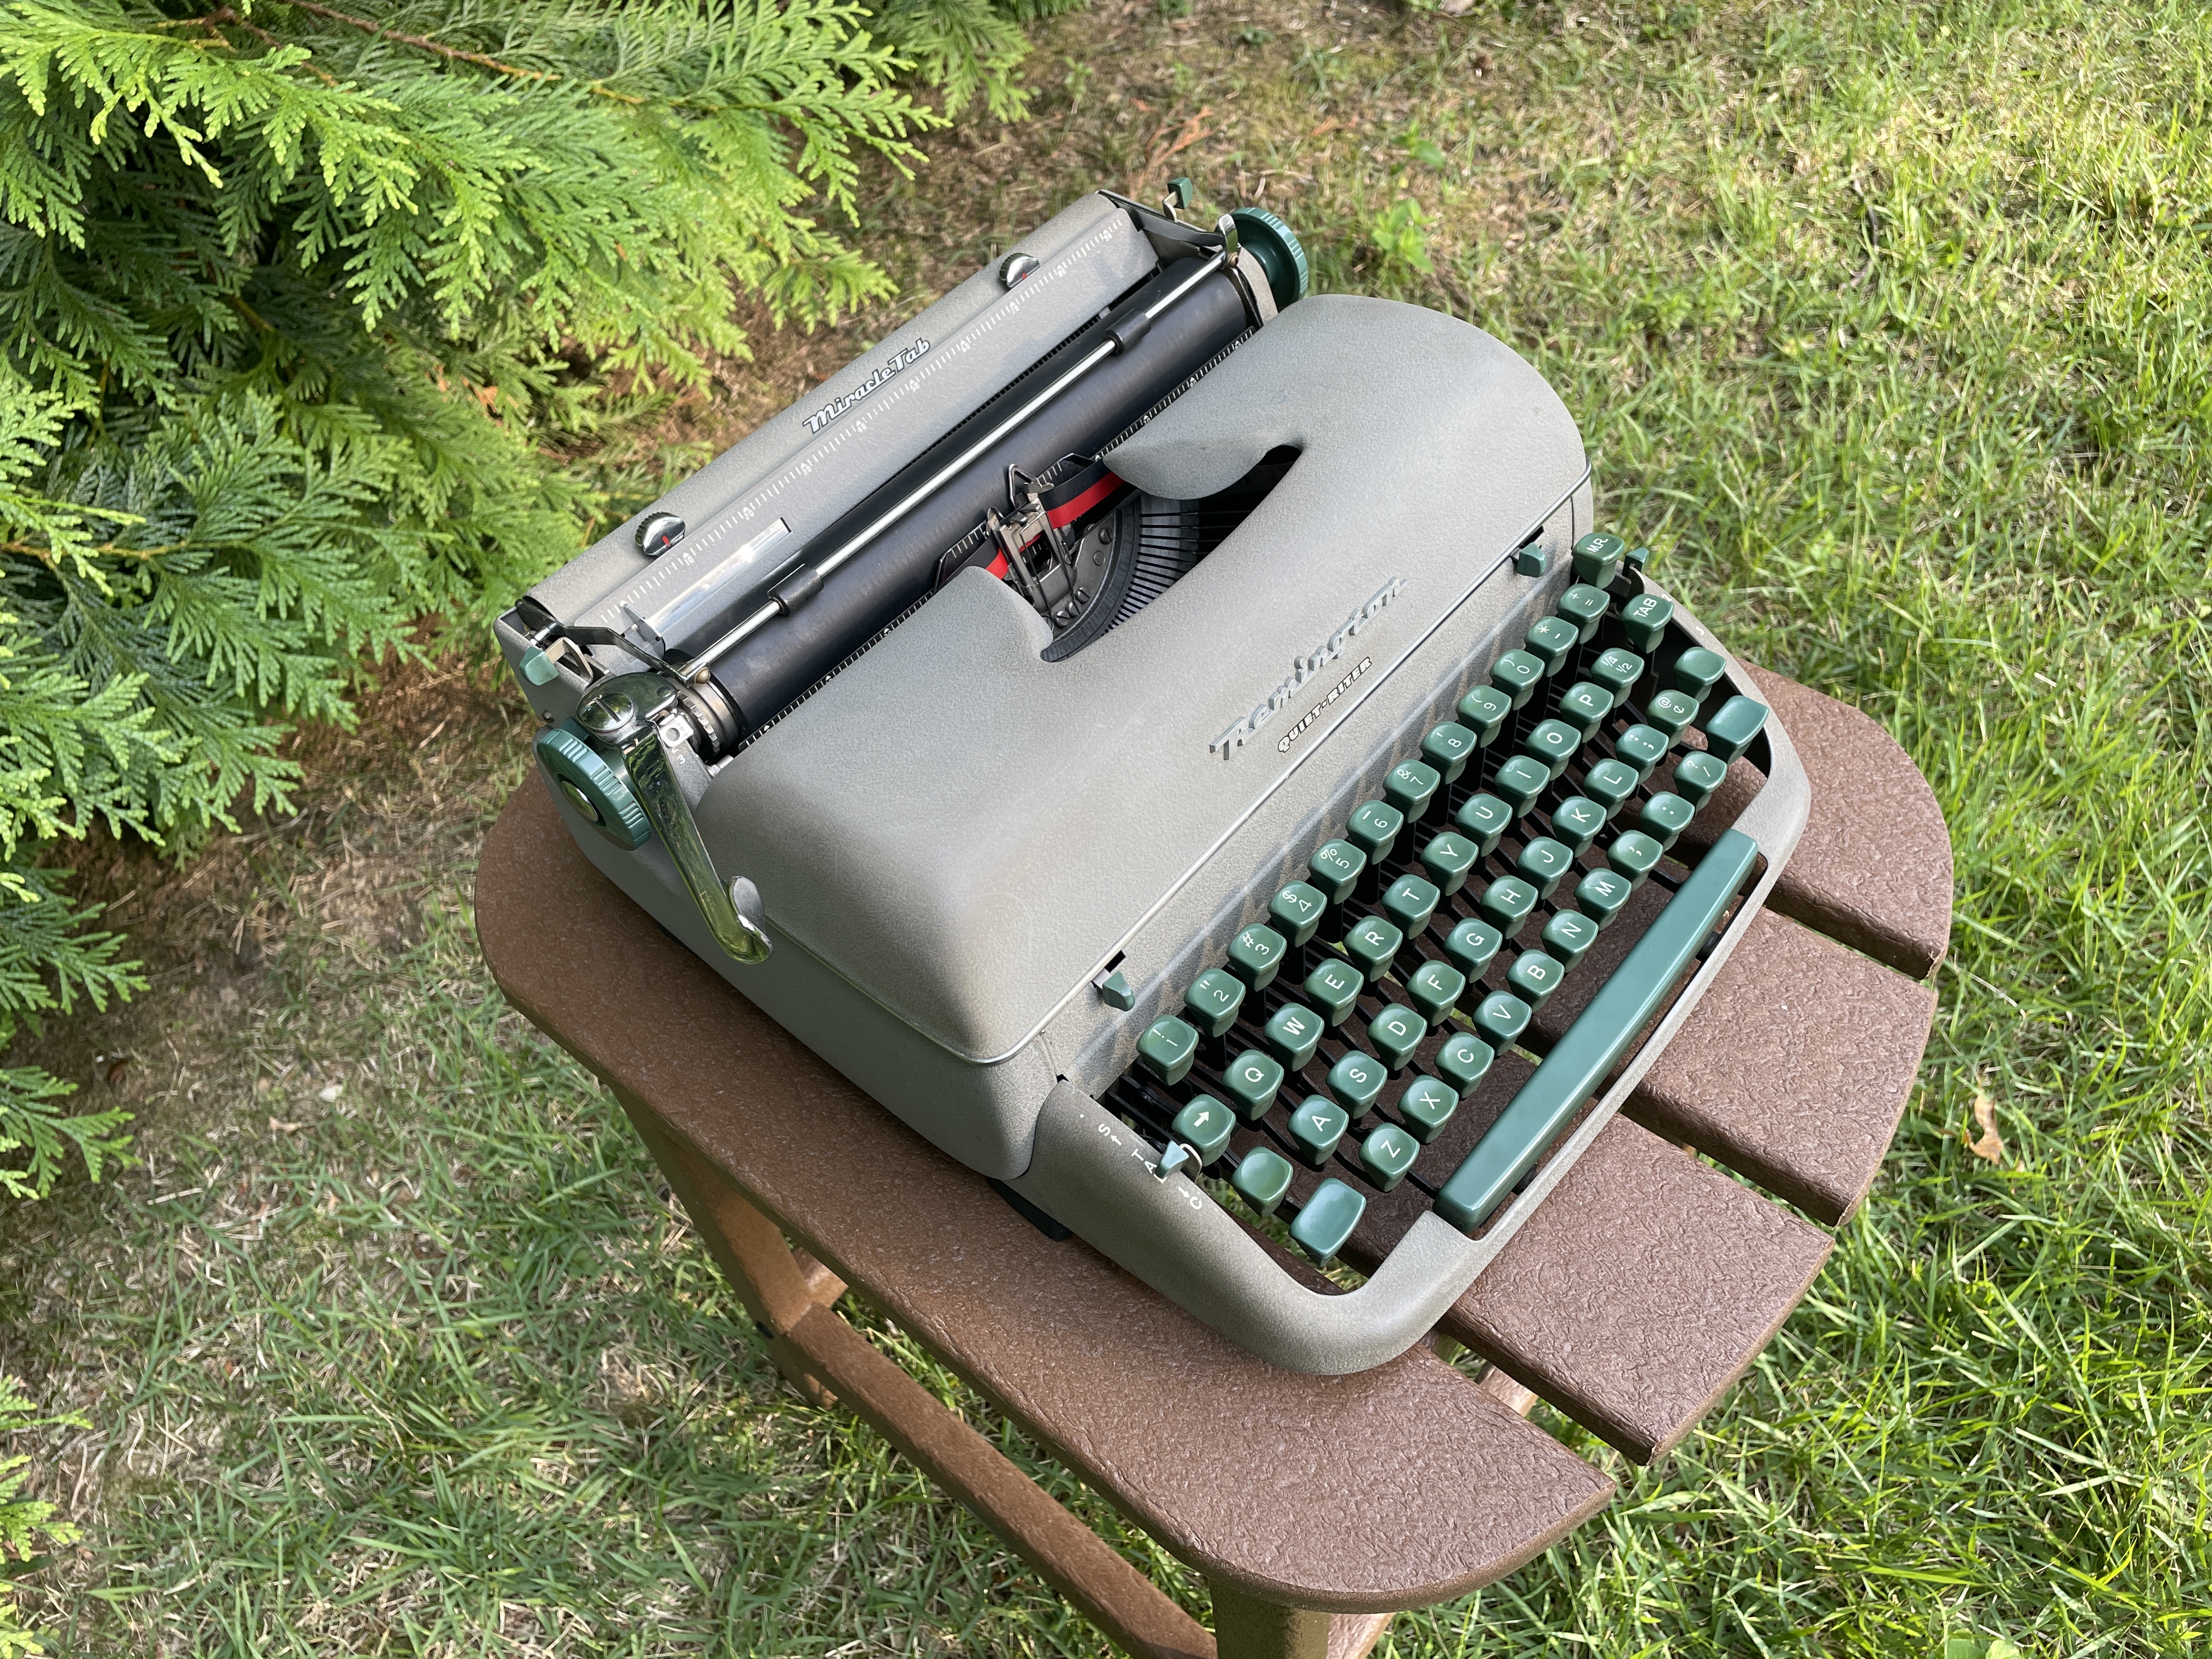
And lastly, I brought home this Remington Quiet-Riter that didn’t want to type. It belonged to another member of The League, David, and he had taken off the back panels for investigation.
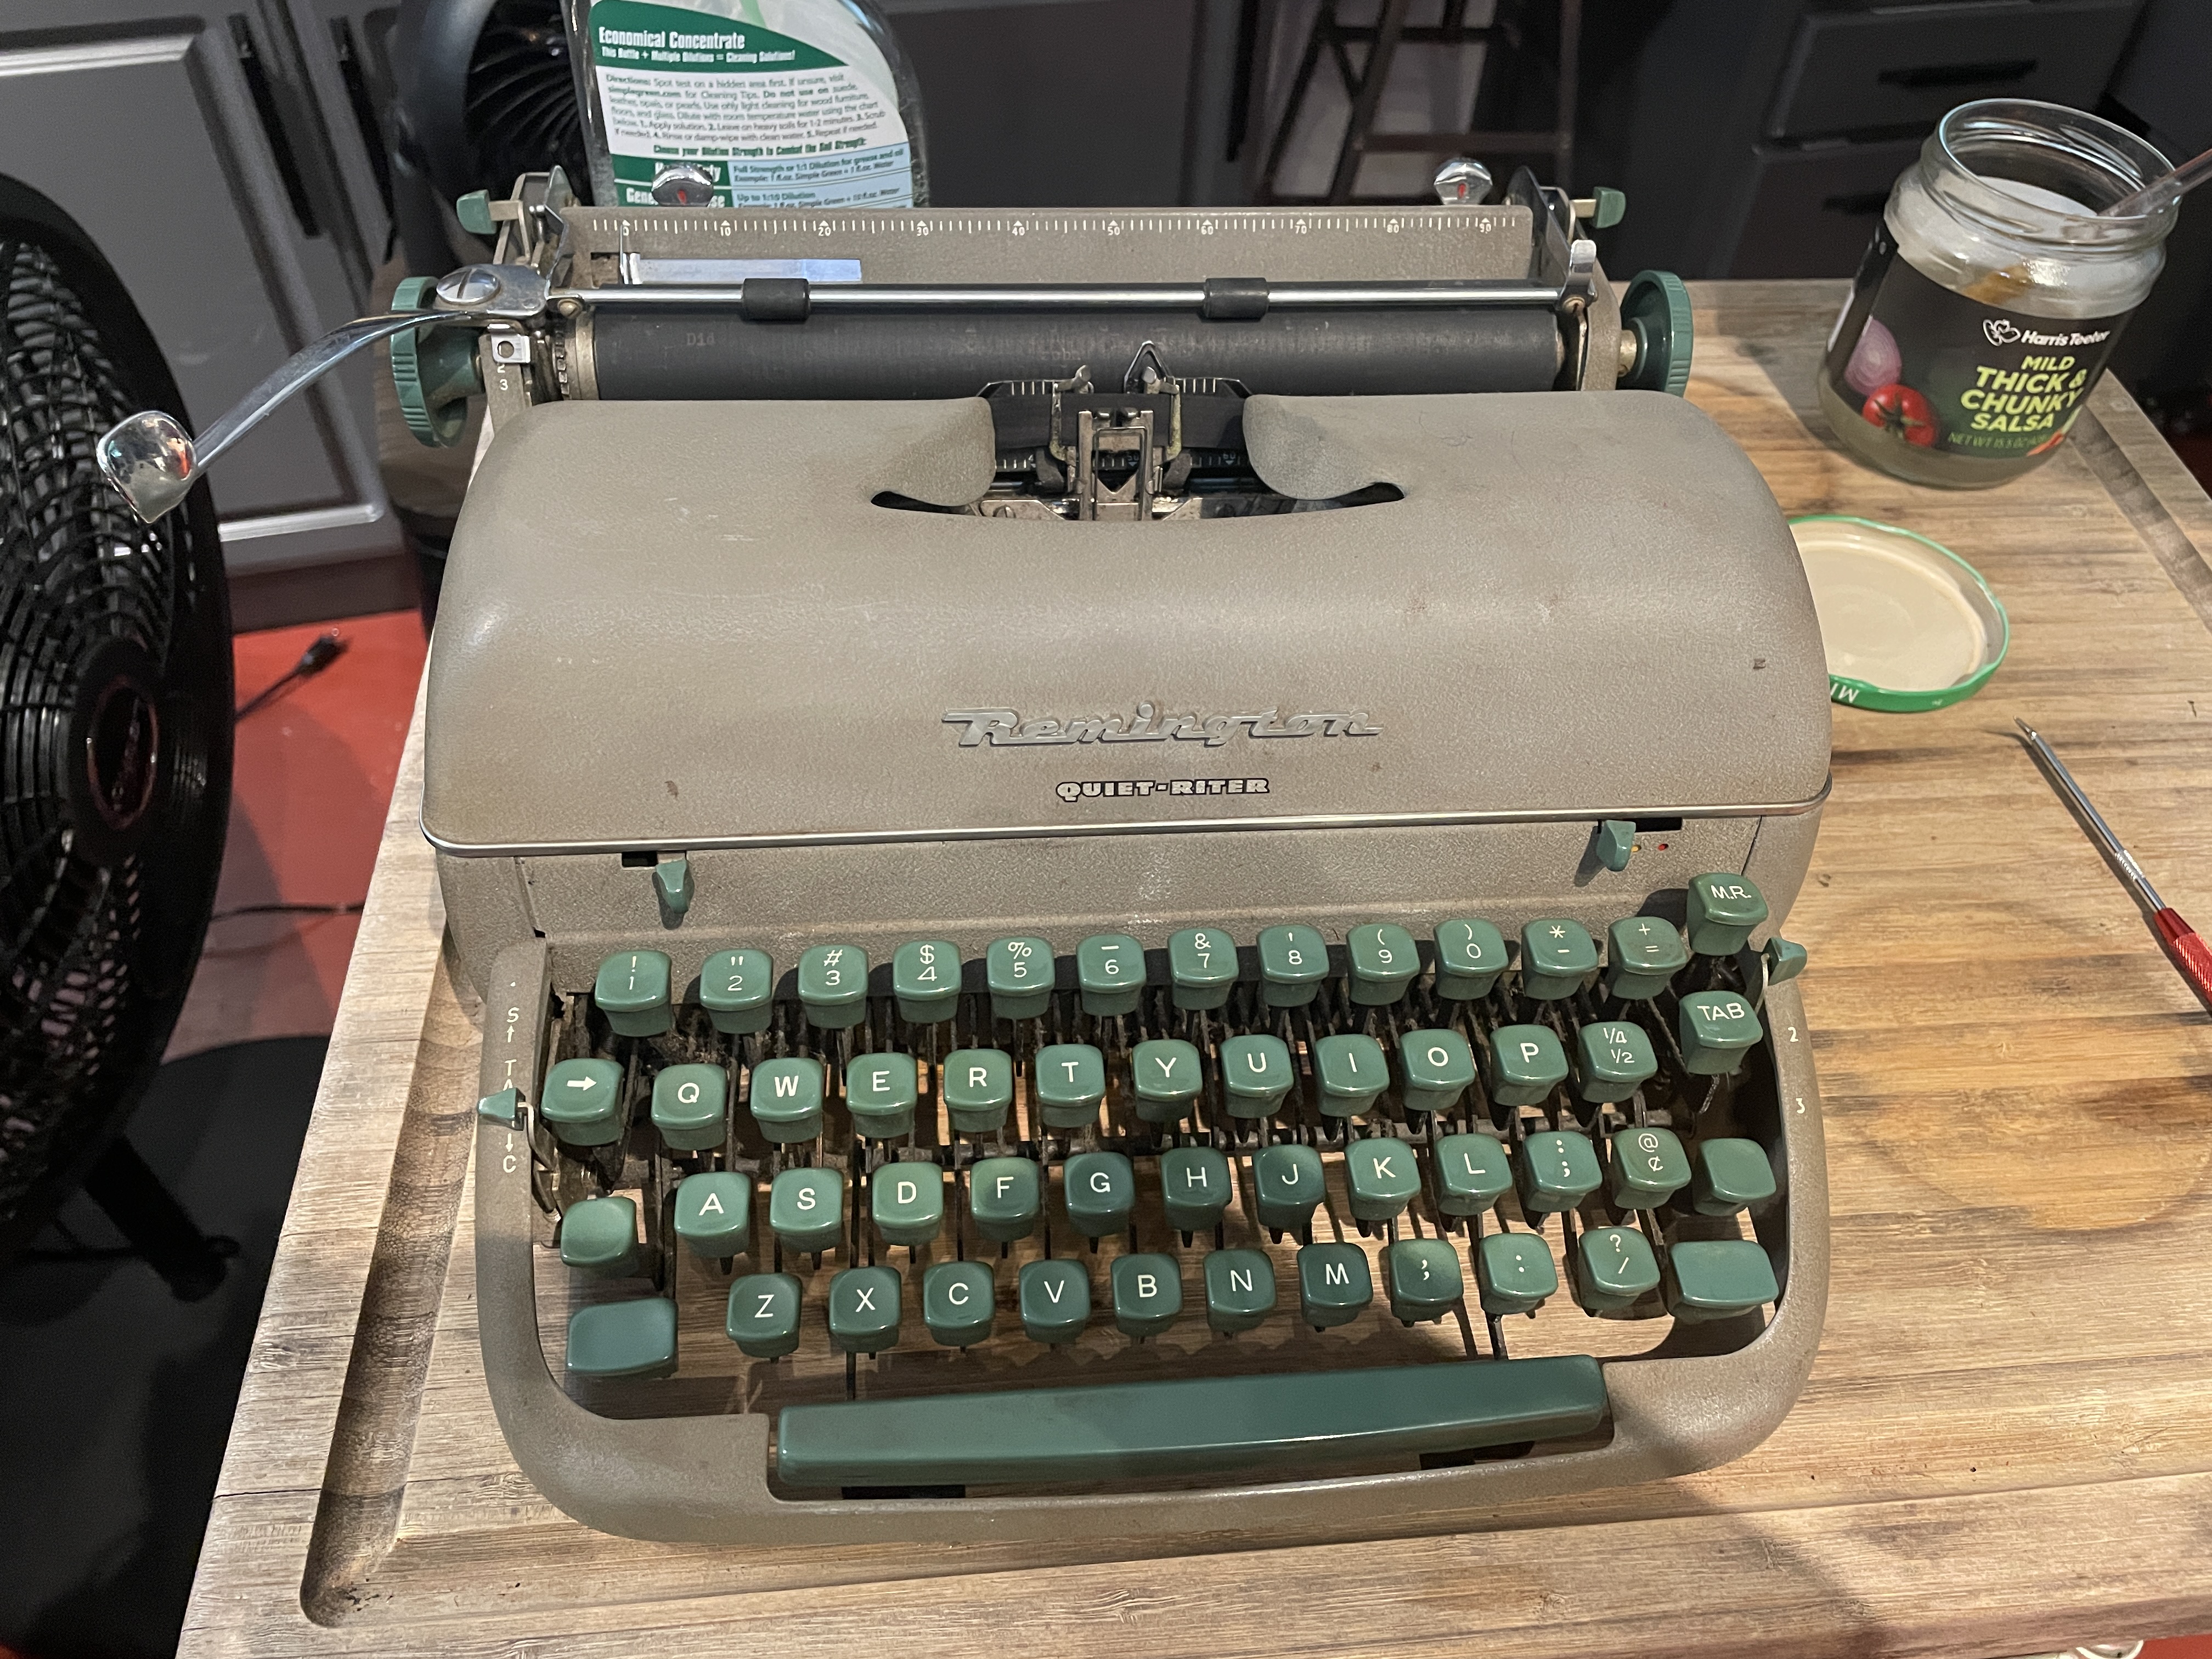
After I got home from the event, I started first on the Quiet-Riter because I have never taken one of these apart. I’ve worked on old-timey Remington portables, but this is very different. It’s a 1958 Quiet-Riter by serial number QR3525188:
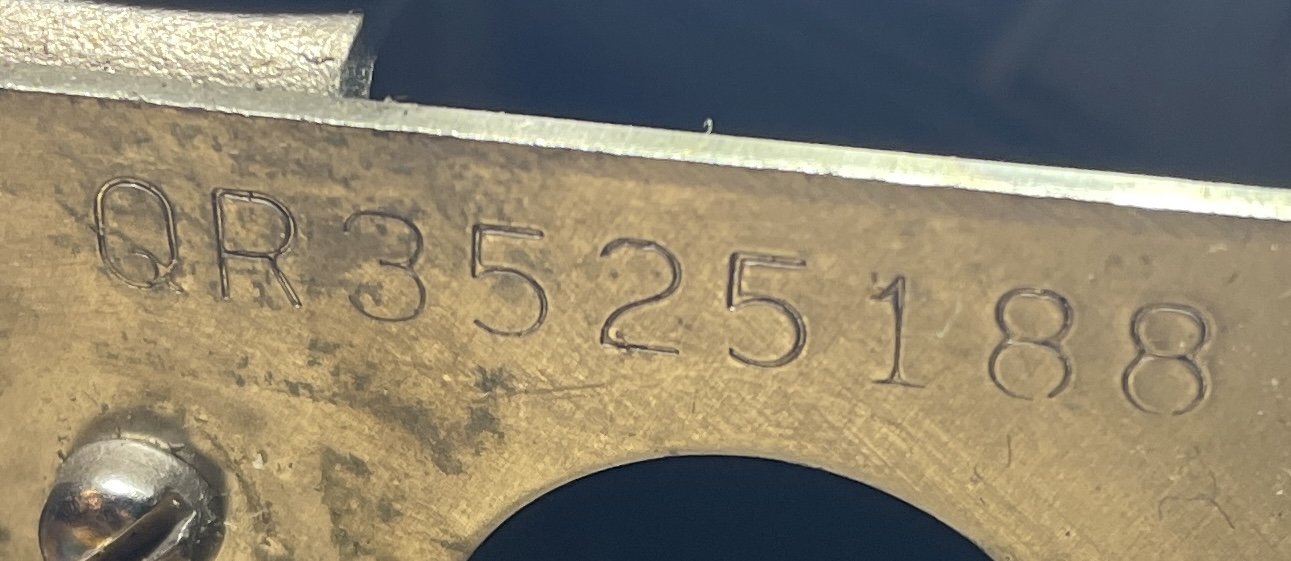
Quiet-Riter serial number stamped on frame next to right ribbon spool
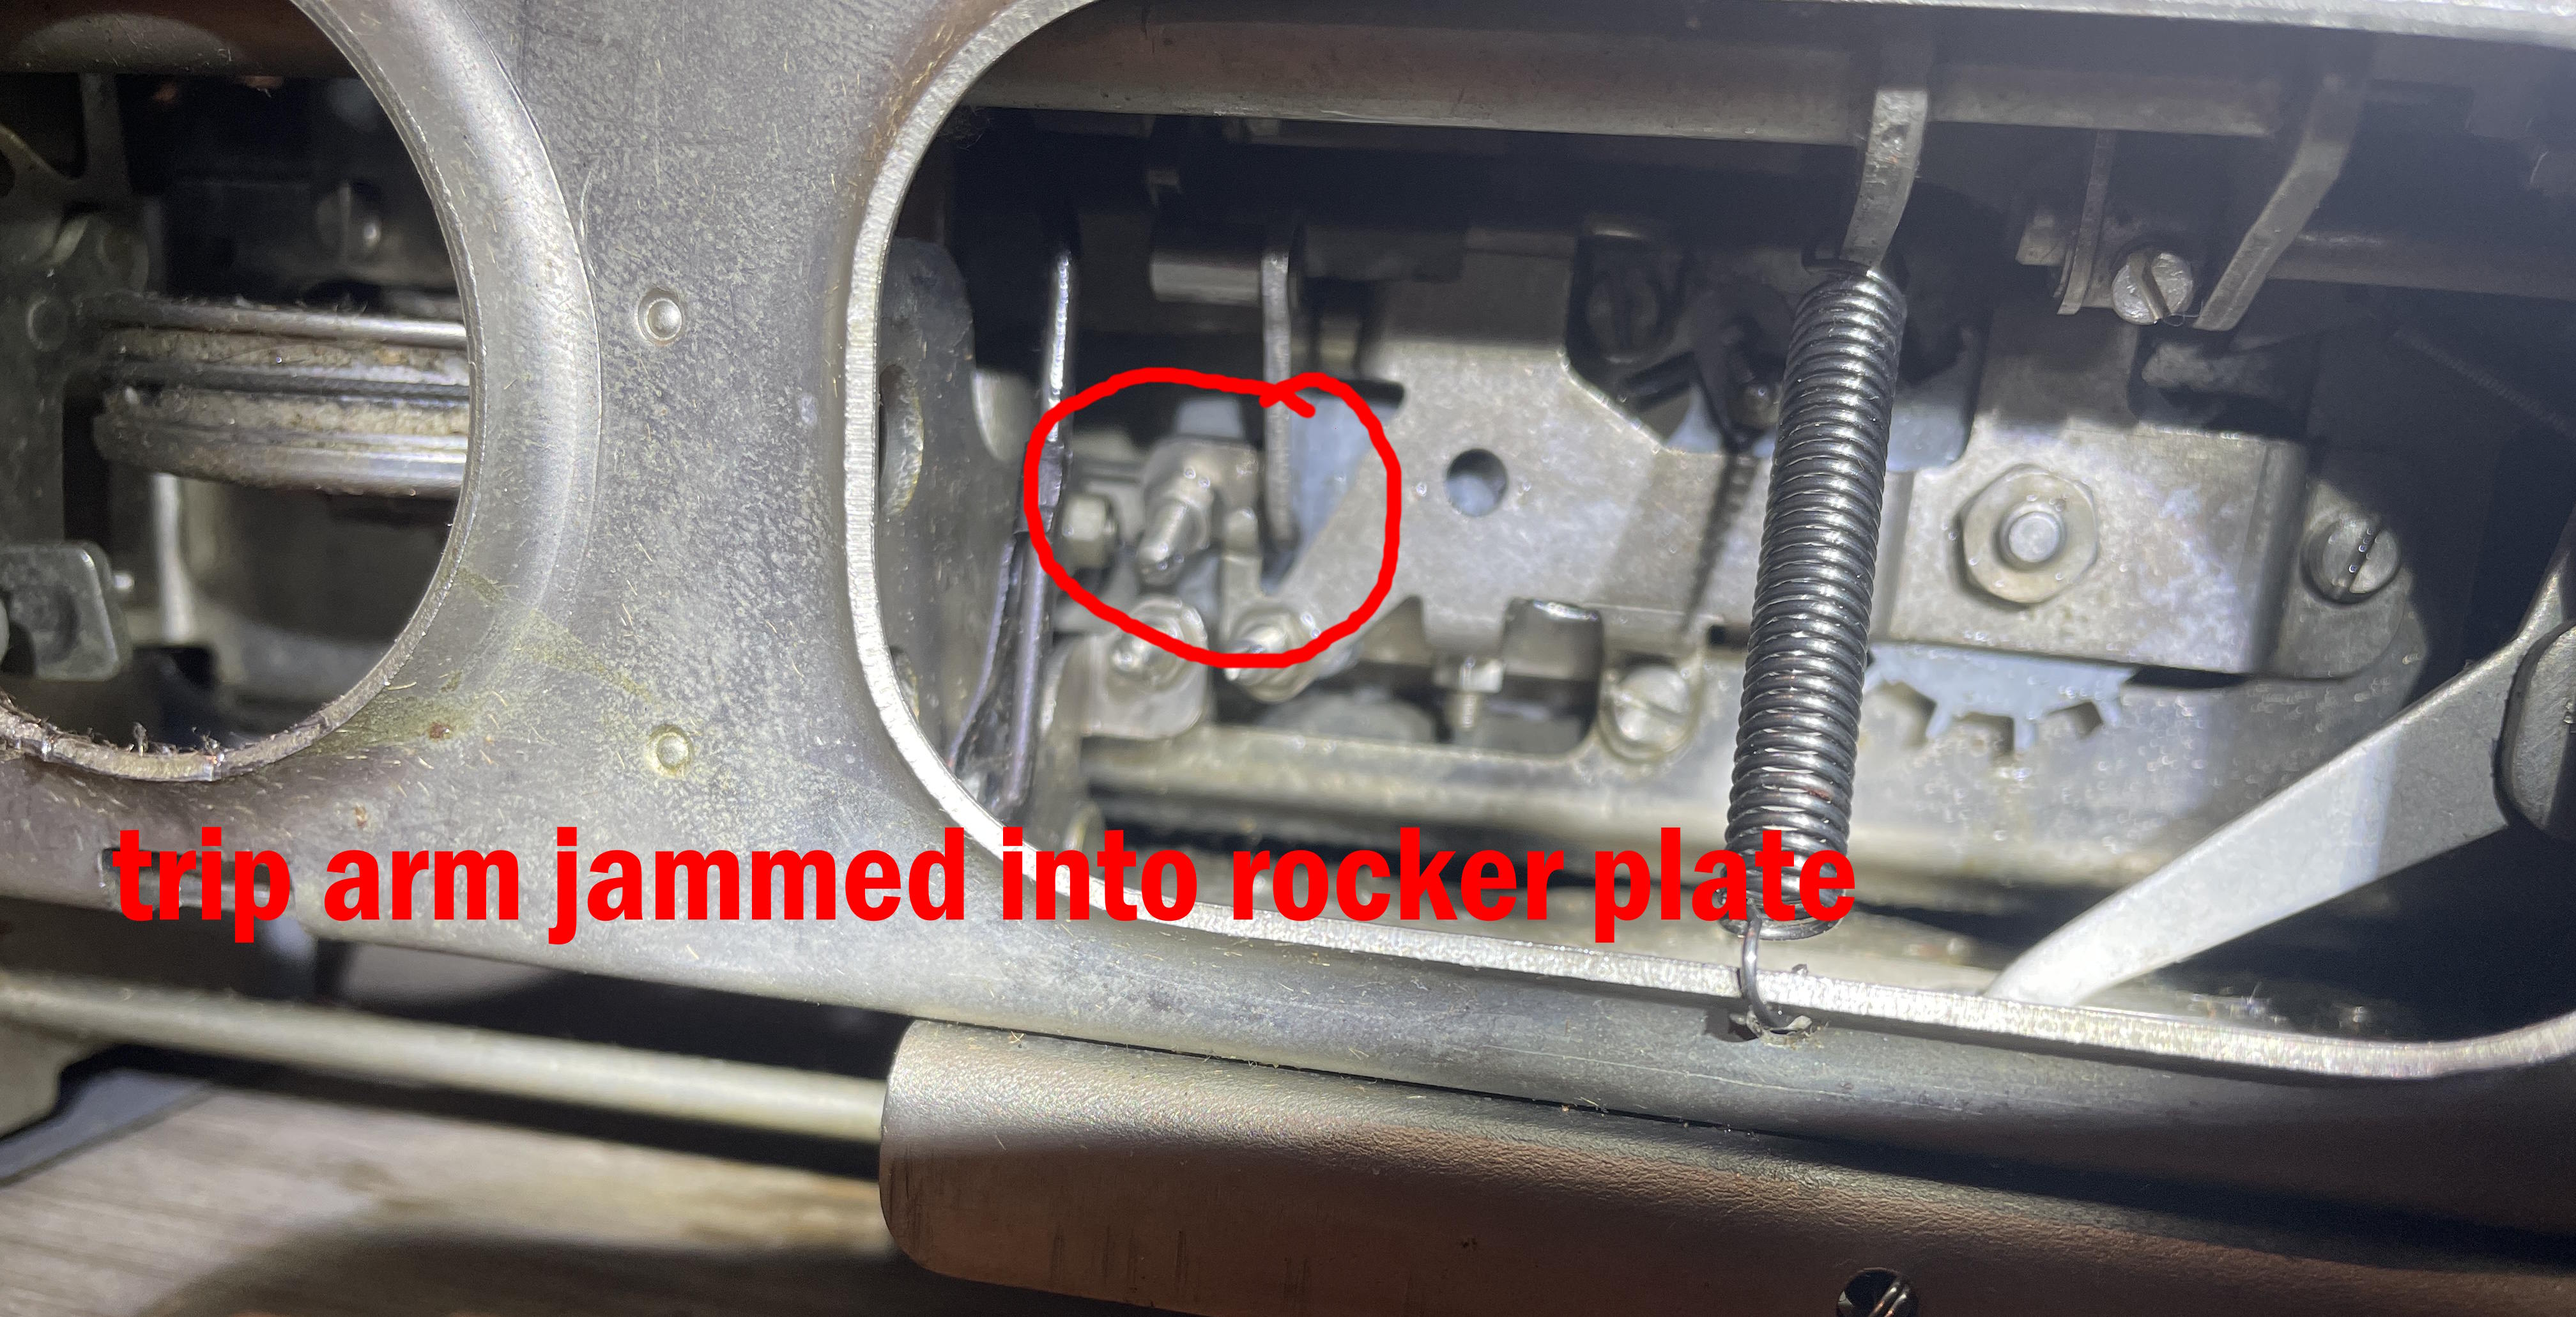
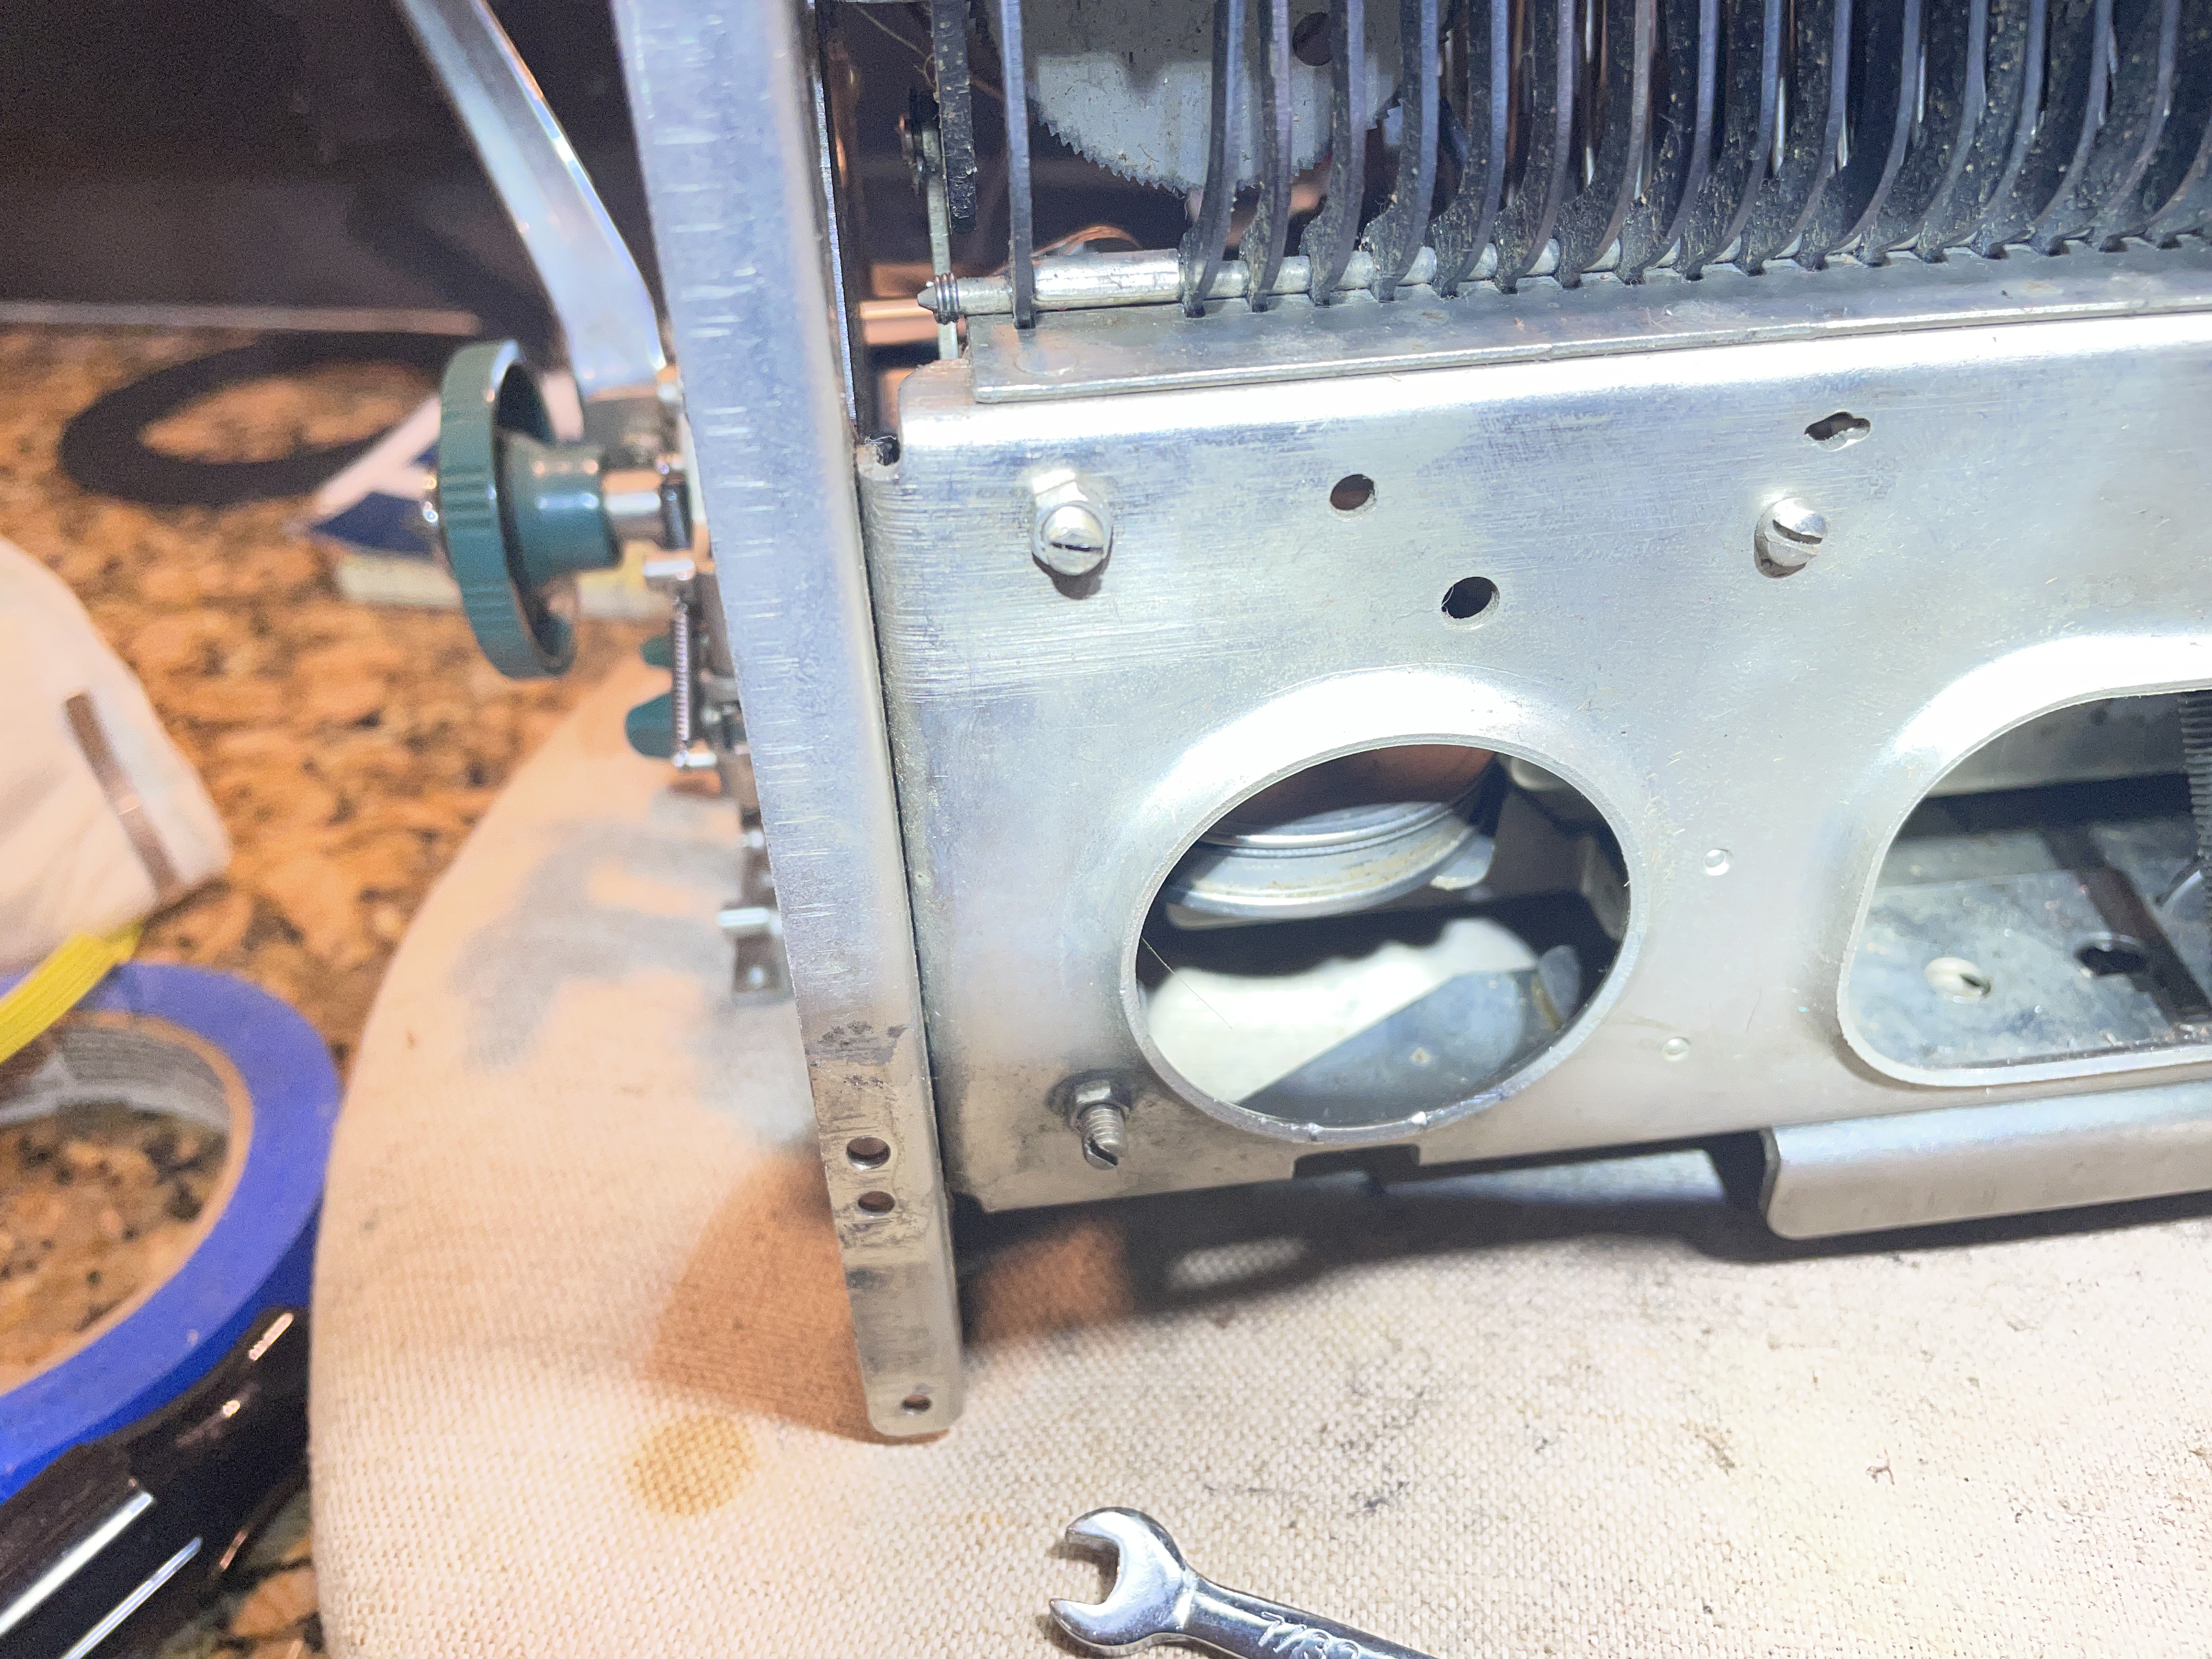
The typebars were swinging freely, but the carriage wasn’t going anywhere. There was a bad sound when I tried to do a carriage return. I looked under the machine and found that the escapement was locked up. I did some cleaning through the hole in the bottom, but it was pretty clear that the escapement trip arm was jammed in a funny position, not allowing the escapement body assembly plate to rock.
I started with taking the shell off. I removed all the cover plates which was pretty straightforward with easily identified screws.
Removing the platen from a 1958 Remington Quiet-Riter typewriter
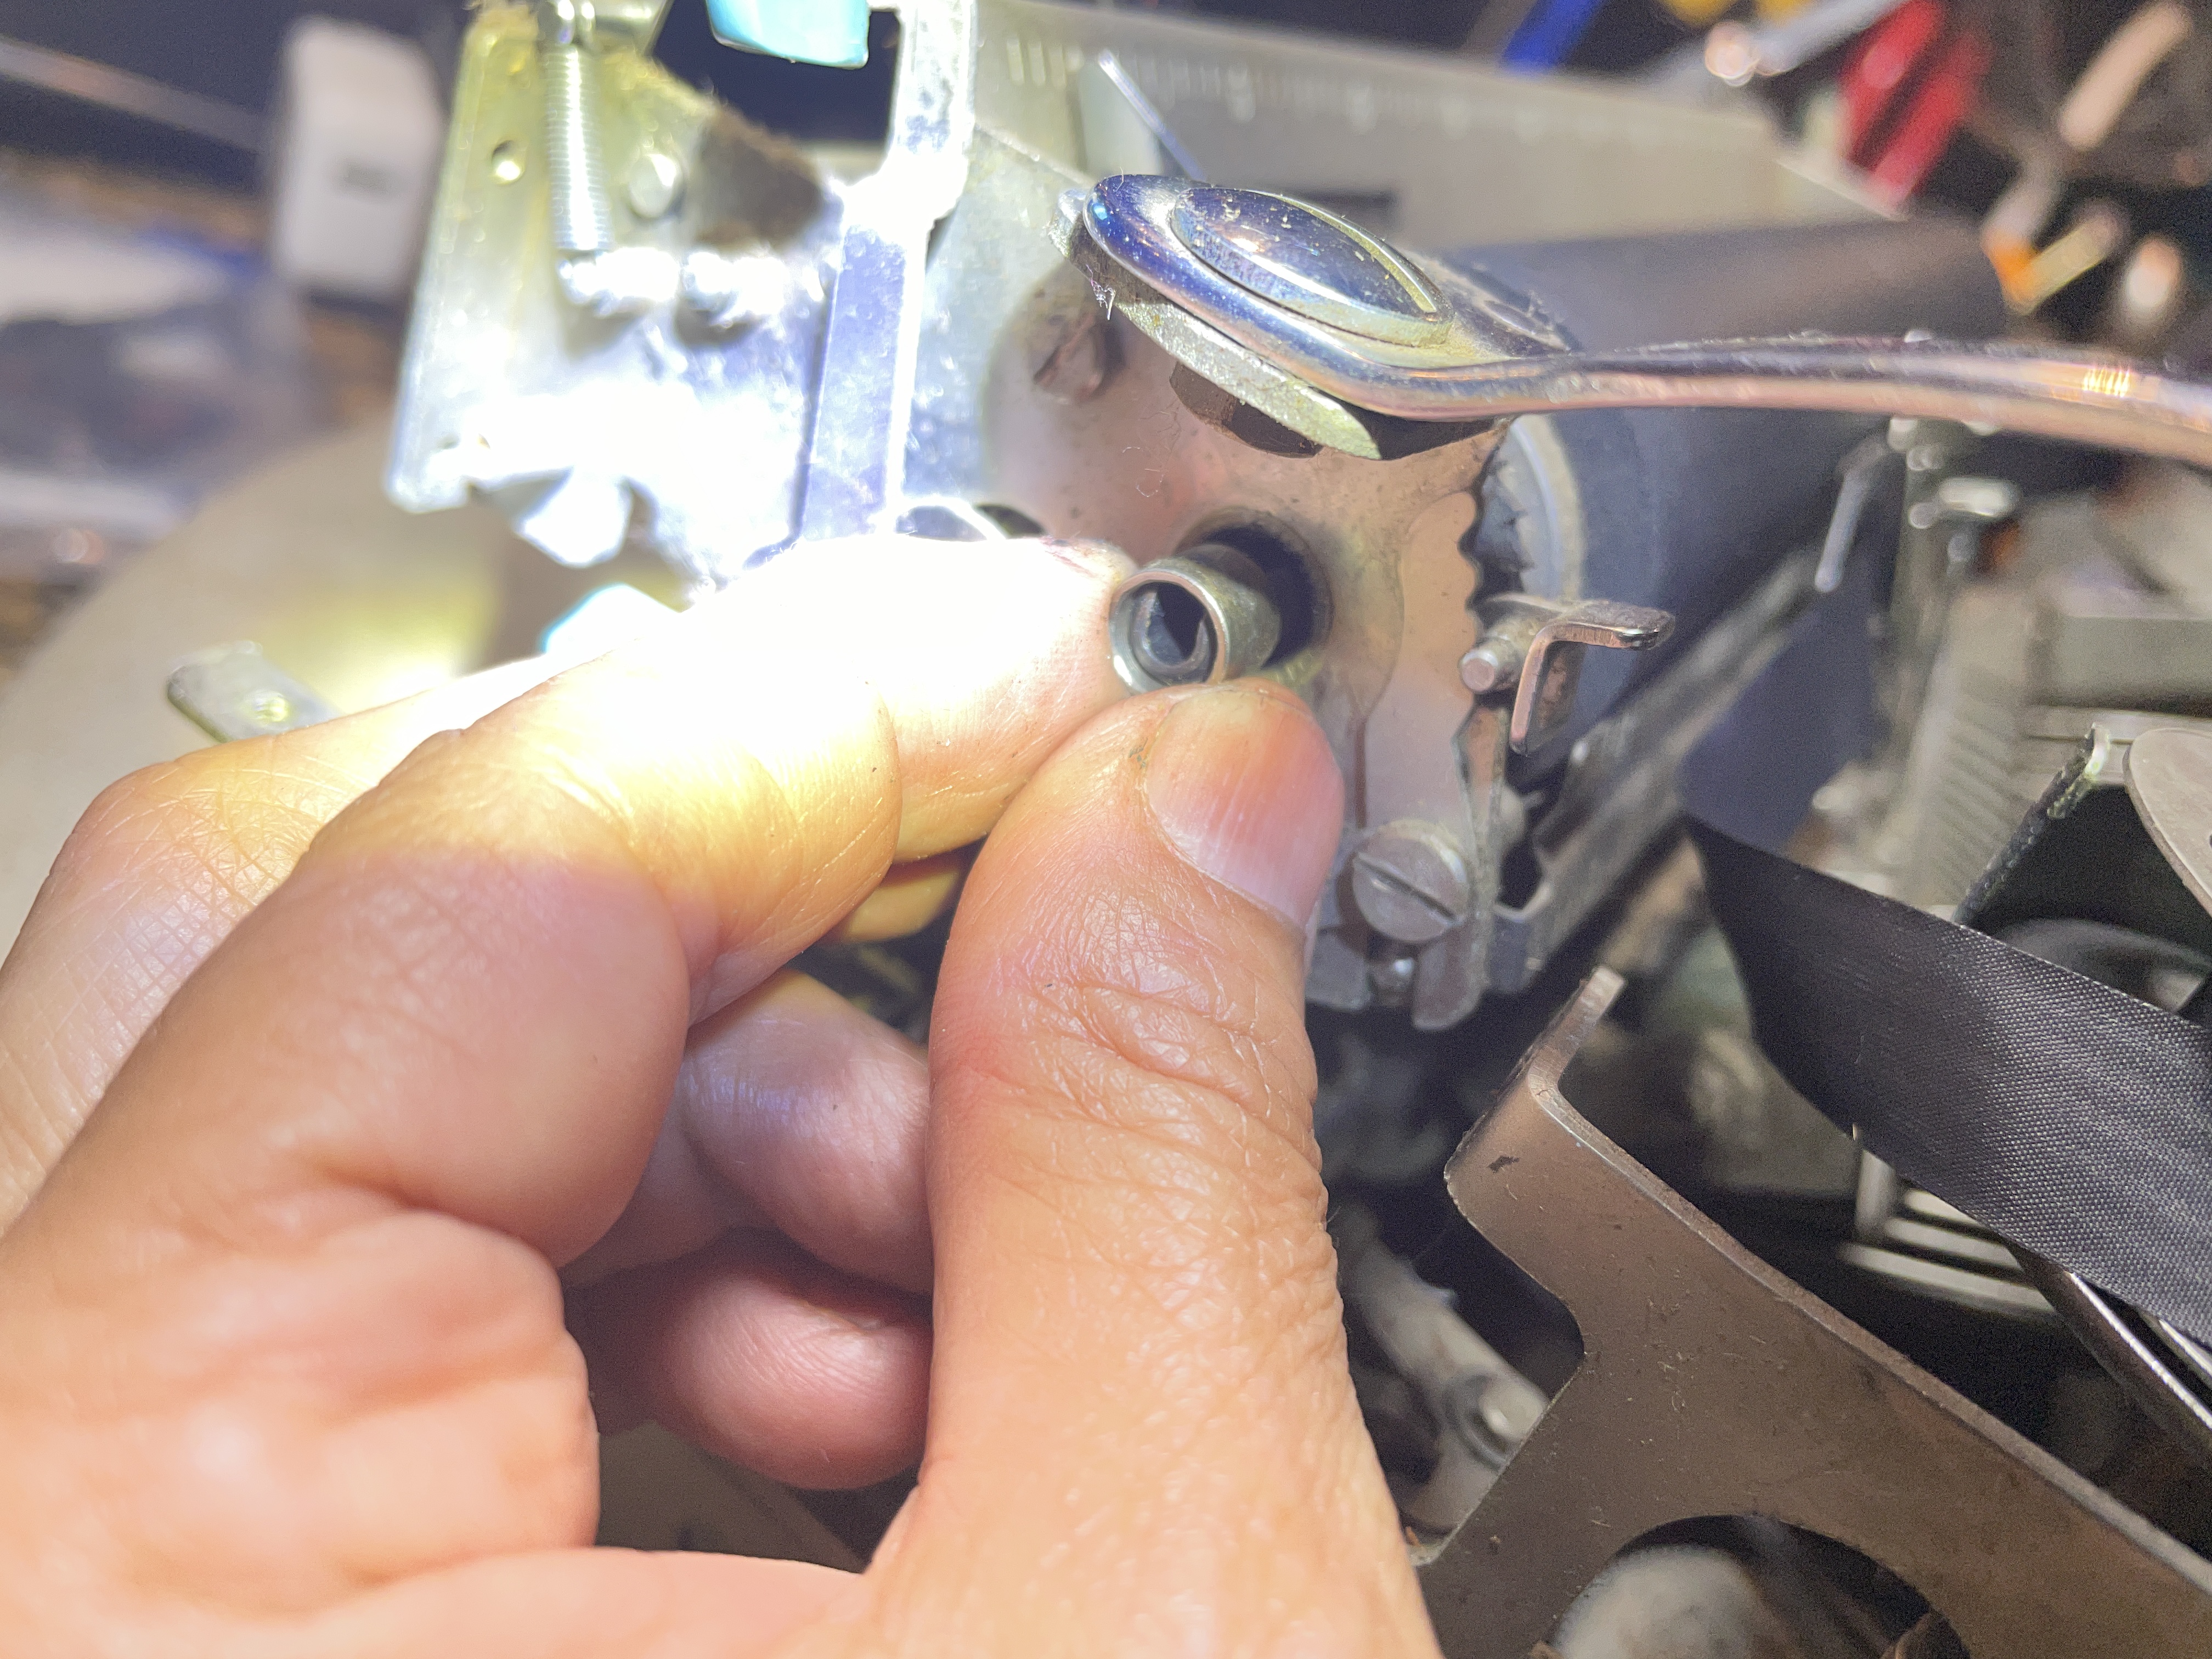
The left platen knob unscrews counter-clockwise. Easy! The right platen knob comes off after the inside set screw is loosened.
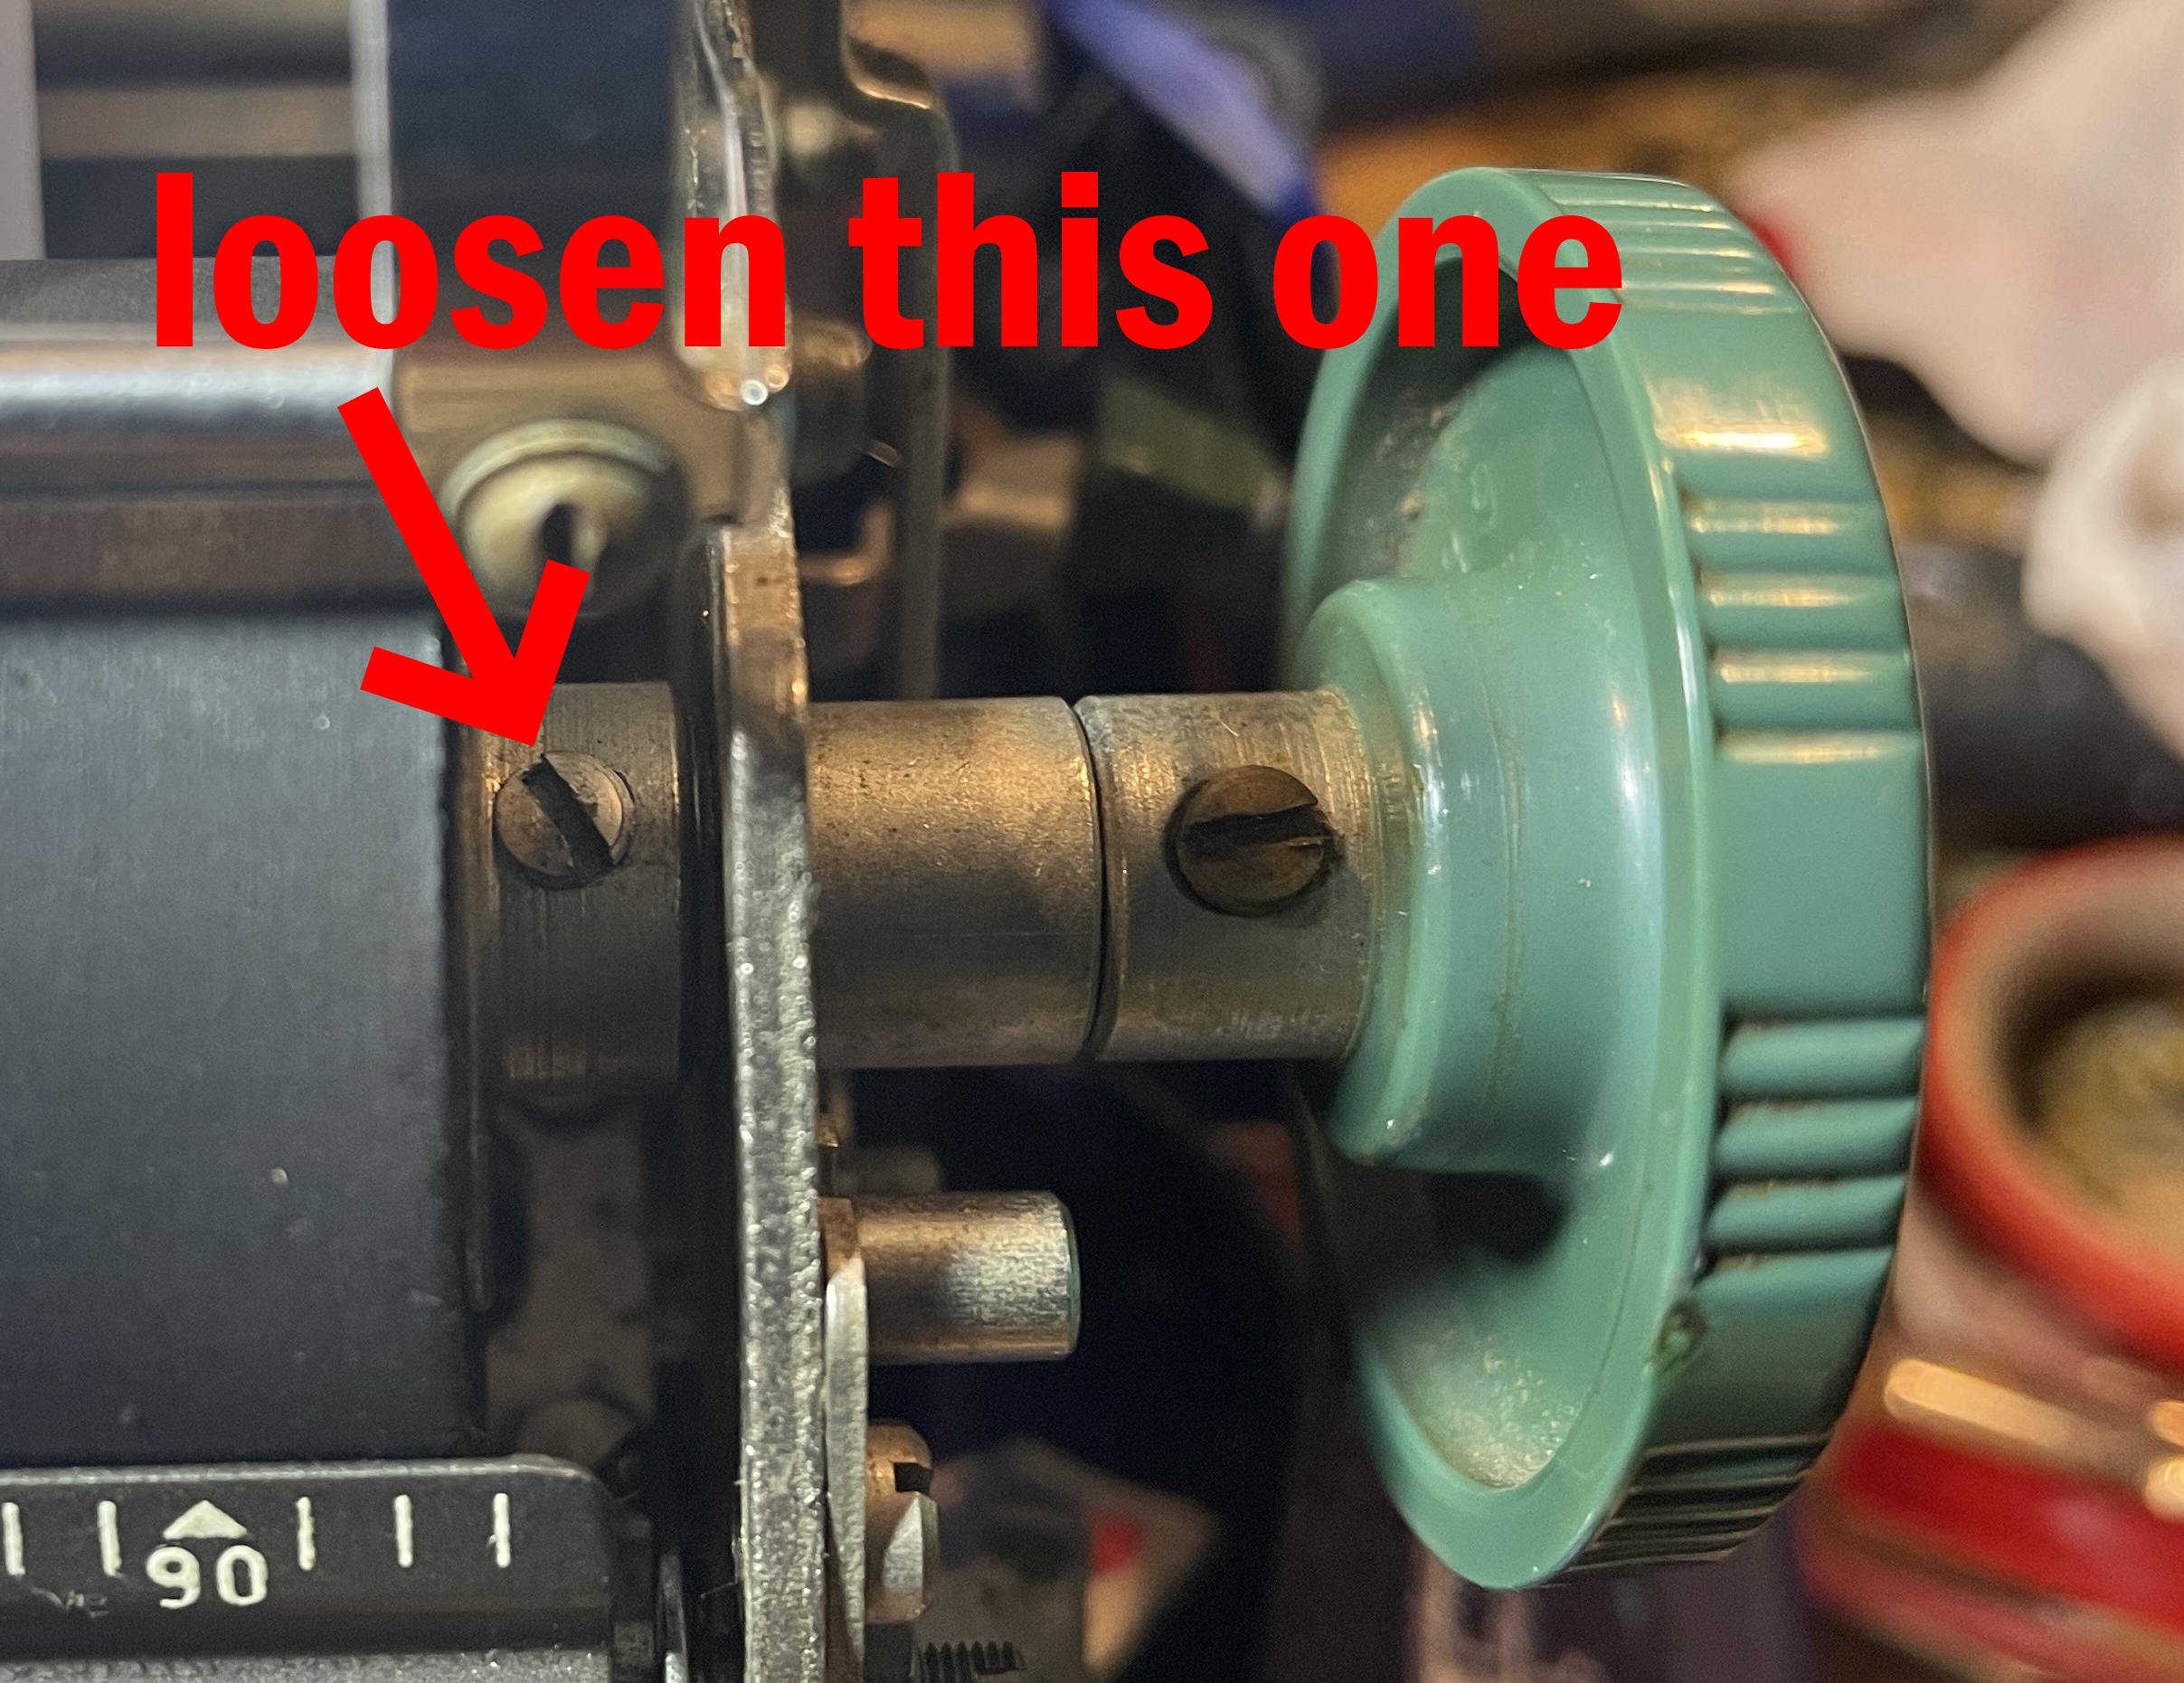
Take out this little collar on the left side of the machine. This will make lifting the platen out easier.
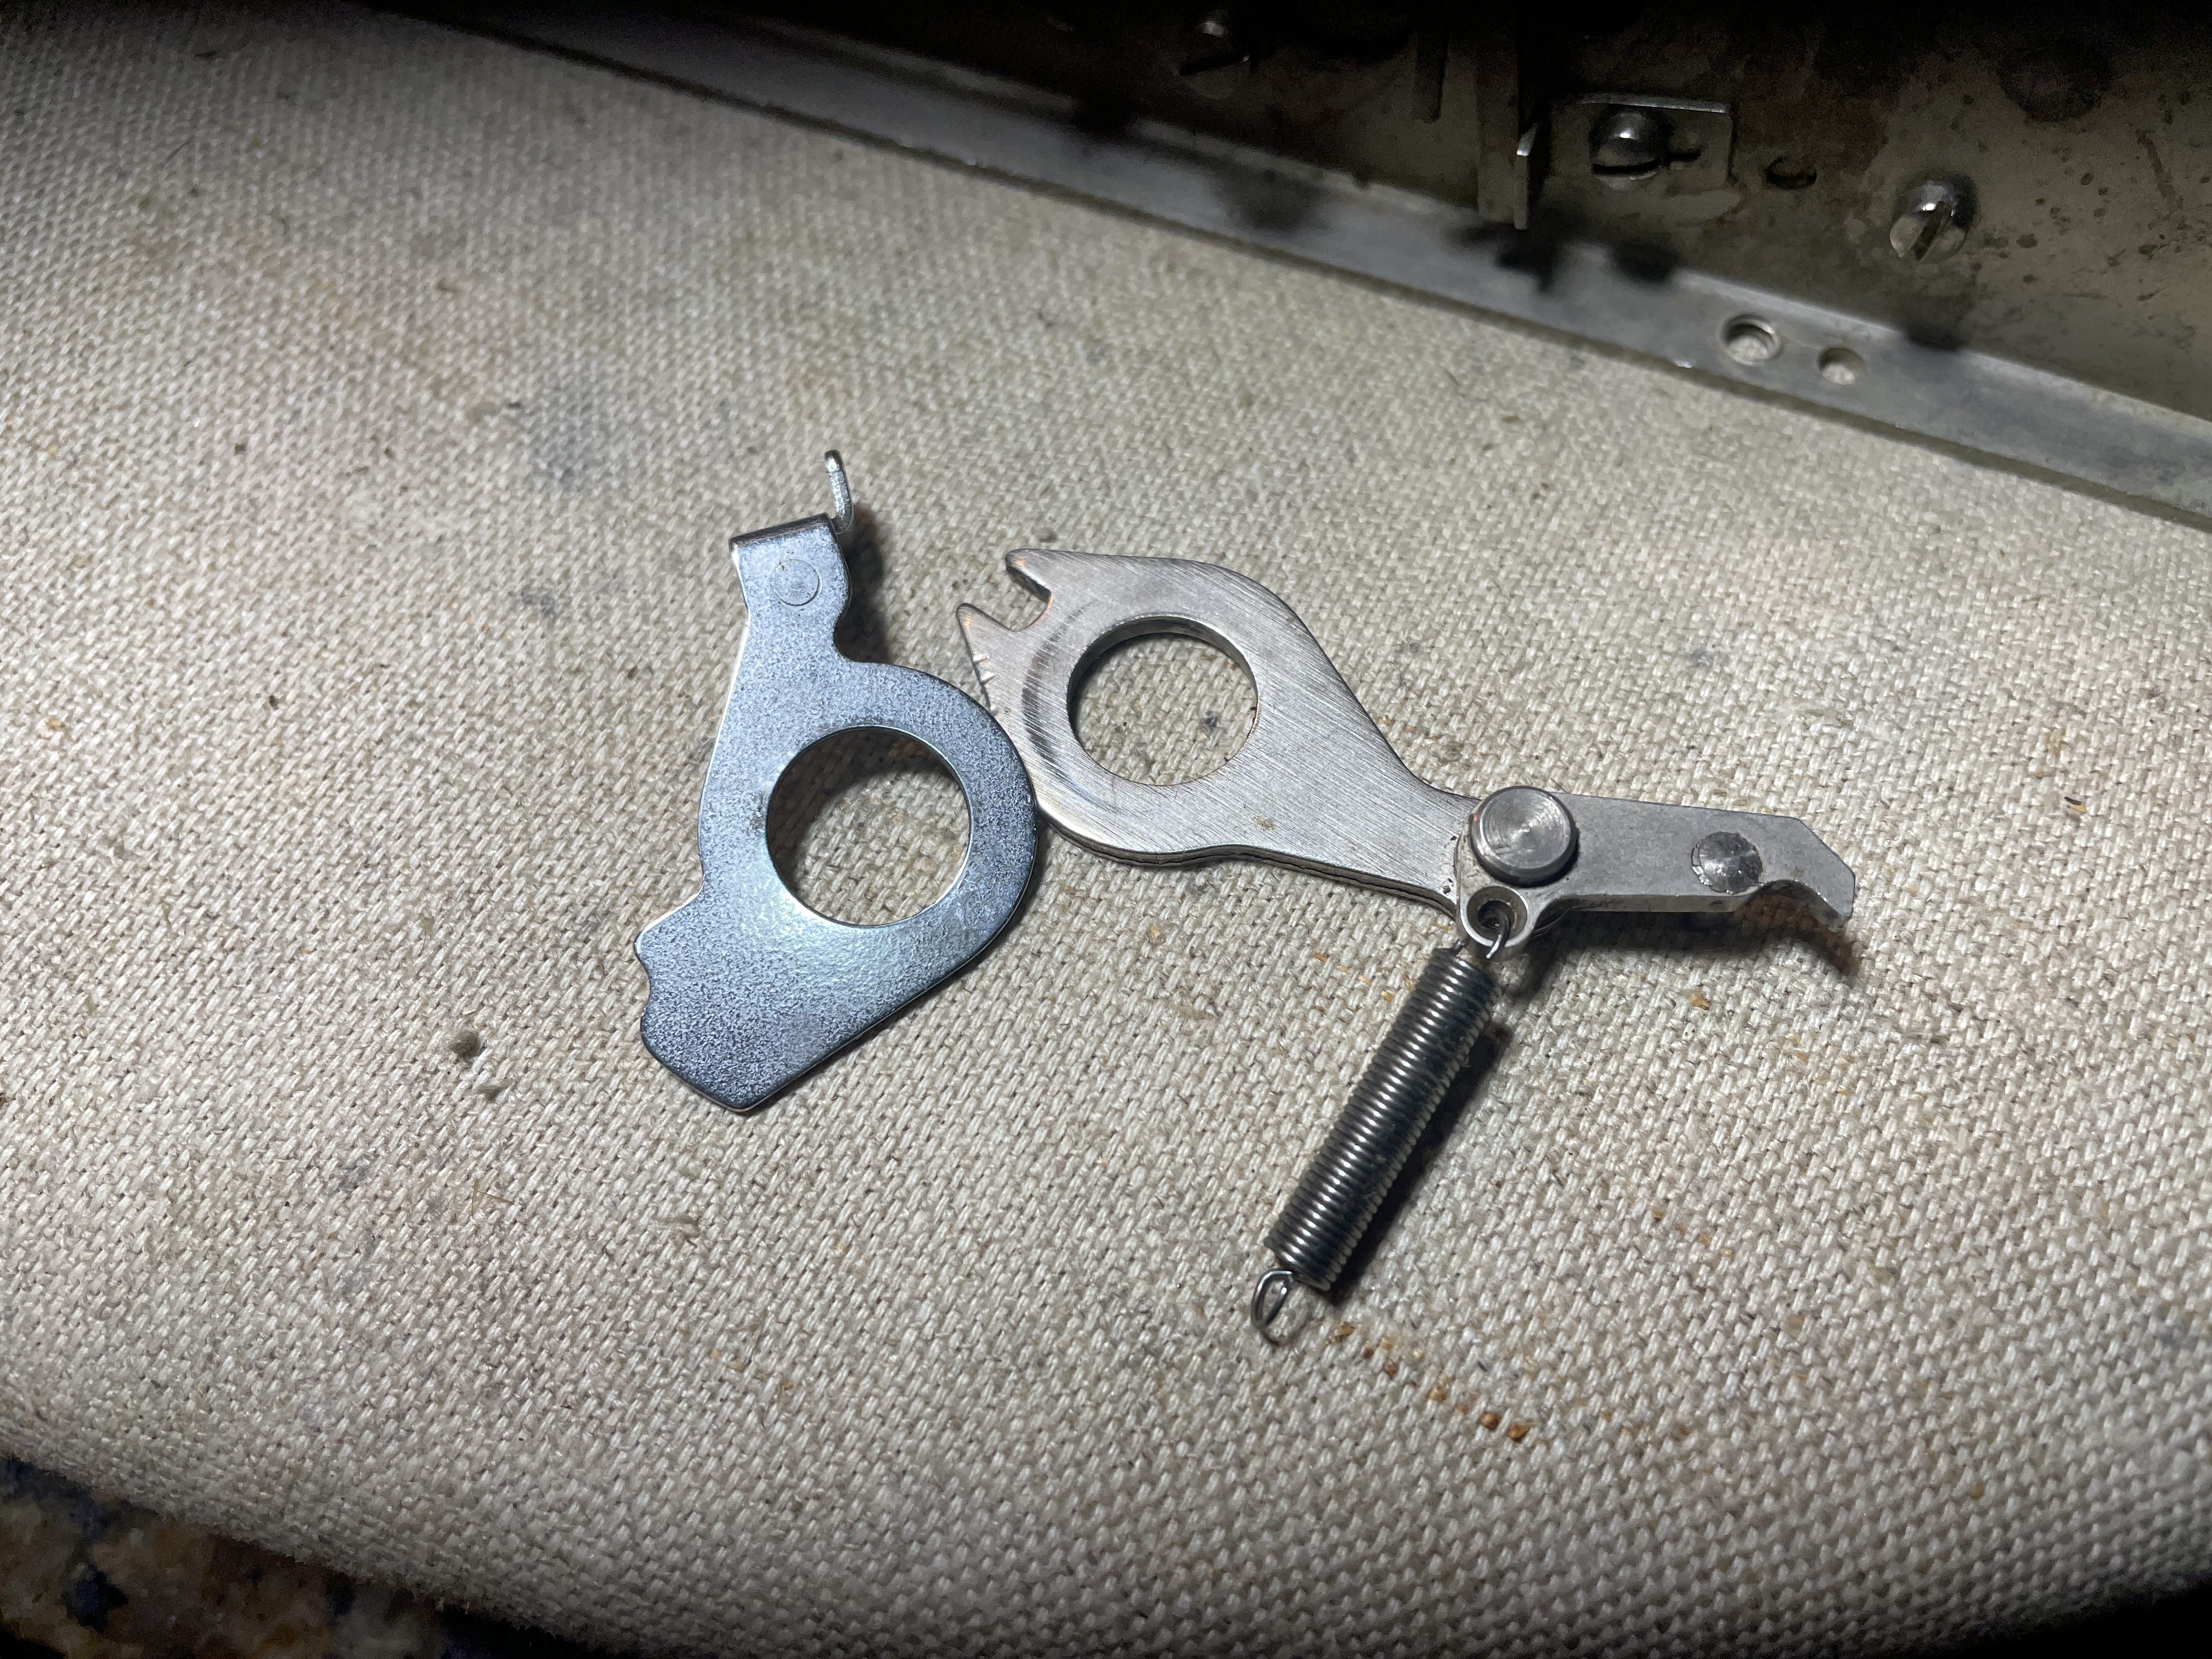
And then you can lift your platen out. When I did, all the index system pieces fell out. Fortunately I had a blurry picture of the set-up before they tumbled out, so I taped them together and set them aside.
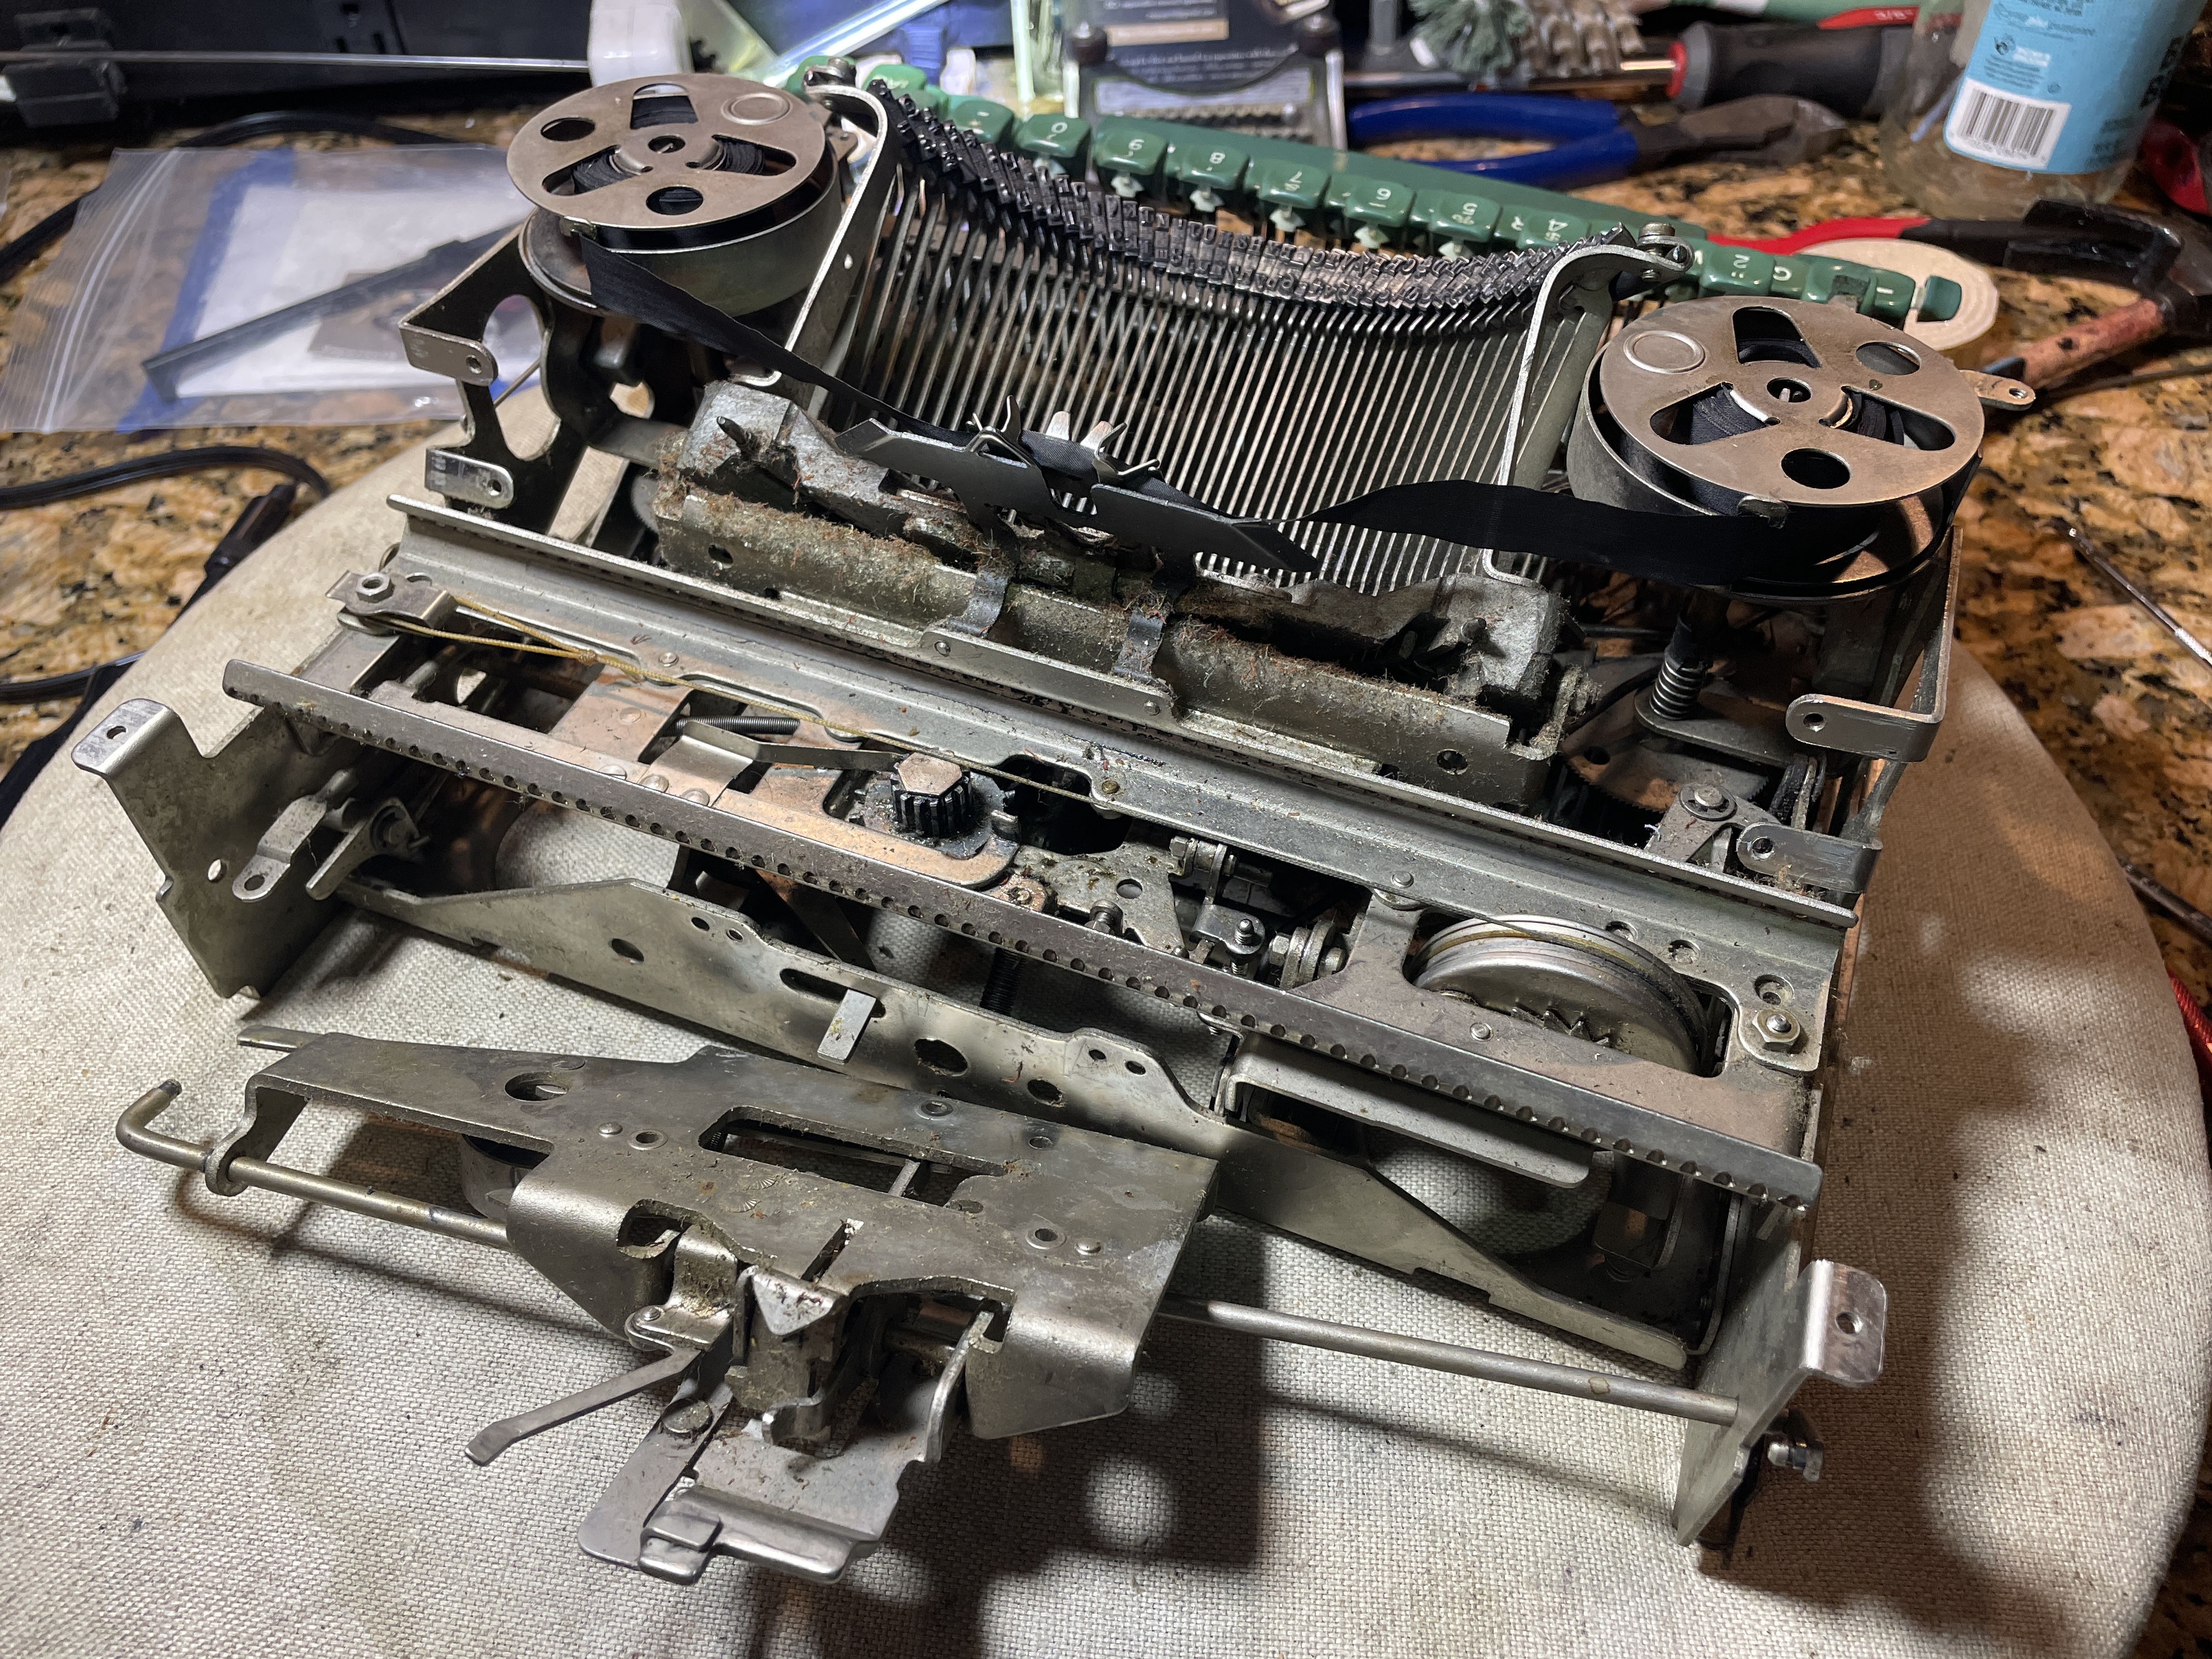
Once the platen is out, the paper pan and feed rollers lift out. Even with the carriage dismantled, I still couldn’t see any better what was going on under the carriage. It was at that point that I decided to remove the carriage. I would never recommend carriage removal to the uninitiated. However, I had a broken typewriter in front of me. I couldn’t make it any worse.
Removal of carriage from 1958 Remington Quiet-Riter
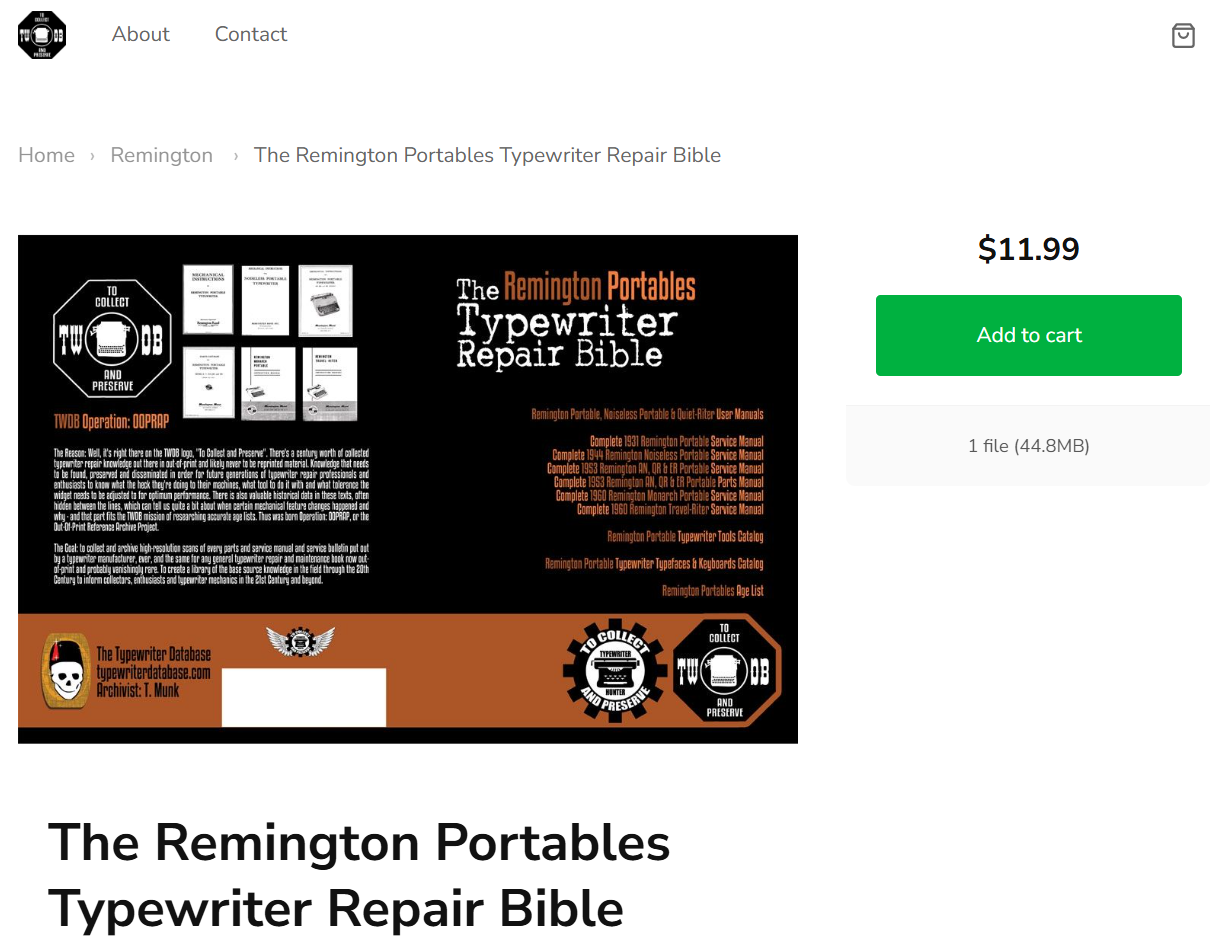
I got a pdf of the Remington Portables Typewriter Repair Bible and looked through the instructions for removing the carriage. The instructions indicate that only the margin release mechanism needs to be loosened, but my Quiet-Riter had a whole tabulator set-up in back that the carriage was never going to clear.
I went off-script and removed the whole Margin Release Bracket Support. It has three screws and an e-clip that hold it onto the back of the machine.
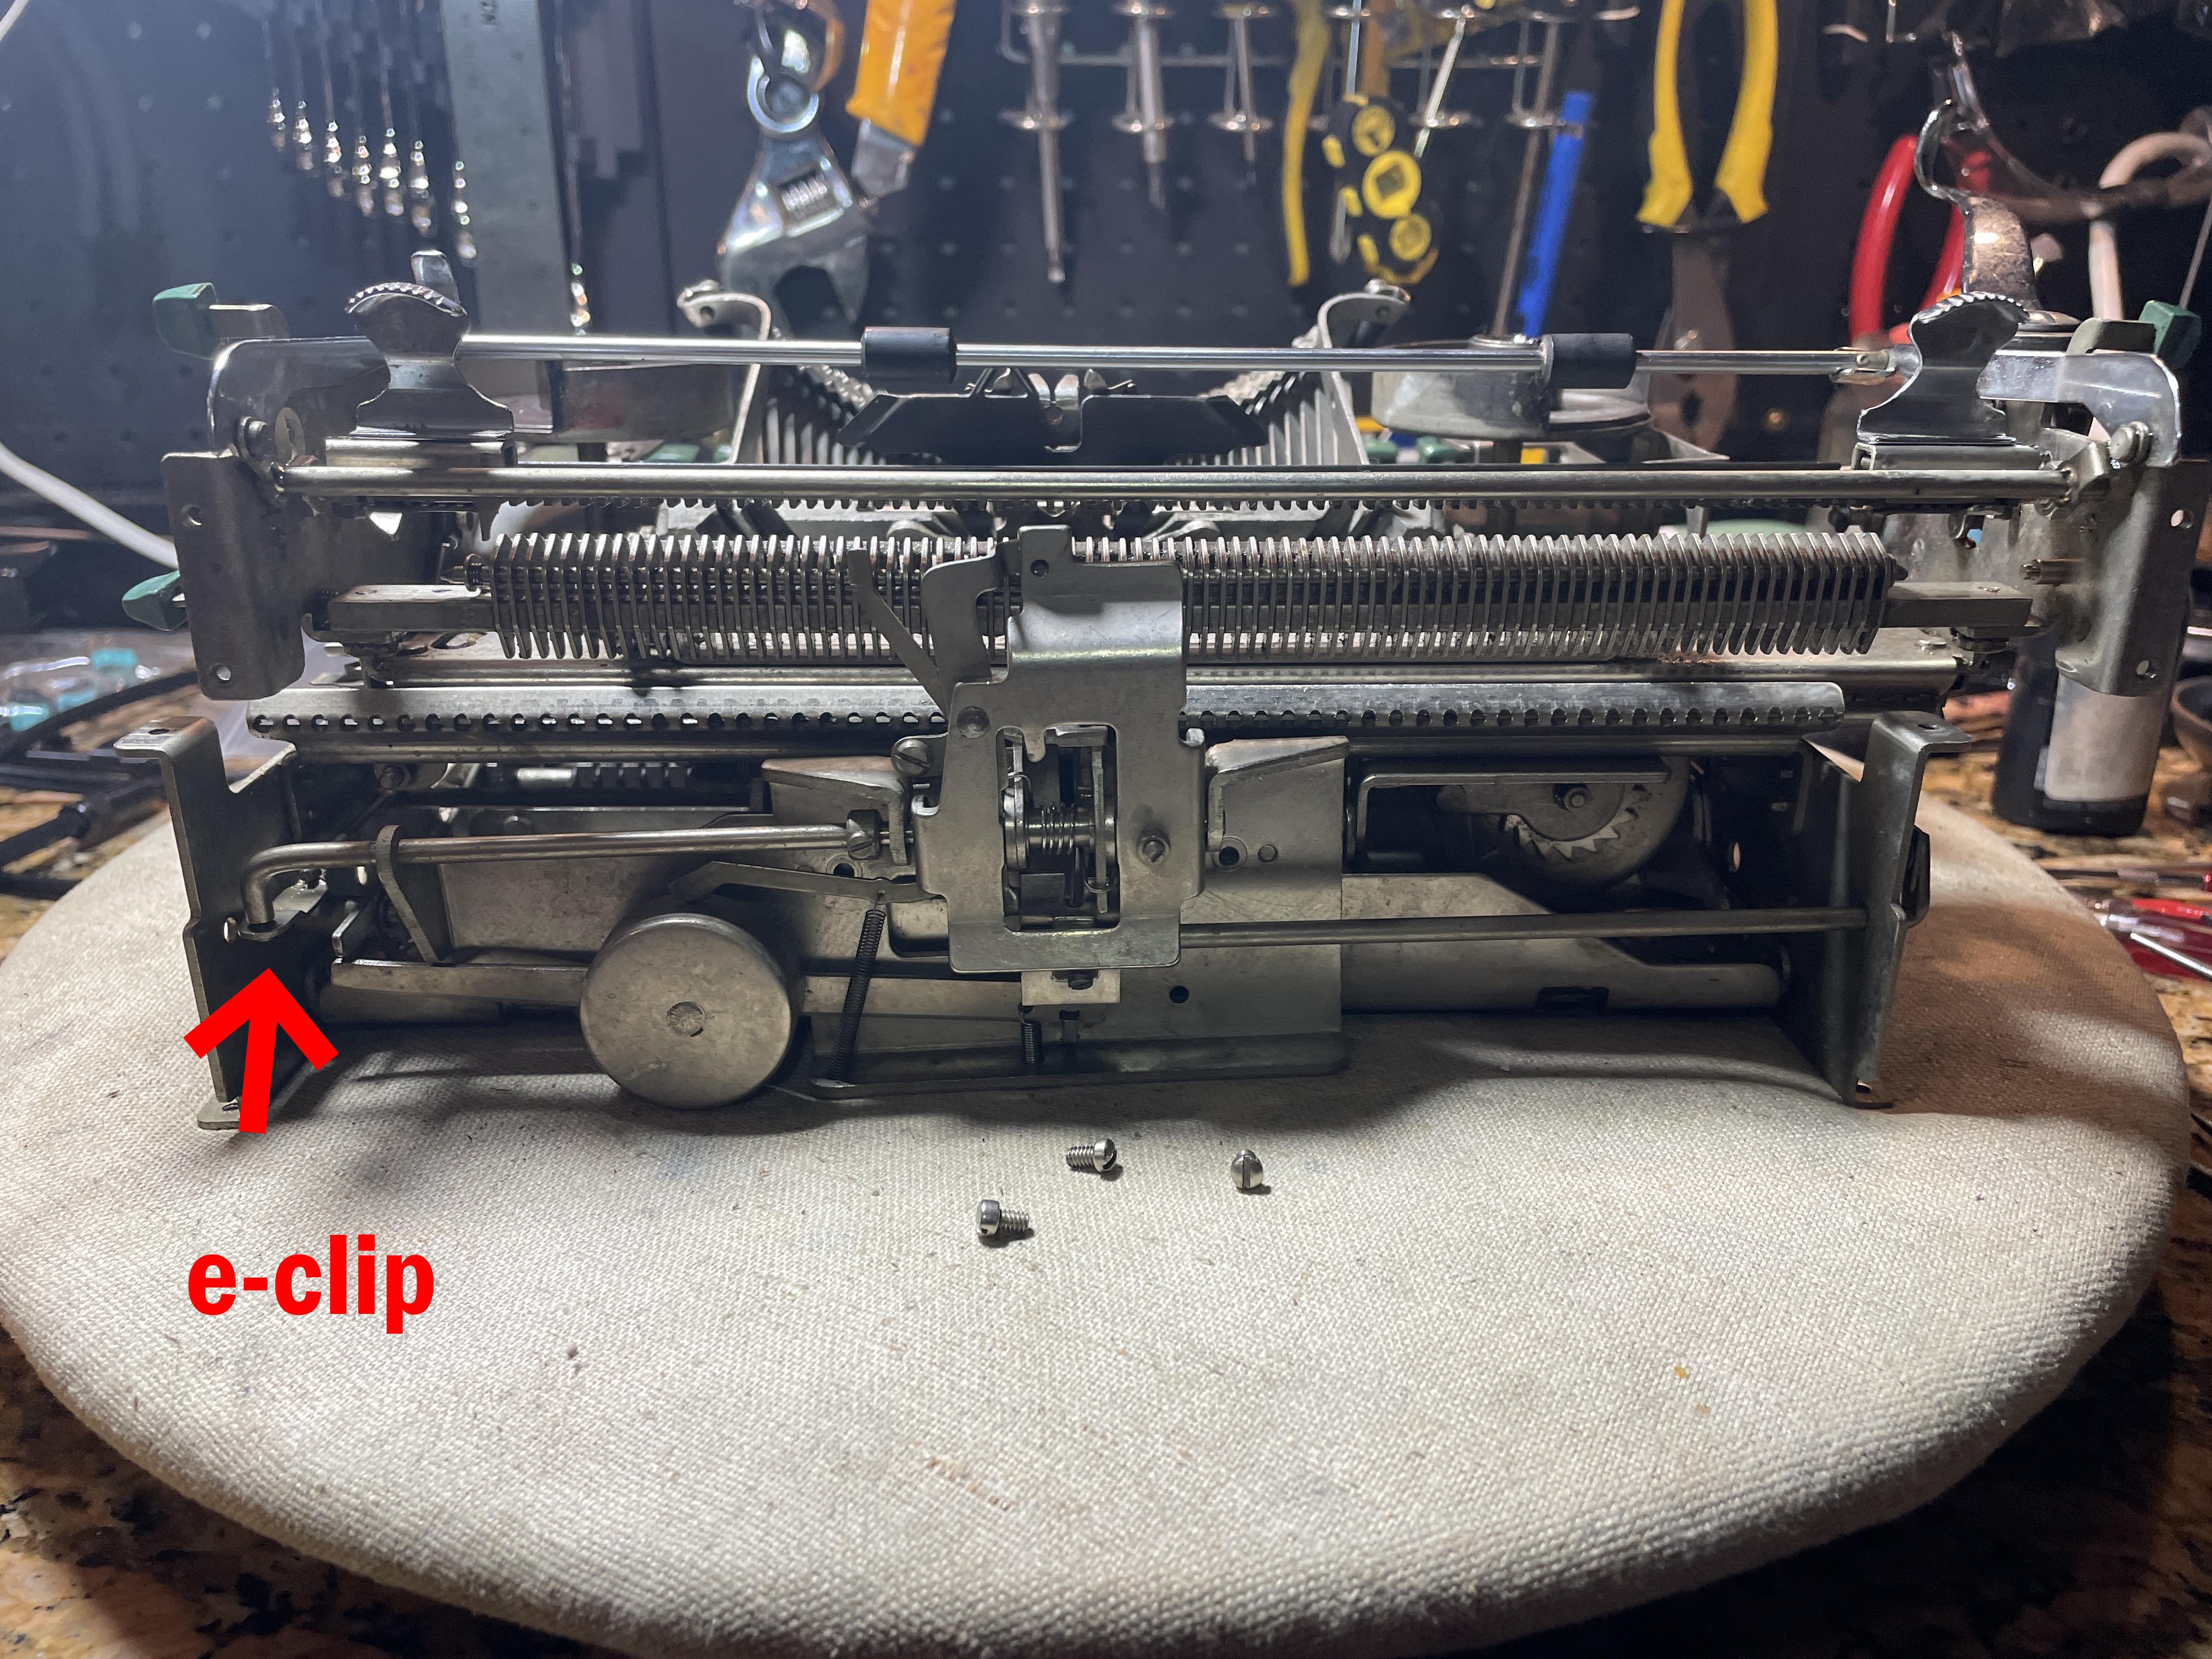
Once the screws are out and the e-clip removed the whole bracket with the tab system and margin release will sag out of the way of the carriage. I anchored the drawstring to the body and rolled the carriage off to the left side of the machine.
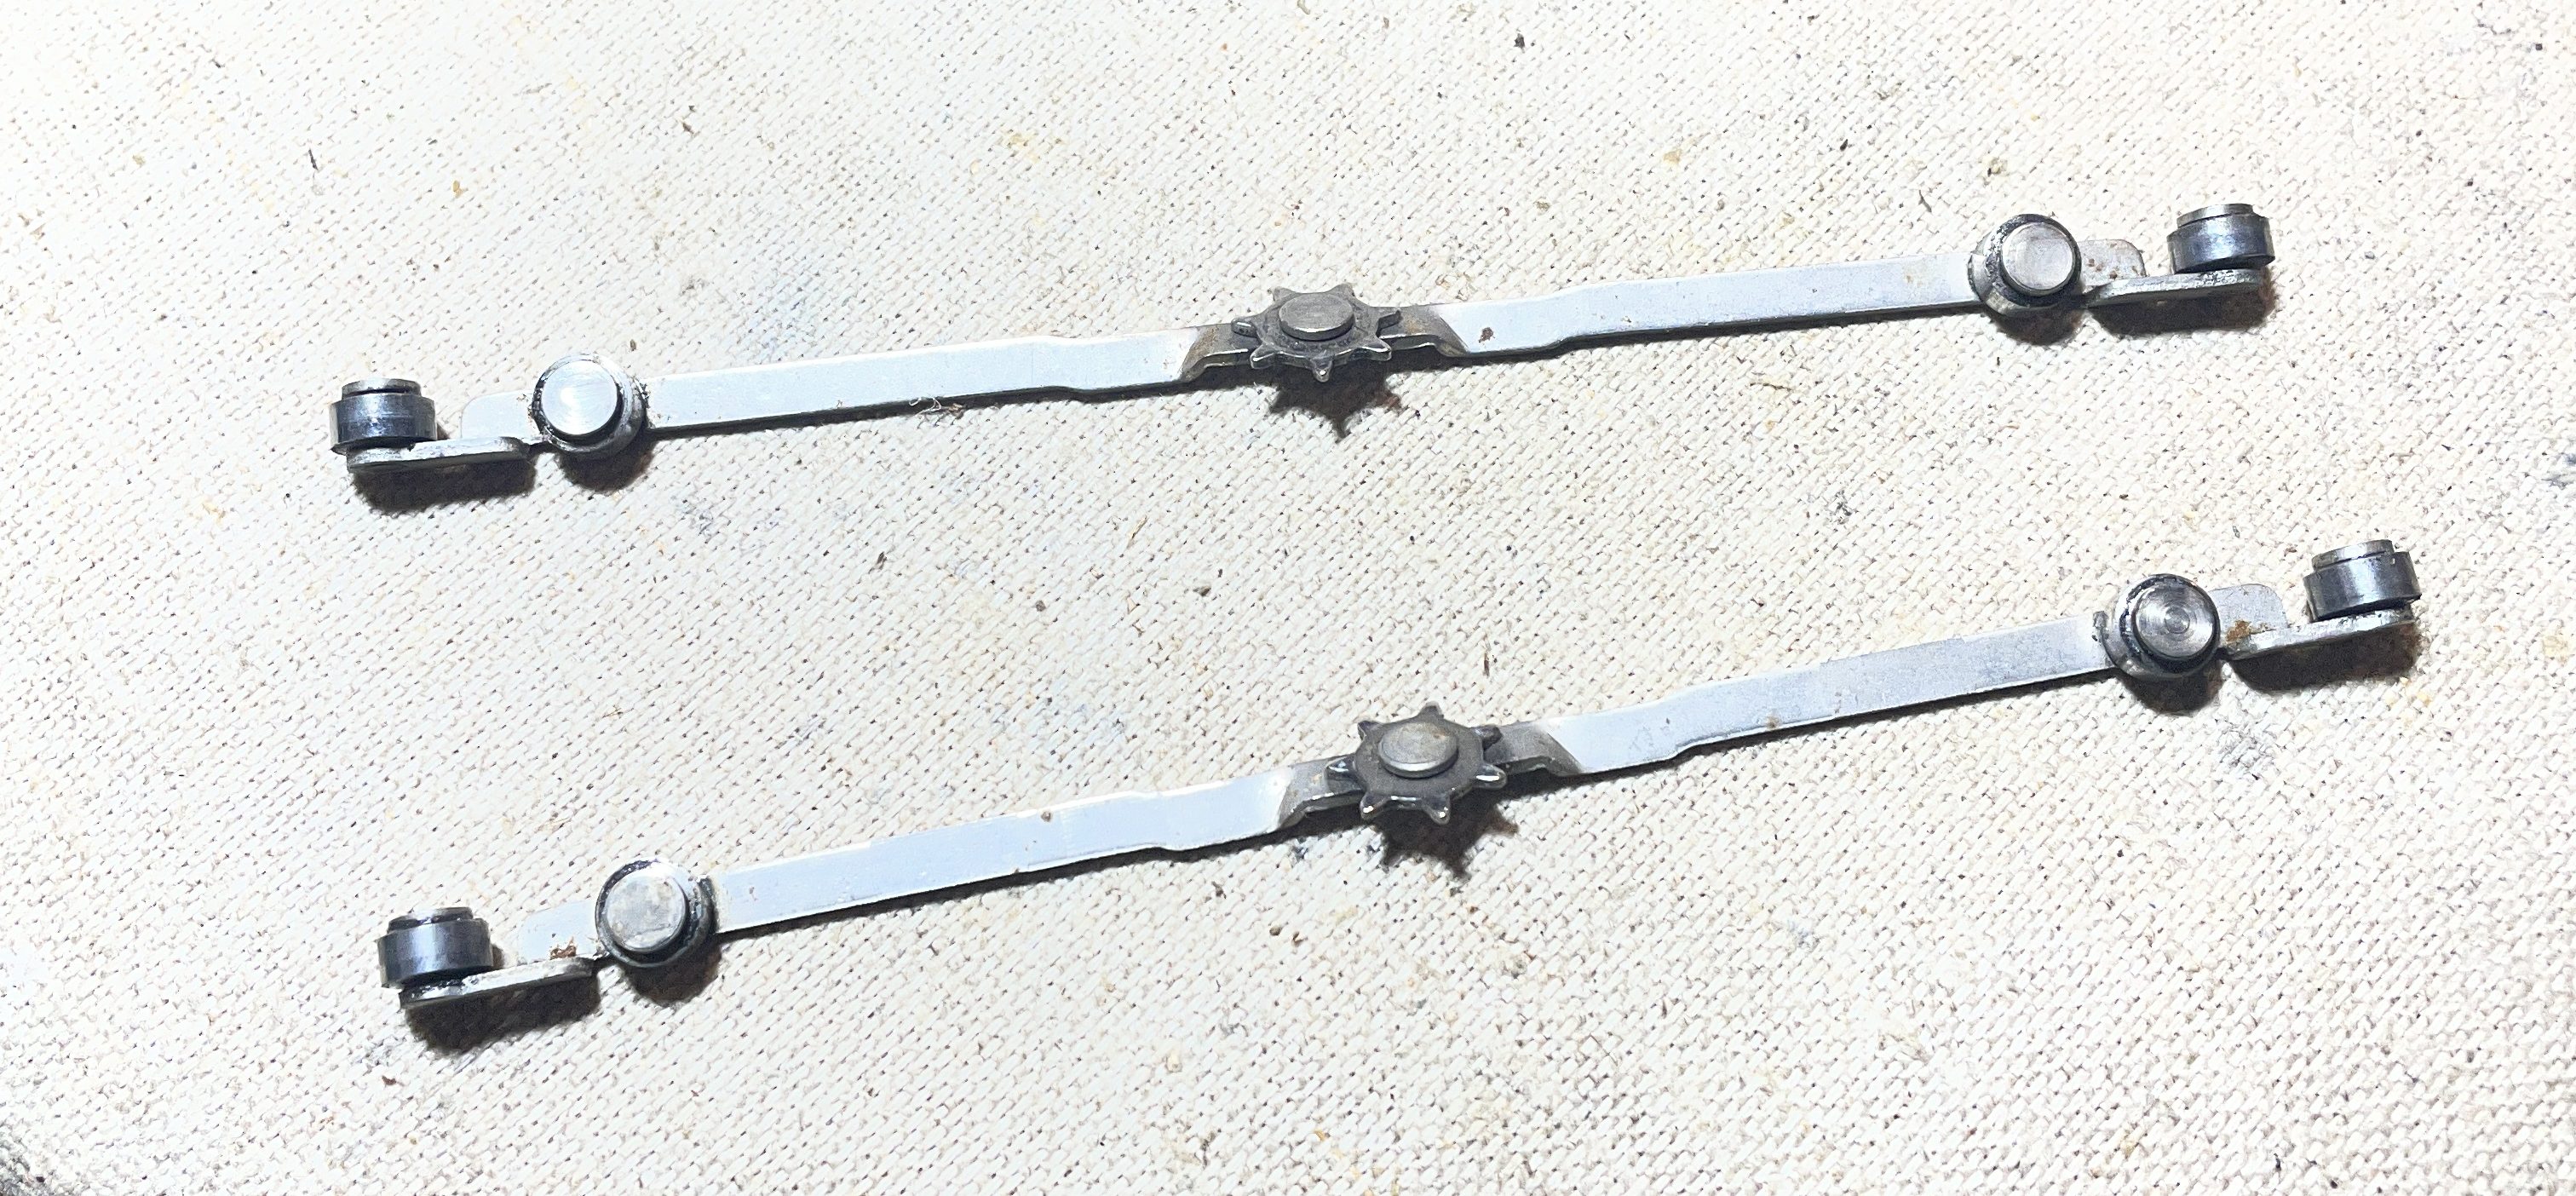
The carriage rolls on these little trucks, “Carriage Roll Retainers”:
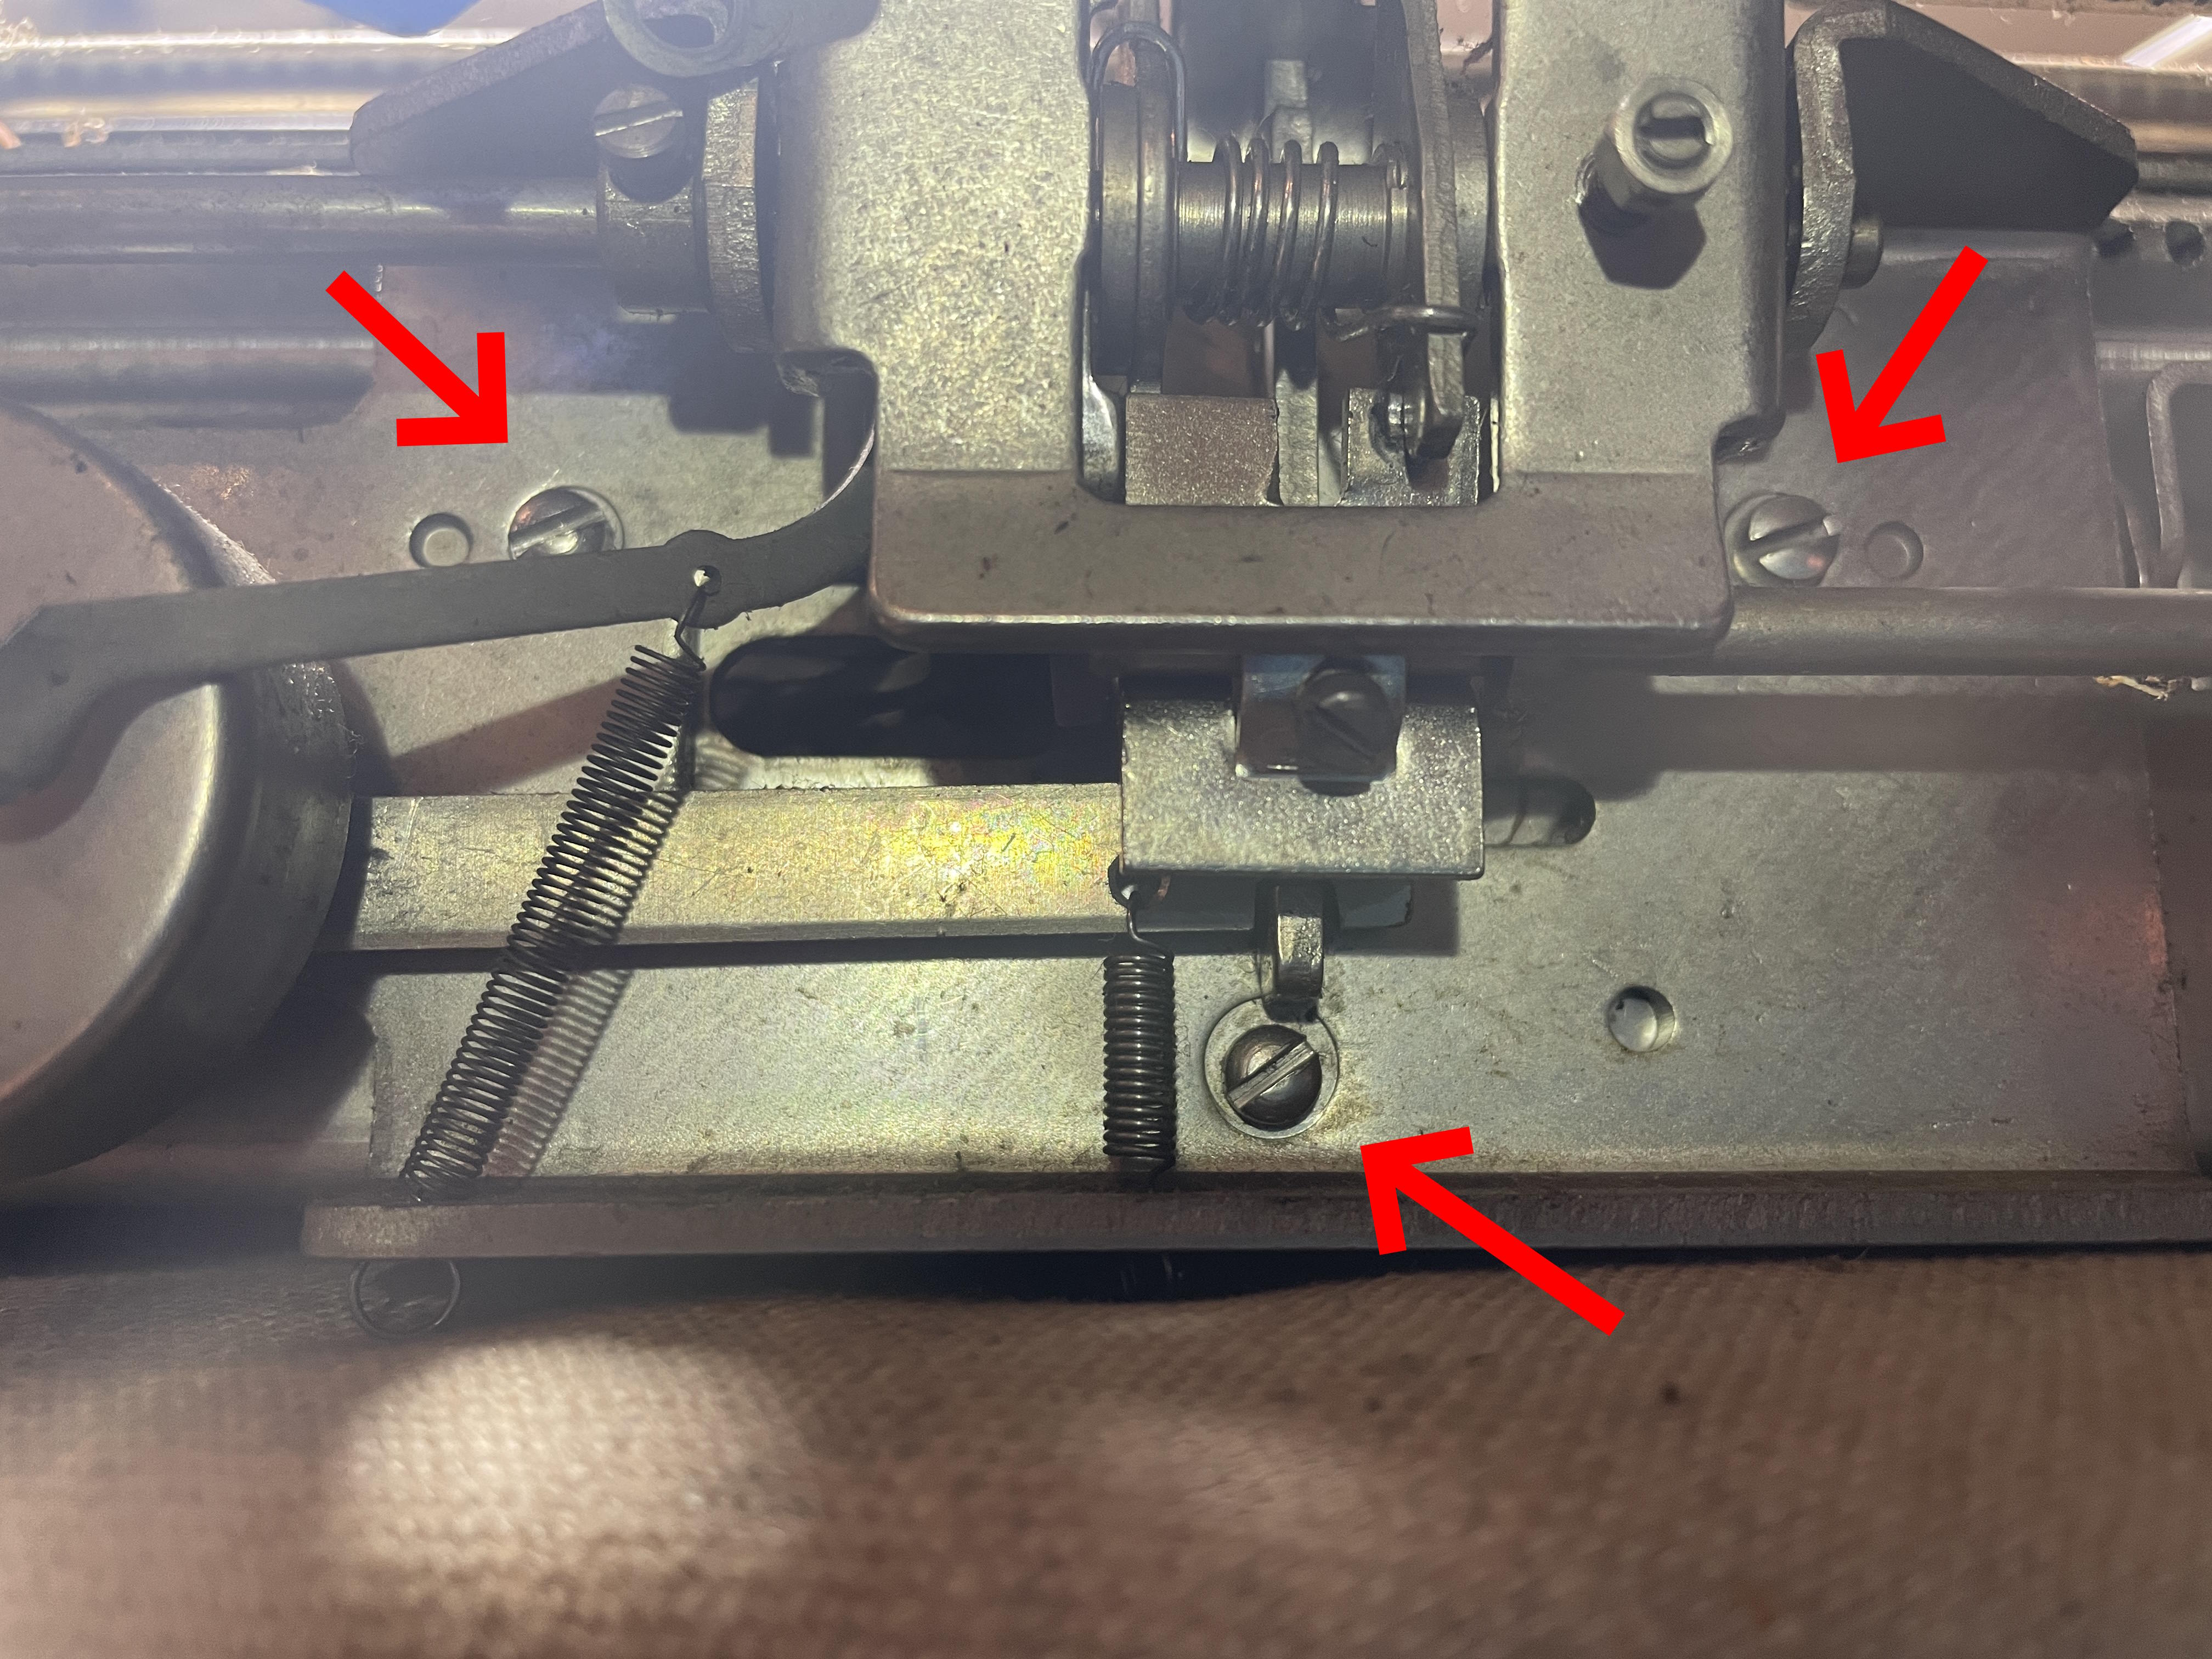
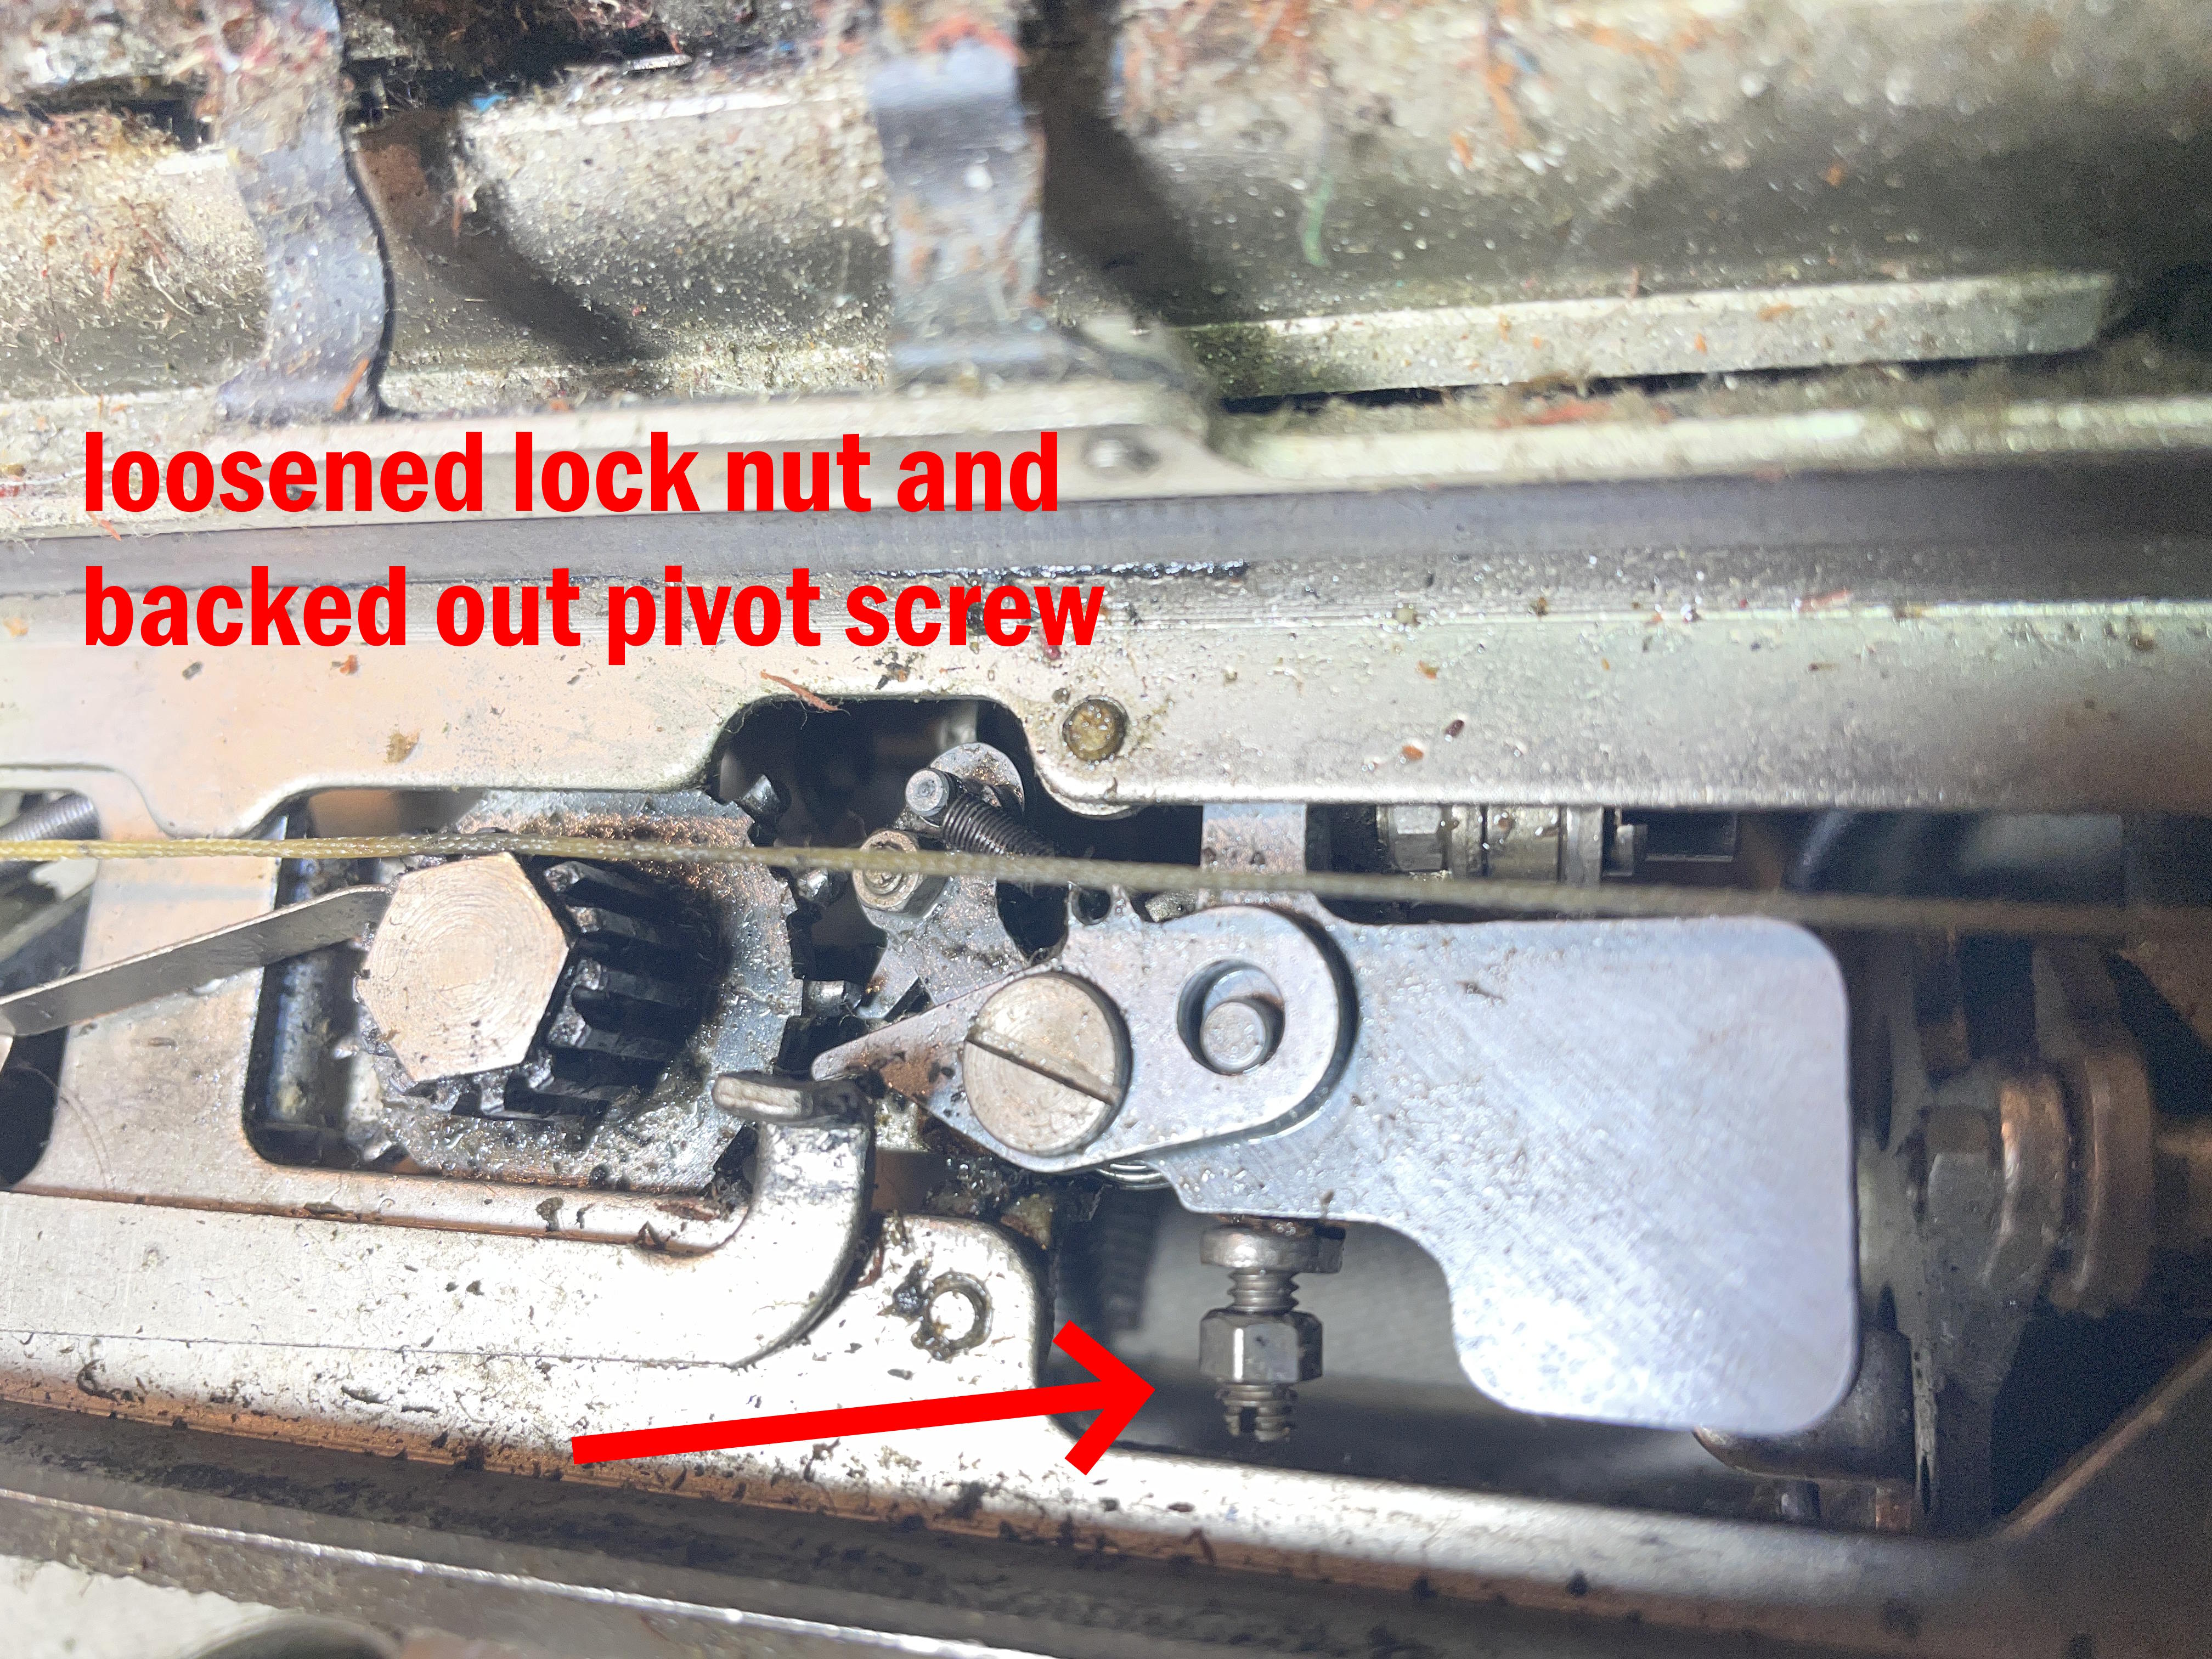
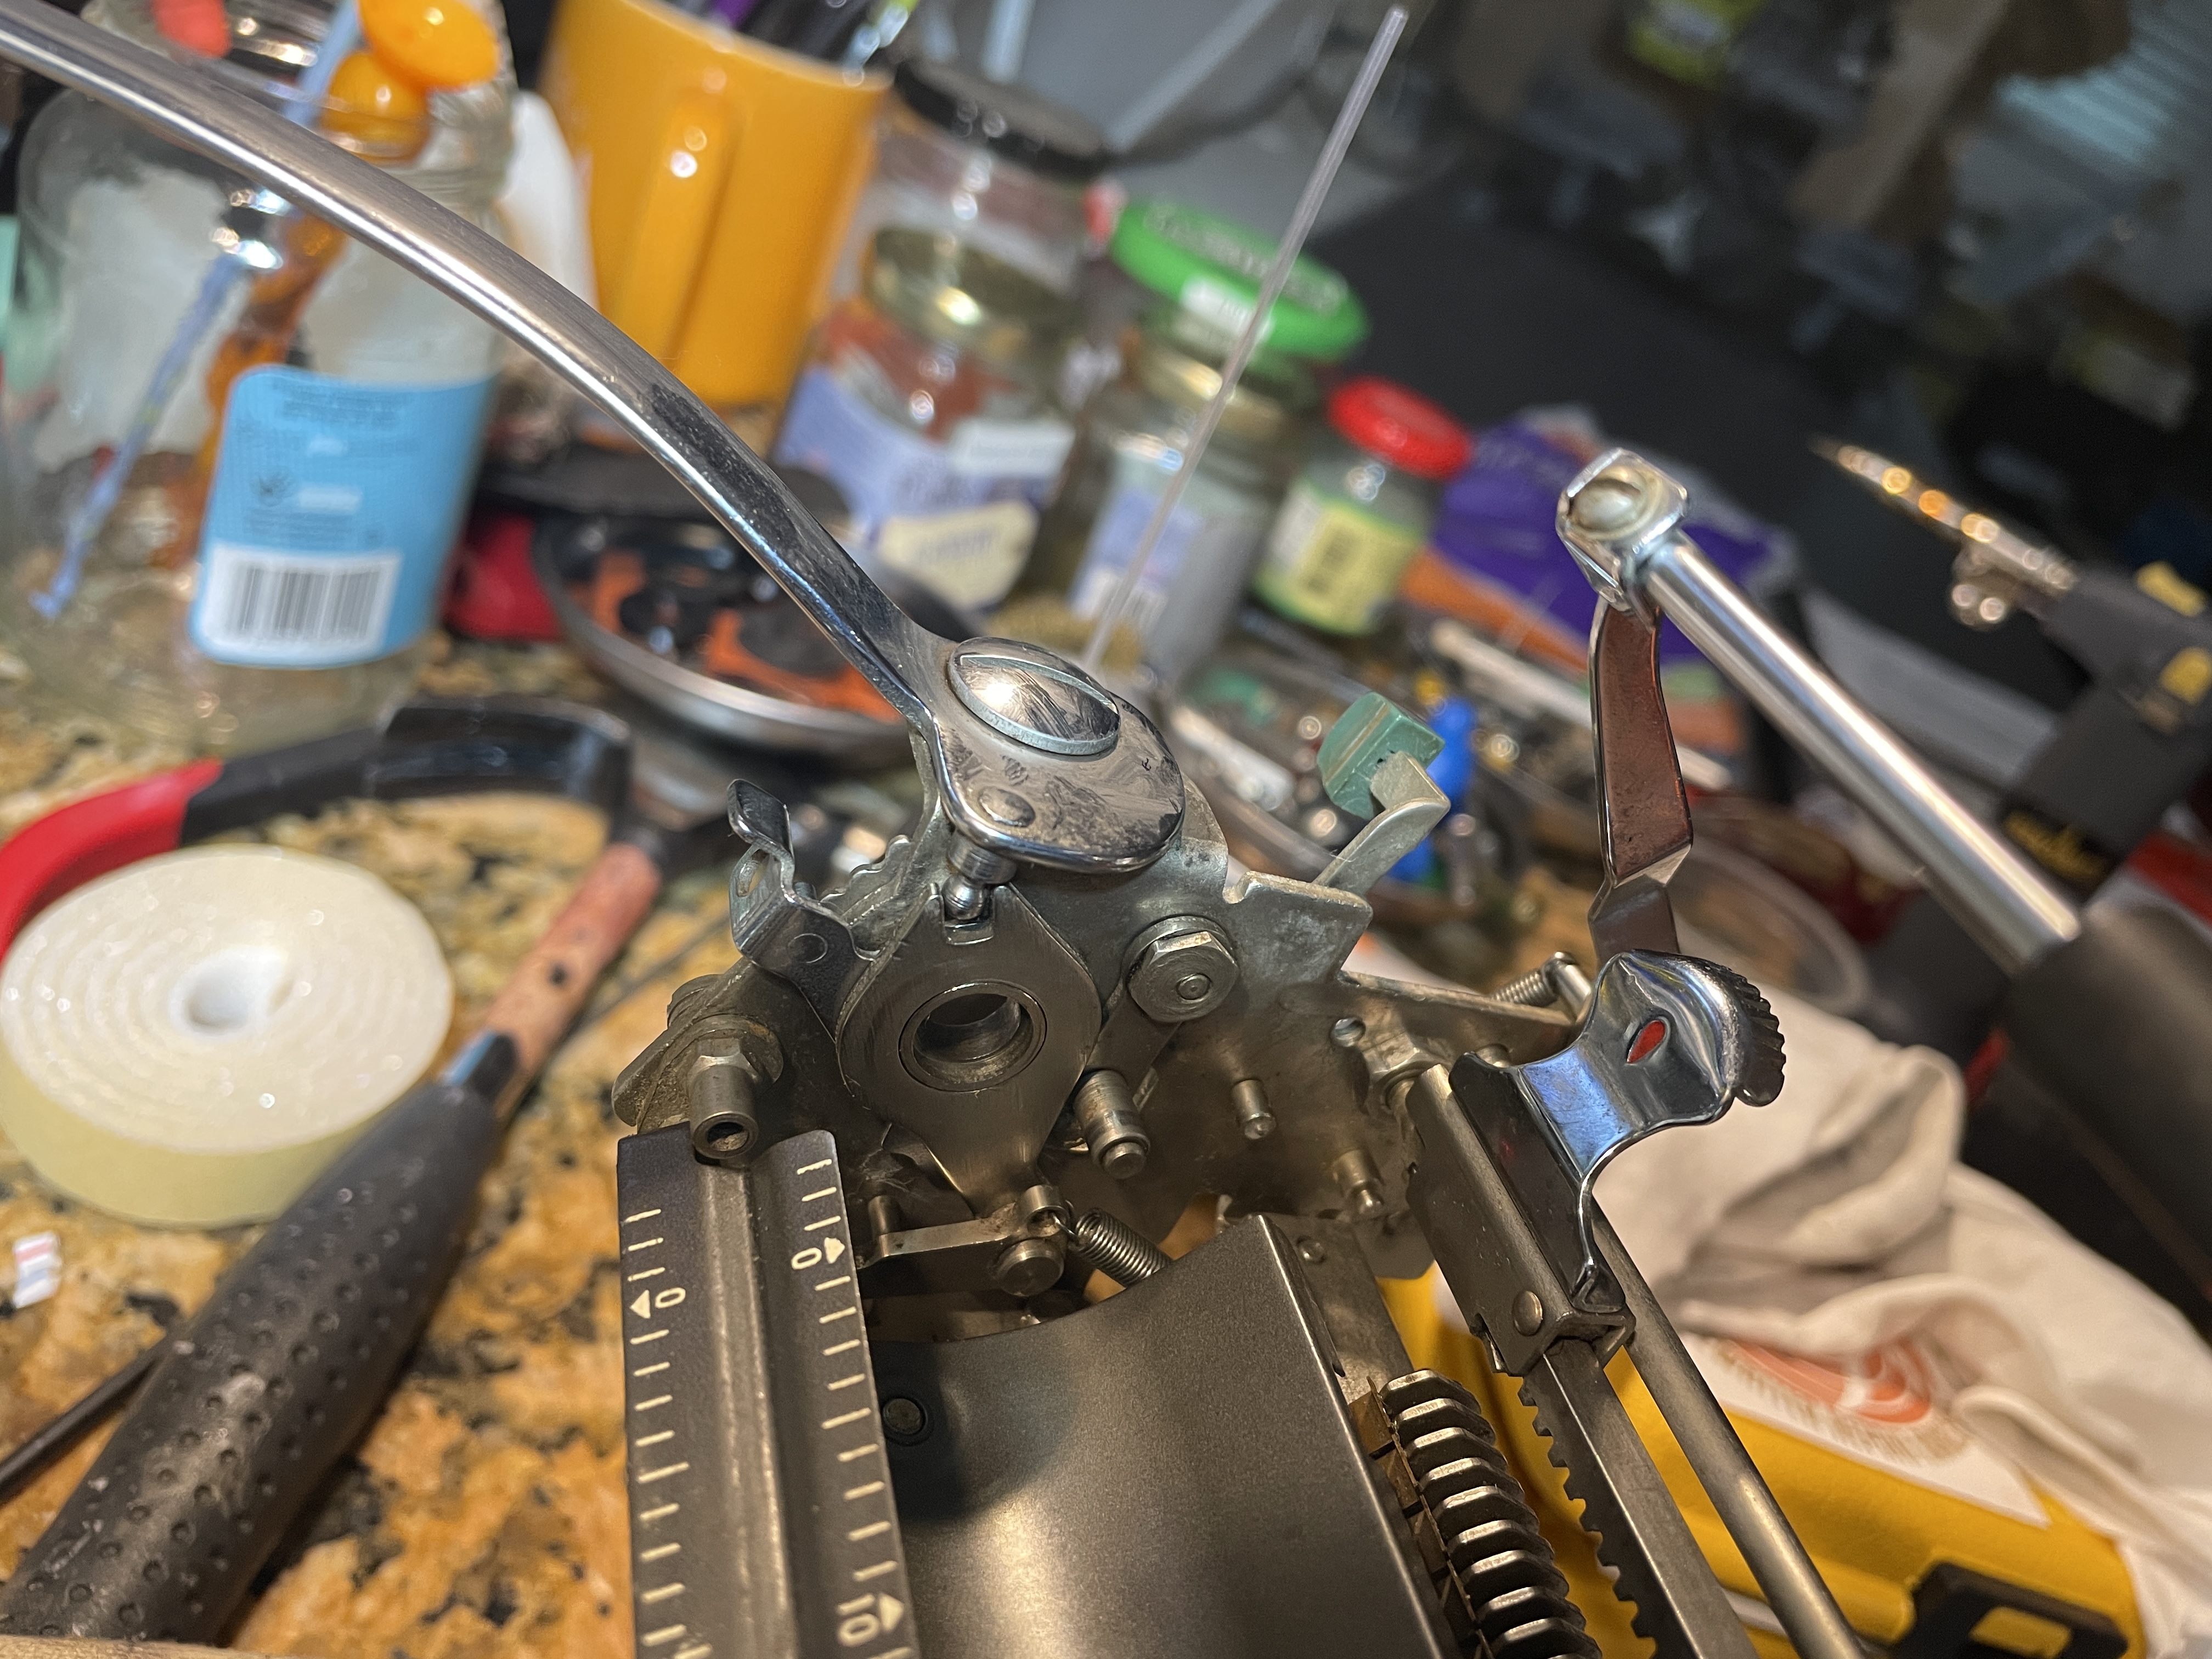
The escapement body assembly was wedged into an “up” position, so much so that it had been scraping the bottom of the carriage. I loosened the lock nut on the pivot screw and pulled it out.
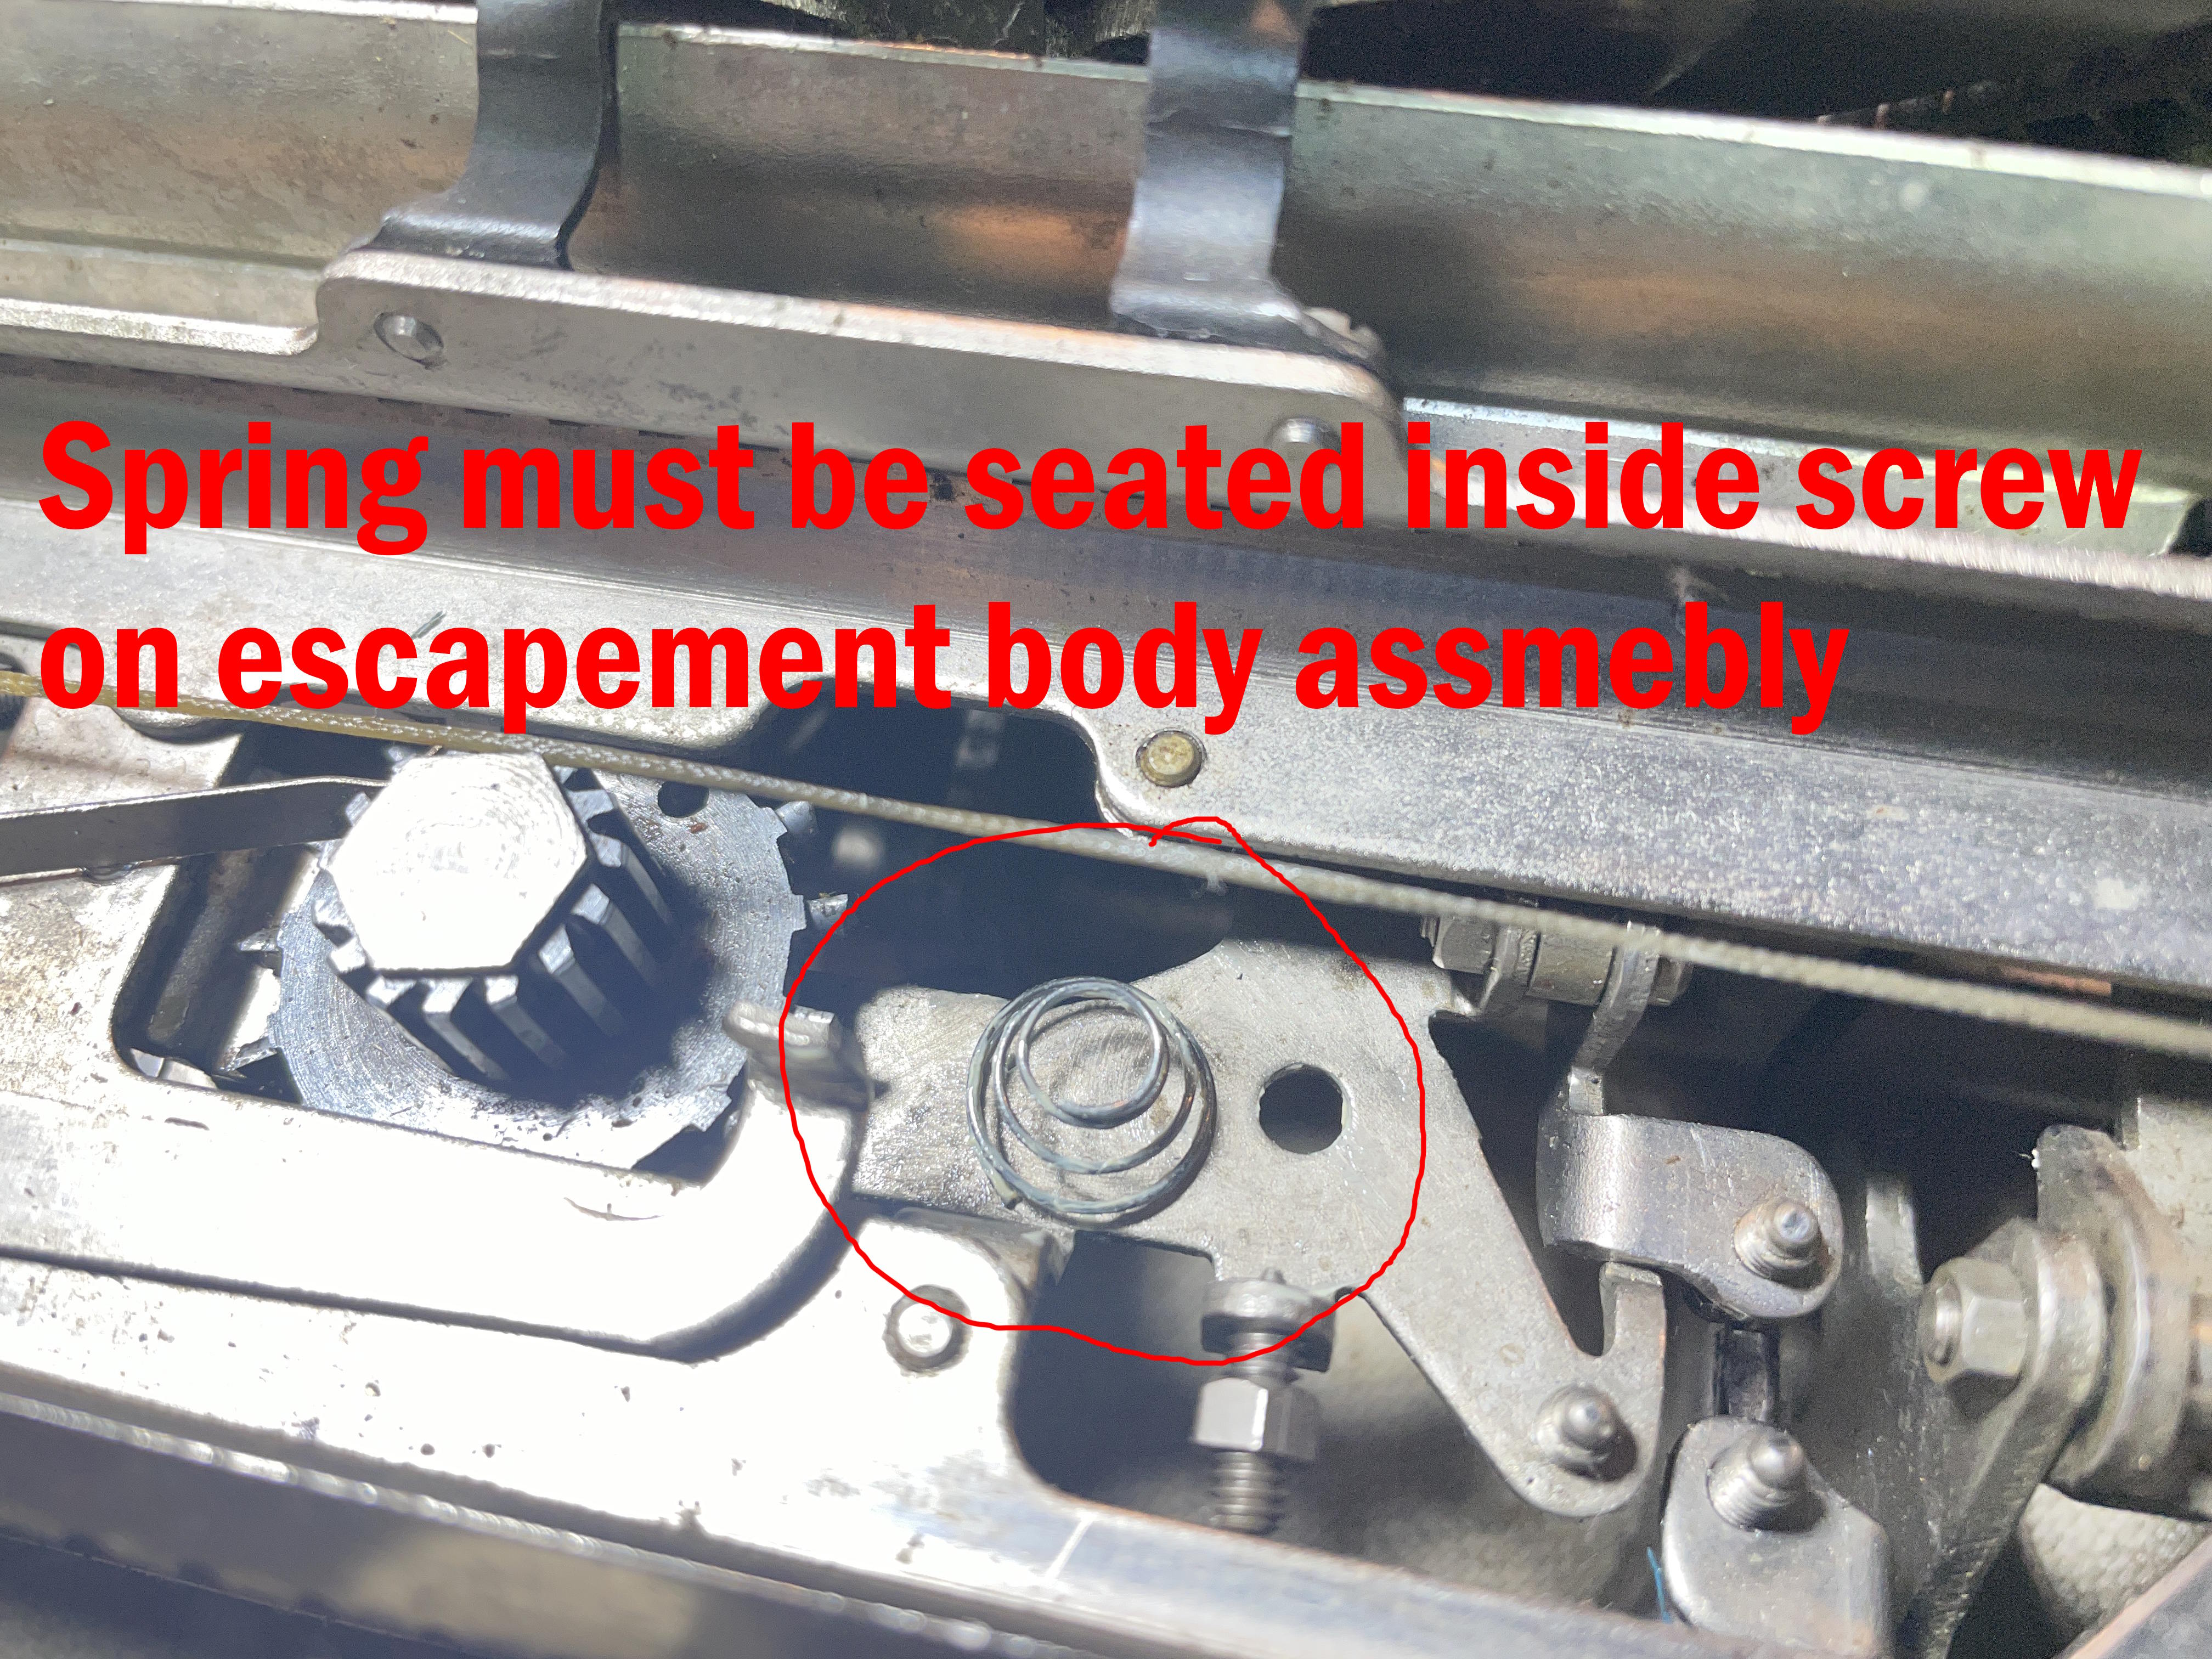
The escapement body assembly looked fine, its dogs intact. It sits on a spring to give it bounce when it rocks:

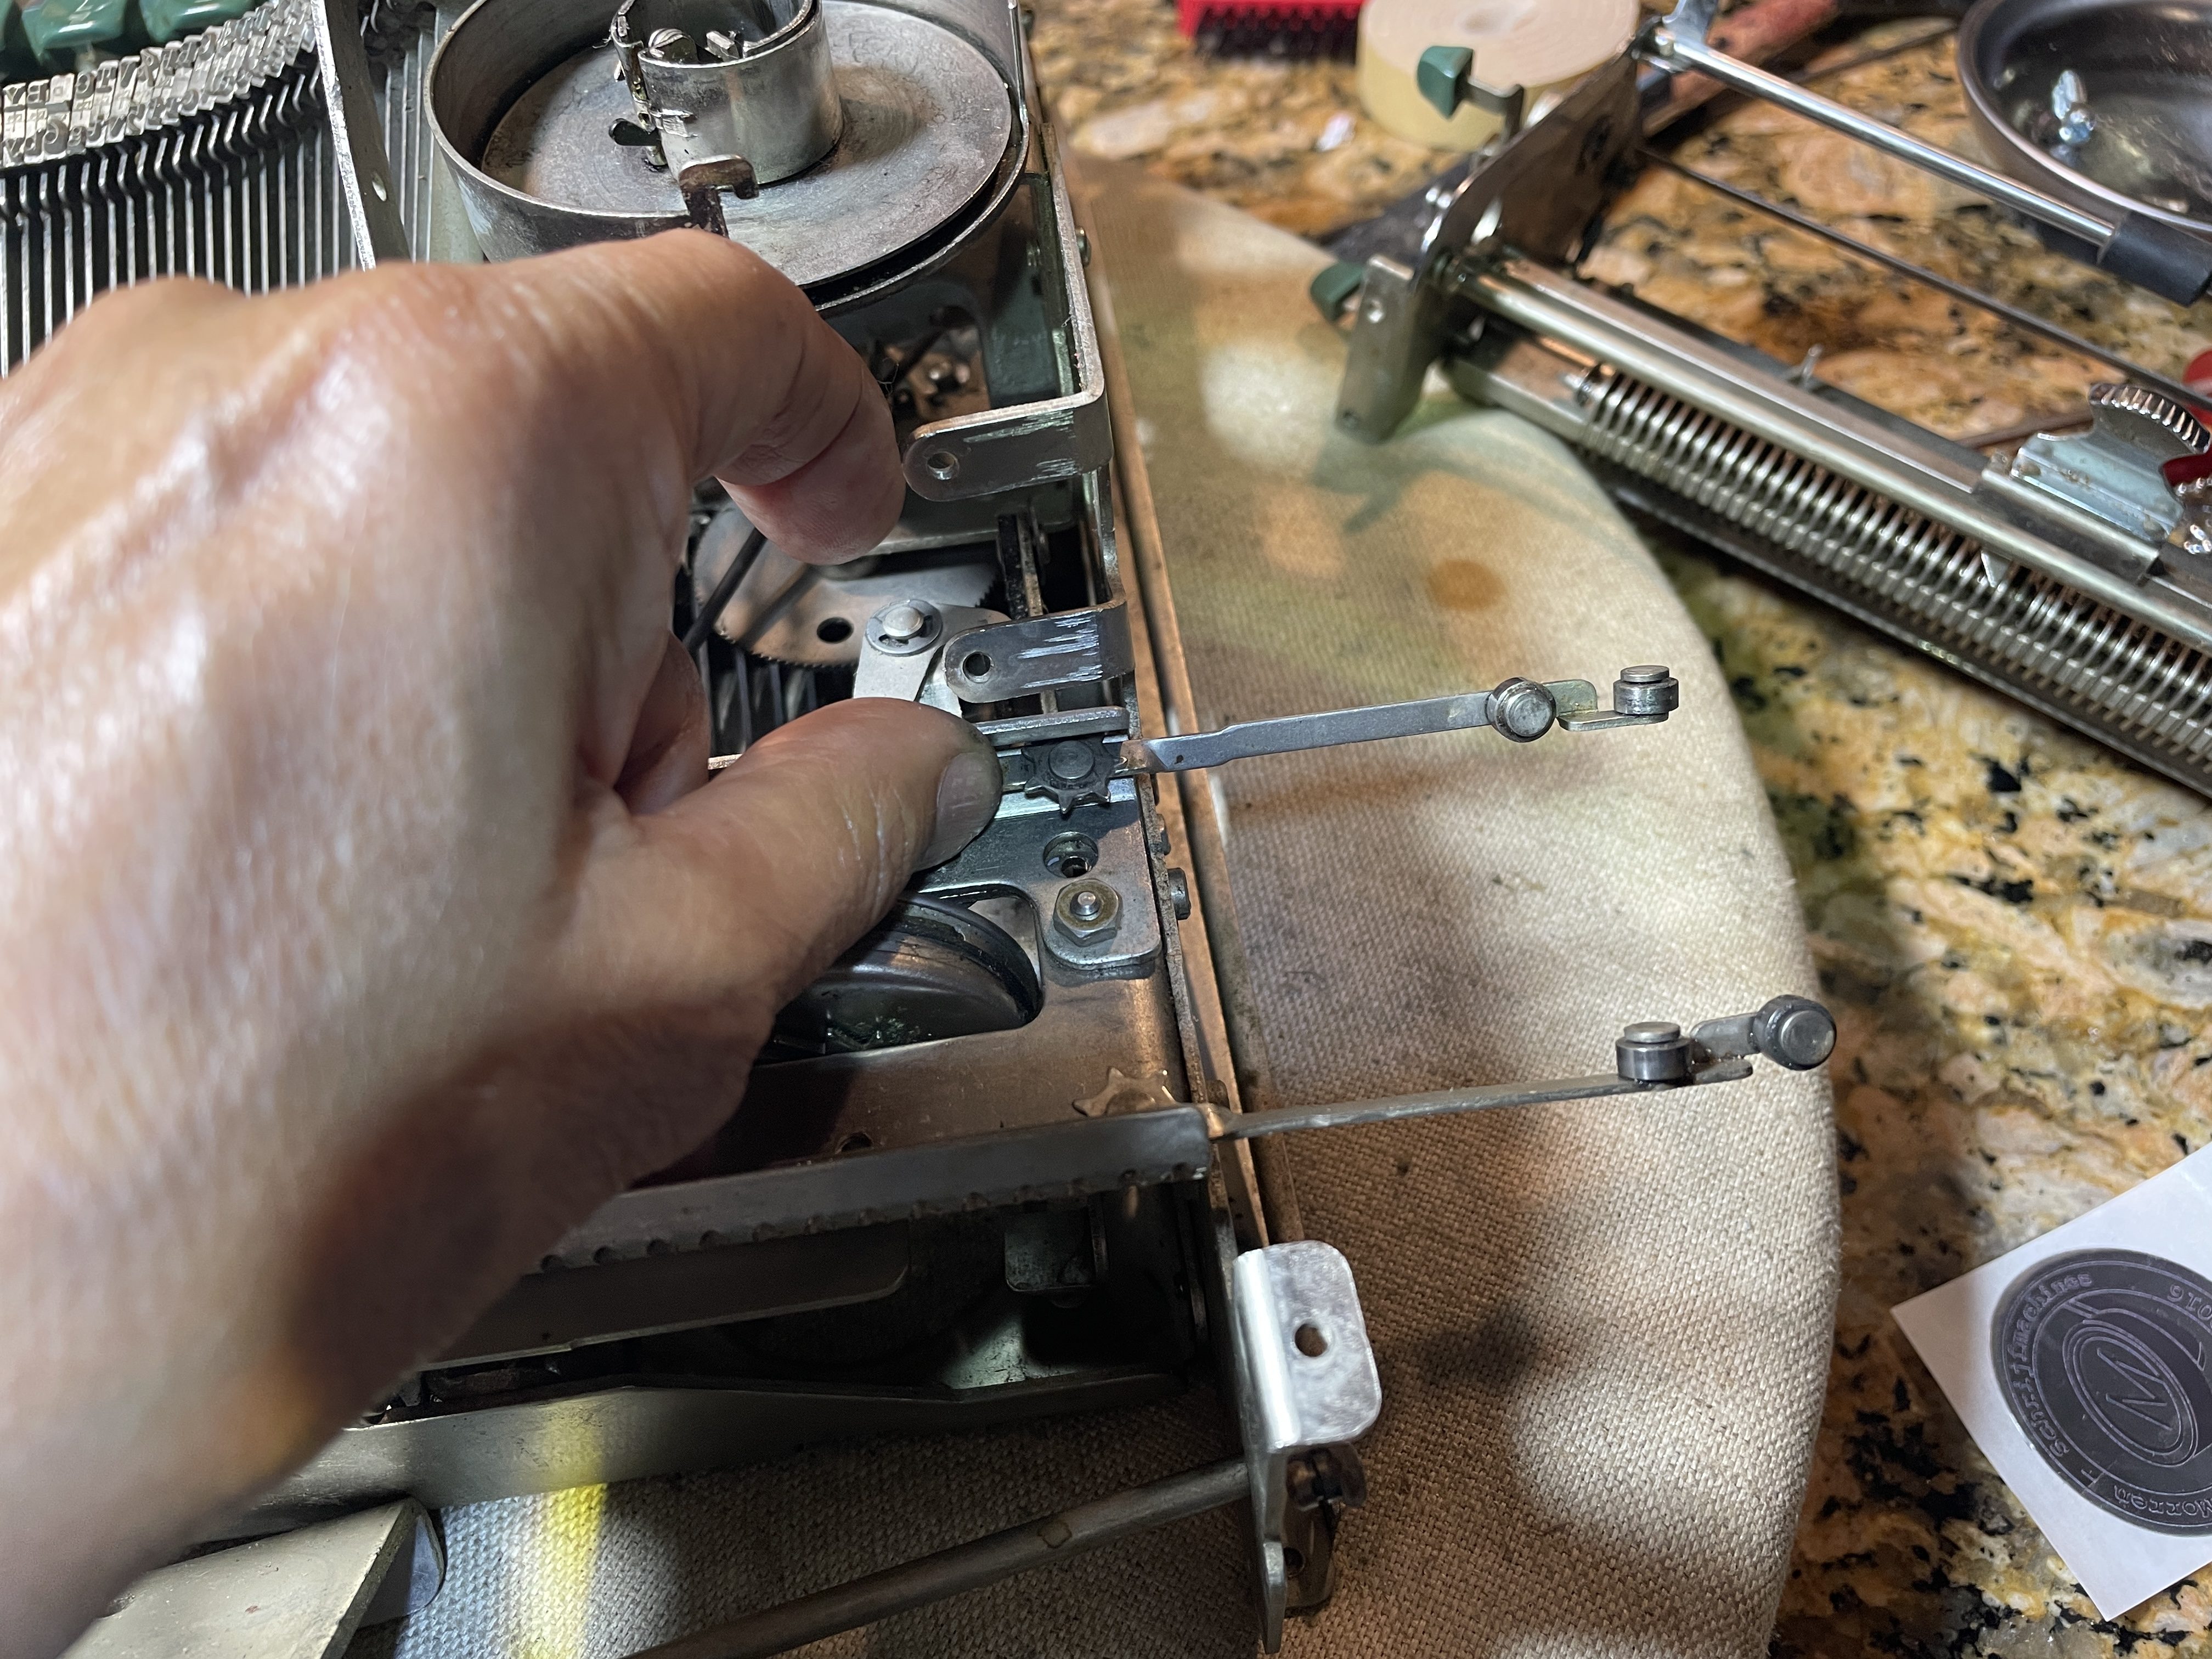
The problem was that the escapement trip bell crank arm was wedged in a funny position underneath the universal bar arm. The universal bar should be able to push on the escapement trip arm.
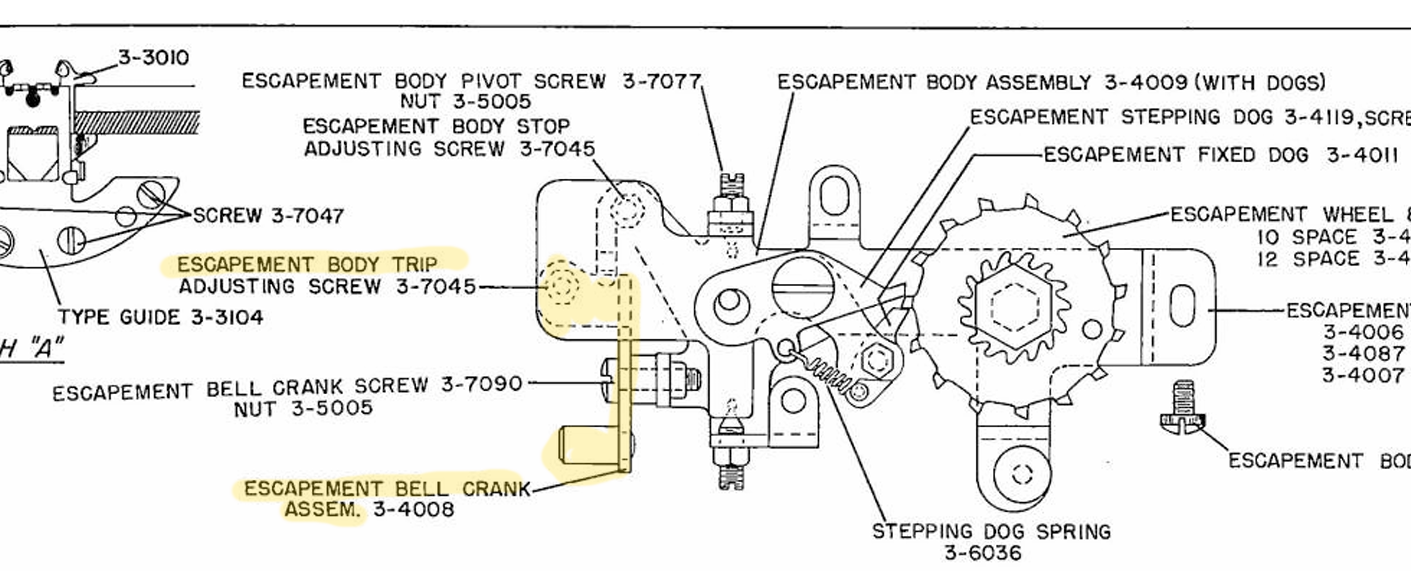
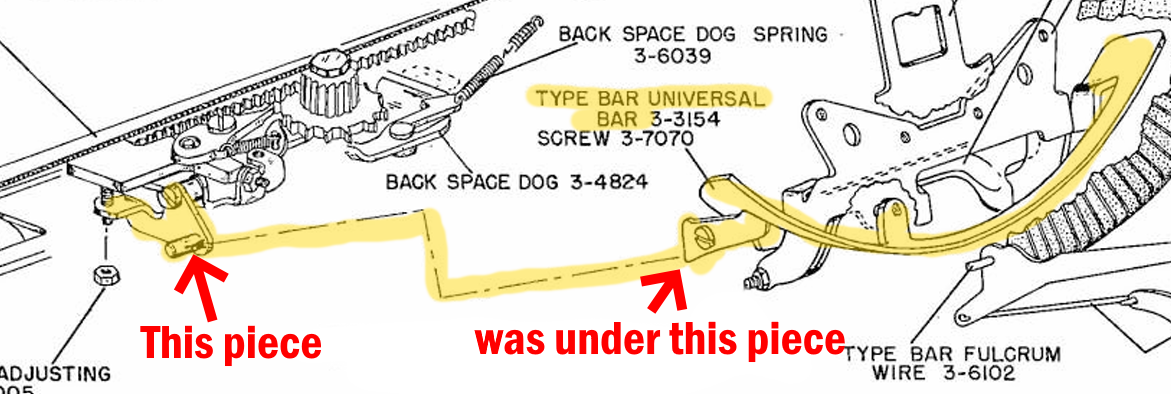
I popped the escapement trip arm out from under the universal bar arm, and it was able to swing freely.
I put it back together. The spring sits under the escapement body assembly and must be seated inside the screw head on the underside of the escapement body assembly. I didn’t do this the first time I put it together. The spring migrated, caused problems, and I had to take it all apart.
I was pretty sure that I had diagnosed and fixed the problem, so I did a deep clean of the mechanics. First I did a blow out with the air compressor, working in a tub in case I blew out a spring or small part.
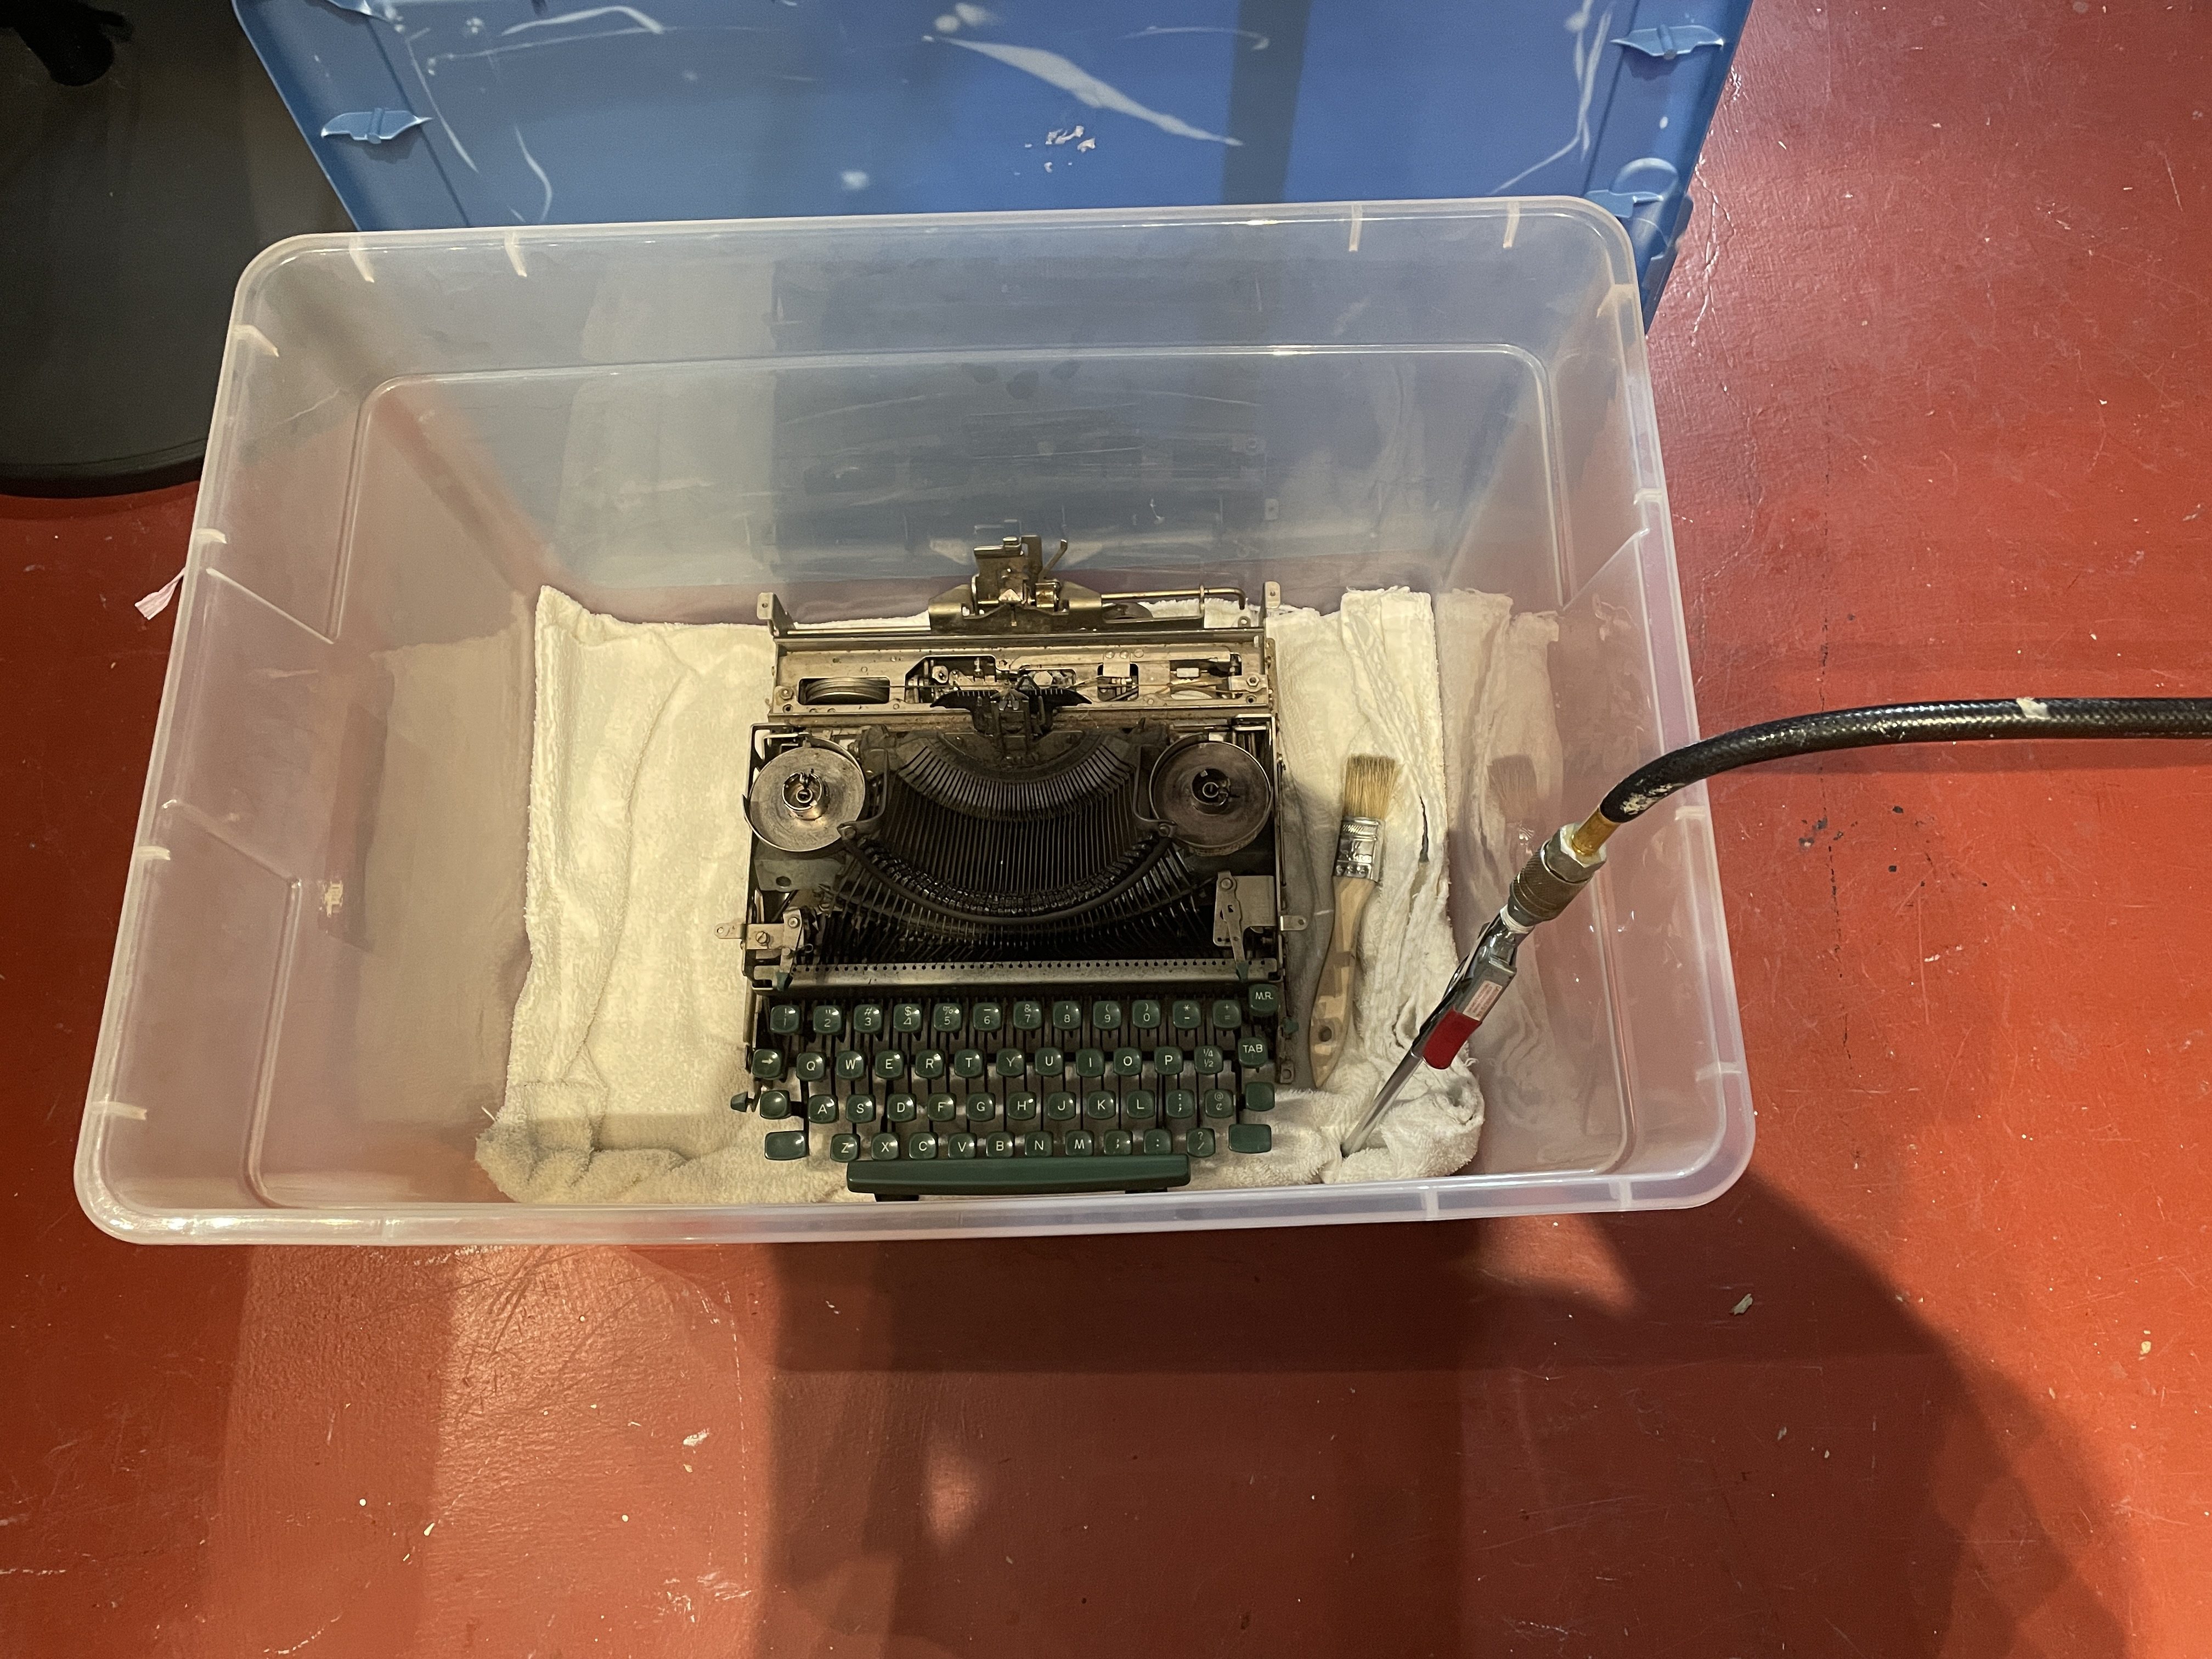
While I cleaned with my small brush and jar of mineral spirits, I dreamed of this:
After cleaning, I put the carriage back on. I placed the star-shaped centers of the “Carriage Roll Retainers” on the end of the rails, and brought the carriage in from the left of the machine.
And it works!
I re-installed the platen. I referred to photos I had taken during dismantling to figure out how the indexing pieces go together and where the return arm spring was supposed to go.
Now I wanted to try it with a ribbon. This Remington has special spools—regular spools won’t work. You need to re-spool onto the machine. Here’s Duane from Phoenix Typewriter describing a method.
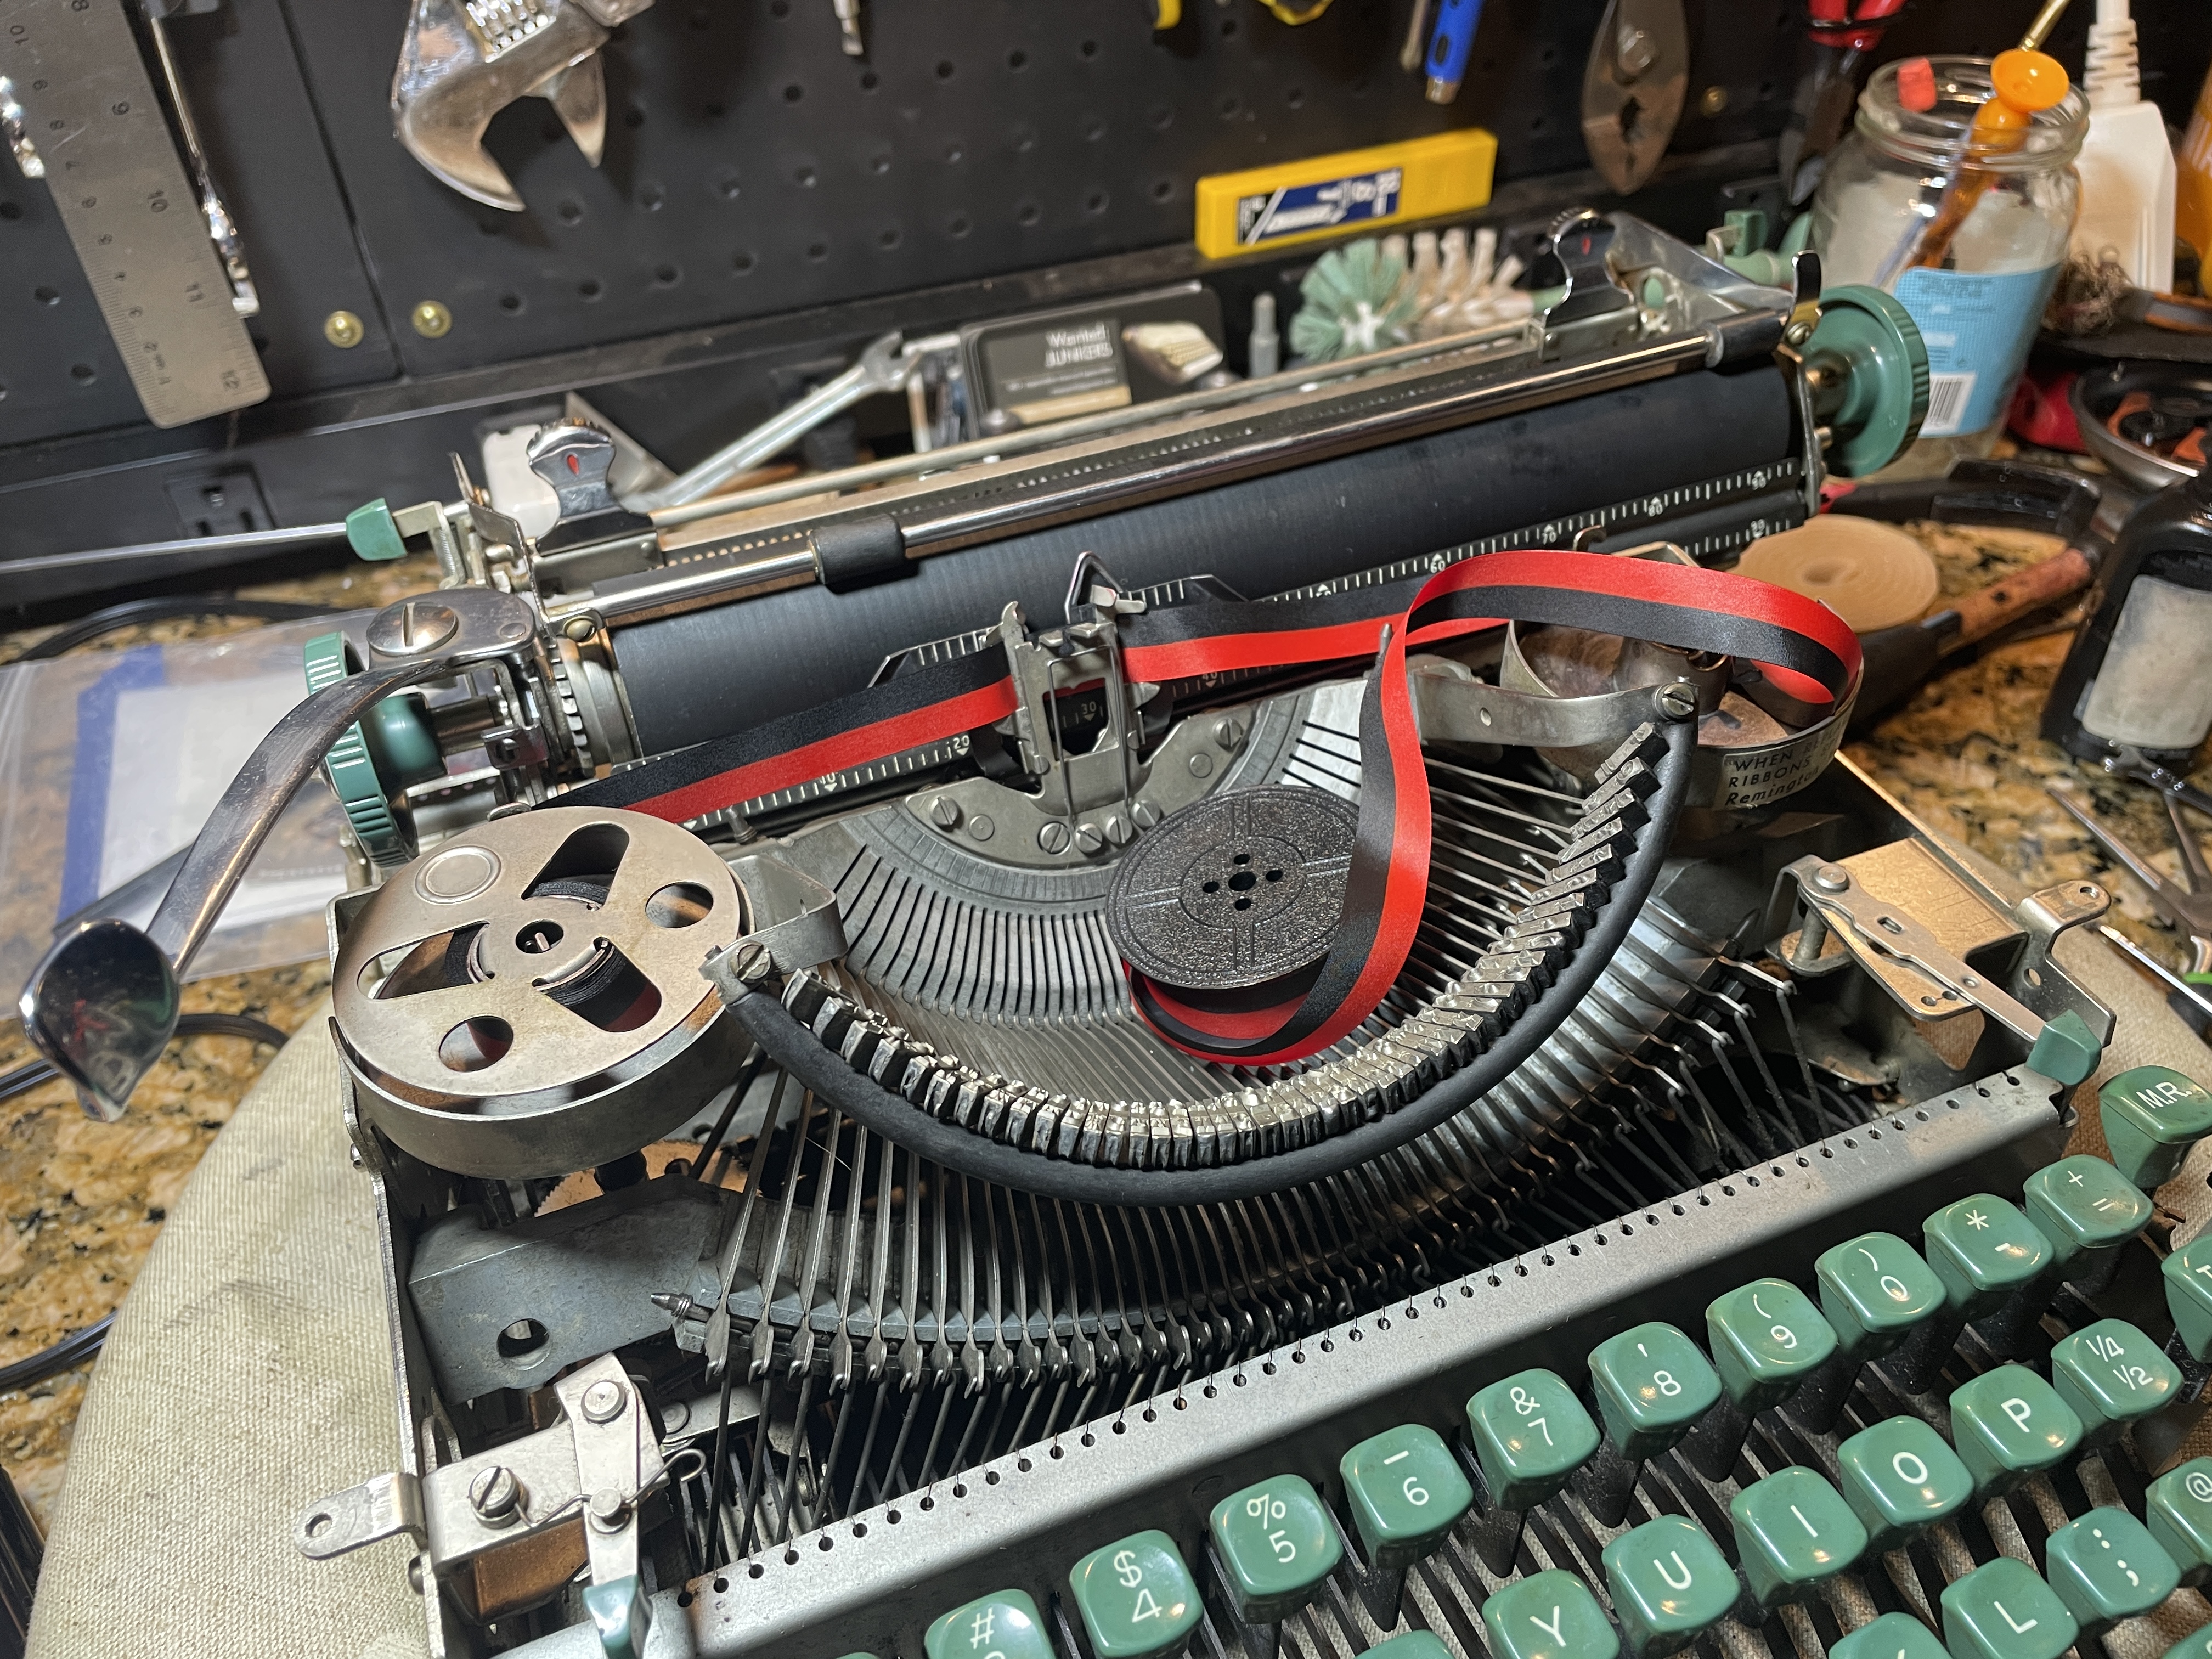
This was a huge pain. How was this supposed to work back in the old days? Did Remington sell the metal tops with spooled ribbon around the center hub? If you know, leave a comment.
I was getting letter piling. The machine was tripping waaaaay into the platen. I needed to adjust so that it tripped further out.

Joe Van Cleave to the rescue. He has a video with all sorts of adjustments he made to his Quiet-Riter:
Here are the time stamps for Joe’s Quiet-Riter repairs:
00:00 Intro
01:08 Ghosting Problem
02:50 Classic Typewriter Page
03:20 Escapement Trip Adjustment
04:53 Further Testing
06:39 Cylinder & Anvil Adjustment
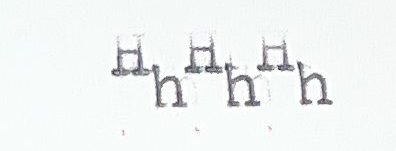
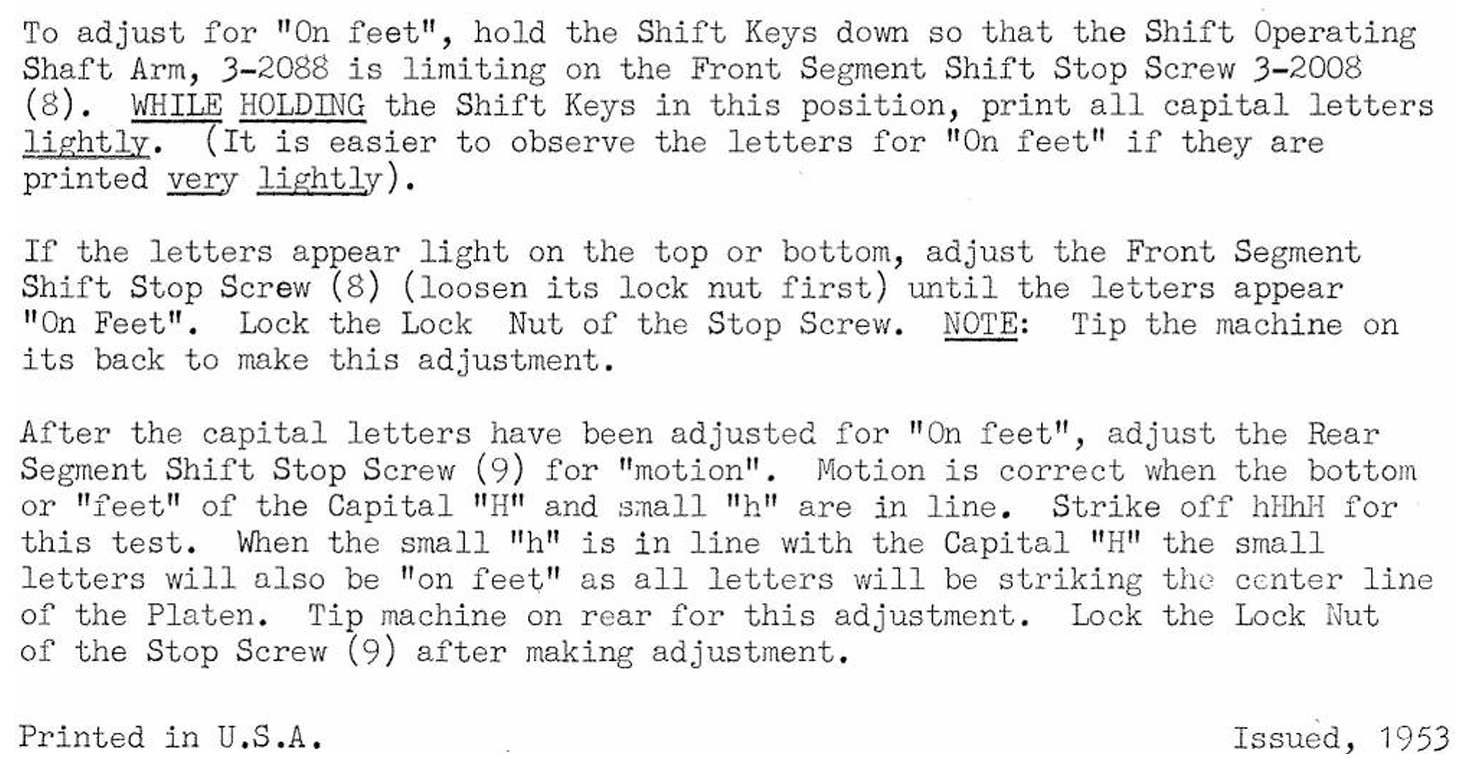
08:28 On Feet & Motion Adjustments
10:59 Test Typing to Verify Adjustments
11:58 Ribbon Lift Adjustment
12:59 Final Tests
13:20 Conclusion
I found that a 3/16″ nut driver works good for loosening the lock nut on the escapement trip screw. After adjusting the escapement trip, I had no more letter piling. However, this Quiet-Riter was not on “On feet”. See how the letters fade at the top:

and the shift was wildly wacky:
I watched Joe’s video and read through the shift adjustment sequence in the Remington Portables Typewriter Repair Bible:
Note: when you are making these adjustments, you may want to put the typewriter feet back on or prop the typewriter up an spools, since there are low hanging mechanics in the shift system that may rub the surface below.
Using a 7/32″ wrench for the lock nuts, I got the typewriter “on feet” and shifting properly. Of note, the capital and lowercase adjustment screws with lock nuts are only on this side of the machine. Weird!

However, I was having red bleed when typing in black and black in red. It seemed as if the ribbon was throwing too high.
Joe covers this color bleed problem in his adjustment video at timestamp 11:58 “Ribbon Lift Adjustment”.
I loosened the screw, pulled the collar down a tad, and re-tightened the screw.
Looking good! Everything is printing great except the tail of that “Q”. I think it’s kind of funny, so I’m debating whether to leave it like that or not. The adjustment of the collar was minute, and I’m worried I will make things worse with continued adjustment.
I had to get the panels back on, and I wasn’t very systematic when I removed the cover plates. I had a bowl of little screws that are subtly different from one another. Good grief, where did that spring come from? Oof. I should have been more mindful and labeled the screws. I usually just re-insert the screws into the frame holes they came out of so I can keep things straight.
Bowl is empty. I guess I succeeded this time.
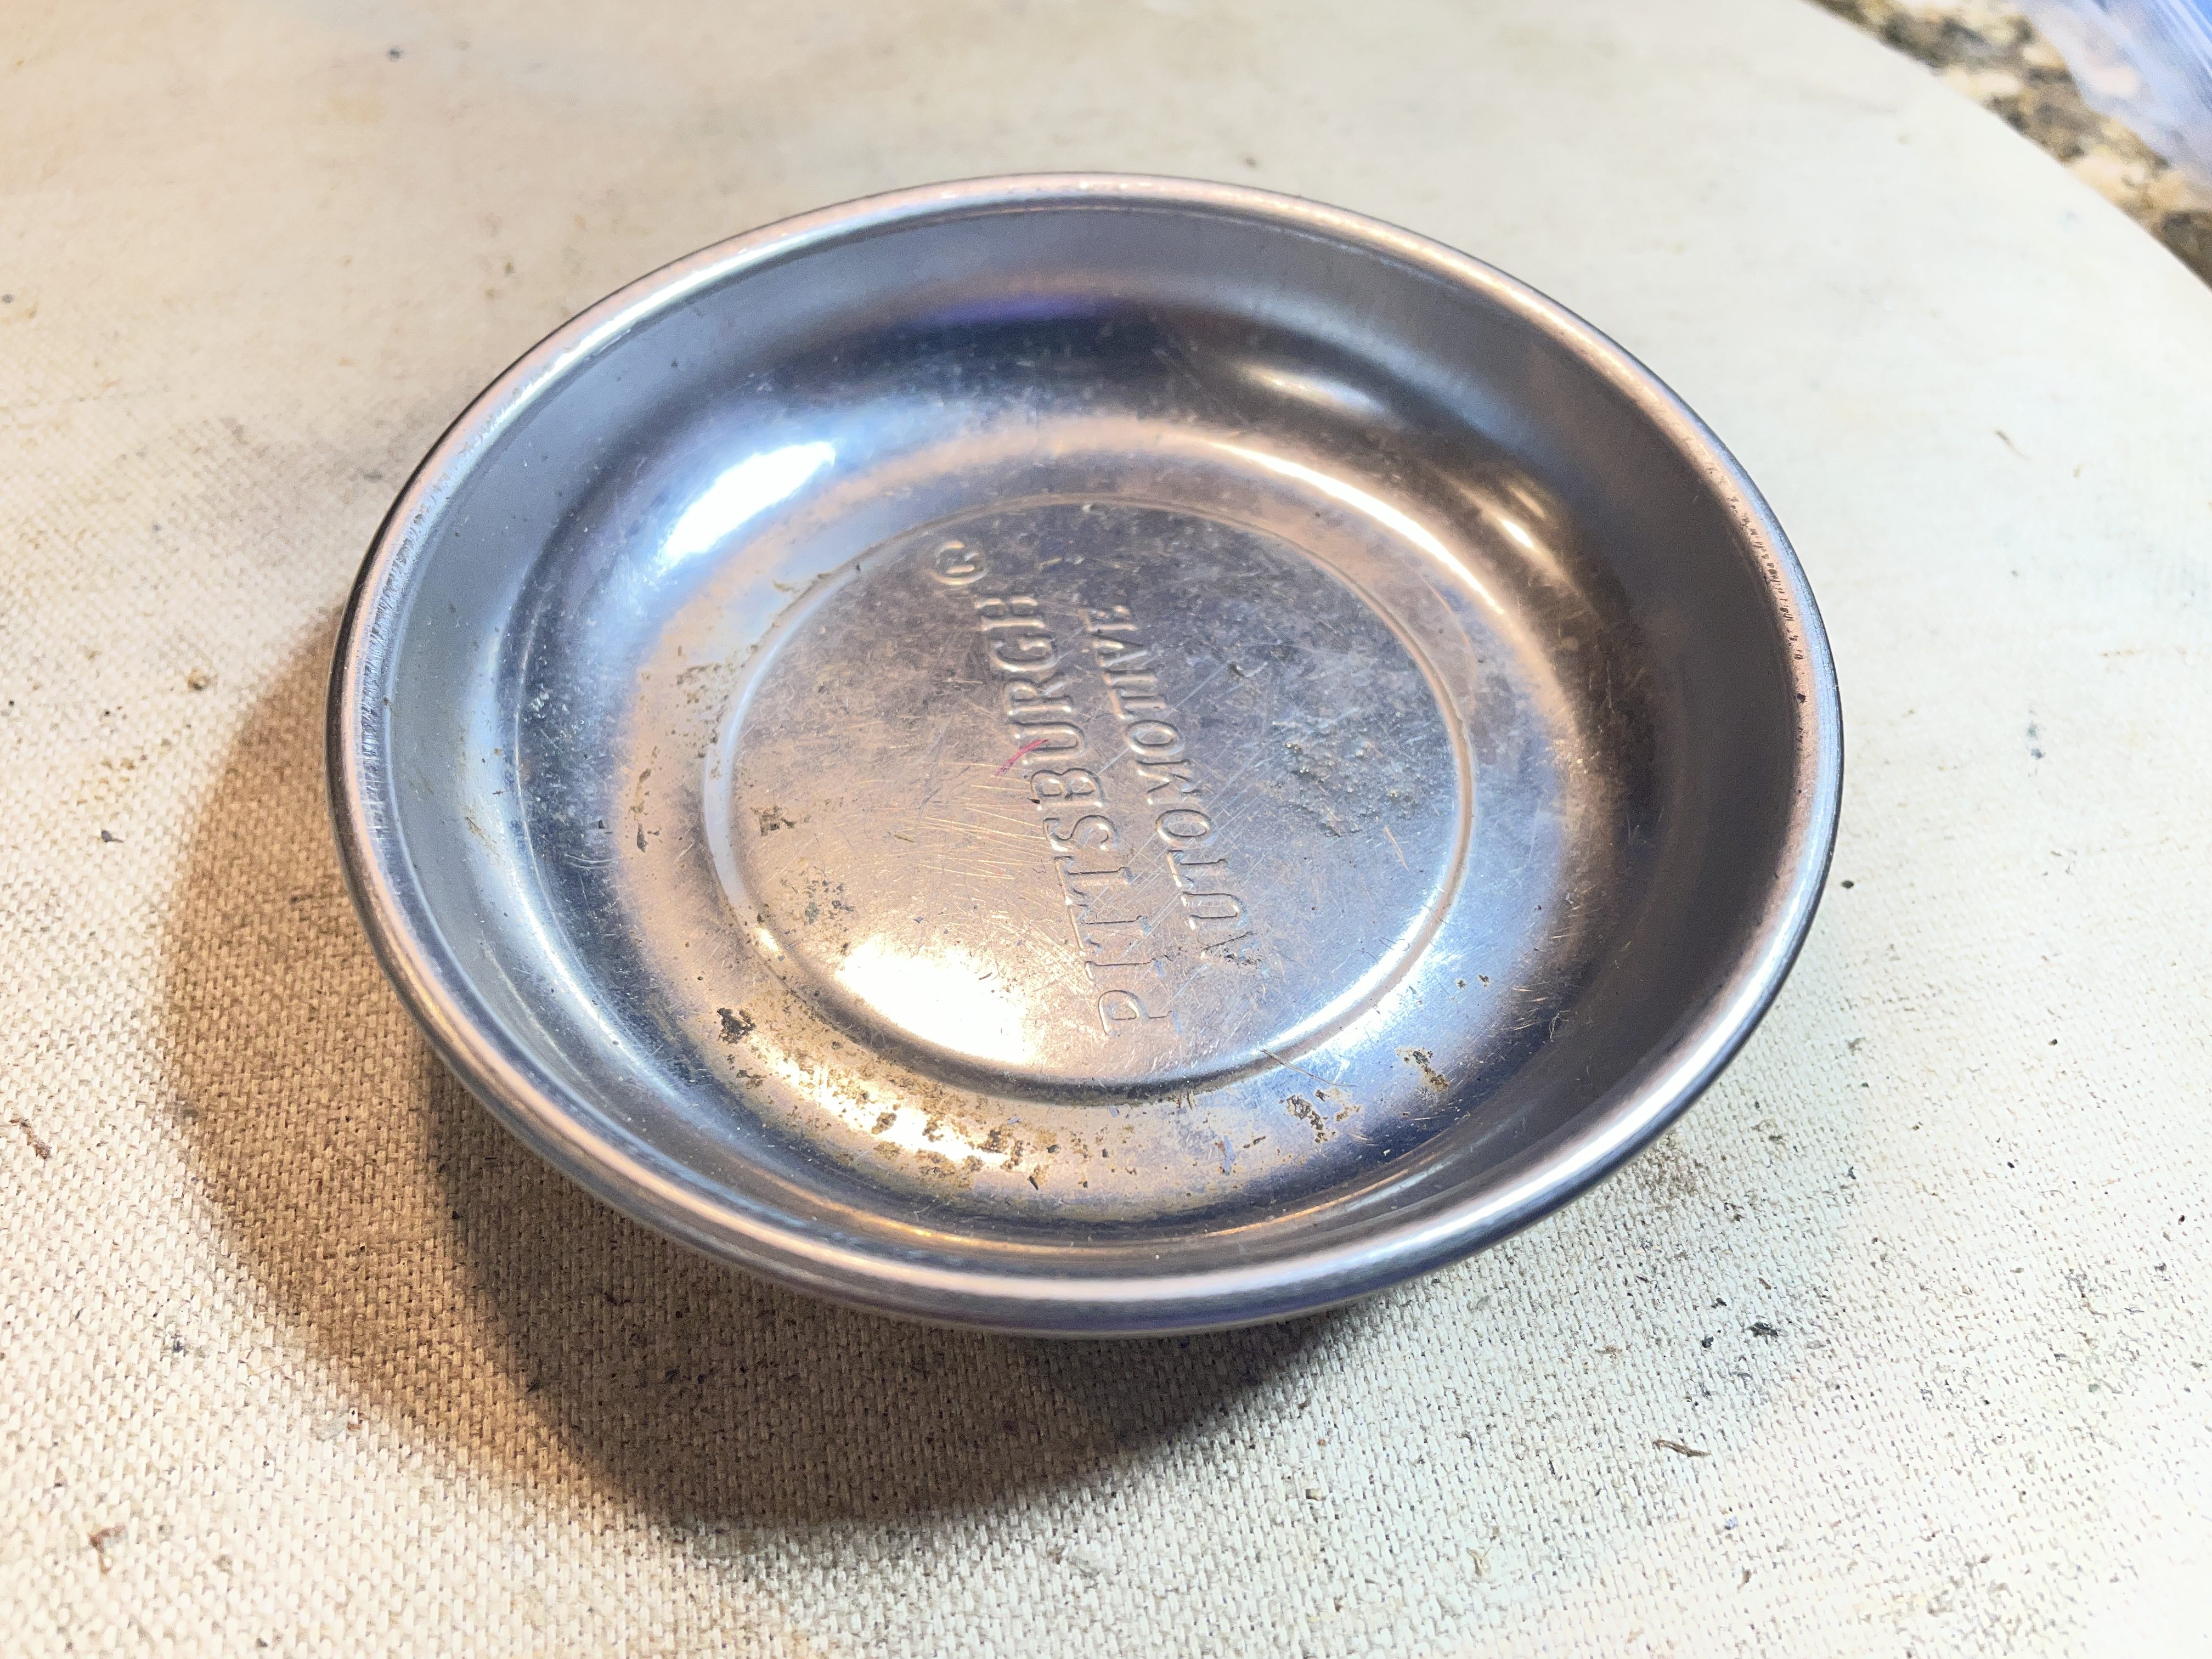
Harbor Freight magnetic bowl
It’s typing really well with the exception of the tabulator. I think I have a tab system misalignment. I did take the carriage off a couple times, and maybe a piece of the tab system is positioned funny. I checked with members of The League of Hobbyist Typewriter Mechanics to see if anyone has a comparison machine I can refer to. Fortunately, Monica and Stephen have a Quiet-Riter I can look at.
This Quiet-Riter on my workbench is a beautiful little machine. Remington called this color “French Grey”, I think. The Quiet-Riter reminds me of a sweet baby triceratops.
Though I scrubbed the cover plates with Simple Green, they could use another go-round with cleaning since there’s some residual grunge and some scribbles on the ribbon cover that will probably come out with some elbow grease.
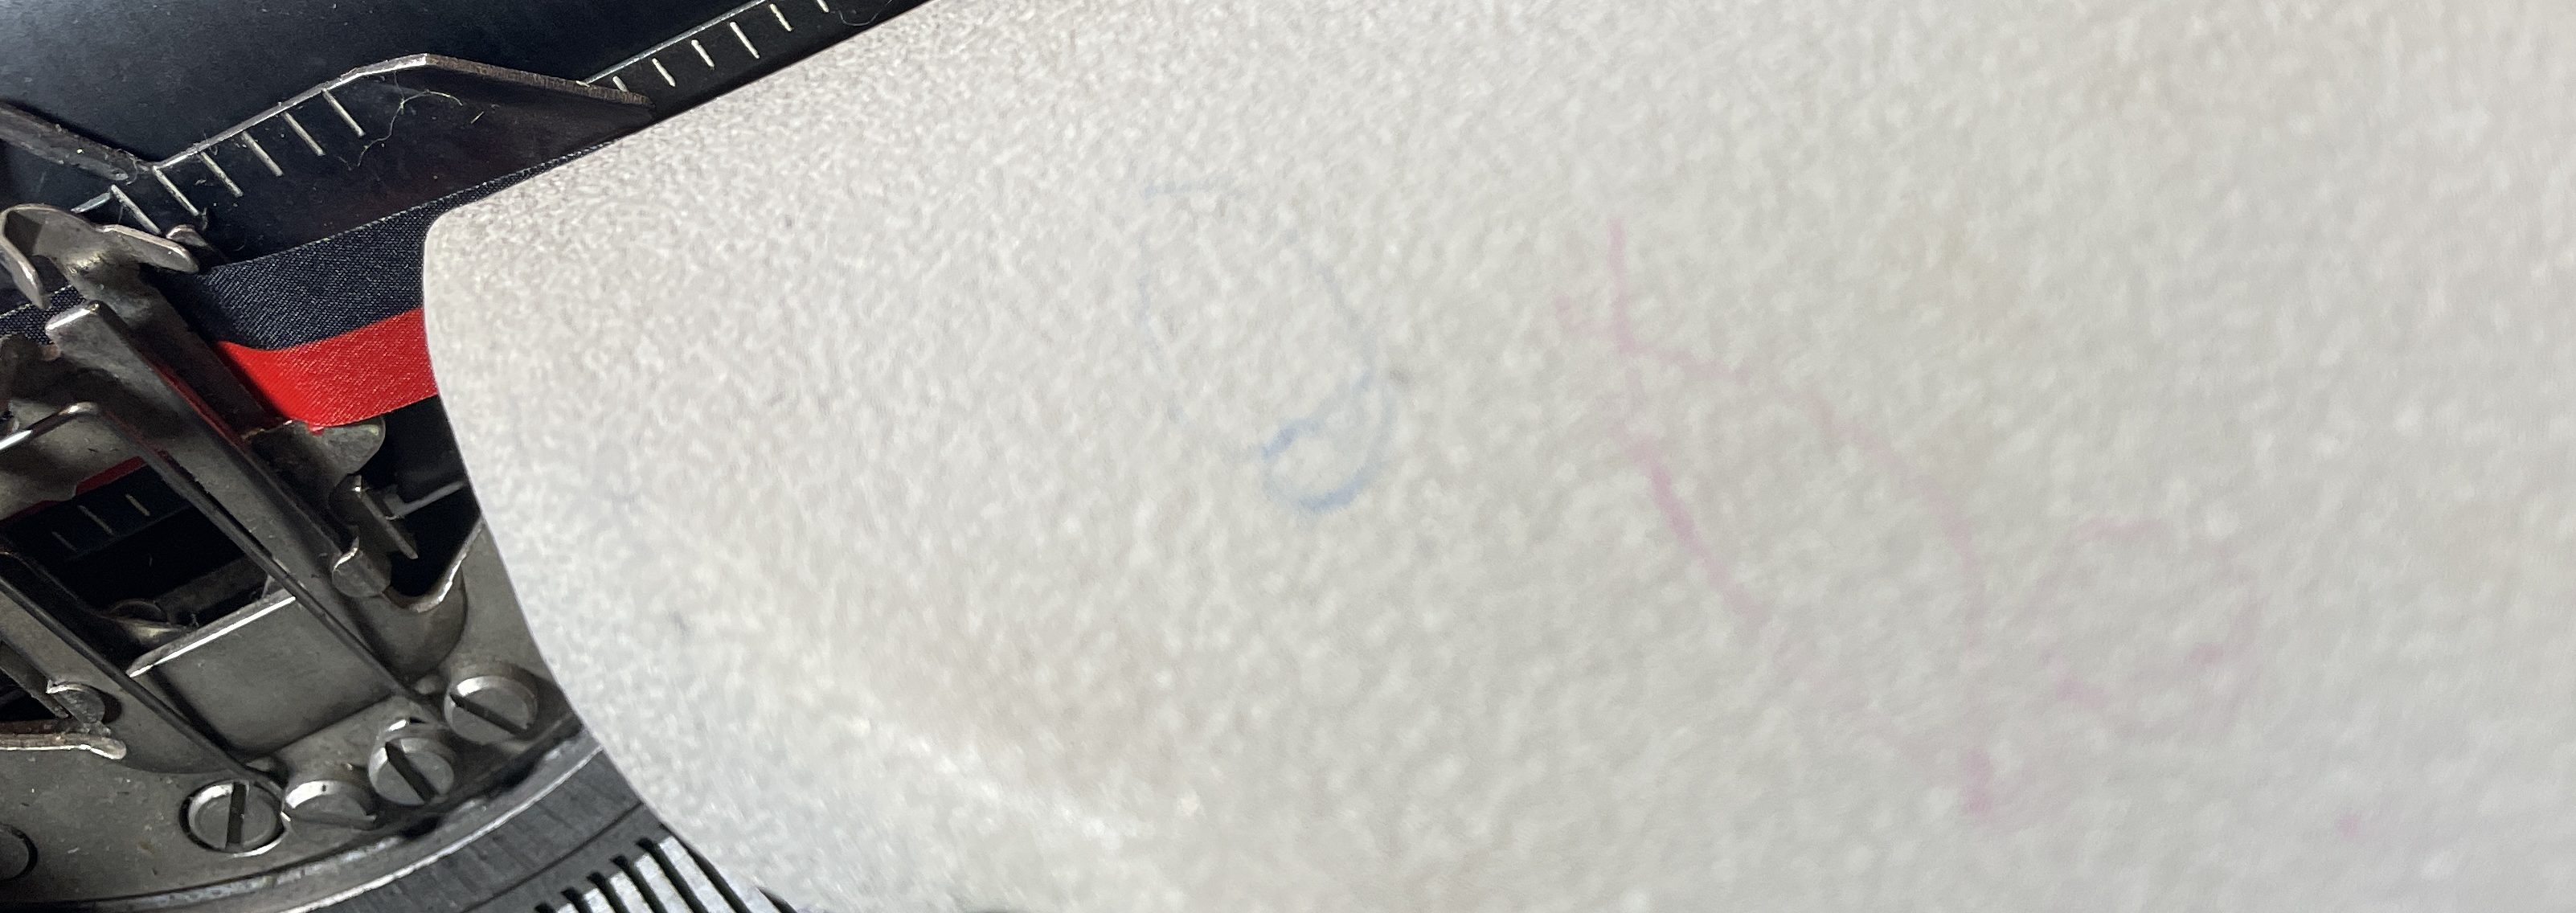
Ancient petroglyphs of a lost civilization or ballpoint scribbles of a four-year-old?
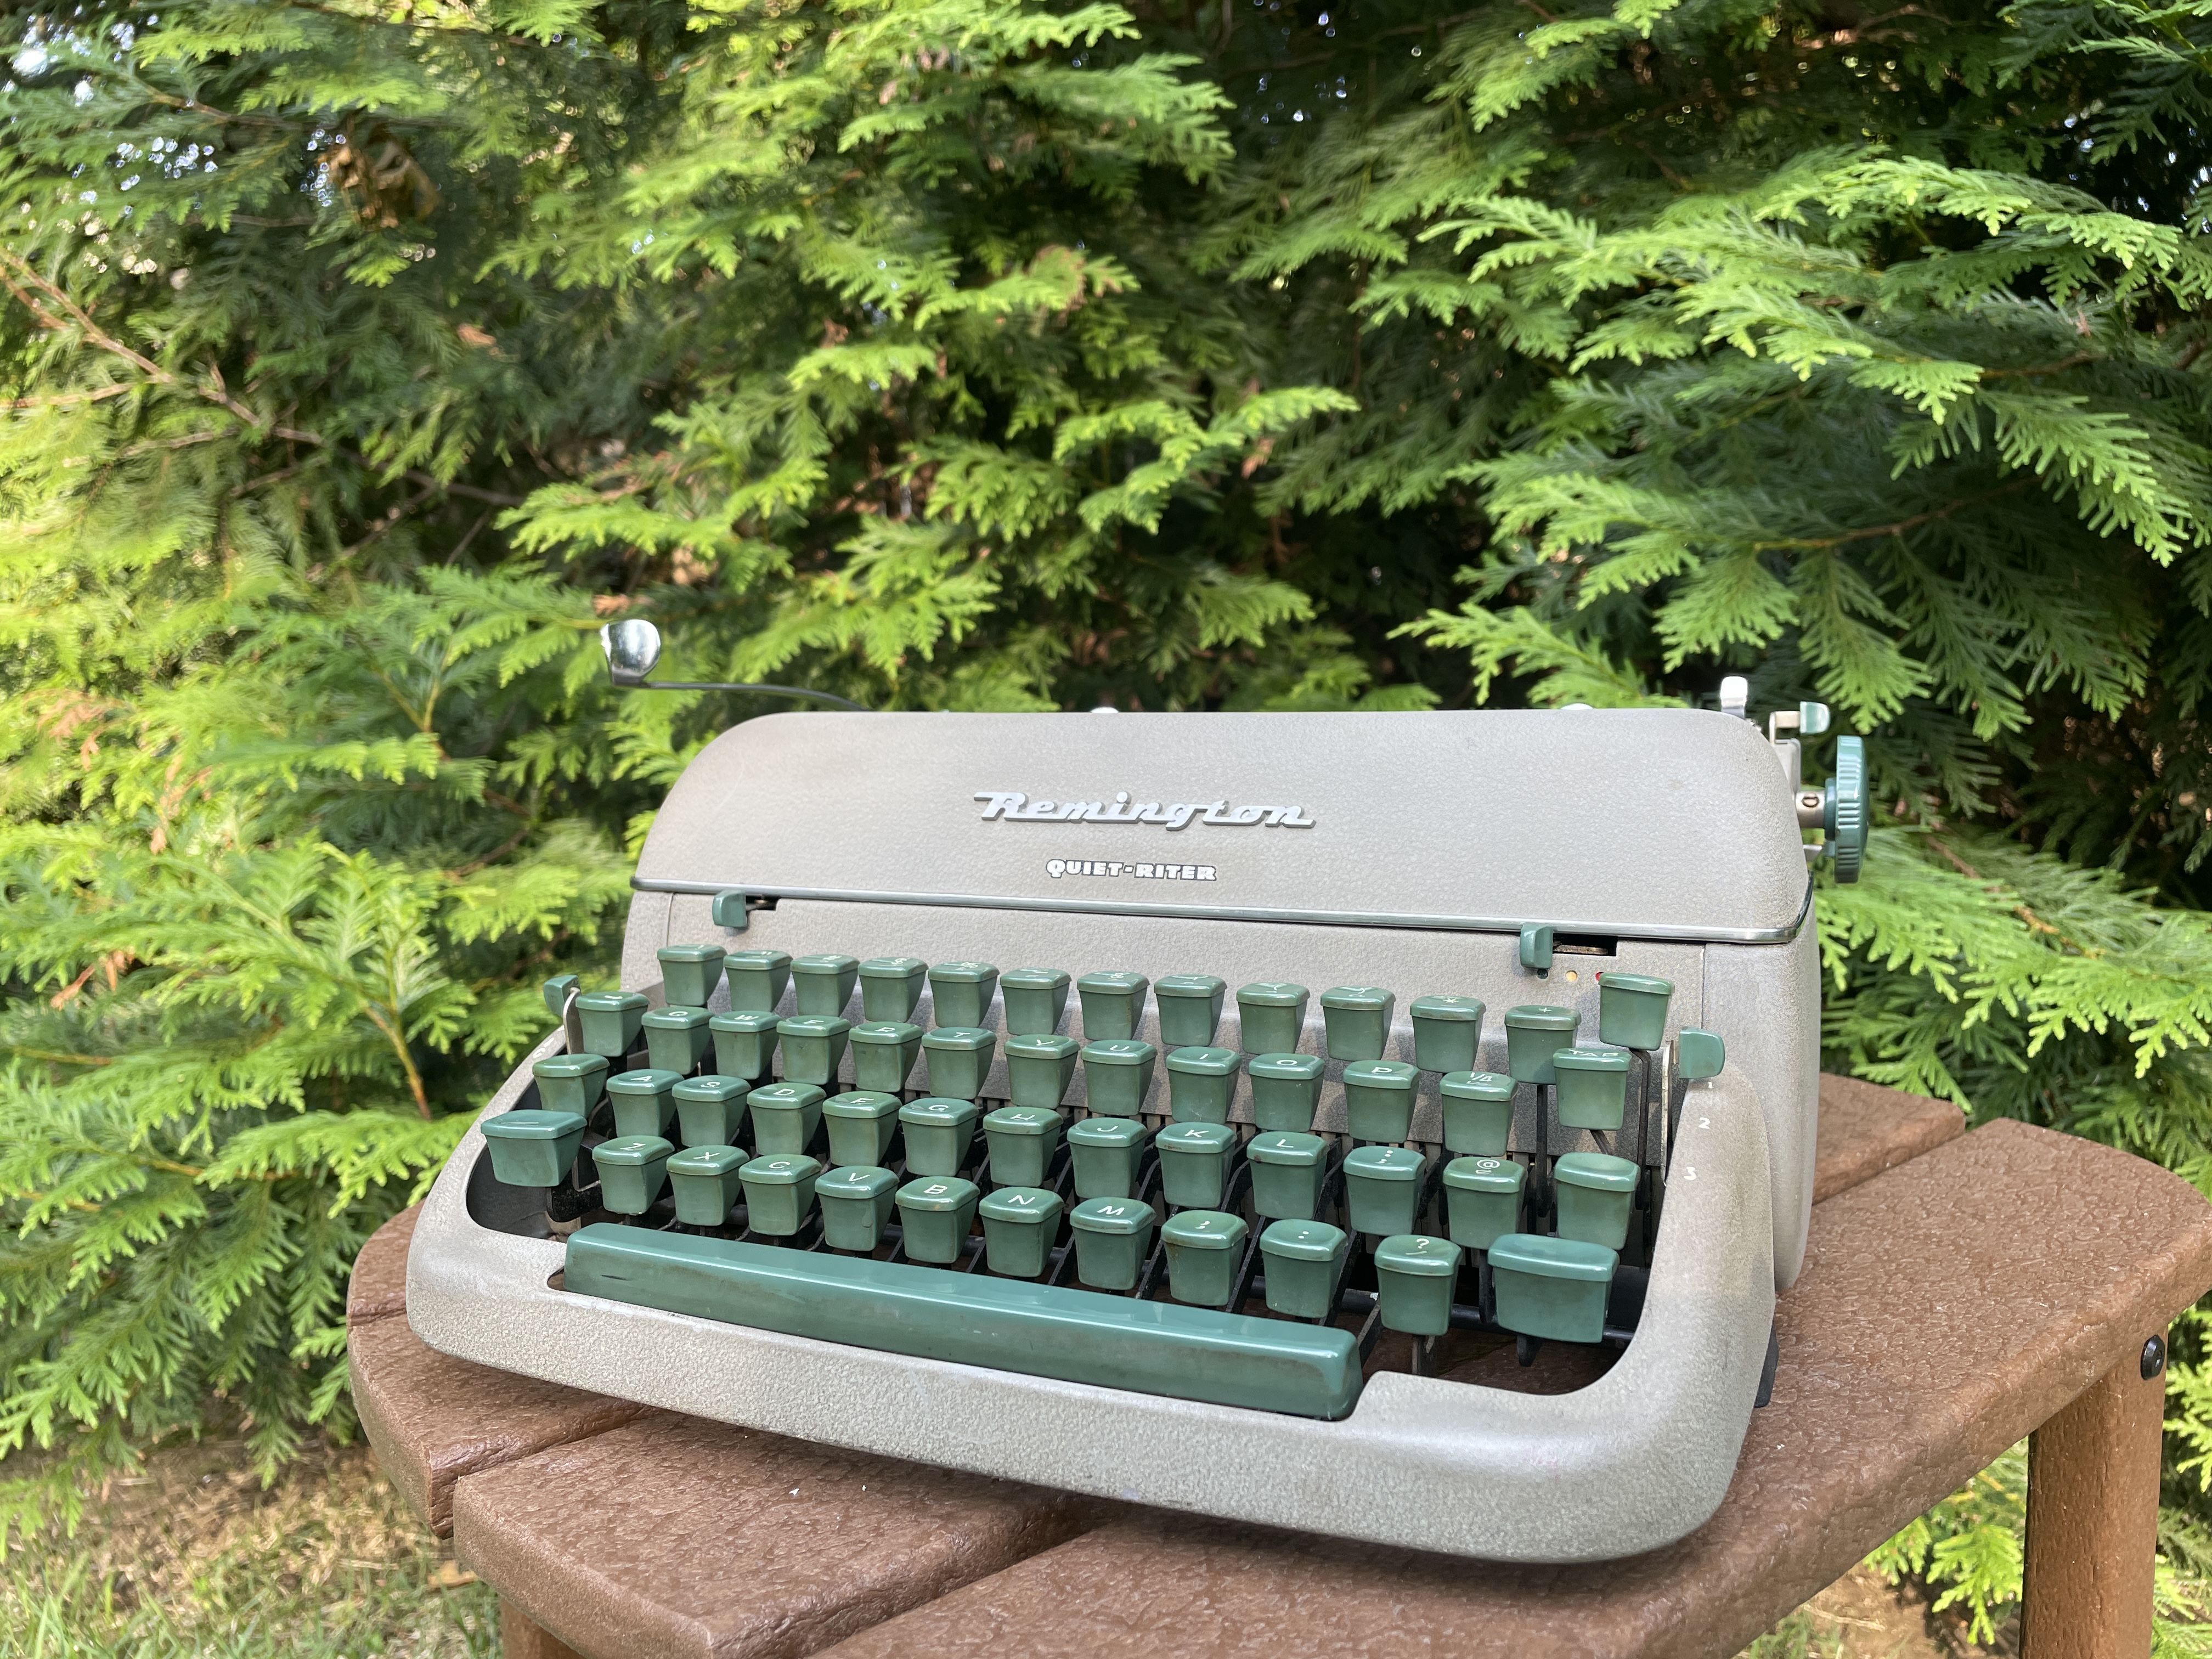
Looking pretty sweet, Quiet-Riter.

You really are AMAZING..I just don’t remotely have the patience to do such repairs anymore. I do love those Quiet Riters etc. I’m glad to see the ribbon winder…I made one out of two 16mm film winders…but it’s the large ribbon spool holder that makes it…the film winders are nice Bell and Howell editors ones. One trick I use when winding onto a typer. is to wind the ribbon onto a spool and hold that free hand. on a bamboo skewer…or I have these metal chop stickish looking metal rods…tapered. so one usually fits iinto the spool hole..and i hold that while winding onto the in typer spool(but you probably have ten better methods) I laughed about your compressor set up…I don’t ever use compressors anymore…just a wide variety of shaped artists bruch….but gosh. the times I’ve dropped teensy gizmos and screws onto my persian carpet…are absurd..especially when I’m bent over on all fours like a doggie. looking for parts(I do have a magnet on a rod…helpful)….I just got a nice lexicon 80 for fifty bucks!!….verrry rusty and filthy…carriage too dirty to slide via spring power. and three buttons gone…..but 80’s are pricey and hardto find…drove 1,1/4 hours to get it…belonged to a brit lady(made in UK)….I did a Nick routine…amazed at how good the rusty metal and paint etc looks…it tyopes great….it takes the same buttons as the early Lettera 22’s. I have one. but I made rubber buttons from some rubber stoppers…they look ok and work. for the moment….you mentioned hpow easy it is to remove the body and carriege…but I have resisted…mebbe sometime…The old trusty PB Blaster really loosened everything (then lubed with my fave synthetic gear oil(it’s the silky best)..my brand is Red Line but any will do. PS. yeah crinkle may need multiple cleaning s…I really like ZEP industrial Citrus Cleaner….and always have L.A. Awesome cleaner…diluted at least 1:1..or 1:2..never straight….it’s great cheap cleaner……I salute your efforts and repair victories, Best Nick
LikeLike
I think the Lexikon 80 is one of the most beautiful typewriters around – congrats on getting yours moving.
I will try the ZEP industrial Citrus Cleaner or L.A. Awesome. The crinkle paint on the Quiet-Riter needs another pass to really shine.
LikeLike
Hello Mary ! You were asking how post-war Remington ribbons were supplied. They didn’t come on a spool, but as a tightly-wound coil of ribbon on a ‘fitting ring’ which slipped over the right hand spool centre. The ring had a slot in it which allowed the ribbon reverse trigger to operate when the ribbon came to an end. These rings are still useful today when rewinding a ribbon onto a Remington from a spool, since they have an arrow head to hook the ribbon fabric on to. But you do not HAVE to have a fitting ring. You can either attach the ribbon by making a very tight knot in the end, trimming close to the knot with a pair of sharp scissors, and then passing the ribbon through the narrowest slot in the spool centre – knot to the inside. Or simply select a ribbon intended for another make, that has a reversing ring already fitted (eyelet) near the end and doing the same as with the knot, leaving the eyelet inside the spool centre. I hope this helps !
LikeLike
Tom, thank you so much for chiming in. You are an invaluable resource. My Quiet-Riter has fitting rings with the helpful arrow heads, but it’s good to know that you don’t HAVE to have fitting rings for ribbon reverse to work properly.
LikeLike